A few hours watching the Discovery Channel can prompt extreme survival fantasies involving frog licking and urine drinking, but what basic skills would you actually need to survive in the wilderness? Here’s a look at the basics you need to become an adult Boy Scout straight from a cadre of survival experts.
Blast from the past is a weekly feature at Lifehacker in which we revive old, but still relevant, posts for your reading and hacking pleasure. This week, we’re talking about how to rough it on your own, or survive out in the wilderness if you go camping, get caught away from your friends, or just need to make it home in one piece.
The key to surviving in the wilderness is preparation. But this post isn’t about stockpiling food or preparing for disasters at home (although both are a good idea). This is about the skills and tricks you can learn and remember now that will help save your life if your car breaks down in the woods, you’re lost while hiking, or a terrible disaster strands you in the wilderness. Before we get started on technique let’s make a list of priorities to keep you alive and we’ll go through them in more detail in a moment.
Know Your Priorities
I talked with survival teacher and founder of onPoint Tactical Kevin Reeve for help coming up with a list of priorities for survival in case of a disaster. This is what he suggests:
- Immediate security: If the building is on fire, get out. If someone is shooting at you, move to cover. Whatever the immediate danger, get away from it.
- First aid: Attend to any medical problems that may have happened in the original event. Check yourself for injuries and treat them.
- Self protection: If you are at risk from predators, two-legged or four-legged, you must arm yourself. This might be a sharpened stick, a knife, machete, shotgun, or banjo. Just have something to attack the zombies with.
- Physical needs (in order): Shelter, fire, water, food, and hygiene.
It’s also worth noting that nearly every survivalist, doctor, paramedic, and teacher recommends one key survival tool everyone should follow: positivity. It seems silly, but it can provide you with the mental endurance to stay safe in any number of situations. A recent study in Psychological Science also suggests that your own perception of illness and the potential for treatment has an effect on the outcome. In short, the idea of mind over matter can help you survive.
Let’s look at each of these in a little more detail, starting with your first priority after making sure you’re not it in immediate danger: first aid.
Learn to Perform Basic First Aid Techniques, Kit or No Kit
Basic first aid is a good life skill to have in general, but it’s an essential survival skill to have in case of an emergency. Knowing how to fix three common injuries will usually get you by. Performing these on yourself will probably cause some tears, but at least you will be able to move to safety. I talked with firefighter and trained paramedic Philip Carlson to find the best solutions if you’re stranded without a proper first aid kit.
Cut and Scrape First Aid
In most cases, you can ignore small cuts, but keep the wound clean and watch it for infection. If the injury is deep and you can’t stop the blood your last resort is a tourniquet to stop the flow of blood. Tourniquets should be at least one-inch wide (a strip of shirt, belt, anything like that will work) and tightened around the limb above the injury. Tighten the tourniquet until the bright red bleeding stops and cover the injury with any clean material you have.
Mend Fractures and Dislocations
If you dislocate a bone you need to get in back in place. For shoulders, you can roll on the ground or hit it against a hard surface to reset the bone. Kneecaps can be popped back in place by stretching your leg out and forcing it into the socket. For fractures, you need to find material to create a splint. In the woods, a couple sticks will do the trick. Stabilize the fractured bone with the sticks and tie them together with shoelaces to hold the brace in place.
Treat Burns
To care for a first (reddening) or second degree (blistering) burn from fire, remove any clothing and find lukewarm water to run over the burn or coat it in honey if it’s available. Wrap the burn loosely with a wet piece of clothing. If water is not available, clean out debris, dirt, and any loose skin as best you can and find water as soon as possible. Keep the wound elevated whenever possible and do not open any blisters that may have formed.
Self Protection
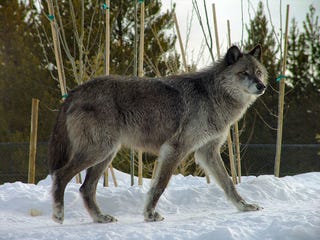
While Liam Neeson can get by punching wolves in the face, that’s generally not the best way to approach a dangerous situation. Instead, it’s best to get away from the animal slowly.
The Boy Scouts recommend a simple approach for wolves, coyotes, and cougars: face the animal and slowly back away from it. Don’t play dead, run, or approach the animal. If you’re cornered, make yourself as big as possible. Spread out your arms and make a lot of noise. If this still doesn’t work, throw anything you can find at the animal.
If it comes down to it, you might have to weather an attack. In his book, Emergency, author Neil Strauss provides a means to defend against wild dogs that can apply to other animals in an emergency: If the animal does attack, block its mouth with your non-dominant arm and smash the heel of your hand into its snout or hit it in the eyes. If you can temporarily disable the animal, run and find a tree to hide in before you attempt first aid.
Photo by Dennis Matheson.
Physical Needs: Build a Shelter and Start a Fire
In order to survive, you need to maintain your body temperature. On one end of the spectrum, this means keeping warm, but you also need to know how to keep cool if you’re caught in a desert. In either situation a shelter is your first order of business.
Build a Shelter to Protect You from the Elements
Even if you can start a fire with everything ranging from your glasses to a bottle of water, you’re going to need a shelter at some point. Thankfully, the human body doesn’t need the Hilton to survive, and your shelter only needs to meet two requirements: it has to block the elements and insulate for warmth.
The A-frame shelter in the video above is the simplest to build in a hurry, but anything that gets you out of the snow, rain, or sun will work. Location and comfort are also two important details to consider, and Kevin Reeve has suggestions for both:http://ift.tt/1sdCuhphttp://ift.tt/1qAn4k9
Focus on finding a shelter that protects you from the ground, the wind, that insulates from the cold or heat, and protects you from rain and snow. A tarp or garbage bag is a lifesaver if stuffed with leaves or grass to form a wind/cold/rain barrier.
Once your shelter is built, it’s time to make a fire.
How to Start a Fire with Nearly Anything
Firefighters recommend keeping two things in mind when starting a fire: the wind direction and the surrounding area. A fire is an important part of your survival, but you don’t want to catch the entire forest on fire just to attract the attention of rescuers. The USDA Forest Service recommends building your campfire away from overhanging branches, rotten stumps, logs, dry grass, and leaves. Fire might have been one of the first things we humans learned how to make, but that doesn’t mean it’s easy to start a fire. Let’s look at a few tricks for using materials you might already have.
- Start a fire with eyeglasses: In order to properly start a fire with glasses, your best bet is a pair of far-sighted glasses, which better resemble a magnifying glass. To use eyeglasses, spit on the lens and use the lens to angle the sun at a pile of kindling (dry leaves, twigs, or Doritos all make great kindling). It will take a while, but your kindling will heat up enough and smolder. Carefully blow on the fire to start the flame.
- Start a fire with a bottle of water: The same idea as the eye glasses can apply to a bottle of water (or a condom or ice). Focus the sun’s rays through the water so that it creates a single point of heat. Eventually, it will catch fire.
- Start a fire with you cell phone battery: The above two methods require a sunny day, but you won’t always have that luxury. If you’re stranded, there’s a decent chance you have a lithium battery. It may be far-fetched, but if you also happen to have some steel wool you can create a short between the positive and negative terminals to cause a spark. If you don’t have steel wool around, you can use your knife or any conductive material you can scavenge.
- Start a fire with sticks: This is by far the hardest method, but it’s also one of the most likely scenarios you might find yourself in. This method requires you to quickly roll a stick on a log and use the friction to start a fire. This will take a while even if you have practice. The good news is that you can safely practice this in your own yard. It took me almost an hour to get a spark this way, but I leapt for joy when I did.
Physical Needs: Learn How to Find Water and Feed Yourself
Your fire-starting skills are great for keeping you warm, but you need to find something to eat and drink to keep you alive. Your first priority is water, so let’s take a look at how you can find and sterilize water for drinking.
How to Find Water to Drink
In many parts of the country you can find water by following the sound of a flowing river, but that’s not always the case. If you have trouble finding water, a few pieces of knowledge will help you on your way:
- Grazing animals usually head to water near dawn and dusk. Following them can often lead you to water.
- Flies and mosquitoes tend to stay within around 400 feet of water.
- Dew that hangs on grass in a field is an excellent source of water. You can collect this by running an extra piece of cloth through the grass as you walk.
- Stagnant water is not usually suitable to drink even if you can boil it.
- In the desert you can often find water if you dig up a dry creek bed.
- Once you find a source of water, bring it to a boil if possible. Even the cleanest of mountain streams can have microbes and parasites in the water. If boiling isn’t not an option, search out water from a flowing stream or the dew on leaves. You can also create a filter by layering bark, stones, sand, and charcoal and running the water through the materials. Remember, no matter how hungry you are, water is more important to your survival. That said, you can settle your gurgling stomach as well. Let’s look at how you can do it without killing yourself.
Learn the Big Four to Always Find Edible Plants

The easiest solution is to remember plants indigenous in most areas. Kevin Reeve suggests being familiar with four plants:
- Acorn from Oak: The entire nut is edible and they’re easy to stockpile.
- Pine: The nuts and inner bark of the tree are edible. You can also make pine needle tea.
- Cattail: This is one of best options out there. The base stalk is like celery, the root and tuber can make flour, and the pollen is very healthy.
- Grass The corm (aka the base) is starchy, but edible and filled with water and carbohydrates.
Learn the Universal Edibility Test
You might have heard the old rule of thumb that you should follow animals around and eat what they eat, but that’s not a foolproof method. In order to find if a plant is edible, you need to test it. You can follow the Universal Edibility Test, which requires you to place a small piece of plant against your lip, then your tongue, and finally in your whole mouth. Unfortunately, you have to wait for eight hours before you know if the plants safe to eat and it’s still possible a plant can poison you.
If you’re more of a berry fan, you can follow a simple mnemonic from former Green Barret Myke Hawke to remember which berries are edible:
White and yellow, kill a fellow. Purple and blue, good for you. Red… could be good, could be dead.
Like the edibility test, the mnemonic isn’t fool proof, but it’s useful if you have no other options.
Physical Needs: The Basic Hygiene You Can Ignore (and What Not To)
If you end up in a long-term survival situation you need to keep up with a few hygiene habits. For the most part, you can ignore a lot of it, but I spoke with Dr. Dan Weiswasser, a primary care physician in Massachusetts about a few hygienic issues you shouldn’t ignore:
If you’re keen to pay attention to hygiene while stranded somewhere, I would primarily address dental care. Dental plaque can build up in a hurry, and dental infections are painful, dangerous, and expensive to repair. Brushing and flossing require relatively universal, rudimentary tools and can go a long way towards preventing such infections (you can make a toothbrush from birch or by just wiping your teeth with a clean piece of cloth).
Beyond that, I would say that a lot of hygiene consideration depends on what conditions are like where you are stranded. Bacteria and fungus flourish where it’s moist, dark, and warm. If you’re trapped in the jungle, you’ll want to keep intertriginous areas (areas where skin touches skin such as the armpits, under breasts, in groin, between the toes, and in other skin folds) as dry and aired out as possible. Again, this can simply be an issue of wearing dry clothes. Baby powder or corn starch can also be helpful for absorbing moisture.
But what do you do when the call of nature is too strong and you need to find toilet paper? Kevin Reeve has a simple solution:
As for primitive toilet paper, in the winter, a snowball is actually quite invigorating, but most of the time, leaves of a plant like mullein are the go-to method. Sometimes an unopened pine cone will work, but ouch! One of the keys to this is to squat not sit. This forces the cheeks apart and means that there will be far less cleaning necessary.
Navigation Methods to Help You Find Your Way Home
http://ift.tt/1xMO5nf… If you’re lost, the Boy Scouts recommend a simple mnemonic: STOP (Stop, Think, Observe, Plan). In most cases, you want to stay where you are and wait for help to come. If it starts to get late, you can build your shelter, start your fire and search for food. If help doesn’t come, it’s time to move on. The first thing you need to do is find north.
In order to figure out your basic directions, remember that the sun sets in the west and rises in the east (just think about which coast starts their work day earlier if you struggle to remember this). There’s also a few simple tricks that will help you find north quickly,
Finding north is only half the battle. You still need to know which direction to head. If you have a general understanding of an area, head toward the nearest road or town. If you don’t know the area, follow a water source downstream, or head toward a clearing where you can better signal for help.
How to Get Rescued
In order to get rescued, you need to know the most basic hand signals to alert a helicopter or plane you see pass overhead. Curiously, a wave is considered a sign to not land. Instead, if you see a helicopter or plane, form your arms in a "Y" as if you’re ready to perform the Village People’s "YMCA".
If you have a signalling tool like a flare, flashlight, or mirror, make use of them the second you see a rescue helicopter. Reflect the sun off the mirror in the direction of the helicopter to attract its attention.
If you hear rescuers in the distance but don’t have any way to signal them, you can call in a deep voice. Normal natural sounds are usually a high pitch. Call out in a low tone so rescuers know you’re a human.
If everything goes well, you won’t ever need these skills, but even if you don’t venture into the woods on camping trips, the chance of a disaster in your city or being stranded on a road trip is always a possibility. With the above survival techniques you can get yourself safely out of any number of situations.
Have some tips you’d like to share? Sound off in the comments.
Photos by Thomas Quine, Daniel Oines, Andy Arthur, and Anthony Kelly.

via Lifehacker
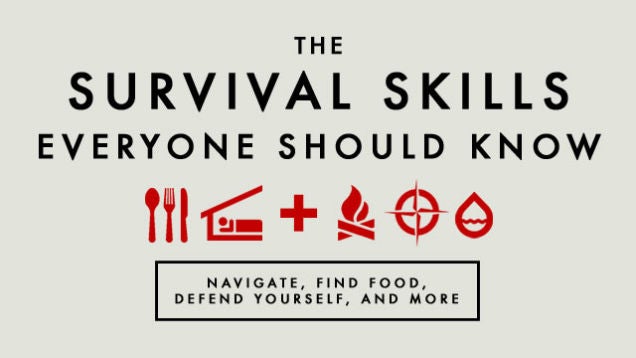
The Wilderness Survival Skills Everyone Should Know