How To Create Comment Nesting In Laravel From Scratch is the today’s main topic. In any topic specific forum, there is always a structure, where you need to reply to someone’s comment and then somebody reply in their comment and so on. So comment nesting is very useful in any web application, which exposes public interest. In this tutorial, we will do it from scratch. We use Polymorphic relationship in this example.
Create Comment Nesting In Laravel From Scratch
As always, install Laravel using the following command. I am using Laravel Valet.
Step 1: Install and configure Laravel.
laravel new comments

# or

composer create-project laravel/laravel comments --prefer-dist
Go to the project.
cd comments
Open the project in your editor.
code .
Configure the MySQL database in the .env file.
Create an auth using the following command.
php artisan make:auth
Now migrate the database using the following command.
php artisan migrate
Step 2: Create a model and migration.
Create a Post model and migration using the following command.
php artisan make:model Post -m
Define the schema in the post migration file.
// create_posts_table

public function up()
{
    Schema::create('posts', function (Blueprint $table) {
        $table->increments('id');
        $table->string('title');
        $table->text('body');
        $table->timestamps();
    });
}
Also, we need to create Comment model and migration, so create by using the following command.
php artisan make:model Comment -m
Okay, now we will use the Polymorphic relationship between the models. So we need to define the schema that way.
// create_comments_table

public function up()
{
    Schema::create('comments', function (Blueprint $table) {
       $table->increments('id');
       $table->integer('user_id')->unsigned();
       $table->integer('parent_id')->unsigned();
       $table->text('body');
       $table->integer('commentable_id')->unsigned();
       $table->string('commentable_type');
       $table->timestamps();
    });
}
Now, migrate the database using the following cmd.
php artisan migrate

Step 3: Define Polymorphic Relationships.
Now, we need to define the Polymorphic relationships between the models. So write the following code inside app >> Post.php file.
<?php

// Post.php

namespace App;

use Illuminate\Database\Eloquent\Model;

class Post extends Model
{
    public function comments()
    {
        return $this->morphMany(Comment::class, 'commentable')->whereNull('parent_id');
    }
}
Here, we have written all the comments, whose parent_id is null. The reason is that we need to display the parent level comment and also save the parent level comment. That is why. We need to differentiate between the Comment and its replies.
Post also belongs To a User. So we can define that relationship as well.
<?php

// Post.php

namespace App;

use Illuminate\Database\Eloquent\Model;

class Post extends Model
{
    public function user()
    {
        return $this->belongsTo(User::class);
    }
    public function comments()
    {
        return $this->morphMany(Comment::class, 'commentable')->whereNull('parent_id');
    }
}
Define the Comment relationship with the Post. Write the following code inside Comment.php file.
<?php

// Comment.php

namespace App;

use Illuminate\Database\Eloquent\Model;

class Comment extends Model
{
    public function user()
    {
        return $this->belongsTo(User::class);
    }
}
Step 3: Define the views, controller, and routes.
Create a PostController.php file using the following command.
php artisan make:controller PostController
Next step is to define the route for the view and store the post in the database. Write the following code inside routes >> web.php file.
<?php

// web.php

Route::get('/', function () {
    return view('welcome');
});

Auth::routes();

Route::get('/home', 'HomeController@index')->name('home');

Route::get('/post/create', 'PostController@create')->name('post.create');
Route::post('/post/store', 'PostController@store')->name('post.store');
Write the following code inside PostController.php file.
<?php

// PostController.php

namespace App\Http\Controllers;

use Illuminate\Http\Request;

class PostController extends Controller
{

    public function __construct()
    {
        return $this->middleware('auth');
    }

    public function create()
    {
        return view('post');
    }

    public function store(Request $request)
    {
        // store code
    }
}
Now, first, we need to create a form for creating the post. So create a blade file inside resources >> views folder called post.blade.php. Write the following code inside a post.blade.php file.
@extends('layouts.app')

@section('content')
<div class="container">
    <div class="row justify-content-center">
        <div class="col-md-8">
            <div class="card">
                <div class="card-header">Create Post</div>
                <div class="card-body">
                    <form method="post" action="">
                        <div class="form-group">
                            @csrf
                            <label class="label">Post Title: </label>
                            <input type="text" name="title" class="form-control" required/>
                        </div>
                        <div class="form-group">
                            <label class="label">Post Body: </label>
                            <textarea name="body" rows="10" cols="30" class="form-control" required></textarea>
                        </div>
                        <div class="form-group">
                            <input type="submit" class="btn btn-success" />
                        </div>
                    </form>
                </div>
            </div>
        </div>
    </div>
</div>
@endsection
Okay, now go to the resources >> views >> layouts >> app.blade.php file and add a link to create a post.
We need to add the link to the @else part of the navigation bar. So, if the user is successfully logged in then and then he/she can create a post otherwise, he or she could not create a post.
@else
     <li class="nav-item">
          <a class="nav-link" href="">Create Post</a>
     </li>
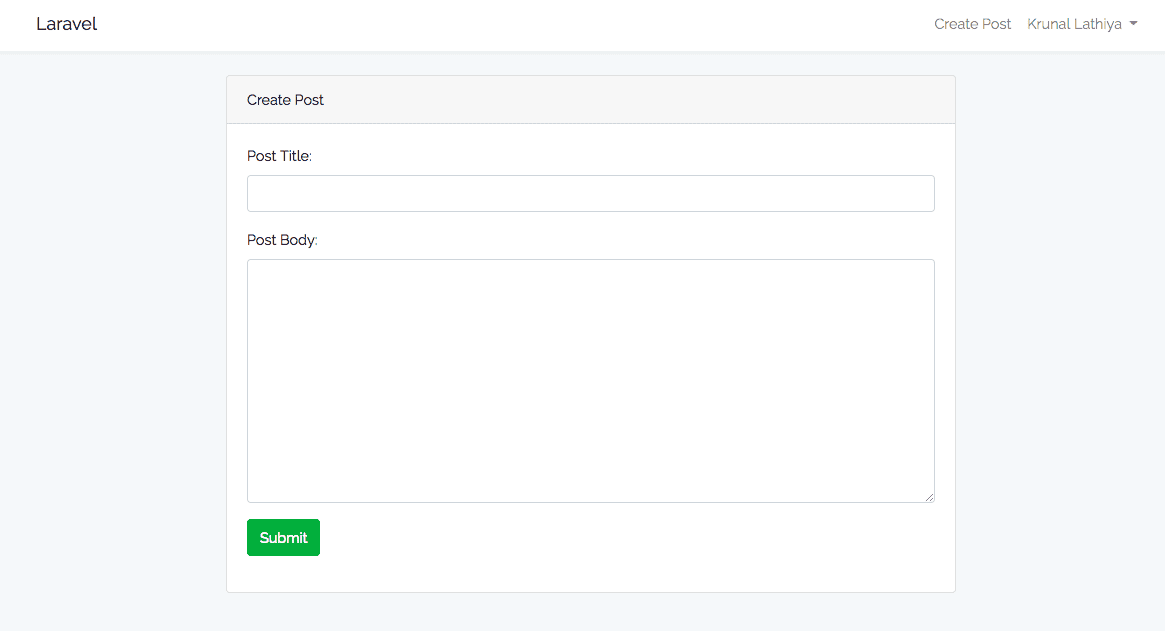
Now, go to this link: http://comments.test/register and register a user. After logged in, you can see the Create Post in the navbar. Click that item, and you will redirect to this route: http://comments.test/post/create. You can see, our form is there with the title and body form fields.
Step 4: Save and display the Post.
Okay, now we need to save the post in the database, so write the following code inside store function of PostController.php file.
<?php

// PostController.php

namespace App\Http\Controllers;
use App\Post;

use Illuminate\Http\Request;

class PostController extends Controller
{

    public function __construct()
    {
        return $this->middleware('auth');
    }

    public function create()
    {
        return view('post');
    }

    public function store(Request $request)
    {
        $post =  new Post;
        $post->title = $request->get('title');
        $post->body = $request->get('body');

        $post->save();

        return redirect('posts');

    }
}
After saving the post, we are redirecting to the posts list page. We need to define its route too. Add the following route inside a web.php file.
// web.php

Route::get('/posts', 'PostController@index')->name('posts');
Also, we need to define the index function inside PostController.php file.
// PostController.php

public function index()
{
    $posts = Post::all();

    return view('index', compact('posts'));
}
Create an index.blade.php file inside views folder. Write the following code inside an index.blade.php file.
@extends('layouts.app')

@section('content')
<div class="container">
    <div class="row justify-content-center">
        <div class="col-md-8">
            <table class="table table-striped">
                <thead>
                    <th>ID</th>
                    <th>Title</th>
                    <th>Action</th>
                </thead>
                <tbody>
                @foreach($posts as $post)
                <tr>
                    <td></td>
                    <td></td>
                    <td>
                        <a href="" class="btn btn-primary">Show Post</a>
                    </td>
                </tr>
                @endforeach
                </tbody>

            </table>
        </div>
    </div>
</div>
@endsection
Now, define the show route inside a web.php file. Add the following line of code inside a web.php file.
// web.php

Route::get('/post/show/{id}', 'PostController@show')->name('post.show');
Also, define the show() function inside PostController.php file.
// PostController.php

public function show($id)
{
    $post = Post::find($id);

    return view('show', compact('post'));
}
Create a show.blade.php file inside views folder and add the following code.
@extends('layouts.app')

@section('content')
<div class="container">
    <div class="row justify-content-center">
        <div class="col-md-8">
            <div class="card">
                <div class="card-body">
                    <p></p>
                    <p>

                    </p>
                </div>
            </div>
        </div>
    </div>
</div>
@endsection
Okay, now you can see the individual posts. Fine till now.
Next step is to display the comments on this post.

Step 5: Create a form to add a comment.
First, create a CommentController.php file using the following command.
php artisan make:controller CommentController
Now, we need to create a form inside a show.blade.php file that can add the comment in the particular post.
Write the following code inside a show.blade.php file.
@extends('layouts.app')

@section('content')
<div class="container">
    <div class="row justify-content-center">
        <div class="col-md-8">
            <div class="card">
                <div class="card-body">
                    <p><b></b></p>
                    <p>

                    </p>
                    <hr />
                    <h4>Add comment</h4>
                    <form method="post" action="">
                        @csrf
                        <div class="form-group">
                            <input type="text" name="comment_body" class="form-control" />
                            <input type="hidden" name="post_id" value="" />
                        </div>
                        <div class="form-group">
                            <input type="submit" class="btn btn-warning" value="Add Comment" />
                        </div>
                    </form>
                </div>
            </div>
        </div>
    </div>
</div>
@endsection
So, we have added a form that can add the comment. Now, we need to define the route to store the comment.
// web.php

Route::post('/comment/store', 'CommentController@store')->name('comment.add');
Okay, now write the store() function and save the comment using the morphMany() relationship.
<?php

namespace App\Http\Controllers;

use Illuminate\Http\Request;
use App\Comment;
use App\Post;

class CommentController extends Controller
{
    public function store(Request $request)
    {
        $comment = new Comment;
        $comment->body = $request->get('comment_body');
        $comment->user()->associate($request->user());
        $post = Post::find($request->get('post_id'));
        $post->comments()->save($comment);

        return back();
    }
}
Okay, now if all is well then, we can now add the comments. Remember, we have not till now display the comments. Just complete the save functionality, whose parent_id is null.
Step 6: Display the comment.
Now, as we have set up the relationship between a Comment and a Post, we can easily pluck out all the comments related to a particular post.
So, write the following code inside the show.blade.php file. I am writing the whole file to display the comments. Remember, this is the parent comments. We still need to create a reply button and then show all the replies.
<!-- show.blade.php -->

@extends('layouts.app')

@section('content')
<div class="container">
    <div class="row justify-content-center">
        <div class="col-md-8">
            <div class="card">
                <div class="card-body">
                    <p><b></b></p>
                    <p>

                    </p>
                    <hr />
                    <h4>Display Comments</h4>
                    @foreach($post->comments as $comment)
                        <div class="display-comment">
                            <strong></strong>
                            <p></p>
                        </div>
                    @endforeach
                    <hr />
                    <h4>Add comment</h4>
                    <form method="post" action="">
                        @csrf
                        <div class="form-group">
                            <input type="text" name="comment_body" class="form-control" />
                            <input type="hidden" name="post_id" value="" />
                        </div>
                        <div class="form-group">
                            <input type="submit" class="btn btn-warning" value="Add Comment" />
                        </div>
                    </form>
                </div>
            </div>
        </div>
    </div>
</div>
@endsection
Now, add the comment, and it will show us here in the same url.

Step 7: Create a Reply form and save replies.
Now, we need to create a function called replies() inside Comment.php model.
<?php

// Comment.php

namespace App;

use Illuminate\Database\Eloquent\Model;

class Comment extends Model
{
    public function user()
    {
        return $this->belongsTo(User::class);
    }

    public function replies()
    {
        return $this->hasMany(Comment::class, 'parent_id');
    }
}
Here, in the replies function, we need to add a primary key as a parent_id because we need to fetch a reply based on a parent comment’s id.
Okay, now we need to write the display of all the comments and its replies code into the partial blade file.
The reason behind is that, we need to nest the comment replies and how much nesting is required depends upon the user interaction. So we can not predict the nesting levels.
To make more and more flexible, we need to create partials and then repeat that partial to display the nested comment replies.
First, create a partials folder inside resources >> views folder and inside partials folder, create one file called _comment_replies.blade.php.
Write the following code inside the _comment_replies.blade.php file.
<!-- _comment_replies.blade.php -->

 @foreach($comments as $comment)
    <div class="display-comment">
        <strong></strong>
        <p></p>
        <a href="" id="reply"></a>
        <form method="post" action="">
            @csrf
            <div class="form-group">
                <input type="text" name="comment_body" class="form-control" />
                <input type="hidden" name="post_id" value="" />
                <input type="hidden" name="comment_id" value="" />
            </div>
            <div class="form-group">
                <input type="submit" class="btn btn-warning" value="Reply" />
            </div>
        </form>
        @include('partials._comment_replies', ['comments' => $comment->replies])
    </div>
@endforeach
Here, I have displayed all the replies with the text box. So it can do further nesting.
Now, this partial is expect to parameters.
- comments
- post_id.
So, when we include this partial inside show.blade.php file, we do need to pass these both of the parameters so that we can access here.
Also, we need to define the route to save the reply.
Add the following line of code inside routes >> web.php file.
// web.php

Route::post('/reply/store', 'CommentController@replyStore')->name('reply.add');
So, our final web.php file looks like below.
<?php

// web.php

Route::get('/', function () {
    return view('welcome');
});

Auth::routes();

Route::get('/home', 'HomeController@index')->name('home');

Route::get('/post/create', 'PostController@create')->name('post.create');
Route::post('/post/store', 'PostController@store')->name('post.store');

Route::get('/posts', 'PostController@index')->name('posts');
Route::get('/post/show/{id}', 'PostController@show')->name('post.show');

Route::post('/comment/store', 'CommentController@store')->name('comment.add');
Route::post('/reply/store', 'CommentController@replyStore')->name('reply.add');
Also, define the replyStore() function inside CommentController.php file.
I am writing here the full code of the CommentController.php file.
<?php

// CommentController.php

namespace App\Http\Controllers;

use Illuminate\Http\Request;
use App\Comment;
use App\Post;

class CommentController extends Controller
{
    public function store(Request $request)
    {
        $comment = new Comment;
        $comment->body = $request->get('comment_body');
        $comment->user()->associate($request->user());
        $post = Post::find($request->get('post_id'));
        $post->comments()->save($comment);

        return back();
    }

    public function replyStore(Request $request)
    {
        $reply = new Comment();
        $reply->body = $request->get('comment_body');
        $reply->user()->associate($request->user());
        $reply->parent_id = $request->get('comment_id');
        $post = Post::find($request->get('post_id'));

        $post->comments()->save($reply);

        return back();

    }
}
So, here almost both of the function store and replyStore function is same. We are storing parent comment and its replies in the same table. But, when we are saving a parent comment, the parent_id becomes null, and when we store any reply, then parent_id becomes its comment_id. So that is the difference.
Finally, our show.blade.php file looks like this.
<!-- show.blade.php -->

@extends('layouts.app')
<style>
    .display-comment .display-comment {
        margin-left: 40px
    }
</style>
@section('content')

<div class="container">
    <div class="row justify-content-center">
        <div class="col-md-8">
            <div class="card">
                <div class="card-body">
                    <p><b></b></p>
                    <p>

                    </p>
                    <hr />
                    <h4>Display Comments</h4>
                    @include('partials._comment_replies', ['comments' => $post->comments, 'post_id' => $post->id])
                    <hr />
                    <h4>Add comment</h4>
                    <form method="post" action="">
                        @csrf
                        <div class="form-group">
                            <input type="text" name="comment_body" class="form-control" />
                            <input type="hidden" name="post_id" value="" />
                        </div>
                        <div class="form-group">
                            <input type="submit" class="btn btn-warning" value="Add Comment" />
                        </div>
                    </form>
                </div>
            </div>
        </div>
    </div>
</div>
@endsection
Here, I have defined the CSS to display proper nesting.
Also, include the partials and pass the both of the parameters.
- Post comments.
- Post id
We can add the parent comment from here but can add the replies from the partials.
I have added the parent comment, and its replies and our database table looks like this.

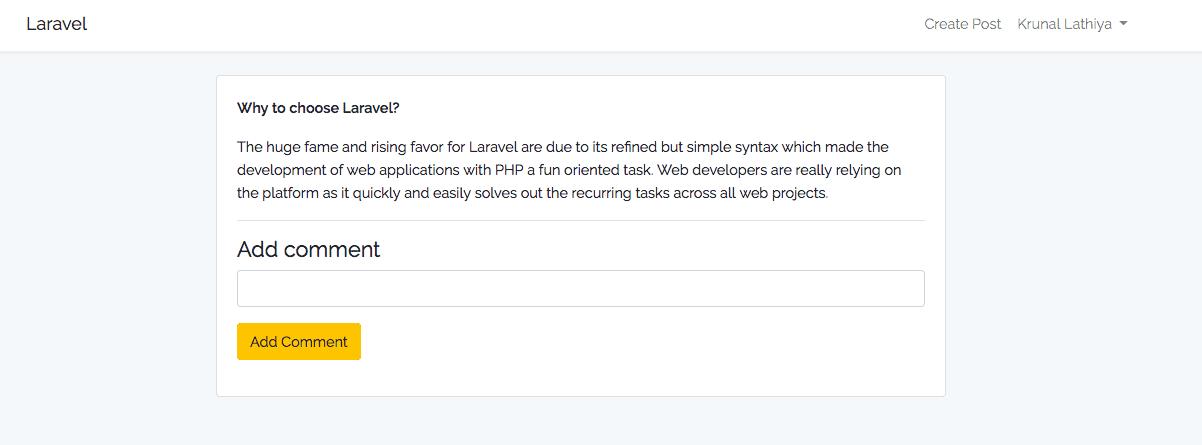
Also, our final output looks like below.

Finally, Create Comment Nesting In Laravel Tutorial With Example is over.
I have put the Github Code of Create Comment Nesting In Laravel so that you can check that out as well.
Github Code
Steps To Use Code
- Clone the repository.
- Install the dependencies
- Configure the database.
- Migrate the database using this command: php artisan migrate
- Go to the register page and add the one user.
- Create the post and comment and reply on the comment.
via Planet MySQL
How To Create Comment Nesting In Laravel From Scratch