
All Macs are perfect, and never encounter a single problem. This is thanks to the unicorn dust applied liberally to the internals of each new machine.
Unfortunately, that’s not true. Just like Windows machines, your Apple hardware can and will go wrong from time to time. Apple provides plenty of tools to get you on your way, but a few free third-party apps don’t hurt either.
Here are eight free tools that can help when your computer don’t work properly.
1. Disk Utility
When to use it: Corrupted files, drive errors, or a Mac that won’t boot into macOS.
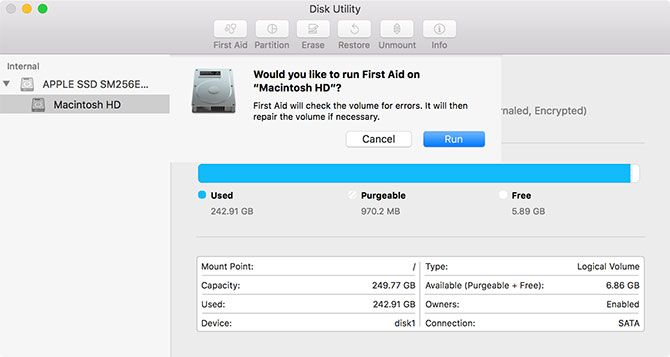
Disk Utility is a utility provided with macOS, which you can find under your Applications > Utilities folder. It’s used for formatting drives, mounting and unmounting volumes, and fixing problems as they arise.
You can run First Aid on any drive by launching the utility and clicking the corresponding button. For better results, and in cases where your Mac won’t boot, you can launch your Mac in Recovery Mode by restarting and holding Cmd + R while it starts up. Select Disk Utility, then First Aid to attempt a fix. Hit Repair Disk if it detects a problem.
It’s also possible to create whole images of your current disk using this utility, which is perfect if your drive is failing. Reboot in Recovery Mode and connect a large enough external drive. Then eject the drive you want to back up (probably called Macintosh HD), followed by File > Create New Image from “Macintosh HD” (or whatever the label is).
Failing Disk Utility’s repair options, you can always boot into single user mode and use fsck to fix drive options from a command line interface.
2. Apple Diagnostics/Apple Hardware Test
When to use it: Suspected hardware issues, when trying to find out which specific component is causing an issue.
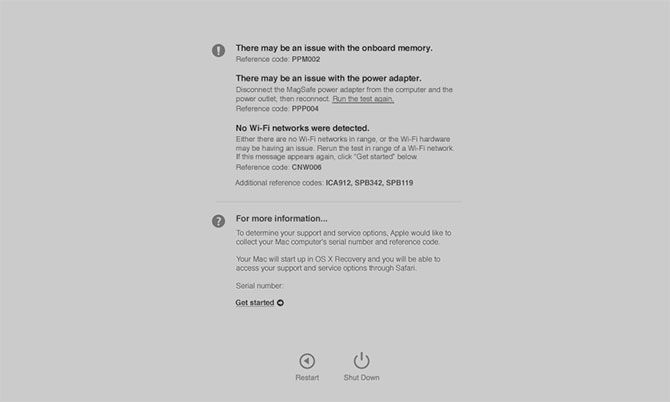
Another tool that comes bundled with your Mac is Apple Hardware Test. This simple utility can help diagnose problems, though it lacks the detail required to make serious repairs. It is, however, useful in cases where you’re trying to isolate a hardware issue from a software one.
The age of your machine will determine whether you use Apple Diagnostics or Apple Hardware Test, but they do the same job and launch using the same shortcut. Simply hold down D while your Mac boots, or Option + D to run the test from the internet (in cases where the test won’t run from disk).
If you’re feeling brave and you want to glean as much information as possible about your hardware problems, you can use Apple Service Diagnostics, assuming your Mac isn’t too new.
3. OnyX

When to use it: For making deep system tweaks, cleaning up caches, and fiddling with the OS.
OnyX is the jack of all trades maintenance tool for macOS. Most users won’t have any specific need for it until the time comes, but it’s a handy tool to have installed. Just like Disk Utility, you can use OnyX to verify the structure of the startup disk. It can also repair permissions, something that most users of El Capitan or later will never need to do.
With OnyX you can perform tasks like run the operating system’s daily, weekly, and monthly clean-up scripts with the click of a button. You can also rebuild databases like Spotlight, Mail, and LaunchServices without having to boot into Safe Mode.
This tool works to to clear just about every cache on your system, though generally speaking you should let the OS take care of this task. You can also perform three and seven-pass secure erases, though you shouldn’t do this on solid state drives. OnyX can also show and hide files, folders, and applications, plus access macOS applications like the hidden Network Utility and Directory Utility tools with a click.
Finally, you can tweak some settings that are usually only available via Terminal prompts. These include the format, location, and naming conventions for screenshots, recent folder and file listings, Safari tweaks like history cutoff and DNS prefetching; startup sounds, and even graphical effects throughout the OS.
Download: OnyX
4. MemTest86
When to use it: Crashes, freezes, app instability—particularly if you just installed some new memory.
RAM is one of the last internal components Mac owners can still customize—on some machines at least. The iMac in particular still provides a window at the back that pops open and allows you to add physical memory. Older MacBooks, where the RAM isn’t soldered to the motherboard, are also open to tinkering.
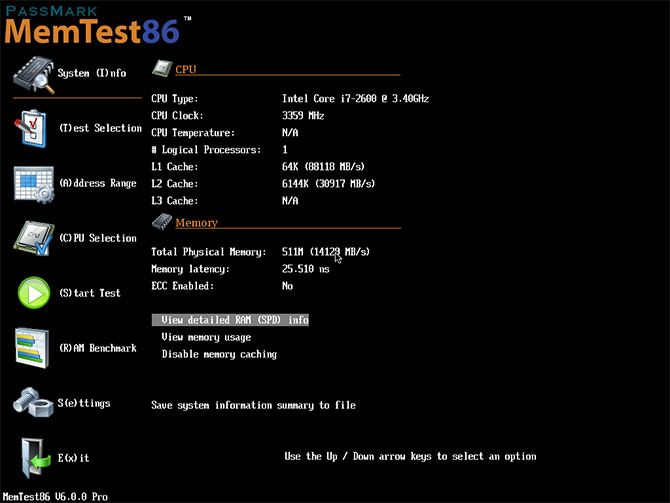
But this can lead to issues when the memory you’ve installed is faulty. Application crashes, hard reboots, and freezing are all symptoms of dud memory. Even the old sticks of RAM installed when your machine was new can fail, leading to problems. MemTest86 is a free tool for thoroughly testing your RAM and isolating memory problems.
To use it, simply download the version for Linux and Mac, create a bootable USB drive using the image, insert your USB stick, and hold the Option key when your Mac boots. Choose the USB boot option from the menu and follow the prompts.
There are memory testing tools that run under macOS or via a graphical interface. But the problem with this approach is that your operating system is already using the RAM you want to test. By booting into a lightweight Unix environment, you can test the RAM more thoroughly.
Download: MemTest86
5. Malwarebytes
When to use it: Periodically to ensure your Mac is malware-free.
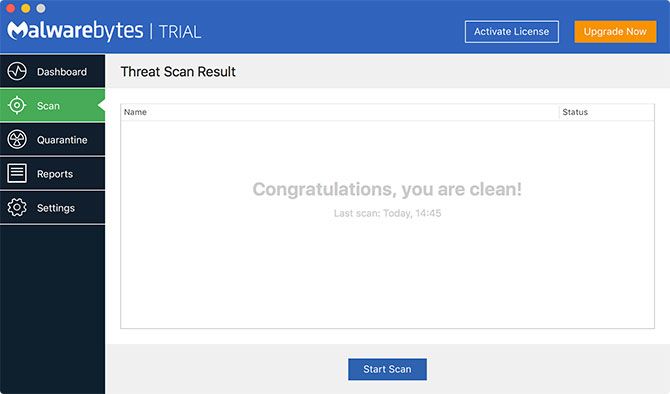
Your Mac is susceptible to malware, even though the likelihood of infection is low. Apple has put in place protections like system integrity protection and Gatekeeper to limit damage from errant third-party software. But exploits still happen, and Malwarebytes is a free solution to keep you protected.
If you’ve already been infected, this is one anti-malware tool that can help. The free version lacks real-time protection, but that’s fine since resources are precious. A quick scan from time to time, as well as running the updates when they arrive, should be enough to keep you safe.
You’ll get a free trial of the premium version of Malwarebytes when you download, but the free version offers ample protection for most users.
Download: Malwarebytes
6. KnockKnock
When to use it: When you suspect malware is persistently trying to install itself on your machine.
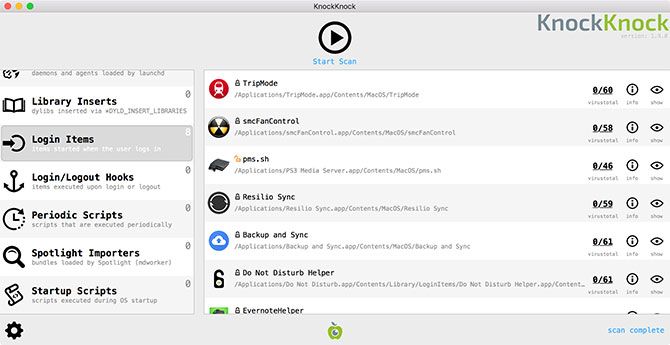
Objective See produces a whole range of security tools for macOS, but we’re going to focus on KnockKnock here. It’s a tool that looks a little deeper than your average malware scanner for applications that attempt to persistently install software on your machine.
This is the hallmark of many vehicles used to deliver malware, though the app will also detect benign applications that do this as part of their regular operation. The app is integrated with VirusTotal protection, indicating if anything unusual is attempting to install something more sinister.
Download: KnockKnock
7. EtreCheck
When to use it: When you’re experiencing problems with the normal operation of macOS.
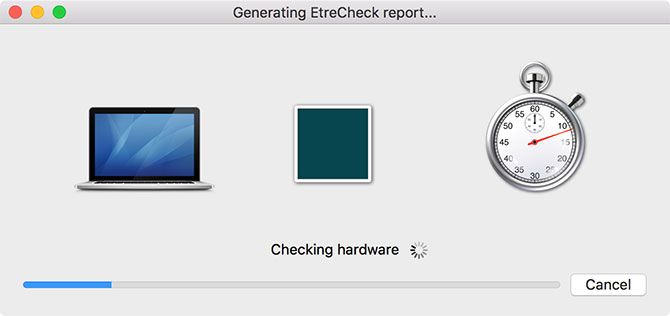
EtreCheck is a tool that can detect over 30 minor and major problems with your Mac. It generates reports based on what it finds, so you can ask others to help remedy the problem. EtreCheck works in tandem with Apple Support Communities to help users with limited technical knowledge solve their computer problems.
EtreCheck will generate five reports for free, which should be enough to help diagnose an immediate problem with your hardware. After this it will cost around $10, depending on where in the world you are. This is so anyone can use it as a fast diagnosis tool, but also to cover the continued development costs.
When you first run the app, you’ll see a prompt asking for description of your problem. EtreCheck will then scan your computer for hardware, configuration, software, and performance issues.
Download: EtreCheck
8. PhotoRec
When to use it: In cases where you need to recover media from external drives.
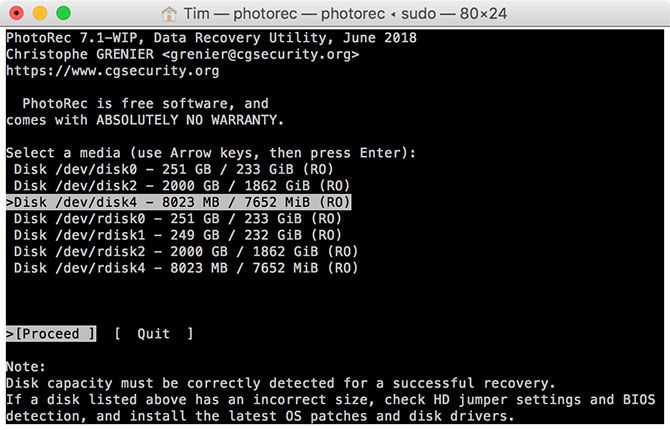
Test Disk and PhotoRec are two closely related projects. The former is aimed at whole drive recovery, while the latter is designed to recovery media from removable storage. Unfortunately, TestDisk doesn’t yet support Apple’s new file system APFS, but it does work with HFS+ file systems created prior to macOS 10.13 High Sierra.
PhotoRec supports the most common file systems used to store media, so if you’ve lost an SD card full of photos it might be your best bet for getting them back. Unfortunately you’ll lose your original filenames, but that’s better than losing the data entirely.
If your card becomes unreadable, remember that you should not write to it at all until you have tried everything to get your data back. The more you write to the volume, the less likely a full recovery is possible.
Don’t Forget Your Boot Modes
You Mac uses various boot modes for all kinds of troubleshooting functions. Safe mode will automatically verify your disk on startup, while resetting your PRAM and SMC can solve numerous minor issues.
Check out the full list of Mac boot modes for fixing a whole range of problems with your computer. If you’re having network issues, macOS’s built-in Network Utility can help you out too.
Read the full article: The 8 Best Free Mac Tools to Detect and Fix Common macOS Problems
via MakeUseOf.com
The 8 Best Free Mac Tools to Detect and Fix Common macOS Problems