Remington 870 Shotguns are one of the definitive shotguns on the market in terms of reliability and ease of use, from civilian use to military and police – the 870 is simply one of the shotguns that almost everyone should own.
It takes a high position in our 5 Best Home Defense & Tactical Shotguns.
But if you’re new to the platform, you might be wondering how to field strip and clean your new scatter gat.
Don’t worry, we’ll cover that and more below…
We also have an awesome video that you can watch if you’d like to see how we clean our 870 directly!
If text and pictures are more your thing, read on!
Cleaning Supplies and Prep
Cleaning an 870 is much like cleaning any other firearm, you’ll need some brushes, patches, a microfiber cloth, solvents, and lubricants. Conveniently all of these tools (except the microfiber cloth), cleaners, and lube are found in the M-Pro 7 Cleaning Kit.
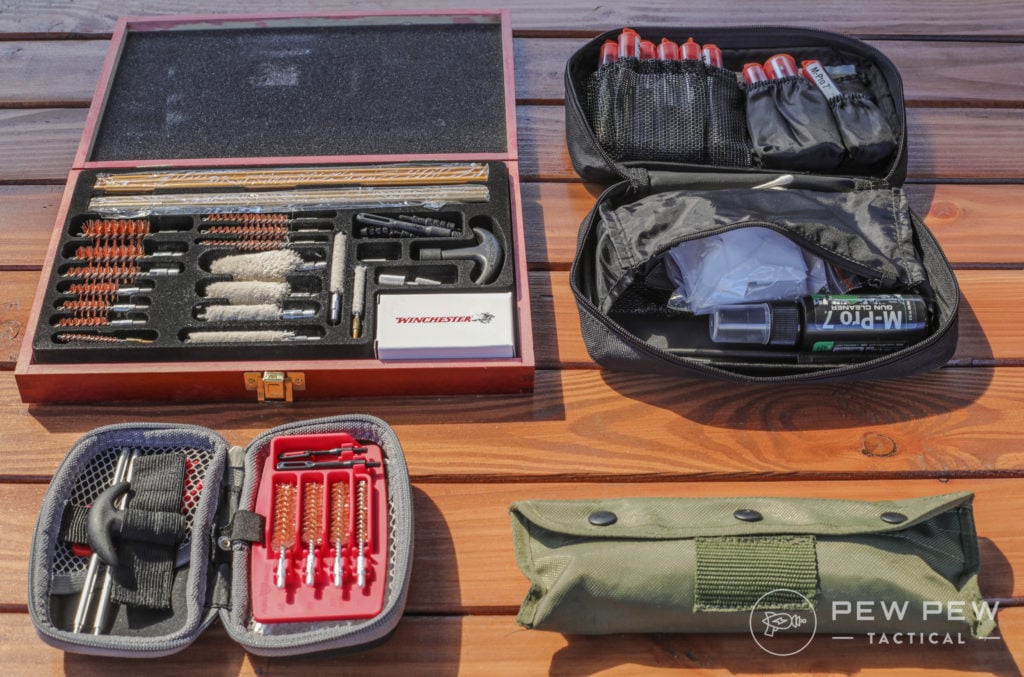
If you want some more great gun cleaning options, take a look at our 4 Best Gun Cleaning Kits!
Now that you have your tools, find a decent place to work – a counter, table, or workbench all work great.
Ensure any and all ammunition is removed from the area before you start cleaning your firearm!
I like to lay down a towel or neoprene mat to soak up any spilled solvents and to catch the carbon, copper, and gunk that is cleaned from the weapon.
Field Stripping
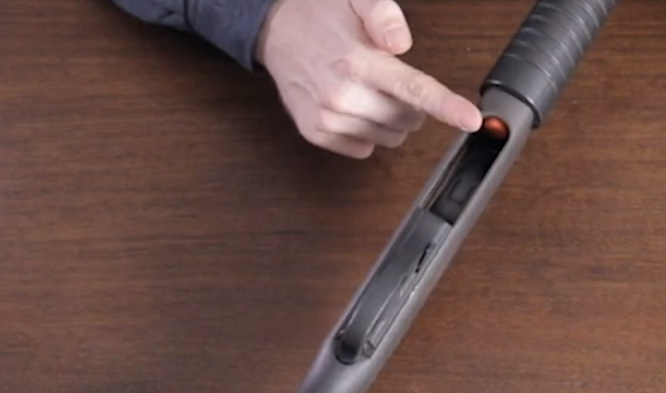
The first step to cleaning any weapon is to double or triple check that the weapon is unloaded. For the 870, start with racking your slide to the rear and visually inspecting the chamber to make sure it is clear.
Flip the shotgun over and ensure that the magazine follower is visible and the shotgun tube is empty of shells.
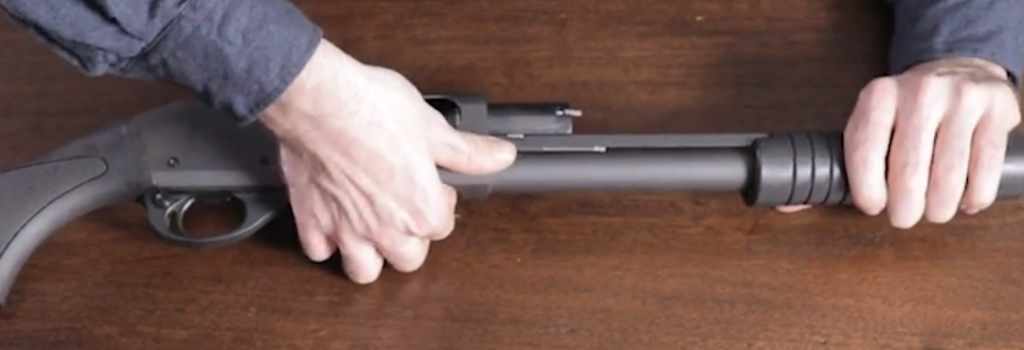
Next, locate your magazine tube cap at the end of your magazine tube and rotate it counter-clockwise. You’ll see that our shotgun has an extended magazine tube, so your cap/tube might look a little different.
Make sure that you keep some pressure on the tube while removing the cap, once the cap is removed the tube will still be under some spring tension and can go flying across the room if you’re not careful.
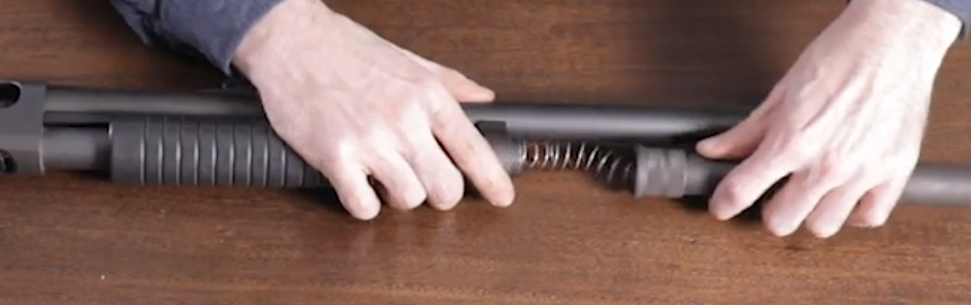
Once complete, the barrel of the shotgun should pull off with a simple tug.
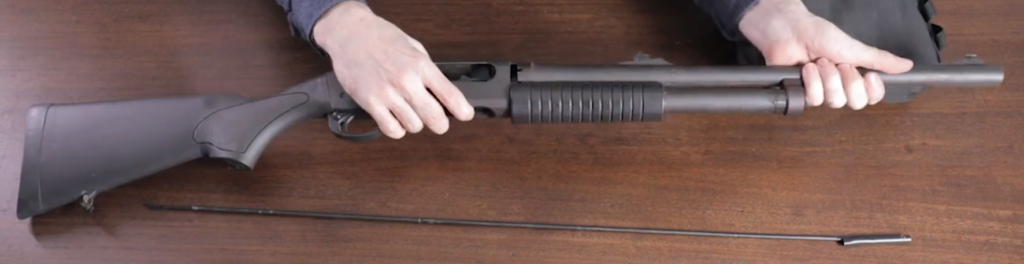
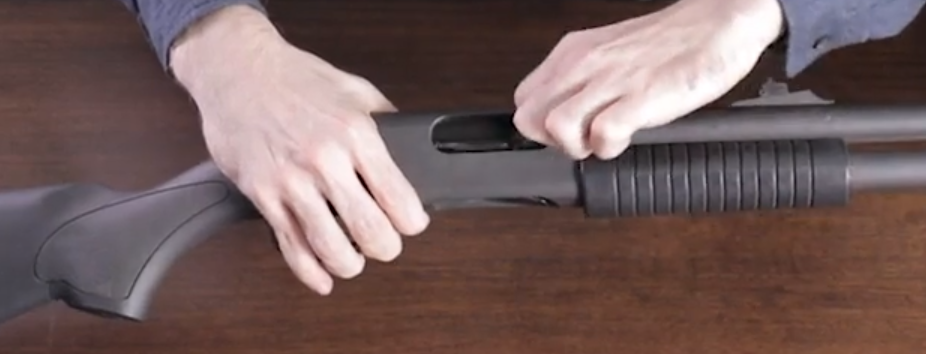
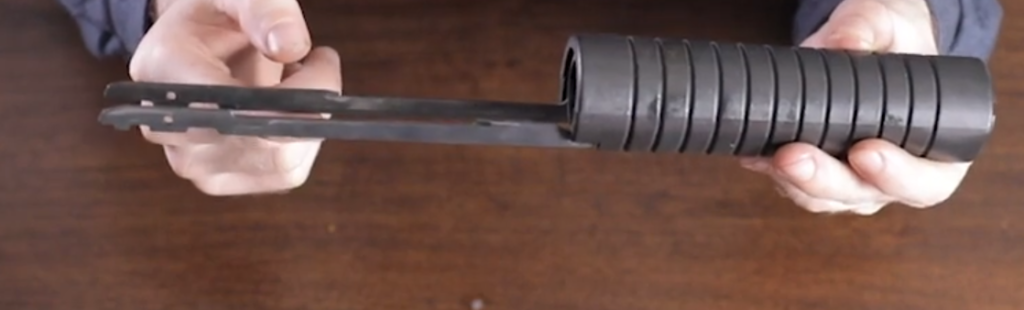
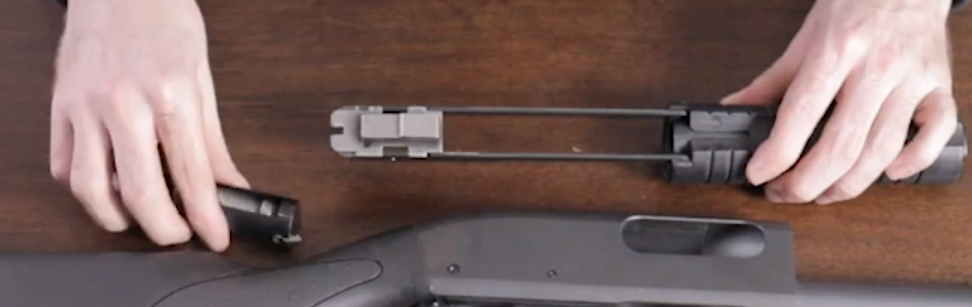
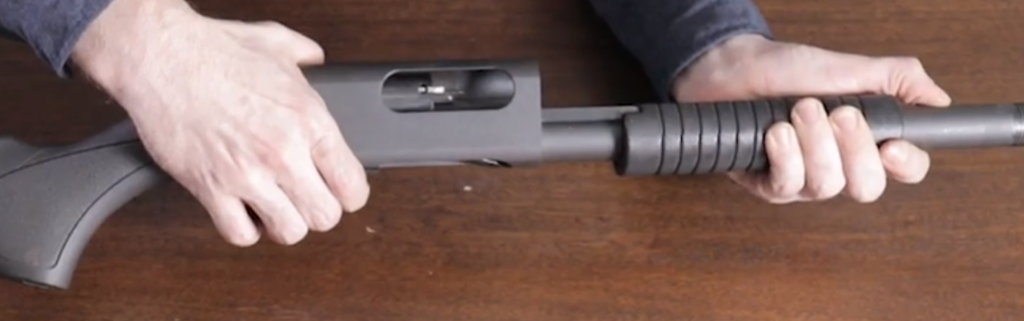
The forend assembly will take a little fiddling – start with turning the shotgun over and depressing the two tabs you find on the inside of the receiver where the magazine tube meets.
You might need to press one tab in and then the other, sometimes these can be a bit stiff and hard to move.
Once released just pull the forend assembly off the rest of the shotgun, the bolt and bolt carrier will come out with this step as well.
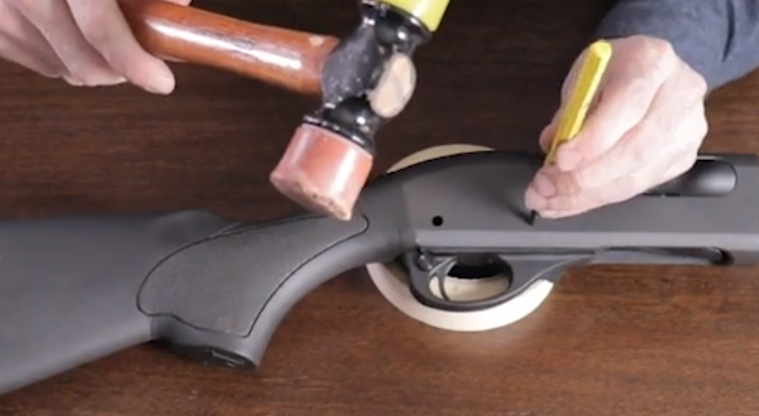
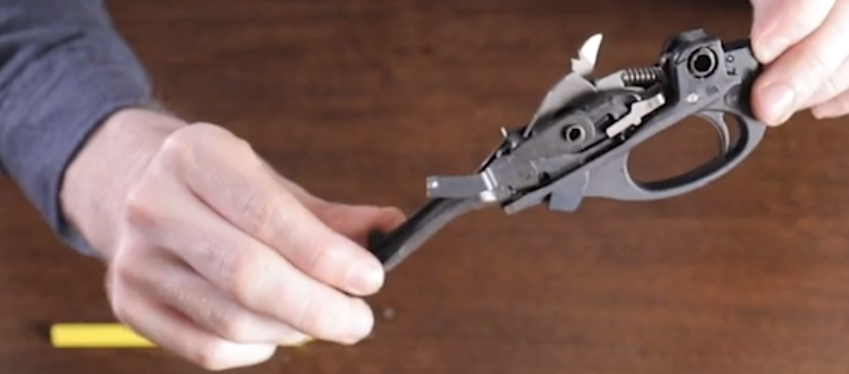
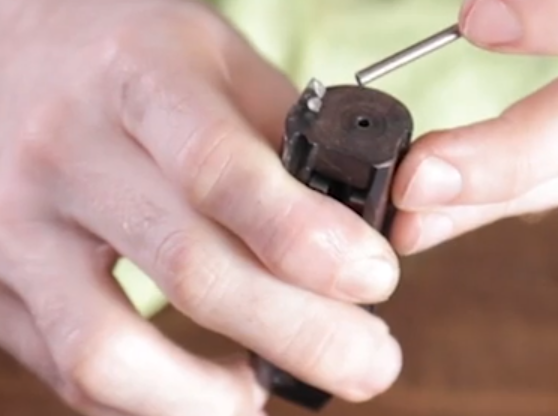
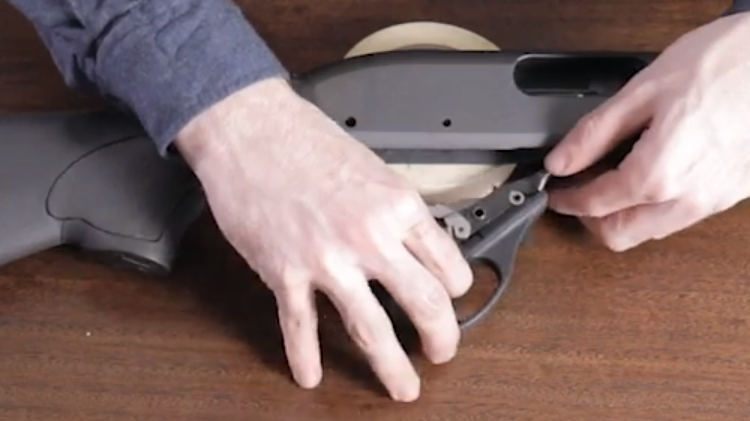
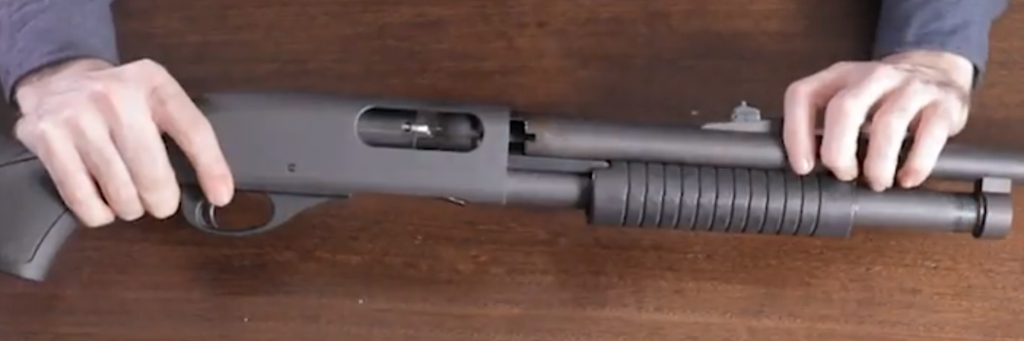
This is the part that you’ll need your pin punch. Set the shotgun on it’s left side and using your punch and hammer, drive the two pins out the other side.
These should come out fairly easy, but don’t feel shy about giving them a good wack to get them out. You’ll start with the forward most pin.
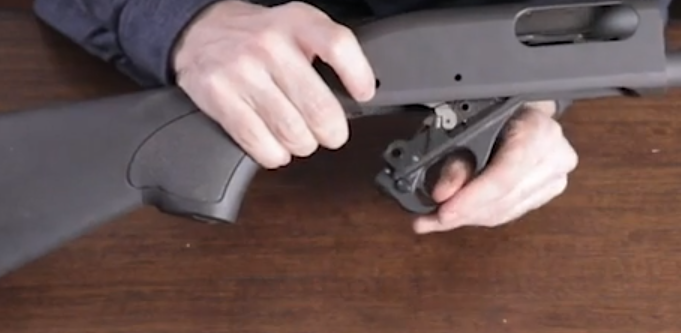
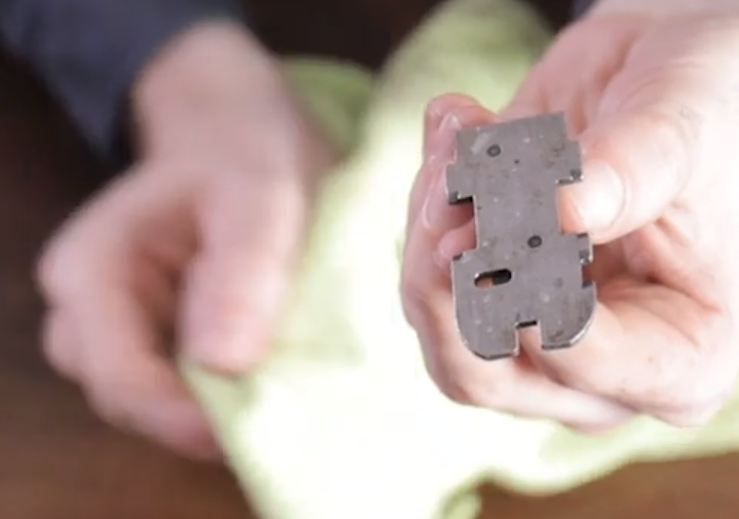
After the pins are removed, you can remove the trigger group from the receiver!
Cleaning
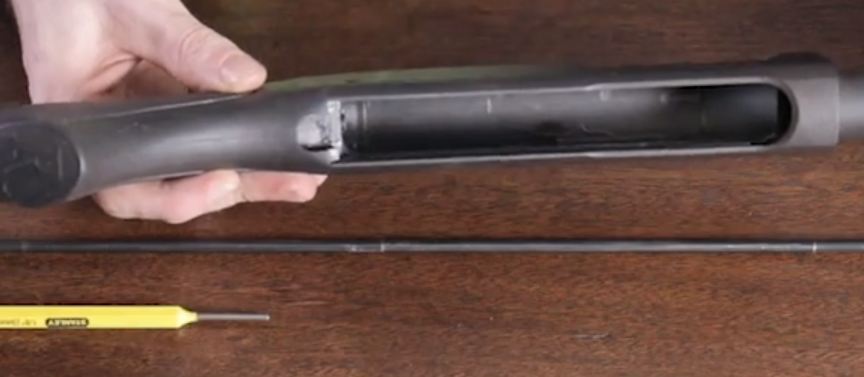
Give the inside of your now empty receiver a spray of cleaner and then set it aside while we work on the other parts.
Starting with the bolt and bolt carrier. Give the bolt a thorough spray down with cleaner…

Followed by spraying the carrier itself – you’ll want to separate the two so you can get to all sides of each.
Take your barrel and spray some cleaner down both ends before setting it once again to the side.

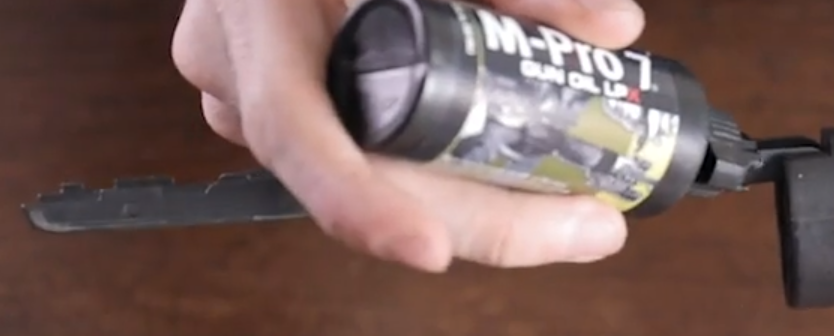
Inspect your forend assembly rails for any carbon build up. There likely won’t be much, so you can normally just wipe it down with a microfiber cloth – but if there is heavy build up, hit it with some cleaner!
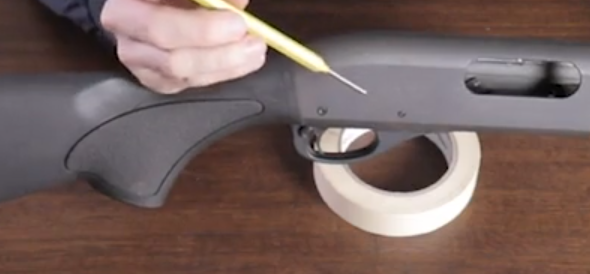
Our trigger group is next! Spray with cleaner and wipe down.
If it is extra dirty you may want to clean it a bit deeper by lowering the hammer to get into the internals of the trigger group. While holding the hammer, gently depress the trigger and slowly lower the hammer down. Be careful as the hammer spring is stiff.
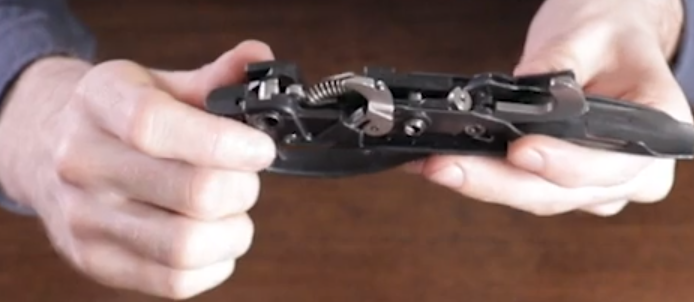
Once clean, recock the hammer and set the trigger group aside.
Grab your bore brush, attach it to your cleaning rod, and run it down the barrel several times starting at the rear of the barrel (the chamber end is the rear).
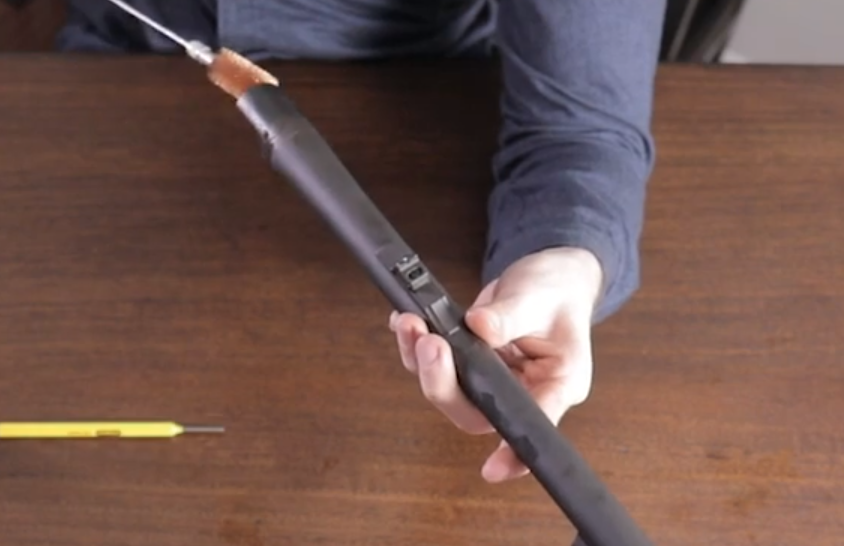
Attach a cleaning patch by wrapping it around your bore brush, then using the same push-forward method run the patch through your barrel.
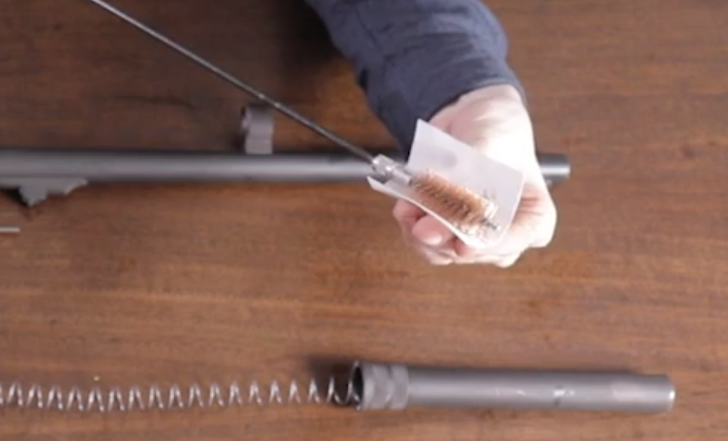
This will likely take a few patches before they start to come out mostly clean.

After the patches are coming out mostly clean, set the barrel aside and grab your receiver!
Using a microfiber cloth wipe down the inside of the receiver paying extra attention to the where the forend assembly rails interface with the receiver. The receiver is unlikely to be extra dirty so this should be easy. If there is buildup though, use a brush to scrub it away.
Inspect your magazine tube and make sure there isn’t any fowling, debris, or other stuff. If there is then use a dry cleaning patch to clean the inside of the tube. Do not use any lube or cleaning down it!

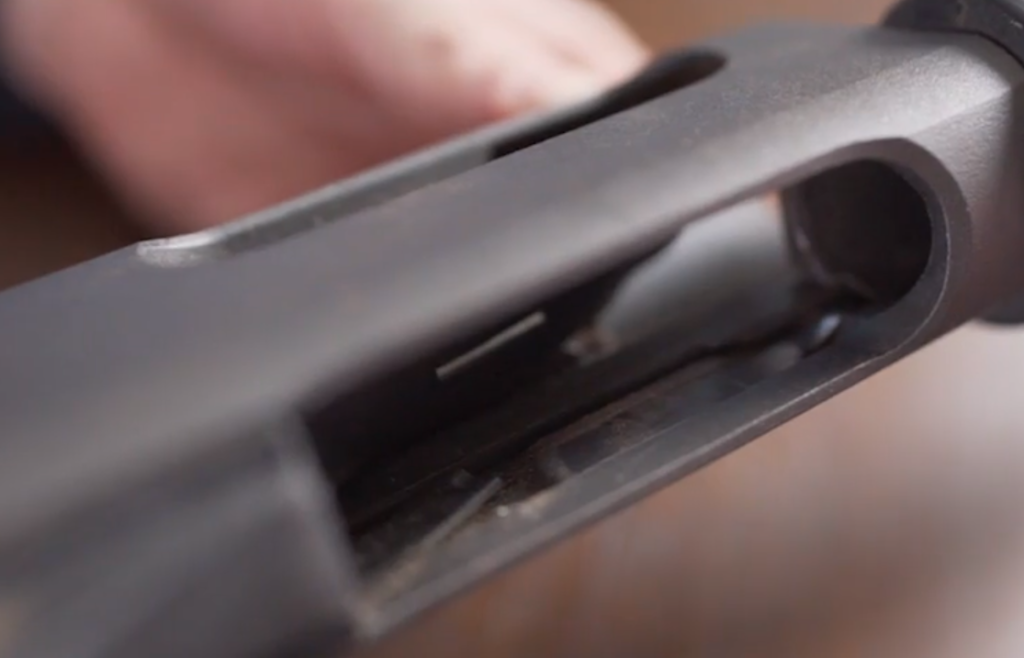
Take your bolt and wipe it down with the microfiber cloth. If there is a heavy build-up, use a brush to scrub it!

Make sure to inspect the bolt face and extractor claw of the bolt, cleaning those are critical.
Repeat with your bolt carrier.
Lubrication
There are only two parts you need to lubricate, so this is quick and easy.
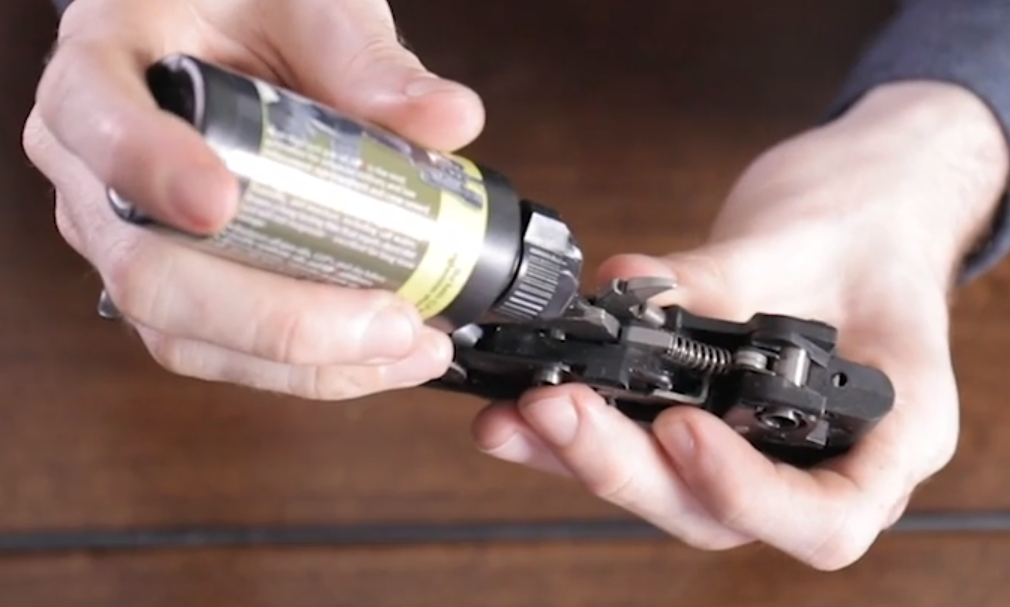
We’ll start with the trigger group. Place a small amount of lube on the hammer face and the hammer spring.
The rails of your forend assembly will also need some lube, but only a small amount and across the entire surface of the rails. Use your microfiber cloth to wipe up excess lube.
Reassembly
Now that everything is clean and slick it’s time to put your shotgun back together.
Start with the trigger group, insert it into the body of the receiver and aline the pin holes.
Replace the pins hammering them from the right to the left and starting with the forward pin.
Set your bolt carrier into the matching notches on your forend rails. Place the bolt on top of the bolt carrier with the bolt face facing forward toward the muzzle end of the shotgun.
Place the bolt on top of the bolt carrier with the bolt face facing forward toward the muzzle end of the shotgun.
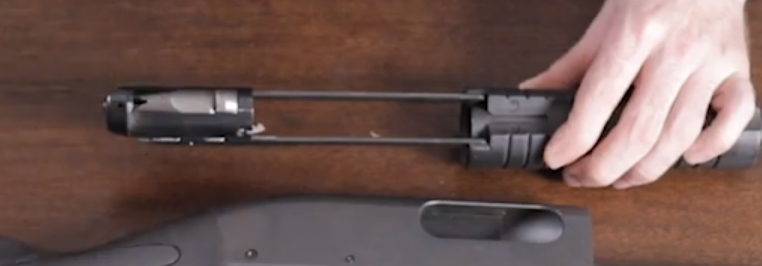
Slide the entire forend assembly over the magazine tube and into the receiver.
Once you feel resistance, push the internal tabs in the receiver and keep sliding the forend assembly into the receiver.
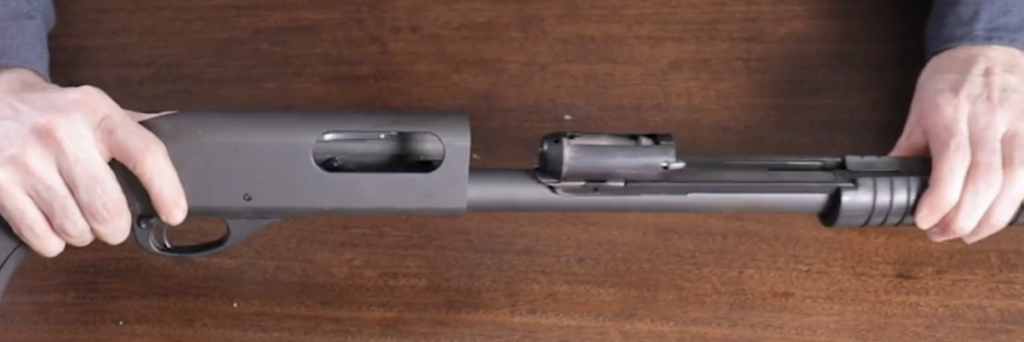
Cycle the pump and the bolt to the rear and then forward about halfway.
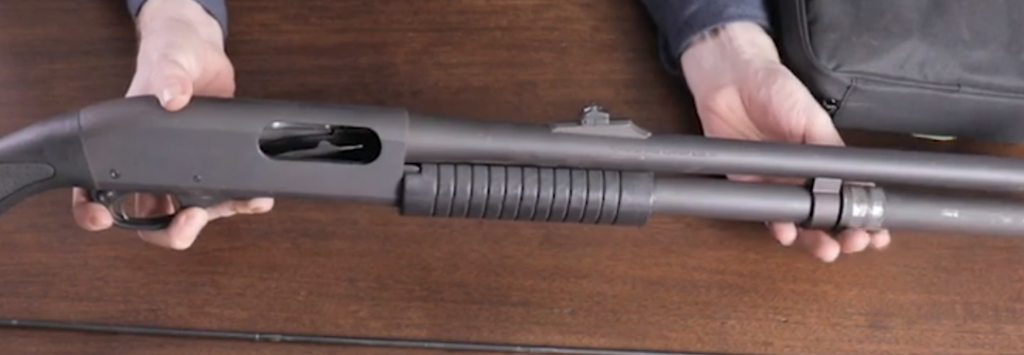
Grab your barrel again and give it one last inspection before reattaching it to the shotgun, the barrel should slide easily into place.
Reinsert your magazine follower and spring assembly into the magazine tube. Note: the follower goes in first!
Keep in mind that we have a magazine tube extension on our 870, but however your tube looks just tighten down your magazine cap to secure the tube in place.
Finally – rack the action of your shotgun to check that everything functions correctly!
One last step you might want to take is to clean the outside of the gun once it is reassembled. Just take some cleaner and a microfiber cloth and give it a good spray and rub down.
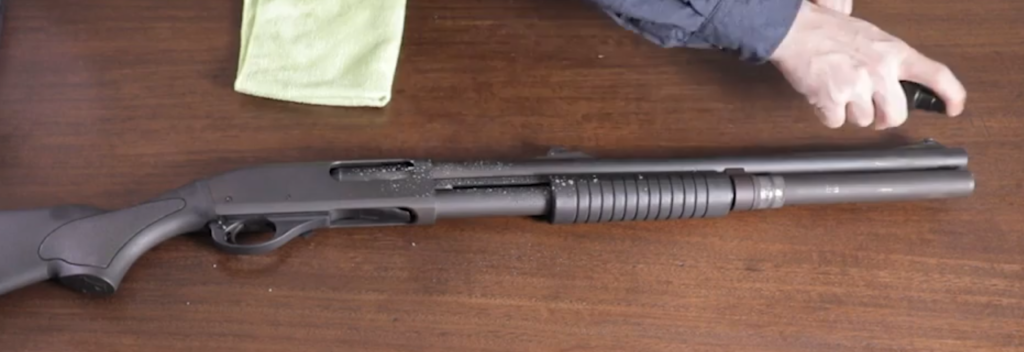
And that’s it! You’re done!
Parting Shots
Now that you’re comfy with taking your shotgun apart and putting it back together again, maybe its time to make some upgrades to your trusty 870.
We recommend starting with some of the Best Shotgun Sights.
Need ammo? Take a look at our Best Shotgun Ammo for the Range & Home Defense article!
Clean your shotgun differently? Let us know about in the comments!
via Pew Pew Tactical
[How To] Disassemble, Clean, & Lube a Remington 870