
In this blog, I will show you how to install PMM on Linode as a low-cost database monitoring solution.
Many of my friends use Linode to run their personal sites, as well as small projects. While Linode is no match for Big Cloud providers in features, it is really wonderful when it comes to cost and simplicity: a Linode “nanode” instance offers 1GB of memory, 1 core, 20GB of storage and 1TB of traffic for just $5 a month.
A single Linode instance is powerful enough to use with Percona Monitoring and Management (PMM) to monitor several systems, so I use Linode a lot when I want to demonstrate PMM deployment through Docker, rather than Amazon Marketplace.
Here are step-by-step instructions to get you started with Percona Monitoring and Management (PMM) on Linode in five minutes (or less):
Step 1: Pick the Linode Type, Location and launch it.

Step 2: Name your Linode
This step is optional and is not PMM-related, but you may want to give your Linode an easy-to-remember name instead of something like “linode7796908”. Click on Linode Name and then on “Settings” and enter a name in “Linode Label”.

Step 3: Deploy the Image
Click on Linode Name and then on “Deploy an Image”.

I suggest choosing the latest Ubuntu LTS version and allocating 512MB for the swap file, especially on a Linode with a small amount of memory. Remember to set a strong root password, as Linode allows root password login by default from any IP.
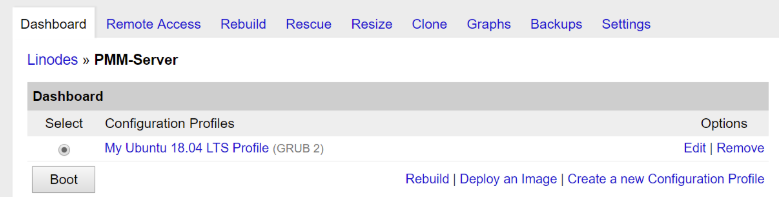
Step 4: Boot Linode
Now prepare the image you need to boot your Linode. Click on the Boot button for that:
Step 5: Login to the system and install Docker
Use your favorite SSH client to login to the Linode you created using “root” user and password you set at Step 3, and install Docker:
apt install docker.io
Step 6: Run PMM Server
Here are detailed instructions to install the PMM Server on Docker. Below are the commands to do basic installation:
docker pull percona/pmm-server:latest
docker create
  -v /opt/prometheus/data
  -v /opt/consul-data
  -v /var/lib/mysql
  -v /var/lib/grafana
  --name pmm-data
  percona/pmm-server:latest /bin/true
docker run -d
  -p 80:80
  --volumes-from pmm-data
  --name pmm-server
  --restart always
  percona/pmm-server:latest
Note: This deploys PMM Server without authentication. For anything but test usage, you should set a password by following instructions on this page.
You’re done!
You’ve now installed PMM Server and you can see it monitoring itself by going to the server IP with a browser.

Now you can go ahead and install the PMM Client on the nodes you want to monitor!
The post Deploying PMM on Linode: Your $5-Per-Month Monitoring Solution appeared first on Percona Database Performance Blog.
via MySQL Performance Blog
Deploying PMM on Linode: Your $5-Per-Month Monitoring Solution