No, I am Thy Father. Musician Samuel Kim has been building a library of Star Wars tracks reimagined in a medieval style. Among the collection is this version of John Williams’ Imperial March that feels right at home among the knights and castles.
Exporting PDF by the web application is an important feature. We need PDF of the customer list, invoice, balance sheet or any other data report. By Laravel and barryvdh/laravel-dompdf package, we can easily generate dynamic PDF from our application. DomPDF can make HTML to PDF and it supports CSS 2.1 compliant HTML layout. The laravel dompdf package is a wrapper package of PHP Dompdf package. With that, we can easily convert our view to PDF. In this post, I’ll show you a step by step process on how to make PDF in Laravel application using the barryvdh/laravel-dompdf package.
Laravel PDF generation
Here, I’ll show you the process of making a PDF for a customer list. According to this strategy, you can make your won custom dynamic PDF by your laravel application.
Note: This post is not a version-specific. Following this tutorial post, you can generate PDF by Laravel 5/6/7.
Step 01: Install the barryvdh/laravel-dompdf package.
composer require barryvdh/laravel-dompdf
Add these in config/app.php file.
add in the providers array
Barryvdh\DomPDF\ServiceProvider::class,
add in the aliases array
'PDF' => Barryvdh\DomPDF\Facade::class,
Step 02: Make a customer model.
php artisan make:model Customer -m
<?php

namespace App;
use Illuminate\Database\Eloquent\Model;

class Customer extends Model {

    public $fillable = ['name', 'email', 'phone', 'dob'];

}
Step 03: Migration Create and run the migration.
<?php

use Illuminate\Database\Migrations\Migration;
use Illuminate\Database\Schema\Blueprint;
use Illuminate\Support\Facades\Schema;

class CreateCustomersTable extends Migration
{

    public function up()
    {
        Schema::create('customers', function (Blueprint $table) {
            $table->bigIncrements('id');
            $table->string('name');
            $table->string('email');
            $table->string('phone');
            $table->string('dob');
            $table->timestamps();
        });
    }


    public function down()
    {
        Schema::dropIfExists('customers');
    }
}
Now run the migration by php artisan migrate command.
Now do the code for showing report and generating the PDF of that report.
<?php

namespace App\Http\Controllers;

use Illuminate\Http\Request;

use App\Customer;
use PDF;

class CustomerController extends Controller
{
    public function index(Request $request)
    {
        $data = Customer::all();

        if ($request->has('export')) {
            if ($request->get('export') == 'pdf') {
                $pdf = PDF::loadView('customers.index-pdf', compact('data'));
                return $pdf->download('customer-list.pdf');
            }
        }

        return view('customers.index', compact('data'));
    }
}
Here, we’ll show the custom report with customers/index.blade.php view and export pdf with the customers/index-pdf.blade.php view when the user clicks on export pdf button from report view.
Hopefully, this step by step tutorial post will help you to learn how to generate dynamic PDF in the Laravel framework. If you find this post helpful then please share it with others.
Introduction In this article, we are going to see how we can implement an audit logging mechanism using MySQL database triggers to store the old and new row states in JSON column types. Database tables Let’s assume we have a library application that has the following two tables: The book table stores all the books that are found in our library, and the book_audit_log table stores the CDC (Change Data Capture) events that happened to a given book record via an INSERT, UPDATE, or DELETE DML statement. The book_audit_log table is created… Read More
[Guide] How To Shoot a Pistol One Handed: Tips, Tricks, & Drills
https://ift.tt/2P78JjZ
We all start our shooting lives using both hands to hold the gun.
Once we’ve mastered the fundamentals and are well on our way to sharpening those skills into something above-average, though, it’s time to move on.
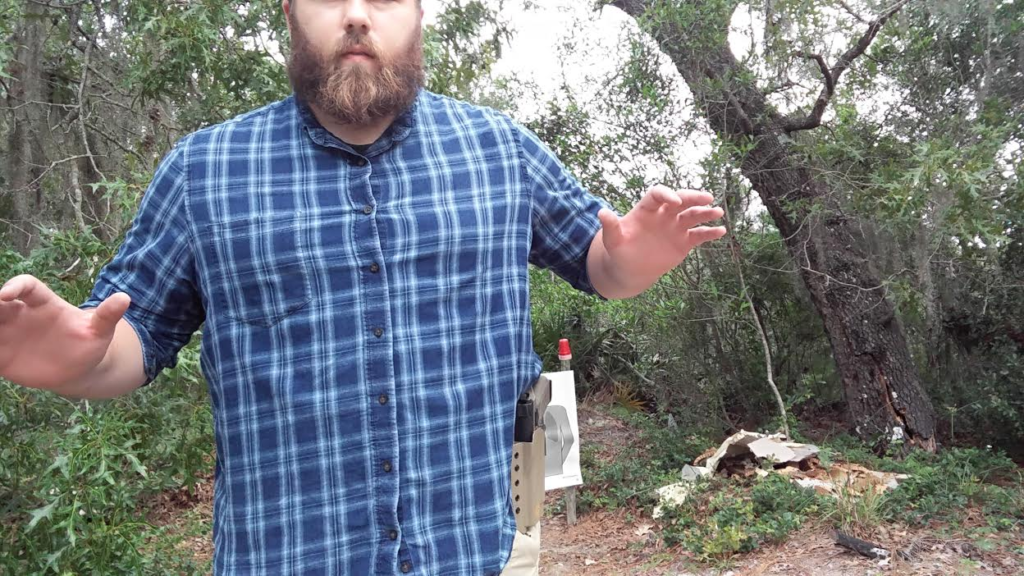
Hadouken
Enter one-handed shooting. Learning to run your gun with one hand isn’t a cool trick or something you do out of boredom it’s a useful ability that might one day save your life.
Here’s how to do it and a little more why.
Table of Contents
Loading…
Self-Defense
The realities of self-defense include the fact you cannot control how a fight for your life will go down.
Maybe you’ll have time to draw your holstered gun and get on target with two hands.
Collateral, Mozambique Drill
Maybe not.
Perhaps you’ll be standing solidly on two feet (probably not). It’s highly unlikely you’ll have time for Isosceles or Weaver or Chapman.
The threat will present itself and you’ll have seconds to react. It’ll probably be over as quickly as it started and you will have only your training to get you through it.
You’re likely to need to aim and fire your gun one-handed in a self-defense scenario. You might be able to get a firm two-handed grip, but don’t count on it.
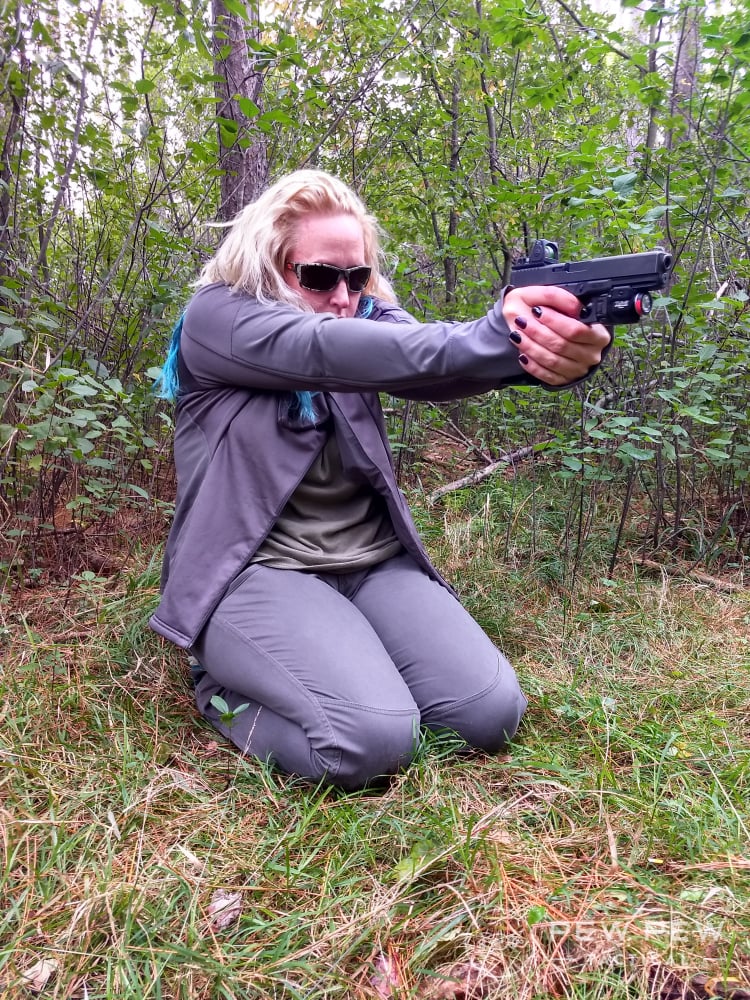
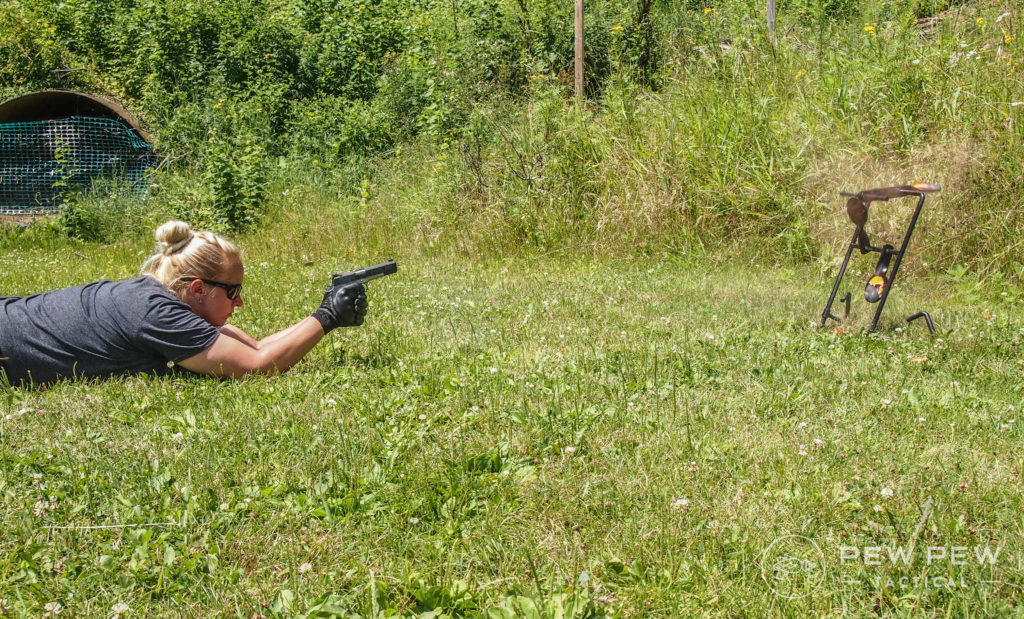
When was the last time you trained drawing and firing from your knees?
You also cannot depend on hip shooting or pure dumb luck to get you through it. Practice is, as always, the answer to shooting dilemmas.
Stance
It might seem counter-intuitive to work on stance with your one-handed SHTF shooting but it isn’t. It’s logical.
The more you train doing something the greater the possibility you’ll automatically do it under pressure. When shooting one-handed put your gun hand foot forward.
That means if you’re shooting with your right hand, put your right foot forward, and vice versa. Shift your weight forward onto that foot, leaving some bend in your knee, but keep your rear foot firmly grounded.
A solid base is important for accurate, safe shooting.
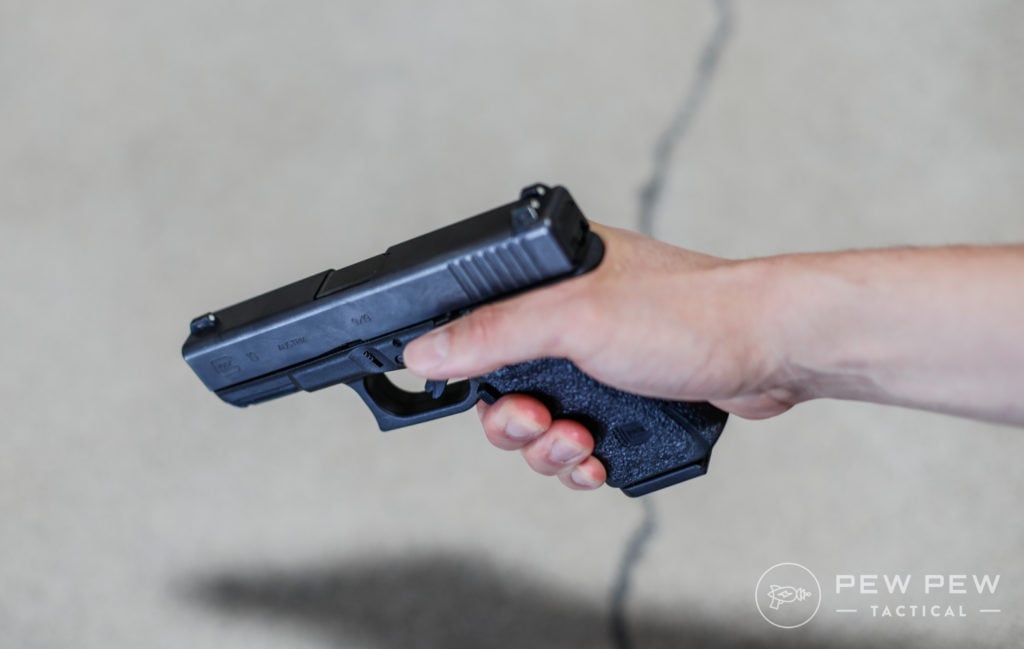
Thumbs
Make a fist. Is your thumb folded down over your fingers or sticking up in the universal thumbs-up gesture?
Try raising your thumb skyward and squeeze your fist closed. Now lower your thumb partway so it’s pointed straight out alongside your pointer finger.
One-handed handgun grip
Squeeze. Finally, drop your thumb down where it probably was originally, folded down over your fingers. Squeeze again. Which thumb position gave you the strongest grip?
Thumb down. When you’re shooting one-handed you’ll be gripping the gun with your thumb down regardless of which hand you’re using. It gives you the firmest grip and enhances accuracy.
That Other Arm
There are a few schools of thought about what to do with your other hand when you’re firing with only one hand.
Some say you should press the flat of your hand – or your fist – to your abdomen; some say to just let your arm hang at your side. My personal preference is the Shotokan Punch method used by Massad Ayoob.
Shooting my Glock 20 10mm one-handed. I’ve found this stance, which is taught by Mas Ayoob, works best for me.
It involves making a fist with your unused hand and raising the arm to hip level with your palm facing upward. Bend your elbow and draw the arm in tightly to your body.
When I’m working with one hand I either do this or pull my fist to my chest. Find what works best for you but take care to hold your free hand and arm tightly out of the way.
If you let it hang it’s unlikely to end well and can throw you off balance, making it harder to fire accurately.
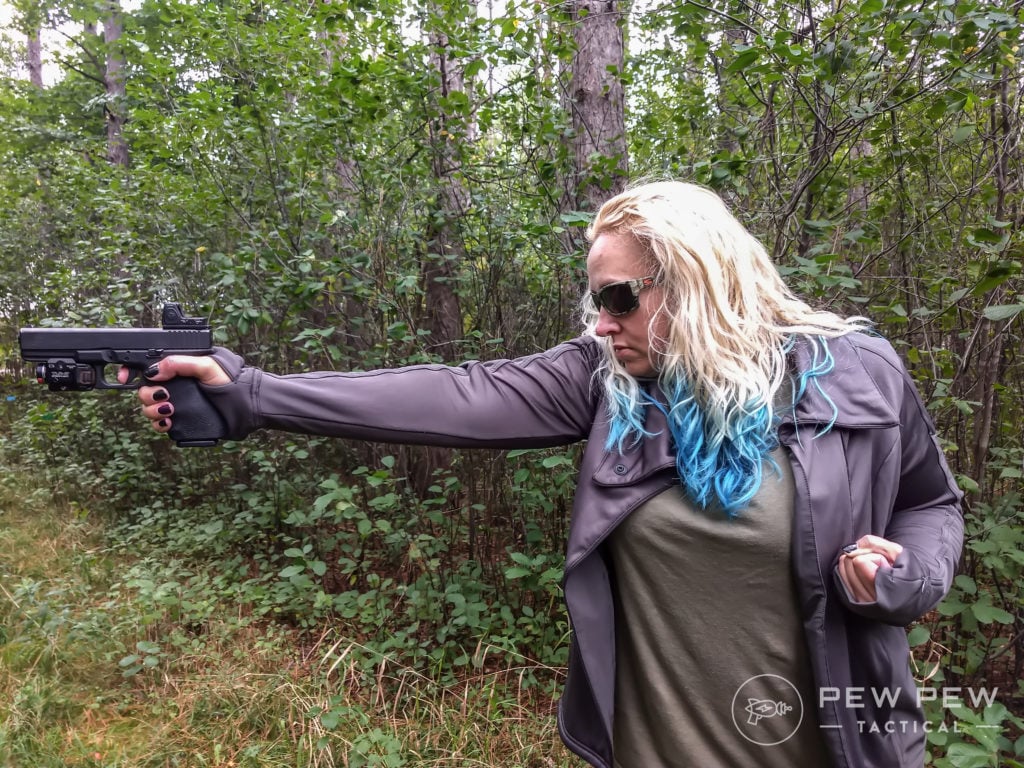
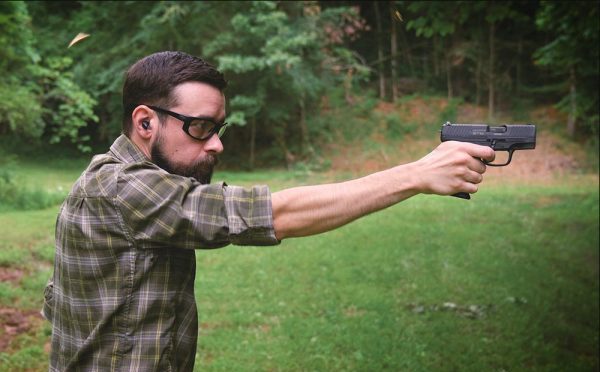
Arm Extended/Straight-Arm
The most commonly used method for firing with one hand involves extending your gun hand straight ahead of you.
Face your target, step forward with your gun-hand-side foot, and raise the gun directly in front of you. This is where I remind you to raise the gun to your eye level, not lower your head to the gun.
Extend your shooting arm straight in front of your body and put enough tension in your arm to control recoil and maintain good follow-through as you shoot.
McMillan Tilt
The McMillan Tilt, or canted, method is a trick you can use with either hand to improve control and accuracy.
To do it, extend the gun like you would using the straight-arm method, then cant the gun inward. You’re looking for an approximately 45-degree angle.
This is not a sideways gangster hold it’s a slight cant for greater control. You may find canting your gun slightly significantly improves your shooting on one or even both sides.
For me, the McMillan Tilt helps quite a bit on the right-hand side but makes it worse on the left. This might have something to do with being cross-dominant or it may simply be one of those random things.
Don’t be afraid to experiment and find out what it takes to give you an edge.
Quick Change
All right, so taking a quick-change approach to moving the gun from one hand to another isn’t the best idea ever.
Always take your time when swapping hands with your gun for one-handed shooting. Do this by carefully and thoughtfully shifting your gun hand in front of your body with the muzzle remaining safely down-range.
Use your free hand’s thumb to slide along the gun’s grip under the palm of the hand gripping the gun.
This allows you to maintain contact with the gun and keeps you in control as you pass the gun to your other hand.
If your gun has an external thumb safety and you’ve just transferred the gun to what is normally your support hand you can reach behind the gun with your dominant hand to flip the safety off when you’re ready to shoot.
Yes, you can also learn to manipulate the safety with your non-dominant hand but it’s wise to wait until you’re more proficient with one hand before adding steps.
Tricks
Keeping 60 percent of your weight on your forward foot while maintaining a strong base is a vital step in the one-handed shooting process.
If your foundation is wobbly your accuracy will suffer (and so will your safety). Take a moment to find your balance and ground yourself.
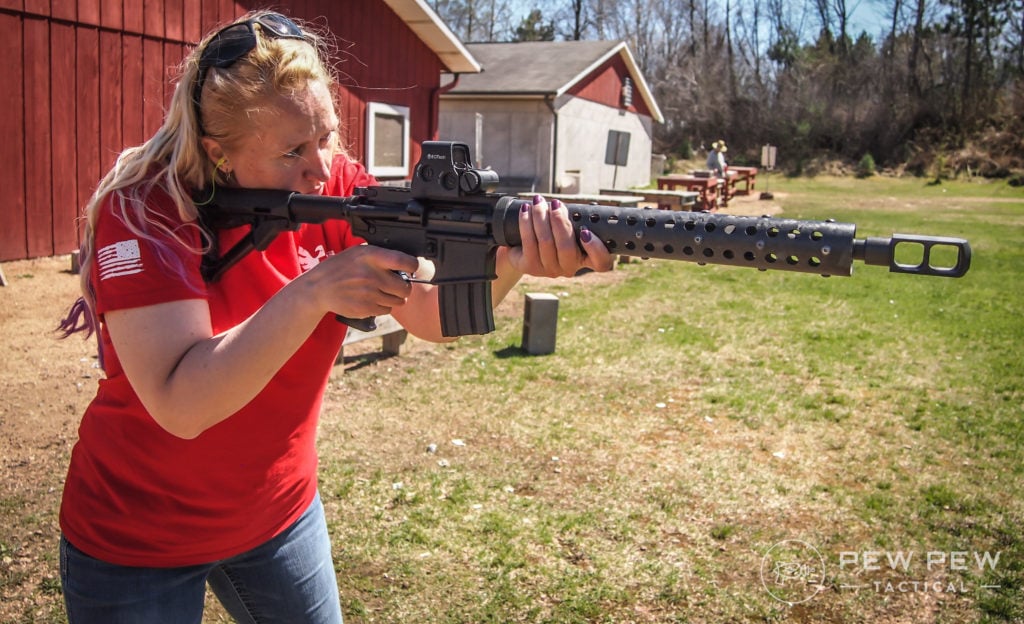
The same applies to a rifle too, especially with big bores! Running the .50 Beowulf at the range, because big boom.
Whether your shooting-side elbow is bent or fully extended comes down to personal preference. I prefer to keep mine fully extended with a great deal of tension in my arm and shoulder.
It helps me shoot better. If you have any kind of arm injury you’re going to want to try to leave some bend in that elbow and there is nothing wrong with that.
Try both ways so you know which position gives you the best control of the gun.
Grip your gun firmly but quit trying to choke the life out of it. An uneven grip or tightening your hand as you shoot will ruin your shots. Do you need to hold on tightly?
The perfect grip for shooting walkers… in the feet. Do NOT make the same mistake.
Absolutely, but don’t get carried away.
Your accuracy when shooting with one hand comes from control. Without a good grip and stance your target reacquisition will be lousy and your shots will be all over the place.
Drive the gun forward with a combination of solidly grounded legs, proper balance, and firm tension in your gun arm. Practice good trigger control just as you do with two hands.
Focus on your front sight. All the fundamentals apply you’re just dropping a hand.
Single Target Drills
When you first start shooting with one hand, keep things simple. Shoot your target from five yards and don’t try moving between different zones, not at first.
Go for center mass. Once you think you’ve got a single shot down move on to strings of three shots at a time, then five. Just as with two-handed target shooting your goal is a nice, tight group.
It’s going to take time, especially with your non-dominant hand, so be patient.
Producing nice groups at center mass? Try moving from center mass to the head box on your target. You can do this by doing a traditional Mozambique Drill – two shots to center mass, one to the head – or you can fire any combination of shots.
Don’t be random about it, have a plan. Also do not focus only on your dominant hand. Both hands need equal attention (realistically, your non-dominant hand is the one you’re going to need to work on a bit more).
Multiple Target Drills
Using two or more targets is a good way to work on movement while firing your gun one-handed. As with all drills, have a plan. This isn’t about firing randomly at whatever target your gun swings past.
Start firing left-to-right or right-to-left. When that gets too easy, mix it up. For example, if you have three targets shoot the center target, then the right-side target, and then the far left-side target.
Try this firing one shot per target before moving on to multiple shots per target. Also, aim at a specific spot on the targets whether center mass or elsewhere.
Do not blindly fire just planning to hit the target “somewhere” as along as it’s on paper or steel.
Distance
5 yards is a good distance to shoot from at first. Just remember, if you’re shooting steel plates you should be using frangibles, not FMJs.
As your skills improve you can increase the distance to 7 yards and 10 yards.
Keep in mind most – although not all – firefights take place at close range. That doesn’t mean you should ignore longer distances simply that you would be right to take the time to hone your closer-range skills first.
Don’t get cocky and start out at 10 yards or move further out prematurely. Go slow. Practice.
Parting Shots
It’s easy to slack off on your one-handed shooting time. After all, it’s harder and might be less rewarding than shooting two-handed, at least initially.
If you just integrate a few one-handed drills into each shooting session you’ll see improvement quickly. Sure, shooting is fun, but self-defense is serious.
As a responsible shooter, it’s your job to make sure you put the work in along with the fun.
How do you train new skills? Share your one-handed target pictures and tips in the comments below! If you’re looking for more training, give Dry Fire a try. If you really want to go to the next level, find yourself a Firearms Training Class!
Mac OS 8 emulator brings the late ’90s to your modern PC
https://ift.tt/2BGBmS3
If you’ve ever been interested in reliving (or discovering) what using a Mac was like in the late ‘90s, here’s your chance. Felix Rieseberg, a Slack developer, has created an app that emulates Mac OS 8, which you can download and run on macOS, Windows or Linux. He did something similar a couple of years ago with Windows 95.
Rieseberg wrote on the GitHub page for the project (via iMore) that while it works pretty well, he built the Electron app using JavaScript, “so please adjust your expectations.” It emulates Mac OS 8.1 on a 1991 Macintosh Quadra 900 with a Motorola CPU — this was before Apple’s move to PowerPC architecture.
I put an entire 1991 Macintosh Quadra with Mac OS 8.1 into an Electron app, together with a bunch of apps and games. It runs on Windows, macOS, and Linux… and JavaScript. Again: I’m sorry.
It’s actually kinda functional in terms of software. It features games and demos from a 1997 Macworld demo disc, including Oregon Trail, Duke Nukem 3D, Civilization II, Alley 19 Bowling, Damage Incorporated and Dungeons & Dragons. There are some other apps and demos too, such as Photoshop 3, Premiere 4 and Illustrator 5.5.
You won’t be able to get online through the emulator, even though it includes Internet Explorer and Netscape. However, there’s a way for you to transfer files into your new, but very old operating system. You might like to grab some games and apps from Macintosh Repository. Rieseberg said he was able to install Encarta on the emulator.
It doesn’t run perfectly, given issues that other GitHub users have raised — the Civ II demo crashed immediately for one brave soul who tried it. So you probably shouldn’t use it for any serious purposes, but it seems like a fun trip down memory lane (or into the before times for some younger folks).
Hunter Education Moves Online: First-Time Hunters, Get Started Now
https://ift.tt/336qqIB
With COVID restrictions redefining public spaces across the country, most states have moved hunter education to an online model. And some are offering free tuition.
New hunters in the United States must pass a hunter education course before buying a license for the first time. Before the pandemic, most hunter ed courses consisted of an in-class learning structure or an online learning requirement, coupled with an instructed field day component complete with the final test. Certifications mandated the completion of the in-person field component to complete the course.
But, with pandemic restrictions, a different kind of safety is being considered. Because of this, state agencies are modifying their hunter and bowhunter education structures to better accommodate new hunters.
States Waive Fees, Create Virtual Field Days
In an effort to make hunter ed more accessible, states are getting creative. States like Washington, Wisconsin, and Florida have moved their instructor field day to a virtual classroom, where volunteer instructors or virtual instructors lead students through the information typically studied.
Other states are moving to an online-only course with testing, and Montana is offering both hunter and bowhunter educational courses online for free. This is restricted to Montana residents. And these courses will still have reciprocity across the U.S. for out-of-state hunting.
Online Option Opens Up Access for New Hunters
The bright side of online hunter education options means that more folks are likely to take the course on their own time. And the majority of hunter ed courses are already affordable, ranging from $10 to $30 per hunter.
It’s a smart idea to go ahead and get the bowhunter certification — whether your state requires it or not — while it’s easily accessible online. Some states require a bowhunting certification, others don’t. But taking it now will ensure your ability to archery hunt nationwide for the foreseeable future.
Find your state’s requirements by going to their wildlife agency’s hunter education page. Companies like Hunter-Ed and the NRA offer online courses, but each state is responding to the current pandemic differently. Some, like Utah, are still requiring small in-person courses for some hunter demographics.
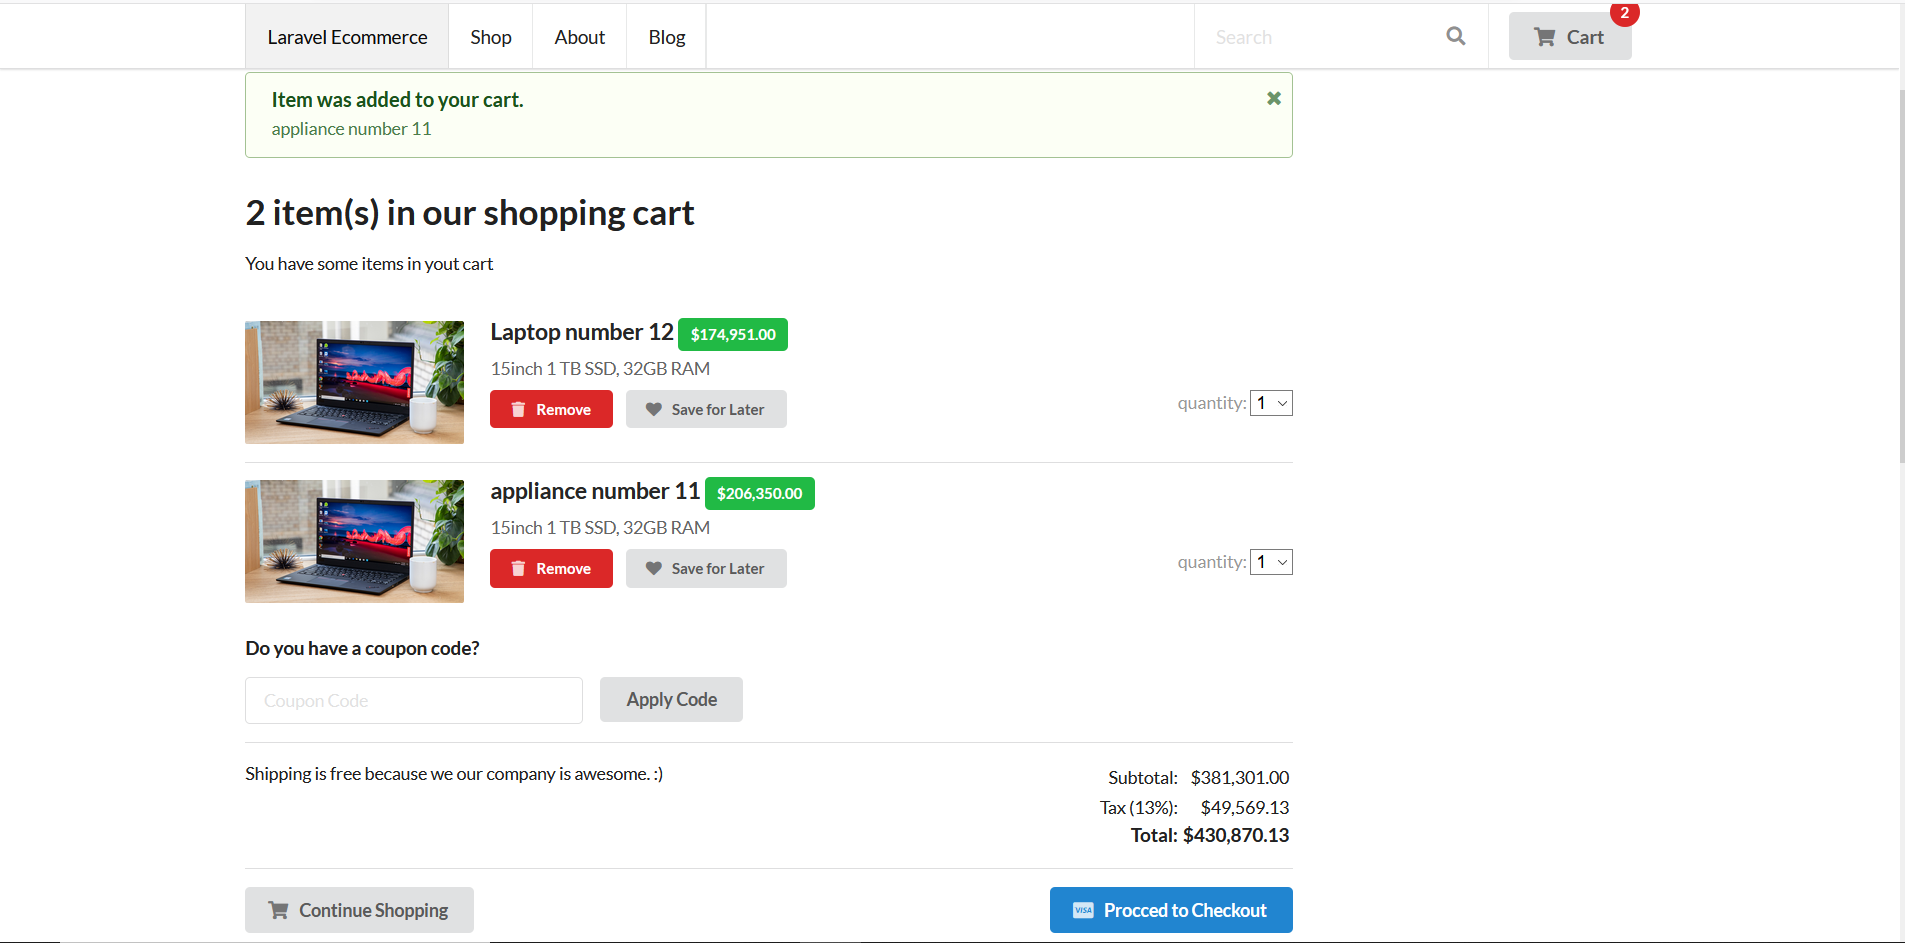
In simple words, e-commerce is buying and selling of goods through internet means. There has been vast development in e-commerce since its introduction in the market. Buying and selling of goods has been a lot easier because of it.
E-commerce laravel was developed using latest Laravel 7. This project is simple yet very educational. It uses MVC as it’s base architecture for development. As a result, it’s coding architecture is clean and simple to understand.
It has almost every important features that a good ecommerce website should have. Some of those features are here below:
Users can view all added products according to categories
It also has add to cart and checkout feature
Users can also saved items for later
Online payment system using Stripe
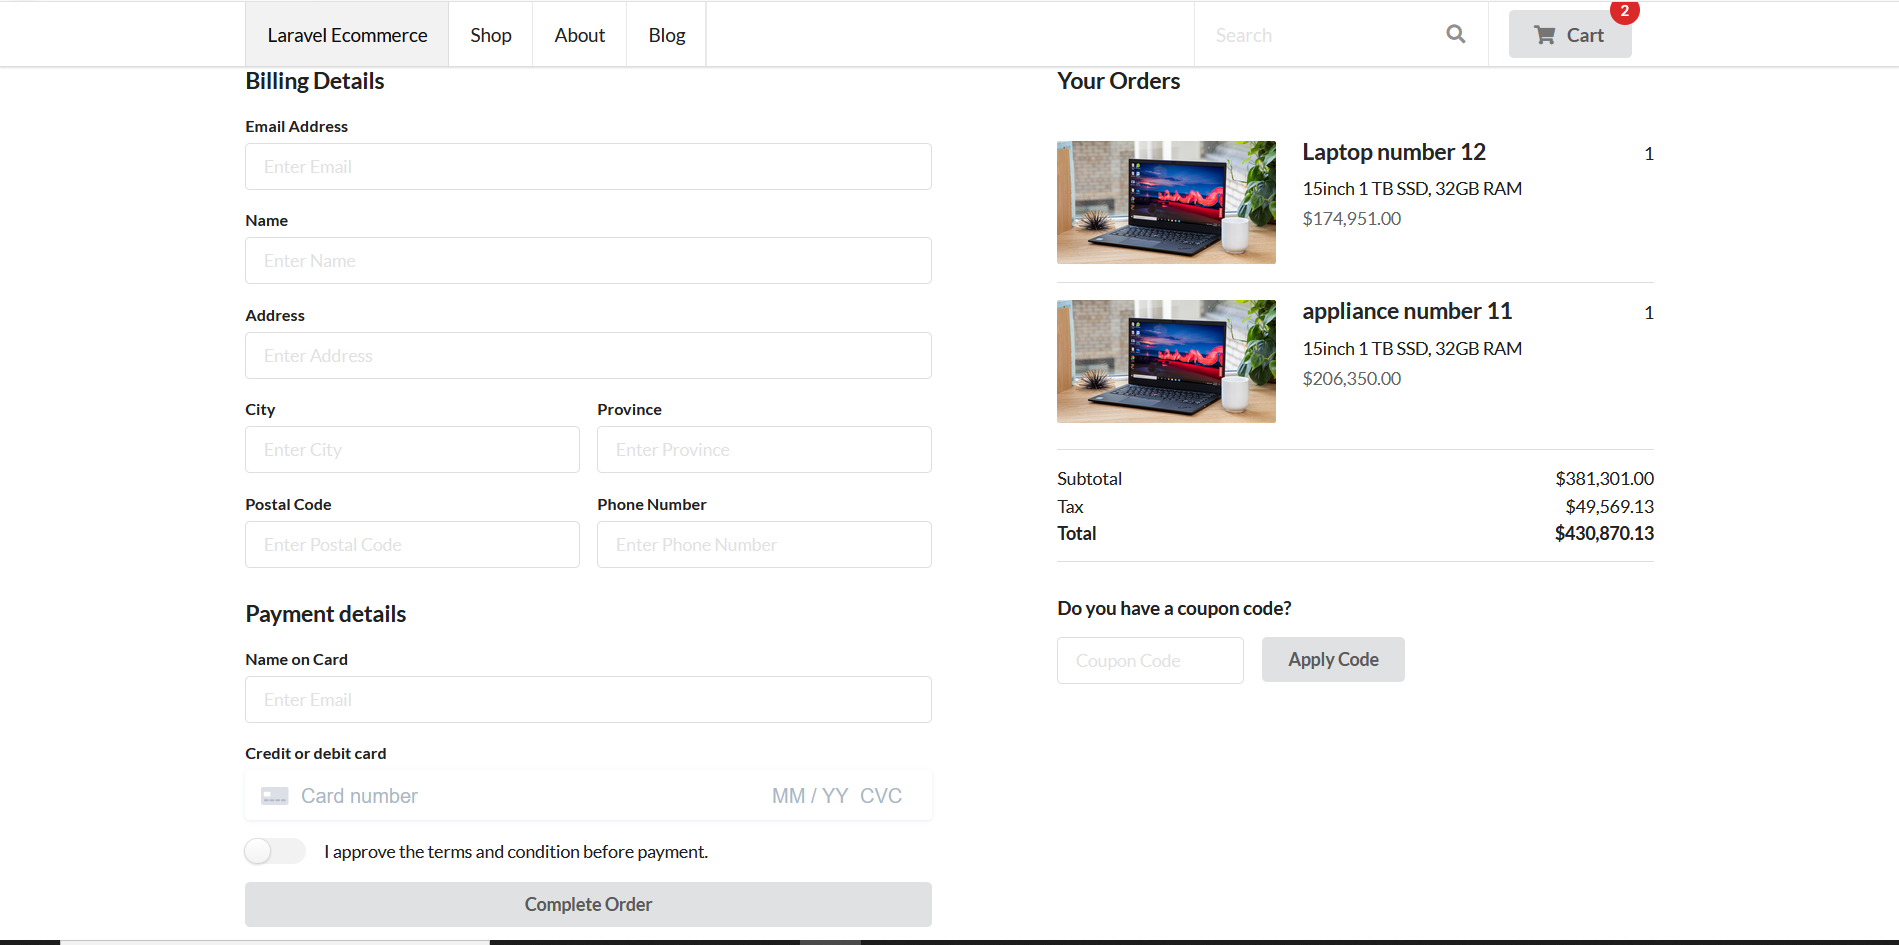
Some snapshots of this website is here below:
Checkout Page
Cart Items Page
Product Page
Steps for installation:
git clone https://github.com/SanishGrg/Laravel7-ecommerce.git Laravel7-ecommerce
cd Laravel7-ecommerce
cp .env.example .env
composer install
php artisan key:generate
php artisan migrate

// if you want dummy data and users to get generated
php artisan db:seed
As the program is still in beta stage be sure to get update for new features. 😉
It’s a multi-tenancy package that lets you turn any Laravel application multi-tenant without having to rewrite the code. It’s as plug-and-play as tenancy packages get.
Side note: In this tutorial, we’ll go over the most common setup — multi-database tenancy on multiple domains. If you need a different setup, it’s 100% possible. Just see the package’s docs.
How it works
This package is unique in the sense that it doesn’t force you to write your application in a specific way. You can write your app just like you’re used to, and it will make it multi-tenant automatically, in the background. You can even integrate the package into an existing application.
Here’s how it works:
A request comes in
The package recognizes the tenant from the request (using domain, subdomain, path, header, query string, etc)
The package switches the default database connection to the tenant’s connection
Any database calls, cache calls, queued jobs, etc will automatically be scoped to the current tenant.
Installation
First, we require the package using composer:
composer require stancl/tenancy
Then, we run the tenancy:install command:
php artisan tenancy:install
This will create a few files: migrations, config file, route file and a service provider.
Let’s run the migrations:
php artisan migrate
Register the service provider in config/app.php. Make sure it’s on the same position as in the code snippet below:
/*
 * Application Service Providers...
 */
App\Providers\AppServiceProvider::class,
App\Providers\AuthServiceProvider::class,
// App\Providers\BroadcastServiceProvider::class,
App\Providers\EventServiceProvider::class,
App\Providers\RouteServiceProvider::class,
App\Providers\TenancyServiceProvider::class, // <-- here
Now we create a custom tenant model. The package is un-opinionated, so to use separate databases and domains, we need to create a slightly customized tenant model. Create a app/Tenant.php file with this code:
<?php

namespace App;

use Stancl\Tenancy\Database\Models\Tenant as BaseTenant;
use Stancl\Tenancy\Contracts\TenantWithDatabase;
use Stancl\Tenancy\Database\Concerns\HasDatabase;
use Stancl\Tenancy\Database\Concerns\HasDomains;

class Tenant extends BaseTenant implements TenantWithDatabase
{
    use HasDatabase, HasDomains;
}
And now we tell the package to use that model for tenants:
the central app — which hosts the landing page, maybe a central dashboard to manage tenants etc
the tenant app — which is the part that your users (tenants) use. This is likely where most of the business logic will live
Separating the apps
Now that we understand the two parts, let’s separate our application accordingly.
Central app
First, let’s make sure the central app is only accessible on central domains.
Go to app/Providers/RouteServiceProvider.php and make sure your web and api routes are only loaded on the central domains:
protected function mapWebRoutes()
{
    foreach ($this->centralDomains() as $domain) {
        Route::middleware('web')
            ->domain($domain)
            ->namespace($this->namespace)
            ->group(base_path('routes/web.php'));
    }
}

protected function mapApiRoutes()
{
    foreach ($this->centralDomains() as $domain) {
        Route::prefix('api')
            ->domain($domain)
            ->middleware('api')
            ->namespace($this->namespace)
            ->group(base_path('routes/api.php'));
    }
}

protected function centralDomains(): array
{
    return config('tenancy.central_domains');
}
Now go to your config/tenancy.php file and actually add the central domains.
I’m using Valet, so for me the central domain is saas.test and tenant domains are for example foo.saas.test and bar.saas.test.
So let’s set the central_domains key:
'central_domains' => [
    'saas.test', // Add the ones that you use. I use this one with Laravel Valet.
],
Tenant app
Now, the fun part. This part is almost too simple.
To make some code tenant-aware, all you need to do is:
move the migrations to the tenant/ directory
move the routes to the tenant.php route file
That’s it.
Having migrations in that specific folder tells the package to run those migrations when a tenant is created. And having routes in that specific route file tells the package to identify tenants on that route.
If you have an existing app, do this with your code. If you’re using a fresh app, follow this example:
Your tenant routes will look like this by default:
Route::middleware([
    'web',
    InitializeTenancyByDomain::class,
    PreventAccessFromCentralDomains::class,
])->group(function () {
    Route::get('/', function () {
        return 'This is your multi-tenant application. The id of the current tenant is ' . tenant('id');
    });
});
These routes will only be accessible on tenant (non-central) domains — the PreventAccessFromCentralDomains middleware enforces that.
Let’s make a small change to dump all the users in the database, so that we can actually see multi-tenancy working. Add this to the middleware group:
Route::get('/', function () {
    dd(\App\User::all());
    return 'This is your multi-tenant application. The id of the current tenant is ' . tenant('id');
});
And now, the migrations. Simply move migrations related to the tenant app to the database/migrations/tenant directory.
So, for our example: To have users in tenant databases, let’s move the users table migration to database/migrations/tenant. This will prevent the table from being created in the central database, and it will be instead created in the tenant database when a tenant is created.
Trying it out
And now let’s create some tenants.
We don’t yet have a landing page where tenants can sign up, but we can create them in tinker!
So let’s open php artisan tinker and create some tenants. Tenants are really just models, so you create them like any other Eloquent models.
Note that we’re using domain identification here. So make sure the domains you use will point to your app. I’m using Valet, so I’m using *.saas.test for tenants. If you use php artisan serve, you can use foo.localhost, for example.
If you visit foo.saas.test (or your environment’s equivalent), you will see a dump of users.
If you visit bar.saas.test, you will see a dump of different users. The databases are 100% separated, and the code we use — App\User::all() — does not need to know about tenancy at all! It all happens automatically in the background. You just write your app like you’re used to, without having to think of any scoping yourself, and it all just works.
Now, of course, you will have a more complex app inside the tenant application. A SaaS that simply dumps users wouldn’t probably be of much use. So that’s your job — write the business logic that will be used by your tenants. The package will take care of the rest.
The Tenancy for Laravel project’s help doesn’t end there though. The package will do all the heavy lifting related to multi-tenancy for you. But if you’re building a SaaS, you will still need to write billing logic, an onboarding flow, and similar standard things yourself. If you’re interested, the project also offers a premium product: the multi-tenant SaaS boilerplate. It’s meant to save you time by giving you the SaaS features you’d normally have to write yourself. All packed in a ready to be deployed multi-tenant app. You may read more about it here.
Final note: This tutorial is meant to show you how simple it is to create a multi-tenant app. For your reading comfort, it’s kept short. For more details, read the package’s quickstart tutorial or the documentation.
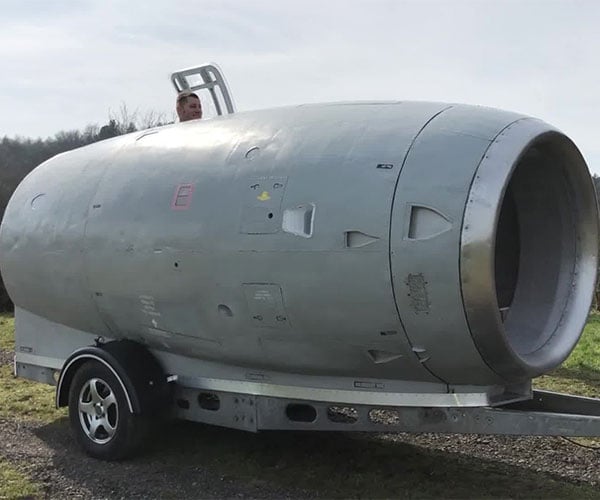
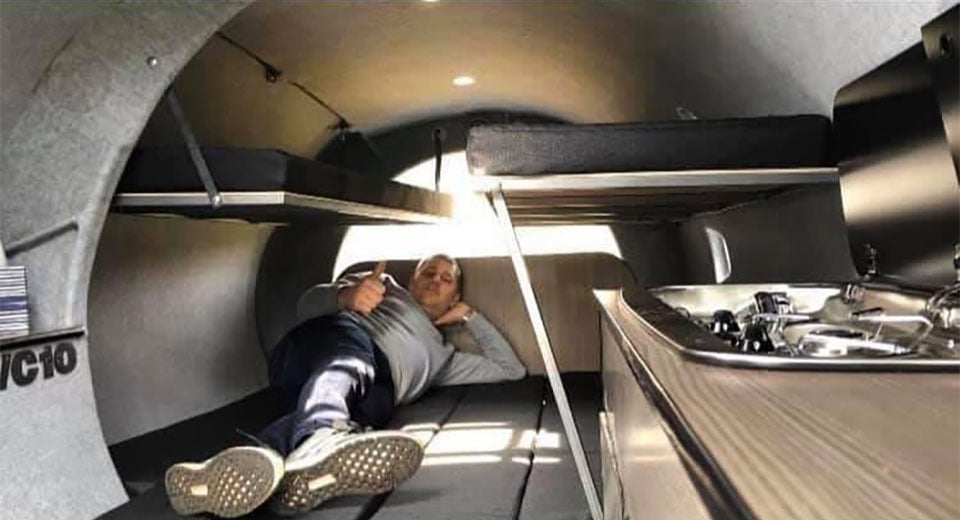
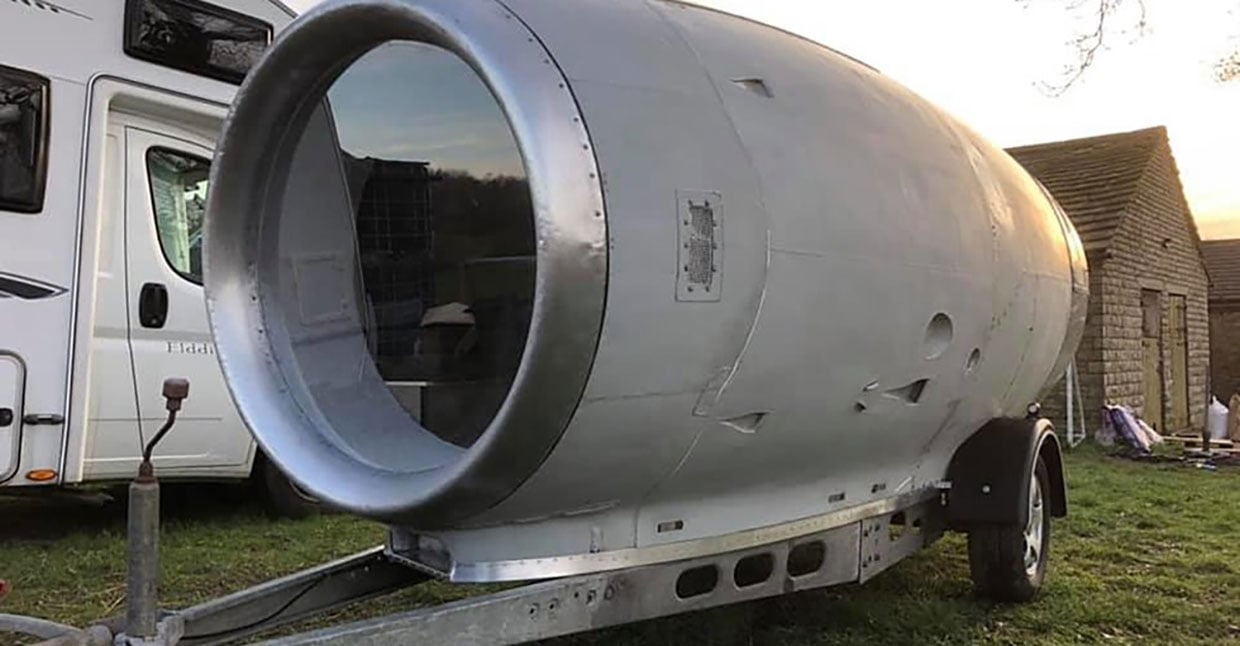
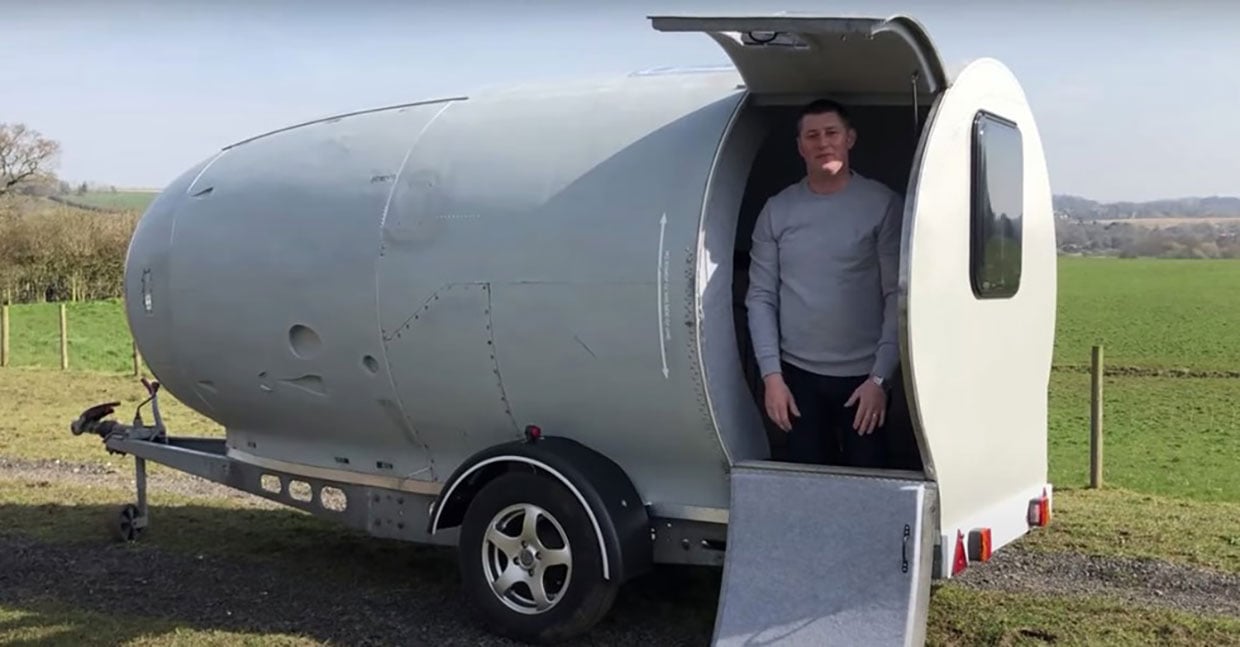
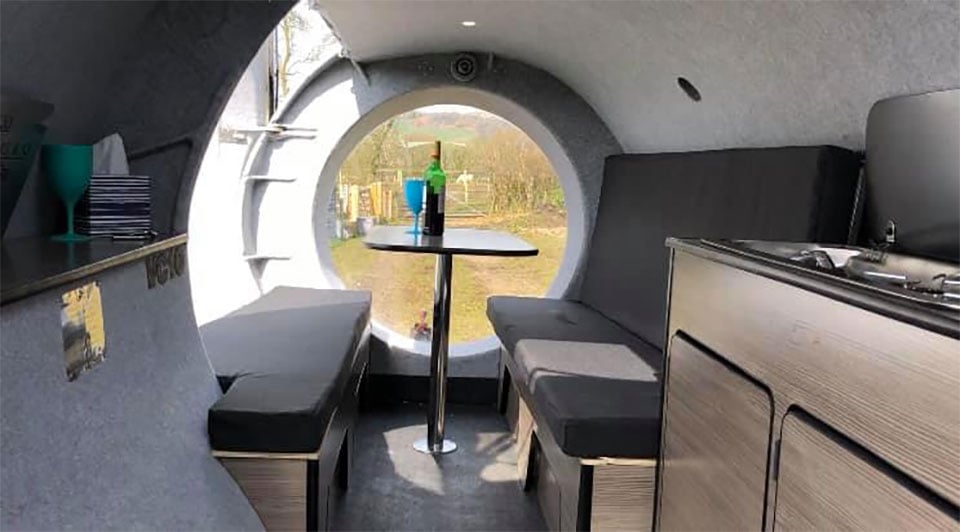
Builder Steve Jones got his hands on the jet engine nacelle from an old Royal Air Force VC10 airplane, and has since transformed the circular housing into a truly unique camper. It can sleep four in its cozy living space, which can transform into a dining room. Check out the full build history on the project’s Facebook page.