The Top 5 Tools For Automation Testing

The Top 5 Tools For Automation Testing

https://ift.tt/2YQoLn5

Automation testing is a software technique to compare the actual outcome of software with the expected outcome.

You may need to use test automation software to automate repetitive tasks and other testing tasks that are difficult to perform manually. You can do this by either writing automation test scripts or using an automation testing tool.

Test automation software has started to apply artificial intelligence and machine learning (AI/ML) to offer more advanced capabilities for optimization as well as intelligent test generation, execution, and reporting.

Here are some tools best poised to take advantage of these trends.

1. Selenium


Selenium is the industry standard for test automation. It’s a free, open-source, automated testing framework used to validate web applications across different browsers and platforms.

Selenium is not just a single tool but a suite of software, each offering a different approach to align with the testing needs of an organization. It has three major components:

  • WebDriver: Uses browser automation APIs to control the browser and run tests. This is as if a real user is operating the browser
  • IDE (Integrated Development Environment): The tool you use to develop your Selenium test cases. It’s an easy-to-use Chrome and Firefox extension and is generally the most efficient way to develop test cases
  • Grid: Allows you to run test cases in different machines across different platforms

To use Selenium effectively, users have to possess advanced programming skills and need to spend considerable time to build the automation frameworks and libraries necessary for automation.

Related: How to Make a Web Crawler With Selenium

2. Appium

Appium is free to use and open-source test automation framework that is mainly intended for mobile applications. The type of applications it serves include:

  • Native apps: Written using the iOS, Android, or Windows SDKs
  • Mobile web apps: Accessed using a mobile browser (Appium supports Safari on iOS and Chrome or other built-in browsers on Android)
  • Hybrid apps: Which use a wrapper around a web view—a native control that enables interaction with web content

Appium was designed to meet mobile automation philosophies as outlined by the following tenets:

1. You Shouldn’t Have to Recompile Your App or Modify It in Any Way in Order to Automate It:

Appium achieves this by using vendor-provided automation frameworks under the hood, which include:

  • iOS 9.3 and later: Apple’s XCUITest
  • iOS 9.2 and earlier: Apple’s UIAutomation
  • Android 4.3+: Google’s UiAutomator/UiAutomator2
  • Windows: Microsoft’s WinAppDriver

2. You Shouldn’t Be Locked In to a Specific Language or Framework to Write and Run Your Tests:

Appium tackles this by wrapping the vendor-provided frameworks in the WebDriver API. It’s a client-server architecture and the client, written in any language, can be used to send the appropriate HTTP requests to the server.

3. A Mobile Automation Framework Shouldn’t Reinvent the Wheel When It Comes to Automation APIs:

Appium has not created a new automation standard for testing mobile applications. Instead, it extends the existing W3C WebDriver by adding extra API methods for mobile automation.

You can learn more about Appium’s core features and how to get started using its official documentation.

3. Katalon Studio


Katalon Studio is a powerful and comprehensive automation solution for testing API, web, mobile, and desktop applications. It also has a rich feature set for this testing and supports multiple platforms including Windows, macOS, and Linux.

Katalon Studio offers a wide range of features:

  • Smart Wait: Resolve problems with the wait feature in Selenium WebDriver
  • Desktop testing: Supports testing desktop apps in Windows 10
  • Test artifacts sharing: Share test cases, test objects, and keywords among team members
  • Comprehensive data-driven testing: Custom data sources and enhanced capabilities to develop test cases with data-driven practices
  • WebDriver Event Listener: Use this enhanced listener to handle events triggered by WebDriver

You can get a detailed understanding of all these features in Katalon Studio’s official documentation.

Katalon Studio offers a free edition and two paid editions, which you can select based on your project size and needs.

4. TestComplete


TestComplete is an automated testing environment for a wide range of application types and technologies, including (but not limited to) Windows, .NET, WPF, Visual C++, Visual Basic, Delphi, C++Builder, Java, and web applications and services.

TestComplete has four major components:

  • TestComplete Platform: It powers TestCompleteDesktop, mobile automated testing tools, and web which will help you build solid automated tests across multiple devices, platforms, and environments smoothly and instantly
  • TestCompleteDesktop Module: TestComplete Desktop, powered by TestComplete Platform, allows you to run unit testing languages such as TestNG, PyUnit, Ruby, PHPUnit, Junit, and NUnit
  • TestCompleteWeb Module: The TestCompleteWeb Module helps you create functional tests for websites and automated Graphical User Interface (GUI), web apps, and mobile applications
  • TestCompleteMobile Module: It allows you to create robust automated tests for web, native, web, or hybrid mobile Android applications

TestComplete comes with out-of-the-box integrations for CI/CD tools like Jenkins and Jira, popular open-source frameworks, and tools like Selenium and SoapUI.

It gives you the ability to run tests in parallel across 1500+ remote test environments, including browsers, operating systems, and devices.

TestComplete offers a 30-day free trial in addition to its paid plans.

5. LambdaTest


LambdaTest enables you to perform end-to-end automation tests on a secure, reliable, and scalable Selenium infrastructure.

The key features of the LambdaTest include:

  • Automated cross-browser testing with Selenium scripts on 2000+ browsers and operating systems environments
  • Integration with various CI/CD tools like Circle CI, Jenkins, and Travis CI
  • LambdaTest uses IP2Location to determine your geolocation, based on which you are routed to the nearest data center. This way you get the best possible performance every time
  • Automated screenshot testing will help you capture up to 25 screenshots of different configurations of browsers and OS in a single session facilitated by instrumented UI test cases to help you realize how seamlessly your web app renders through different screen sizes using different browsers

LambdaTest offers a lifetime free plan with limited features. It also offers some paid plans for more enterprise-level testing features.

Related: YouTube Tests Automatic Chapters Created With Machine Learning

Choose the Right Tool

The choice of selecting the right tool not only depends on the size and nature of your project but also on the potential trends and improvements the tool has to offer.

Automation testing is a hot space and it’s evolving constantly and incorporating emerging trends like AI and machine learning. The increasing need for codeless testing will create more opportunities for existing tools and give rise to new players in the automation testing space.

non critical

via MakeUseOf.com https://www.muo.com

February 6, 2021 at 09:35AM
[How-To] Make The Best Homemade Beef Jerky

[How-To] Make The Best Homemade Beef Jerky

https://ift.tt/2N17cho

Who doesn’t love beef jerky? Seriously, beef jerky may be the most delicious food on the face of the planet. 

But it’s also expensive

Tasty homemade jerky

Working the price of beef jerky (or any other type of mouth-watering meat jerky) into my limited snack budget is no easy feat.

Honestly, my main goal in life is to become so successful that I can just snatch bags off the convenience store rack without batting an eyelash. 

Expensive
*sigh*

Thankfully, making jerky at home is relatively easy, much less expensive, and insanely delicious.

If you crave dried meat as I do, but rage at the cost of that fancy, overpriced packaged stuff, I have the answer to your protein-packed prayers.

I’m going to walk you through the jerky-making process. You’ll be eating like a king (or queen) in no time.

Table of Contents

Loading…

What is Jerky?

In its most basic form, jerky is simply dried meat.

It was invented by early humans as a means to keep protein sources edible for longer periods of time. By dehydrating the meat from large kills (usually in the sun), our 20x great-grandparents (who had no access to the modern Frigidaire) were able to prevent bacterial and fungal enzymes from reacting with their food source. This process helped preserve the meat, increasing the amount of time it could be safely eaten. 

2000 year old Chinese jerky
2000 year old Chinese jerky. Yum? (China.org.cn)

Jerky is also a lightweight, and highly portable food source, making it perfect for early nomadic cultures, not to mention modern backcountry hikers. 

Native American jerky drying in the sun

There is archeological evidence of dried meat in Egyptian tombs that dates back to 1338 BC. However, there is some version of dried meat traditional to nearly every culture on the face of the planet. 

What Type of Meat to Dry?

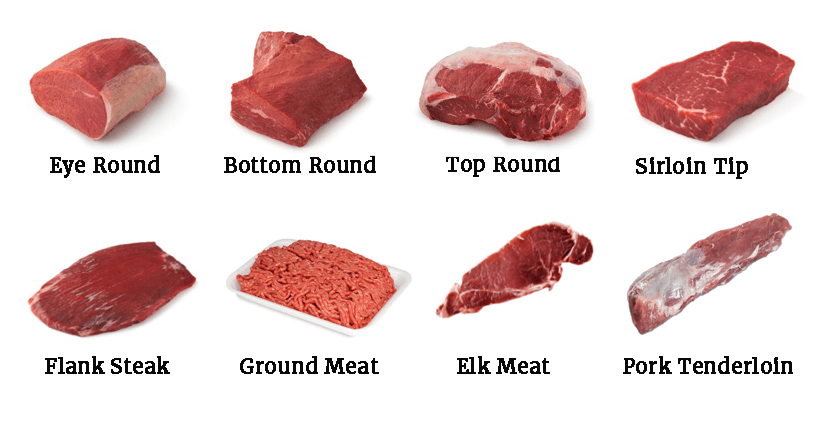
The biggest factor in making fabulous-tasting jerky is the cut of meat you use. If you plan to make traditional beef jerky, you can’t go wrong with a big beautiful flank steak. I know it’s a little more expensive, but your tastebuds will thank you later.

Best cuts of meat for jerky

If you can’t bring yourself to fork out the dough for flank steak, London broil, eye of round, sirloin, and top or bottom round also work well. Go as lean as possible. Avoid cuts with lots of marbling (intramuscular fat), and trim off any visible outer fat before you begin. 

Fat is a fast-track ticket to moldy, rancid jerky. It is the enemy. Avoid it as much as possible.

Because lean meat makes great jerky, game meat like elk, deer, and moose are terrific options for homemade jerky. Just be careful. Since drying concentrates flavors, ditch the meat that may have gotten a little gut juice on it in the field. Trust me, gut juice is not the flavor you want to intensify. 

gag
*hulk!*

Making the Cut

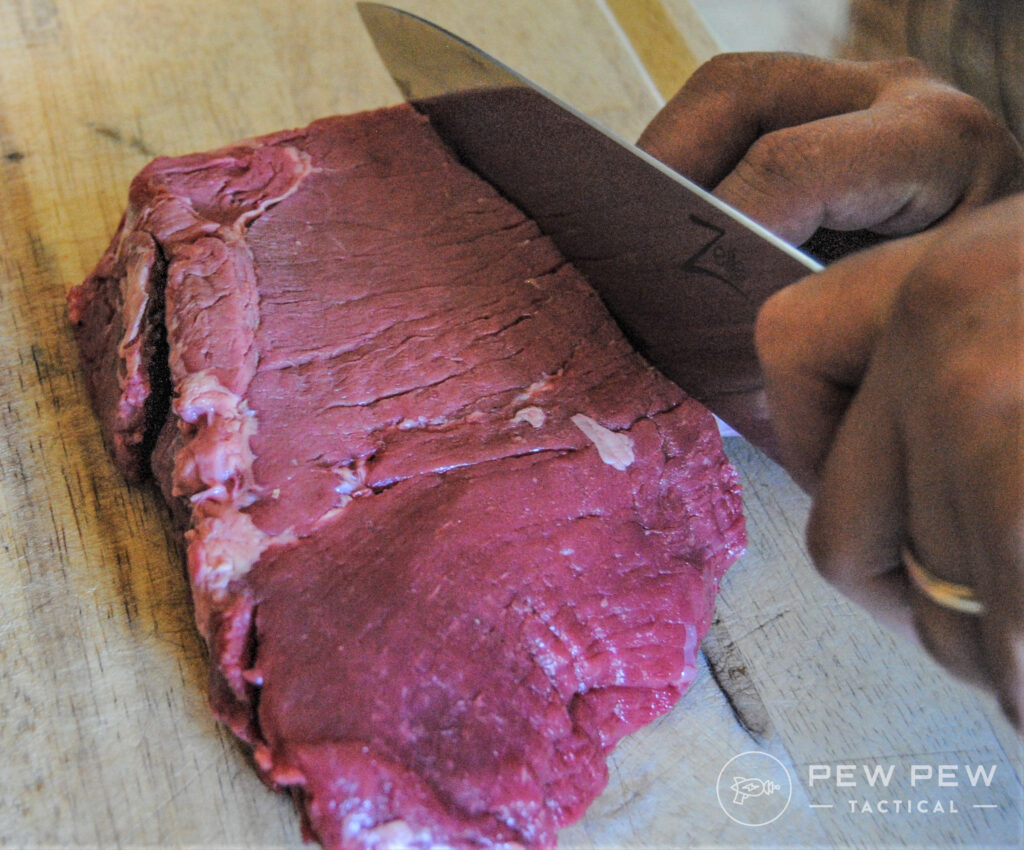
Starting with a large cut of meat that can be easily sliced into thin strips will make your jerky-making much easier. So if you’re sourcing your meat from a grocery store, start with a large roast rather than pre-cut steaks. 

Popping your meat in the freezer for an hour or so will make it easier to slice. And you definitely want to use a sharp knife. 

Like wood, muscle meat has a grain. The grain is simply long lines of muscle fiber that run in parallel lines. When carving up a piece of meat for steaks, you always, always, ALWAYS slice perpendicular to the grain.

Cutting meat against the grain for tender jerky

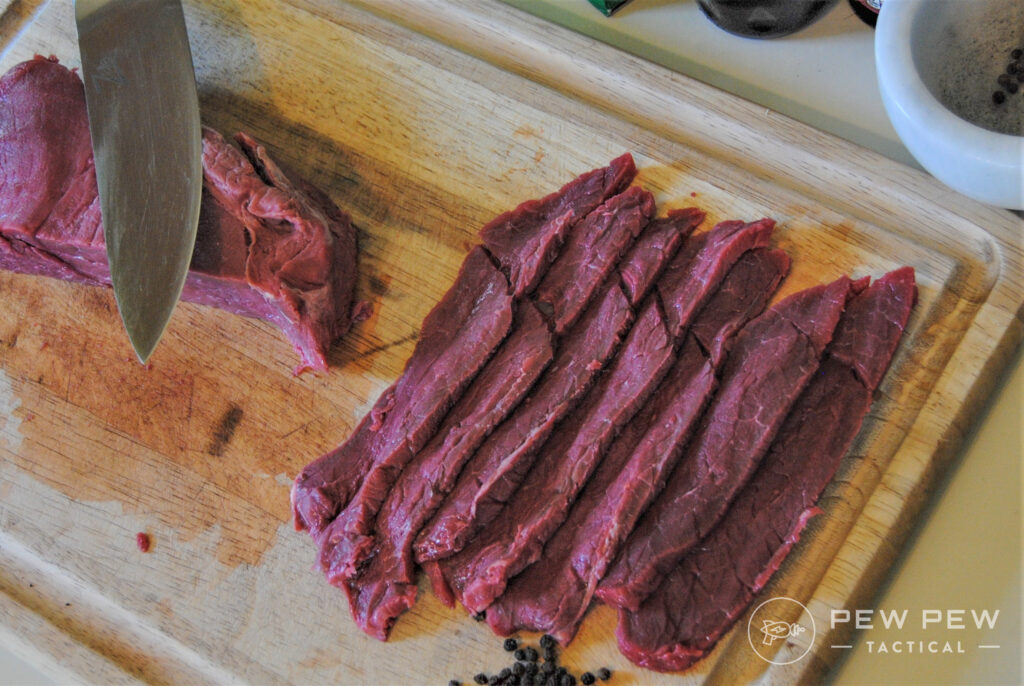
However, when making jerky, you can make your cuts either with or against the grain. Strips cut perpendicular to the grain will be softer and easier to chew. Cut them parallel to the grain, and your jerky will be tougher and super chewy. 

Most commercial jerky is made with strips cut against the grain. However, some people prefer to suck on their jerky like a lollipop through an afternoon hike. Others like to wear down their teeth on their jerky.

If you’re one of those people, feel free to (literally and figuratively) butcher that backstrap by cutting parallel to the muscle fibers. Just be aware that I’m silently judging you.

judging you

To ensure your jerky pieces dry evenly, you want to cut uniformly thin steaks. Your strips should be between ⅛” and ¼” thick. Some people prefer thick-cut jerky. It definitely makes for a hearty, satisfying snack. However, when done right, paper-thin jerky feels like a melt-in-your-mouth luxury. 

Grind It Out

You can also make ground-meat jerky. This works particularly well if you’re using less-than-stellar cuts of meat. 

Meat grinder
A meat grinder is a great tool to have around if you are a meat-eater! (SpruceEats)

To make ground-jerky meat sticks, you’re going to need a good grinder. Don’t waste your time with the old-fashioned crank grinders…unless you like a good arm workout. If that’s the case, knock yourself out. But you might want to chug a pre-workout before you get started. 

A quality electric meat grinder will make the process a zillion times easier. And they last practically forever. 

77

at Amazon

Prices accurate at time of writing

Prices accurate at time of writing

After you’ve trimmed away all the fat, toss your meat in the grinder and run it through the smallest grinder plate possible. Then when you’re done, run it through the grinder again. 

Season it up and stuff it in a jerky gun, and you’re on your way to the best Slim Jim knock-offs this side of wherever Slim Jims are made. 

Macho Man Randy Savage Slim Jims
Macho Man Randy Savage and his Slim Jims

….Are Slim Jims made?

48

at Amazon

Prices accurate at time of writing

Prices accurate at time of writing

Spicing It Up

Once you have your meat prepared, you’ll want to add some seasonings to spice things up. There are a ton of marinade recipes out there floating around the internet. The most common ingredients are black pepper, garlic, onion powder, soy sauce, Worcestershire sauce, and red chili flakes. 

Cuts of steak, all ready to be made into delicious jerky

Finding the perfect marinade recipe depends on your personal tastes. There are some that are sweet, spicy, salty, or some combination of all three. 

That said, here is my favorite jerky marinade. I like mine a little sweet and spicy, so be advised. The recipe makes enough to flavor about two pounds of meat. 

  • ½ cup soy sauce
  • 2 Tablespoons Worcestershire sauce
  • ¼ cup brown sugar
  • 2 teaspoons red pepper flakes
  • 1 teaspoon ground black pepper
  • 1 teaspoon garlic powder
  • 1 teaspoon onion powder
  • 1 teaspoon paprika

If you aren’t skilled in the culinary arts, you can always purchase pre-made jerky seasoning. I’ve tried Jim Melton’s Jerky Marinade and it makes pretty tasty jerky. Plus, if you follow the directions, this method is basically idiot-proof. 

15

at Amazon

Prices accurate at time of writing

Prices accurate at time of writing

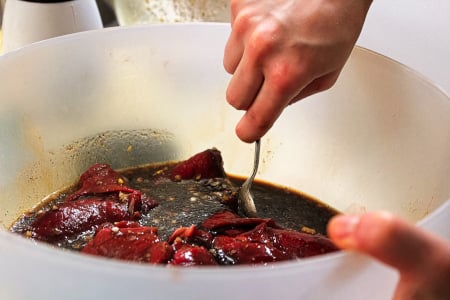
For best results, toss your marinade into a large Ziploc bag with your meat strips. Give it a few good squishes to make sure all the strips make contact with the marinade.

Mixing a batch of meat marinading for jerky.
Mixing a batch of meat marinating for jerky.

Then, leave it in the refrigerator for at least an hour, but not more than 24. Give the bag a few firm squeezes from time to evenly distribute the flavor during the marinating process.

The longer you let it marinate, the more flavor your jerky will have. 

The Cure

No, I’m not talking about the 80s English rock band (Gawd, I am showing my age). I’m talking about adding “cure” to your homemade jerky.

The Cure
Look — don’t judge, okay?

The cure (sometimes called curing salts or Prague Powder) acts as an additional preservative for the jerky. This is an optional step that makes the end product more shelf-stable. 

11

at Amazon

Prices accurate at time of writing

Prices accurate at time of writing

Drying Methods

Humans have been drying meat since our ancient ancestors killed their first woolly mammoth. Traditionally, meat was hung in the sun to dry. However, if you’ve ever seen road kill baking in the late July sun, you probably understand why we might want to try a slightly more modern method. 

Squirrel scream
Us at the idea of road kill jerky.

Modern jerky chefs leave the sun-drying for roadkill and use more hygienic drying methods, like ovens, smokers, and dehydrators.

The Oven Method

Since pretty much everyone has an oven in their kitchen, oven-drying is the simplest way to make jerky. All you have to do is drape your meat strips on a clean oven rack and turn the oven down to 160 degrees. (If your oven doesn’t go that low, you can prop the oven door open to keep the interior temperature from getting too hot.) 

Oven drying beef jerky

In about three hours, you’ll be devouring mouth-watering homemade jerky. 

When making jerky, you can’t really set a timer. Instead, you’ll need to keep an observant eye on your drying meat. The jerky is done when it is dry and firm, yet still pliable enough to chew. When you bend a piece, it should bend and crack without snapping. 

Homemade Jerky
Homemade jerky is also a great way to seriously impress your friends.

The USDA recommends heating meat to an internal temperature of 160 degrees to murder dangerous microbes like salmonella and E. coli.

The Smoker Method

Smoking meat is all the rage these days, and it is a surefire way to add some really intense flavors to your jerky. Wood-fired pellet grills are perfect for making jerky. 

Wood smoker
Now, imagine making jerky in that!

To make jerky in a smoker, first, pat your marinated strips with a paper towel to remove excess moisture. Lay your strips evenly across the grill grates, making sure none of your strips are touching. 

Smoked venison jerky

You’ll need to smoke your strips for four to five hours to complete the drying process. Be sure to keep the temperature of your smoker between 160 and 200 degrees to kill off harmful bacteria and prevent spoiling. 

The Dehydrator Method

Don’t be intimidated by the modern dehydrator. It is basically just a low-heat oven that circulates air to dry your jerky. 

Dehydrator jerky
Dehydrator jerky

I’ve been using a relatively cheap dehydrator from RedHead for nearly a decade. I’ve made a butt-ton of jerky in it (totally an accurate measurement), and it has never let me down. The customer ratings are kind of low, so apparently, not everyone has enjoyed the same jerky-making success. 

If you want something fancier, might I recommend the COSORI Premium Food Dehydrator Machine? It’s like the Lamborghini of food dehydrators. 

144

at Amazon

Prices accurate at time of writing

Prices accurate at time of writing

To make jerky in a food dehydrator, lay your marinated meat strips in a single layer on the dehydrator trays. To ensure proper air circulation, make sure the strips aren’t touching each other.

Follow the directions in your model’s owner’s manual for the best results. Most dehydrators take anywhere from 7 to 10 hours to finish the drying process. 

Storing Your Jerky

Once your jerky has cooled, it’s time to package it up. Moisture is the enemy when it comes to safely storing your homemade jerky. You may want to keep your jerky in a plain paper sack for a few days to expel any lingering dampness in the finished product.

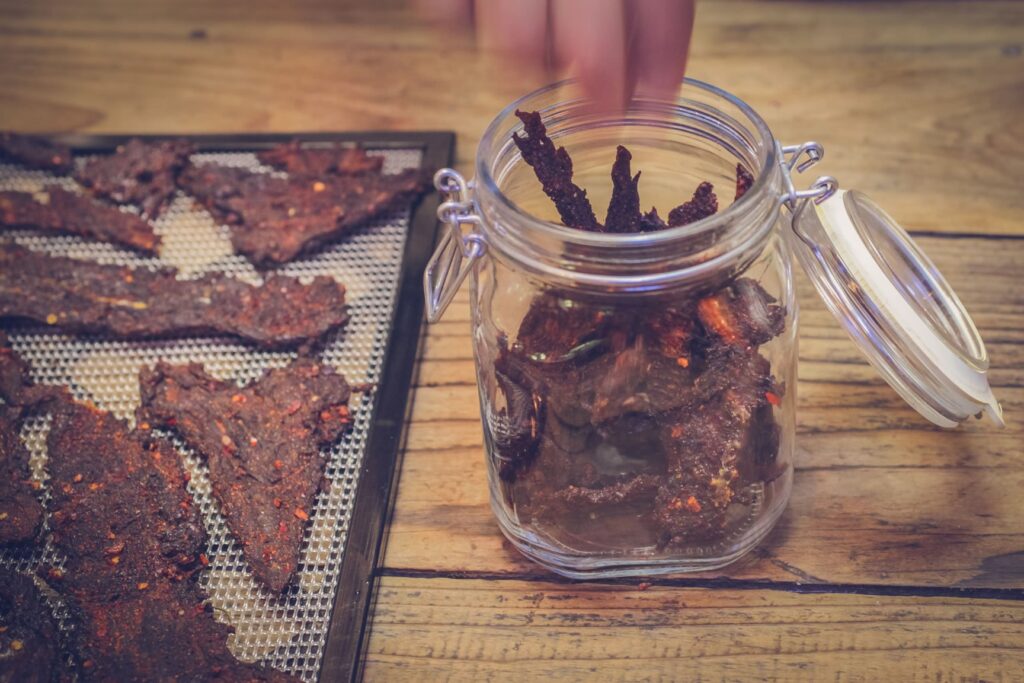
Beef jerky in a Ball jar
Beef jerky in a jar? Hubba hubba!

Most dried meat aficionados store their jerky in airtight containers like zip-lock storage bags or Mason jars. To keep your jerky fresh, toss a food-grade oxygen absorber into your container. This will help prevent bacteria from taking up residence inside your packaging and spoiling your snacks. 

To maintain the quality of your homemade jerky, store your packages in a cool, dry place. Most jerky kept at room temperature will last about a week (up to two weeks if you’re lucky). If you can’t eat it all in that time, it will keep longer (3-6 months) in the refrigerator. 

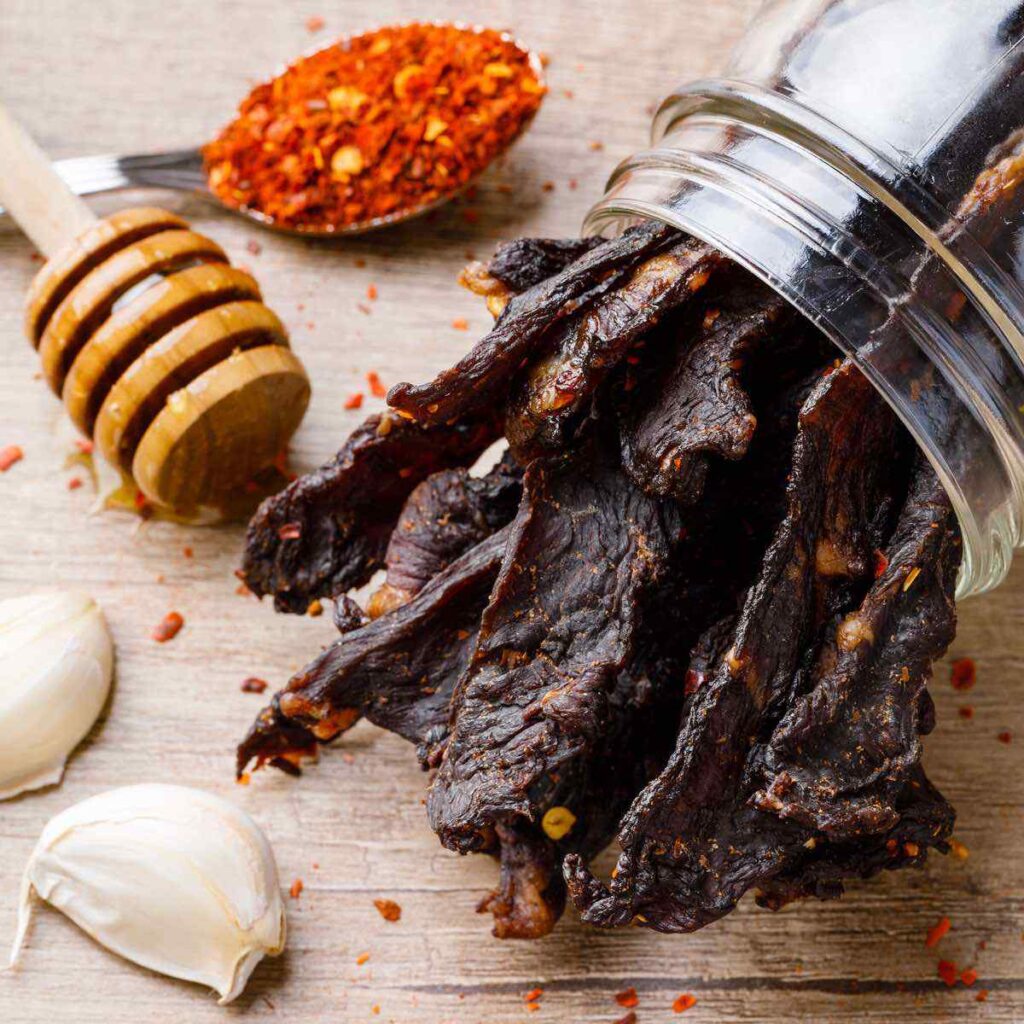
More beef jerky in a jar
More beef jerky in a jar — it’s just so #aesthetic!

Or if you’ve made a huge batch of jerky, it can keep for up to a year in the freezer, although freezing can alter the flavor and texture of your jerky. 

Conclusion

Jerky is a classic snack enjoyed by muscle-bound gym rats and lazy couch potatoes alike. It’s also perfect for munching while hunting, backpacking, or just studying for that tough final exam. 

Plus, honing your jerky-making skills now could potentially save your skin in a long-term emergency situation…or maybe woo some lucky guy, gal, or pal? 

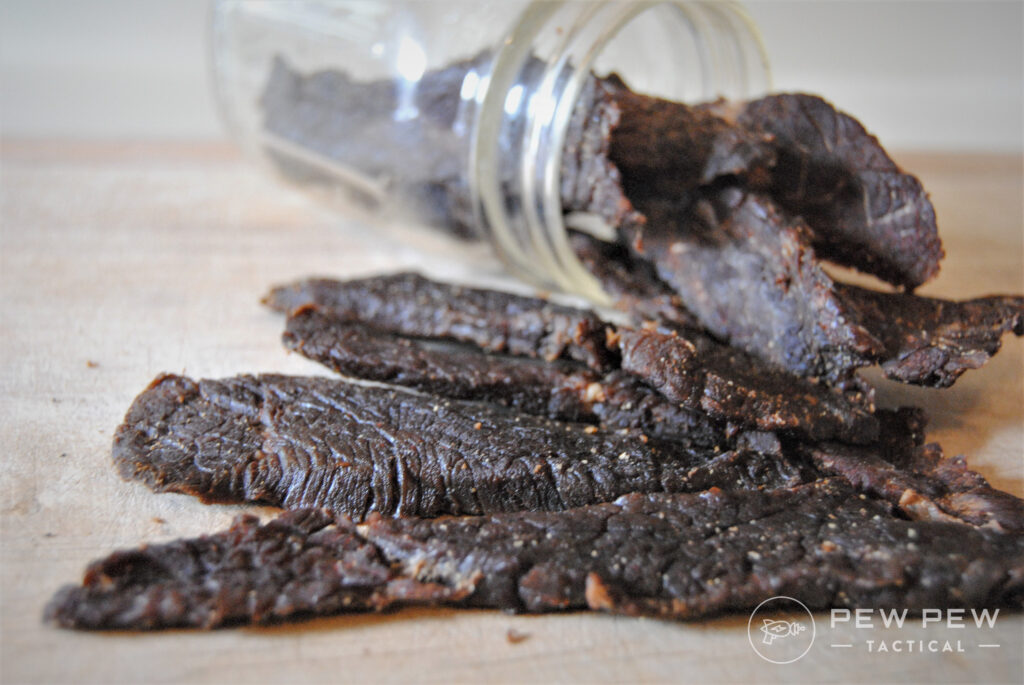
Even more beef jerky in a jar
Even more beef jerky in a jar!

For now, my jerky-making motivation is to save some cash. At least until I hit the big time and the cost of beef jerky no longer makes my head spin. 

Do you have your own jerky recipe you’d like to share? Or maybe you just want to sing the praises of this protein-packed snack? Tell us all about it in the comments below! Are you preparing for the end of the world or another inconvenient lock-down? Check out our article detailing How To Stockpile Food & Water for Emergencies.

The post [How-To] Make The Best Homemade Beef Jerky appeared first on Pew Pew Tactical.

guns

via Pew Pew Tactical https://ift.tt/2m7cc0U

February 5, 2021 at 06:32PM

Using JSON column types in Laravel

Using JSON column types in Laravel

https://ift.tt/3roxg5b


Learn how to store JSON in a MySQL database and how to select and update them easily with Eloquent.

First of all, you should check if your MySQL version is equal to or greater than 5.7.8 version, otherwise will not be compatible.

MySQL supports the native JSON data type since version 5.7.8.

In these examples I will use the information of the furniture used in the Habbo game, which is served in JSON by means of this url.

Furniture data

Furniture data

As you can see, the data is in json format segmented in two categories: room item types and wall item types. We will get that information and we will store it in a table of our database to make some examples with the JSON data.

Creating the migration

First of all we need to make a migration to create the items table and be able to store our data

<?php

use Illuminate\Database\Migrations\Migration;
use Illuminate\Database\Schema\Blueprint;
use Illuminate\Support\Facades\Schema;

class CreateItemsTable extends Migration
{
    public function up()
    {
        Schema::create('items', function (Blueprint $table) {
            $table->id();
            $table->json('furni');
            $table->string('type');
            $table->timestamps();
        });
    }

    public function down()
    {
        Schema::dropIfExists('items');
    }
}

As you have noticed, we have marked furni column as json.

Did you know?

When creating a migration with the make:migration artisan command you don’t need to specify the migration name with low bars and without spaces, you only need to do it like this:

php artisan make:migration "create items table"

Fetching the data

To fetch the data from the furni data resource I have crafted a tiny command that will export It to the items table.

First of all make sure to create the Item model:

php artisan make:model Item

Then, we proceed with the command that looks like this:

<?php

namespace App\Console\Commands;

use App\Models\Item;
use Illuminate\Console\Command;
use Illuminate\Support\Facades\Http;
use Symfony\Component\Console\Helper\ProgressBar;

class AddItemsCommand extends Command
{
    private const HASHES_URL = 'https://www.habbo.com/gamedata/hashes2';

    protected $signature = 'add:items';
    protected $description = 'Add items from gamedata';

    public function handle()
    {
        $this->storeFurniData();

        $this->newLine();
        return $this->info('Furni info fetched!');
    }

    private function getFurniDataUrl(): string
    {
        $hashUrl = Http::get(self::HASHES_URL);

        if (! $hashUrl->successful()) {
            $this->error('Furni data could not be fetched.');
        }

        $hashes = collect($hashUrl->json()['hashes']);
        $hashes = $hashes->mapWithKeys(fn($hash) => [$hash['name'] => $hash]);

        $furnidata = $hashes->get('furnidata');
        return "{$furnidata['url']}/{$furnidata['hash']}";
    }

    private function storeFurniData(): void
    {
        $data = Http::get($this->getFurniDataUrl());
        $data = collect($data->json());

        $data = $data->mapWithKeys(fn($items, $key) => [$key => $items]);
        $furniCount = $data->map(fn($items) => count($items['furnitype']))->flatten()->sum();

        $this->info("Trying to fetch {$furniCount} furnis.");
        $progressBar = $this->output->createProgressBar($furniCount);
        $progressBar->start();

        $data->each(fn($types, $type) => collect($types)->each(fn($items) => collect($items)->each(fn($item) => $this->addItem($item, $type, $progressBar))));

        $progressBar->finish();
    }

    private function addItem(array $furni, string $type, ProgressBar $bar): void
    {
        $item = new Item();
        $item->furni = json_encode($furni);
        $item->type = $type;
        $item->save();

        $bar->advance();
    }
}

As you can see, we get the furni data URL and then we iterate through the items to store in our database. Remember to encode the JSON information as we do in this example when adding new rows to the table!

By executing this command we will have our items table full of data in a few seconds.

Processing the data

Let’s see the JSON information of the first furniture through a simple select:

\App\Models\Item::first()->furni

{
	"bc": true,
	"id": 13,
	"name": "Beige Bookcase",
	"rare": false,
	"xdim": 1,
	"ydim": 1,
	"adurl": null,
	"buyout": true,
	"offerid": 5,
	"canlayon": false,
	"cansiton": false,
	"category": "shelf",
	"revision": 61856,
	"classname": "shelves_norja",
	"furniline": "iced",
	"canstandon": false,
	"defaultdir": 0,
	"partcolors": {
		"color": [
			"#ffffff",
			"#F7EBBC"
		]
	},
	"rentbuyout": false,
	"description": "For nic naks and books.",
	"environment": null,
	"rentofferid": -1,
	"specialtype": 1,
	"customparams": null,
	"excludeddynamic": false
}

This is what is included in the first row of our items table in the furni column. As you can see, there are a lot of properties that are stored in a single column!

Casting JSON to array

It’s possible to transform JSON into array with no need of using json_decode by casting the column. All we need to do is adding this in our Item model.

protected $casts = [
    'furni' => 'array'
];

Now, every time we fetch data from the furni column, we will get an array response.

Using JSON Where Clauses

Imagin you only want to query the iced furniline items, how could be it done?

Laravel eloquent provides JSON where clauses which will help us to fix this quickly:

\App\Models\Item::where('furni->furniline', 'iced')->get()
Iced furniline response data

Iced furniline response data

As you can see, we only need to query a JSON column using the -> operator.

Query JSON arrays by their length

What if we want to query the furnis that have three colors? This can be done through the whereJsonLength method, thath will check how many items does the array have.

\App\Models\Item::whereJsonLength('furni->partcolors->color', 3)->get()
Furniture with three colors response data

Furniture with three colors response data

And that’s it, we have obtained the 534 items in an easy way!

Updating JSON column data

Updating JSON data is also very easy to do using the -> syntax.

We will change the rare property to true in those furnis with the rare furniline:

\App\Models\Item::where('furni->furniline', 'rare')->update(['furni->rare' => true])
Rare furniline response data

Rare furniline response data

And it’s done! By doing the query below we will see that our rare furniline furnis has they rare parameter as true.

\App\Models\Item::where('furni->furniline', 'rare')->get()

Conclusions

In my opinion, store and process JSON data is very easy to handle with Laravel. From selecting a simple JSON value to updating massively some JSON data. I hope these tricks have been helpful to you.

programming

via Laravel News Links https://ift.tt/2dvygAJ

February 4, 2021 at 10:06PM

Yamuna Body Rolling Footsavers

Yamuna Body Rolling Footsavers

https://ift.tt/3cDks6Q

I was turned onto the aptly-named Yamuna Body Rolling Footsavers about five years ago and haven’t looked back. Like a hard racquetball that has been sliced in half, the Footsavers are designed to help realign the bones, muscles and tendons in your feet. You stand on them and work your feet, positioning each foot down the inside line, outside line and mid-line.

It’s a simple routine that’s explained on the instructional DVD it comes with. If you have any foot discomfort, the kind you get from imperfect shoes or simply being on your feel all day, these really can make a difference. At first, it will be painful. You will likely have to not put all your weight onto the Savers, and probably need to do it next to a wall for balance. But the moment you step off the saver, your feet enter a whole new world. I always take these when I travel, as they are quite small.

They have saved me after days of walking all around Manhattan and after ultimate frisbee and any bike ride. I find they’re also great after or before any normal day as well. What I appreciate about Footsaving is that you can do it while you drink your morning coffee or while you watch a little TV. Makes it difficult to use the “too busy” excuse. The routine is quick and the relief to my feet has been monumental. I’m sure there is an acupressure effect of some kind with these, though I don’t know exactly how/why it works. I just know they’ve been well worth the initial discomfort and adjustment.

— Aaron Pastor

Yamuna Body Rolling Foot Savers

Available from Amazon

fun

via Cool Tools https://ift.tt/2A8ZeMz

February 4, 2021 at 11:08AM

AK-47 vs Propane Tanks

AK-47 vs Propane Tanks

https://ift.tt/3cDU1On

AK-47 vs Propane Tanks

Link

Does your day not have enough explosions in it? Then tune in to Edwin Sarkissian’s YouTube channel for your daily dose of destruction. Here, he and his buddy Mark Serbu take aim at a stack of fully-loaded propane canisters and lay waste to them with some serious firepower. Yep, don’t try this one at home.

fun

via The Awesomer https://theawesomer.com

February 3, 2021 at 12:30PM

Part 2: Laravel Sanctum API Token Authentication Tutorial with example

Part 2: Laravel Sanctum API Token Authentication Tutorial with example

https://ift.tt/39DlGgw


Laravel Sanctum is a popular package for API Token Authentication. There are many other packages available to authenticate the APIs request in Laravel. For example, We are already familiar with Laravel Passport and JWT to authenticate the APIs. 

I have already shared the tutorial for making RESTful APIs using Passport Authentication. The main difference between passport and Sanctum is Passport uses OAuth for authorization. On the other hand, Sanctum produces the API tokens without the complication of OAuth.

Laravel Sanctum Installation

Run the following command in your terminal to install the Laravel Sanctum package:

composer require laravel/sanctum

After successfully install package, we need to publish configuration file with following command:

php artisan vendor:publish --provider="Laravel\Sanctum\SanctumServiceProvider"

Now run the migration command.

Next, if you see the kernel.php, by default, it uses auth:api middleware for making simple token-based API authentication. Because we want to use Sanctum for API authentication, so we need to replace it with auth:sanctum middleware.

//kernel.php

use Laravel\Sanctum\Http\Middleware\EnsureFrontendRequestsAreStateful;

'api' => [
    EnsureFrontendRequestsAreStateful::class,
    'throttle:60,1',
    \Illuminate\Routing\Middleware\SubstituteBindings::class,
],

`HasApiTokens` trait

To issuing API token, we have to use the HasApiTokens trait in the User model. 

use Laravel\Sanctum\HasApiTokens;

class User extends Authenticatable
{
    use HasApiTokens, Notifiable;

    // ...
}

Now we can issue tokens for a user.

$token = $user->createToken('here-token-name');
return $token->plainTextToken;

Laravel Sanctum Usages

Route::middleware('auth:sanctum')->get('/user', function (Request $request) {
    return $request->user();
});

API Token Issuing

To issue a token, you may use the createToken method. The createToken method returns a Laravel\Sanctum\NewAccessToken instance. 

$token = $user->createToken('here-token-name');
return $token->plainTextToken;

Token Abilities

You may pass an array of string abilities as the second argument to the createToken method:

return $user->createToken('token-name', ['post:update'])->plainTextToken;

To check the ability of a token, you can use tokenCan  method on a User model object. 

if ($user->tokenCan('post:update')) {
    //
}

Revoking Tokens

$user->tokens->each->delete();

Hope this post will help you to learn about Laravel Sanctum and how to make API using the Laravel Sanctum package.

programming

via Laravel News Links https://ift.tt/2dvygAJ

February 1, 2021 at 10:06PM

And suddenly no mask is good enough

And suddenly no mask is good enough

https://ift.tt/3r36hMm


CDC pulled and ATF and is now mandating masks in all ways of public transportation including rideshares services.

PEMBROKE PARK, Fla. – Throughout the pandemic, Florida’s Gov. Ron DeSantis held steadfast about his position on mask wearing. In November, he extended his executive order that banned local governments from enforcing mask mandate violations.

Now, at least as far as public transportation goes, there is no more fine line about wearing a mask. Starting Monday at 11:59 p.m., if you are inside an airport, on a bus, train, ferry or ship, or taking a ride-share such as Uber, Lyft, or a taxi, it is a federal directive to wear a face covering.

CDC’s mask mandate starts Monday at 11:59 p.m.

I simply do not see the FBI’s HRT coming to arrest some cranky old Cuban in Calle Ocho because he refuses to wear the appropriate mask during the bus ride.

But what defines an appropriate mask? The good folks of the CDC are very helpful describing it but this particular point made me laugh:

Masks made from loosely woven fabric or that are knitted, i.e., fabrics that let light pass through

So what I did was fetch one of my flashlights and test the two facemask types I have (gaiter not included) and see if they survive the test. The double layered extra large thick black one designed for bearded guys seemed like a sure bet to pass the tests…and nope, I could see light coming through.

So next I went to the box of disposable masks, the mask being used by possibly 80% of the population and medical personnel and take a wild guess what happened? Yup, lumens upon lumens of light just shined through. Not only the CDC just declared the masks useless, but confirmed the idea that the darned things have always been a joke and nothing but a theatrical costume, something many people have been saying from Day One.

That can only mean something: Some factory in China is poised to make billions manufacturing the new masks capable of pass the new Federal mandate. Hey, something had to be done by POTUS* to apologize for the actions of Trump against China’s economic interests.


*POTUS: (Pederast Of The United States)


guns

via https://gunfreezone.net

February 1, 2021 at 06:51AM