Knots

https://s3.amazonaws.com/revue/items/images/018/025/100/mail/Knots.jpg?1663327286

Once a week we’ll send out a page from Cool Tools: A Catalog of Possibilities. The tools might be outdated or obsolete, but the possibilities they inspire are new. Sign up here to get Tools for Possibilities a week early in your inbox.

Best knot teacher
Animated Knots, animatedknots.com
All knots are knotty and hard to visualize the first time. This free website is the best knot teacher yet. It beats any of the beginner books I’ve seen, as well as all the other knot websites. The key here is the stepped animations synchronized with instructions, which you can run at any speed. Replay them till you get them right. Animated Knots is the next best thing to having old Pete next to ya. Once you get the basic ones down, try some of the harder ones. There are 75 cool knots animated in total. – KK
Next step beyond the basic knots
Morrow Guide to Knots, $18
Knots are such fundamental tools, and matching the right job with the right knot is so often essential, the important next step from the Klutz Book is the equally lucid and fairly comprehensive Morrow Guide to Knots. Last week my wife Ryan gave a glad cry at the clarity in the book when she wanted to see a couple ways to tie a clove hitch, and learned that it’s easy to put a slip in a clove hitch for quick release. – Stewart Brand
Knot substitute
Nite Ize Figure 9 Carabiner$7
The Figure 9 carabiner lets you quickly fasten – and quickly loosen or adjust – a small-diameter rope to a fixed point without a knot deploying a clever combination of friction and angles. To those of us with knot-dyslexia, this is a real boon. The only requirement: your fixed attachment point must feature either a place to clip the carabiner (i.e. a metal loop in a pick-up truck bed or a thin, sturdy tree branch), or something around which your line can be looped. That could mean securing a Tarp tent to a tree, improvising a handle around a bundle of cables, or securing a travel clothesline between window-grate and curtain-rod.

All you need to do is pull the rope through in the right sequence and finish with the rope’s loose end tugged into the notched “V” section to keep the rope attached and taut. There are actually multiple sequences and ways to work the geometry. Three methods are diagrammed in the instructions that come with the carabiner.

Thus far, I have used the devices only with standard-issue parachute cord, but they’re sized to work with a range of small-diameter ropes. Though the tying system looks suspiciously wimpy, I’ve found it is as robust as promised. I ordered the Figure 9s to replace the mesh netting that came with the roof-rack basket on my car. Not only do these make a decent replacement (i.e. riding around with a kayak strapped to my car this summer), but tying one more knot under the car is something I’m glad to skip. Note: the device is anodized aluminum and weighs a bit more than I expected (slight downside to ultra-light hikers); still, “Not for climbing” is printed on the packaging, repeated in the instructions, and emblazoned on each carabiner. I think they mean it. – Timothy Lord

Quick, easy tie-down
Rope Ratchet, $20 (¼-inch, w/rope) roperatchet.com
I wanted to rig a single line of rope across the ceiling of my garage for a storage solution, but was concerned about getting the line tight enough to keep from sagging. Rather than tie up a come-along winch – which requires a lot more hook up room and has a tendency to release quite hard – I saw the Rope Ratchet and decided to give it a try; I’m glad I did. The contraption is basically a rope that’s fed into and around a ratcheting wheel and bracket that holds the line and prevents backspin; you can release the line with a lever. It’s quite simple, but I haven’t seen anything quite like it. I’m using one to hold up a 70-lbs. tackle bag 6 feet off the floor of my garage and another holding about 80 lbs. of plastic lures on a rope stretched across hooks against the ceiling of my garage. I’m using the ¼-inch Rope Ratchet that’s rated for a working load of 150 lbs., but there are different sizes for different needs: the 1/8-inch will hold 75 lbs. up, while the ½-inch will hold 500 lbs. After a number of months, mine are holding strong with no sign of failure. – Doug Mainor

Cool Tools

Laravel Localization Guide step-by-step.

https://uselocale.com/storage/posts/GX1QkQRJvyViR73j1QEjVswYjzAV3bglAfoVfgwa.png

Learn how to fully localize your Laravel application in this tutorial. Localization is essential for your business, so it is to localize your Laravel application.

Learn how to manage your translation files, work with localized strings and create localized routes.

Laravel’s localization features provide a way to work with localized strings but with some extra code, you can convert your application into a real multilanguage app.

Installation

As a Laravel user, we’ll assume you already have a Laravel application, or you created a new one. You can follow the more suitable method from the official documentation or the recent Laravel Bootcamp.

Language files

Language files are stored within the lang directory. Laravel provides two ways to organize your translations.

First, language strings stored in .php files in a directory for each language supported by the application.

/lang
    /en
        messages.php
    /es
        messages.php

With this method, you should define your translation string using short keys like messages.welcome inside a PHP file:

<?php
 
// lang/en/messages.php
 
return [
    'welcome' => 'Welcome to our application!',
];

Or, translation strings stored in JSON files that are placed within the lang directory. Each language supported by your application should have a corresponding JSON file within the lang directory.

/lang
    en.json
    es.json

With this method, the key is used also as a translation for the default locale. For example, if your application has a Spanish translation and English as a default locale, you should create a lang/es.json file:

{
    "I love programming.": "Me encanta programar."
}

You should decide which method is the most suitable for your project depending on your translation strings volume and organization.

While the official docs conclude that JSON files are better for applications with a larger number of translatable strings, we’ve found that this is not always true, and it depends on your application or team.

Our advice is to try and investigate which method works best for your application.

Using translation strings

You may retrieve your string using the __ helper function. Depending on the translation string strategy you choose, you should refer to your translation string in a different way:

  • For short keys (PHP array files): you should use the dot syntax. For example, to retrieve the welcome string from the lang/en/messages.php, you should use __('messages.welcome')
  • For default translation string keys (JSON files): you should pass the default translation in the default language to the __ function. For example, __('I love programming.')

In both cases, if the translation exists does not exist, the __ function will return the translation string key.

Starting here, we’ll use the short keys syntax for our examples, but you can use what works best for your application.

Configuring Laravel locales

Default and fallback locales for Laravel are configured in the config/app.php configuration file:

/*
|--------------------------------------------------------------------------
| Application Locale Configuration
|--------------------------------------------------------------------------
|
| The application locale determines the default locale that will be used
| by the translation service provider. You are free to set this value
| to any of the locales which will be supported by the application.
|
*/

'locale' => 'en',

/*
|--------------------------------------------------------------------------
| Application Fallback Locale
|--------------------------------------------------------------------------
|
| The fallback locale determines the locale to use when the current one
| is not available. You may change the value to correspond to any of
| the language folders that are provided through your application.
|
*/

'fallback_locale' => 'en',

But we also want to define other available locales apart from the default one. We can do that by modifying this configuration file and adding a new available_locales key after your existing locale key:

'locale' => 'en',

'available_locales' => [
	'en' => 'English',
	'pt' => 'Português',
	'de' => 'Deutsch',
],

Redirect and switch locales

There are lots of different ways to set the application locale for every request on your application, but in this article, we’ll create a Middleware to detect the route locale and set the application language.

Creating the middleware

You can create the Middleware using the make:middleware Artisan command:

php artisan make:middleware Localized

We want to register this Middleware in order to be able to use it in our routes files, so we should add it in the app/Http/Kernel.php file. We need to add it on the application’s route middlewares:

/**
 * The application's route middleware.
 *
 * These middleware may be assigned to groups or used individually.
 *
 * @var array<string, class-string|string>
 */
protected $routeMiddleware = [
    // ... other middlewares
    'localized' => \App\Http\Middleware\Localized::class,
];

And finally, we can add the localization features to our middleware:

<?php

namespace App\Http\Middleware;

use Closure;
use Illuminate\Http\Request;

class Localized
{
    /**
     * Handle an incoming request.
     *
     * @param  \Illuminate\Http\Request  $request
     * @param  \Closure(\Illuminate\Http\Request): (\Illuminate\Http\Response|\Illuminate\Http\RedirectResponse)  $next
     * @return \Illuminate\Http\Response|\Illuminate\Http\RedirectResponse
     */
    public function handle(Request $request, Closure $next)
    {
        if (! $routeLocale = $request->route()->parameter('locale')) {
            return redirect($this->localizedUrl($request->path()));
        }

        if (! in_array($routeLocale, array_keys(config('app.available_locales')))) {
            return redirect($this->localizedUrl($request->path()));
        }

        $request->session()->put('locale', $routeLocale);
        app()->setLocale($routeLocale);

        return $next($request);
    }

    private function localizedUrl(string $path, ?string $locale = null) : string
    {
        /**
         * Get the default locale if it's not defined
         */
        if (! $locale and request()->session()->has('locale')) {
            $locale = request()->session()->get('locale');
        }

        return url(trim($locale . '/' . $path, '/'));
    }
}

Adding locale to routes

Modify your routes/web.php file to add the locale prefix and the redirection middleware:

<?php

use Illuminate\Support\Facades\Route;

/**
 * Localized routes
 */
Route::prefix('{locale?}')
    ->middleware('localized')
    ->group(function() {
        Route::get('/', function () {
            return view('welcome');
        });
    });

/**
 * Other non-localized routes
 */

Switching locale

At this point, you can simply add your locale prefix to your URL, and the middleware will set your application language. For example, /pt will set the application locale to Portuguese. Also, if you open any localized route without a locale prefix, the user will be redirected to the last used locale stored in the session.

Finally, you can loop over the available locales to create a localized navigation:

<nav>
    @foreach(config('app.available_locales') as $locale => $language)
        <a href=""></a>
    @endforeach
</nav>

Keep in mind that this is a really simple example. A final version should generate localized links for the current URL on each request.

Parameters

When retrieving translation strings, you may wish to replace placeholders with custom parameters. In this case, you should define a placeholder with a : prefix. For example, you may define a welcome message with a placeholder name:

'welcome' => 'Welcome, :name',

And then retrieve the translation string passing an array of replacements as the second argument:

__('messages.welcome', ['name' => 'Joan']);

You can also modify your placeholder to capitalize the replacement in this way:

'welcome' => 'Welcome, :NAME', // Welcome, JOAN
'goodbye' => 'Goodbye, :Name', // Goodbye, Joan

This is especially useful when a language needs to place the placeholder at the start of the string and another in the middle of it:

'accepted' => 'The :attribute must be accepted.', // English
'accepted' => ':Attribute moet geaccepteerd zijn.', // Dutch

Make it easier with Locale

As a developer, after working on internationalization for your application, you may be involved also in the localization process with translators and your team. That could be a long process and a good reason to choose a translation management tool like Locale.

With Locale, your team and translators will be able to enjoy a next-level localization workflow built for productivity.

Get started for free now and level up your workflow.

You can learn how simple the configuration process is by following our 4-step guide.

And, if you are a visual learner and prefer to watch the process, we’ve recorded a step-by-step video showing how easy it is.

Be the first to know about our awesome new features, promotions and deals by signing up to our newsletter.

Be the first to get notified.

Be the first to know about our awesome new features, promotions and deals by signing up to our newsletter.

Laravel News Links

Are You Nuts? Know your Fishing Knots! – The Dropper Loop

https://www.alloutdoor.com/wp-content/uploads/2022/10/20221027_203759-e1666919780368.jpg

This is a bit unique knot compared to all the others we’ve covered so far. The Dropper Loop does not actually tie anything together, it instead is to create a connection point in the line. The Dropper Loop is very versatile and easy to tie and is a knot that every angler should know how to tie. I use them regularly when fishing bait either in the surf or the boat. These loops are the basis for pompano rigs or chicken rigs offshore. They make a great base for loop-to-loop connections when you need to change leaders quickly or just attach hooks directly to the loops by running the loop through the eye of the hook then wrapping back over the eye of the hook.

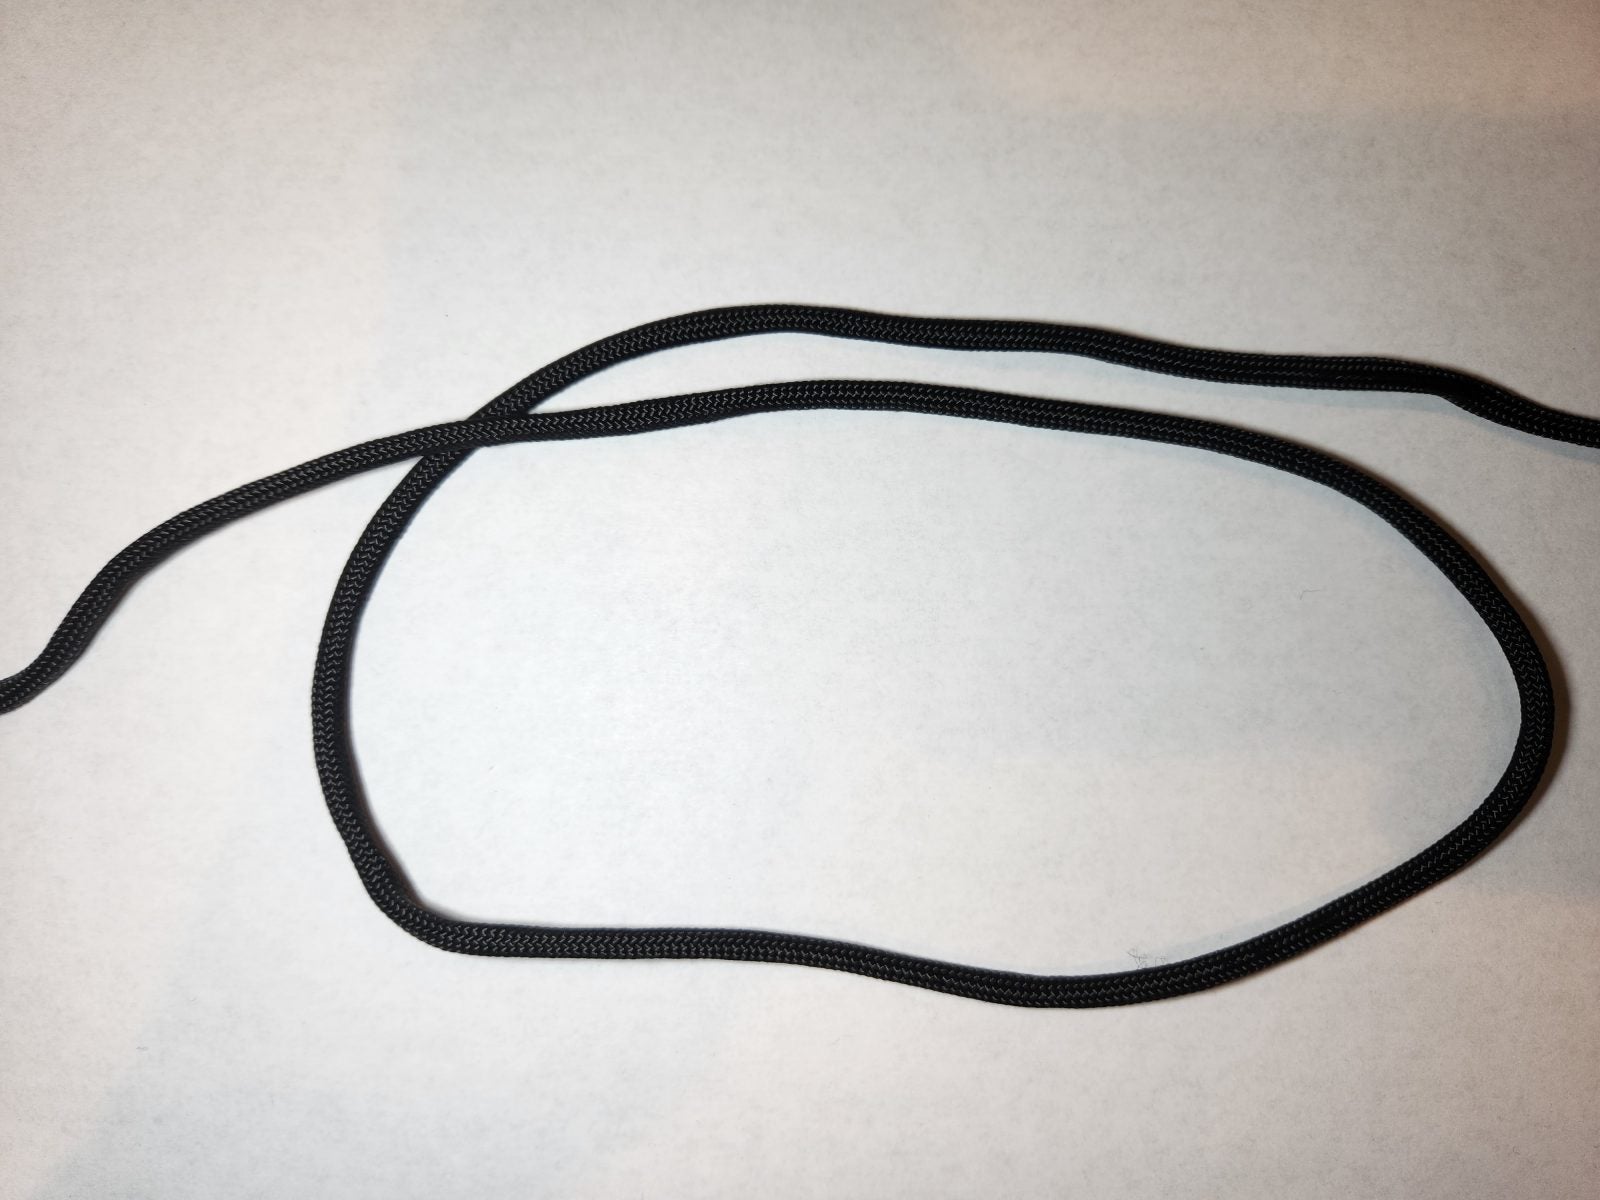
Step 1

Start with just your mainline and then make a loop that overlaps.

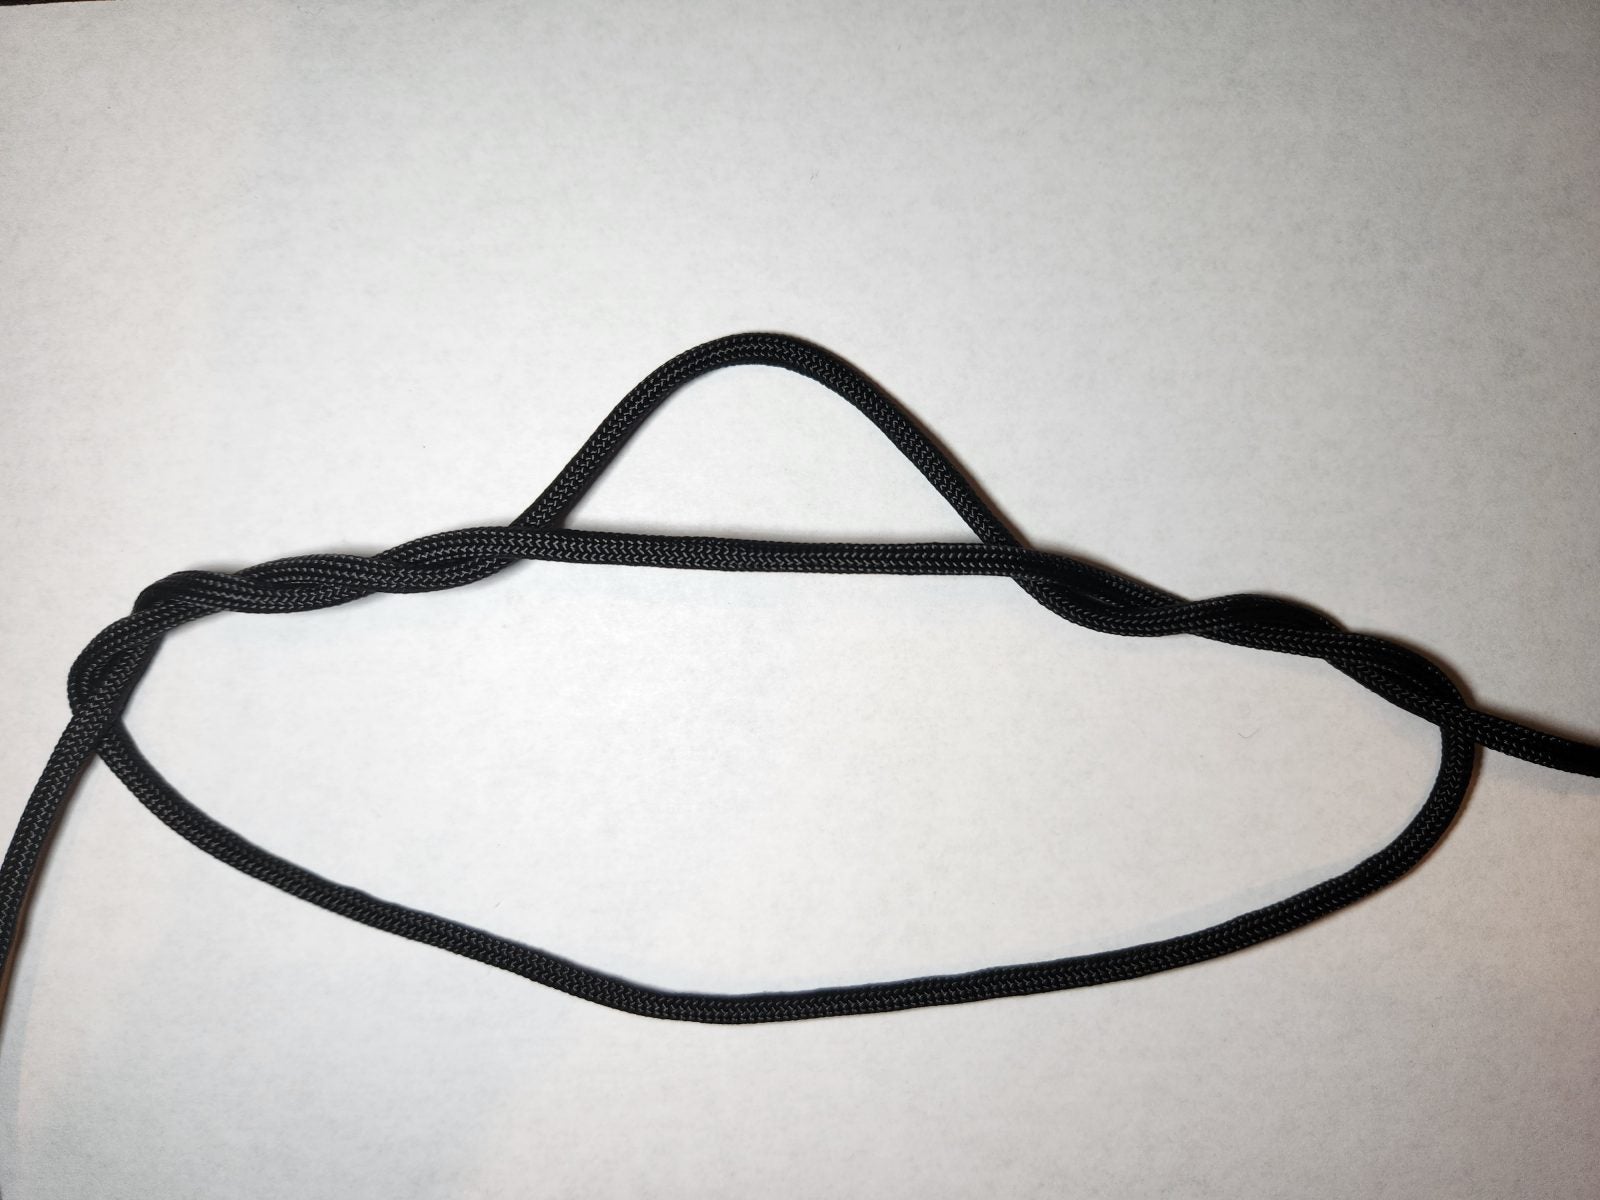
Step 2

With the loop pass one of the line from one side of the loop through and around to the other side of the loop. With that side make 5+ wraps around the line. The process of making the wraps will leave a new loop open in the center. Keep this new loop open.

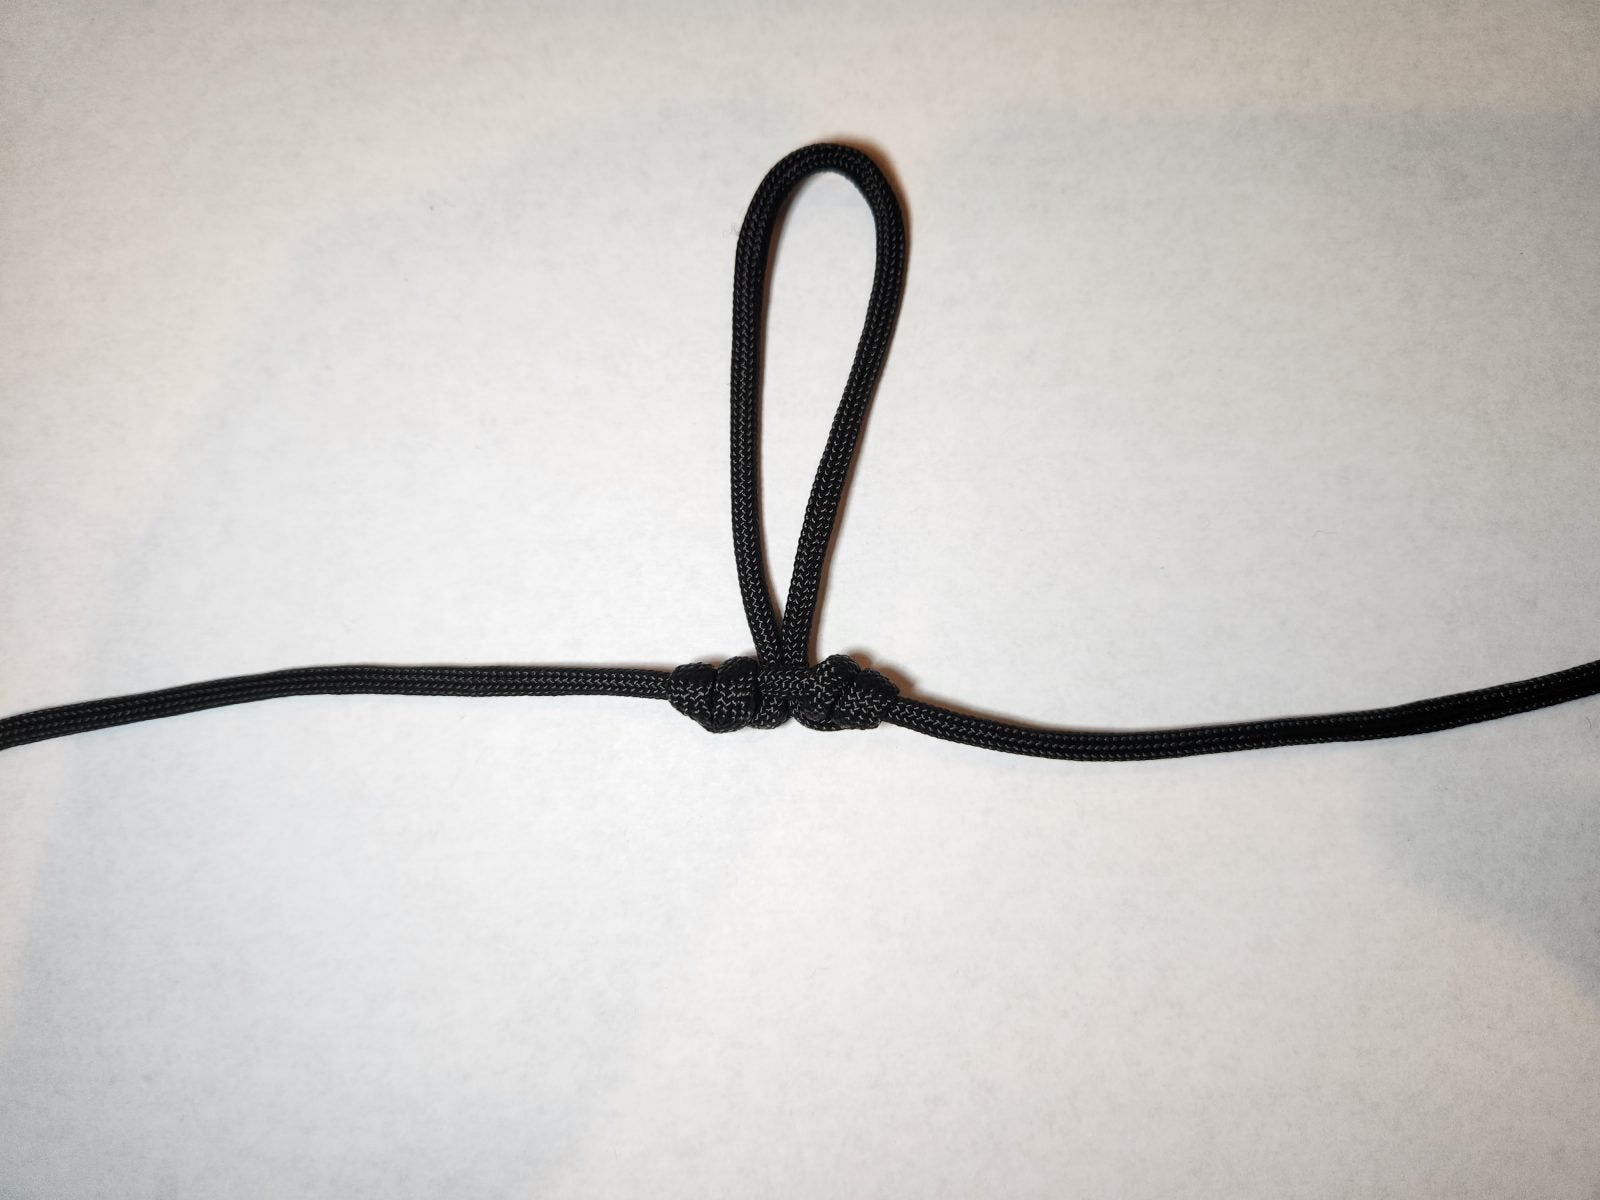
Step 3

Take the opposite side of the loop from the wraps and the little loop you made in step two, and run the line through the little loop.

Step 4

Now with the line through the small loop set it to the length you want, and then wet all the lines. Then pull evenly from both sides of the dropper loop. Do this till the coils of the line tighten and the loop is set and stands out from the line. That completes your dropper loop. Now you can use the loop to add a leader too or just attach a hook directly to it.

The post Are You Nuts? Know your Fishing Knots! – The Dropper Loop appeared first on AllOutdoor.com.

AllOutdoor.com

My current setup (end 2022 edition)

https://freek.dev/og-images/e9f9d4c4a27374d1c9a354562ceabd41/2357.png

After tweeting out a screenshot, it often get questions around which editor, font or color scheme I’m using. Instead of replying to those questions individually I’ve decided to just write down the settings and apps that I’m using.

IDE

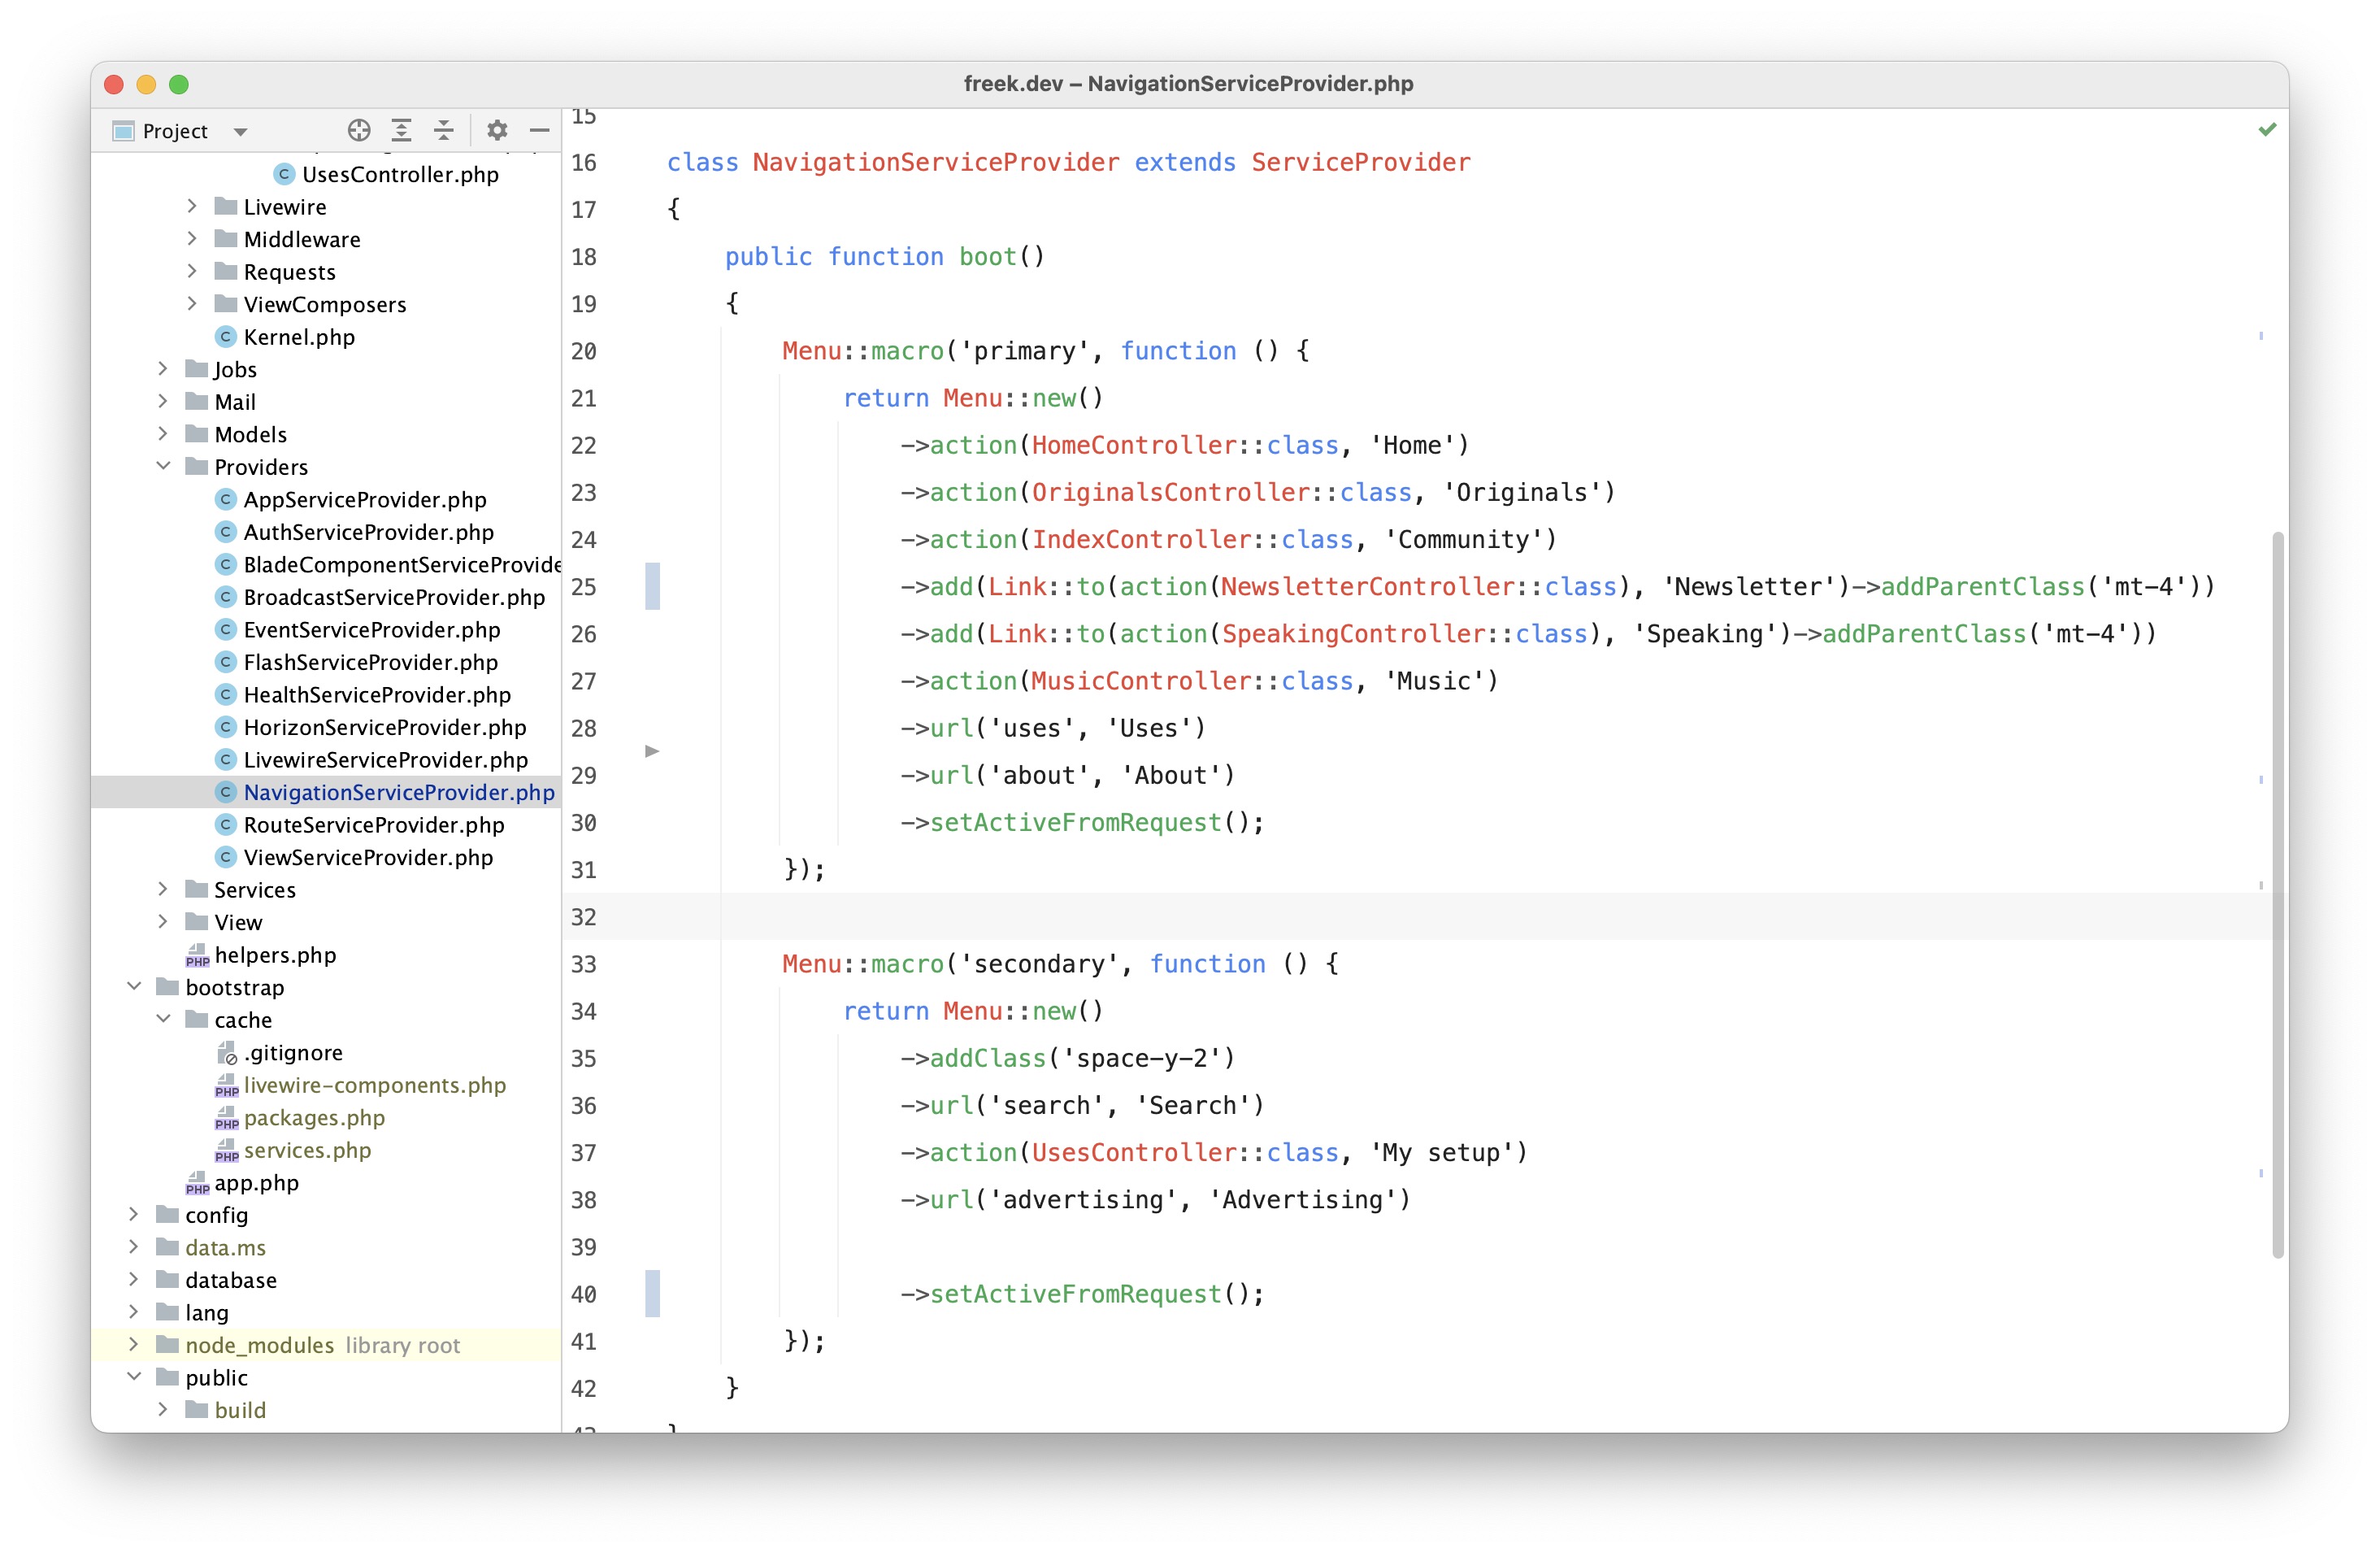
I mainly program PHP. Mostly I develop in PhpStorm. Here’s a screenshot of it:

I’m using phpstorm-light-lite-theme which was handcrafted by Brent Roose. The font used is Menlo. Font size is 15, line height 1.6

Like seen in the screenshot I’ve hidden a lot of things of the UI of PhpStorm. I like to keep it minimal.
I like working using a light based theme. In some circles this is maybe a bit controversial. Watch this excellent video by my colleague Brent to learn what the benefits of using a light based theme are.

Mostly I work on Laravel projects. One of my favourite PhpStorm extensions is Laravel Idea, which can do stuff like autocomplete route names, request fields, and a whole lot more. It’s paid, but definitely worth it.

Another PhpStorm plugin that I use is the Pest Plugin. It makes Pest a first class citizen in the IDE. This one is free.

Terminal

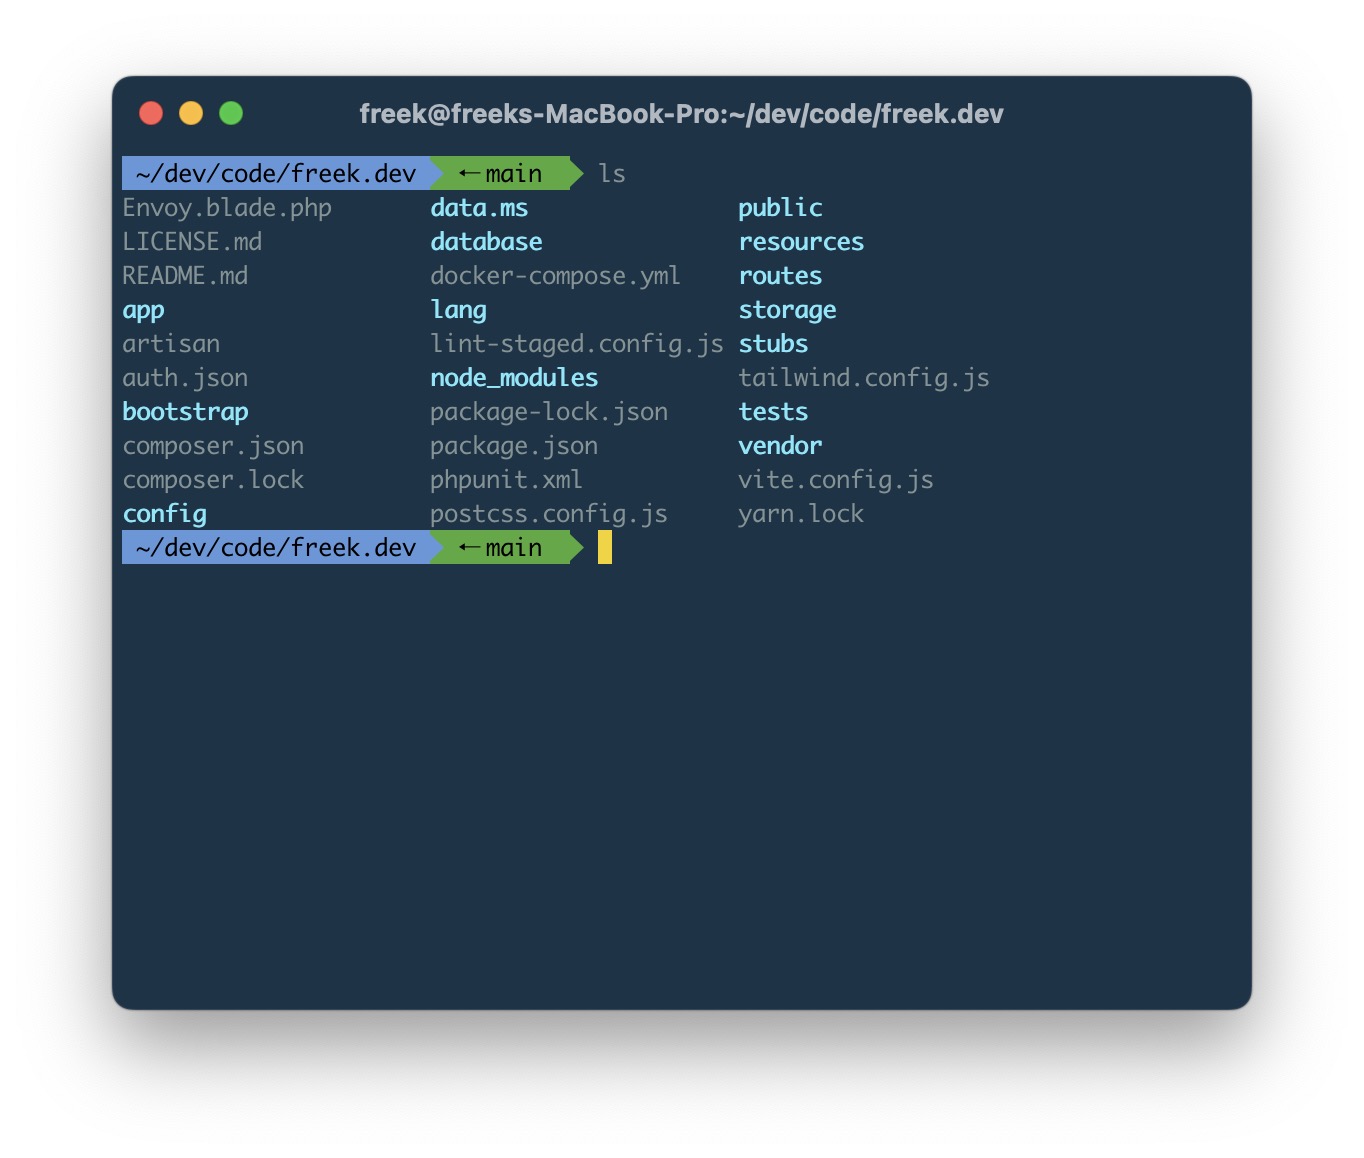
Here’s a screenshot from my terminal.

All my terminal settings are saved in my dotfiles repository. If you want the same environment you follow the installation instructions of the repo.

My terminal of choice is iTerm2. I’m using the Z shell and Oh My Zsh.

The color scheme used is a slightly modified version of Solarized Dark. The font used is a patched version of Menlo. I’m using several hand crafted aliases and functions.

MacOS

I’m a day one upgrader of MacOS, so I’m always using the latest version. I also sometimes dare to use beta versions of MacOS when people are saying it’s stable enough.

By default I hide the menu bar and dock. I like to keep my desktop ultra clean, even hard disks aren’t allowed to be displayed there. On my dock there aren’t any sticky programs. Only apps that are running are on there. I only have a stacks to Downloads and Desktop permanently on there. Here’s a screenshot where I’ve deliberately moved my pointer down so the dock is shown.

Dock

I’ve also hidden the indicator for running apps (that dot underneath each app), because if it’s on my dock it’s running.

In my dotfiles repo you’ll find my custom MacOS settings.

The spacey background I’m using was the default one on OSX 10.6 Snow Leopard. If you would like to use a class OSX background to, head over to this page at 512pixels.net.

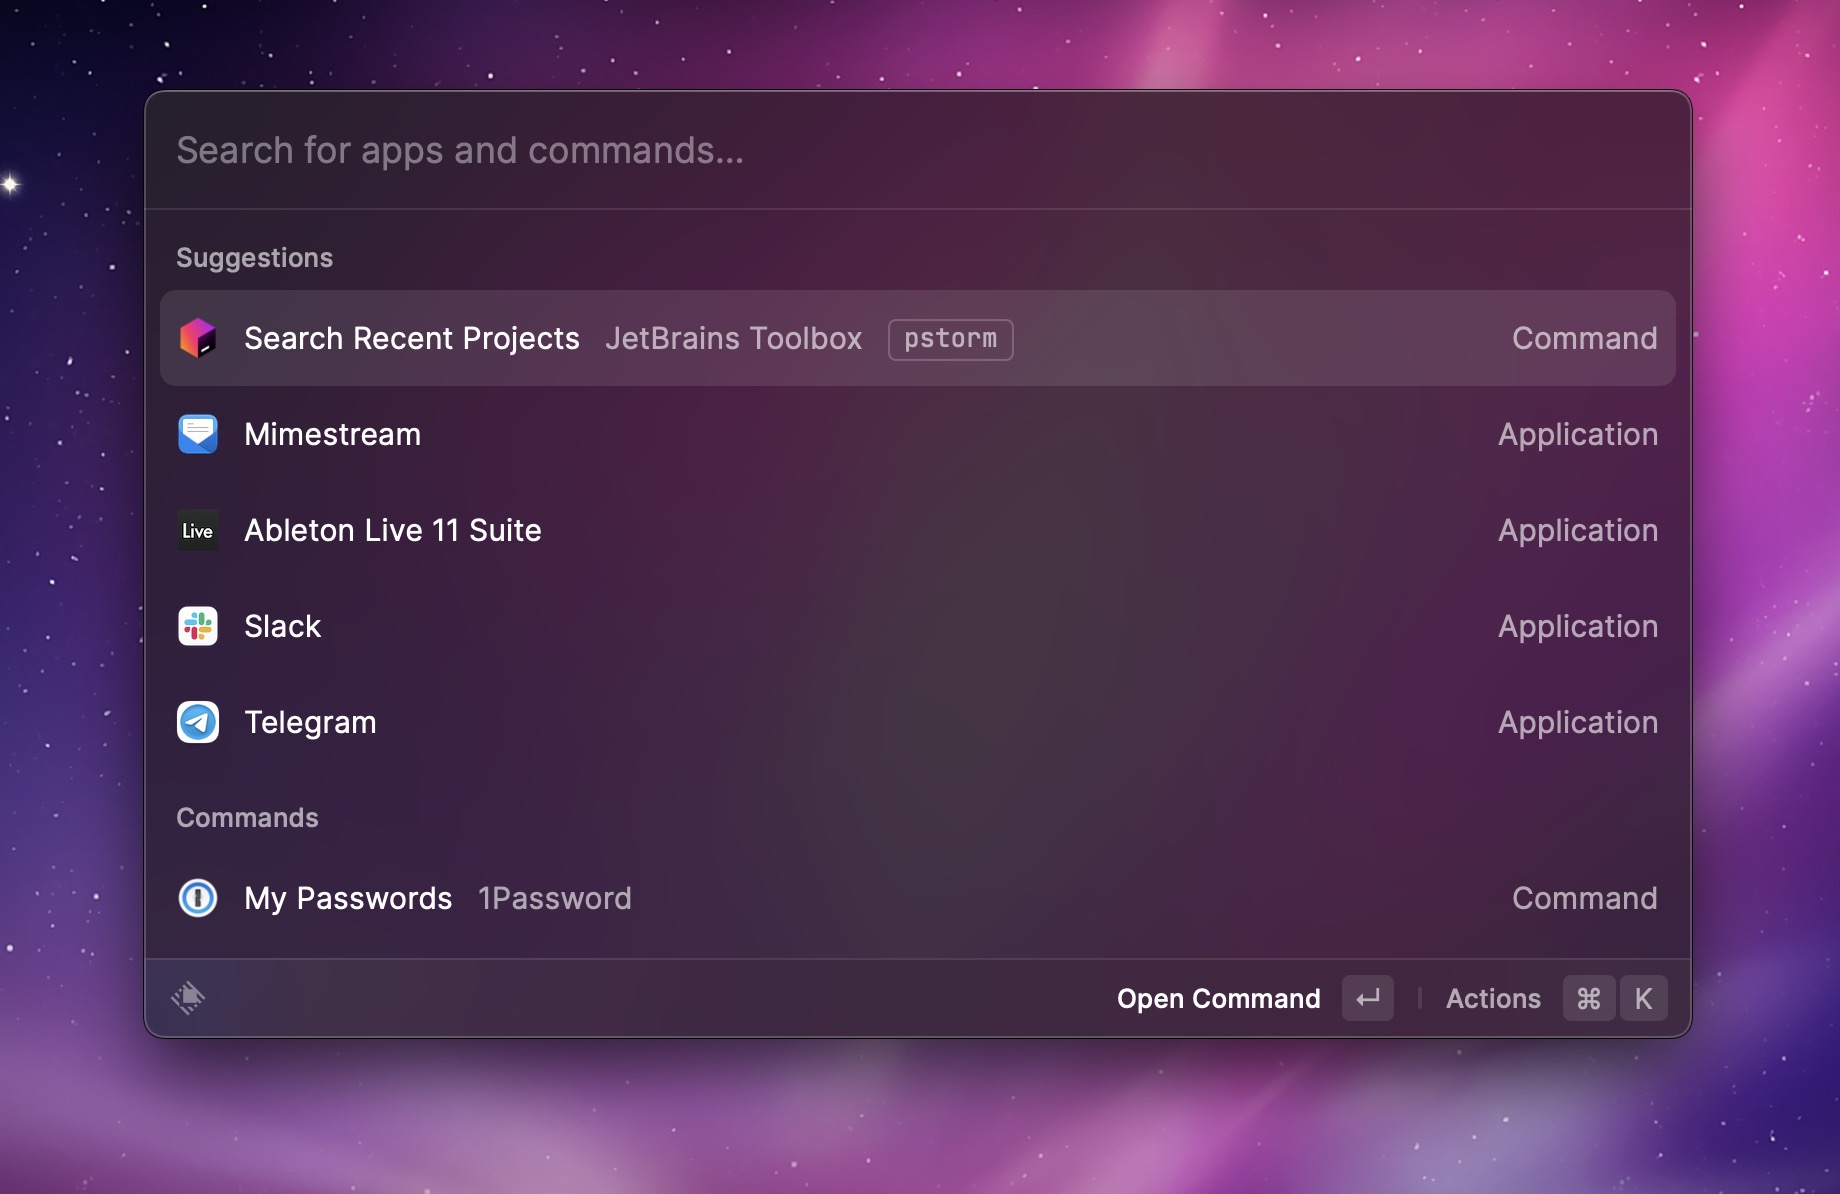
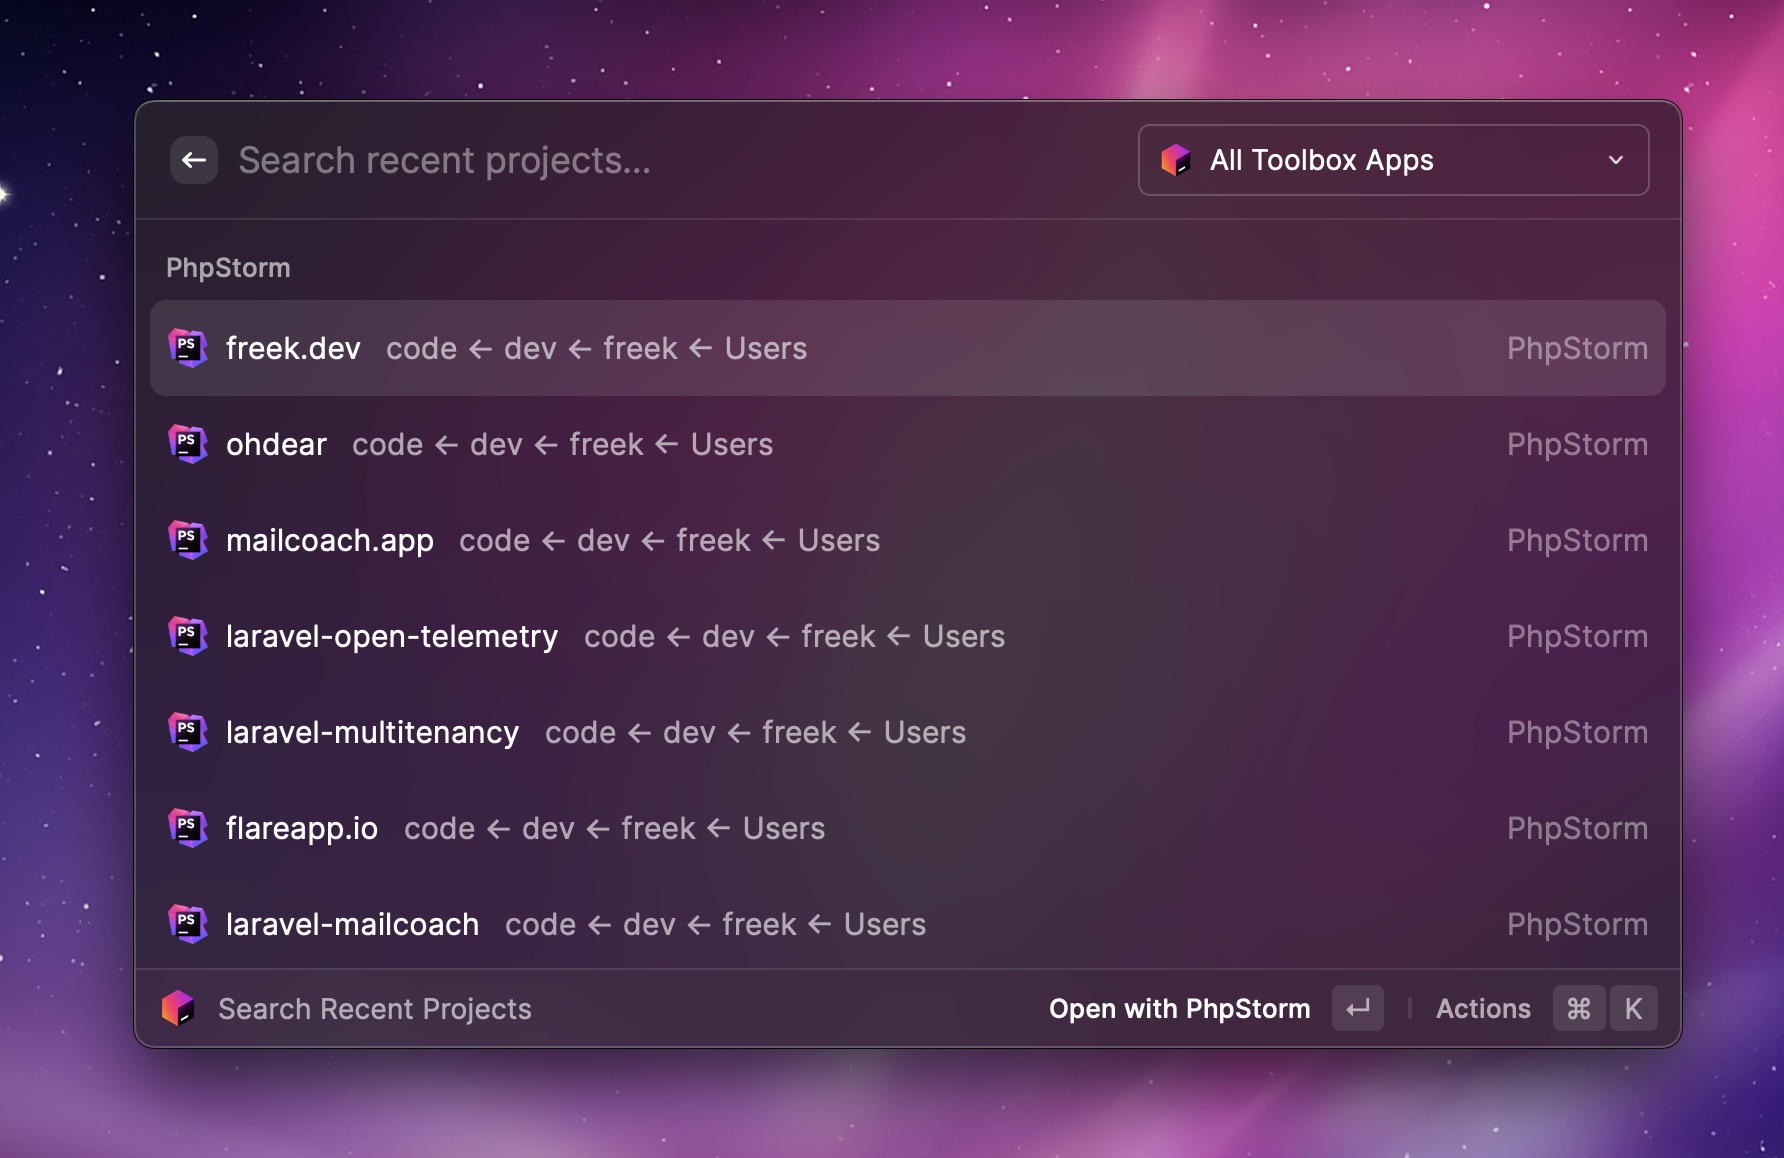
One the most important apps that I use is the excellent Raycast. It allows make me to quickly do basic tasks such as opening up apps, locking my computer, empting the trash, and much more. One of the best built in functions is the clipboard history. By default, MacOS will only hold one thing in your clipboard, with Raycast I have a seemingly unending history of things I’ve copied, and the clipboard even survives a restart. It may sound silly, but I find myself using the clipboard history multiple times a day, it’s that handy.

Raycast is also a window manager. I often work with two windows side by side: one of the left part of the screen, the other one on the right. I’ve configured Raycast with these window managing shortcuts:

  • ctrl+opt+cmd+arrow left: resize active window to the left half of the screen
  • ctrl+opt+cmd+arrow right: resize active window to the right half of the screen
  • ctrl+opt+cmd+arrow right: resize active window to take the whole screen

I’ve installed these Raycast extensions:

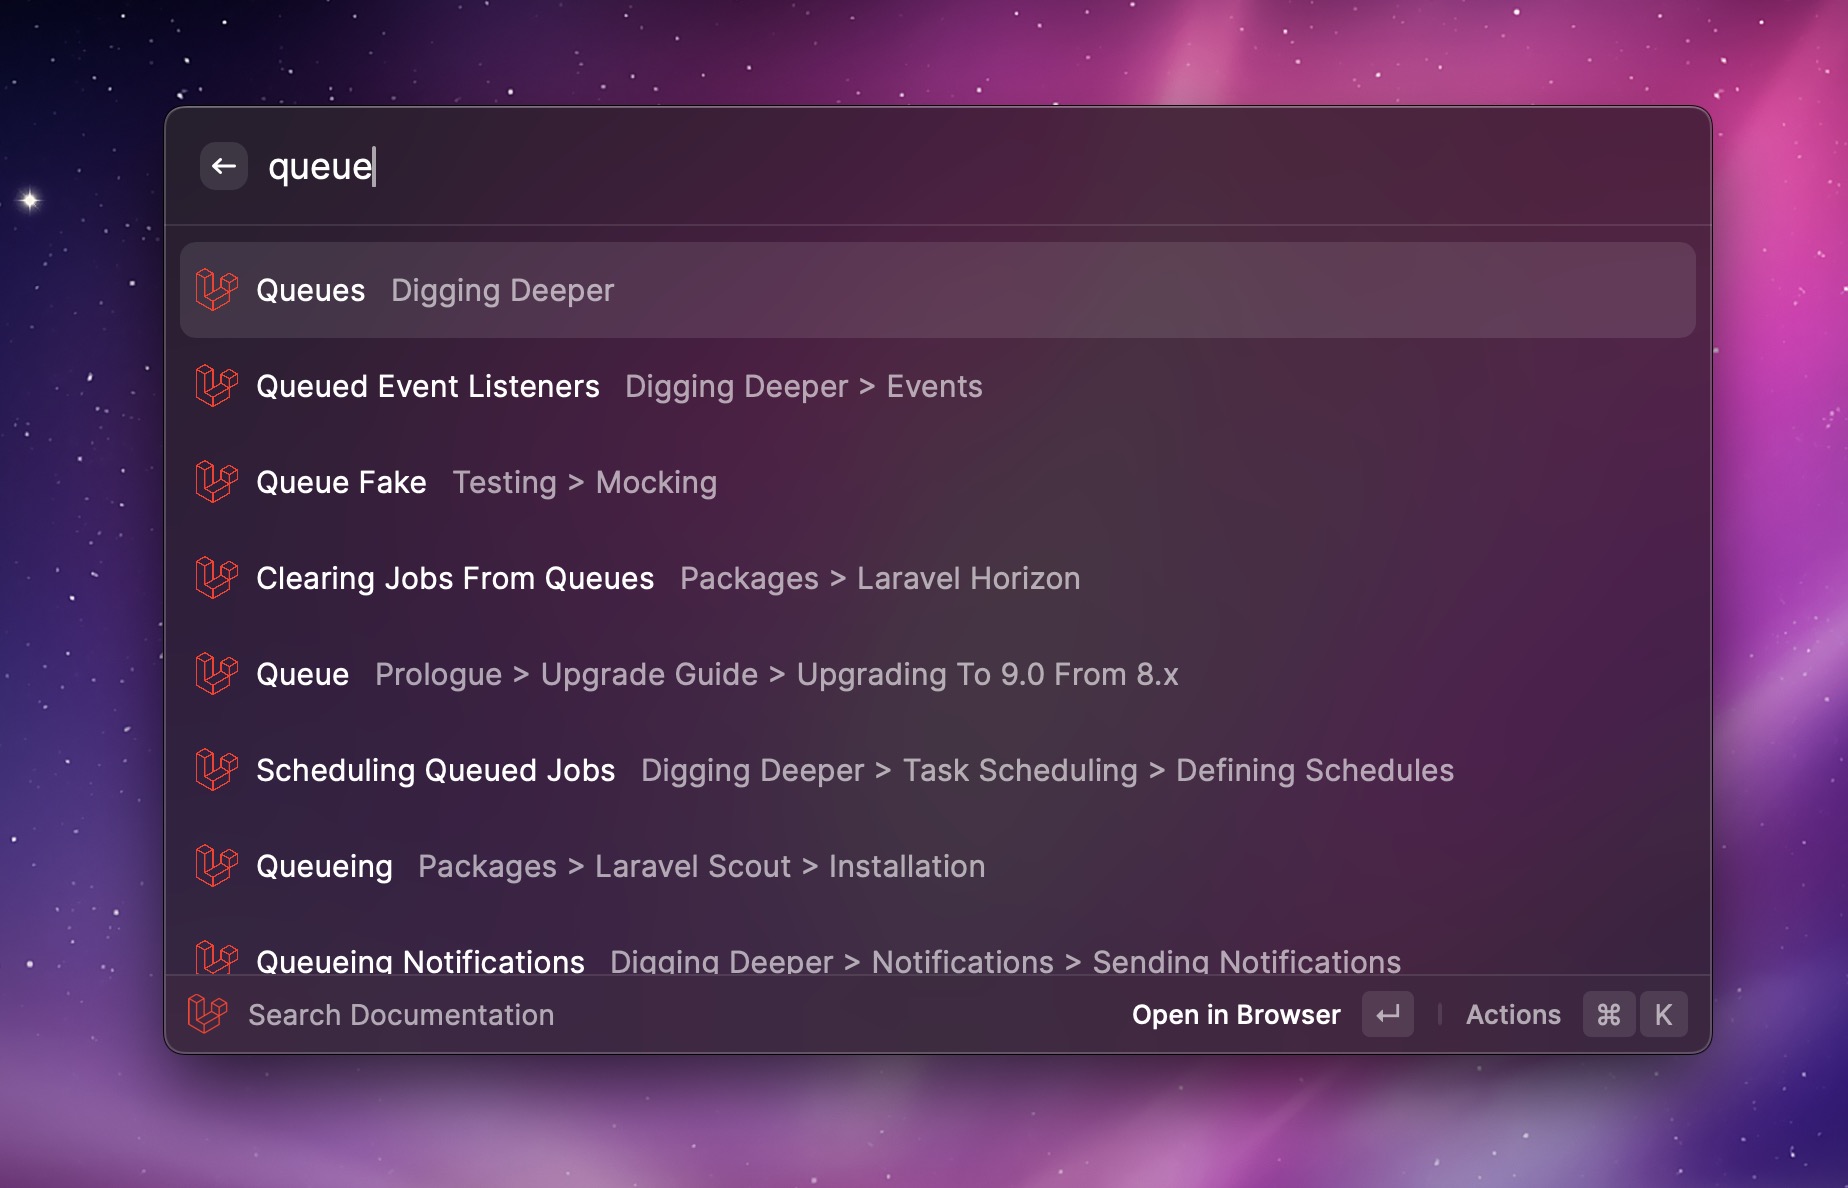
  • Laravel Docs: allows me to search the Laravel Docs from anywhere

These are some of the other apps I’m using:

  • To run projects locally I use Laravel Valet.
  • To connect to S3, FTP (?) and sftp servers I use Transmit.
  • Ray is a little homegrown tool that I use for debugging apps.
  • Local mail testing is done with Nodemailer. This handly little app install a local mailserver. In the apps you develop locally you can use that webserver to send mails. You can inspect all sent mails in Nodemailers beautiful, native UI.
  • Sometimes I need to run an arbitrary piece of PHP code. CodeRunner is an excellent app to do just that.
  • Paw is an amazing app to perform API calls.
  • Databases are managed with TablePlus
  • My favourite cloud storage solution is Dropbox. All my personal documents are on there and at Spatie we use it extensively too.
  • If you’re not using a password manager, you’re doing it wrong. I use 1Password. Personal passwords are sync in a vault stored on Dropbox. For Spatie we have a team account.
  • All settings of my apps are backupped to Dropbox through Mackup. This is a fantastic piece of software that moves all your preferences to Dropbox and symlinks them.
  • I don’t use Time Machine, my backups are handled with Backblaze.
  • Tweets are tweeted with Tweetbot.
  • I read a lot of blogs through RSS feeds in Reeder.
  • Mails are read and written in Mimestream. Unlike other email clients which rely on IMAP, Mimestream uses the full Gmail API. It super fast, and the author is dedicated using the latest stuff in MacOS. It’s a magnificent app really.
  • My browser of choice is Safari, because of its speed and low power use. To block ads on certain sites I use the AdGuard plugin.
  • I like to write long blogposts in iA Writer
  • To create videos I use ScreenFlow.
  • I regularly stream stuff on YouTube. For that I use Ecamm Live
  • To pair program with anyone in my team, I use Tuple. The quality of the shared screen and sound is fantastic.
  • Even though I’m not a designer I sometimes have to edit images. For this I use Pixelmator.
  • DaisyDisk is a nice app that helps you determine how your disk space is being use used.
  • Outside of programming, I also record music. My DAW of choice is Ableton, I’m using the complete edition.

iOS

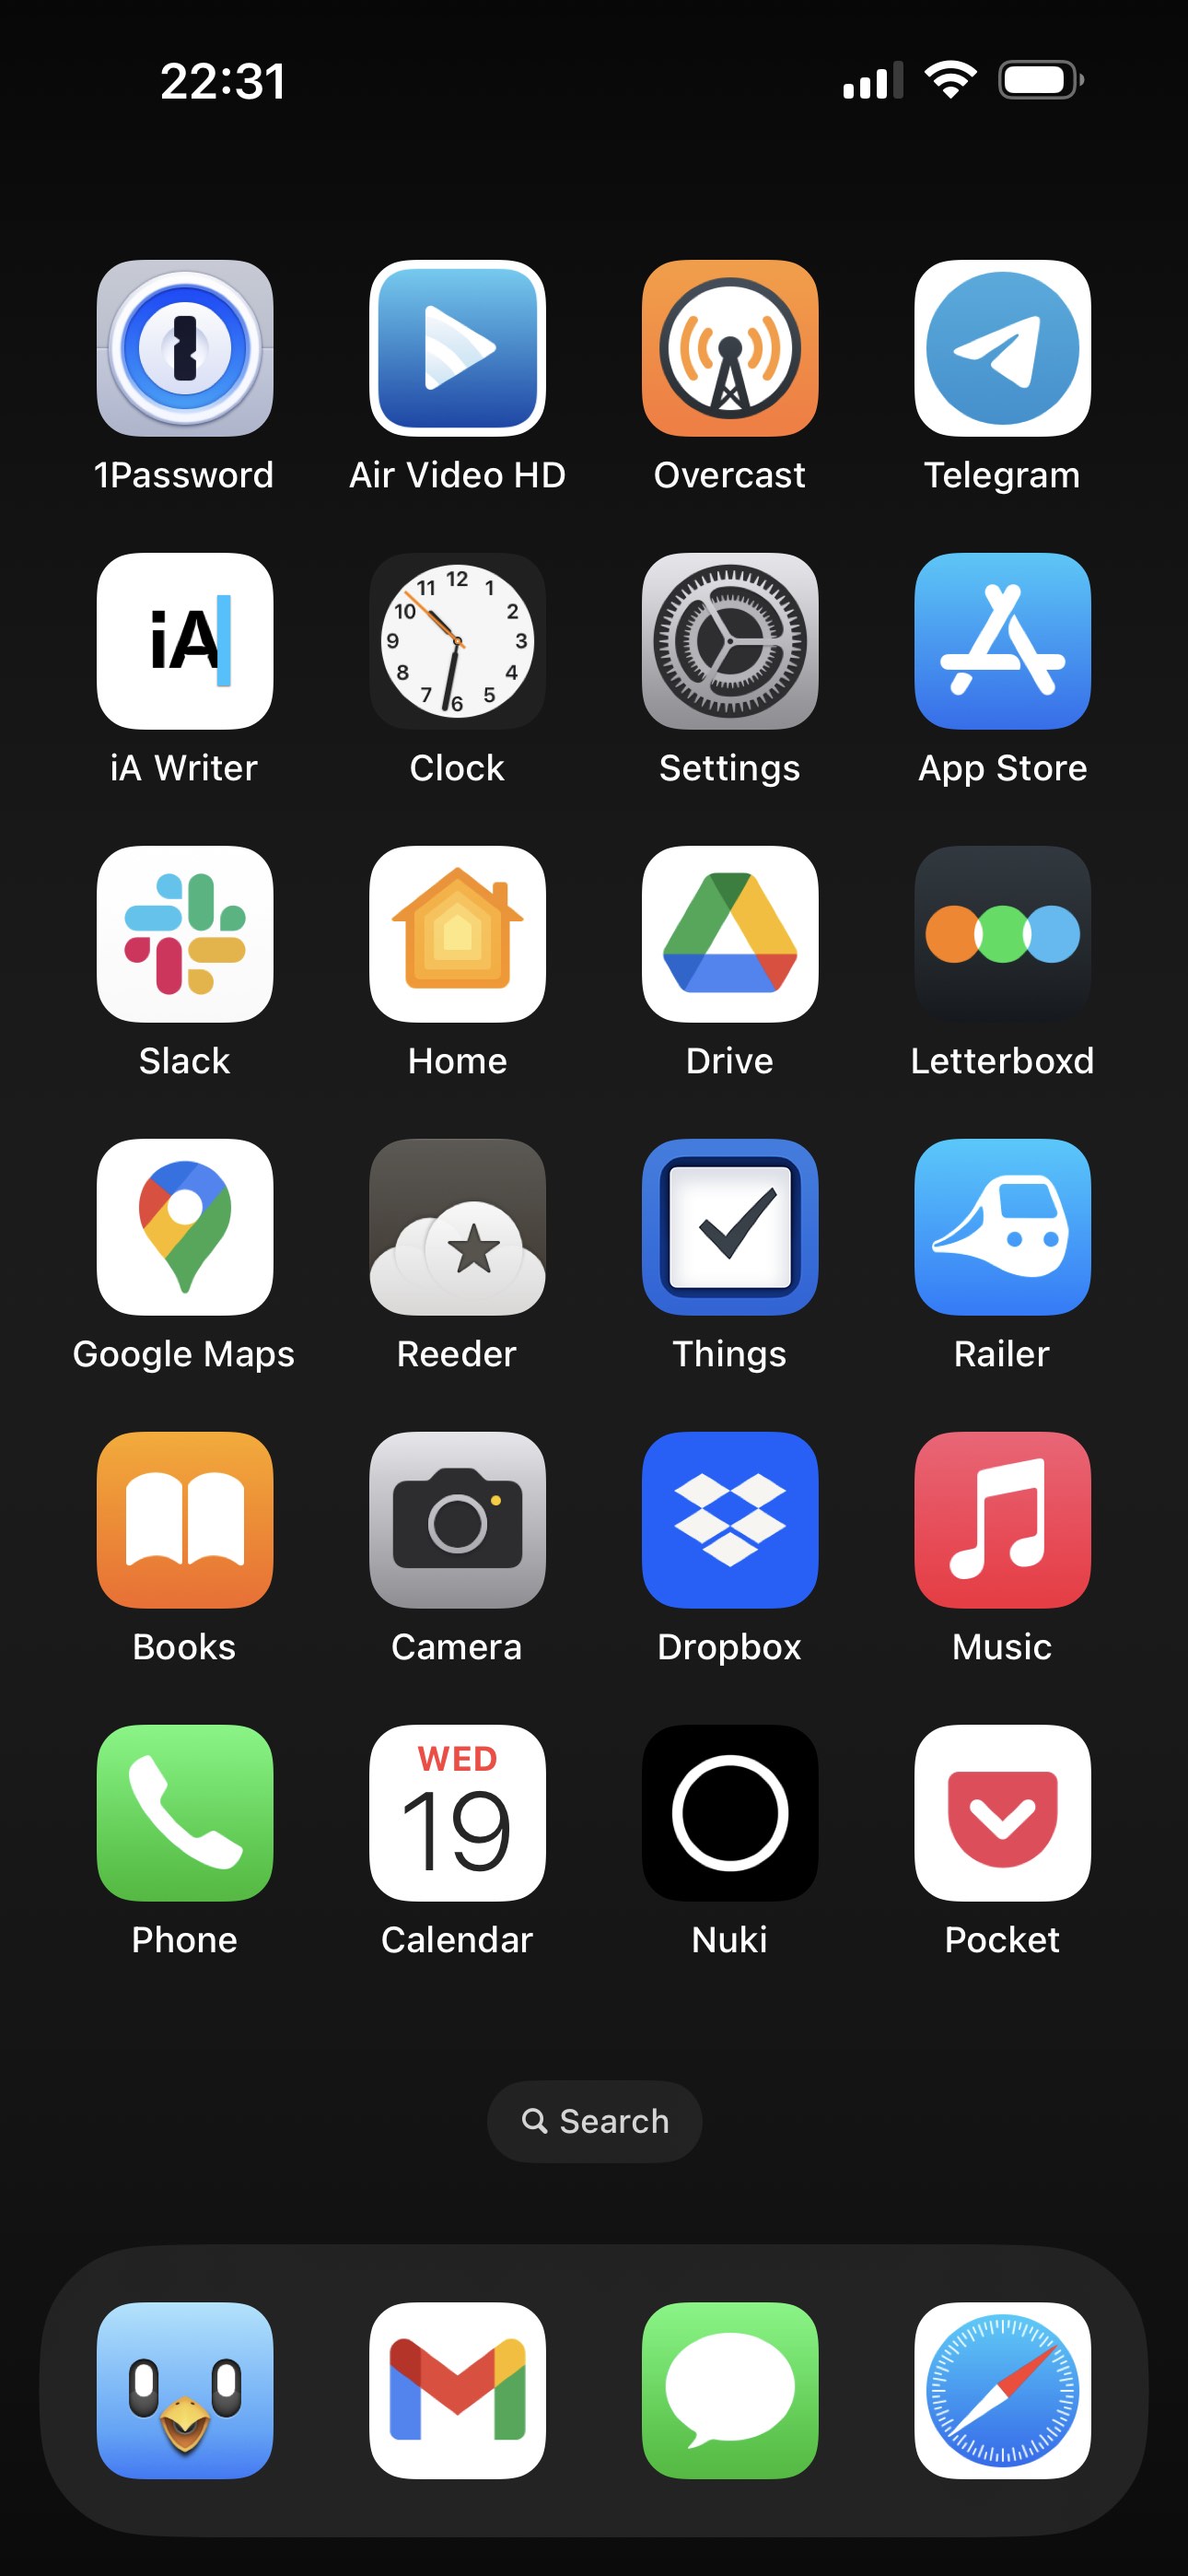
Here’s a screenshot of my current homescreen.

I don’t use folders and try to keep the number of installed apps to a minimum. There’s also just one screen with apps, all the other apps are opened via search. Most of my time is spent in Safari, Pocket, Reeder and Tweetbot. Notifications and notification badges are turned off for all apps except Messages.

Here’s a rundown of some of the apps currently on the homescreen:

  • 1Password: my favourite password manager
  • Air Video HD: I find it much more reliable to sync videos to this one the stock Videos app. No iTunes needed.
  • Overcast: an excellent podcast client
  • Telegram: most of my geeky friends are on there
  • iA writer: to quickly write some stuff or take notes on the go
  • Clock: tick, tock, …
  • Home: my home is full off HomeKit controlled lights, which I switch on/off using this app
  • Reeder: an RSS client
  • Slack: for communicating with my team and some other communities
  • Letterboxd: a pretty imdb. I use it to log every movie I watch
  • Railer: to easily look up the train schedules in Belgium
  • Pocket: my favourite read later service
  • Things: contains my to dos
  • Nuki: this controls the electronic doorlock at our office

There’s no other screens setup. I use the App Library to hunt down any app I want to use that isn’t on the home screen.

Hardware

Here’s a picture of the desk I have at home.

You might be surprised to see a lot of synths there. Next to programming, my big passion is recording music under my artist name Kobus. You can find my music on Spotify and Apple Music.

Behind my desk there’s a Hue Light Strip. When working in the evening, I like to set it to a moody color.

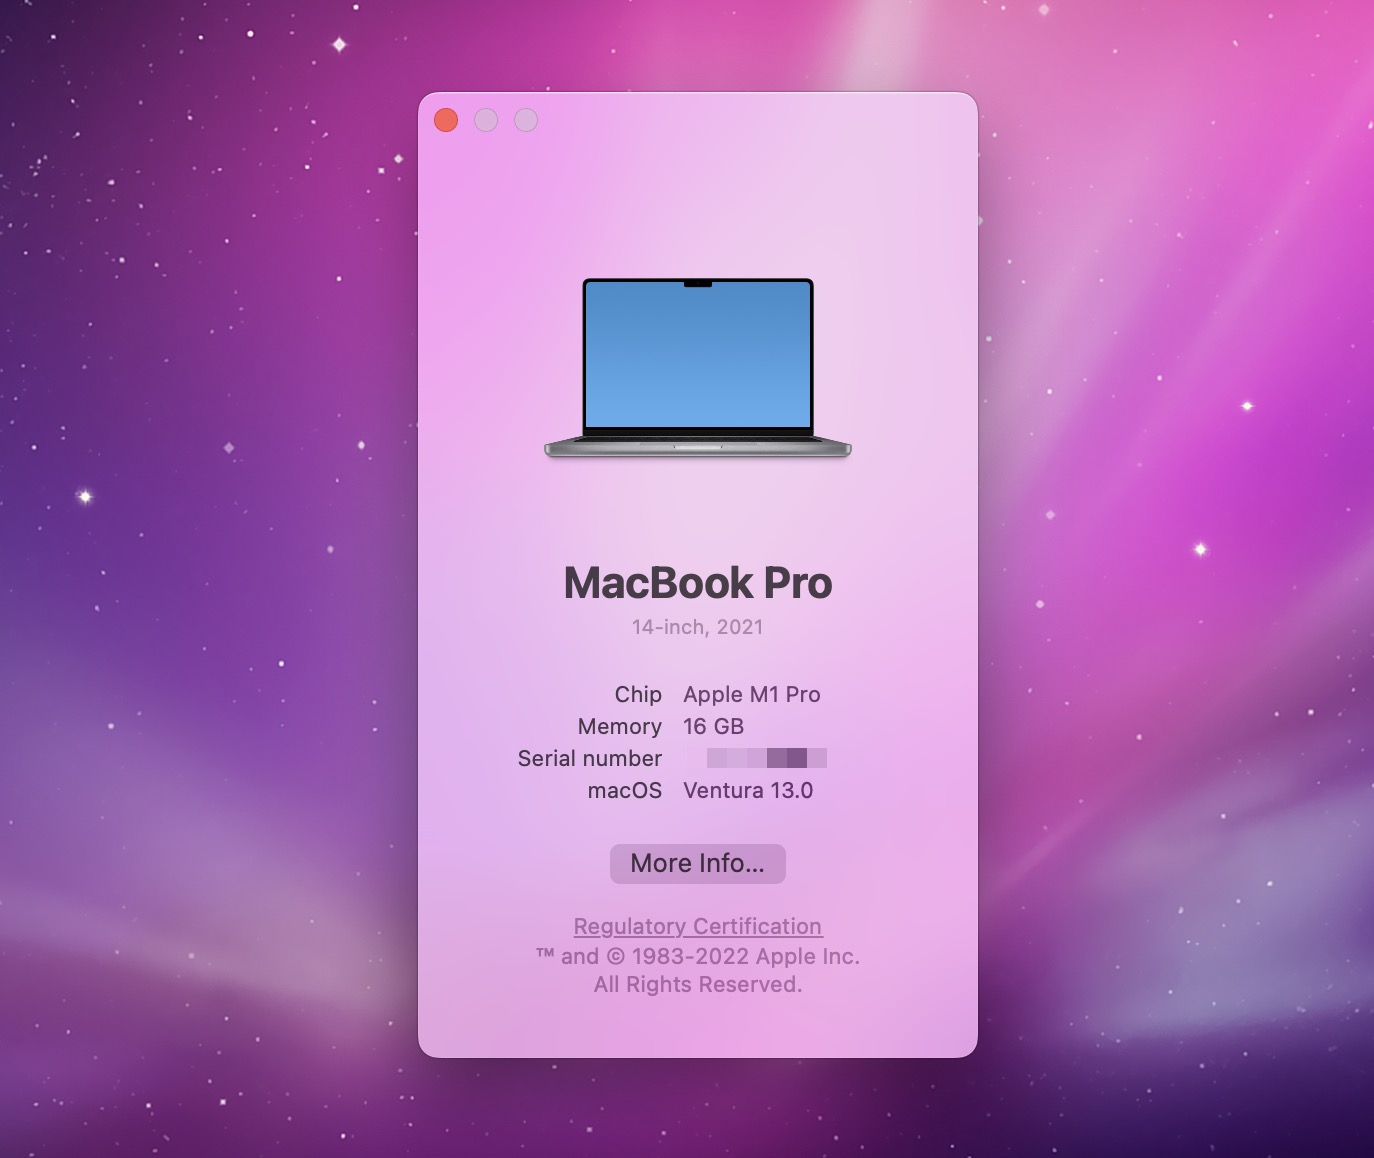
I’m using a MacBook Pro 14″ with an Apple M1 Pro processor, 16GB of RAM and 1T hard disk.

I usually work in closed-display mode. To save some desk space, I use a beautiful vertical Mac stand: the Twelve South BookArc.

Here’s the hardware that is on my desk

As a webcam I use a Sony a6400 camera with a Sigma 16mm 1.4 lens. It is connected to my computer via an Elgato Cam Link 4K. The camera also mounted on a Rode PSA1 boom arm, and when I’m not using it, the camera is behind my monitor.

To connect all external hardware to my MacBook I got a CalDigit TS3 plus. This allows me to connect the webcam / mic / USB Piano keyboard, and more to my MacBook with a single USB-C cable. That cable also charges the MacBook. Less clutter on the desktop, means I have more headspace, so I’m pretty happy with the TS3 plus.

I play music on a HomePod stereo pair. To stay in “the zone” when commuting and at the office I put on my QuietComfort 35 wireless headphones.

My current phone is an iPhone 14 Pro Max with 128 GB of storage.

Misc

  • At Spatie, we use Google Workspace to handle mail and calendars
  • High level planning at the company is done using Float
  • All servers I work on are provisioned by Forge.
  • The performance and uptime of those servers are monitored via Oh Dear.
  • To track exceptions in production, we use Flare
  • To send mails to our audience that is interested in our paid products, we use our homegrown Mailcoach.

If you want to know some more tools we use at Spatie, go over to the uses page on our company website.

In closing

Every year, I write a new version of the post. Here’s the 2021 version.

If you have any questions on any of these apps and services, feel free to contact me on Twitter.

Laravel News Links

Laravel Datetime to Carbon Automatically: $dates or $casts

https://laraveldaily.com/storage/128/Untitled-design-(40).png

In Laravel, there’s a convenient way to transform date/time DB fields to Carbon objects automatically. In fact, there are two ways, let me tell you about both.

Inconvenience: With No Casting

Imagine you have a DB field projects.activated_at with values in the DB like “2022-10-05” or “2021-12-23”, so a typical YYYY-MM-DD.

What if you want to show them in another format to users, like “m/d/Y”?

You need to convert them every time, right? And Carbon library would help, something like this:

1Carbon::createFromFormat('Y-m-d', $project->activated_at)

2 ->format('m/d/Y');

So, you need to create a Carbon object yourself, and then you can convert it to whatever you want.

Every time in every place where you want to show that value.

Wouldn’t it be cool to have something like this?

1$project->activated_at->format('m/d/Y')?

So, meet Eloquent $casts and $dates.


$casts and $dates Properties

For long years in Laravel, there has been a property that you can define on Eloquent models, which fields should be auto-transformed into Carbon objects:

1class Project extends Model {

2 

3 protected $dates = [

4 'activated_at',

5 'deactivated_at',

6 // ...

7 ];

8 

9}

And then, everywhere you use this value, in Blade or elsewhere, you get a Carbon object and can use it like in the example above: $project->activated_at->format('m/d/Y')

But a bit later, Laravel introduced a more global concept of Casting, auto-transforming any field to any of the available types, and date/time became just one single example of a broader casting topic.

From then, the officially recommended behavior became to auto-Carbon the dates with $casts property, instead of the older $dates:

1class Project extends Model {

2 

3 protected $casts = [

4 'activated_at' => 'date',

5 'deactivated_at' => 'date',

6 ];

7 

8}

Notice: the older $dates property also still works, at least at the time of writing this article.

Now, the new casting property comes with an additional benefit: you can also provide the format inside the property, like this:

1protected $casts = [

2 'activated_at' => 'date:m/d/Y',

3 'deactivated_at' => 'date:m/d/Y',

4];

It will not auto-transform the $project->activated_at to the correct format when you access it, but it will do it when you use ->toArray() or ->toJSON() methods on the model.

1$project->activated_at;

2// Value: Illuminate\Support\Carbon @1664928000 {#5836

3// date: 2022-10-05 00:00:00.0 UTC (+00:00),

4// }

5 

6$project->toArray()['activated_at'];

7// Value: 05/10/2022

You can read more about date casting in the official docs.

Laravel News Links

Backyard Squirrel Maze 3.0

https://theawesomer.com/photos/2022/10/mark_rober_squirrel_olympics_t.jpg

Backyard Squirrel Maze 3.0

Link

Mark Rober and his backyard buddies are back. Not only are the obstacles more difficult than ever, but now it’s a squirrel vs. squirrel, Olympic-style competition. Who will take home the nutty grand prize? Will it be Phat Gus, Augustine, Rick, or Marty? Hit play and find out.

The Awesomer

Laravel’s Safety Mechanisms

https://planetscale.com/images/blog/content/laravel-safety-mechanisms/laravel-safety-mechanisms-social.png

Laravel is a mature PHP web application framework with built-in support for almost everything modern applications need. But we’re not going to cover all of those features here! Instead, we’ll look at a topic that doesn’t get talked about nearly enough: Laravel’s many safety features that can help prevent painful mistakes.

We’ll take a look at the following safety mechanisms:

Each of these protections is configurable, and we’ll recommend how and when to configure them.

Many ORMs, Eloquent included, offer a “feature“ that allows you to lazy load a model’s relationship. Lazy loading is convenient because you don’t have to think upfront about which relationships to select from the database, but it often leads to a performance nightmare known as the “N+1 problem.”

The N+1 problem is one of the most common problems people run into when using an ORM, and it’s often a reason people cite for avoiding ORMs altogether. That’s a bit of an overcorrection, as we can simply disable lazy loading altogether!

Imagine a naive listing of blog posts. We’ll show the blog’s title and the author’s name.

$posts = Post::all();

foreach($posts as $post) {
    // `author` is lazy loaded.
    echo $post->title . ' - ' . $post->author->name;
}

This is an example of the N+1 problem! The first line selects all of the blog posts. Then, for every single post, we run another query to get the post’s author.

SELECT * FROM posts;
SELECT * FROM users WHERE user_id = 1;
SELECT * FROM users WHERE user_id = 2;
SELECT * FROM users WHERE user_id = 3;
SELECT * FROM users WHERE user_id = 4;
SELECT * FROM users WHERE user_id = 5;

The “N+1“ notation comes from the fact that an additional query is run for each of the n-many records returned by the first query. One initial query plus n-many more. N+1.

Even though each individual query is probably quite fast, in aggregate, you can see a huge performance penalty. And because each individual query is fast, this isn’t something that would show up in your slow query log!

With Laravel, you can use the preventLazyLoading method on the Model class to disable lazy loading altogether. Problem solved! Truly, it is that simple.

You can add the method in your AppServiceProvider:

use Illuminate\Database\Eloquent\Model;

public function boot()
{
    Model::preventLazyLoading();
}

Every attempt to lazy load a relationship will now throw a LazyLoadingViolationException exception. Instead of lazy loading, you’ll need to explicitly eager load your relationships.

// Eager load the `author` relationship.
$posts = Post::with('author')->get();

foreach($posts as $post) {
    // `author` is already loaded.
    echo $post->title . ' - ' . $post->author->name;
}

Lazy loading relationships does not affect the correctness of your application, merely the performance of it. Ideally, all the relations you need are eager loaded, but if not, it simply falls through and lazy loads the required relationships.

For that reason, we recommend disallowing lazy loading in every environment except production. Hopefully, all lazy loads will be caught in local development or testing, but in the rare case that a lazy load makes its way into production, your app will continue to work just fine, if a bit slower.

To prevent lazy loading in non-production environments, you can add this to your AppServiceProvider:

use Illuminate\Database\Eloquent\Model;

public function boot()
{
    // Prevent lazy loading, but only when the app is not in production.
    Model::preventLazyLoading(!$this->app->isProduction());
}

If you want to log errant lazy loading in production, you can register your own lazy load violation handler using the static handleLazyLoadingViolationUsing method on the Model class.

In the example below, we will disallow lazy loading in every environment, but in production, we log the violation rather than throwing an exception. This ensures that our application continues to work as intended, but we can go back and fix our lazy load mistakes.

use Illuminate\Database\Eloquent\Model;

public function boot()
{
    // Prevent lazy loading always.
    Model::preventLazyLoading();

    // But in production, log the violation instead of throwing an exception.
    if ($this->app->isProduction()) {
        Model::handleLazyLoadingViolationUsing(function ($model, $relation) {
            $class = get_class($model);

            info("Attempted to lazy load [{$relation}] on model [{$class}].");
        });
    }
}

In almost every book about SQL, one of the performance recommendations that you’ll see is to “select only the columns that you need.” It’s good advice! You only want the database to fetch and return the data that you’re actually going to use because everything else is simply discarded.

Until recently, this has been a tricky (and sometimes dangerous!) recommendation to follow in Laravel.

Laravel’s Eloquent models are an implementation of the active record pattern, where each instance of a model is backed by a row in the database.

To retrieve the user with an ID of 1, you can use Eloquent’s User::find() method, which runs the following SQL query:

SELECT * FROM users WHERE id = 1;

Your model will be fully hydrated, meaning that every column from the database will be present in the in-memory model representation:

$user = User::find(1);
// -> SELECT * FROM users where id = 1;

// Fully hydrated model, every column is present as an attribute.

// App\User {#5522
//   id: 1,
//   name: "Aaron",
//   email: "aaron@example.com",
//   is_admin: 0,
//   is_blocked: 0,
//   created_at: "1989-02-14 08:43:00",
//   updated_at: "2022-10-19 12:45:12",
// }

Selecting all of the columns, in this case, is probably fine! But if your users table is extremely wide, has LONGTEXT or BLOB columns, or you’re selecting hundreds or thousands of rows, you probably want to limit the columns to just the ones you plan on using.

You can control which columns are selected using the select method, which leads to a partially hydrated model. The in-memory model contains a subset of attributes from the row in the database.

$user = User::select('id', 'name')->find(1);
// -> SELECT id, name FROM users where id = 1;

// Partially hydrated model, only some attributes are present.
// App\User {
//   id: 1,
//   name: "Aaron",
// }

Here’s where things get dangerous.

If you access an attribute that was not selected from the database, Laravel simply returns null. Your code will think an attribute is null, but really it just wasn’t selected from the database. It might not be null at all!

In the following example, a model is partially hydrated with only id and name, then the is_blocked attribute is accessed further down. Because is_blocked was never selected from the database, the attribute’s value will always be null, treating every blocked user as if they aren’t blocked.

// Partially hydrate a model.
$user = User::select('id', 'name')->find(1);

// is_blocked was not selected! It will always be `null`.
if ($user->is_blocked) {
    throw new \Illuminate\Auth\Access\AuthorizationException;
}

This exact example probably (probably) wouldn’t happen, but when data retrieval and usage are spread across multiple files, something like this will happen. There is no warning anywhere that a model is partially hydrated, and as requirements evolve, you may end up accessing attributes that were never loaded.

With extreme care and 100% test coverage, you might be able to prevent this from ever happening, but it’s still a loaded gun pointed straight at your foot. For that reason, we’ve recommended never modifying the SELECT statement that populates an Eloquent model.

Until now!

The release of Laravel 9.35.0 brings us a new safety feature to prevent this from happening.

In 9.35.0 you can call Model::preventAccessingMissingAttributes() to prevent accessing attributes that were not loaded from the database. Instead of returning null, an exception will be thrown, and everything will grind to a halt. This is a very good thing.

You can enable this new behavior by adding this to your AppServiceProvider:

use Illuminate\Database\Eloquent\Model;

public function boot()
{
    Model::preventAccessingMissingAttributes();
}

Notice that we enabled this protection across the board, regardless of environment! You could enable this protection only in local development, but the most important place for it to be enabled is production.

Unlike N+1 protection, preventing access to missing attributes is not a performance issue, it’s an application correctness issue. Enabling it prevents your application from behaving in unexpected and incorrect ways.

Accessing attributes that weren’t selected could lead to all sorts of catastrophic behavior:

  • Data loss
  • Overwriting data
  • Treating free users as paid
  • Treating paid users as free
  • Sending factually incorrect emails
  • Sending the same email dozens of times

The list goes on and on.

While throwing exceptions in production is inconvenient, it’s much worse to have silent failures that could lead to data corruption. Better to face the exceptions and fix them.

This is a continuation of the previous section and another plea to turn on Model::preventAccessingMissingAttributes() in your production environments.

We just spent a long time looking at how preventAccessingMissingAttributes() protects you from partially hydrated models, but there are two other scenarios where this method can protect you!

The first is typos.

Continuing with the is_blocked scenario from above, if you accidentally misspell “blocked,” Laravel will just return null instead of letting you know about your mistake.

// Fully hydrated model.
$user = User::find(1);

// Oops! Spelled "blocked" wrong. Everyone gets through!
if ($user->is_blokced) {
    throw new \Illuminate\Auth\Access\AuthorizationException;
}

This particular example would likely be caught in testing, but why risk it?

The second scenario is renamed columns. If your column started out named blocked and then later you decide it makes more sense for it to be named is_blocked, you’d need to make sure to go back through your code and update every reference to blocked. And if you miss one? It just becomes null.

// Fully hydrated model.
$user = User::find(1);

// Oops! Used the old name. Everyone gets through!
if ($user->blocked) {
    throw new \Illuminate\Auth\Access\AuthorizationException;
}

Turning on Model::preventAccessingMissingAttributes() would turn this silent failure into an explicit one.

A mass assignment is a vulnerability that allows users to set attributes that they shouldn’t be allowed to set.

For example, if you have an is_admin property, you don’t want users to be able to arbitrarily upgrade themselves to an admin! Laravel prevents this by default, requiring you to explicitly allow attributes to be mass assigned.

In this example, the only attributes that can be mass assigned are name and email.

class User extends Model
{
    protected $fillable = [
        'name',
        'email',
    ];
}

It doesn’t matter how many attributes you pass in when creating or saving the model. Only name and email will get saved:

// It doesn't matter what the user passed in, only `name`
// and `email` are updated. `is_admin` is discarded.
User::find(1)->update([
    'name' => 'Aaron',
    'email' => 'aaron@example.com',
    'is_admin' => true
]);

Many Laravel developers opt to turn off mass assignment protection altogether and rely on request validation to exclude attributes. That’s totally reasonable! You just need to ensure you never pass $request->all() into your model persistence methods.

You can add this to your AppServiceProvider to turn off mass assignment protection altogether.

use Illuminate\Database\Eloquent\Model;

public function boot()
{
    // No mass assignment protection at all.
    Model::unguard();
}

Remember: you’re taking a risk when you unguard your models! Be sure to never blindly pass in all of the request data.

// Only update `name` and `email`.
User::find(1)->update($request->only(['name', 'email']));

If you decide to keep mass assignment protection on, there is one other method that you’ll find helpful: the Model::preventSilentlyDiscardingAttributes() method.

In the case where your fillable attributes are only name and email, and you try to update birthday, then birthday will be silently discarded with no warning.

// We're trying to update `birthday`, but it won't persist!
User::find(1)->update([
    'name' => 'Aaron',
    'email' => 'aaron@example.com',
    'birthday' => '1989-02-14'
]);

The birthday attribute gets thrown away because it’s not fillable. This is mass assignment protection in action, and it’s what we want! It’s just a little bit confusing because it’s silent instead of explicit.

Laravel now provides a way to make that silent error explicit:

use Illuminate\Database\Eloquent\Model;

public function boot()
{
    // Warn us when we try to set an unfillable property.
    Model::preventSilentlyDiscardingAttributes();
}

Instead of silently discarding the attributes, a MassAssignmentException will be thrown, and you’ll immediately know what’s happening.

This protection is very similar to the preventAccessingMissingAttributes protection. It is primarily about application correctness versus application performance. If you’re expecting that data is saved, but it is not saved, that’s an exception and should never be silently ignored, regardless of environment.

For that reason, we recommend keeping this protection on in all environments!

use Illuminate\Database\Eloquent\Model;

public function boot()
{
    // Warn us when we try to set an unfillable property,
    // in every environment!
    Model::preventSilentlyDiscardingAttributes();
}

Laravel 9.35.0 provides a helper method called Model::shouldBeStrict() that controls the three Eloquent “strictness” settings:

  • Model::preventLazyLoading()
  • Model::preventSilentlyDiscardingAttributes()
  • Model::preventsAccessingMissingAttributes()

The idea here is that you could put the shouldBeStrict() call in your AppServiceProvider and turn all three settings on or off with one method call. Let’s quickly recap our recommendations for each setting:

  • preventLazyLoading: Primarily for application performance. Off for production, on locally. (Unless you’re logging violations in production.)
  • preventSilentlyDiscardingAttributes: Primarily for application correctness. On everywhere.
  • preventsAccessingMissingAttributes: Primarily for application correctness. On everywhere.

Considering this, if you’re planning on logging lazy loading violations in production, you could configure your AppServiceProvider like this:

use Illuminate\Database\Eloquent\Model;

public function boot()
{
    // Everything strict, all the time.
    Model::shouldBeStrict();

    // In production, merely log lazy loading violations.
    if ($this->app->isProduction()) {
        Model::handleLazyLoadingViolationUsing(function ($model, $relation) {
            $class = get_class($model);

            info("Attempted to lazy load [{$relation}] on model [{$class}].");
        });
    }
}

If you’re not planning on logging lazy load violations (which is a reasonable decision!), then you would configure your settings this way:

use Illuminate\Database\Eloquent\Model;

public function boot()
{
    // As these are concerned with application correctness,
    // leave them enabled all the time.
    Model::preventAccessingMissingAttributes();
    Model::preventSilentlyDiscardingAttributes();

    // Since this is a performance concern only, don't halt
    // production for violations.
    Model::preventLazyLoading(!$this->app->isProduction());
}

A polymorphic relationship is a special type of relationship that allows many types of parent models to share a single type of child model.

For example, a blog post and a user may both have images, and instead of creating a separate image model for each, you can create a polymorphic relationship. This lets you have a single Image model that serves both the Post and User models. In this example, the Image is the polymorphic relationship.

In the images table, you’ll see two columns that Laravel uses to locate the parent model: an imageable_type and an imageable_id column.

The imageable_type column stores the model type in the form of the fully qualified class name (FQCN), and the imageable_id is the model’s primary key.

mysql> select * from images;
+----+-------------+-----------------+------------------------------+
| id | imageable_id | imageable_type | url                          |
+----+-------------+-----------------+------------------------------+
|  1 |           1 | App\Post        | https://example.com/1001.jpg |
|  2 |           2 | App\Post        | https://example.com/1002.jpg |
|  3 |           3 | App\Post        | https://example.com/1003.jpg |
|  4 |       22001 | App\User        | https://example.com/1004.jpg |
|  5 |       22000 | App\User        | https://example.com/1005.jpg |
|  6 |       22002 | App\User        | https://example.com/1006.jpg |
|  7 |           4 | App\Post        | https://example.com/1007.jpg |
|  8 |           5 | App\Post        | https://example.com/1008.jpg |
|  9 |       22003 | App\User        | https://example.com/1009.jpg |
| 10 |       22004 | App\User        | https://example.com/1010.jpg |
+----+-------------+-----------------+------------------------------+

This is Laravel’s default behavior, but it’s not a good practice to store FQCNs in your database. Tying the data in your database to the particular class name is very brittle and can lead to unforeseen breakages if you ever refactor your classes.

To prevent this, Laravel gives us a way to control what values end up in the database with the Relation::morphMap method. Using this method, you can give every morphed class a unique key that never changes, even if the class name does change:

use Illuminate\Database\Eloquent\Relations;

public function boot()
{
    Relation::morphMap([
        'user' => \App\User::class,
        'post' => \App\Post::class,
    ]);
}

Now we’ve broken the association between our class name and the data stored in the database. Instead of seeing \App\User in the database, we’ll see user. A good start!

We’re still exposed to one potential problem, though: this mapping is not required. We could create a new Comment model and forget to add it to the morphMap, and Laravel will default to the FQCN, leaving us with a bit of a mess.

mysql> select * from images;
+----+-------------+-----------------+------------------------------+
| id | imageable_id | imageable_type | url                          |
+----+-------------+-----------------+------------------------------+
|  1 |           1 | post            | https://example.com/1001.jpg |
|  2 |           2 | post            | https://example.com/1002.jpg |
| .. |         ... | ....            |  . . . . . . . . . . . . . . |
| 10 |       22004 | user            | https://example.com/1010.jpg |
| 11 |          10 | App\Comment     | https://example.com/1011.jpg |
| 12 |          11 | App\Comment     | https://example.com/1012.jpg |
| 13 |          12 | App\Comment     | https://example.com/1013.jpg |
+----+-------------+-----------------+------------------------------+

Some of our imageable_type values are correctly decoupled, but because we forgot to map the App\Comment model to a key, the FQCN still ends up in the database!

Laravel has our back (again) by providing us a method to enforce that every morphed model is mapped. You can change your morphMap call to an enforceMorphMap call, and the fall-through-to-FQCN behavior is disabled.

use Illuminate\Database\Eloquent\Relations;

public function boot()
{
    // Enforce a morph map instead of making it optional.
    Relation::enforceMorphMap([
        'user' => \App\User::class,
        'post' => \App\Post::class,
    ]);
}

Now, if you try to use a new morph that you haven’t mapped, you’ll be greeted with a ClassMorphViolationException, which you can fix before the bad data makes it to the database.

The most pernicious failures are the silent ones; it’s always better to have explicit failures!

While testing your application, it’s common to fake outgoing requests to third parties so you can control the various testing scenarios and not spam your providers.

Laravel has offered us a way to do that for a long time by calling Http::fake(), which fakes all outgoing HTTP requests. Most often, though, you want to fake a specific request and provide a response:

use Illuminate\Support\Facades\Http;

// Fake GitHub requests only.
Http::fake([
    'github.com/*' => Http::response(['user_id' => '1234'], 200)
]);

In this scenario, outgoing HTTP requests to any other domain will not be faked and will be sent out as regular HTTP requests. You may not notice this until you realize that specific tests are slow or you start hitting rate limits.

Laravel 9.12.0 introduced the preventStrayRequests method to protect you from making errant requests.

use Illuminate\Support\Facades\Http;

// Don't let any requests go out.
Http::preventStrayRequests();

// Fake GitHub requests only.
Http::fake([
    'github.com/*' => Http::response(['user_id' => '1234'], 200)
]);

// Not faked, so an exception is thrown.
Http::get('https://planetscale.com');

This is another good protection to always enable. If your tests need to reach external services, you should explicitly allow that. If you have a base test class, I recommend putting it in the setUp method of that base class:

protected function setUp(): void
{
    parent::setUp();

    Http::preventStrayRequests();
}

In any tests where you need to allow non-mocked requests to go out, you can re-enable that by calling Http::allowStrayRequests() in that particular test.

These last few methods aren’t about preventing discrete, incorrect behaviors but rather monitoring the entire application. These methods can be helpful if you don’t have an application performance monitoring tool.

Long database queries

Laravel 9.18.0 introduced the DB::whenQueryingForLongerThan() method, which allows you to run a callback when cumulative runtime across all of your queries exceeds a certain threshold.

use Illuminate\Support\Facades\DB;

public function boot()
{
    // Log a warning if we spend more than a total of 2000ms querying.
    DB::whenQueryingForLongerThan(2000, function (Connection $connection) {
        Log::warning("Database queries exceeded 2 seconds on {$connection->getName()}");
    });
}

If you want to run a callback when a single query takes a long time, you can do that with a DB::listen callback.

use Illuminate\Support\Facades\DB;

public function boot()
{
    // Log a warning if we spend more than 1000ms on a single query.
    DB::listen(function ($query) {
        if ($query->time > 1000) {
            Log::warning("An individual database query exceeded 1 second.", [
                'sql' => $query->sql
            ]);
        }
    });
}

Again, these are helpful methods if you do not have an APM tool or a query monitoring tool like PlanetScale’s Query Insights.

Request and command lifecycle

Similar to long-running query monitoring, you can monitor when your request or command lifecycle takes longer than a certain threshold. Both of these methods are available beginning with Laravel 9.31.0.

use Illuminate\Contracts\Http\Kernel as HttpKernel;
use Illuminate\Contracts\Console\Kernel as ConsoleKernel;

public function boot()
{
    if ($this->app->runningInConsole()) {
        // Log slow commands.
        $this->app[ConsoleKernel::class]->whenCommandLifecycleIsLongerThan(
            5000,
            function ($startedAt, $input, $status) {
                Log::warning("A command took longer than 5 seconds.");
            }
        );
    } else {
        // Log slow requests.
        $this->app[HttpKernel::class]->whenRequestLifecycleIsLongerThan(
            5000,
            function ($startedAt, $request, $response) {
                Log::warning("A request took longer than 5 seconds.");
            }
        );
    }
}

Many of these Laravel safety features take implicit behaviors and turn them into explicit exceptions. In the early days of a project, it’s easy to keep all of the implicit behaviors in your head, but as time goes on, it’s easy to forget one or two of them and end up in a situation where your application is not behaving as you’d expect.

You have enough things to worry about. Take some off your plate by enabling these protections!

Want a powerful and performant database that doesn’t slow you down?

Laravel News Links