We should create a layout file to reduce the amount of HTML duplication from the previous episode….Laracasts
Why Russia’s Weapons Suck
http://img.youtube.com/vi/bKEryR7jPnQ/0.jpg
We’ve covered some of this before, but here’s a nice roundup of why Russia’s major weapons systems suck. It’s a handy tour through the world of over-promised, under-performing vaporwear.

It’s always safest to assume that the latest Russian wunderwaffen is vaporware unless proven otherwise.
Lawrence Person’s BattleSwarm Blog
Cognition Emerges From Stealth To Launch AI Software Engineer ‘Devin’
Longtime Slashdot reader ahbond shares a report from VentureBeat: Today, Cognition, a recently formed AI startup backed by Peter Thiel’s Founders Fund and tech industry leaders including former Twitter executive Elad Gil and Doordash co-founder Tony Xu, announced a fully autonomous AI software engineer called "Devin." While there are multiple coding assistants out there, including the famous Github Copilot, Devin is said to stand out from the crowd with its ability to handle entire development projects end-to-end, right from writing the code and fixing the bugs associated with it to final execution. This is the first offering of this kind and even capable of handling projects on Upwork, the startup has demonstrated. […]
In a blog post today on Cognition’s website, Scott Wu, the founder and CEO of Cognition and an award-winning sports coder, explained Devin can access common developer tools, including its own shell, code editor and browser, within a sandboxed compute environment to plan and execute complex engineering tasks requiring thousands of decisions. The human user simply types a natural language prompt into Devin’s chatbot style interface, and the AI software engineer takes it from there, developing a detailed, step-by-step plan to tackle the problem. It then begins the project using its developer tools, just like how a human would use them, writing its own code, fixing issues, testing and reporting on its progress in real-time, allowing the user to keep an eye on everything as it works. […]
According to demos shared by Wu, Devin is capable of handling a range of tasks in its current form. This includes common engineering projects like deploying and improving apps/websites end-to-end and finding and fixing bugs in codebases to more complex things like setting up fine-tuning for a large language model using the link to a research repository on GitHub or learning how to use unfamiliar technologies. In one case, it learned from a blog post how to run the code to produce images with concealed messages. Meanwhile, in another, it handled an Upwork project to run a computer vision model by writing and debugging the code for it. In the SWE-bench test, which challenges AI assistants with GitHub issues from real-world open-source projects, the AI software engineer was able to correctly resolve 13.86% of the cases end-to-end — without any assistance from humans. In comparison, Claude 2 could resolve just 4.80% while SWE-Llama-13b and GPT-4 could handle 3.97% and 1.74% of the issues, respectively. All these models even required assistance, where they were told which file had to be fixed. Currently, Devin is available only to a select few customers. Bloomberg journalist Ashlee Vance wrote a piece about his experience using it here.
"The Doom of Man is at hand," captions Slashdot reader ahbond. "It will start with the low-hanging Jira tickets, and in a year or two, able to handle 99% of them. In the short term, software engineers may become like bot farmers, herding 10-1000 bots writing code, etc. Welcome to the future."
Read more of this story at Slashdot.
Slashdot
Meet BFA at Open Seasons Sportsman’s Expo March 15-17
https://www.buckeyefirearms.org/sites/buckeyefirearms.org/files/styles/slideshow/public/field/image/sportsman-expo.jpg?itok=IlX0PfyA

Leaders of the Buckeye Firearms Association will be on hand this weekend at the Open Seasons Sportsman’s Expo.
The weekend-long expo, to be held inside the Bricker Building at the Ohio Expo Center & State Fair, will feature the latest in outdoor gear from national and regional exhibitors, hands-on demonstration opportunities, numerous entertainment and educational seminars with industry experts, and special guests.
Other attractions include deer exhibits, archery trick shooting, field-to-fork cooking demos, and a 3D archery competition.
Look for BFA leaders at booth 514, between Benning Distributing and Deer IQ.
Event hours are 2 to 7 p.m. Friday, 9 a.m. to 6 p.m. Saturday, and 9 a.m. to 3 p.m. Sunday. The expo center is at 717 E. 17th Ave. in Columbus.
For ticket and other information, visit openseasonsportsmansexpo.com/ohio.

Buckeye Firearms Association
Blue lasers/Camera pocket guide/Earth in real time
Sign up here to get Recomendo a week early in your inbox.
Blue lasers
I spend too many hours a day watching YouTubes. Many of the channels I subscribe to produce content as good as or better than anything produced by PBS, cable TV, and your average documentary. For free. For a fantastic example of world class content on YouTube watch this Veritasium episode on Blue Lasers. Turns out blue lasers were “impossible” to create, but after decades of an insane amount of work by one crazy guy in Japan, they are now possible and all the cheap screens we have in our lives now are due to him. Veritasium tells this amazing human story, with heaps of illuminating technical detail on why blue lasers were nearly impossible and how they work, all in a brilliant 33 minutes. — KK
Pocket guide to understanding a camera
I gave my wife a camera for Christmas. It has an auto-setting, but she wanted to learn how to operate it manually. We were initially puzzled by terms like ISO, shutter speed, and aperture. Then I stumbled upon a PDF guide from Humburger Fotospots that demystifies these concepts with simple icons and explanations. I printed it out and stored it in the camera case. — MF
View images of Earth in real time
The GOES Image Viewer hosts the most up-to-date real time images of Earth available to the public. You can view and download satellite images that capture the entire visible disk of Earth and are updated every 10 to 15 minutes. I don’t know much about meteorology or geoscience, but I am an Earth lover, and it’s fascinating to be able to visualize weather patterns on a global scale. — CD
Galactic compass
If you train yourself to pay attention to your surroundings you should be able to immediately point north without too much thinking. The next-level awareness is to point to the center of the galaxy at any time. Because the earth rotates during the day and orbits during the year, this direction changes constantly. You’ll need an app to help you. Galactic Compass is a free iPhone app that does only one thing: points toward the center of the galaxy. — KK
Typography Guide
If you’re like me and would like to know more about fonts than just serif and san-serif, here is a cool guide to check out: The Logo Company’s Guide to Typography and Fonts. It breaks down the entire anatomy of fonts. — CD
Ryan Holiday’s career wisdom
Writer and entrepreneur Ryan Holiday has had a varied career, from Hollywood agent assistant to marketing director for American Apparel. He’s put together a list of 37 pieces of hard-fought career advice that’s useful for anyone who works. Examples:
- Find what nobody else wants to do and do it. Find inefficiency and waste and redundancies. Identify leaks and patches to free up resources for new areas. Produce more than everyone else and give your ideas away.
- Always say less than necessary. Saying less than necessary, not interjecting at every chance we get — this is actually the mark not just of a self-disciplined person, but also a very smart and wise person.
- Your creative output, your personal relationships, and your social life—balancing all three is impossible. You can excel in two if you say no to one. If you can’t, you’ll have none.
- When people compete, somebody loses. So go where you’re the only one. Do what only you can do. Run a race with yourself.
— MF
Cool Tools
Lifesaving Skills Every Gun Owner Should Know
https://www.recoilweb.com/wp-content/uploads/2024/03/RECP-202405-SKILLS-ICT28851.jpg
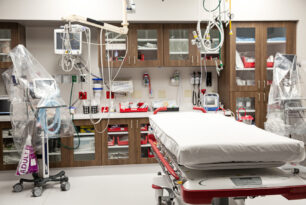
 Ask anyone who carries an IFAK and a gun every day what they use more often — the IFAK always wins. What other skills do you need? Find out.Recoil
Ohio Supreme Court Says ‘Warning Shots’ Count as Self-Defense
https://media.townhall.com/cdn/hodl/ba/images/up/2023/10/gun-pistol-handgun-weapon-firearm-5947350-150×150.jpg
How to Upload Images With Spatie Media Library in Laravel
https://laracoding.com/wp-content/uploads/2024/02/upload-image-spatie-media-library1.png
The Spatie Media Library simplifies the process of handling media files, such as images, in Laravel. It provides features for storage, manipulation, and retrieval of media files. One of the strengths of the package is that you can easily associate uploaded files with your Eloquent Models.
In this guide, you will learn how to integrate the Media Library package into an application. We’ll use it to associate uploaded images with an Eloquent Model, specifically the Product model.
We’ll cover all the required steps like the package installation process, model setup, defining a migration, creating the controller, views and routes to show products, show a product form with upload and storing new products.
Let’s get started!
Step 1: Install Laravel
Begin by creating a new Laravel project using Composer by running:
composer create-project --prefer-dist laravel/laravel product-media-demoStep 2: Install Spatie Media Library
Next, install the Spatie Media Library package via Composer. Run the following command in your terminal:
composer require "spatie/laravel-medialibrary:^11.0.0"After this has finished, we need to run following command to publish a migration the media library requires to work properly:
php artisan vendor:publish --provider="Spatie\MediaLibrary\MediaLibraryServiceProvider" --tag="medialibrary-migrations"What this publishing does is it creates a file like, for example database/migrations/2024_02_26_203939_create_media_table.php . This migration serves to define a table ‘media’ with all the columns predefined as they are required by media library.
Afterwards we need to execute this migration by running:
The Spatie Media Library has now been successfully installed.
Step 3: Create Model and Migration
Now, let’s create a “Product” model along with its migration by running:
php artisan make:model Product -mStep 4: Add Migration Code
Open the generated migration file (database/migrations/YYYY_MM_DD_create_products_table.php) and add additional columns that could be encountered in a real-world product application, such as “name,” “description,” “price,” and “image”:
database/migrations/2024_02_25_184519_create_products_table.php
<?php

use Illuminate\Database\Migrations\Migration;
use Illuminate\Database\Schema\Blueprint;
use Illuminate\Support\Facades\Schema;

return new class extends Migration
{
 public function up()
 {
 Schema::create('products', function (Blueprint $table) {
 $table->id();
 $table->string('name');
 $table->text('description')->nullable();
 $table->decimal('price', 8, 2);
 $table->string('image')->nullable(); // Added for image path
 $table->timestamps();
 });
 }

 public function down()
 {
 Schema::dropIfExists('products');
 }
};
Step 5: Run Migration
Now, run the migration to create the products table in the database:
Step 6: Add Model Code
Open the “Product” model (app\Models\Product.php) and configure it to use the Spatie Media Library trait and implement the HasMedia interface.
app\Models\Product.php
<?php

namespace App\Models;

use Illuminate\Database\Eloquent\Model;
use Spatie\MediaLibrary\HasMedia;
use Spatie\MediaLibrary\InteractsWithMedia;

class Product extends Model implements HasMedia
{
 use InteractsWithMedia;

 protected $fillable = ['name', 'description', 'price', 'image'];
}
Defining our Model this way allows us to associate media, like an uploaded image, with each instance of a Product. We’ll see exactly how this is used, when we add our controller code in step 9.
Step 7: Create Controller
Generate a controller named “ProductController” by running the following Artisan command:
php artisan make:controller ProductControllerStep 8: Add Controller Code
Now open the generated “ProductController” (app\Http\Controllers\ProductController.php) and implement the methods below to list an index page with products, show a create product form and finally storing a new product along with its uploaded image:
app/Http/Controllers/ProductController.php
<?php

namespace App\Http\Controllers;

use App\Models\Product;
use Illuminate\Http\Request;

class ProductController extends Controller
{
 // Display a list of created products along with their images
 public function index()
 {
 $products = Product::latest()->paginate(10);
 return view('products.index', compact('products'));
 }

 // Display the form to create a new product
 public function create()
 {
 return view('products.create');
 }

 // Store a new product along with its uploaded image file
 public function store(Request $request)
 {
 $request->validate([
 // Sets a max image upload file size of 2048 kilobytes or 2MB, adjust as needed:
 'image' => 'required|image|max:2048',
 // Validate that other fields contain proper values too:
 'name' => 'required|string|max:255',
 'description' => 'nullable|string|max:255',
 'price' => 'required|numeric|min:0|max:999999.99',
 ]);

 // First create the product in the database using the Eloquent model
 $product = Product::create($request->validated());

 // Then associate the uploaded image file with the product
 $product->addMediaFromRequest('image')->toMediaCollection('product-images');

 // Send the user back to the product list page
 return redirect(route('products.index'))->with('success', 'Product created successfully.');
 }
}
Step 9: Add a View to Create a Product
In this step we’ll create a view that contains the form to add a new product along with an uploaded image.
I made sure the blade code offers a nicely layouted form that shows error messages for missing or invalid values. This way we can guarantee the user is prompted to always upload an actual image file and fill the required fields name and price.
Create a file at resources/views/products/create.blade.php and add the following code:
resources/views/products/create.blade.php
<!DOCTYPE html>
<html lang="en">
<head>
 <meta charset="UTF-8">
 <meta name="viewport" content="width=device-width, initial-scale=1.0">
 <title>Excel Import</title>
 <!-- Bootstrap CSS -->
 <link href="https://cdn.jsdelivr.net/npm/bootstrap@5.3.0/dist/css/bootstrap.min.css" rel="stylesheet">
</head>
<body>
<div class="container mt-5">
 <h1 class="my-4">Create Product</h1>
 <form action="" method="POST" enctype="multipart/form-data">
 @csrf
 <div class="mb-3">
 <label for="name" class="form-label">Name</label>
 @error('name')
 <div class="text-danger">
 <small></small>
 </div>
 @enderror
 <input type="text" class="form-control" id="name" name="name">
 </div>
 <div class="mb-3">
 <label for="description" class="form-label">Description</label>
 @error('description')
 <div class="text-danger">
 <small></small>
 </div>
 @enderror
 <textarea class="form-control" id="description" name="description"></textarea>
 </div>
 <div class="mb-3">
 <label for="price" class="form-label">Price</label>
 @error('price')
 <div class="text-danger">
 <small></small>
 </div>
 @enderror
 <input type="number" step="0.01" class="form-control" id="price" name="price">
 </div>
 <div class="mb-3">
 <label for="image" class="form-label">Product Image</label>
 @error('image')
 <div class="text-danger">
 <small></small>
 </div>
 @enderror
 <input type="file" class="form-control" id="image" name="image">
 </div>
 <button type="submit" class="btn btn-primary">Create Product</button>
 </form>
</div>

</body>
</html>
Step 10: Create a View to Show Products
In this step we’ll create a view that allows us to show all products. We will use Spatie Media Library to render a thumbnail of the uploaded product image.
Create a file at resources/views/products/index.blade.php and add the following code:
resources/views/products/index.blade.php
<!DOCTYPE html>
<html lang="en">
<head>
 <meta charset="UTF-8">
 <meta name="viewport" content="width=device-width, initial-scale=1.0">
 <title>Excel Import</title>
 <!-- Bootstrap CSS -->
 <link href="https://cdn.jsdelivr.net/npm/bootstrap@5.3.0/dist/css/bootstrap.min.css" rel="stylesheet">
</head>
<body>
<div class="container mt-5">

 <!-- Display success message if it was set-->
 @if(session('success'))
 <div class="alert alert-success"></div>
 @endif

 <h1 class="my-4">Product Listing</h1>
 <table class="table">
 <thead>
 <tr>
 <th colspan="3"></th>
 <th class="text-end">
 <a href="" class="btn btn-primary">Create Product</a>
 </th>
 </tr>
 <tr>
 <th>Name</th>
 <th>Description</th>
 <th>Price</th>
 <th>Image</th>
 </tr>
 </thead>
 <tbody>
 @foreach($products as $product)
 <tr>
 <td></td>
 <td></td>
 <td></td>
 <!-- Fetch a thumbnail image based on the product's associated media -->
 <td><img src="" alt="Product Image" width="140px"></td>
 </tr>
 @endforeach
 </tbody>
 </table>

</div>

</body>
</html>
Step 11: Define Routes
Finally, before we can test the application, we need to define the routes to list products, show the create form, and store a product.
Open routes/web.php and add:
routes/web.php
<?php

use Illuminate\Support\Facades\Route;
use App\Http\Controllers\ProductController;

Route::get('/products', [ProductController::class, 'index'])->name('products.index');
Route::get('/products/create', [ProductController::class, 'create'])->name('products.create');
Route::post('/products', [ProductController::class, 'store'])->name('products.store');
Step 12: Test the Application
You can now test the application by running the development server:
Now you can navigate to http://127.0.0.1:8000/products in your browser to view the product listing. Proceed to http://127.0.0.1:8000/products/create to access the create product form.
Select an image to upload and fill in the other product details and submit the form. Verify that the product and its associated image are successfully stored in the database.
After storing the form your database contents should look somewhat like this:
products and Associated media TableNow if you continue and upload a few more you’ll see it nicely displays all the thumbnail images on the product page:
That’s it! You’ve successfully built your first application that uses Spatie Media Library to manage its uploaded media files.
Conclusion
In this tutorial, we’ve explored how to upload images using the Spatie Media Library package in a Laravel application. By following the steps outlined above, you can easily handle image uploads and storage in your Laravel projects.
Using third party packages like this can greatly speed up your development process. Before you use a package in your production application, check that the package is well maintained, supports your Laravel version, is properly documented and does not have lots of unresolved issues posted on their git page.
Spatie is a well-known company that has been developing and maintaining numerous packages for years and provides them for free as open source. The Media Library is one of their most widely used packages and is likely to meet most quality requirements.
I hope this helped you get started in using this handy third party package. Let me know in the comments what you’re using it for, how it went and what issues you may have had with it.
Happy Coding!
References
Laravel News Links
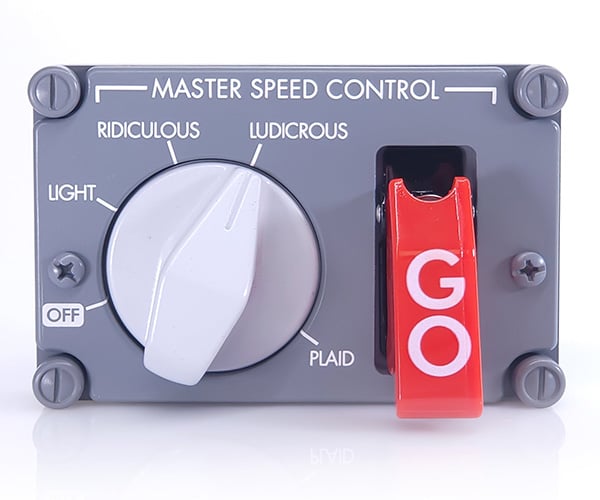
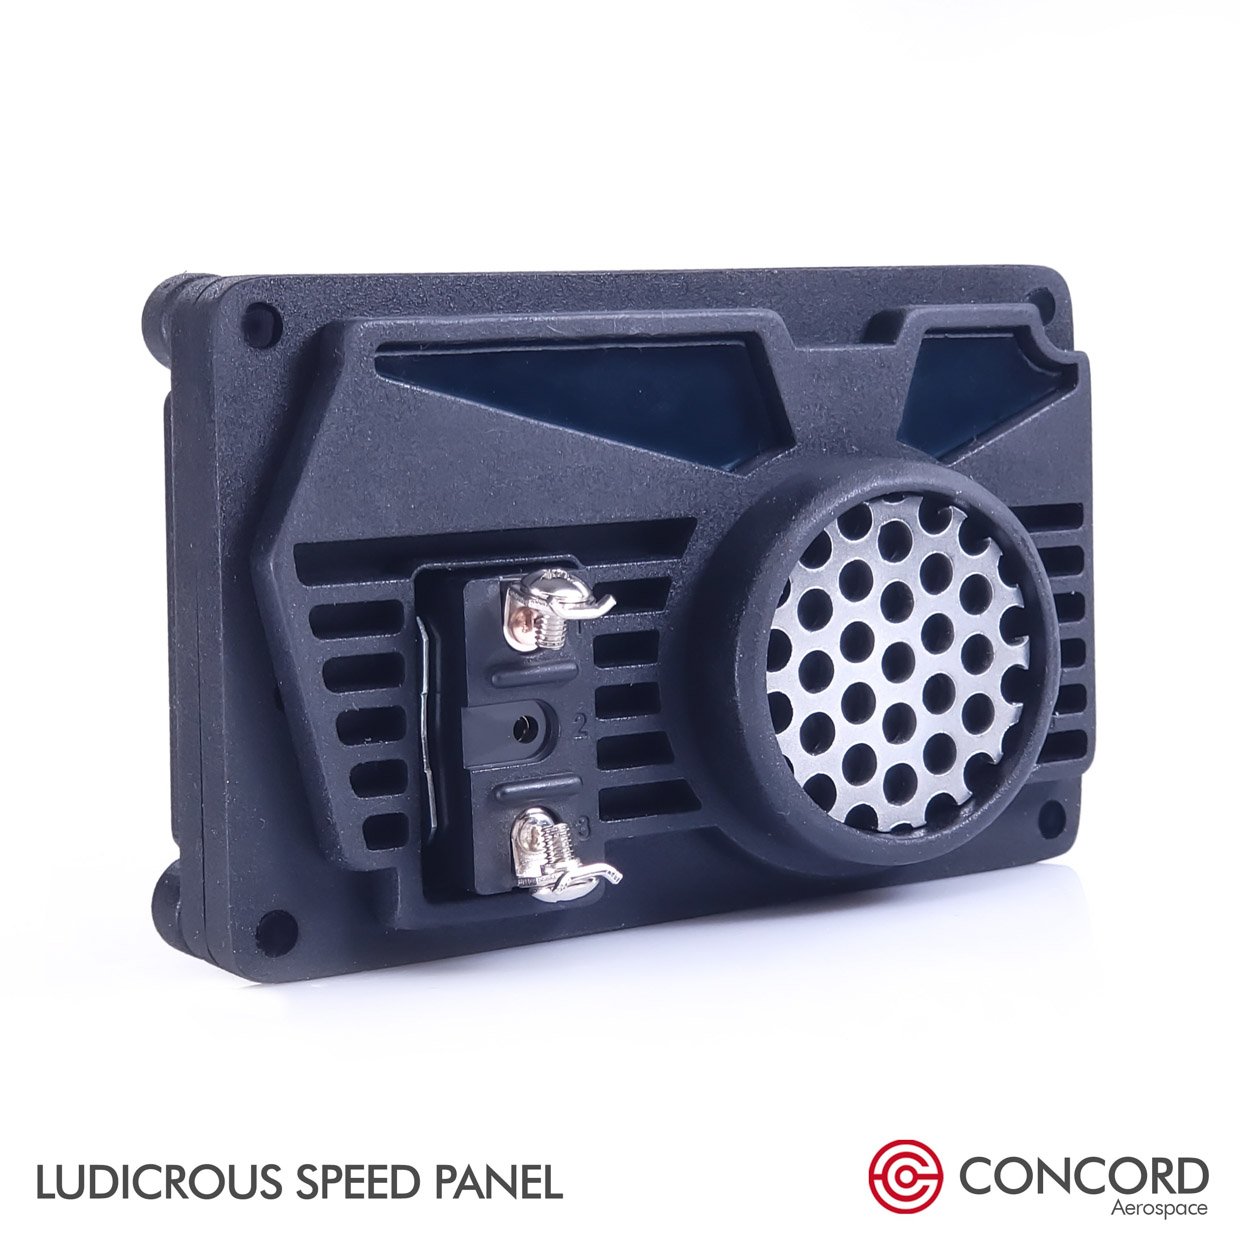
Ludicrous Speed Panel
https://theawesomer.com/photos/2024/03/ludicrous_speed_switch_t.jpg
| Buy
Level up your transportation with the Spaceballs-inspired Ludicrous Speed Panel from Concord Aerospace. Turn its dial to increase your speed from Light to Ridiculous to Ludicrous, then go to Plaid. The Apollo-era control panel has a working main switch hidden under a “GO” cover, and its knob can be equipped with a potentiometer for controlling devices.
The Awesomer