Longer Battery, Better Tracking, Improved Fit: Halo Collar 4 Review

https://s3.us-east-1.amazonaws.com/images.gearjunkie.com/uploads/2024/09/IMG_R_0098.jpg

(Photo/Rachelle Schrute)

The peace of mind that comes with knowing your dog is safe is almost invaluable. I should know. I currently have 11 dogs. Each of them has some kind of collar that best suits their sport, personality, and temperament.

I’ve not hidden my love of Halo GPS dog collars. I’ve used just about every major “wireless fence” style dog collar on the market, and the Halo collars have yet to let me down. Where other collars have failed and left me searching for one of my bird dogs for several days, the Halo Collars have stepped up and always filled the role of reliable, consistent, and user-friendly.

When I heard the Halo Collar 4 was coming out, I assumed it would be much the same when I agreed to test it. I was wrong. Not only does it sport a smaller frame and hinged component, making it far more comfortable for a pup, but it’s also compatible with dogs half the size of its predecessor (from a 20-pound minimum size down to 20-pound pups).

The biggest claim is the jump in battery life. You can go ahead and color me skeptical when a brand makes bold battery life claims. So, did it measure down and battery up as much as the brand claims?

In short: Skepticism be damned. The Halo Collar 4 ($599) outperforms its predecessor in every way, which is a tough feat to conquer. The battery life is wild and, in my tests, actually goes above and beyond what the company claims.

Halo Collar 4 Review

Specs

  • Dual-frequency GPS collar
  • Fits dogs 10 lbs. and up with neck sizes from 8" up to 30.5"
  • Smaller, hinged fit
  • 30+ battery life
  • (New) Midnight Blue, Graphite, Orchid, and Sunburst colors.

Pros

  • Incredible jump in battery life

  • Better fit for more dogs

  • Very accurate real-time location

Cons

  • Another new, collar-specific charger


Rachelle Schrute

What Halo Has to Say About the Newest Addition to the Lineup

If we’re going to start anywhere, let’s start with cofounder Cesar Millan. I want you to picture the following quote in his voice. It makes it better, I promise.

“Halo Collar 4 allows pet parents to set rules, boundaries and limitations while creating a backyard everywhere they go. You can now provide trust, respect and love to your dog knowing they are safe wherever they go.” 

— Halo Cofounder Cesar Millan

Cesar Millan
(Photo/Halo)

The Halo Collar 4 promises a lot. I’m going to do something I rarely do and copy the intro to the press release here verbatim (with a few Oxford commas added because I have editorial integrity).

Halo, the most advanced GPS dog fence ever created, is launching the Halo Collar 4, the first collar designed to fit big and small dogs, giving pet parents the ability to create a “backyard” everywhere they go. It is the first and only dual-frequency GPS dog fence for unrivaled accuracy that combines data from L1 and L5 GPS bands for the most accurate location that is not impacted by obstacles, even in urban or bad signal areas. 

Halo Collar 4 also offers the perfect fit for big and small dogs with a tailoring system that lets you custom fit the collar to your dog’s exact neck size from 8 inches to 30.5 inches. The updated rendition includes 25% more battery life for 30+ hours between charges, a smaller and lighter all-day fit, and comes in a new Midnight Blue color, as well as updated Graphite, Orchid, and Sunburst colors.

Those are some hefty claims that I was borderline excited to bust.

Testing the Halo Collar 4

Dogs in the bed of a truck in the mountains
Bird dogs at elk camp too interested in birds; (photo/Rachelle Schrute)

The Trainee

The thing about bird dogs from a strong hunting line is this: when bird season rolls around, a young bird dog can be almost impossible to keep contained when birds are about. My youngest Brittany is that dog. At a year and a half old, she knows her duty is to hunt ’em up. She does not, however, practice much restraint when she isn’t supposed to hunt ’em up. Known for having boundless energy, she measures up in all the best and worst ways that her breed has to offer.

Enter the true challenge for the Halo Collar 4. Even when faced with rooster pheasants at the edge of her perimeter, the Halo collars have kept her contained without the need for static shock or human intervention. She’s learned her tones and learned that it’s only when the collar comes off and the shotgun comes out that she can take to the field.

Battery Life to the Moon

Halo Collar Comparison
The Halo Collar 3 (Yellow) and the Halo Collar 4 (blue) after being dirtied and covered by dog hair, as they should be; (photo/Rachelle Schrute)

After testing two previous version of the Halo collars, I wasn’t sure I’d see much benefit with the newest iteration. And then the battery life jumped up and smacked me in the face.

I run the Halo Collar 2 and Halo Collar 3 on another Brittany and a German shorthair. Both those collars give me a day of battery life. When I say a day, I mean a daylight day. Depending on how rowdy the pups get, I see anywhere from 8 to 12 hours of consistent battery life. That means they are contained for the work day and a bit after. Each night, the collars get plugged in when the pups get tucked into bed.

The Halo Collar 4 has run for 2 full days with no charge and held battery life the entire time. Yes, while at home, it still gets plugged in every night. However, this means a weekend away in the mountains requires no additional draw on the power banks I rely on. That leap in battery life is huge for those who overnight sans power in the great outdoors.

What the Halo Collar 4 Does Well

Halo Collar 4
The new Midnight Blue color option; (photo/Halo)

Everything it claims to. If you need a reliable GPS dog collar to keep your pup contained without fences, this collar will do it and do it well. If you have a pup that is too small to wear most GPS collars, this one might be the ticket.

I love being able to sit at my desk and look at the exact location of my pups on my phone. They don’t have to be penned up when I’m not looking. They can roam and play and be dogs, all while I know they are safe and secure. I’m not a fan of putting up fences for a heap of reasons, and this allows me to keep the landscape natural and my dogs safe.

The App

Halo App

The Halo Collar App is another huge win for Halo. I’ve used other digital-fence-style collars with apps that made me want to throw my phone out the window. The Halo app is user-friendly, intuitive, clean, and simple to use. I can open my phone, see where my dogs are, and even whistle at them to come home. The app is top-notch in the world of GPS collars.

It also has a full dog training module taught by none other than Cesar Millan himself.

Always On

This is a big one. If your collar dies and you stick it on the charger, it turns itself back on. You don’t need to hold the power button for 30 seconds, rub your belly six times, and spin in a complete circle to get the collar to turn on and connect to the app. That might seem silly, but I’ve used other collars that are a pain in the royal arse to get reconnected to your phone, and I was never certain whether the collar was even on.

The Halo Collar 4 (and its previous versions) turns itself on and automatically connects to the app, ensuring immediate protection for your pup by just grabbing it off the charger and snapping it on. It’s grab-and-go protection that has never let me down.

Where’s the Downside?

Halo Collar 4
The hinged collar is rad. Another new charger is less rad; (photo/Halo)

You could say that they’re expensive, but they really aren’t. The Halo Collar 4 is at or below the cost of almost any other big-name GPS collar at $599.

The Charger

What you could complain about is the charger, but that’s only if you have former versions of the collar. I have three different versions, and each one has a different charger. That is frustrating, but I do get it. The newer versions likely require a bit more oomph, so they likely require a heftier charger.

That being said, a universal USB-C charger would be a huge perk, especially if you’re on the go and don’t have your collar-specific charger handy. Only my oldest Halo Collar offers that option.

A Little Lag

This is one that I guess can be expected. Occasionally, depending on weather or tree cover, you might experience a little lag in GPS connection. I always try to open my app when I send the pups outside, just to make sure they’re connected and covered. That being said, the lag is absolutely minimal, particularly when compared to other GPS collars.

Who Should Buy the Halo Collar 4?

Halo Collar 4
For little and big pups; (photo/Halo)

Anyone interested in knowing where their canine companion is without going to the window or walking outside should consider the Halo Collar 4. This collar is perfect for anyone who lives near a busy road or can’t put up a fence. It’s the solution for weekend warriors who need to keep their pup at camp and out of the far-reaching mountains.

To be honest, I’m not sure who the Halo Collar 4 wouldn’t be good for. If you have a dog that weighs 10 pounds or more, you would benefit from adding it to your pup’s accessories. Period. End of story. They rock.

One of the other perks is that I bet the Halo Collar 3 is about to go on sale. So … you know, getcha one of those, too.

If you can’t tell, I stinkin’ love mine.

The post Longer Battery, Better Tracking, Improved Fit: Halo Collar 4 Review appeared first on GearJunkie.

GearJunkie

Prevent and Detect Rapid Fire Password Attacks on MySQL

Using “failed login” policies, dbas can prevent brute force rapid fire attacks on MySQL user’s passwords. This uses a technique know as “login throttling”. This method affectively thwarts these “rapid fire” login attempt attacks by increasing delays for each failed attempt. These policies are simple and straightforward to put in place and define. Enabling defense and detection of rapid fire and other password attacks.Planet MySQL

The History of PKM, the Most Common Machine Gun In the World (Part 1)

https://cdn-fastly.thefirearmblog.com/media/2024/09/16/10061/the-history-of-pkm-the-most-common-machine-gun-in-the-world-part-1.jpg?size=720×845&nocrop=1

Everyone knows AK-47. It is everywhere: movies, books, crime statistics. Interestingly enough, those who spend some time in the warzone often have stronger feelings towards another Kalashnikov creation – the PK/PKM belt-fed machine gun.

Some say that PK is the best weapon Kalashnikov ever created. While AK was developed at the very beginning of his career, PK was created when Kalashnikov had plenty of experience.

Millions of those machine guns are used all over the world, US special forces requested American companies to produce those guns multiple times, and some experts call it “the best general purpose machine gun”.

However, few people know that it was created almost by accident. There are many great articles on AK history, but there is almost nothing published in English about the PK development, and hopefully, this article can fix that.

One of many PKMs the author inspected and repaired in Afghanistan

How it all started

The summer of 1959 was a busy time for Mihail Kalashnikov. The new family of weapons he designed, which included AKM and RPK light machine guns, was just getting into production. He had to prove for the second time in his career that his rifle was the best.

First, his AK 47 won the competition in 1949, and ten years later his other creation, AKM bested all rivals and now was destined to become the new service rifle of the Soviet Army and most Warsaw Pact countries.

Kalashnikov hadn’t had a vacation in 4 years. That summer there was finally an opportunity to celebrate, and it was all more convenient that his old friend visited him in the city of Izhevsk.

Vladimir Deikin and Mihail Kalashnikov

The old friend was army officer Vladimir Deikin, who was one of the people who made AK happen. The officer of GRAU, the military department responsible for procurement of new weaponry, he supported Kalashnikov all the way through the development of the original AK rifle, ruthlessly crushing bureaucracy and red tape that got in the way of a young weapon design engineer.

As the years went by, a young and shy Kalashnikov became the most respected weapon designer in the Soviet Union, and Vladimir Deikin became a colonel, rising to the top of the career ladder.

That summer two friends who have been through a lot could finally enjoy their life. They took a boat and went fishing, invited friends from the factory, and spent the weekend in a cabin on the lake, talking about guns and cooking fish they caught.

Before leaving, Vladimir Deikin nonchalantly shared some news: “This guy Nikitin at the factory in Tula is developing GPMG (general purpose machine gun). The trials are almost over, it adheres to the requirements… But in GRAU we think it is a little too complicated. The army needs something more simple”.

Prototype of the Nikitin GPMG

He didn’t ask Kalashnikov to get involved. He never asked for help. But he knew his old friend and realized, Kalashnikov won’t just leave it alone. Now, after his friend left, Kalashnikov had a whole bunch of questions.

Why wasn’t I asked to develop this new GPMG? Why don’t they trust me? Am I in trouble? How complicated is too complicated? Will they ask me to redesign this gun once it finishes trials? Or is it the end of my career?

The brainstorming

Kalashnikov decided that he must do something about it. He already had a team of engineers and enough authority to build a machine gun from scratch without asking permission.

There was no money allocated for this project, but he could pull some strings and use money from his other projects to finance the ammo and all the prototype building.

Prototype of the PK. The machine gun is from the collection of the Artillery Museum in Saint Petersburg.

He became obsessed with his new machine gun and completed the first sketches in just ten days. However, drawings alone are no good, you need to make blueprints, which Kalashnikov couldn’t really do – he was never formally educated and always relied on someone else to make blueprints.

In this case, engineer Krupin was tasked with creating proper blueprints, and the entire team got on with the project. The rival machine gun from Tula was already undergoing troop trials, the Ministry of Industry never asked for another contender, but Kalashnikov decided that he would deal with that another day.

The obsession Kalashnikov had was contagious, engineers were staying at work until 5 in the morning, and within weeks they started making the first parts of the prototype.

Milled receiver of the PK prototype. The machine gun is from the collection of the Artillery Museum in Saint Petersburg.

Often, there was no time to make proper blueprints, so engineers just winged it, making parts on the lathe and milling machine relying solely on their imagination and some sketches.

Within a month, the first prototype of PKM was ready. Now Kalashnikov just had to convince the entire Soviet military-industrial complex that his crude prototype was better than a machine gun that already passed all the trials and ticked all the boxes. How did he manage to do that? That is the story for Part 2 of this article.

The Firearm Blog

Triple Apple Charger/US Passport Changes/Designer Cities

A weekly newsletter with four quick bites, edited by Tim Leffel, author of A Better Life for Half the Price and The World’s Cheapest Destinations. See past editions here, where your like-minded friends can subscribe and join you.

Triple Travel Charger for Apple Devices

If you’re all-in on Apple products, you might like this 3-in-1 travel charger a reader recommended for your iPhone, watch, and Airpods. The folding magnetic charger is smaller than a phone but can charge up all three of these fast-fading devices every night so you can start fresh in the morning. Selling for $60 now at Amazon. (Thanks to reader Jim from the SpanishAndGo podcast, which I recommend by the way if you’re an intermediate learner.)

Two U.S. Passport Developments

Good news for U.S. passport holders this week. First of all, the State Department is leaping into the modern age and you can now renew your passport online after a successful beta text. Just don’t expect it to be any faster, they warn. Also, Google announced that it’s in beta tests to create a digital ID from your passport that you’ll be able to use at TSA checkpoints. They’re also adding driver’s licenses for many states and commuter cards for public transportation.

New UK Entry Fee

It’ll soon cost you the equivalent of a few pub pints to enter the UK—unless you’re Irish. Most countries will have to apply for and pay a fee of £10. For most travelers that begins in November, but for Europeans it will roll out in the spring. You’ll even have to cough up the fee for your lap baby as apparently this fee to fund enhanced security is required for them as well. This is separate from the upcoming ETIAS €7 fee to enter the EU, so you’ll pay twice if you’re going to both. See the details here.

Cities That Inspire Designers

Where do interior designers like to go when they’re looking for inspiration? This article from House Beautiful runs down 12 places that the people picking out sofas and curtains called out when asked. Some are a bit puzzling to me, but I’ve certainly seen hints of other named spots in Morocco, Colombia, Turkey, and Italy in restaurants and hotels in other places.

Cool Tools

How to Enable, Configure, and Use MySQL Query Logging

In this article, we will address questions such as the purpose of query logging in MySQL, why it is important, how to enable and configure it, and more. You’ll find a detailed guide on how to use mysqldumpslow to analyze slow query logs, along with tips on harnessing convenient GUI tools like dbForge Studio for MySQL to your advantage.

The post How to Enable, Configure, and Use MySQL Query Logging appeared first on Devart Blog.

Planet MySQL

Understanding MySQL Indexes: Types, Benefits, and Best Practices

https://www.percona.com/blog/wp-content/uploads/2024/06/Understanding-MySQL-Indexes-200×112.jpgWhen it comes to MySQL databases, performance is everything. As more activities move online and data volumes grow exponentially, ensuring efficient data retrieval and query execution becomes crucial. Database indexing plays a significant role in this by providing powerful tools to optimize operations in MySQL. Without an index, MySQL must perform a full table scan, […]Percona Database Performance Blog
These Are My Favorite Google Docs Invoice Templates

https://static1.makeuseofimages.com/wordpress/wp-content/uploads/2024/09/tax-professional-with-a-digital-invoice.jpg

Google Docs templates make it easy to start creating resumes, letters, brochures, reports, and project proposals, but there is no built-in template for making invoices in Google Docs.

MAKEUSEOF VIDEO OF THE DAY
SCROLL TO CONTINUE WITH CONTENT

So, what do you do when you need to create an invoice? You could painstakingly create one from scratch for every client or use one of these free, customizable invoice templates available for download.

Square is an end-to-end payment processor that can be used to accept payments from clients as a freelancer. It offers a free, client-ready invoice template that can be downloaded in various formats: Word, Excel, and PDF.

You will need to fill in the details required: your business information (name, location, email address, and phone number), the customer’s information, due date and amount, payment terms, and the job description. Replace the logo placeholder with a suitable image, and delete the Square Invoices footer. List each important line item in the breakdown table. You can duplicate the borderline in the breakdown table and add more items as needed.

The Square invoice template isn’t directly available for Google Docs, but you can download the Word document and open it in Google Docs for editing and customization.

Wave is popular for its invoicing and accounting software, but it also offers a free Google Docs invoice template that any freelancer or small business owner can tailor to send to their clients. There are up to five different invoice templates available in Doc, Sheets, PDF, and Excel. All templates are simple, attractive, and professional. They can be customized to fit your brand image and business clients.

After selecting the template you prefer, you can proceed to insert your business name, project details, and other information. It doesn’t include a logo placeholder, but you can still place one in the header or the background of the document. There is a Notes section at the bottom for additional details such as payment terms, terms of service, and probably, a warm, appreciative message to the client.

Creating an invoice template reduces the work you have to do each time since you can incorporate the logo and other non-changing information in the template itself. Also, it will make it much easier to make templates for more complicated documents. By following our guide to creating an invoice template in Google Docs, you will be able to create simple invoices that you can send to your clients with little editing.

Invoice Simple is a freemium invoicing software available on mobile and web platforms. The company has a collection of free Google Docs and Sheets invoice templates. The spreadsheet versions are recommended for download since they come with built-in formulas and are easier to customize.

You can choose an invoice template from the collection, click Google Docs under the image, and select Make a copy in the next window. You can then proceed to replace the placeholders and enter the requisite information. The Invoice Simple template includes a Ship to section for businesses with a physical product. Make sure to omit this section if you don’t need it.

The GooDocs website features thousands of free templates for Google Docs, Google Slides, and Google Sheets. You can download up to five templates for free without creating an account. On GooDocs, there are several invoice templates to choose from, with categories like consulting, contracting, freelance, medical, wedding, rental, and restaurant. With the myriad choices available, you will be able to find an invoice template that suits your business needs.

Once you find the one you like, you can select Edit in Google Docs from the sidebar options. You should switch the colors, fonts, and other design elements to better match your business’ branding. Your logo should be prominently displayed in the invoice’s header.

With a little bit of editing, you can turn any Google Docs invoice template into a professional, client-ready invoice document that makes a great impression.

MakeUseOf

MySql Explain with Tobias Petry

https://picperf.io/https://laravelnews.s3.amazonaws.com/featured-images/Tobias Petry on MySQL.png

This week, we welcome Tobias Petry to the Laravel Creator Series show to discuss his journey into database optimization, the development of his MySQL Explain tool, and the acquisition of the domain mysqlexplain.com. Tobias also shares insights about his other projects, including Stack Bricks, a tool for managing different database versions, and his contributions to the Laravel Debug Bar.

➡️ Save 10% on his Indexing Beyond the Basics book and video package with the coupon code LARAVELNEWS

Show Links


The post MySql Explain with Tobias Petry appeared first on Laravel News.

Join the Laravel Newsletter to get all the latest
Laravel articles like this directly in your inbox.

Laravel News

A handy guide to the universal language for the mathematically perplexed

https://cdn.arstechnica.net/wp-content/uploads/2024/09/math3-760×380.jpg

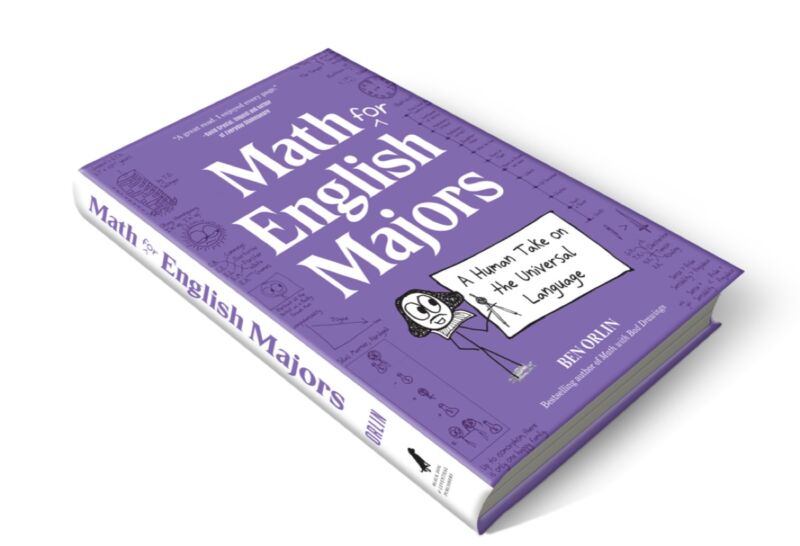
cover of book

Enlarge / Math for English Majors talks about numbers as nouns, verbs as calculations, and algebra as grammar.

Ben Orlin

Galileo once famously described the universe as a great book "written in mathematical language and its characters are triangles, circles, and other geometrical figures." Unfortunately, it’s a language that many people outside of math and science simply do not speak, largely because they are flummoxed and/or intimidated by the sheer density of all that strange symbolic notation.

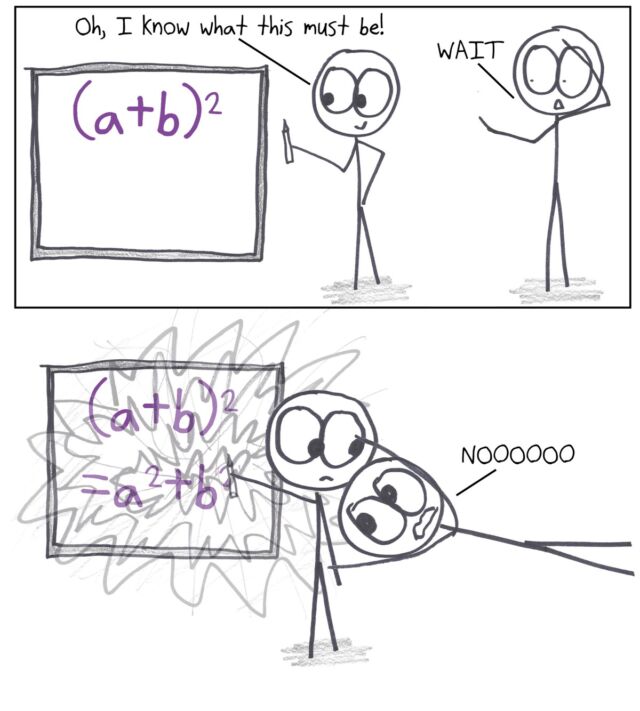
Math teacher extraordinaire Ben Orlin is here to help with his latest book: Math for English Majors: A Human Take on the Universal Language. And just like Orlin’s previous outings, it’s filled with the author’s trademark bad drawings. Bonus: Orlin created a fun personality quiz, which you can take here to find out your mathematical style.

Orlin’s first book, Math with Bad Drawings, after his blog of the same name, was published in 2018. It included such highlights as placing a discussion of the correlation coefficient and "Anscombe’s Quartet" into the world of Harry Potter and arguing that building the Death Star in the shape of a sphere may not have been the Galactic Empire’s wisest move. We declared it "a great, entertaining read for neophytes and math fans alike, because Orlin excels at finding novel ways to connect the math to real-world problems—or in the case of the Death Star, to problems in fictional worlds."

In 2019, Orlin took on the challenge of conveying the usefulness and beauty of calculus with tall tales, witty asides, and even more bad drawings in Change Is the Only Constant: The Wisdom of Calculus in a Madcap World. That book is a colorful collection of 28 mathematical tales connecting concepts in calculus to art, literature, and all manner of things human beings grapple with on a daily basis.

Orlin’s most recent book was 2022’s Math Games with Bad Drawings—less a book one reads cover to cover and more a chance for readers to browse randomly at their leisure to find the games best suited to their particular tastes and skills, such as Jotto, a logic-oriented word game invented in 1955 that is similar to Wordle. There were five different categories of games: spatial games, number games, combination games, games of risk and reward, and information games. All could be played with just a few common household items: pencil and paper, coins, colored pens, standard dice, Goldfish crackers, paper clips, your hands, and occasionally an Internet connection. (You can try your hand at a game of Quantum Go Fish here.)

Unlike his prior books, where he carefully avoided most mathematical notation, Math for English Majors is designed to teach readers how to read and interpret mathematical symbols, proofs, and mathematical diagrams. His original vision was to write the math-y equivalent to Lynne Truss’ bestselling Eats, Shoots & Leaves. "It’s a very playful book about English punctuation that weaves together fun stories about the common, the semicolon, and the dash," Orlin told Ars. "But I found that math is just a fundamentally different sort of language, and that template didn’t quite work for me."

Some elements of that earlier vision remain: Math for English Majors talks about numbers as nouns, verbs as calculations, and algebra as grammar, highlighting certain idioms ("exponential") and etymologies "squaring") for good measure.

But Orlin’s main objective is to reconcile the expert’s view of math, "where the notation vanishes and you’re just focusing on the ideas that the notation conveys," with the beginner’s experience of math, "where you can’t even access the ideas because there’s this thick wall of symbolism in the way." Math, says Orlin, is both "a collection of beautiful ideas and a language for expressing those ideas." His approach is the opposite of the usual popularizations of math, where ideas are translated into plain English and notation is largely avoided. Here, the notation is the primary focus.

Ars spoke with Orlin to learn more.

Ben Orlin

Ars Technica: People who are not mathematically inclined usually see all those abstract symbols and their eyes glaze over. Let’s talk about the nature of symbols in math and why becoming more familiar with mathematical notation can help non-math people surmount that language barrier.  

Ben Orlin: It’s tricky. When I first became a teacher, I was mostly trying to push against students who’d only learned symbol manipulation procedures and didn’t have any sense of how to read and access the information behind them. It always mystified me: why do we teach that way? You end up with very bright, clever students, and all we’re giving them is hundreds of hours of practice in symbol manipulation. But what is a quadratic? They can’t really tell you.

One of the things I’ve gradually come to accept is that it’s almost baked into the language that mathematical notation has developed specifically for the purpose of manipulating it without thinking hard about it. If you’ve had the right set of experiences leading into that, that’s very convenient, because it means that when you sit down to solve a problem, you don’t have to solve it like Archimedes with lots of brilliant one-off steps where you just have gorgeous geometric intuition about everything. You can just be like, "Okay, I’m going to crank through the symbol manipulation procedures." So there’s a real power in those procedures. They’re really valuable and important.

But if it’s all you have, then you’re doing a dance where you know the moves, but you’ve never heard the music. You can’t troubleshoot. Sometimes I wish as a teacher, you could just say, "Look, the symbol manipulation procedures are worthless. We can just skip those and focus on the ideas." But they’re tangled up in a much more complex way. So somehow you have to climb in there with the students and move back and forth between the things that are happening on the page and the ideas that are unfolding in some kind of higher space.

That’s the place this book eventually gets to. But I go there gradually, because you need a lot of experience with symbols that make sense to you before you can feel comfortable when you do manipulations on a page.

Ars Technica – All content

IMPLEMENTING MULTI-TENANCY IN LARAVEL: A COMPREHENSIVE GUIDE

https://zorandev.info/storage/01J53ME8JCDTVWY15S163T4JWA.webp

Multi-tenancy in web applications refers to the architecture where a single instance of the application serves multiple customers, or ‘tenants.’ Each tenant’s data and, sometimes, specific configurations are kept isolated from others. This setup is essential in SaaS (Software as a Service) platforms where multiple businesses or organizations might use the same application.

In this guide, we’ll walk through setting up a database-per-tenant approach in Laravel, complete with code examples, detailed explanations, and the necessary console commands for creating the database itself with no need or usage of any external package.
Step 1: Setting Up Database Connections
In the config/database.php file, we define two connections:

1. ** Owner Connection**: This connection manages the information about all tenants, such as their domain and database names.
2. **Tenant Connection**: This connection dynamically switches based on the tenant currently being accessed.

Here’s how to set up these connections:

return [
    'default' => env('DB_CONNECTION', 'tenant'),

    'connections' => [
        'tenant' => [
            'driver' => 'mysql',
            'host' => env('DB_HOST', '127.0.0.1'),
            'port' => env('DB_PORT', '3306'),
            'database' => null, // Database will be set dynamically
            'username' => env('DB_USERNAME', 'root'),
            'password' => env('DB_PASSWORD', ''),
            'charset' => 'utf8mb4',
            'collation' => 'utf8mb4_unicode_ci',
            'prefix' => '',
            'strict' => true,
        ],

        ' owner' => [
            'driver' => 'mysql',
            'host' => env(‘OWNER_DB_HOST', '127.0.0.1'),
            'port' => env(,OWNER _DB_PORT', '3306'),
            'database' => env(' OWNER _DB_DATABASE', 'landlord'),
            'username' => env(' OWNER _DB_USERNAME', 'root'),
            'password' => env(' OWNER _DB_PASSWORD', ''),
            'charset' => 'utf8mb4',
            'collation' => 'utf8mb4_unicode_ci',
            'prefix' => '',
            'strict' => true,
        ],
    ],
];

Step 2: Creating the Tenant Model and Migrations
We need to create a Tenant model that uses the landlord connection. This model will manage tenant-related data such as the domain and database name.
Tenant Migration:

In the migration for the tenants table, we’ll include columns for the tenant’s name, domain, and the specific database used:

Schema::create('tenants', function (Blueprint $table) {
    $table->id();
    $table->string('name');
    $table->string('domain')->unique();
    $table->string('database');
    $table->timestamps();
});

Tenant Model:

The Tenant model should be linked to the landlord connection and include methods for configuring and using the tenant:

class Tenant extends Model
{
    use HasFactory;

    protected $fillable = [
        'name',
        'domain',
        'database',
    ];

    protected $connection = 'owner'; // Default connection for the owner database

    /**
     * Configure the tenant's database connection dynamically.
     */
    public function configure(): self
    {
        // Update the configuration for the tenant connection dynamically
        config([
            'database.connections.tenant.database' => $this->database,
        ]);

        // Purge the 'tenant' connection to refresh its settings
        DB::purge('tenant');

        // Clear tenant-specific cache if cache table exists
        if (Schema::hasTable('cache')) {
            $this->clearTenantCache();
        }

        return $this;
    }

    /**
     * Activate the tenant context across the application.
     */
    public function use(): self
    {
        // Set the default database connection to 'tenant'
        DB::setDefaultConnection('tenant');

        return $this;
    }

    /**
     * Clear cache specific to the tenant.
     */
    public function clearTenantCache(): void
    {
        // Get tenant-specific cache keys
        $cacheKeys = Cache::get('tenant_'.$this->id.'_keys', []);

        // Forget each cache key
        foreach ($cacheKeys as $key) {
            Cache::forget($key);
        }

        // Optionally remove the keys tracking itself
        Cache::forget('tenant_'.$this->id.'_keys');
    }

    /**
     * Add a tenant-specific cache key.
     */
    public function addCacheKey(string $key): void
    {
        // Get the current list of cache keys for the tenant
        $cacheKeys = Cache::get('tenant_'.$this->id.'_keys', []);

        // Add the new cache key
        $cacheKeys[] = $key;

        // Update the list in the cache
        Cache::put('tenant_'.$this->id.'_keys', $cacheKeys);
    }
}

Step 3: Custom Console Command for Tenant initialization 

We will create console command to initialize the owner table where all tenant database info will be stored 

class TenantInit extends Command
{
    protected $signature = 'tenants:init';
    protected $description = 'Create owner table where all domains for tenant app live';

    public function handle(): int
    {
        DB::setDefaultConnection('owner');
        $path = database_path('migrations/owner'); // Custom migration path for the owner DB
        $this->info('Running migrations from: ' . $path);

        try {
            $this->call('migrate', ['--path' => $path, '--force' => true]);
            $this->info('Migrations have been executed successfully.');
        } catch (\Exception $e) {
            $this->error('An error occurred: ' . $e->getMessage());
            return 1; // Return non-zero for failure
        }

        return 0; // Return zero for success
    }
}

Step 4: Custom Console Command for Tenant Migrations

Since each tenant has its own database, we need a way to migrate the schema for each one. Laravel’s built-in migrate command only runs migrations on the default connection, so we’ll create a custom Artisan command to handle tenant migrations.
TenantsMigrateCommand:

This command will loop through all tenants, configure the tenant’s database connection, and run migrations on each database:

class TenantsMigrateCommand extends Command

{
    /**
     * The name and signature of the console command.
     *
     * @var string
     */
    protected $signature = 'tenants:migrate {tenant?} {--fresh} {--seed}';

    /**
     * The console command description.
     *
     * @var string
     */
    protected $description = 'Create clean migration and seed for one tenant or for all tenants';

    /**
     * Execute the console command.
     */
    public function handle(): void
    {
        if ($tenantId = $this->argument('tenant')) {
            $tenant = Tenant::find($tenantId);
            if ($tenant) {
                $this->migrate($tenant);
            } else {
                $this->error("Tenant with ID {$tenantId} not found.");
            }
        } else {
            Tenant::all()->each(
                fn ($tenant) => $this->migrate($tenant)
            );
        }
    }

    /**
     * Migrate the given tenant.
     */
    public function migrate(Tenant $tenant): void
    {
        $tenant->configure()->use();
        $this->line('');
        $this->line('-----------------------------------------');
        $this->info("Migrating Tenant #{$tenant->id} ({$tenant->name})");
        $this->line('-----------------------------------------');
        $options = ['--force' => true];
        if ($this->option('seed')) {
            $options['--seed'] = true;
        }
        $this->call(
            $this->option('fresh') ? 'migrate:fresh' : 'migrate',
            $options
        );
    }
}

• {tenant?}: The tenant argument is now optional. If provided, it will run migrations for the specified tenant only.
• {–fresh}: Option to run migrate:fresh, which drops all tables and re-runs all migrations.
• {–seed}: Option to seed the database after running migrations.

Step 5: Middleware for Tenant Resolution

To ensure that the correct tenant is used for each request, we’ll create middleware that identifies the tenant based on the domain and configures the application accordingly.
TenantSessionMiddleware:

class TenantSessionMiddleware
{
    public function handle(Request $request, Closure $next): Response
    {
        if (! $request->session()->has('tenant_id')) {
            $request->session()->put('tenant_id', app('tenant')->id);
            return $next($request);
        }
        if ($request->session()->get('tenant_id') != app('tenant')->id) {
            abort(401);
        }

        return $next($request);
    }}

Step 6: Testing Multi-Tenant Applications
Testing in a multi-tenant environment requires that both the landlord and tenant databases are properly set up before each test. Here’s how you can configure your tests:

public function setUp(): void
{
    parent::setUp();

    // Migrate the owner's database and seed data
    $this->artisan('migrate', ['--database' => 'owner']);
    $this->seed(OwnerSeeder::class);

    // Loop through tenants and migrate their databases
    Tenant::all()->each(function (Tenant $tenant) {
        $tenant->configure();
        $this->artisan('migrate', ['--database' => 'tenant']);
    });
}

Step 7: Setting Up a Service Provider for Tenant Resolution

In a multi-tenant application, it’s crucial to ensure that the correct tenant context is established for each incoming request. This is where a service provider comes into play. The service provider will configure the tenant based on the request’s domain or subdomain, ensuring that the correct tenant’s database and other settings are used throughout the application lifecycle.

Creating the TenancyServiceProvider

<?php

namespace App\Providers;

use App\Models\Tenant;
use Illuminate\Queue\Events\JobProcessing;
use Illuminate\Support\Facades\Event;
use Illuminate\Support\Facades\Queue;
use Illuminate\Support\ServiceProvider;

class TenancyServiceProvider extends ServiceProvider
{
    /**
     * Register services.
     */
    public function register(): void
    {
        //
    }

    /**
     * Bootstrap services.
     */
    public function boot(): void
    {
        $this->configureTenant();
        $this->configureQueue();
    }

    /**
     * Configure tenant based on the domain.
     */
    protected function configureTenant(): void
    {
        if ($this->app->runningInConsole()) {
            return;
        }

        $host = request()->getHost();
        $tenant = Tenant::whereDomain($host)->firstOrFail();
        $tenant->configure()->use();  // Set up and use tenant configuration
    }

    /**
     * Configure the queue system to be aware of tenants.
     */
    protected function configureQueue(): void
    {
        // Add tenant_id to the job payload
        Queue::createPayloadUsing(function () {
            if (app()->bound('tenant')) {
                $tenant = app()->make('tenant');

                return ['tenant_id' => $tenant->id];
            }

            return [];
        });

        // Restore tenant context when job is processing
        Event::listen(JobProcessing::class, function (JobProcessing $event) {
            $tenantId = $event->job->payload()['tenant_id'] ?? null;

            if ($tenantId) {
                $tenant = Tenant::find($tenantId);
                $tenant?->configure()->use();
            }
        });
    }
}

Expanded Explanation of Service Provider Methods
The methods you’ve shared are essential for managing tenant context both during normal HTTP requests and within Laravel’s queue system. These methods ensure that the correct tenant is always in scope, whether you’re handling web requests or processing background jobs.

Method 1: configureTenant

protected function configureTenant(): void
{
    if ($this->app->runningInConsole()) {
        return;
    }

    $host = request()->getHost();
    $tenant = Tenant::whereDomain($host)->firstOrFail();
    $tenant->configure()->use();  // Set up and use tenant configuration
}

Explanation:

Purpose: This method sets up the tenant configuration based on the incoming request’s domain and ensures that the correct tenant is used throughout the request lifecycle.

if ($this->app->runningInConsole())
{ 
   return; 
}:

This check ensures that the tenant configuration logic only runs during HTTP requests. If the application is running in the console (e.g., during migrations or other Artisan commands), the method will exit early. This is because console commands may not be associated with any particular tenant, and running tenant-specific logic could cause unintended behavior.

$host = request()->getHost();:

This retrieves the domain name from the incoming HTTP request. The domain is typically used to determine which tenant the request is for.

$tenant = Tenant::whereDomain($host)->firstOrFail();:
This line queries the tenants table to find the tenant that matches the domain name. The firstOrFail() method will throw a ModelNotFoundException if no tenant is found, which can result in a 404 error being returned to the user.

$tenant->configure()->use();:
Once the tenant is found, the configure() method sets up the database connection and other tenant-specific configurations.
The use() method then registers this tenant in the service container, making it accessible throughout the application for the duration of the request.

Method 2: configureQueue

/**
 * Configure the queue system to be aware of tenants.
 */
protected function configureQueue(): void
    {
        // Add tenant_id to the job payload
        Queue::createPayloadUsing(function () {
            if (app()->bound('tenant')) {
                $tenant = app()->make('tenant');

                return ['tenant_id' => $tenant->id];
            }

            return [];
        });

        // Restore tenant context when job is processing
        Event::listen(JobProcessing::class, function (JobProcessing $event) {
            $tenantId = $event->job->payload()['tenant_id'] ?? null;

            if ($tenantId) {
                $tenant = Tenant::find($tenantId);
                $tenant?->configure()->use();
            }
        });
    }

Explanation:
Purpose: This method ensures that Laravel’s queue system is tenant-aware. By attaching the tenant_id to the job payload, and reconfiguring the tenant context during job processing, we ensure that the job runs in the correct tenant’s context. This is particularly crucial for distributed queue systems like Redis, where workers could be shared across tenants.

Queue::createPayloadUsing():

This method hooks into the queue system to modify the job payload. The payload is essentially the data that is passed along with a job when it is queued.

if ($this->app->bound('tenant')) {:

This checks if the application has a tenant bound to the service container. If a tenant is bound, it means the current request is associated with a specific tenant.

$tenant = $this->app->make('tenant');:

This retrieves the currently bound tenant from the service container.

return ['tenant_id' => $tenant->id];:

This adds the tenant_id to the job payload, ensuring that the tenant context is passed along with the job when it is dispatched.

return [];:

If no tenant is bound, the payload remains unchanged.

Event::listen(JobProcessing::class, ...):

This listens for the JobProcessing event, which is fired just before a queued job starts processing.

$tenantId = $event->job->payload()['tenant_id'] ?? null;:

This retrieves the tenant_id from the job’s payload. If no tenant_id is found, it returns null.

$tenant = Tenant::find($tenantId);:

This finds the tenant by the tenant_id stored in the payload.

$tenant?->configure()->use();:

If a tenant is found, the configure() method sets up the tenant’s database connection, and use() registers this tenant as the current tenant for the job’s processing context.
You can create a service provider that handles the tenant resolution and configuration. This service provider will hook into Laravel’s bootstrapping process and set up the tenant context at the beginning of each request.
Conclusion
Implementing multi-tenancy in Laravel using a database-per-tenant approach offers strong data isolation and scalability. The steps outlined in this guide provide a complete framework for setting up multi-tenancy, handling migrations, and ensuring that your application uses the correct database for each tenant.

Pros:

• Data Isolation: Each tenant’s data is completely separated, ensuring strong data isolation.
• Scalability: This approach allows easy scaling by adding new databases for new tenants.
• Security: By isolating each tenant’s data in separate databases, the risk of data leakage between tenants is minimized.
• Cache Efficiency: The use of tenant-specific cache keys ensures that only tenant-relevant cached data is cleared, improving performance.
• Queue Robustness: Tenant context is preserved in queues, even in distributed environments, preventing cross-tenant data leakage in background tasks.

Cons:

• Complexity: Setting up and managing multiple databases adds complexity to the application architecture.
• Resource Overhead: Maintaining separate databases for each tenant requires more infrastructure resources.
• Backup Complexity: Managing backups across multiple databases can be challenging, especially when scaling to hundreds or thousands of tenants.
• Migration Overhead: Running migrations for each tenant adds additional overhead compared to a single-database architecture.
• By following this approach, you can build robust, scalable multi-tenant applications in Laravel.

the code example can be locale at  :https://github.com/KalimeroMK/multitenant

Laravel News Links