Lavalier microphones, also known as lapel microphones, are designed to capture audio from a single subject. By clipping the microphone to clothing, audio capture will be clear and consistent regardless of which direction the camera is pointing.
Wireless lavalier microphones simplify the process further by removing cables and allowing your subjects to move around freely. In many situations, they’re almost a requirement.
Here are the best wireless lavalier microphones for all budgets.
macOS is an intuitive operating system, so you don’t have to spend lot of time learning the basics; Knowing this, why should you learn and take advantage of the Unix command line available on your Mac? We have four good reasons:
There are dozens of open source and freely available Unix-based apps. You don’t have to spend money on these.
When you’re having difficulty searching for files in Spotlight, you can turn to Unix search tools. They’re way more powerful than Spotlight.
You can manage files, folders, and file archives in an automated manner. Setting up a cron job will handle this automatically.
It gives you more power and control over your system.
With so many Mac commands, it’s often difficult to remember and use them all. We’re here to help with a detailed cheat sheet of Mac Terminal commands you can use to unlock enhanced productivity on your system.
Launch the Terminal app from Applications > Utilities or search for it via Spotlight. Then you can get started with some of the powerful commands below.
The Mac Terminal Commands Cheat Sheet
Command
Action
Shortcuts
Tab
Auto-complete file and folder names
Ctrl + A
Go to the beginning of the line you’re currently typing on
Ctrl + E
Go to the end of the line you’re currently typing on
Ctrl + U
Clear the line before the cursor
Ctrl + K
Clear the line after the cursor
Ctrl + W
Delete the word before the cursor
Ctrl + T
Swap the last two characters before the cursor
Esc + T
Swap the last two words before the cursor
Ctrl + L
Clear the screen
Ctrl + C
Kill whatever you’re running
Ctrl + D
Exit the current shell
Option + →
Move cursor one word forward
Option + ←
Move cursor one word backward
Ctrl + F
Move cursor one character forward
Ctrl + B
Move cursor one character backward
Ctrl + Y
Paste whatever was cut by the last command
Ctrl + Z
Puts whatever you’re running into a suspended background process
Ctrl + _
Undo the last command
Basics
/ (Forward Slash)
Top level directory
. (Single Period)
Current directory
.. (Double Period)
Parent directory
~ (Tilde)
Home directory
sudo [command]
Run command with the security privileges of the super user
nano [file]
Opens the Terminal editor
open [file]
Opens a file
[command] -h
Get help about a command
man [command]
Show the help manual of the command
Change Directory
cd
Home directory
cd [folder]
Change directory, e.g. cd Documents
cd ~
Home directory
cd/
Root of the drive
cd –
Previous directory or folder you last browsed
pwd
Show your working directory
cd..
Move up to the parent directory
cd../..
Move up two levels
List Directory Contents
ls
Display the name of files and subdirectories in the directory
ls -C
Force multi-column output of the listing
ls -a
List all entries including those with .(period) and ..(double period)
ls -1
Output the list of files in one entry per line format
ls -F
Display a / (slash) immediately after each path that is a directory, * (asterisk) after executable programs or scripts, and @ after a symbolic link
ls -S
Sort files or entries by size
ls -l
List in a long format. Includes file mode, owner and group name, date and time file was modified, pathname, and more
ls -lt
List the files sorted by time modified (most recent first)
ls -lh
Long listing with human readable file sizes in KB, MB, or GB
ls -lo
List the file names with size, owner, and flags
ls -la
List detailed directory contents, including hidden files
File Size and Disk Space
du
List usage for each subdirectory and its contents
du -sh [folder]
Human readable output of all files in a directory
du -s
Display an entry for each specified file
du -sk* | sort -nr
List files and folders, totaling the size including the subfolders. Replace sk* with sm* to list directories in MB
df -h
Calculate your system’s free disk space
df -H
Calculate free disk space in powers of 1,000 (as opposed to 1,024)
File and Directory Management
mkdir <dir>
Create new folder named <dir>
mkdir -p <dir>/<dir>
Create nested folders
mkdir <dir1> <dir2> <dir3>
Create several folders at once
mkdir "<dir>"
Create a folder with a space in the filename
rmdir <dir>
Delete a folder (only works on empty folders)
rm -R <dir>
Delete a folder and its contents
touch <file>
Create a new file without any extension
cp <file> <dir>
Copy a file to the folder
cp <file> <newfile>
Copy a file to the current folder
cp <file>~/<dir>/<newfile>
Copy a file to the folder and rename the copied file
cp -R <dir> <"new dir">
Copy a folder to a new folder with spaces in the filename
cp -i <file><dir>
Prompts you before copying a file with a warning overwrite message
cp <file1> <file2> <file3>/Users/<dir>
Copy multiple files to a folder
rm <file>
Delete a file (This deletes the file permanently; use with caution.)
rm -i <file>
Delete a file only when you give confirmation
rm -f <file>
Force removal without confirmation
rm <file1> <file2> <file3>
Delete multiple files without any confirmation
mv <file> <newfilename>
Move/rename
mv <file> <dir>
Move a file to the folder, possibly by overwriting an existing file
mv -i <file> <dir>
Optional -i flag to warn you before overwriting the file
mv *.png ~/<dir>
Move all PNG files from current folder to a different folder
Command History
Ctrl + R
Search through previously used commands
history n
Shows the previous commands you’ve typed. Add a number to limit to the last n items
![value]
Execute the last command typed that starts with a value
!!
Execute the last command typed
Permissions
ls -ld
Display the default permission for a home directory
ls -ld/<dir>
Display the read, write, and access permission of a particular folder
chmod 755 <file>
Change the permission of a file to 755
chmod -R 600 <dir>
Change the permission of a folder (and its contents) to 600
chown <user>:<group> <file>
Change the ownership of a file to user and group. Add -R to include folder contents
Processes
ps -ax
Output currently running processes. Here, a shows processes from all users and x shows processes that are not connected with the Terminal
ps -aux
Shows all the processes with %cpu, %mem, page in, PID, and command
top
Display live information about currently running processes
top -ocpu -s 5
Display processes sorted by CPU usage, updating every 5 seconds
top -o rsize
Sort top by memory usage
kill PID
Quit process with ID <PID>. You’ll see PID as a column in the Activity Monitor
ps -ax | grep <appname>
Find a process by name or PID
Network
ping <host>
Ping host and display status
whois <domain>
Output whois info for a domain
curl -O <url/to/file>
Download file via HTTP, HTTPS, or FTP
ssh <username>@<host>
Establish SSH connection to <host> with user <username>
scp <file><user>@<host>:/remote/path
Copy <file> to a remote <host>
Homebrew
brew doctor
Check brew for potential problems
brew install <formula>
Install a formula
brew uninstall <formula>
Uninstall a formula
brew list
List all the installed formulas
brew search
Display available formulas for brewing
brew upgrade
Upgrade all outdated and unpinned brews
brew update
Fetch latest version of homebrew and formula
brew cleanup
Remove older version of installed formula
brew tap homebrew/cask
Tap the cask repository from GitHub
brew cask list
List all installed casks
brew cask install <cask>
Install the given cask
brew cask uninstall <cask>
Uninstall the given cask
Search
find <dir> -name <"file">
Find all files named <file> inside <dir>. Use wildcards (*) to search for parts of filenames
grep "<text>" <file>
Output all occurrences of <text> inside <file> (add -i for case insensitivity)
grep -rl "<text>" <dir>
Search for all files containing <text> inside <dir>
Output
cat <file>
Output the content of <file>
less <file>
Output the contents of <file> using the less command that supports pagination and more
head <file>
Output the first 10 lines of <file>
<cmd> > > <file>
Appends the output of <cmd> to <file>
<cmd> > <file>
Direct the output of <cmd> into <file>
<cmd1> | <cmd2>
Direct the output of <cmd1> to <cmd2>
Next, Customize the Terminal
There are lot of commands in this cheat sheet. But you don’t have to learn all of them at once! Pick a few that integrate well with your workflow and save you the most time. Once you’ve mastered these commands, there’s still more to learn about the Terminal to enhance your experience with it.
I don’t know how good pliers are made (rivet joints and box joints) so that they don’t seize up immediately. One extra whack of the big factory hammer seems to me like it’d wreck most efforts to make a good pair of pliers, or almost anything with a similar joint. They usually seem to get it close enough though, so good on ‘em.
Too many pliers at the stores are packaged so you can’t really get a good feel for the condition of a tool’s joint before you walk away (with it or without). I’ve got a few pliers with silky joints, and they’re an absolute pleasure to use. I’ve had (past tense!) some with sorta sticky joints that were more than a little irritating to use. I’ve had a few that were pretty well stuck, and so got zero use.
Breaking them in just didn’t seem to be worth the effort.
Bought another German pair around Christmas, mail order, good sale price. Too sticky to use. Dang. So I checked the solution machine at YouTube and got this:
Some Permatex compound ($5), some WD40, not a whole lot of work, and Bang! All my previously irritating pliers are silky! I’ve even picked up some truly rusty old abused pliers at Flea Markets and now they’re silky too. Last weekend I found a pair of Kraeuter pliers (a model last made in 1921) and, after some restoration work, they may be better than new. The process is cheap, only a little bit messy and easy to clean up. Rescue those pliers! Oh, and that new German pair (from NWS) is now terrific!
The M16 has a fascinating history in many ways. Its appearance is iconic, and has certainly become part of American culture. It is also a symbol, a microcosm, representing both American ingenuity, blunders…but also triumph.
The M16 design and development process itself was a brutal slog, resulting in a number of wrongheaded missteps, and ultimately in the tragic deaths of service members due to bureaucratic idiocy. Eventually, however, it became, in many ways, a superior rifle to the ones it replaced and led to the current service rifle of our armed forces, the M4 carbine.
It began with a comedy of errors, but ended in success. I’m going to skip a few details here and there to keep this a reasonable length. If someone wanted to commission me to do a book-length feature on this topic (if you’ve got the money, honey, I’ve got the time), get with me after this.
. The Korean War impressed upon the armed forces that while the M1 was accurate, powerful and reliable (when maintained) the poor carrying capacity and relatively heavy recoil made it ill-suited to attacks by massive waves of enemy troops which requires lots of rounds being shot at them.
The M1 Carbine fared no better; while the greater capacity was in its favor, the rather limp 110-grain .30 caliber bullet (less powerful than a .30-30) didn’t have the necessary wallop.
Since most killing in combat took place at rather close range (within 150 yards) they also decided that there were too many weapons systems in service. Why bother issuing the M1 Garand, M1 Carbine, Thompson submachine gun AND the BAR when you could replace them with a single gun that fired the same cartridge?
The government wanted a .30 rifle caliber cartridge, since that’s what they were used to. Additionally, the new .308 Winchester round offered a lot compared to .30-06. With the shorter case length, slightly flatter trajectory and roughly equivalent power, the soldier loses no firepower, but more ammunition can be shipped in the same size of cargo container.
So, they started taking submissions for a new rifle.
Armalite, a division of Fairchild, and their design wiz
, created a semi-auto rifle that handled a .30 caliber cartridge (the then-new .308 Winchester) with a simpler semi-automatic design and lightweight construction. That rifle, the AR-10, used a direct gas impingement system to cycle the bolt.
The design was ingenious at the time. The AR-10 cycles exhaust gases directly back into the receiver, blowing the bolt backward and ejecting the spent round. The buffer spring in the stock compresses and then sends the bolt forward, cocking the gun and cycling the next round into the chamber.
The AR-10, was fitted with furniture made of Bakelite (a hardy, somewhat heat-resistant resinous plastic notable for being the first totally synthetic plastic) and an alloy receiver, weighed less than 7 pounds unloaded.
It had most of the features you’re familiar with. There was a carrying handle, rear aperture sight and front blade sight, polymer stock, pistol grip and forend, the charging handle in the carrying handle rather than on the receiver, flash suppressor, an adjustable gas compensator and the hinged takedown design.
The T-47, an early prototype of the M14 rifle. Credit: Springfield Armory National Historic Site [Public domain], via Wikimedia Commons
Despite very favorable impressions in testing, the T44 rifle submitted by the Springfield Armory (the actual one; not the gun company) was chosen instead,
. The M14 was an improved M1 Garand design; the firing mechanism was almost unchanged, operation and maintenance were almost unchanged except that the M14 chambered .308 (later standardized by NATO as the 7.62mm NATO) ammunition, was magazine-fed with a 20-round box magazine instead of en bloc clips and was select fire-capable.
However, some folks in the armed forces felt almost right away that a smaller cartridge would solve several inherent problems. The .308/7.62mm round is effective, no doubt, but its recoil is rather stout when firing rapidly in semi-auto, and darn tough in full-auto. If a smaller cartridge could be created that had killing power out to, say, 500 yards, with lighter recoil, it would increase the effective lethality of the soldier wielding it.
That was exactly the thinking of General Willard Wyman, who put out a proposal in 1957 for a lightweight infantry rifle that chambered a .223-caliber bullet, effective to 500 yards and with more velocity than M1 Carbine ammunition. Since such a rifle would be easier to fire in close-quarters combat, it would replace the M1 Carbine, M1 Garand and Thompson as well.
Eugene Stoner set to work, scaling his rifle down for the new cartridge (commercialized as the .223 Remington) and had working prototypes in testing by 1958. The new rifle, then-designated the AR-15, actually worked very well.
The receiver, made of stamped alloy, was easy to make at scale since it didn’t require machining. The receiver and barrel, chrome-lined for durability, made it very reliable. The cyclic rate of 600 to 700 rounds per minute was very good and the rifle was quite controllable in full-auto firing. The barrel – with a fast 1:12 twist – made it quite accurate.
Now, by 1958, the M14 wasn’t Facebook official quite yet. Armalite, which was made into a going concern by Fairchild’s investment, had yet to sell any guns beyond the AR-7 (which was only sold in limited numbers to the Air Force) and was tired of having nothing to show for all its hard work. When General Maxwell Taylor ix-nayed the AR-15 in favor of the M14, Armalite decided it had had enough and sold the AR-15 and all rights to Colt.
Colt realized the potential of the AR-15 (and thus the M16) and decided to hang in there. Army trials demonstrated the easier operation but also the efficacy of the rifle, leading to General Curtis LeMay of the US Air Force ordering more than 8,000 of them and declaring it the standard service rifle of the Air Force in 1960.
Around that same time, the conflict in Vietnam was heating up. M14s in the hands of US “advisors” were already showing some weaknesses. Full-auto operation was all but untenable and semi-auto operation and the heavy rifle wasn’t much better when you’re confronted by a close-range ambush or mass charge. The M1 Carbine lacked stopping power, so that was clearly a non-starter.
As a field test, a few thousand AR-15s in their early configuration were put in the hands of South Vietnamese troops for testing under fire. The results were overwhelmingly positive, and reports of the M16’s performance continued to make their way back to Washington.
However, a series of tests conducted by the US Army continued to favor the M14 despite reports from the field indicating the opposite. Secretary of Defense Robert S. McNamara ordered Cyrus Vance – then-Secretary of the Army – to look into why that was happening, and he discovered that the Army was (purposefully) testing match-grade M14s against off-the-rack M16 rifles.
Robert S. McNamara. Credit: Cecil Stoughton, White House photographer [Public domain], via Wikimedia Commons
McNamara called BS, and after having a look at the supply chain for the M14 (McNamara, prior to his service as SecDef, was a rising star at the Ford Motor Company, briefly serving as the company’s president) concluded that it wasn’t sustainable. So he told Taylor, et al., that their goose was cooked and ordered a whole lot of M16 rifles.
However, the old guard wasn’t done. They insisted on the installation of a forward assist in case of jams, which the M1 Garand and M14 had. Everyone who developed the rifle responded, “What are you doing forcing a round in that doesn’t want to go…just eject the thing!” but they would have none of it. The Air Force, however, went ahead; Air Force M16s lacked the forward assist. However, the Army version – the XM16E1 – were equipped with a forward assist. At that point, it was basically done.
By 1963, the M16 was adopted as the standard service rifle for the armed forces. Colt even started selling Colt Armalite Rifles and Colt Sporter Rifles to civilians, which were semi-auto versions for sport shooting. However, at this point, a few key revisions had been made to the M16 that severely compromised its use in the field.
The chrome lining of the receiver had been omitted, to save cost in manufacturing. And by 1964, DuPont informed the government that it couldn’t keep up with demand for propellant.
The .223 Remington cartridge was devised by seating a 55-grain .223-caliber bullet over IMR 4475, a stick powder. Olin came up with an alternative, WC 846, a ball powder. While WC 486 did the job of propelling a 55-grain projectile at 3,300 feet per second, it burned dirty and produced a lot more fouling. Colt also decided it was good idea to bill the rifle as “self-cleaning” and therefore, soldiers didn’t need a cleaning kit.
Early editions of the rifle, had a storage compartment in the stock which contained a cleaning kit. In the first few years of its service history in Vietnam, there was no cleaning kit in there, nor did many infantrymen receive one.
Prior to that, the rifle was known to function reliably. It was accurate at ranges up to 500 yards and lethal. It had few stoppages. Bureaucratic in-fighting and corner-cutting would end up costing many US Army soldiers and US Marines their lives.
By 1965, all troops in-country were issued M16 rifles. Reports started coming in of frequent stoppages, usually failures to eject caused by constant fouling; dead soldiers were found clutching a cleaning rod. Keeping the rifles in working order required constant cleaning, often more than was feasible.
PFC John Henson of the 101st Airborne cleans his M16 rifle. Credit: US Army Post-Work: User:W.wolny [Public domain], via Wikimedia Commons
This led those who had the option to reach for BARs, Stoner rifles and M14s issued to South Vietnamese forces, or picking up AK-47s from dead North Vietnamese and Viet Cong troops.
Eventually, the US Government decided to do something about it and started making some fixes. The chamber and bore were chromed to reduce fouling, cleaning kits were issued more liberally, and new lubricants and propellants were developed to make the gun run cleaner and more reliably.
They also added a birdcage flash suppressor and – in limited batches – created a variant that fired three-round burst instead of full auto.
The fixes worked, and the new variant with said improvements – the M16A1, which first entered service in 1967 – was immediately noted as a drastic improvement over the original.
By 1969, the M14 had been officially knocked off its perch, and the M16A1 remained the standard service rifle until the M16A2 was introduced in the 1980s.
During the Vietnam war, NATO was advised that they should switch to the 5.56mm round instead of the then-standard 7.62x51mm round. NATO pretty much agreed, creating the now-standard 5.56mm NATO round.
After the war, the new standard 5.56mm NATO round (and experience) required some updates, which the US Marines and the army started asking for by the end of the 70s. The Marines asked for a heavier end to the barrel, a flash suppressor with a closed bottom, and sights that could be adjusted for windage and elevation on the fly.
They also wanted a round handguard as opposed the triangular handguard that had been the standard for so long, and they wanted to be able to put a grenade launcher on it (because freedom). Additionally, the twist rate was to be changed to 1:7 to accommodate heavier NATO rounds, including 62-grain tracer ammunition.
M16A2 upper. Note the sight adjustment controls outside the carrying handle. Credit: Fourdee via Wikimedia Commons
The firing mechanism was also changed to three-shot bursts, as it was found the full-auto M16A1 lent itself to “spraying and praying” by inexperienced operators. Pretty much everyone agreed, and those changes were instituted by the mid-80s and the rifle re-designated the M16A2. This rifle served as the official rifle of the US armed forces from the 1980s through the first Gulf War.
A limited number of M16A3s, with full-auto capability instead of 3-round bursts, were made for Navy SEAL and other special operations groups. However, the M16A2 remained in service until…pretty much a few years ago when they were finally phased out of Marine Corps service.
Throughout the Vietnam war, a number of carbine-length versions of the M16 were created and used in various capacities, called the Colt Commando. It wasn’t much at long range but was well-liked for close-in work.
Colt set about tuning it up in the 1980s, eventually settling on a variant with a 14.5-inch barrel. This gave the rifle the optimum balance between accuracy and compact form, along with an adjustable stock which let it be compacted even more.
M4 Carbines in a live-fire exercise. Credit: US Marine Corps Sgt. Devin Nichols [Public domain], via Wikimedia Commons
The then-XM4 was dubbed the M4, and saw its first real deployment in Kosovo. It performed so well that the Army started issuing more and more of them, even ordering officers up to Lt. Colonel in rank to stop carrying pistols and carry an M4 instead. It also replaced submachine guns for most uses. It became so common that the US Army had phased the M16 almost entirely out of front-line service by the early 2000s.
The US Marines also made some revisions in recent years to create the M16A4 variant. The M16A4 eliminated the round handguard in favor of a quad-rail handgaurd by Knight’s Armament. The carry handle and sights were eliminated in favor of a Picatinny rail running the entire length of the receiver to the end of the handguard, and combat optics (red dot sights) added in lieu of iron sights.
M16A4 in combat with the US Marine Corps. Note the optic and quad-rail handguard. Credit: U.S. Marine Corps photo by Cpl. James L. Yarboro [Public domain], via Wikimedia Commons
The M16A4 also added a muzzle compensator instead of a flash suppressor, installed a heavier barrel and free-floated it for greater accuracy. Bolt-catch releases and charging handles were changed to allow ambidextrous operation, and the trigger was improved for an easier pull. The M16A4 was also issued in semi-auto only in addition to the burst mode. Limited numbers of rifles with adjustable stocks were also issued by the Marines.
However, these improvements came a little late in the game. M16A4 rifles were issued in limited numbers starting in 2014 and 2015, which happened to coincide with the announcement that the Marine Corps was switching entirely to the M4 Carbine.
Some other changes occurred along the way. No longer entirely satisfied with Colt’s products, the Army and the Marines have both changed providers to FN. FN had already been making M16A4s for the USMC, but is now also producing M4s for the US Army and the Marines…though the Marine Corps is also in the process of phasing out the M4 in favor of the M27 IAR, an improved AR design by Heckler and Koch.
A member of Marine Force Recon firing the M27 IAR, an H&K-designed rifle based heavily on the M16. Credit: Staff Sgt. Ezekiel Kitandwe [Public domain], via Wikimedia Commons
Today, the M16 has been all but completely phased out except for some select examples that are still in service in front line and reserve units. The M4 has pretty much replaced it, which itself
Best Tech DealsThe best tech deals from around the web, updated daily.
Turns out, having a laptop with only USB-C ports means you need to carry a dongle with you from time to time. Who knew? Luckily, these $15 hubs from VAVA ($15 clippable coupon + promo code KINJAVAHUB) are designed to perfectly match your MacBook, and turn one USB-C port into an ethernet port, an SD card reader, an HDMI output, and three USB 3.0 ports. There’s even pass-through USB-C charging, so you’re not even really using up one of your precious ports.
For comparison, the best previous deal we’ve seen on this hub was $27, which itself was pretty noteworthy. These things aren’t cheap! So if you have a USB-C-powered laptop (or even a phone or a tablet), and don’t already own something like this, I’d order it quickly before the deal goes kaput.
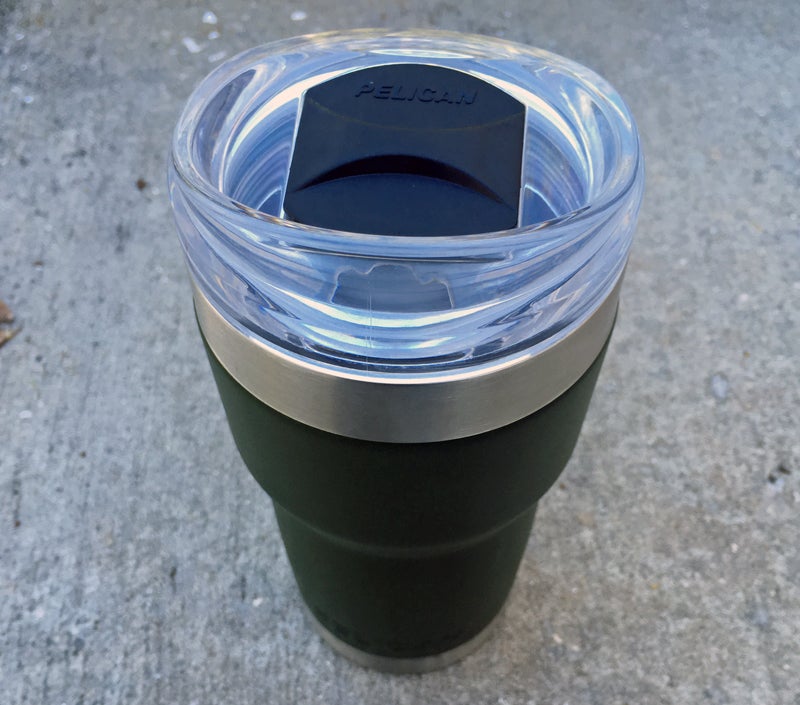
Working and playing in the great outdoors isn’t always about camouflage and chainsaws. We gotta stay hydrated while we’re out there! And to that end, Pelican sent me one of their stainless steel vacuum tumblers to try out. After more than a year of regular use, it’s time to talk about it here.
Guaranteed for life (“You break it, we replace it… Forever”)
Spill-resistant lid with sliding cover
Generous “lip” on lid keeps your lips off of the stainless steel
Available colors: Black, OD Green, Seafoam, Stainless
It Works
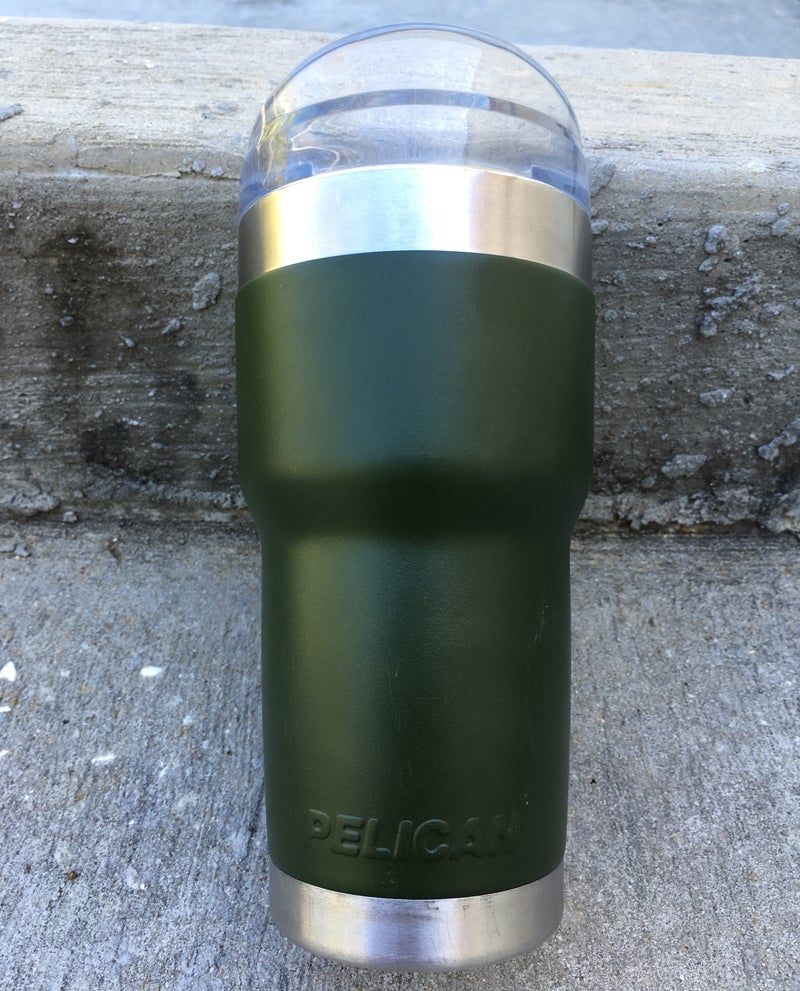
I ordered my Pelican tumbler in OD Green, which is a really attractive color in my opinion. And even though my wife doesn’t usually love green, she commandeered my Pelican tumbler almost immediately. One reason is that when she drives somewhere with her sisters, this Pelican fits in cup holders where her other stainless tumbler just won’t.
Pelican claims it “fits in up to 99% of all car and truck cup holders,” and so far they’ve been correct.
The smaller portion at the base which allows it to fit so many cup holders also makes it easier to hold in your hand, and the shoulder helps prevent it from slipping down in wet (or weaker) hands.
As for ice retention, the Pelican Traveler is certainly up to snuff. Even after sitting in a closed vehicle in the hot Florida sun for hours, the Traveler still has ice inside. In fact, we had to stop filling it all the way with ice before adding water, because after drinking all the water, the ice would never melt! Being thirsty with a tumbler full of ice is no fun.
The Traveler’s lid is the best I’ve ever seen for one of these stainless vacuum tumblers. Instead of cramming it down into the tumbler and later fighting with a tight rubber seal to remove it, you just screw it on and off. Not only is it easier to put on and off — my sweetie says it doesn’t hurt her hands like other lids — but this also means the lid is not going to come flying off if you drop your Traveler.
The sliding cover is also a nice touch. This is great for dusty conditions like when you’re mowing the lawn or trail riding, and it helps prevent your drink from splashing out too.
Our other favorite feature of the Traveler’s lid is that your mouth doesn’t touch the tumbler when you drink. The lid has a large lip or spout area, which makes it easier and more pleasant to drink from than most stainless steel tumblers.
Of course, the Pelican Traveler has the same recommendations as other vacuum-insulated stainless steel vessels: Don’t freeze it, don’t microwave it, and hand-wash instead of using the dishwasher.
The Pelican 22-Ounce Traveler stainless steel tumbler is a well-made drinking vessel that should last for a heck of a long time. It’s well-designed and durable, easy to hold, fits in most cup holders, won’t sweat, and has the best lid around.
We sure like ours, and my wife is certain to keep her claim on this one. And that’s okay, because I’d rather have the 32-ounce model anyhow…
Welcome to TFB’s series on building your own Glock. In this series, we will take an 80% frame and a pile of parts, and assemble a safe and consistent G19. Believe it or not, it is very easy, and perfectly legal. You will see that with a bit of patience and minimal equipment you CAN build your own Glock. If you go with the standard parts and look, you may not save too much. If you want to go the custom route or are interested in having a pistol you created, AKA a “ghost gun”, this is the way to go.
Legality
Is this even legal? According to the ATF, yes, though state and local laws may be different. After my research, I was able to find an ATF agent kind enough to sit down with me. A great guy who was willing to go over all points with me. As with everything, it seems, it comes down to intent. If you intend on building a Glock for yourself you are fine. If you intend on building a firearm to sell or trade you need a firearms manufacturer license. Build it, keep it and you are fine. Again, check your local laws.
The Build
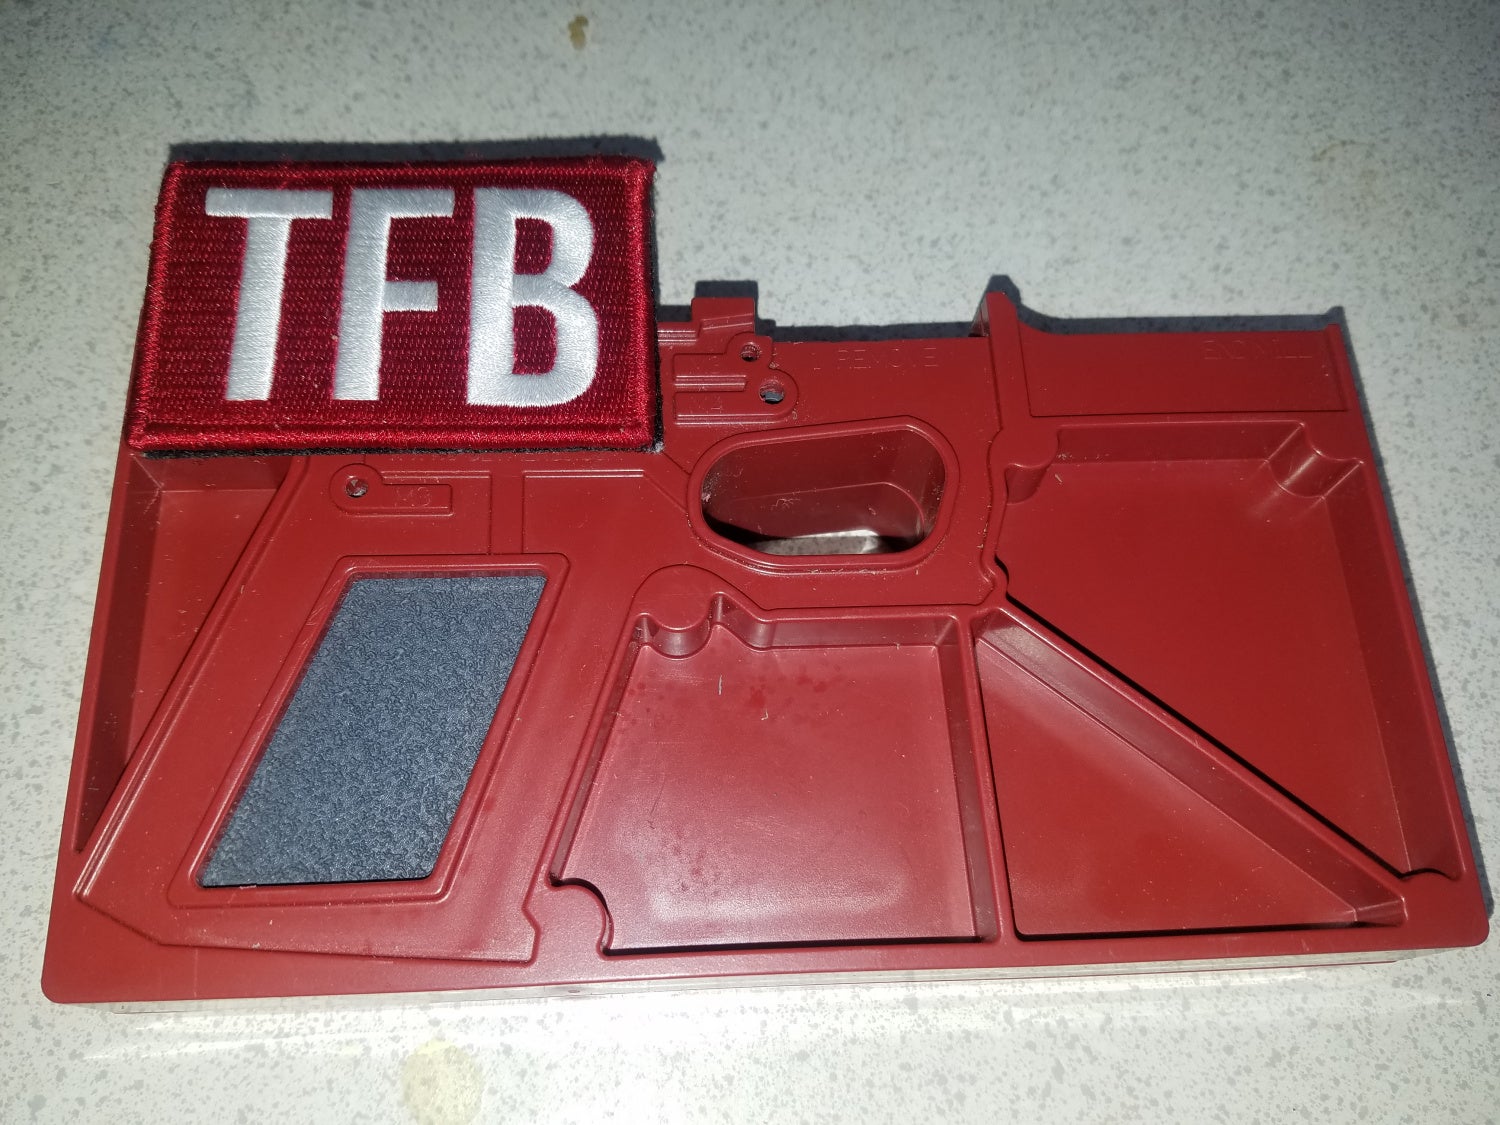
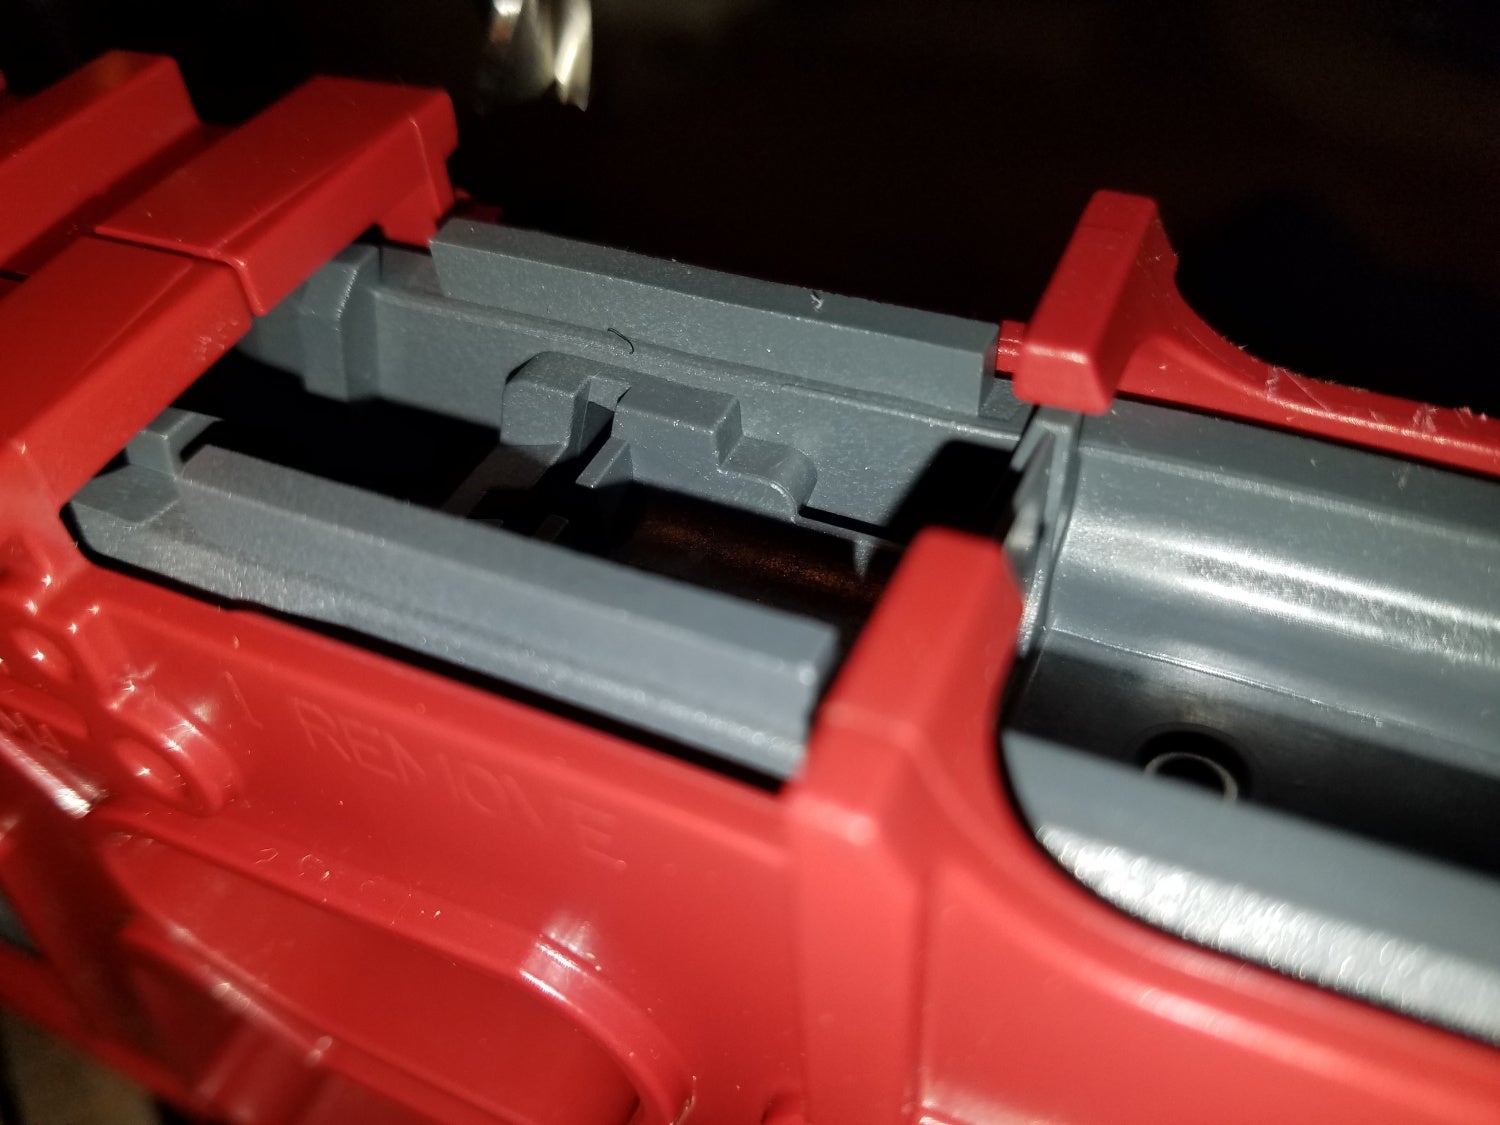
Your Glock 80% receiver will ship all ready inside the jig. The jig is there to guide your cutting and drilling. Although it is counterintuitive, your building labor is actually removing material. The pin holes are not present, and there is extra material on the top of the receiver, as well the center. That material should be removed to bring the receiver to “100%”
The jig arrives with the receiver in place. The drill holes are obvious here
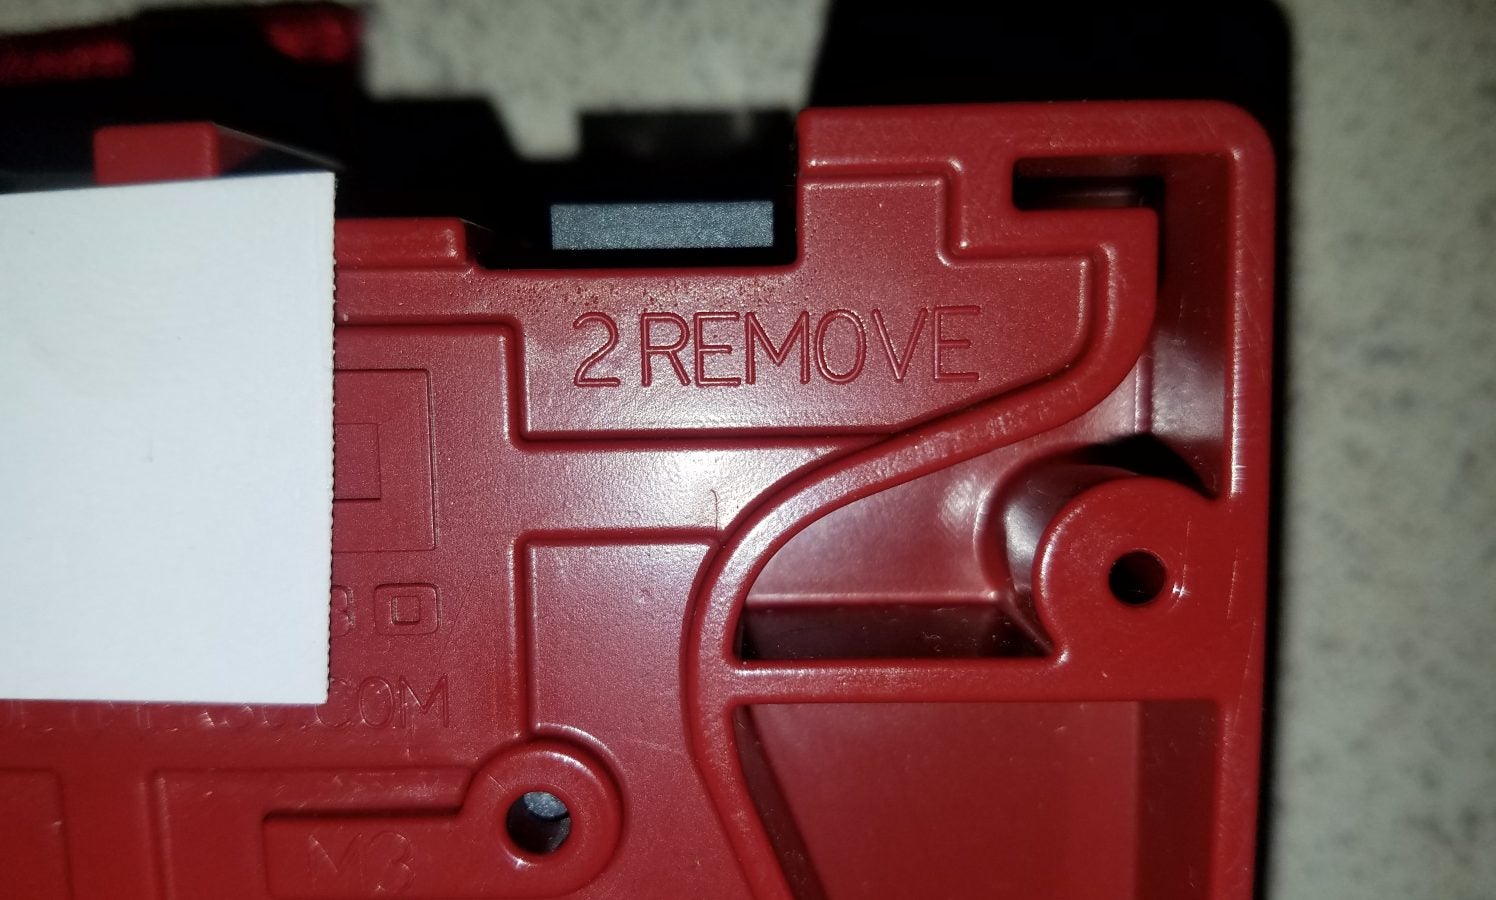
The jig is clearly marked what material to remove
The jig is set up to guide you in removing the material. Here is some of the extra material to remove.
I found a video that gives some great advice on how to do it. It is done on an older (or at least different) 80% frame then I received, but the same ideas apply. You can see it here.
My frame came with a link to a PDF of the instructions. Find it here.
REMOVING MATERIAL
Initially, the drill press was my plan to remove the excess material. I had some problems with the jig getting bucked, so I stopped and went to the Dremel. A Dremel is a great tool, just do not go angry beaver and remove too much and destroy your frame. If you go with the Dremel I strongly recommend you remove about 75% of what you want to remove, then remove material by hand. I finished the work up with files and then sandpaper. As with anything like this, TAKE YOUR TIME.
When you have removed the material, finish with some fine sandpaper. Sanding it with oil will help you get a finer finish.
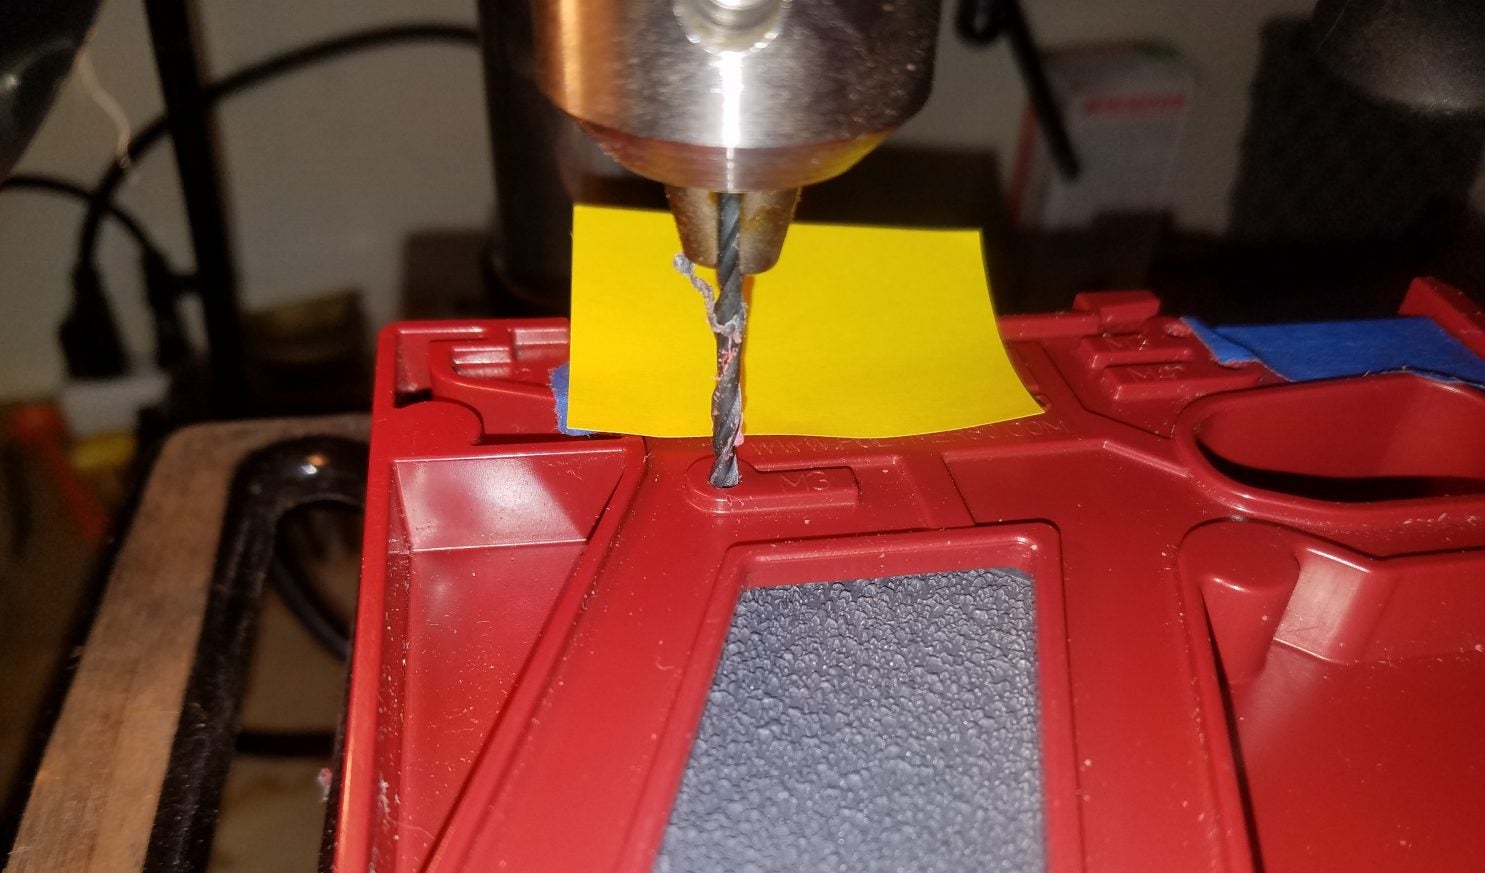
I still used the drill press for drilling the holes. I was told it was easy to not make the holes even by using a hand drill. Once you remove material, there is no putting it back.
On the 80% frame, you need to drill from the outside in. So you drill each side of the jig to the center, not all the way through.
Drill both sides, outside to center only
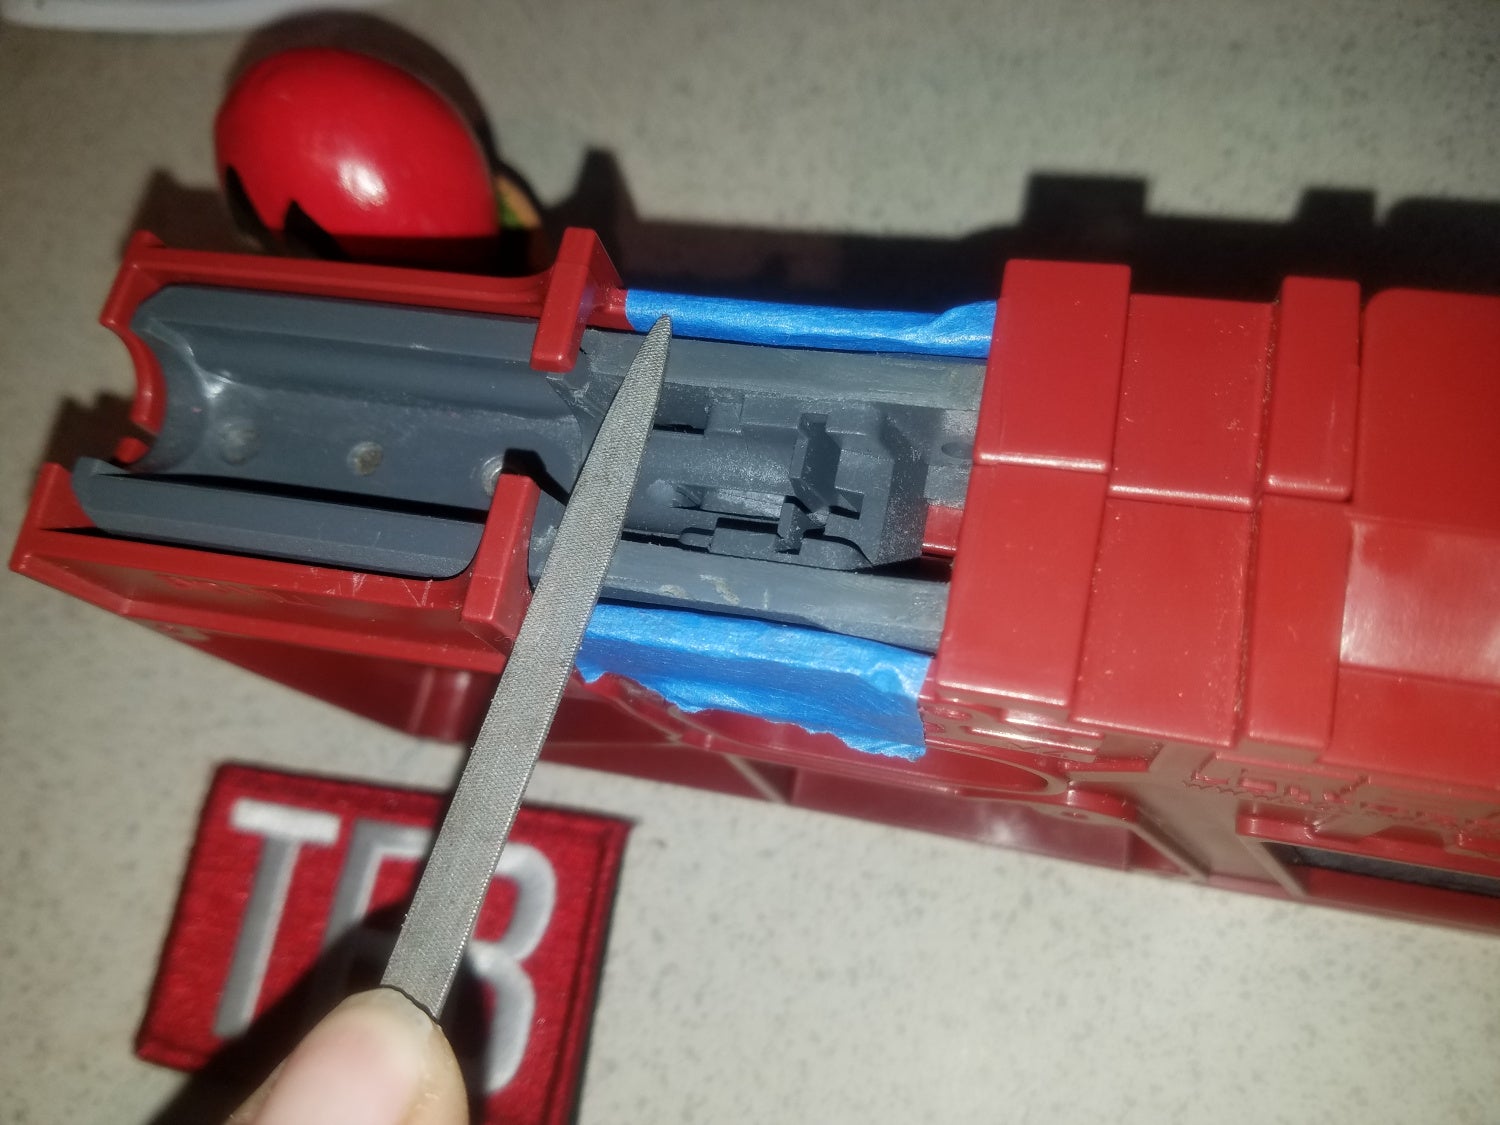
After the Dremel, I used files. A little tape allows me to know when I have taken off enough material
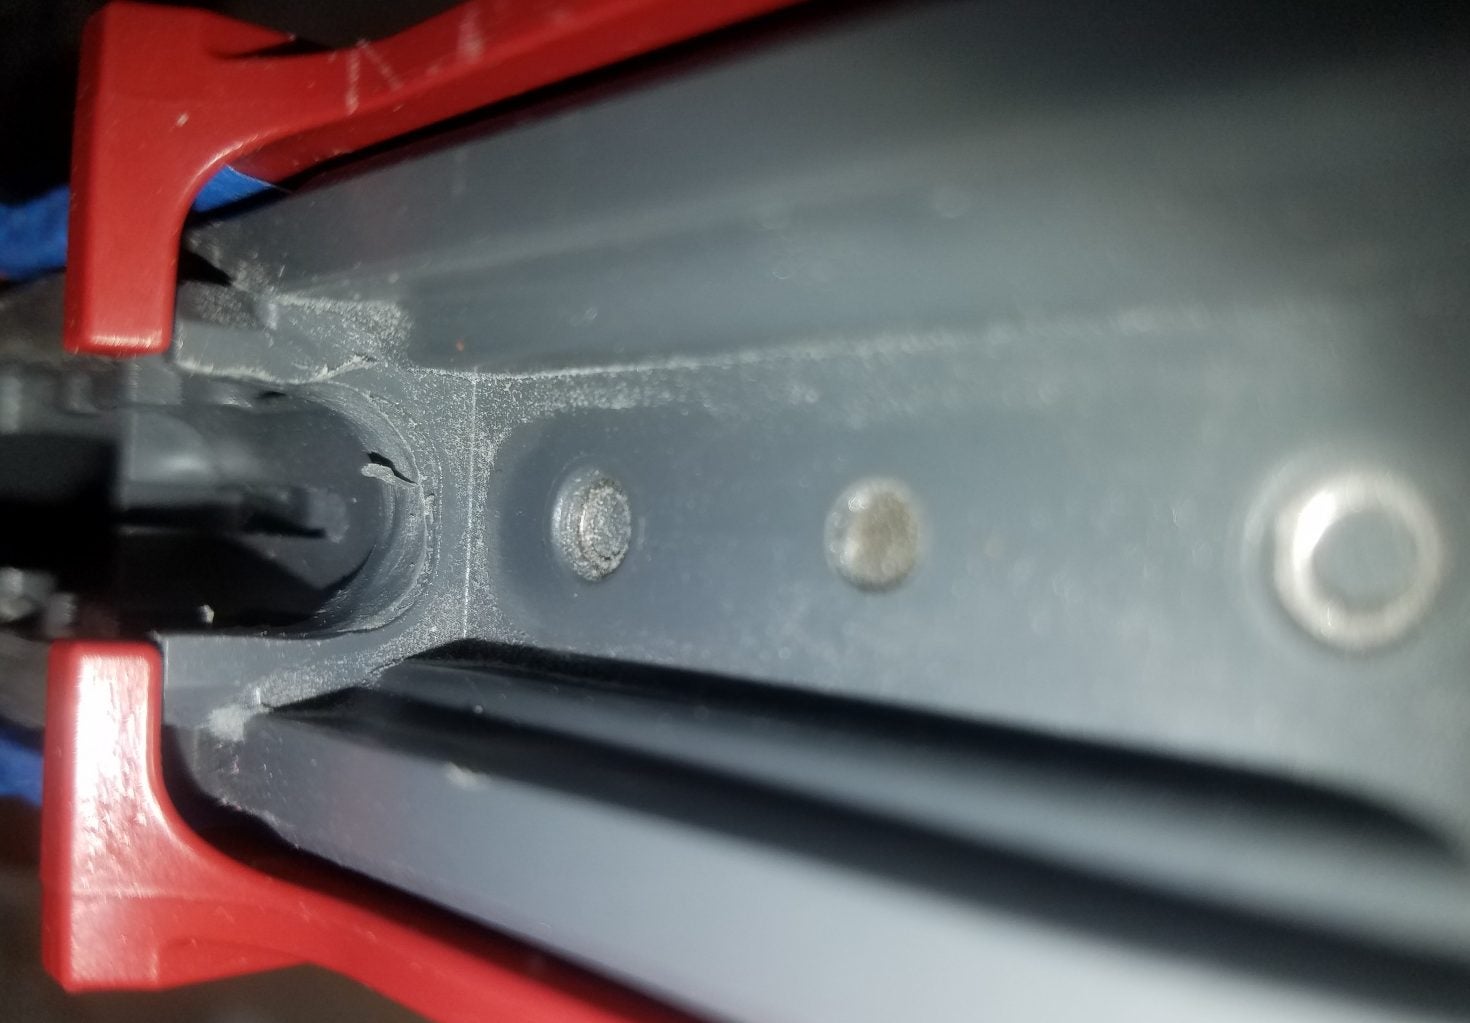
Close-up of where the material was removed, before finishing with sandpaper.
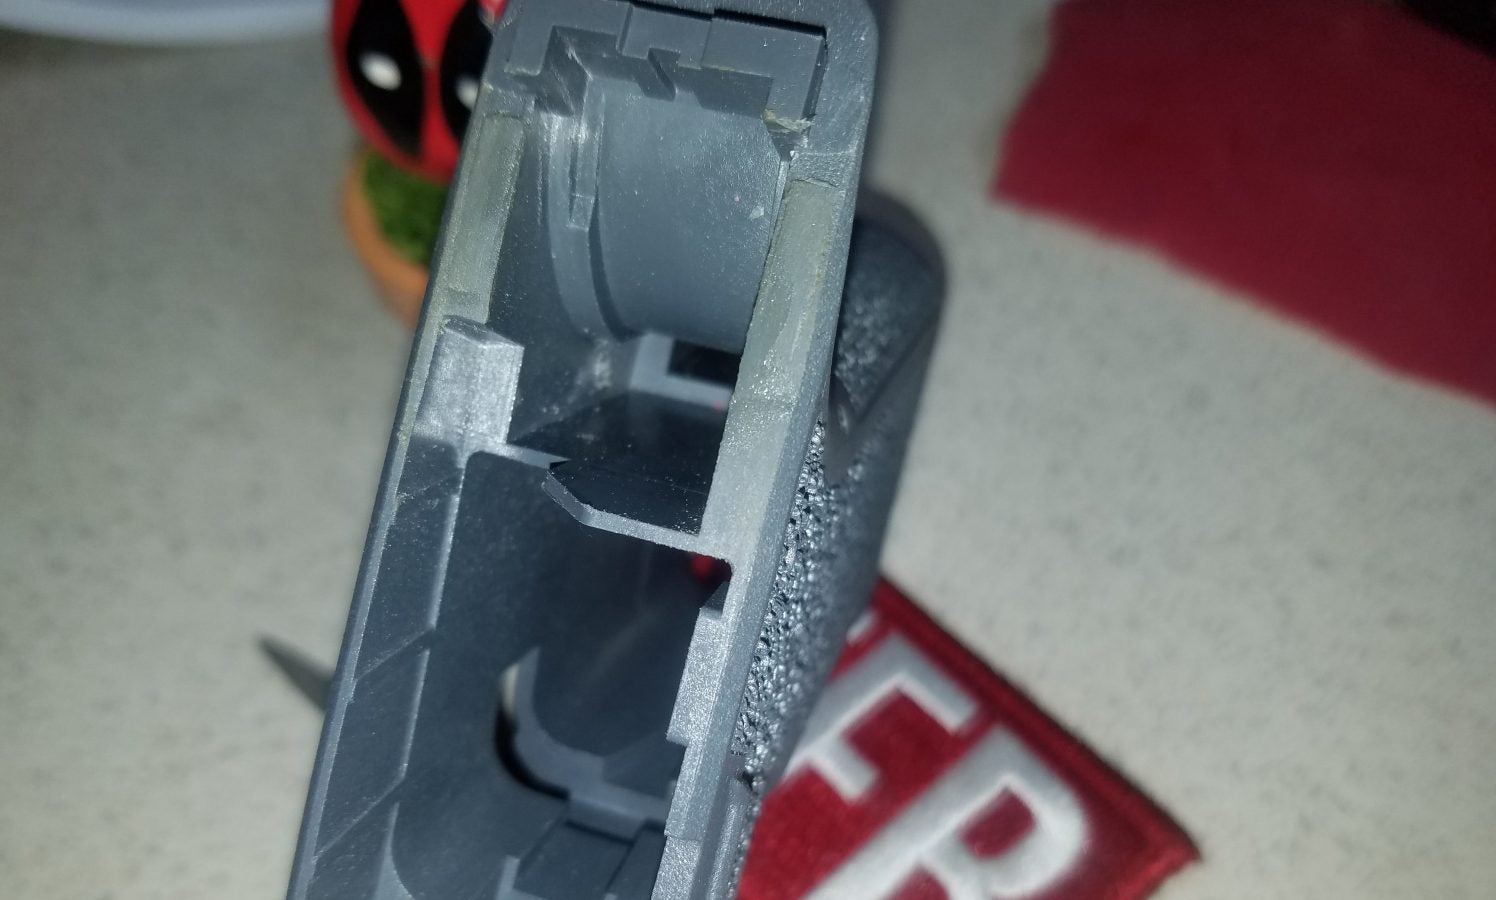
The area of the barrel block was easy to Dremel but challenging to finish up. This is just after the Dremel.
Conclusion
Bringing the 80% up to 100% was pretty easy. Just take your time. The more time you put into it, the better the completed product becomes. All it is removing 4 strips of material, and drilling 6 holes. Not too much, but plenty of opportunities to make a mistake. Spend more time with sandpaper then with the Dremel. I spent about 20 minutes on the Dremel and about 2 hours with sandpaper, and am very happy with the outcome.
A HUGE thanks to Lonewolf for coming thru with this, when others did not. Although they did not give me all this merchandise, they gave me a good discount. I ask that you consider them if you are going to build your own Glock.
Great company with good people. Check them out here.
A shout out to “Mr. J” who reached out to me and gave some great advice. He has built a number of these and gave some great insight. I very much appreciate it. His input has a lot of influence on the next article in the series.
We are committed to finding, researching, and recommending the best products. We earn commissions from purchases you make using the retail links in our product reviews.
In this tutorial, we’ll learn how to add JWT authentication to our REST API PHP application.
We’ll see what JWT is and how it works. We’ll also see how to get the authorization header in PHP. What is JWT
JWT stands for JSON Web Token and comprised of user encrypted information that can be used to authenticate users and exchange information between clients and servers. When building REST API, instead of server sessions commonly used in PHP apps we tokens which are sent with HTTP headers from the server to clients where they are persisted (usually using local storage) then attached to every outgoing request originating from the client to the server. The server checks the token and allow or deny access to the request resource. RESTful APIs are stateless. This means that requests from clients should contain all the necessary information required to process the request. If you are building a REST API application using PHP, you are not going to use the $_SESSION variable to save data about the client’s session. This means, we can not access the state of a client (such as login state). In order to solve the issue, the client is responsible for perisiting the state locally and send it to the sever with each request. Since these important information are now persisted in the client local storage we need to protect it from eyes dropping. Enter JWTs. A JWT token is simply a JSON object that has information about the user. For example:
{
"user": "bob",
"email": "bob@email.com",
"access_token": "at145451sd451sd4e5r4",
"expire_at"; "11245454"
}
Since thos token can be tampered with to get access to protected resources. For example, a malicious user can change the previous token as follows to access admin only resources on the server:
{
"user": "administrator",
"email": "admin@email.com"
}
To prevent this situation, we JWTs need to be signed by the server. If the token is changed on the client side, the token’s signature will no longer be valid and the server will deny access to the requested resource.
How JWT Works
JWT tokens are simply encrypted user’s information like identifier, username, email and password. When users are successfully logged in the server, the latter will produce and send a JWT token back to the client. This JWT token will be persisted by the client using the browser’s local storage or cookies and attached with every outgoing request so if the user requests access to certain protected resources, the token needs to be checked first by the server to allow or deny access. What is PHP-JWT
php-jwt is a PHP library that allows you to encode and decode JSON Web Tokens (JWT) in PHP, conforming to RFC 7519.
Prerequisites
You must have the following prerequsites to be able to follow this tutorial from scratch:
You need PHP 7, Composer and MySQL database system installed on your development environment,
You need to have basic knowledge of PHP and SQL.
Creating the MySQL Database and Table(s)
If you have the prerequisites, let’s get started by creating the MySQL database. We’ll be using the MySQL client installed with the server. Open a terminal and run the following command to invoke the client:
$ mysql -u root -p
You need to enter your MySQL password when prompted.
Next, let’s create a database using the following SQL instruction:
mysql> create database db;
Note: Here we assume you have a MySQL user called root. You need to change that to the name of an existing MySQL user.
You can also use phpMyAdmin or any MySQL client you are comfortable with to create the database and SQL tables.
Let’s now select the db database and create a users table that will hold the users of our application:
mysql> use db;
mysql> CREATE TABLE IF NOT EXISTS `Users` (
`id` INT AUTO_INCREMENT ,
`first_name` VARCHAR(150) NOT NULL ,
`last_name` VARCHAR(150) NOT NULL ,
`email` VARCHAR(255),
`password` VARCHAR(255),
PRIMARY KEY (`id`) );
Creating the Project Directory Structure
Let’s create a simple directory strucutre for our project. In your terminal, navigate to your working directory and create a folder for our project:
$ mkdir php-jwt-example
$ cd php-jwt-example
$ mkdir api && cd api
$ mkdir config
We first created the project’s directory. Next, we created an api folder. Inside it, we created a config folder. Connecting to your MySQL Database in PHP
Navigate to the config folder and create a database.php file with the following code:
<?php
// used to get mysql database connection
class DatabaseService{
private $db_host = "localhost";
private $db_name = "mydb";
private $db_user = "root";
private $db_password = "";
private $connection;
public function getConnection(){
$this->connection = null;
try{
$this->connection = new PDO("mysql:host=" . $this->db_host . ";dbname=" . $this->db_name, $this->db_user, $this->db_password);
}catch(PDOException $exception){
echo "Connection failed: " . $exception->getMessage();
}
return $this->connection;
}
}
?>
Installing php-jwt
Let’s now proceed to install the php-jwt library using Composer. In your terminal, run the following command from the root of your project’s directory:
$ composer require firebase/php-jwt
This will donwload the php-jwt library into a vendor folder.
You can require the php-jwt library to encode and decode JWT tokens using the following code:
<?php require "vendor/autoload.php";
use \Firebase\JWT\JWT;
Adding the User Registration API Endpoint
Inside the api folder, create a register.php file and add the following code to create a new user in the MySQL database:
<?php
include_once ‘./config/database.php’;
header("Access-Control-Allow-Origin: * ");
header("Content-Type: application/json; charset=UTF-8");
header("Access-Control-Allow-Methods: POST");
header("Access-Control-Max-Age: 3600");
header("Access-Control-Allow-Headers: Content-Type, Access-Control-Allow-Headers, Authorization, X-Requested-With");
$firstName = ”;
$lastName = ”;
$email = ”;
$password = ”;
$conn = null;
$databaseService = new DatabaseService();
$conn = $databaseService->getConnection();
$data = json_decode(file_get_contents("php://input"));
$firstName = $data->first_name;
$lastName = $data->last_name;
$email = $data->email;
$password = $data->password;
$table_name = ‘Users’;
$query = "INSERT INTO " . $table_name . "
SET first_name = :firstname,
last_name = :lastname,
email = :email,
password = :password";
$stmt = $conn->prepare($query);
$stmt->bindParam(‘:firstname’, $firstName);
$stmt->bindParam(‘:lastname’, $lastName);
$stmt->bindParam(‘:email’, $email);
$password_hash = password_hash($password, PASSWORD_BCRYPT);
$stmt->bindParam(‘:password’, $password_hash);
if($stmt->execute()){
http_response_code(200);
echo json_encode(array("message" => "User was successfully registered."));
}
else{
http_response_code(400);
echo json_encode(array("message" => "Unable to register the user."));
}
?>
Adding the User Login API Endpoint
Inside the api folder, create a login.php file and add the following code to check the user credentials and return a JWT token to the client:
<?php
include_once ‘./config/database.php’;
require "../vendor/autoload.php";
use \Firebase\JWT\JWT;
header("Access-Control-Allow-Origin: *");
header("Content-Type: application/json; charset=UTF-8");
header("Access-Control-Allow-Methods: POST");
header("Access-Control-Max-Age: 3600");
header("Access-Control-Allow-Headers: Content-Type, Access-Control-Allow-Headers, Authorization, X-Requested-With");
$email = ”;
$password = ”;
$databaseService = new DatabaseService();
$conn = $databaseService->getConnection();
$data = json_decode(file_get_contents("php://input"));
$email = $data->email;
$password = $data->password;
$table_name = ‘Users’;
$query = "SELECT id, first_name, last_name, password FROM " . $table_name . " WHERE email = ? LIMIT 0,1";
$stmt = $conn->prepare( $query );
$stmt->bindParam(1, $email);
$stmt->execute();
$num = $stmt->rowCount();
if($num > 0){
$row = $stmt->fetch(PDO::FETCH_ASSOC);
$id = $row[‘id’];
$firstname = $row[‘first_name’];
$lastname = $row[‘last_name’];
$password2 = $row[‘password’];
if(password_verify($password, $password2))
{
$secret_key = "YOUR_SECRET_KEY";
$issuer_claim = "THE_ISSUER";
$audience_claim = "THE_AUDIENCE";
$issuedat_claim = TIME_IN_SECONDS; // issued at
$notbefore_claim = TIME_IN_SECONDS; //not before
$token = array(
"iss" => $issuer_claim,
"aud" => $audience_claim,
"iat" => $issuedat_claim,
"nbf" => $notbefore_claim,
"data" => array(
"id" => $id,
"firstname" => $firstname,
"lastname" => $lastname,
"email" => $email
));
http_response_code(200);
$jwt = JWT::encode($token, $secret_key);
echo json_encode(
array(
"message" => "Successful login.",
"jwt" => $jwt
));
}
else{
http_response_code(401);
echo json_encode(array("message" => "Login failed.", "password" => $password, "password2" => $password2));
}
}
?>
We now have two restful endpoints for registering and log users in. At this point, you can use a REST client like Postman to intercat with the API.
First, start your PHP server using the following command:
$ php -S 127.0.0.1:8080
A development server will be running from the 127.0.0.1:8080 address.
Let’s now, create a user in the database by sending a POST request to the api/register.php endpoint with a JSON body that contains the first_name, last_name, email and password:
You should get an 200 HTTP response with a User was successfully registered. message.
Next, you need to send a POST request to the /api/login.php endpoint with a JSON body that contains the email and password used for registering the user:
You should get a Successful login message with a JWT token.
The JWT token needs to be persisted in your browser’s local storage or cookies using JavaScript then attached to each send HTTP request to access a protected resource on your PHP server.
Protecting an API Endpoint Using JWT
Let’s now see how we can protected our server endpoints using JWT tokens. Before accessing an endpoint a JWT token is sent with every request from the client. The server needs to decode the JWT and check if it’s valid before allowing access to the endpoint.
Inside the api folder, create a protected.php file and add the following code:
<?php
include_once ‘./config/database.php’;
require "../vendor/autoload.php";
use \Firebase\JWT\JWT;
header("Access-Control-Allow-Origin: *");
header("Content-Type: application/json; charset=UTF-8");
header("Access-Control-Allow-Methods: POST");
header("Access-Control-Max-Age: 3600");
header("Access-Control-Allow-Headers: Content-Type, Access-Control-Allow-Headers, Authorization, X-Requested-With");
$secret_key = "YOUR_SECRET_KEY";
$jwt = null;
$databaseService = new DatabaseService();
$conn = $databaseService->getConnection();
$data = json_decode(file_get_contents("php://input"));
$authHeader = $_SERVER[‘HTTP_AUTHORIZATION’];
$arr = explode(" ", $authHeader);
/*echo json_encode(array(
"message" => "sd" .$arr[1]
));*/
$jwt = $arr[1];
if($jwt){
try {
$decoded = JWT::decode($jwt, $secret_key, array(‘HS256’));
// Access is granted. Add code of the operation here echo json_encode(array(
"message" => "Access granted:",
"error" => $e->getMessage()
));
}catch (Exception $e){
http_response_code(401);
echo json_encode(array(
"message" => "Access denied.",
"error" => $e->getMessage()
));
}
}
?>
You can now send a POST request with an Authorization header in the following formats:
JWT <YOUR_JWT_TOKEN_HERE> Or also using the bearer format:
Bearer <YOUR_JWT_TOKEN_HERE>
Conclusion
In this tutorial, we’ve seen how to implement JWT authentication in PHP and MySQL.
via Planet MySQL PHP JWT Authentication Tutorial


.jpg)