The case for boosting enterprise software startups with services


One of the truisms of software business strategy is that services is bad business; heck, we’ve also said it. The reason, put bluntly, is that it’s a business with low margins and is not as scalable. So in the early days of bringing to market a complex enterprise software product, the repeated feedback I got from nearly all my advisors was to make sure customers were paying for software licenses, not services. (Although I remember when receiving this advice in the early days of Nicira that I wished I even had the problem of money coming in the “wrong” way in the first place — wow, look at all this cash; if ONLY my margins were better and I could scale faster!)

Now, it’s certainly good advice as a company matures: limiting non-recurring revenue from services means better margins/ unit economics, a more scalable business, and so on. And even in an earlier stage company (that’s pre-product-market fit or in a pre-chasm market), the advice is still a sound warning — because unless someone is actually buyingthe product, you don’t actually know if you have the right minimum viable product (MVP) to sell in the first place. In this context, services can be startup speak for “I’m doing custom engineering per customer because I don’t yet have a product more than one customer wants”.

Yet the reasons for this advice are far more nuanced than appears on the surface, and I’d argue that for a company that’s in a pre-chasm market — particularly one with a complex product that touches sensitive infrastructure — leaning in to services can also be a good thing for the business. Because services are a well-established path to helping a deployment be successful and helping your startup become a strategic advisor to the target customer. Being in that support flow and having that position are both crucial aspects of getting an early go-to-market engine going.

Here’s more on why enterprise startups should not dismiss services so quickly, particularly in pre-chasm markets…

  • Services are an account control leverage point. Often when doing enterprise sales, the initial sale is for just a few seats (individual licensees within an organization), and the hope is to “land and expand” that over time. Having a strong solutions architect work with the customer to help integrate and run the product positions you as a strategic advisor, especially if you’re the one helping define the value of the product to the company in the first place. More importantly, it provides you direct visibility into their context and culture that helps control and frame the conversation when it’s time to expand or upsell. Most enterprise startups are competing against large incumbents who almost certainly have a sizeable service arm, and that are likely directing the customer away from your product (Cisco’s services business alone is $12B annually!). So it’s fair to assume that organization will have someone close to the buyer with the ability to de-position your startup once you start to pose a threat. In such situations, having your own employees deeply engaged in the account is a good leverage point for re-asserting control.


  • Services help ensure a new product works. For a fledgling startup still figuring out product-market fit — let alone how their product works “in the wild” — a problematic early deployment would be a terrible setback in terms of customer credibility (not to mention internal morale for your startup). But besides obvious bugs or downtimes, issues are most often caused by user error or misconfigurations. Having someone inside via services, with their finger on the pulse of the deployment, can immediately help troubleshoot and detect the problem — a good solutions architect can often identify and rectify a bug before there is any impact. That person or account support team can also be a local knowledgeable resource for the company’s engineering organization to work with to figure out the issue and fix the situation before it escalates any further, giving advocates from the inside more reason to believe in the product and continue championing it.


  • Service dollars are a great way to get channel partners involved. In enterprise sales, a lot of distribution and purchasing is done via a third-party ecosystem of channel partners. However, it’s hard for a pre-chasm startup to bootstrap this partner ecosystem; without an existing market draw, it’s hard to incent those channel partners to put in the work (pitching, educating, hiring the right sales force). Yet without the channel it’s hard to get leverage in sales and services as you scale. So a successful approach I’ve seen is for a startup to build a material services business, and over time, as more customers bite on the core software product business, to then offload the services business to the channel. Service revenue is often far more attractive to channel partners than software license revenue anyway. And if there are real dollars at play, those channel partners will be far more incented to dedicate the necessary resources, prioritize your product in their offerings, and look past conflicts with more entrenched competitors. In this way services are a vector to engaging the channel without keeping it as a burden; the services business should not be an albatross around your neck later — the key is to use it to draw and entice your partner ecosystem, but then offload it at the right time.
  • Service dollars reveal the true price the market is willing to pay for license. I’ve seen this play out multiple times in early sales: Annual contract value (ACV) per account — which measures the value of the contract over a 12-month period — is very high, indicating customers are willing to pay you more on average for your product over time. But each account — especially if you’re giving away tons of services or they’re buying into short contracts (or contracts with the option to discontinue without penalty) — is effectively getting unlimited, free attention, from integration to operations. What’s often really going on is that the startup is offering free services in exchange for a smaller discount on license. There is no free lunch: In reality, those free services are hitting the startup’s balance sheet, thus impacting overall margins. And when the startup eventually does ask for the “fully loaded” price of the license, they lose leverage and may see a decrease in ACV. Since young startups can use all the pricing leverage they can get, offering services can actually be a good practice to help set license pricing high in the early days. However, it’s also important to be realistic about what’s going on with respect to future roadmap and pricing planning.

Now comes the hard part… How do you know when you have the just-right amount or timing of services, or that it’s an albatross around your company’s neck dragging down your unit economics and preventing you from scaling the business as you grow? When are you doing too much — or that it is too late to do services?

Here’s the thing: Customers often WANT to pay for services. Enterprise buyers know what it means to adopt technology from a startup and are realistic about product maturity; they understand that there will be integration time as well as educational and operational hurdles. If you’ve made the case that your product is core to their strategy, and they are engaging with you, then it’s likely they’re deeply motivated to make absorbing your product into their enterprise successful. One of the very few actions the customer can take to de-risk the effort is to throw money at services. I’ve been in multiple situations where companies effectively demanded services precisely because they were keen on investing in the new product’s success.

So services are a good way for startups to engage with targets. The reality is that with most complex software products, you’re going to have to do the work anyway, and you might as well also collect services revenue to raise your top line and provide the business (and channel partners) more incentive to lean into the product. But this is where the truisms about services on the surface are also, well, true — relying on services can be risky and even be a fatal distraction. How can you tell the difference between a good services scenario and a bad one?

There are some pitfalls to be aware of, that can help avoid going down a fatal path:

  • Services dollars are not necessarily a signal for product-market fit. As I’ve mentioned before, companies are highly motivated to pay a lot (at least to a startup) for services simply to learn about a technology area or as an expected later stage in the sales process. But service dollars do not necessarily translate to product dollars down the line. Even if services can be a useful leverage point to expand or upsell the customer account over time, there is no direct correlation between services and product dollars. So beware.


  • Watch out for the line between solutions integration and engineering. I would be very careful before extending services to include engineering work, because the most limited (and arguably most valuable) resource a software company has in its early days is the R&D organization/ engineering department. Anything that distracts it from a dead run towards an MVP is jeopardizing the entire business. So build a services organization, not a contract engineering organization. And by that I mean: don’t let services dollars dictate what your product engineers do; that should still be dictated by the entrepeneur’s vision and all the signals you’re getting around product-market fit. But it’s all too common that a startup wooed by the particular needs of a single or few large clients encumbers themselves with one-off development work — losing sight of the big picture and bigger market they’re going for — and is therefore unable to respond when the market shifts or the competitive environment heats up.


  • Building a profitable services organization is not the point. For the companies that do lean into services, I find they often try and optimize too early and often at the cost of customer engagement. The point of this post is not that services are a good business. The point is that collecting service dollars can help with customer engagement. Often I see entrepreneurs obsess about margins in the services business, justifying that to limit customer engagement, even though the company broadly is burning cash. Once you have a mature business with predictable growth and positive unit economics, you can start to worry about services margin if you plan to keep the business. Know why and when and how you’re doing it, and don’t build a services organization by accident.

Of course, many startups today do have a small services business. The standard advice is to keep services to less than 20% of total revenue. While that works for some products selling to some verticals, I’ve seen many successful enterprise products have services that accounted for over 40% of revenue early on.

As always, my point here is not to give formulaic, one-size-fits-all advice. If you can get by without the operational pressure of building out a services organization, that’s great. Less complex products — or those that don’t drastically change costumer behavior — can for sure get by with relatively little services. But that blanket advice doesn’t fit every startup. So if you’re in a place where more services would help, I’d think seriously about being more aggressive with them… as long as you’re being disciplined about how you do it, and when to stop. I certainly won’t judge you; heck, I may even view it as an asset when implemented at the right time and with the right strategic planning mindset behind it.

Featured Image: Blend Images/Shutterstock

via TechCrunch
The case for boosting enterprise software startups with services

How Atlassian moved Jira and Confluence users to Amazon Web Services, and what it learned along the way

A sample Jira screen. (Atlassian Image)

If your business is built around servicing software developers who know exactly what state-of-the-art tools should be capable of doing, at a certain point it’s time to bite the bullet and modernize your infrastructure.

Atlassian just completed a two-year-long migration to Amazon Web Services after hitting scaling issues with its old hosted approach, created and developed before the public cloud was a viable option for larger companies. Users of Atlassian’s Jira bug-management tool and Confluence, its collaboration software product, used to have their applications run on their own dedicated virtual machine on a server in Atlassian’s data centers, but around 2014 that system started to break down, said Mike Tria, head of infrastructure for the Sydney, Australia-based company, in a recent interview.

About 70 percent of Atlassian’s customers were running its software on Atlassian-hosted infrastructure (the rest ran it on their own servers), and as those numbers grew, Atlassian’s infrastructure began to strain under the weight of thousands of servers and tens of thousands of virtual machines, Tria said. Atlassian’s original hosted product was set up as a single-tenant service, which meant that each customer got a dedicated server for their instance of the software.

Mike Tria, head of infrastructure, Atlassian (Atlassian Photo)

That was standard practice back in 2010 when Atlassian first set up this system, but growing pains and the benefits of multitenant architectures have steadily changed the thinking around how to provision applications across big distributed systems. Public clouds are multitenant, which means that different customers can share the same servers in the name of efficiency.

So around the time Atlassian decided it needed to embrace the benefits of the public cloud in 2013 and 2014 (“we had to replace disks all the time,” Tria said) it also decided to rewrite Jira and Confluence in cloud-native fashion to take advantage of multitenancy and microservices, rather than simply “lifting and shifting” that code into AWS.

This required the company to develop several tools along the way in order to make sure customer data would not mix on a multitenant cloud, which is the base fear of any CIO thinking about a move to cloud computing. Atlassian hopes to release some of those tools as open-source projects in the coming months.

“(The migration) is definitely the largest engineering project that we’ve ever done,” Tria said.

Atlassian evaluated other cloud providers, including Microsoft Azure and Google Cloud Platform, but when it was first planning the project in 2013 felt AWS offered the most proven platform. The company was also drawn by the breadth of services offered by AWS; of the nearly 100 separate services offered by AWS, Atlassian is using all of them but three, Tria said.

The company completed the migration of its cloud customers from its own infrastructure to AWS in December, and in most cases the end user of that software had no idea, he said. That’s not to say, however, that everything went smoothly.

Under the old system, customers who wanted to search for something specific across all of their bug filing and tracking systems had to re-index all that data with every query, which took a lot of time. So Atlassian decided that it would move from a search-engine style interface for those queries to the Postgres database, which would be much faster.

However, there was a catch: Postgres queries returned different answers than the old system, which threw the team into a frenzy trying to figure out how to replicate the old results under the new system. “We probably had 30 or 40 developers banging away on keyboards just trying to get it done,” Tria said.

As it turned out, however, the Postgres queries actually produced better results than the old system. Still, it took quite a bit of time to realize that, and in not wanting “to replace their reindexing pain with other pain, it took longer than we had thought,” he said.

Atlassian was also forced to discard years’ worth of tricks and tactics for squeezing performance out of a single-tenant architecture with the move to a multitenant architecture, he said. Luckily, some of other products in the Atlassian family, such as Trello and Bitbucket, were built for the cloud era and were able to share some of their knowledge with the Jira and Confluence teams, Tria said.

And just last week, the company got a rude lesson in the benefits of redundancy — an issue it thought it had tackled with this move — last week thanks to what Tria called a “black-swan event” that he said took out all the availability zones in the U.S. East region run by AWS. Atlassian thought it had planned for such an event by using multiple availability zones for its networking connections to AWS, but it was one of the more prominent companies affected by last week’s weather-related outage, which also took out a fair amount of Capital One’s services as well as Amazon’s own Alexa service.

However, that incident is still an advertisement for the public cloud, Tria said, because it would have taken Atlassian far longer to recover from such an incident running a single-tenant infrastructure managed by its own people.

via GeekWire
How Atlassian moved Jira and Confluence users to Amazon Web Services, and what it learned along the way

Former Slave, 2-Time Olympian Becomes an Airman

By Air Force Airman Dillon Parker
Joint Base San Antonio-Lackland

Gour Maker
Gour Maker, a trainee at basic military training, receives an “Airman’s Coin” at the Coin Ceremony Feb. 1, 2018 outside the Pfingston Reception Center at Joint Base San Antonio-Lackland, Texas. Maker was recognized by his wingmen as a selfless leader and motivator during his time at BMT.
(Click photo for screen-resolution image);high-resolution image available.

JOINT BASE SAN ANTONIO-LACKLAND, Texas –-(Ammoland.com)- After enduring countless hardships and overcoming unimaginable obstacles, Air Force Airman 1st Class Guor Maker found his way out of war-torn South Sudan and into the U.S. nearly 20 years ago.

As one of roughly 20,000 children uprooted by the gruesome second Sudanese civil war, Maker’s childhood was far from normal. After losing 28 family members, including eight of his nine siblings, 8-year-old Maker set out on foot from South Sudan to live with his uncle.

“The country I came from was torn apart by war,” said Maker, who is attending training here to become a dental assistant “It was all I knew growing up, nothing else. I’ve seen people die in front of me, but I knew no matter what, I had to make it.”

During his harrowing journey, he was captured and enslaved twice: once by Sudanese soldiers, and once by herdsmen.

“When I was captured, I was forced to be a slave laborer,” Maker said. “I would wash dishes or do anything else needed to get by. I slept in a small cell and rarely got to eat … but not always.”

Twice escaped from enslavement, he finally joined his uncle in Khartoum after three perilous years. However, Maker’s journey to safety was far from over.

During a nighttime attack on his uncle’s home, he was beaten unconscious by a soldier who smashed his jaw with a rifle.

“My mouth was shut for two months and I could only consume liquids because my jaw was broken,” said. “We fled to Egypt after that, and the United Nations treated my injuries.”

After two years of filling out paperwork at U.S. Citizenship and Immigration Services in Egypt, Maker and his uncle’s family were finally granted permission to enter the United States.

“I was very excited to come to the U.S.,” he said. “Looking back at everything my family and I endured, it is a miracle that we made it out of there.”

Dreaming

When Maker first arrived in the U.S. in 2001, he settled in Concord, New Hampshire. Not only did he want to survive, but he wanted to thrive.

“I wanted to change my life, help my parents back in South Sudan, and give my future children a better childhood than the one I had,” he said. “And the only way to do that was through education and determination.”

Maker started with the basics — learning English by watching children’s cartoons and spending plenty of time with other high school kids, listening to their conversations and absorbing all that he could.

“Within a short amount of time, I was able to communicate with effectively with other students and teachers, order food, and really get by on my own,” he said.

While learning English was a crucial step his personal journey, Maker’s high school career really took off when one of his teachers introduced him to running.

“Running was always just natural and easy for me,” he said. “It was a great high school experience and it helped me meet a lot of friends, build confidence and it was genuinely fun.”

After winning the National High School indoor two-mile title, Maker received a scholarship to compete at Iowa State University, where he allowed himself to dream of things that had never been done before.

“When I got to college in 2005, I remember hanging a piece of paper on my wall that said I was going to run in the Olympics in 2012 for South Sudan,” he said. “I thought ‘Why not me? Why can’t I do it?’”

Maker graduated with a bachelor’s degree in chemistry and reached All-American status as a . Ready to start his new life, Maker planned to head to Flagstaff, Arizona, to train for the 2012 Olympics.

The same day he left for Arizona in 2011 was the day South Sudan officially gained its independence.

“I drove the whole way celebrating and it was a very special day that I will always remember,” Maker said.

Stateless

Following his year of training, he qualified to run the marathon in the 2012 London Olympics.

Gour Maker Training
Gour Maker, a trainee at basic military training, completes the one and a half mile run portion of the Air Force physical fitness test Jan. 30, 2018 at the 324th Training Squadron’s physical training pad at Join Base San Antonio-Lackland, Texas. Maker finished his run with a time of 7 minutes 31 seconds, earning the top fitness score for males in his graduating class.

Even though South Sudan was officially an independent nation, it was not yet a member of the International Olympic Committee, and Maker was not yet a U.S. citizen.

“State senators from New Hampshire and Arizona presented my case to the Senate in Washington, D.C., so the International Olympic Committee allowed me to run in the Olympics without a country,” he said.

Even though his dream of running for South Sudan went unrealized in 2012, Maker accomplished a great deal as an unaffiliated Olympian.

“All of the people in South Sudan knew where I was from,” he said. “I wanted to be the inspiration for the children to say, ‘Hey, if Maker can do it, you know what, I can do it too.’”

After the 2012 Olympics, Maker was undeterred and set a new goal for himself and his country.

“I said to myself, ‘In 2016, I’m going to bring South Sudan to the Olympics for the first time,’” he said. “I wanted to try to do more for my country and the 2012 Olympics only strengthened my conviction to accomplish my goal.”

Maker’s dream became a reality in Rio de when he was one of three athletes to represent South Sudan in the 2016 Olympics. He also served as South Sudan’s flag bearer for the opening ceremony.

“Walking into that stadium, carrying the South Sudan flag was just indescribable,” he said. “The people of South Sudan were in my mind the whole time I was running into the stadium with that flag and it meant so much to me.”

While it was a truly incredible and improbable moment for Maker, his thoughts were filled with the people of his home country while he was running with that flag.

“Over 50 years of civil war and my country finally got independence,” he said. “So many lives were lost for our freedom, it was just ringing in my head that we have done it, we have done it. On that day, everyone in South Sudan was at peace watching the Olympics for the first time.”

The 2016 Olympics were an enormous accomplishment for the former slave and South Sudan native that went far beyond his 82nd overall finish in the marathon.

“I couldn’t have accomplished any of it without all the support I received from my family and the opportunity the United States gave me. It’s the highlight of my athletic career so far and a moment I’ll treasure forever,” he said.

Serving

The next chapter in Maker’s life began when he decided to join the Air Force to serve the country that gave him so many opportunities.

“All of the things I’ve accomplished have derived from the opportunities the U.S. has afforded me,” he said. “When I first came to America, I didn’t have hardly anything, but with the support and opportunity this country has given me, I’ve been able to completely change my life.”

The staff at basic military training had no idea who Maker was, but he quickly stood out to leaders at the 324th Training Squadron.

“I went out to the track and saw the instructors were putting their attention on one trainee in particular,” said Air Force Maj. John Lippolis, director of operations for the 324th TRS. “I could see him running noticeably faster than everyone else and the instructors explained to me that we had a two-time Olympian at [basic military training].”

In addition to Maker’s Olympian status, his unique personal story also stood out to Lippolis.

“I was just absolutely floored when I talked to him about what he went through to get to where he is today,” he said. “Not only did he get , he wanted to better himself and he has accomplished so much. He has an amazing story and the drive he has displayed to succeed like that in the face of such adversity is truly inspiring.”

Maker inspired not only but other members of his flight.

“All of his wingmen said the same things when I talked to them,” Lippolis said. “They told me what an inspiration he was the flight; that the flight rallied around him and he doesn’t do anything he’s supposed to do for himself until he helps out everybody else.

While Maker has accomplished a great deal in his lifetime, he’s not done dreaming. After he completes his training here, he hopes to join the Air Force World Class Athlete Program, a program designed to allow elite athletes to train and compete in national events to make the Olympics. He also wants to make the 2020 Olympics, where he’ll have the opportunity to represent his new home and the country that gave him so much.

“Joining the greatest Air Force in the world has been an absolute miracle,” Maker said. “I can’t wait to see what this next chapter holds for me.”

This post Former Slave, 2-Time Olympian Becomes an Airman appeared first on AmmoLand.com .

via AmmoLand.com
Former Slave, 2-Time Olympian Becomes an Airman

Comic for March 11, 2018

Transcript

Dilbert: What would you say are your biggest weaknesses? Man: I like to rifle through my coworkers’ desks when they aren’t looking. But I don’t steal anything unless I know I can frame someone else for the crime. I leave for work an hour late every day and blame traffic. I avoid accomplishing goals so I won’t feel like sellout. Sometimes I’ll start a trash fire just to get out of a meeting. And I’ve gotten every one of my bosses fired for things they didn’t say or do. Boss: Would he be a good fit? Dilbert: I like what he has to offer.

via Dilbert Daily Strip
Comic for March 11, 2018

The Best Multiport USB Wall Charger

For an impressive amount of power in a tiny package, we like Aukey’s 12W / 2.4A Home Travel USB Wall Charger Adapter with AIPower Tech. You get as much juice as you’d get with Apple’s iPad charger and an extra charging port, in a much smaller package—a scant 1.4 by 1.2 by 1.2 inches with its prongs folded in—for half the price. The Aukey is the smallest full-speed iPad/tablet charger we’ve found, and it’s a great travel companion for charging a tablet and phone overnight, for fast-charging two smartphones, or for just charging your phone and a Bluetooth headset or speakers. (It provides a total of 2.4 amps of current, which means it can fast-charge an iPad by itself; if you connect two tablets, or a tablet and a smartphone, those 2.4 amps will be split between them.)

ChargeTech’s Fast Charge Dual USB Wall Charger is essentially the same product as the Aukey 12W / 2.4A, above, but more expensive.

Zolt is a tiny (3.2 inches long, 1.3 inches in diameter, 3.7 ounces) travel charger with fold-out prongs and three USB-charging ports, one of which can provide up to 65 watts to your laptop when paired with the included proprietary cable and the appropriate charging head for your laptop. (The company includes eight connectors to work with most major laptop brands, including Dell, HP, and Lenovo; you can purchase a $20 MagSafe cable for use with older Apple laptops.) We tested the Zolt with three Mac laptops, and the only issue we saw was slow charging with the 15-inch 2015 MacBook Pro, which requires 85 watts to charge at full speed. As for USB charging, when testing with an iPad Air and an iPad Air 2, instead of charging at full speed (2.4 amps), each iPad drew about 2.1 amps. If space when traveling is truly at a premium, the Zolt is a neat accessory worthy of a look. But its $100 price ($120 if you need to buy the Mac cable) is too high for most people, especially considering that it doesn’t live up to all its promises. In addition, as of the July 2017 update to this guide, the Zolt website has gone dark, though the charger is still available on Amazon.

Tylt’s Energi 5-Port USB Charging Station is so much more expensive than our top charging picks that we have a really hard time recommending it despite its novelty. Four USB ports provide up to 2.4 amps each, as advertised. But what makes this one kind of cool is the inclusion of a 1-amp, 3,200-mAh battery pack that slides into the base station for charging—you just pop it out when you need portable power. (The 0.8 inch by 0.8 inch by 3.7 inch battery can also be charged via a Micro-USB cable on the go.) However, considering that similar-capacity batteries from reputable brands go for as little as $10, we don’t think the huge price premium for the setup is worth it.

We saw all sorts of weird readings with Photive’s 50-Watt 6-Port USB Desktop Rapid Charger on our power meters during testing.

Poweradd’s 50W 6-Port Family-Sized USB Desktop Charger didn’t live up to the company’s claims. It promises two 2.4-amp ports, two 2.1-amp ports, and two 1-amp ports, but in repeated tests, one of the 2.1-amp ports put out only about 0.5 amps.

A few chargers made it past the first round of testing but were dismissed based on their performance with multiple tablets. Choetech’s 50-Watt 6-Port Desktop Rapid USB Charger continuously reset the amperage meters we used when five or six iPads were connected, and we saw wild fluctuations in the charge rate to an iPad Air even with only four tablets plugged in.

iLuv’s RockWall 6 Compact 6 USB Port AC Charger worked fine when five iPads were connected. With the sixth plugged in, the current sometimes, but not always, fluctuated dramatically from 1 amp to 2.3 amps. We also saw the dreaded “This accessory may not be supported” message on the screen of some connected iPads. Though neither of these are absolute dealbreakers, our top picks didn’t exhibit such issues.

The Bolse 60W / 12-Amp 7-Port Fast Charging USB Wall / Desktop Charging Station With SmartIC Technology has more ports than any other unit we tested. Though we didn’t have seven iPads on hand to test, it turns out that we didn’t need to fill all seven ports to eliminate this one from contention. With only six iPads plugged in, our amperage meters continuously reset, likely because the charger itself was shutting down due to built-in protection circuitry. This one also one felt cheap in a number of ways—for example, it was sometimes difficult to insert USB plugs into the charger’s ports because of alignment/fit issues.

We also ruled out Griffin’s PowerDock 5, mainly because its ports are capable of putting out only 2.0 amps each rather than 2.4 amps. This is true even if only one iPad is plugged in—the ports are simply 2.0 amps each. The PowerDock 5’s thin plastic dividers also pop out of the base a bit too easily.

Kanex’s Sydnee has only four ports, and each of those puts out only 2.1 amps—pretty good, but not enough for power-hungry tablets to charge at full speed. And the design of its tablet-organization slots means those slots work only with naked tablets or ones in thin cases. The Signal model, our former recommendation, provides an additional port (and maximum output from each) for only a few dollars more.

In an earlier version of this guide, we picked Signal’s Power Station 5 High Performance Universal Charge Dock as our favorite organizational charging dock. It can hold and charge five 9.7-inch iPads at full speed simultaneously, and we liked its sturdy metal base and thick, rubber-covered dividers. However, though our review unit has functioned properly for nearly a year, Wirecutter readers and Amazon customers have had too many negative experiences for us to continue to recommend the dock. The most common issues include DOA units and individual ports (or the entire dock) dying within a few months of purchase.

We’ve been testing Griffin Technology’s Griffin Technology’s Cove, and although it’s an appealing idea, its high price ($130 as of this writing) makes it difficult to recommend for most people. The Cove is a plastic shell measuring 16.8 inches wide by 12.8 inches deep by 6.7 inches tall. Most of the body is white, but the top and the exterior of the fold-down front door are covered in a woodlike veneer (your choice of birch, walnut, or ebony). Inside are three shelves with openings to route charging cables that you connect to a five-port USB charger built into the top, slide-out shelf. (Only a power cable for the charger is included—you don’t get any device-charging cables.) Each port can provide 2.4 amps of current, and the front door can either close completely or sit slightly ajar to act as an angled tablet stand, using the door’s handle as a cradle. The shelves are covered in thick felt, and a drawer-like cubby in front of the charger ports offers a good place to stash your smartphone. The Cove keeps your devices organized and hidden while charging, though keeping the cables organized inside the Cove takes a bit of finagling. And despite the Cove’s sturdy looks, the top is largely unsupported—you can store a MacBook on top, but anything heavier (or similar in weight but not spread out over the top of the Cove) will cause the top to sag, which prevents its door from opening. If you’re seeking a way to keep all your devices hidden when charging, and you like the Cove’s design, take a look, but for the price, we’d like something sturdier and perhaps made with real wood.

Satechi’s 7-Port USB Charging Station Dock uses the same body as our organizational-charger pick, Skiva’s StandCharger, but only three of the Satechi model’s seven ports provide 2.4 amps of charging current; the other four offer only 1 amp each.

via Wirecutter: Reviews for the Real World
The Best Multiport USB Wall Charger

AR-15 Parts List: Building a Rifle? Start Here!

So you’re building an AR-15, or an AR-10, or an AR-47, or an AR-whatever.  

Awesome!

Building a rifle is one of the best things you can do to improve your knowledge as a shooter, and it means you end up with a rifle that’s uniquely yours.

custom ar-15
Building an AR let’s you create a rifle that’s uniquely yours.

What’s the most important thing to have when you’re building your rifle?

Bingo, your parts list!

Today, we’re going to talk about all the little parts and pieces you need to build an AR-15, where you can buy them, how to choose them, and the tools you’ll need to assemble everything.  

This should cover basically everything you need to build an AR of any caliber, except for the actual build process, which you can find here.

The actual parts you will need are:

Lower Parts List

  • Stripped Lower
  • Lower Parts Kit
  • Trigger (If not using parts kit trigger)
  • Buffer Kit  (Buffer, buffer tube, buffer spring)
  • Stock
  • Pistol Grip

Upper Parts List

  • Stripped or Assembled Upper
  • Forward Assist (If using a Stripped Upper)
  • Dust Cover (If using Stripped Upper)
  • Barrel
  • Handguard
  • Gas Tube
  • Gas Block
  • Bolt Carrier Group
  • Charging Handle
  • Muzzle Device

Tools Needed

  • Vice
  • Upper Vice Block
  • Lower Vice Block
  • Pin Punches
  • Armorer’s Wrench
  • Mallet
  • Utility Knife
  • Hex Key Set
  • C-Clamp or Roll Pin Pusher

Alright, if you just wanted to make sure you weren’t missing a part, you’re all done!  Good luck with your build, and make sure to let us know how it went in the comments below!

If you want a little more info about each of these parts, keep reading.

AR-15 Lower Parts List

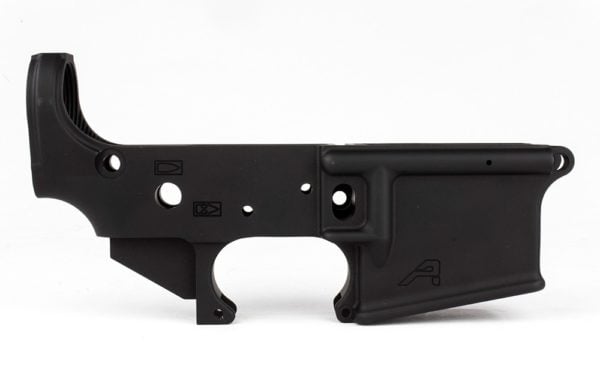
  • Stripped Lower: You can get a stripped lower from a lot of different places, and there’s not going to be a huge amount of difference between the best one and an average one.  In general, buy from a brand you like, or buy one you like the rollmark on. This is going to be the heart of your build, so make sure you go with something you’ll like looking at a year from now.  If you aren’t sure, check out our list of best AR-15 lowers.
Editor’s Pick (Forged)
Aero Precision Lower

Aero Precision Lower

Prices accurate at time of writing

  • Lower Parts Kit: This contains all the springs and pins and detents and other hardware that will go into holding your lower together.  You can also get them with or without a trigger, depending on if you want a basic Mil-Spec-style trigger, or want something a little bit nicer.
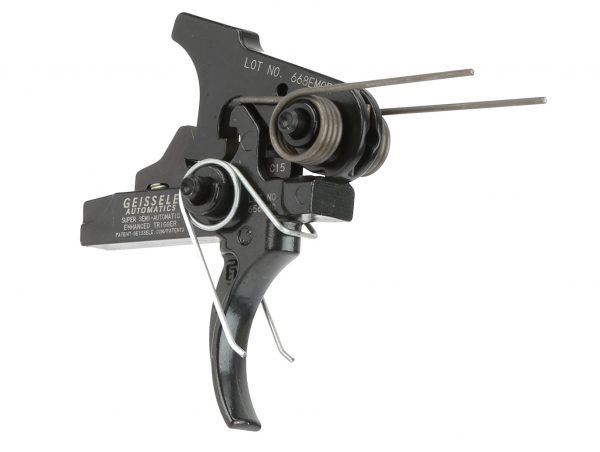
  • Trigger: The quality of your barrel is going to have a huge effect on your accuracy, so it makes sense to spend a little money here, even if it means saving a little money elsewhere.  Check out our list of Best AR-15 Triggers if that’s something you’re interested in.
Geissele AR-15 Enhanced Triggers

Geissele AR-15 Enhanced Triggers

Prices accurate at time of writing

  • Buffer Kit: Your buffer system is what manages the recoil of your rifle and allows the rifle to cycle.  There’s a lot to be said about choosing a buffer weight, so be sure to check out this article on how to choose the proper buffer for your system.
  • Stock: MagPul or gtfo.  Just kidding. There’s about a million AR stock manufacturers out there, so just pick one you like the look of, or choose one that fits your purpose for the rifle, so a nice light stock like the standard MagPul MOE stock for a run-and-gun rifle, or  something like a PRS stock for a precision rifle.
  • Pistol Grip: Same deal as the stock, unless you’re doing a featureless build and need something to comply with your state’s gun laws (I’m looking at you California).
AR-15 with Magpul M-LOK handguard
AR-15 with Magpul M-LOK handguard and Magpul pistol grip and stock.

That does it for your lower parts.  Be sure to follow our AR-15 lower build guide if you want to make sure you’ve got all your parts in the right place, or just want to take a look at how we build our rifles.

AR-15 Upper Parts List

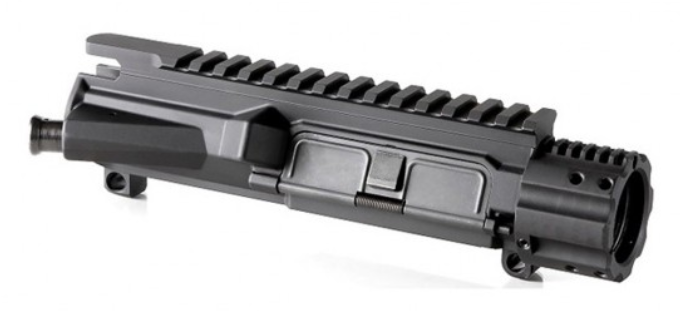
  • Stripped or Assembled Upper:  A “stripped” upper is just the upper.  An “assembled” upper comes with your forward assist and dust/ejection port cover.  A “complete” upper will include the barrel, handguard…well, everything.  Hence “complete”.  The final option is good if you don’t want to buy the tools to build an upper, or if you don’t want to mess with an upper at all and just want to slap something on a complete lower that works.  Also, people are going to tell you that building an upper is hard. Those people are wrong.  It’s easy, it’s safe (AR’s are self-headspacing for the most part, so you’re not going to accidentally build a hand grenade, and if you’re worried, you can get a No-Go or headspace gauge.  So, I recommend getting a stripped or assembled upper, the latter of which just comes with your ejection port and forward assist installed, and is what I’d suggest if you don’t want a fancy dust cover.   If you absolutely have to have your Punisher logo or whatever, get a stripped one.  All our suggestions here.
Aero M4E1 Enhanced Upper

Aero M4E1 Enhanced Upper

Prices accurate at time of writing

  • Forward Assist: I have…never, in my life, needed a forward assist on a rifle.  I know people with multiple tours of duty in very dry, sandy places who have never touched a forward assist outside of training.  I can count one one hand the number of times I’ve heard of people ever needing a forward assist.  Ostensibly, it’s on there if you need a little extra help getting a round seated in a dirty gun.  Realistically, especially if you’re cleaning your AR the way you should be, you’ll never need one, and I’d be fine running an upper that doesn’t have a slot for one.  You may feel differently, and that’s fine. I totally understand the “better to have it and not need it” mindset as well.  That’s the great thing about building your AR, you can get exactly what you want, not what some asshole on the internet (me) tells you to get.
  • Dust cover:  Your dust cover (also called an ejection port cover) goes over your ejection port to keep out dust.  Pretty self-explanatory. The only thing I’ll say is that you can get ones with cool designs, so if looking fashionable at the range is important to you, or you want to do a custom build around a theme, like this Storm Trooper build from IACoatings.com.
stormtrooper Iacoating
Not every rifle has to be a scurry black gun. It’s okay to have fun with it.
  • Barrel: Other than the trigger, your barrel is going to be the biggest factor impacting your accuracy and the overall performance of the rifle.  There are a lot of factors to think about when choosing a barrel like rifling twist, length, steel or fancy-shmancy carbon fiber, lining options, and more.  Be sure to check out our list of the best AR-15 barrels if you want to learn more about solid options, or how to choose a barrel for your build.
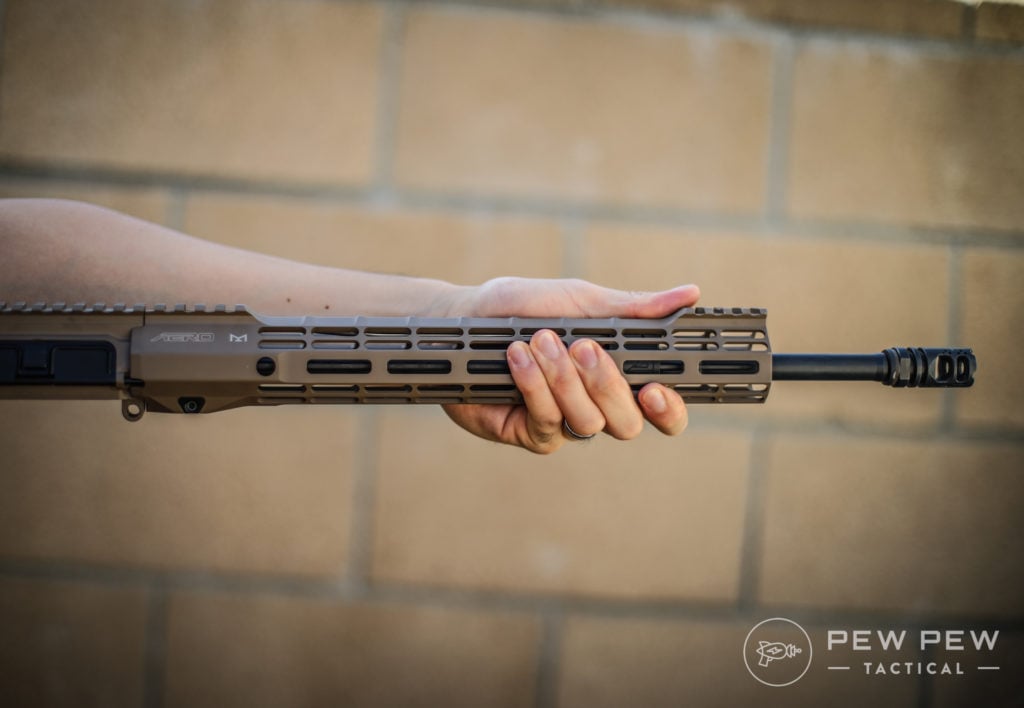
  • Handguard: Your handguard should reflect what you’re using the rifle for, and there are literally hundreds of options out there.  Pick one that suits your needs, and you’ll be all good. This is an area of intense personal preference, so pick something you’ll like.  Personally, I likes my rifles nice and light, so I usually go for minimalist options without all the rails and such. If you want to hang four flashlights and a coffee grinder on your gun, you’ll want the rails though, so again, pick something that fits your purpose.  Here’s our picks of the best AR-15 Handguards.
Aero Precision M4E1 with ATLAS Handguards
  • Gas Tube: It’s a tube that transports gas.  Really, there’s not much to say here other than to match the gas tube to your barrel’s system length (carbine, rifle, mid-length) and pick from a brand you trust.  Worst case, they’re like $20 unless you’re building a piston-based upper, so don’t stress too much over it.
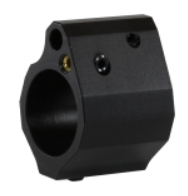
  • Gas Block: This is another area where you have to pick your poison yourself.  You might be fine with a plain old gas block, you might be running a suppressor sometimes and need an adjustable gas block.  Get something that matches your purpose. I’d recommend an adjustable gas block for all rifles if you have the money though, as it’ll let you fine-tune your gas system to minimize recoil.  More functionality is almost always a good thing because it let’s you get a rifle that’s more suited to your specific needs and style.
Seekins

Seekins’ Adjustable Gas Block

Prices accurate at time of writing

  • Bolt Carrier Group: The BCG is the part that handles the actual firing and extraction of your rounds.  In general, what you want to think is “light and smooth”. The lighter your BCG is, the less recoil you’ll have, the less muzzle movement, the more accurate you can be, especially during rapid fire.  The smoother the BCG is, the more reliable and the more consistent your AR will be, and the well, smoother it will be to shoot. There are a number of coating options that’ll make your gun a little smoother, and there are a number of lightweight BCGS out there.  The BCG is one of the easiest parts to swap out, and indeed you’ll be pulling it out every time you clean your gun anyway, so it’s okay to cheap out at first if you want to get a basic gun built that you can upgrade later.  Check out our BCG guide for more info.
Brownells Lightweight Bolt Carrier Group Finished in Titanium Nitride
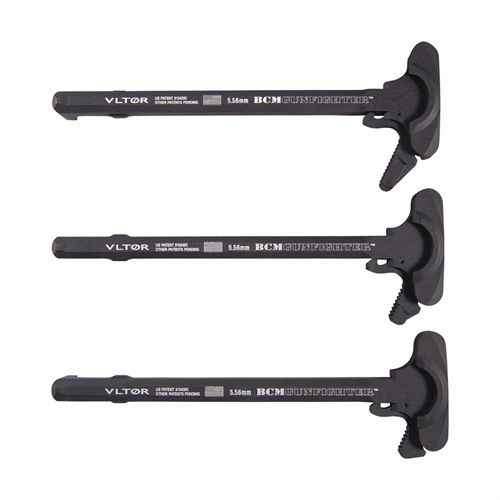
  • Charging Handle:  This is what you will use to chamber a round in your AR.  If you’re going with a basic build, go with a basic charging handle.  If not, go with something nicer. I will say, if you’re a leftie, or building a rifle for someone who is, or you just want a slightly more useable rifle, get yourself an ambidextrous handle.  If you just want a quick, high-quality recommendation, BCM’s Gunfighter handle is on all my rifles, and I love it.
BCM Charging Handle
BCM Charging Handle
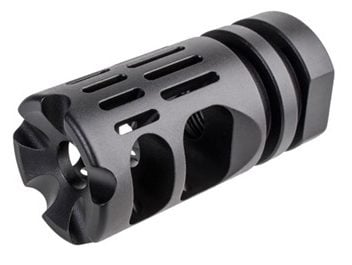
  • Muzzle Device:  Compensators, Flash Hiders, Suppressors, Brakes, there’s all kinds of things you can slap on the end of your rifle, and they all have their benefits.  Check out our muzzle device guide  to figure out what you need for your build.
VG6 Gamma 556
VG6 Gamma 556


That does it for our upper parts, so check out our AR-15 upper build guide if you want to make sure you got all your parts in the right way.

AR-15 Build Tools Parts List

  • Vice:  Necessary for keeping everything stable while you’re hammering and punching and such.  I use a basic bench vise, but you can use whatever works for the space you’re in. You can also get by without one if you’re very, very, very careful, and creative.  I’ve seen people building rifles in caves using nothing but a box cutter, a screwdriver, and an old brick, but I wouldn’t recommend it.
  • Upper Vice Block: This let’s you safely and effectively hold your upper in place, which is especially important while you’re installing your barrel.  I use this DPMS block
  • Lower Vice Block: Less important than the upper block, still highly recommended if you want to make your life easier while building your rifle.  
  • Pin Punches:  Brass is recommended so you don’t mar your finish.  I like these.
Trigger Hammer Pin with Punch
  • C-Clamp:  Buy a cheap 3 Pack off Amazon and use them as needed to install your roll pins.
  • Roll-Pin Pusher/Drift Tool:  Not strictly necessary, still highly recommended if you’re going to be building multiple rifles. Makes roll-pin installation much easier
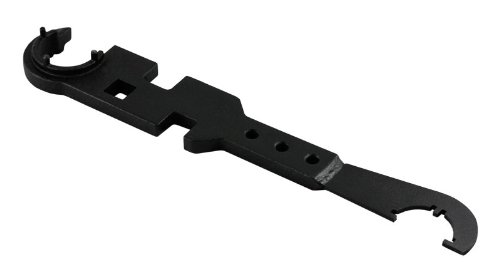
  • Armorer’s Wrench: Needed for tightening your barrel nut, delta ring, castle nut, etc.  They’re relatively cheap, and is also one of the only purpose-built tools you’ll need.  We recommend this guy.
AR-15 Armorer's Wrench
AR-15 Armorer’s Wrench
  • Utility Knife: A box cutter is the best way to install some of your detents, trust me.
  • Hex Key Set:  Needed for installing some handguards, as well as things like your gas block, and often your trigger guard.

That about does it for the tools you’ll need.  I’m sure there’s a million and one other things out there that you can use, and I’d love to here about tools that could make the job easier, or about the…creative ways you all have built your rifles, so let me know in the comments below.

How To Build One

We’ve got you covered here too!

And for more recommendations down to individual parts…check out our AR-15 Definitive Resource.

Parting Shots

That about does it for our parts list.  There’s probably something I’m forgetting so let me know in the comments below if I left something out, and let me know about any builds this helps you with.  I can also help you out if you have any questions about the parts we’ve talked about today.

What did you think of our parts list?  Did this help you with your build? Let me know in the comments!

The post AR-15 Parts List: Building a Rifle? Start Here! appeared first on Pew Pew Tactical.

via Pew Pew Tactical
AR-15 Parts List: Building a Rifle? Start Here!

Comparison of Window Functions & CTEs in MySQL 8 vs MariaDB

Every MySQL database programmer should learn and apply the newly added MariaDB and MySQL Window Functions and Common Table Expressions(CTEs) in their daily work. Both CTEs and window functions enable easy solutions to many query challenges that in prior releases have been difficult and sometimes impossible to surmount. Mastering these features opens the door to query solutions that are more robust, execute faster, and are easier to maintain over time than prior solutions using older techniques.

In our last blog we compared User Roles in MySQL 8 vs. MariaDB.  Today, we will here compare Window Functions and Common Table Expressions in both databases.

Window Functions

While all database administrators are familiar with aggregate functions like COUNT(), SUM(), and AVG(), far less people make use of window functions in their queries.  Unlike aggregate functions, which operate on an entire table, window functions operate on a set of rows and return a single aggregated value for each row.

The main advantage of using window functions over regular aggregate functions is that window functions do not cause rows to become grouped into a single output row.  Instead, the rows retain their separate identities and an aggregated value is added to each row.

Window Functions in MariaDB

Windowing functions were added to the ANSI/ISO Standard SQL:2003 and then extended in ANSI/ISO Standard SQL:2008.  DB2, Oracle, Sybase, PostgreSQL and other products have had full implementations for years. Other vendors added support for window functions later on.  Case in point, Microsoft did not add Window Functions to SQL Server until SQL 2012.

After numerous wishes and feature requests for window functions over the years, they were finally introduced in MariaDB 10.2.0 to great fanfare!  Now MariaDB includes window functions such as ROW_NUMBER, RANK, DENSE_RANK, PERCENT_RANK, CUME_DIST, NTILE, COUNT, SUM, AVG, BIT_OR, BIT_AND and BIT_XOR.

The Syntax

Window function queries are characterised by the OVER keyword, following which the set of rows used for the calculation is specified. By default, the set of rows used for the calculation (the “window”) is the entire dataset, which can be ordered with the ORDER BY clause. The PARTITION BY clause is then employed to reduce the window to a particular group within the dataset.

Here’s an example:
Given the following table of student test scores:

+------------+---------+--------+
| name       | test    | score  |
+------------+---------+--------+
| Steve      | SQL     | 75     |
+------------+---------+--------+
| Robert     | SQL     | 43     |
+------------+---------+--------+
| Tracy      | SQL     | 56     |
+------------+---------+--------+
| Tatiana    | SQL     | 87     |
+------------+---------+--------+
| Steve      | Tuning  | 73     |
+------------+---------+--------+
| Robert     | Tuning  | 31     |
+------------+---------+--------+
| Tracy      | Tuning  | 88     |
+------------+---------+--------+
| Tatiana    | Tuning  | 83     |
+------------+---------+--------+

The following two queries return the average test scores partitioned by test and by name respectively – in other words, aggregated by test and by name:

SELECT name, test, score, AVG(score) OVER (PARTITION BY test) 

  AS average_by_test FROM test_scores;

+----------+--------+-------+-----------------+
| name     | test   | score | average_by_test |
+----------+--------+-------+-----------------+
| Steve    | SQL    |    75 |         65.2500 |
| Steve    | Tuning |    73 |         68.7500 |
| Robert   | SQL    |    43 |         65.2500 |
| Robert   | Tuning |    31 |         68.7500 |
| Tracy    | SQL    |    56 |         65.2500 |
| Tracy    | Tuning |    88 |         68.7500 |
| Tatiana  | SQL    |    87 |         65.2500 |
| Tatiana  | Tuning |    83 |         68.7500 |
+----------+--------+-------+-----------------+
SELECT name, test, score, AVG(score) OVER (PARTITION BY name) 

  AS average_by_name FROM student;

+---------+--------+-------+-----------------+
| name    | test   | score | average_by_name |
+---------+--------+-------+-----------------+
| Steve   | SQL    |    75 |         74.0000 |
| Steve   | Tuning |    73 |         74.0000 |
| Robert  | SQL    |    43 |         37.0000 |
| Robert  | Tuning |    31 |         37.0000 |
| Tracy   | SQL    |    56 |         72.0000 |
| Tracy   | Tuning |    88 |         72.0000 |
| Tatiana | SQL    |    87 |         85.0000 |
| Tatiana | Tuning |    83 |         85.0000 |
+---------+--------+-------+-----------------+

In both cases, note that the original scores are still available to each row.

Window Functions in MySQL 8

MySQL has been even later in adopting the Window Functions standard, with it being part of version 8.0 that is expected to be released later this year.   

MySQL employs the same ANSI/ISO Standard as other DBMSes whereby Window function queries are characterised by the OVER keyword and the PARTITION BY clause is employed to reduce the window to a specific group within the result set.

The currently supported functions include:

Name Description
CUME_DIST() Cumulative distribution value
DENSE_RANK() Rank of current row within its partition, without gaps
FIRST_VALUE() Value of argument from the first row of window frame
LAG() Value of argument from row lagging current row within partition
LAST_VALUE() Value of argument from the last row of window frame
LEAD() Value of argument from row leading current row within partition
NTH_VALUE() Value of argument from N-th row of window frame
NTILE() Bucket number of the current row within its partition.
PERCENT_RANK() Percentage rank value
RANK() Rank of current row within its partition, with gaps
ROW_NUMBER() Number of current row within its partition

As an example, we’ll explore the CUME_DIST() function.

It returns the cumulative distribution of a value within a group of values; that is, the percentage of partition values less than or equal to the value in the current row. This represents the number of rows preceding or peer with the current row in the window ordering of the window partition divided by the total number of rows in the window partition. Return values range from 0 to 1.

This function is usually used with ORDER BY to sort partition rows into the desired order. Without ORDER BY, all rows are peers having a value of 1.

The following query shows, for the set of values in the val column, the CUME_DIST() value for each row, as well as the percentage rank value returned by the similar PERCENT_RANK() function. For reference, the query also displays row numbers using ROW_NUMBER():

SELECT

  val,

  ROW_NUMBER()   OVER w AS 'row_number',

  CUME_DIST()    OVER w AS 'cume_dist',

  PERCENT_RANK() OVER w AS 'percent_rank'

FROM numbers

WINDOW w AS (ORDER BY val);

+------+------------+--------------------+--------------+
| val  | row_number | cume_dist          | percent_rank |
+------+------------+--------------------+--------------+
|    1 |          1 | 0.2222222222222222 |            0 |
|    1 |          2 | 0.2222222222222222 |            0 |
|    2 |          3 | 0.3333333333333333 |         0.25 |
|    3 |          4 | 0.6666666666666666 |        0.375 |
|    3 |          5 | 0.6666666666666666 |        0.375 |
|    3 |          6 | 0.6666666666666666 |        0.375 |
|    4 |          7 | 0.8888888888888888 |         0.75 |
|    4 |          8 | 0.8888888888888888 |         0.75 |
|    5 |          9 |                  1 |            1 |
+------+------------+--------------------+--------------+

The OVER clause is permitted for many aggregate functions, including:

  • AVG()
  • COUNT()
  • MAX()
  • MIN()
  • STDDEV_POP(), STDDEV(), STD()
  • STDDEV_SAMP()
  • SUM()
  • VAR_POP(), VARIANCE()
  • VAR_SAMP()

These can be used as window or non-window functions, depending on whether the OVER clause is present or absent:

MySQL also supports non-aggregate functions that are used only as window functions. For these, the OVER clause is mandatory:

  • CUME_DIST()
  • DENSE_RANK()
  • FIRST_VALUE()
  • LAG()
  • LAST_VALUE()
  • LEAD()
  • NTH_VALUE()
  • NTILE()
  • PERCENT_RANK()
  • RANK()
  • ROW_NUMBER()

As an example of a non-aggregate window functions, this query uses ROW_NUMBER(), which produces the row number of each row within its partition. In this case, rows are numbered per country. By default, partition rows are unordered and row numbering is indeterminate. To sort partition rows, include an ORDER BY clause within the window definition. The query uses unordered and ordered partitions (the row_num1 and row_num2 columns) to illustrate the difference that omitting and including ORDER BY makes:

SELECT

  year, country, product, profit,

  ROW_NUMBER() OVER(PARTITION BY country) AS row_num1,

  ROW_NUMBER() OVER(PARTITION BY country ORDER BY year, product) AS row_num2

FROM sales;

+------+---------+------------+--------+----------+----------+
| year | country | product    | profit | row_num1 | row_num2 |
+------+---------+------------+--------+----------+----------+
| 2000 | Finland | Computer   |   1500 |        2 |        1 |
| 2000 | Finland | Phone      |    100 |        1 |        2 |
| 2001 | Finland | Phone      |     10 |        3 |        3 |
| 2000 | India   | Calculator |     75 |        2 |        1 |
| 2000 | India   | Calculator |     75 |        3 |        2 |
| 2000 | India   | Computer   |   1200 |        1 |        3 |
| 2000 | USA     | Calculator |     75 |        5 |        1 |
| 2000 | USA     | Computer   |   1500 |        4 |        2 |
| 2001 | USA     | Calculator |     50 |        2 |        3 |
| 2001 | USA     | Computer   |   1500 |        3 |        4 |
| 2001 | USA     | Computer   |   1200 |        7 |        5 |
| 2001 | USA     | TV         |    150 |        1 |        6 |
| 2001 | USA     | TV         |    100 |        6 |        7 |
+------+---------+------------+--------+----------+----------+

Common Table Expressions (CTEs)

A common table expression (CTE) can be thought of as a temporary result set that is defined within the execution scope of a single SELECT, INSERT, UPDATE, DELETE, or CREATE VIEW statement. A CTE is similar to a derived table in that it is not stored as an object and lasts only for the duration of the query. However, unlike a derived table, a CTE can be self-referencing and can be referenced multiple times in the same query.

A CTE can be used to:

  • Create a recursive query.
  • Substitute for a view when the general use of a view is not required; that is, you do not have to store the definition in metadata.
  • Enable grouping by a column that is derived from a scalar subselect, or a function that is either not deterministic or has external access.
  • Reference the resulting table multiple times in the same statement.

Using a CTE offers the advantages of improved readability and ease in maintenance of complex queries. The query can be divided into separate, simple, logical building blocks. These simple blocks can then be used to build more complex, interim CTEs until the final result set is generated.

Recursive CTEs

Recursive common table expressions (CTEs) were an implementation of standard SQL:1999 for hierarchical queries.  The first implementations of Recursive CTEs began appearing in 2007. The recursive CTEs from the standard were relatively close to the existing implementation in IBM DB2 version 2.  Recursive CTEs were eventually supported by Microsoft SQL Server (since SQL Server 2008 R2), Firebird 2.1, PostgreSQL 8.4+, SQLite 3.8.3+, Oracle 11g Release 2, and IBM Informix version 11.50+.

Without Common-table-expressions or a connected-by clause it is still possible to achieve hierarchical queries with user-defined recursive functions, but these tend to result in very complex SQL.

CTEs in MariaDB

In MariaDB, a non-recursive CTE is basically considered to be a query-local VIEW whose syntax is more readable than nested FROM (SELECT …). A CTE can refer to another and it can be referenced from multiple places.

Thus, CTEs are similar to derived tables. For example,

SQL with derived table:

SELECT * FROM

   ( SELECT * FROM employees

     WHERE dept = 'Engineering' ) AS engineers

WHERE
...

SQL with CTE:

WITH engineers AS
 
   ( SELECT * FROM employees

     WHERE dept = 'Engineering' )

SELECT * FROM engineers

WHERE ...

SQL is generally poor at recursion.  One of the advantages of CTEs is that they permit a query to reference itself, hence recursive SQL. A recursive CTE will repeatedly execute subsets of the data until it obtains the complete result set. This makes it particularly useful for handling hierarchical or tree-structured data.

With recursive CTEs you can achieve things that would be very difficult to do with standard SQL and at a faster execution speed. They can help solve many types of business problems and even simplify some complex SQL/application logic down to a simple recursive call to the database.

Some example uses for recursive CTE are to find gaps in data, create organization charts and create test data.

WITH RECURSIVE signifies a recursive CTE. It is given a name, followed by a body (the main query) as follows:

Below is a recursive CTE that counts from 1 to 50.
WITH   cte

AS     (SELECT 1 AS n -- anchor member

        UNION ALL

        SELECT n + 1 -- recursive member

        FROM   cte

        WHERE  n < 50 -- terminator
       )

SELECT n

FROM   cte;

The above statement prints a number series from 1 to 49.

CTEs in MySQL

MySQL 8.0 adds CTEs via the standard WITH keyword, in much the same way it is implemented in competing products.

To specify common table expressions, use a WITH clause that has one or more comma-separated subclauses. Each subclause provides a subquery that produces a result set, and associates a name with the subquery. The following example defines CTEs named cte1 and cte2 in the WITH clause, and refers to them in the top-level SELECT that follows the WITH clause:

WITH

  cte1 AS (SELECT a, b FROM table1),

  cte2 AS (SELECT c, d FROM table2)

SELECT b, d FROM cte1 JOIN cte2

WHERE cte1.a = cte2.c;

Immediately preceding SELECT for statements that include a SELECT statement:

  • INSERT … WITH … SELECT …
  • REPLACE … WITH … SELECT …
  • CREATE TABLE … WITH … SELECT …
  • CREATE VIEW … WITH … SELECT …
  • DECLARE CURSOR … WITH … SELECT …
  • EXPLAIN … WITH … SELECT …

A recursive common table expression is one having a subquery that refers to its own name. For example:

WITH RECURSIVE cte (n) AS

(
  SELECT 1

  UNION ALL

  SELECT n + 1 FROM cte WHERE n < 5
)

SELECT * FROM cte;

+------+
| n    |
+------+
|    1 |
|    2 |
|    3 |
|    4 |
|    5 |
+------+

Conclusion
Window Functions and Common Table Expressions (CTEs) have been a mainstay of many popular database products for some time now.  With the release of MySQL version 8 and MariaDB 10.2.0, both vendors have caught up with competing DBMSes such as SQL Server and Oracle.

The post Comparison of Window Functions & CTEs in MySQL 8 vs MariaDB appeared first on SQLyog Blog.

via Planet MySQL
Comparison of Window Functions & CTEs in MySQL 8 vs MariaDB

Open and Concealed Carry are Protected by the Second Amendment

Constitutional We the People
We the People have the right to keep and bear arms. It says it right here on this Constitution.

Arizona -(Ammoland.com)- The natural right to bear arms includes the right to carry them concealed as well as openly. Both types of carry were practiced at the time of the ratification of the Bill of Rights. Flintlock “muff pistols” were widely available before 1791. Daggers, dirks and other assorted blades were commonly carried concealed. Sword canes conceal the blade inside of the cane, and are considered concealed weapons. They were commonly available.  They became popular, in part, to avoid any social reproach against the carry of swords, anticipating the condemnation of open carry today.

Historic examples of choices for concealed carry.

The Second Amendment does not differentiate between concealed and openly carried arms.  Such differentiation was not discussed during the debates about the Second Amendment.  It was decades after the Bill of Rights was ratified that concealed carry was questioned. Arms technology had not changed significantly.

Concealed weapons had and have military purposes. General Gage, the British Officer in charge of occupied Boston, had his officers conceal their sidearms when patrolling to prevent Paul Revere’s ride. From William Diamond’s Drum page 94:

And finally, unbeknown to him. Gage had that afternoon posted mounted officers, with their sidearms concealed as though they were on pleasure jaunts, along the Cambridge roads, just in case messengers should try to give out alarms that night.

There were no colonial statutes that separated the carrying of concealed weapons from the open carrying of weapons.

The Kentucky legislature passed a statute forbidding concealed arms in 1813. It was challenged in court.

The statute was found unconstitutional in Bliss v. Commonwealth of Kentucky, in the state Supreme Court. It was 1822, three decades after the Second Amendment was ratified.  Any restriction on bearing arms was contrary to “the right of the citizens to bear arms in defense of themselves and the state“, and was therefore void.

The court reasoned that any diminution of the right that existed when the Constitutional protection was adopted, was an infringement of the right, and was therefore unconstitutional. The logic is impeccable.

In 1833, the Supreme Court ruled that the Bill of Rights, including the Second Amendment, did not apply to the states.

In 1833, the Indiana Supreme Court ruled that concealed carry could be banned for people who were not travelers.

Five other state courts, with different state constitutions,  (Alabama, Tennessee, Arkansas, Georgia, and Louisiana), ruled their legislatures could ban concealed carry  from 1833 to 1850, to varying degrees.

In Kentucky, a Constitutional amendment was deemed necessary. The constitutional amendment to allow the legislature to regulate the concealed carry of weapons passed in 1849, as part of a constitutional convention. In 1850, the wording in bold was added:

  “That the rights of the citizens to bear arms in defense of themselves and the State shall not be questioned; but the General Assembly may pass laws to prevent persons from carrying concealed arms.”

All but Indiana were slave states.  Prohibiting the carry of concealed weapons is particularly important to keeping suspect minorities disarmed.  If the weapons are concealed, it is much harder to enforce legal or extralegal disarmament techniques, such as selective enforcement under color of law.

In 1859,  The Texas Supreme Court, in Cockrum v. state, held that “The right of a citizen to bear arms, in defense of himself or the State, is absolute.”  The court cited both the Second Amendment and the then current Texas Constitution. The case held that if inexpensive weapons were prohibited, the right of self defense would be chilled for poor people.

In 1868 the Fourteenth Amendment was passed to assure, in part, that the Second Amendment would be enforced to insure that freed slaves could keep and bear arms. The former slave states found ways to evade the requirement. In 1873, the Fourteenth Amendment’s enforcement of the Bill of Rights against state encroachment was nullified by the Supreme Court.

In 1903, the Vermont Supreme Court, in State v. Rosenthal, found that an ordinance requiring a permit to carry a concealed pistol “..repugnant to the Constitution and laws of the state,”.

Federal laws have never been passed against the carry of concealed weapons.

In 2008 the Heller decision made clear what it meant to bear arms. Scalia quoted Justice Ginsburg’s writing in a previous case.  From cornell.edu:

Justice Ginsburg wrote that “[s]urely a most familiar meaning is, as the Constitution’s Second Amendment … indicate[s]: ‘wear, bear, or carry … upon the person or in the clothing or in a pocket, for the purpose … of being armed and ready for offensive or defensive action in a case of conflict with another person.’ ”

“..in the clothing or in a pocket” is carrying concealed.

Justice Scalia concluded that laws banning the concealed carry of arms were constitutional, solely because such laws were long standing in a number of states. Such laws were not upheld before the 1830’s, 40 years after the Bill of Rights was ratified.

Laws against the concealed carry of weapons are vestiges of laws designed to keep slaves and free blacks disarmed.

In 2010, the Supreme Court held the Second Amendment is incorporated against the States by the Fourteenth Amendment, finally doing what the Court should have done in 1873.

Adam Winkler, an Constitutional scholar at UCLA, has written that allowing only open carry may be the best way to discourage bearing arms in general.  He made the case this might be the most effective way for the California legislature to chill the exercise of the Second Amendment.

Vermont has never required a permit for open or concealed carry. Twelve states have reformed their laws to allow the carrying of weapons, concealed or openly, without permission from the government, since 2003. They call it Constitutional Carry.

Both open carry and concealed carry are protected by the Second Amendment. Restricting the bearing of arms to either open carry or  concealed carry is a clear infringement of that right to bear arms.

©2018 by Dean Weingarten: Permission to share is granted when this notice is included.

Link to Gun Watch


About Dean Weingarten:Dean Weingarten

Dean Weingarten has been a peace officer, a military officer, was on the University of Wisconsin Pistol Team for four years, and was first certified to teach firearms safety in 1973. He taught the Arizona concealed carry course for fifteen years until the goal of constitutional carry was attained. He has degrees in meteorology and mining engineering, and recently retired from the Department of Defense after a 30 year career in Army Research, Development, Testing, and Evaluation.

This post Open and Concealed Carry are Protected by the Second Amendment appeared first on AmmoLand.com .

via AmmoLand.com
Open and Concealed Carry are Protected by the Second Amendment

How to Concealed Carry a Full-Size (Or Even Larger) Gun

Sometimes you don’t want to just carry a pocket pistol.

Instead, you want to be able to feel the weight of that 1911 as you walk around, and hear it clunk on your nightstand when you take it off for the evening.

You just want to carry something big.

gun recoiling into shooters face
Well, Something Big – Within Reason.

Now when most people think “big gun,” they think 1911 or a long barrel revolver, but unless you’re the Joker, you probably aren’t going to carry a Smith & Wesson 500 Magnum with the 6.5-inch barrel or a full-size Desert Eagle.

Instead, you might want to carry a Glock 17, H&K VP9, Kimber Stainless II 1911, or something similar.

While some of these have shorter barrels than others, they are all full-size guns, and none of them are small.

CCW Full Size 1911
Concealed Carry 1911. Because You Can.

Of course, carrying a bigger gun brings a different set of challenges that you face when you carry a subcompact or even a compact handgun.

To help you out, this article is going to go over some of the things you’ll want to consider when you are thinking about or having trouble carrying a big gun.

Now, as you read below, it may come across like carrying a big gun is not a good idea.  That’s not the case at all; it’s totally up to you what you carry.

I do, however, want to discuss the pitfalls of carrying a big gun so you are aware of them before you go out and spend 1200 dollars on a sweet 1911 and realize you can’t appendix carry it like you saw in a movie.

So let’s get started.

Size Matters

Let’s compare some guns so you can see the size difference.

Springfield 1911 A1
Springfield 1911 A1

Compared to something like the Sig P238 in .380, a standard 1911 is 3.4 inches longer and almost twice as thick.  Even compared to a Glock 36 (their .45 ACP subcompact) you aren’t gaining much other than more gun to carry around.

Is one round worth hauling around the extra 15.5 ounces?  That’s almost an extra pound… for one bullet.

So what do we gain with the bigger gun?

For starters, you get a slightly larger round if you go with a 9mm version of the Kimber.  But, if you are carrying a 1911, most wouldn’t bother with 9mm and instead, go with the .45 ACP. This gives you a much larger round, obviously.

9mm Will Kill Your Body, .45 ACP Will Kill Your Soul

So yeah, you get one more bullet with the .45 ACP version, but the gun is almost twice as wide.  It’s even wider than the Glock 36 which is 1.10 inches wide and holds 6+1 rounds also.

Carry Positions for a Large CCW

Now that you know what you’re getting into, let’s talk carry positions for your big CCW gun.  Your carry position will greatly depend on your body type.

For example, if you are 5’11” and weigh 180 pounds, you’re more limited than a guy who’s 6’5” and 280 pounds.

Of course, your clothing choices will also play a large part how and where you carry a big CCW gun.

Do you wear tee shirts all the time?

Do you wear a jacket and dress pants?

Carrying pistol concealed
How You Dress Affects How You Carry

A smaller frame pistol will be easier to conceal in the summer and in thinner, tighter fitting clothing.

Furthermore, your full-sized gun isn’t something you’ll want to carry in an ankle holster or even appendix carry.  It’s not going to be comfortable and is unlikely to even fit in the first place.

All that said, let’s look examine what options you do have.

Wear a Jacket

Depending on the occasion, you could wear a jacket.  This would allow for an OWB holster anywhere from the 3-6 o’clock position.  Most jackets will easily hide even a full-size gun in a holster.

Plus, even if you are able to comfortably carry your sidearm of choice in an IWB holster, adding another layer of loose-fitting clothing will help you ensure that you won’t print.

If you do choose to use an OWB holster, be sure not to keep it in a spot where it can easily be accidentally exposed.

Carrying a Glock
Carrying a Glock Under a Jacket

Making sure your gun isn’t an attention grabber will also help.  If you have a nickel plated something or other with a mural painted on the slide, it’s going to be a lot easier to spot if your jacket opens in the wind.

Black gun, black holster, black pants; even a darker shirt helps.  And, of course, just keeping your jacket zipped or buttoned makes a huge difference.  If black isn’t your thing…check out our Gray Man Loadout.

Shoulder Holster

A shoulder holster is an alternative to a waistband holster if you are wearing a jacket.

This kind of holster isn’t for everyone though.  Those of us who have a thinner build might need to position the holster more to the vertically to hide the gun.

Regardless, the barrel could poke at the rear of your jacket or the grip might print out the front.

Shoulder Holster
Shoulder Holster and 1911

When holstering your gun under your arm, make sure you practice your draw. If you aren’t accustomed to it, you may fumble or have an otherwise difficult time if you need to pull your gun under pressure. This also goes for t-shirt holsters.

Inside the Waistband Holster

An IWB holster is also an option.  Like a shoulder holster, using a holster inside your waistband will really depend on your body-type.

You will also need to make sure you wear the appropriate clothing to conceal your gun.  A tuckable holster can help when you aren’t wearing a jacket or some other outer layer like a sweatshirt.

The position of your carry will also greatly depend on your body shape.  If you are on the leaner side, you will probably need to carry at the 4 or 5 o’clock position.

If you have a little more mass to you, the 3 o’clock position might be easier for you to hide and still draw your gun easily if you need it.

We can help you find the right IWB holster for you in our Best Concealed Carry Holsters review.

Final Thoughts

When you choose the gun you are going to carry every day to protect yourself, you need to make sure you can handle it well, so be sure to consider why you want to choose a large CCW weapon.

I prefer to carry for safety, but don’t like to have the inconvenience of a large gun where I need to change the way I bend or move or wear different clothing.

On the other hand, some people prefer the feeling of security that goes with a weightier weapon or feels more confident carrying a larger caliber.

Looking for more options? You should take a look at our other Best CCW Guns articles, we’ve looked at a huge range of guns from full-size to revolvers to subcompacts.

What about you?  What’s your CCW sidearm of choice?  What are your thoughts on big guns for CCW?  Have any advice for those looking for concealed carry larger sidearms?  As always, share your thoughts in the comments!

The post How to Concealed Carry a Full-Size (Or Even Larger) Gun appeared first on Pew Pew Tactical.

via Pew Pew Tactical
How to Concealed Carry a Full-Size (Or Even Larger) Gun

New Webinar on How to Design Open Source Databases for High Availability

Join us March 27th for this webinar on how to design open source databases for high availability with Ashraf Sharif, Senior Support Engineer at Severalnines. From discussing high availability concepts through to failover or switch over mechanisms, Ashraf will cover all the need-to-know information when it comes to building highly available database infrastructures.

It’s been said that not designing for failure leads to failure; but what is the best way to design a database system from the ground up to withstand failure?

Designing open source databases for high availability can be a challenge as failures happen in many different ways, which sometimes go beyond imagination. This is one of the consequences of the complexity of today’s open source database environments.

At Severalnines we’re big fans of high availability databases and have seen our fair share of failure scenarios across the thousands of database deployment attempts that we come across every year.

In this webinar, we’ll look at the different types of failures you might encounter and what mechanisms can be used to address them. We will also look at some of popular high availability solutions used today, and how they can help you achieve different levels of availability.

Sign up for the webinar

Date, Time & Registration

Europe/MEA/APAC

Tuesday, March 27th at 09:00 BST / 10:00 CEST (Germany, France, Sweden)

Register Now

North America/LatAm

Tuesday, March 27th at 09:00 PDT (US) / 12:00 EDT (US)

Register Now

Agenda

  • Why design for High Availability?
  • High availability concepts
    • CAP theorem
    • PACELC theorem
  • Trade offs
    • Deployment and operational cost
    • System complexity
    • Performance issues
    • Lock management
  • Architecting databases for failures
    • Capacity planning
    • Redundancy
    • Load balancing
    • Failover and switchover
    • Quorum and split brain
    • Fencing
    • Multi datacenter and multi-cloud setups
    • Recovery policy
  • High availability solutions
    • Database architecture determines Availability
    • Active-Standby failover solution with shared storage or DRBD
    • Master-slave replication
    • Master-master cluster
  • Failover and switchover mechanisms
    • Reverse proxy
    • Caching
    • Virtual IP address
    • Application connector

Sign up for the webinar

Speaker

Ashraf Sharif is System Support Engineer at Severalnines. He was previously involved in hosting world and LAMP stack, where he worked as principal consultant and head of support team and delivered clustering solutions for large websites in the South East Asia region. His professional interests are on system scalability and high availability.

via Planet MySQL
New Webinar on How to Design Open Source Databases for High Availability