This fascinating video from GWIN TECH shows how a factory quickly cranks out lightweight plastic boats. The blow molding process involves filling a plastic bladder with hot air and then stamping them together with giant dies while the plastic is still pliable.
Man, it’s been almost two years now, and ammo prices still suck. A lot of us have chewed through our stash and are faced with paying higher prices or seeking training alternatives.
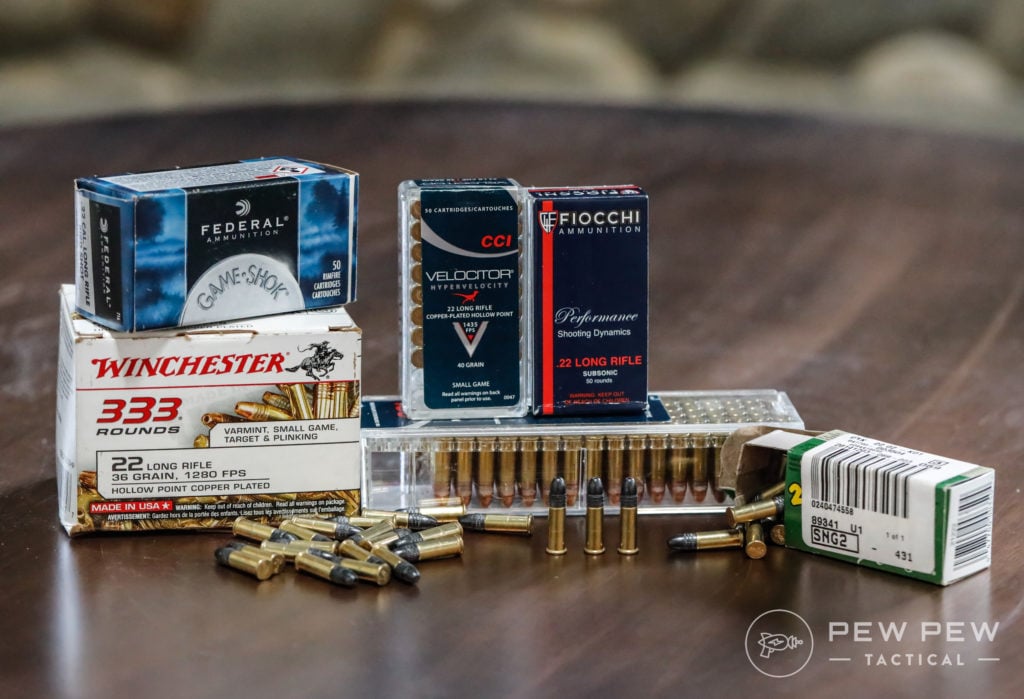
If only we had all this…
I mean, no one expects us to just stop shooting, right? Well, maybe we can turn to the old classic, .22 LR. While the price of .22 LR has risen, it hasn’t reached the crazy levels of 9mm and 5.56.
With that in mind, I’ve started searching out some of the better options for .22 LR trainers. These guns can replicate the feel and handling of a larger caliber firearm and offer you some training value without emptying your wallet.
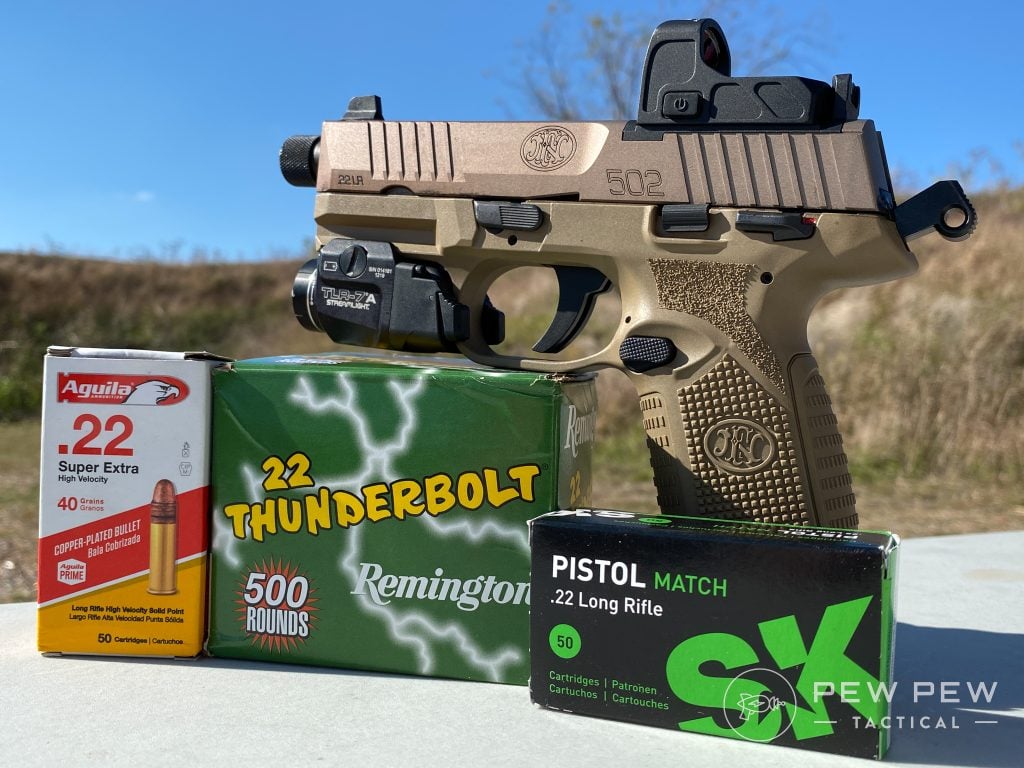
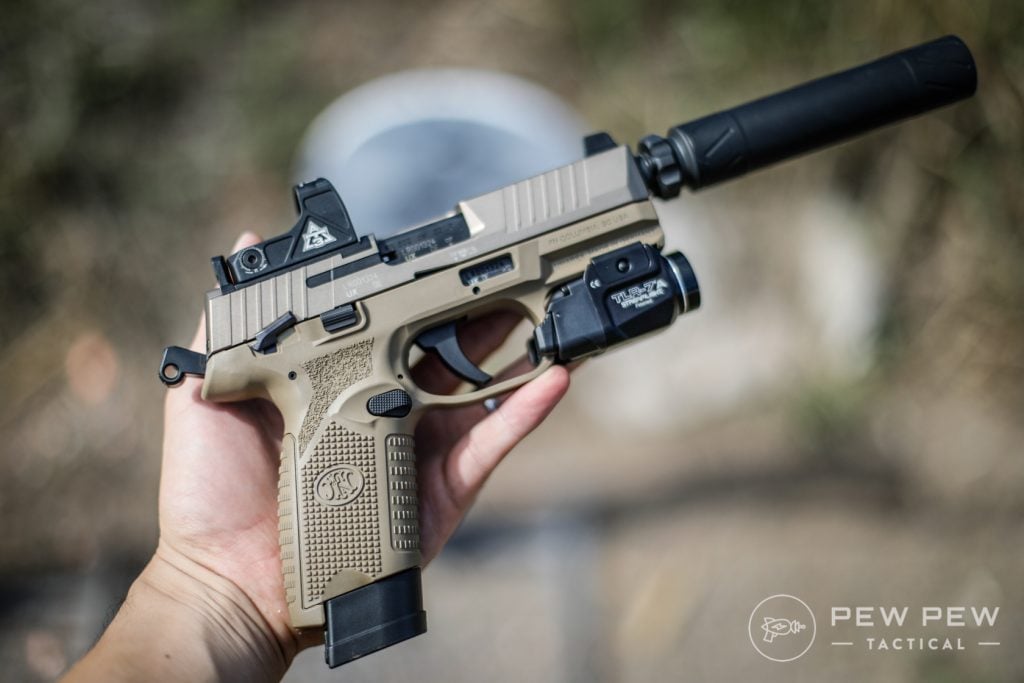
The FN 502 hit the ground running and is part of FN’s 500 series pistols. It shrinks things down to rimfire size and goes from a striker-fired gun to a hammer-fired gun.
FN 502 Tactical – Various Ammo
The hammer-fired action is single action only, so it’s roughly similar to a striker-fired trigger. And it fits most of the FN 509 holsters and matches the look and feel of the FN 509. However, it replicates the feel of most striker-fired modern pistols.
There isn’t much difference between models, and I believe the FN 502 could stand in for the Glock, S&W, Walther, etc.
FN 502 in action
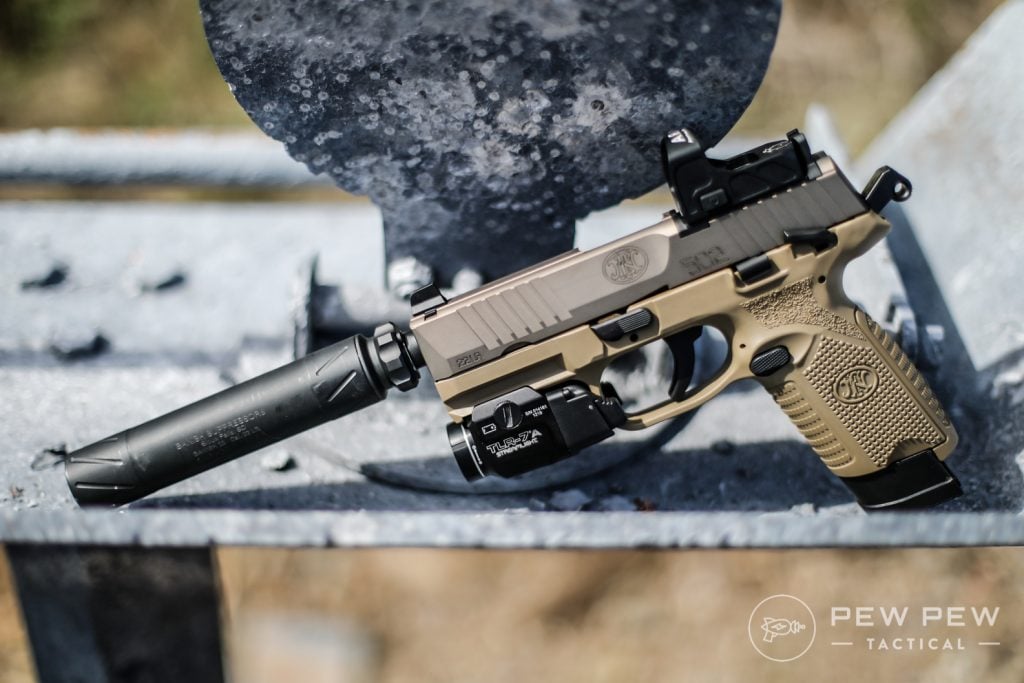
One of the more interesting features is the weapon’s optics compatibility. Toss on whatever optic you want, and now you can effectively replicate a modern MRDS-equipped handgun.
The sights are suppressor height sights, and the barrel is also threaded.
All in all, it’s one of the best rimfire handguns on the market. It comes with a flush 10-round magazine and an extended 15-round magazine.
This is perfect for training for defensive handgun use. It also works well when it comes to some competition training.
Set up a cardboard Steel Challenge course, and you can work your way through it with ease. The FN 502 allows you to work on your red dot presentation, your draw, and trigger control.
Every little boy and girl needs a .22 LR revolver. Seriously, the S&W 317 Kit gun might be the best to double as both a training .22 LR and a practical gun. It’s also just a ton of fun.
This revolver is a double-action model with an exposed hammer, and it sits on a rather compact frame.
S&W AirLite Model 317 (Photo: Major Pandemic)
Shooters get a nice 3-inch barrel and the 317 packs eight rounds of the little .22 LR. It’s a handy little gun that uses the J-frame, but don’t mistake it for a snub nose.
At 11.7 ounces, it’s not tough for younger shooters to handle.
The single-action hammer makes it a sweet shooter, especially when you factor in the Hi-Viz front sight and adjustable rear sight.
S&W Model 317 Hi Viz front sight (Photo: Smith & Wesson)
The Kit gun is perfect for learning how to use a modern revolver. Its trigger design allows you to train for both a standard exposed hammer and an enclosed hammer. And the gun uses a modern swing-out cylinder.
Heck, they even make speed loaders for it.
The 317 Kit gun gives you a handy little gun for hunting, fishing, and other tasks where you might want a portable pest remover. This gun is plenty robust and perfect for general purpose outdoorsy, plus it’s a lot of fun.
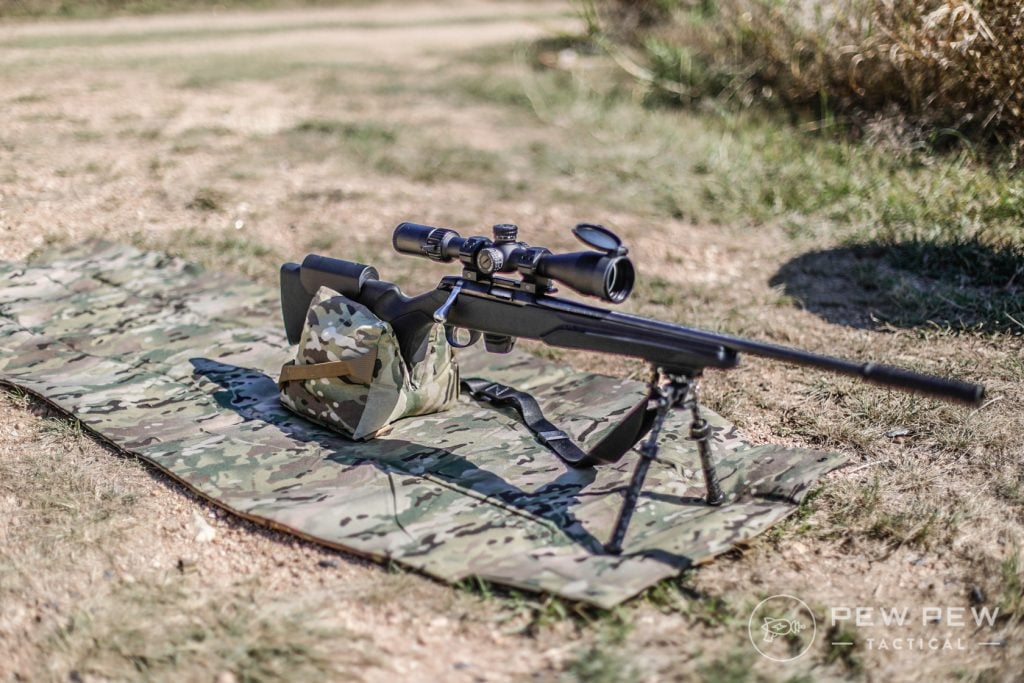
The Tikka T1x brings the training rimfire rifle to a bolt-action design. Like all Tikka firearms, the 1X is a fantastic example of what a bolt gun should be.
Shooters get a well-built rifle with a medium contour barrel, a 10-round magazine, and a very smooth bolt-action system.
The modular stock allows you to swap pistol grips at various angles, and you can attach a wider forend at the front of the gun for a better grip.
Tikka T1x Build for NRL22 Base Class
Tikka utilizes a crossover-style barrel system that mixes the stability and accuracy of a heavy barrel without being unbalanced and heavy.
For making those accurate shots, the barrel is cold hammer-forged and threaded, and ready for a suppressor.
The Tikka T1x provides a rimfire stand-in for the already awesome Tikka T3x rifles. Tikka uses the same bedding surfaces and inlay footprint as the centerfire T3x.
Besides being a stand-in for the T3x, it’s also just a great stand-in for any bolt action rifle.
Tikka T1x in MDT ACC Chassis
Bolt-action rifles are known for their accuracy, and the Tikka T1x is plenty accurate. It might not provide the range of a centerfire rifle; however, with a reduced-sized target and some good glass, you can work your accuracy skills well.
Beyond that, the Tikka T1x is just a great general-purpose training tool for new shooters.
As a bolt-action, shooters aren’t tempted to rapid-fire. New shooters can safely and easily learn accuracy fundamentals and gun safety.
Lots of .22 LR AR rifles exist, but it’s tough to find a better, more affordable option that matches the look, feel, and controls of a real AR-15 than the M&P 15-22 at a great price point.
Smith & Wesson M&P 15-22 Sport in Khaki
S&W also makes various models with handguard options including quad rails and M-LOK rails. The magazines are as close as you get to the real thing and hold up to 25 rounds.
The S&W M&P 15-22 keeps the price point low by using hefty amounts of polymer in their design. It’s clearly not as heavy as an actual AR-15 but tries its best to match the real thing.
The gun uses a blowback action, which you come to expect from .22 LR rifles.
It’s like this but in .22 LR
The presence of a last-round bolt hold open makes reloads accurate, and it’s a great feature to have for training purposes.
You can toss on a cheaper red dot and even light to replicate your actual gun at a lower price. An S&W M&P 15-22 makes your AR-15 training efficient and cheap.
On top of that, the S&W M&P 15-22 can be used at indoor ranges, which often prohibit the use of rifle rounds, but allow the humble .22 LR. Plus, it’s also a lot of fun to shoot and perfect for plinking cans and squirrel hunting.
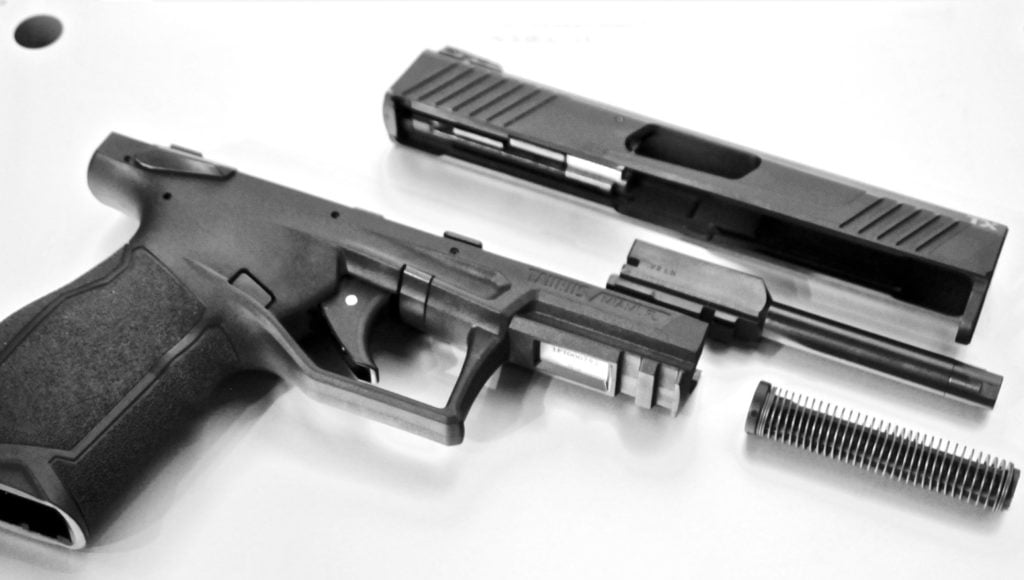
The Taurus TX22 might be my favorite .22 LR pistol on the market.
This striker-fired, polymer frame wonder 9 is the generic of generic pistols, and the Taurus TX22 replicates that generic pistol well enough to be a training pistol for nearly anything.
A shooter with a TX22 can easily replicate their Glock, their FN, their SIG, or beyond with the TX22.
Its simple controls make using the TX22 in place of any other gun easy. The TX22 did find a way to implement 16 rounds in a flush fighting magazine, which again brings the capacity up to a realistic count.
With a rock-solid price point, the TX22 provides a great training pistol that not only replicates your basic 9mm handgun but makes generalized training easy.
The Taurus TX22 is a decent little starter pistol in .22 LR.
The TX22 is well suited for new shooters learning the art of the handgun without the recoil of a 9mm. It’s much cheaper to train with, and the TX22 has proven itself to be reliable and frustration-free.
Taurus’ latest model incorporates a red dot, but it’s a little less traditional. However, you can still train that valuable red dot presentation and learn to effectively use a red dot.
What do you think of the Taurus TX22? Rate it below!
Readers’ Ratings
5.00/5 (1)
Your Rating?
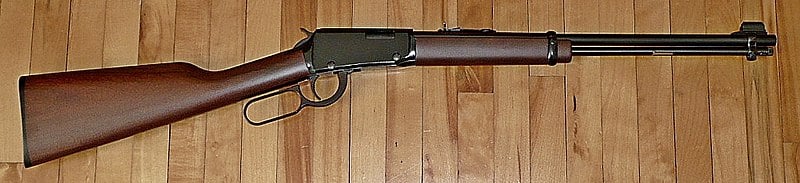
6. Henry Classic .22 LR Lever Gun
If you are a fan of the classics and use a lever gun, you know the ammo is expensive. Lever guns don’t come in 9mm-friendly price points. .44 Mag, .45 Colt, .357 Mag, and more cost a pretty penny.
If you shoot SASS, then you are familiar with the high cost of ammunition. The Henry Classic Lever-Action .22 LR brings you all the fun of a lever gun without the cost.
We love lever guns…but the ammo…well that can get pricey.
It’s perfect for learning to run the lever gun fast and hard. Working that smooth action and sending a pile of .22 LR downrange is both a ton of fun and a big challenge. Pair it with a shot timer, and you will both effectively train and have the time of your life.
The Classic lever gun doesn’t implement some crazy manual safeties or other features that detract from the classic lever gun.
The only downside is that it’s tube-loaded, and it doesn’t utilize a side gate. Side gates are tough with .22 LR because the projectiles don’t take pressure well without bending, which will cause feeding issues.
Luckily, even with this slight issue, the Henry Classic lever gun gives you all the feeling and joy of a standard lever gun without the high price of lever gun ammo.
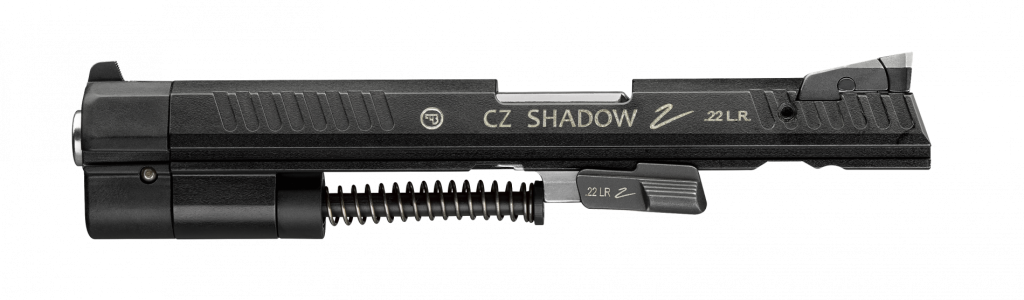
The CZ Kadet kits are not firearms. Instead, they are conversion kits for CZ series pistols.
Five exist, and they allow you to outfit your CZ 75, your P09, your P07, your SP01, and your CZ Shadow with a new complete slide and .22 LR magazines.
These kits vary in price but offer an affordable way to convert the gun you already have to a .22 LR pistol.
The Kadet kits are drop-in designs and make the conversion absolutely painless. Heck, it’s easy enough to swap at the range and warm up with .22 LR and start training with 9mm.
CZ Shadow 2…just toss on one of the kits and you can run .22 LR
If you’ve already joined the CZ master race, why not turn your 9mm into a .22 LR for training purposes? CZ firearms are well represented in the fields of defensive use and competition, both of which require a ton of practice to be sufficient.
Tossing a Kadet Kit on your favorite CZ allows you to use the same trigger, controls, and everything else, but with a different slide and maybe different sights.
Hammer-fired CZs are a natural and easy conversion to .22 LR. The kits will pay for themselves quite quickly.
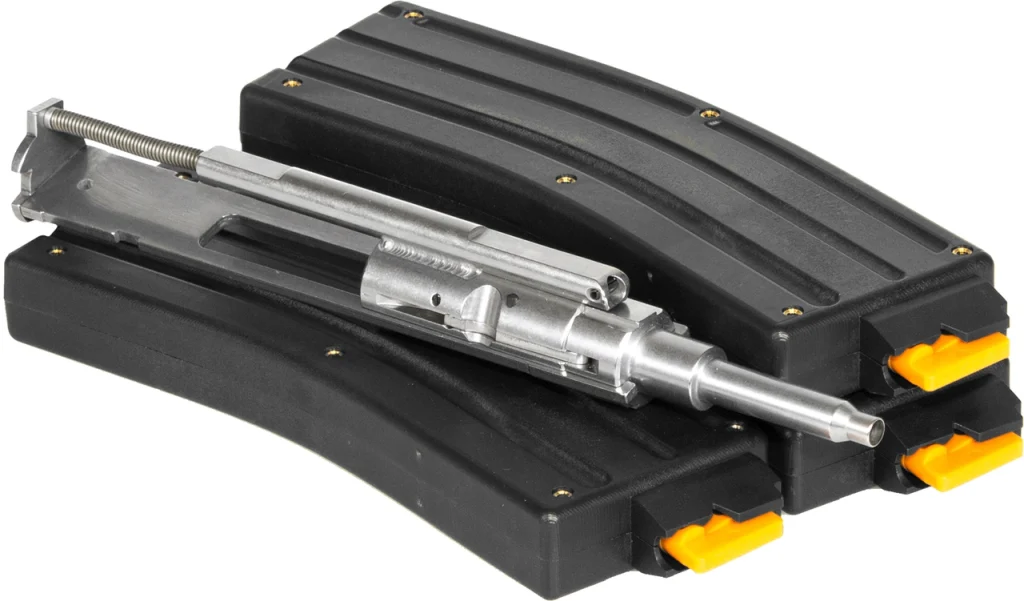
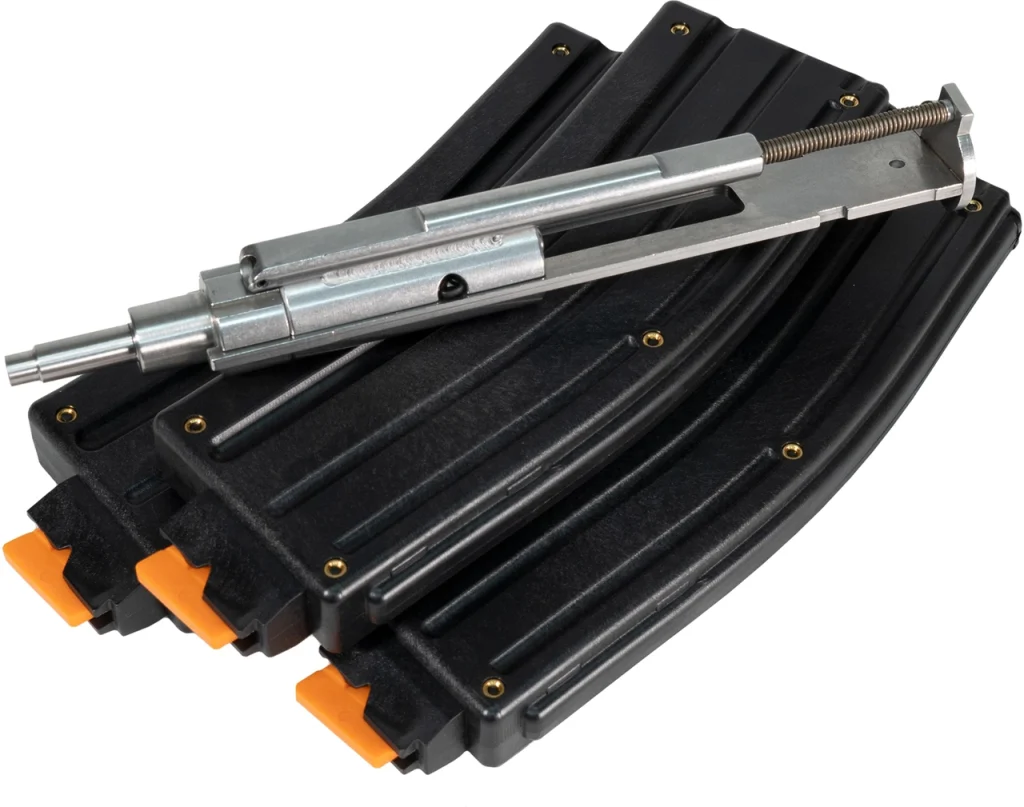
The CMMG .22 LR AR Conversion Kit is exactly what it sounds like. This drop-in bolt conversion kit allows you to take any 5.56 caliber AR-15 and chamber it in .22 LR.
It’s one of the most affordable ways to train with rimfire in your AR 15 rifle.
It’s a drop-in kit that utilizes an integral everything, including a buffer. The magazines are proprietary, 25-round magazines that work almost flawlessly. They tend to prefer jacketed ammunition over bare lead.
The price history of .22lr when adjusted for inflation and unskilled laborer earning potential is fascinating. IMG Jim Grant
U.S.A. –-(AmmoLand.com)-— The author has been interested in the historical costs of .22 rimfire cartridges since childhood. Starting in early adolescence, and continuing for many years, the value of things and time was measured in .22 cartridges. It was a simple calculation, an easy comparison. From that era, 1964 to the present, .22 Long Rifle cartridge list prices, converted to constant unskilled labor dollars, have been fairly stable.
The unskilled labor number is based on the time it takes for an unskilled laborer to earn the same purchasing power for a particular year. It took about 146 hours (about two weeks, 12 hours a day, six days a week), for an unskilled laborer in 1911, to earn the same purchasing power as 1 hour of unskilled labor in 2022. The chart shows the value of unskilled labor increased rapidly from 1911 to present, with some glitches. The most obvious is the depression, in 1932, post-WWII in 1950, most of the 1980s, and after the election of President Obama, 2008 onward.
The .22 caliber rimfire cartridges are the most successful cartridges in history. Billions are produced annually. They are the most used cartridges of all time. The .22 Long Rifle is the most common. For a considerable time, the .22 Short gave it significant competition. The .22 Long, while sold in considerable quantities, was never as popular as either the Long Rifle or the Short.
.22 rimfire cartridges have been used to kill the biggest land animals on the planet, from elephants (according to Peter Hathaway Capstick, in Safari, the Last Adventure, p.114 to 116) to grizzly bears.
The chart shows the prices, in the value of unskilled labor, of a .22 Long Rifle cartridge, in 2022 dollars, from 1911 to 2022.
The .22 Winchester Rimfire (WRF) and the .22 WRF magnum deserve mention, but their use and production pale in significance to the Long Rifle and the Short.
The .22 rimfire has always been the least expensive cartridge to purchase. For most of history, the .22 Short has been less expensive than the Long Rifle. That changed in the 1980s. The Long Rifle has always been more versatile.
This correspondent has obtained manufacturer price list information for .22 Long Rifle ammunition from 1911 to 2022. The information covers 111 ears of pricing history. Of the 111 years, this correspondent obtained data for 70 years. There are enough data points to catch most variations lasting a couple of years or more.
For consistency, the prices are those of smokeless, 40-grain high-velocity Long Rifle cartridges. The prices are all from one highly successful manufacturer. The cost of obtaining the prices was confidentiality.
Material costs seem to have relatively little effect on overall cartridge costs. Looking at a 2003 Gun Digest, variations of 50 rounds of .25 Auto and 50 rounds of .44 magnum were both priced at $17.
The incredible increase in productivity brought about by the petroleum age and increasing technological prowess reduced the relative costs of cartridges enormously. In 1911, the petroleum age was just starting. Automobiles were in their infancy. So were airplanes. The ability to fix nitrogen from the air for fertilizer and explosives had been discovered by German scientists in 1909, in the Haber-Bosch process.
In 1911, the relative cost of a thousand rounds of .22 Long Rifle, in dollars earned by unskilled labor, was $1,095, or about $1.10 per cartridge in 2022 valuation. The nominal cost in 1911 was 3/4 of a cent per round. To give perspective, butter was 20 cents a pound; fresh eggs were 20 cents a dozen. A day of unskilled labor was paid about $1.
After WWI and the vast increase in technological knowledge and skill, the cost fell to about 28 cents per round in the value of unskilled labor in 2022. WWII sparked more increases in technological prowess and knowledge. The price gradually fell to about 20 cents per round in 2022 unskilled labor dollars. The lowest prices, per round of .22 long rifle, in unskilled labor, were reached from 1993 to 2006, at about 4.5 cents per round.
From the Obama years onward, the price has gone up and down to about 8 cents per round currently. If we maintain a republic, this correspondent expects .22 Long Rifle cartridges to move back down in the neighborhood of 4 cents a cartridge in constant dollars.
Diligent shoppers will find cartridges on sale, going out of business, discontinued, or other bargains. Estates of shooters often sell ammunition at bargain-basement prices. Gun stores often refuse to resell ammunition, even in unopened boxes.
Ammunition, if stored in reasonable conditions, will last many decades, probably over a hundred years. 65-year-old .22 rimfire ammunition has been tested by this correspondent. There was no measurable degradation in performance.
—
About Dean Weingarten:
Dean Weingarten has been a peace officer, a military officer, was on the University of Wisconsin Pistol Team for four years, and was first certified to teach firearms safety in 1973. He taught the Arizona concealed carry course for fifteen years until the goal of Constitutional Carry was attained. He has degrees in meteorology and mining engineering, and retired from the Department of Defense after a 30 year career in Army Research, Development, Testing, and Evaluation.
As you might know, mysqldump is single-threaded and STDOUT is its default output. As MyDumper is multithreaded, it has to write on different files. Since version 0.11.3 was released in Nov 2021, we have the possibility to stream our backup in MyDumper. We thought for several months until we decided what was the simplest way to implement it and we also had to add support for compression. So, after fixing several bugs, and we now consider it is stable enough, we can explain how it works.
How Can You Stream if MyDumper is Multithreaded?
Receiving a stream is not a problem for myloader, it receives a file at a time and sends it to a thread to process it. However, each worker thread in mydumper is connected to the database, and as soon as it reads data, it should be sent to the stream, which might cause collisions with other worker threads that are reading data from the database. In order to avoid this issue, we ended up with the simplest solution: mydumper is going to take a backup and store it in the local file system that you configured, and the filename will be enqueued to be processed by the Stream Thread which pops one file at a time and pipes to stdout. We study the alternative to send chunks of the file while it is being dumped, but the way that we implemented is simpler and improves the overall performance.
Implementation Details
Here is a high-level diagram of how we implemented it:
When a mydumper Worker Thread processes a job, it connects to the database and stores the output into a file. That didn’t change, but with stream, we are pushing the filename into the mydumper stream_queue.
The mydumper Stream Thread is popping filenames from the mydumper stream_queue, it is going to send the header of the file to stdout and then open the file and send its content.
Then, myloader Stream Thread is going to receive and detect the header, it will create the new file with the filename from the header and store the content in it.
After closing the file, it will enqueue the filename in the myloader stream_queue. A myloader Worker Thread is going to take that file and process it according to the kind of file it is.
By default, the files are deleted, but if you want to keep them, you can use the –no-delete option.
The header is simply adding — to the filename so you can use myloader or mysql client to import your database. Here is an example:
-- sbtest-schema-create.sql
CREATE DATABASE /*!32312 IF NOT EXISTS*/ `sbtest` /*!40100 DEFAULT CHARACTER SET utf8mb4 COLLATE utf8mb4_0900_ai_ci */ /*!80016 DEFAULT ENCRYPTION='N' */;

-- sbtest.sbtest1-schema.sql
/*!40101 SET NAMES binary*/;
/*!40014 SET FOREIGN_KEY_CHECKS=0*/;

/*!40103 SET TIME_ZONE='+00:00' */;
CREATE TABLE `sbtest1` (
  `id` int NOT NULL AUTO_INCREMENT,
  `k` int NOT NULL DEFAULT '0',
  `c` char(120) NOT NULL DEFAULT '',
  `pad` char(60) NOT NULL DEFAULT '',
  `pad2` char(60) NOT NULL DEFAULT '',
  PRIMARY KEY (`id`)
) ENGINE=InnoDB AUTO_INCREMENT=100010 DEFAULT CHARSET=utf8mb4 COLLATE=utf8mb4_0900_ai_ci;

-- sbtest.sbtest1.00000.sql
/*!40101 SET NAMES binary*/;
/*!40014 SET FOREIGN_KEY_CHECKS=0*/;
/*!40103 SET TIME_ZONE='+00:00' */;
INSERT INTO `sbtest1` VALUES(1,49929,"83868641912-28773972837-60736120486-75162659906-27563526494-20381887404-41576422241-93426793964-56405065102-33518432330","67847967377-48000963322-62604785301-91415491898-96926520291","")
…
Simple Use Cases
A thread writes to a single file to avoid a collision, which improves the performance. However, having thousands of files for a backup of a couple of tables is not manageable. So, the simplest use case is to send everything to a single file:
This implementation is using the backup directory on mydumper and myloader as Buffers, you must take this into account, as by default it is going to create a directory where you run it.
Another thing that you need to take into account is that mydumper and myloader will be writing on disk, the whole backup will be written on both File Systems while it is being processed, and use a file system with enough disk space.
Finally, you can keep myloader running and send several mydumper backups. First, you need to run:
-k When a connection is completed, listen for another one. Requires -l.
-N shutdown(2) the network socket after EOF on the input. Some servers require this to finish their work.
This is very useful if you are refreshing some testing environment and you only need a couple of tables on different databases or if you are using a where clause that only applies to some tables.
Considerations
Usually, when you send data to STDOUT, you are not going to have trouble with disk space usage on the dumper server. That is NOT true if you are using MyDumper. Files will be stored on the mydumper server until they are transferred to the receiving server. For instance, if you have a 10TB database, with a very low network bandwidth compared to the disk bandwidth, you might end up filling up the disk where you keep the files temporarily.
Conclusion
We focus the implementation to speed up export and import processes. Opposite to other software or implementations, we use the file system as a buffer causing a higher disk utilization.
Not only does Lego’s Optimus Prime look great in robot mode, he actually looks even better as a truck. The transformation process very closely matches the same steps used for Hasbro’s original ‘80s toy, with the addition of a 180-degree twist at the waist, hands that fold out of the way instead of needing to be removed, and the front of the truck temporarily swinging up and out of the way providing extra clearance as various parts move around.
I like that Prime’s legs feature clips on the inside so that they can be secured together when flipped 90 degrees to form the back of the truck, and I kind of wish the arms had a similar locking mechanism too, as they tended to sag in truck mode, creating noticeable gaps in the body panels.
Photo: Andrew Liszewski – io9
I’m going to award some bonus points here because while accessories like the jetpack, axe, and energon cube don’t really have any place to call home when they’re not in use, the truck mode’s design includes a spot between Prime’s legs where his blaster can be stored more or less out of sight: a clever solution until Lego decides to release a buildable trailer for Optimus as well. (Please… pleeeeease!)
If you spent a lot of time browsing the internet, then you no doubt understand that there are simply too many websites out there to check on regularly. RSS readers can help solve this problem by condensing your online browsing all into one feed, but how can you know which RSS reader to go with?
Whether you’re new to RSS feeds or an old veteran, there are plenty of options out there to consider. Here are four of the very best.
First up on this list we have Feedreader. Feedreader is a great online tool that allows you to more easily check your RSS feed than ever before.
To get started with Feedreader, you’ll need to first sign up for an account, which is a pretty straightforward process. All you need to do is input your e-mail and a password, and you’ll be ready to go.
The layout of Feedreader itself is pretty intuitive when you first look at it. On the left, you have a variety of different categories to browse through such as starred items, and across the top of the screen, you have plenty of options to choose from.
The main bulk of the RSS reader is dedicated to the center of the screen, whereas you might expect is where your added feeds will be displayed. Adding new RSS feeds is pretty straightforward, too, as all you have to do is click on the add a new feed button to do so.
MAKEUSEOF VIDEO OF THE DAY
You get the option to create categories when you’re doing this as well. If you subscribe to a lot of different types of content, such as podcasts, articles, and more, you can easily differentiate them this way.
It’s all online here, which means that if you’ve looked through the best RSS readers in the Windows store and found them all wanting, you can access this easily from your browser.
What’s great about Feedreader is that if you’re new to RSS feeds and not so sure what you’re looking for, then there are some good tips to help guide your way. Feedreader has its own RSS feed to follow, as well as a blog to help you find your way.
Next up, we have Inoreader. If you’re looking for an RSS reader that will help to streamline your process and even automate parts of your RSS feed, then Inoreader is a great option to do just that.
At its core, Inoreader is capable of doing just about anything you might want from an RSS reader. You can add new feeds easily yourself, and if you’re a long-time user coming from another RSS reader, you can easily import your feeds directly.
What’s cool about Inoreader, however, is how it helps you to find more of what you want to see. You can search for feeds using Inoreader’s inbuilt search engine, or try out some of its featured feed collections.
The options here are diverse and include collections from news, to investing, to more creative pursuits. These collections feature a whole bunch of different options from different sources all over the internet, so you can quickly and easily set up your RSS feed.
On top of this, Inoreader features some pretty impressive automation options to help you get more out of your feed than you would with a standard reader. You can monitor certain keywords across your feed or even across all public articles, and can highlight certain words that pop up to make sure that you don’t miss them as you scroll.
There are options here to create certain filters and even action-based rules, though this is only available if you subscribe to Inoreader’s premium plan.
If you’re looking for something to help guide you through the process of setting up an RSS feed from scratch for the very first time, then Feeder is an excellent option to help you out.
When you first sign up with Feeder, you’ll be asked about your specific needs. You’ll have the option to choose between personal or work use, and from there be able to further narrow in on how you plan to use Feeder.
After that, the service will give you some recommendations on what feeds it thinks you’re likely to want. This is all based on how you went through the first step.
From there, Feeder behaves much like any other RSS reader. You have the option to look through your various feeds, as well as change the appearance of the service and even add rules. This last option is only available for premium users, however.
While Feeder is free to use, you’ll be limited to just 10 feeds and a pretty slow update speed without upgrading. If you do upgrade, however, you’ll have access to filters, collections, and e-mail notifications if you so wish.
Next up on this list comes NewsBlur. While the name may imply that NewsBlur is only useful for keeping up to date with news, it’s actually a great RSS reader with a little something for everyone.
If you’re new to RSS readers, for instance, then NewsBlur comes with a handy introduction after you sign up to help guide you through its service. It’ll show you various categories of feeds you may be interested in, as well as giving you the option to link up with others on social media.
From there, you can access all sorts of information about the site, as well as easily add new feeds directly to the service. There are plenty of different viewing modes here, and a lot of options to customize just how NewsBlur presents its information to you.
If you’re looking for new feeds, NewsBlur has recommended sites you can look at, as well as news and more for you to look at to get some ideas about what next to add.
If you’re looking for more options than that, NewsBlur also comes with a premium account option. This lets you save stories with searchable tags, and adds more custom options, as well as tons more.
As you can see, there are a wealth of great RSS readers available online for you to try. Each one provides something a little different, which means that one is bound to be just right for you.
All you need to do is give them a go. After all, they’re entirely free for you to use, which means that you don’t have to worry before you give them a go.
I participated (just a bit) in the writing of this book as technical reviewer with Vadim and Fipar. I really enjoyed that role of carefully reading the early drafts of the chapters Daniel was writing.
Although Daniel says the book is not for the experts, I think even experts will enjoy it because several key InnoDB concepts are also covered. You can see that I refer to the book often in my A graph a day, keeps the doctor away ! series on monitoring and trending.
If you’re looking for information on transaction isolation and undo logs, fuzzy checkpointing, etc… you’ll find valuable information in the book.
The book is also enhanced with detailed illustrations that help in understanding complicated concepts (InnoDB page flushing, page 216, Source to Replica , page 235, MVCC and undo logs, page 277 are some examples).
Personally, I use this book as I used the 2nd and 3rd editions of High Performance MySQL.
From the beginning to the end of the book, Daniel focuses on the most important and measurable metric for all database consumers: query response time.
I had the chance to meet again Daniel at Percona Live and offered me a signed copy 😉
the wonderful signature 😀
I also had the privilege of having my review published in the back of the book:
If you are looking for a book to improve your knowledge of MySQL or if you are a software engineer who needs to deal with MySQL, this is a good choice.
I also recommend reading Daniel’s blog which is a complement to the book.
Home defense is a hot topic in the firearms community, with newbies and seasoned pros debating the merits of different platforms.
But what should you consider when setting up a home defense or bedside gun?
What happens when things go bump in the night?
Well, I’m here to help. I’m going to try and dial in on some suggestions of things I would consider essential in home defense, as well as looking at the stats behind home invasions.
I will preface this by saying that everything contained in this article is meant as a general picture and in no way should be construed as an all-inclusive, gospel, or a cookie-cutter response to fit every person or scenario.
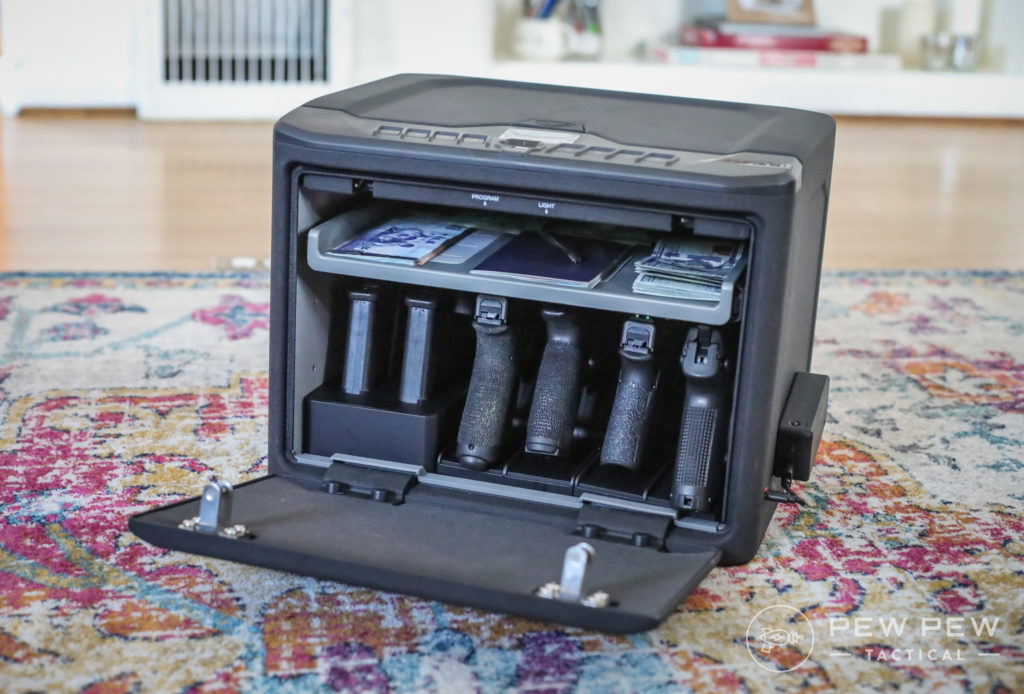
Vaultek MXi
There are simply too many variables to account for in one article in dealing with a home defense scenario and what the correct tool for the job is.
But I’ve done my best to offer a broad perspective that should at least get you started. So keep reading to learn more!
Table of Contents
Loading…
Science of Home Defense
One of the common misconceptions in the firearms community is that we must prepare to fight off waves of invaders in a home defense situation.
Could that happen? Sure. Is it likely? Reading through recent home invasion stories reported to the police, no.
Probably not going to be fighting these off. (Photo: Rogue Pictures)
Local statistics in Las Vegas are that the likelihood is one or two (average was 1.5) persons will attempt to gain entry, though more are possibly outside in supporting roles.
This can vary from area to area, but lower-income locations typically see more burglaries and attempts.
Per the FBI’s Criminal Justice Information Services Division, a break-in occurs once every 26 seconds in the United States.
Ominous Shadow
Of those break-ins, 61% of offenders were unarmed at the time of the offense, and only 12% of all violent break-ins involved the offender having a firearm. Often, the offenders were known to the victims, and an assault occurred in only 5% of the break-ins reported.
So, what does all that have to do with setting up your home defense? First and foremost, the best deterrent you can have to prevent a home invasion is a security system — 83% of would-be burglars check for some sort of security system before breaking in.
Ring Security System
If you choose to defend yourself, your home, and your family with a firearm, you need to understand that you may know the person attempting to break in, they may or may not be armed, and that the likelihood is that they want to get in and get out with cash or goods, not hurt you.
In short, make sure you understand your local laws VERY well.
What’s the Best Home Defense Tool?
This is a very complicated answer, and there isn’t a blanket “this works best for everyone” response.
Instead of going into a nuanced answer, I’m going to attempt to give some information that will highlight the strengths and weaknesses of different firearms for home defense.
Ultimately you will have to decide what will work best based on your level of familiarity and comfort with a particular platform, the layout of your house, availability of defensive ammo, and many other variables.
Why does the layout of your house matter? Defending a one-bedroom apartment will be a vastly different scenario than trying to defend a 10,000-square-foot ranch house on 27 acres of land.
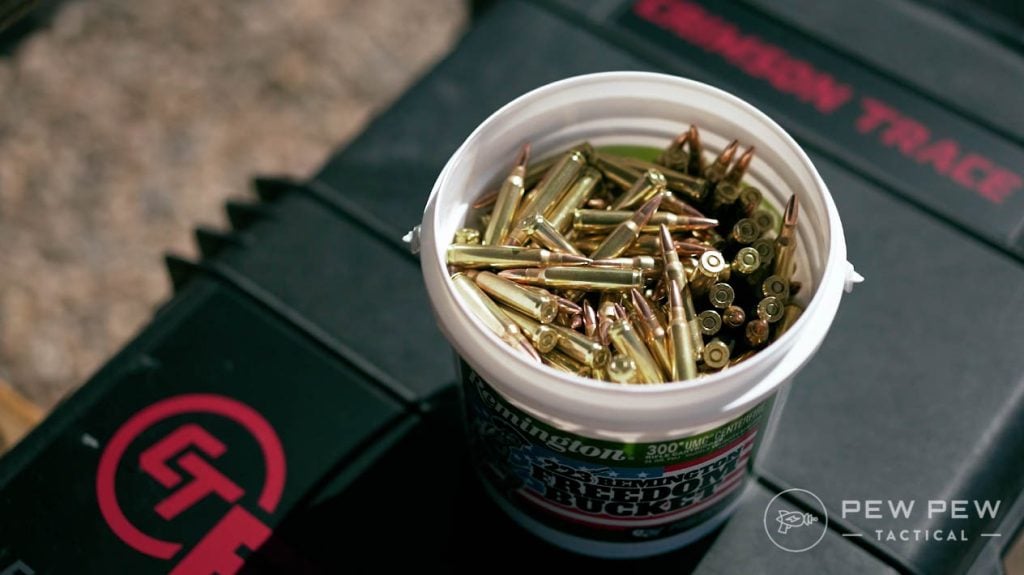
The key here is realizing that you are legally responsible for everything a bullet does once it exits the muzzle of your firearm after being discharged.
You are responsible for every one of these that leaves the barrel…
Sending a round through a wall into your neighboring townhouse means you are responsible for any damages or injuries it causes. Different tools will excel in different environments, so figure out what will do the best for you.
Investing in some deterrents can often prevent the need to use force.
We already saw that potential burglars check for a security system, so that is the first thing you should be investing in. (Or take a look at our article on the Best Ways to Secure Your Home for more tips!)
Beyond that, what’s the next step to deterring a burglary without escalating to force? A good-quality handheld flashlight and properly using it.
Let’s face facts; if something goes bump in the night, most of the time, there isn’t a need to point a gun at it.
The use of a flashlight to investigate what is skulking around your property allows you to make an informed decision on whether the use of force is necessary or if you simply caught your teenage kid sneaking back into the house.
A little light goes a long way.
If you spot a would-be burglar, the threat of being caught and detained statistically shows they are less likely to stay.
In that 5% of break-ins that turn into an assault, however, use of force may be needed, and that is where other tools are more suitable for the job.
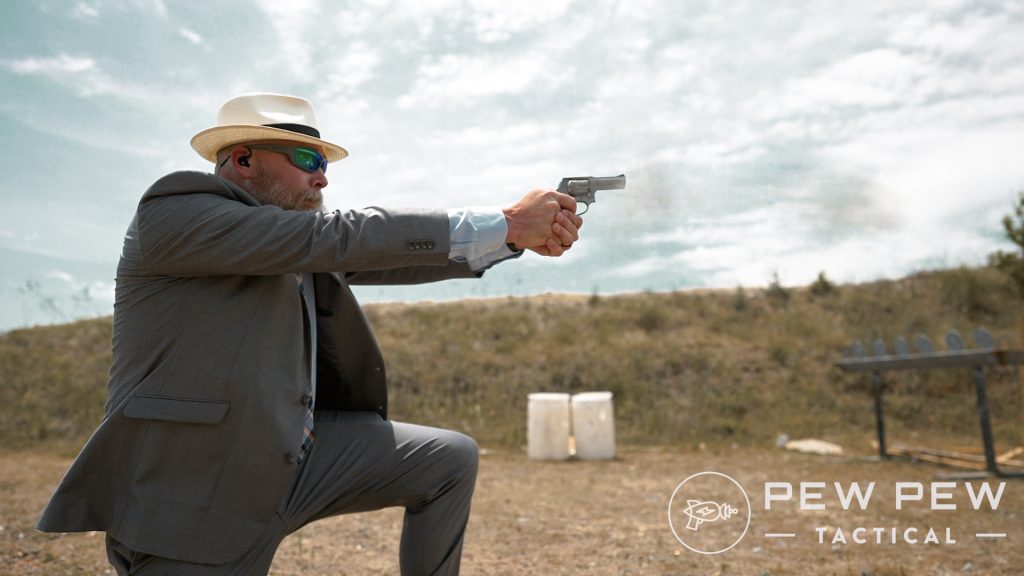
Hands & Home Defense
I’m not getting into a debate over semi-automatic vs. revolver or a debate on which caliber is the best.
The correct answer is finding a gun that you will train to become more proficient with, that can add the features you work best with, and ensure you are confident in its use.
If you can wield a revolver well, then rock on, my friends.
I will not recommend a .22 LR as a defensive handgun, but if that is all you have, you better make it work for you.
Generally, any caliber from .380 and up that offers hollow-point rounds can be suitable for a defensive gun. Each caliber will have some advantages and disadvantages.
Popular Pistol Calibers
Quality matters for defensive guns. Right now, finding quality guns can be both difficult and expensive, but you have to ask yourself what your life is worth.
Let’s face it, in the middle of the night; you should have the advantage in your home over a stranger. You know the layout better, you know where obstacles typically are, and you are just generally more familiar. Why not press that advantage with your firearm?
You know the layout better than they do.
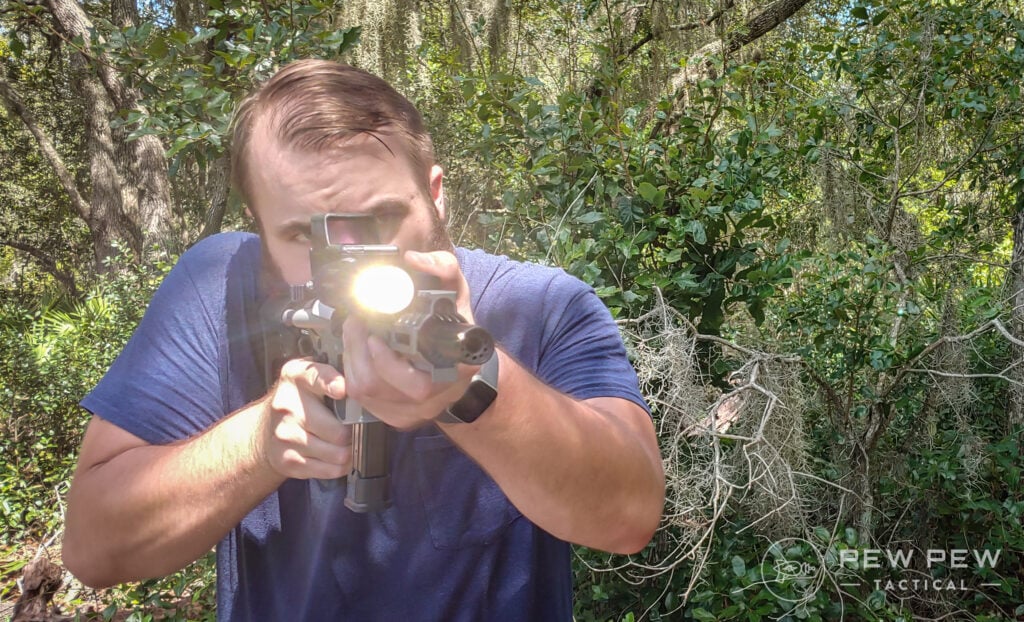
If you find yourself in a dark house trying to defend yourself, getting positive target identification and getting sights on target are the two things with which you need to be concerned — speaking in terms of operating the gun itself, not considering things like finding and using cover, etc.
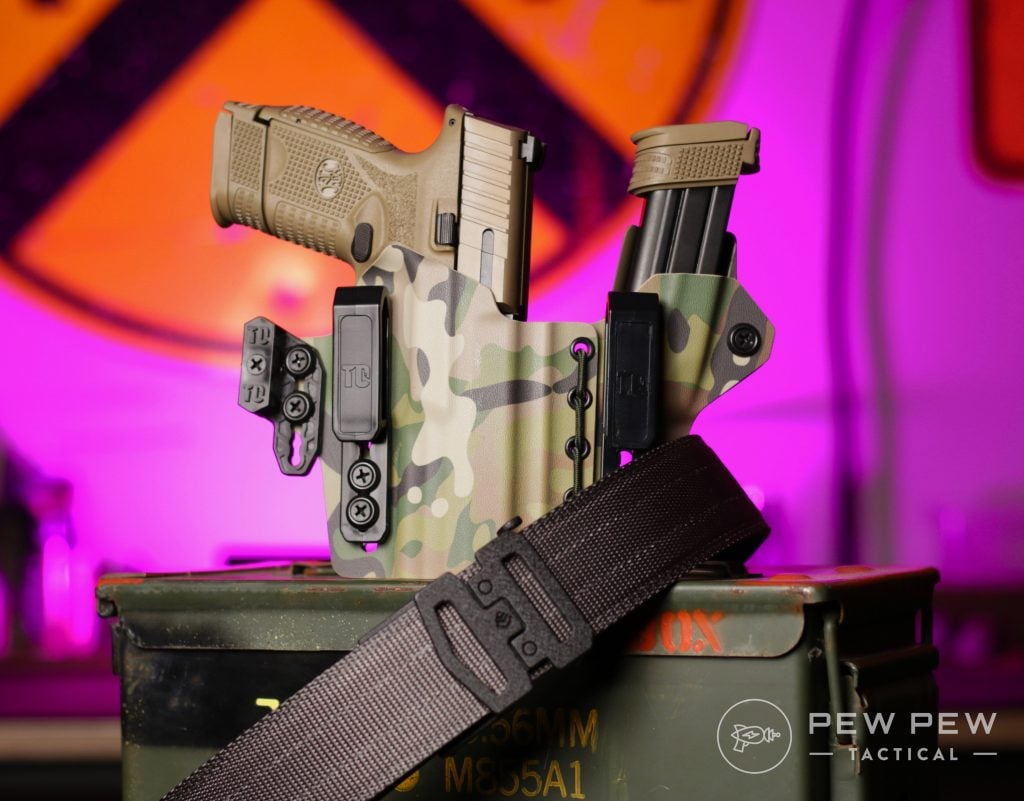
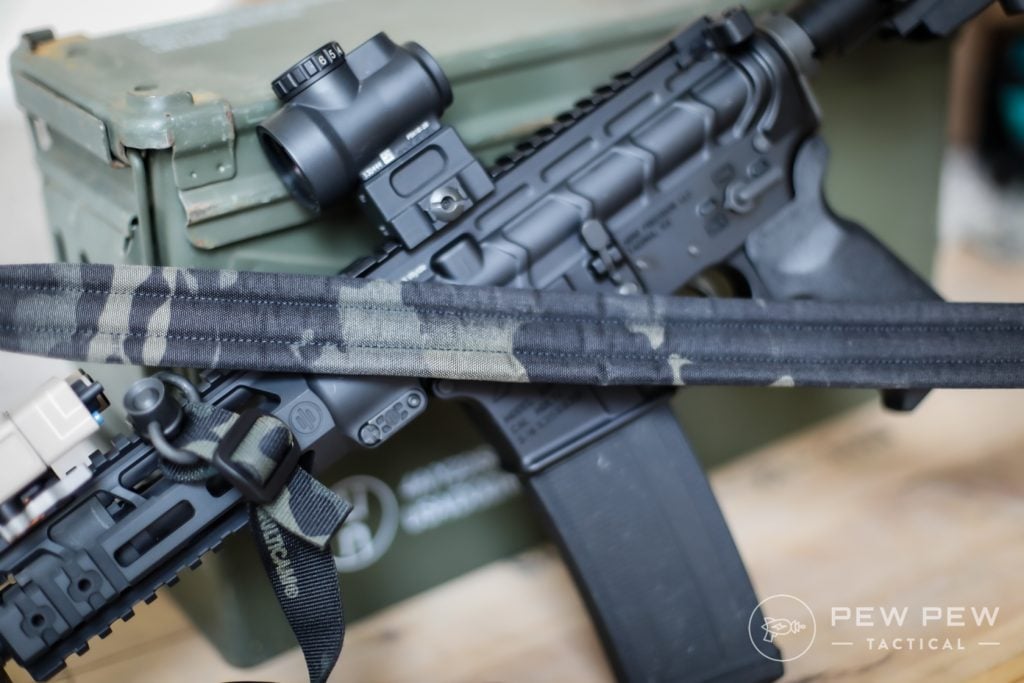
To this end, I do recommend a weapon-mounted light of good quality — Streamlight, Surefire, Modlite, etc.
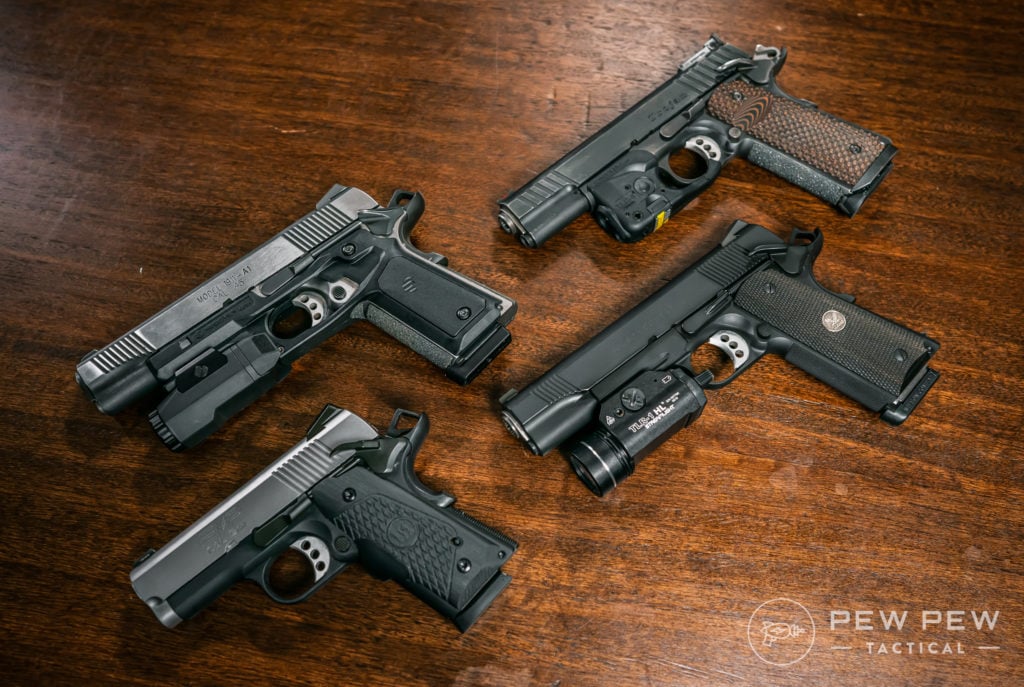
1911s with Lights & Lasers
Additionally, I am a huge advocate for adding an optic to your pistol. Optics allow you to be threat-focused, rather than requiring you to switch to sight focus beyond a certain distance.
Optics allow you to acquire your aiming device regardless of lighting conditions and permit faster follow-up shots with more consistency, regardless of shooting experience.
Bunch of Micro Guns and Red Dots
Can’t night sights/fiber optic sights do the same thing? Yes and no. They will allow you to find your sights faster, but you are still limited by lighting conditions to get sights on target, and iron sights still require sight focus vs. being target focused.
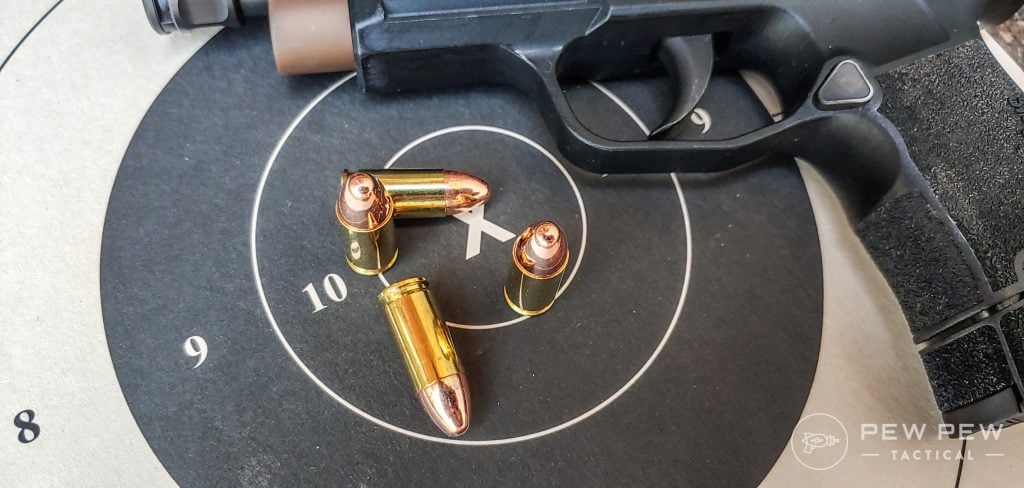
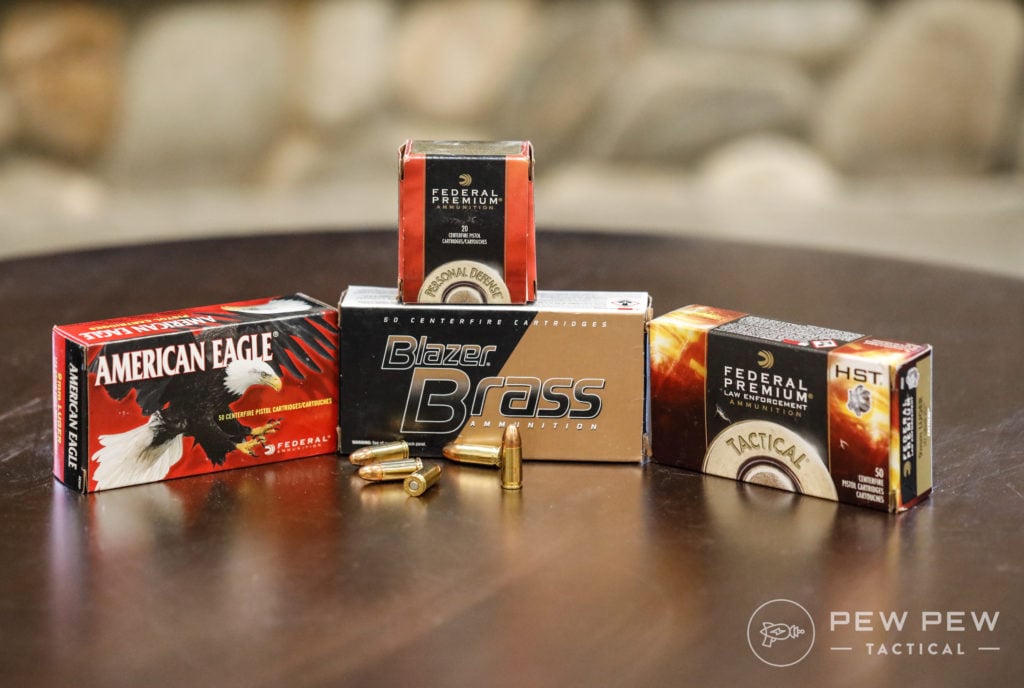
The last component is ammo. Find good quality, consistent hollow points that will get the job done.
Popular 9mm Ammo
Examples of this would include but are not limited to Speer Gold Dot, Hornady Critical Duty, or Federal HST for larger handguns like the Glock G17 and G19.
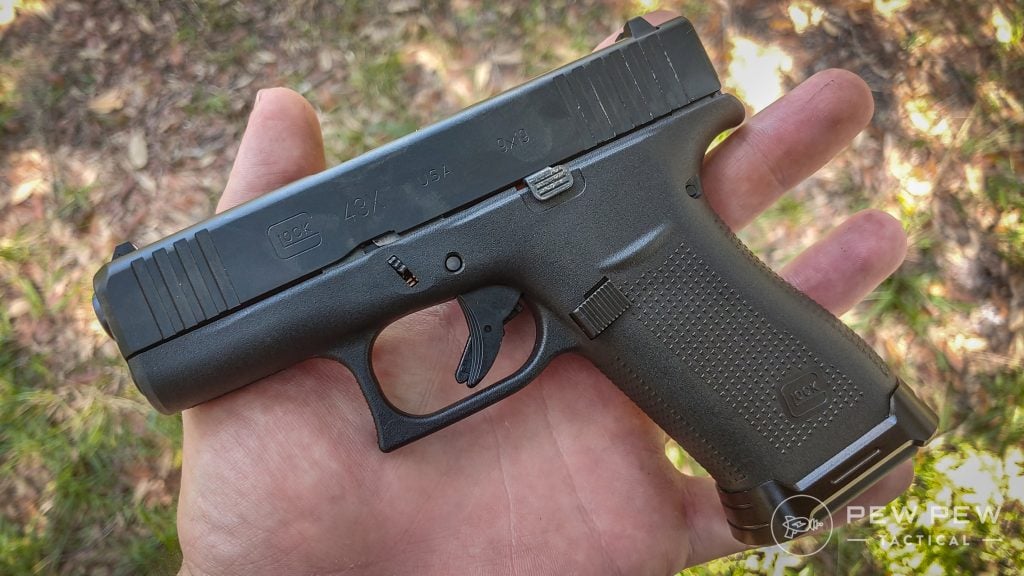
For shorter barreled guns like Glock G43x, S&W Shield, or Sig P365, Hornady Critical Defense or Federal Punch are better options.
Speaking with Chuck Haggard of Agile/Training & Consulting, he mentioned that shorter barreled handguns lead to the round not fully expanding on some of the duty grade hollow points.
His testing and experience showed that Critical Defense was a much better choice in that scenario.
Glock G43X
Make sure your gun is rated for any +P or +P+ ammo you intend to shoot, and then shoot a magazine worth through your gun to make sure it cycles without any issue.
Pistols do have their limits, and you need to know them.
Depending on the handgun you’ve selected, you will have between six and 17 rounds to use for your defense without reloading.
Shield vs Stock Glock 43x Mag
Looking back at the average number of attackers, that is between three and eight shots at each adversary.
Add in adrenaline and the high stress of the situation, and you now have a scenario where you are likely reverting to your lowest proficiency and training to put hits on target.
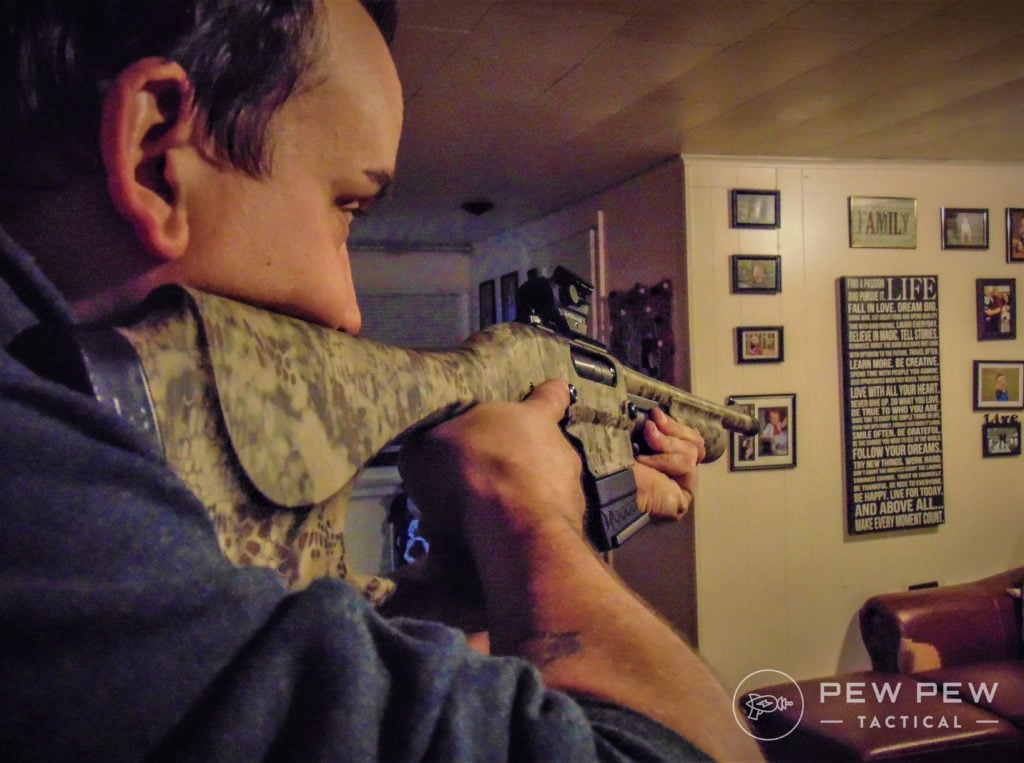
Rifles for Home Defense
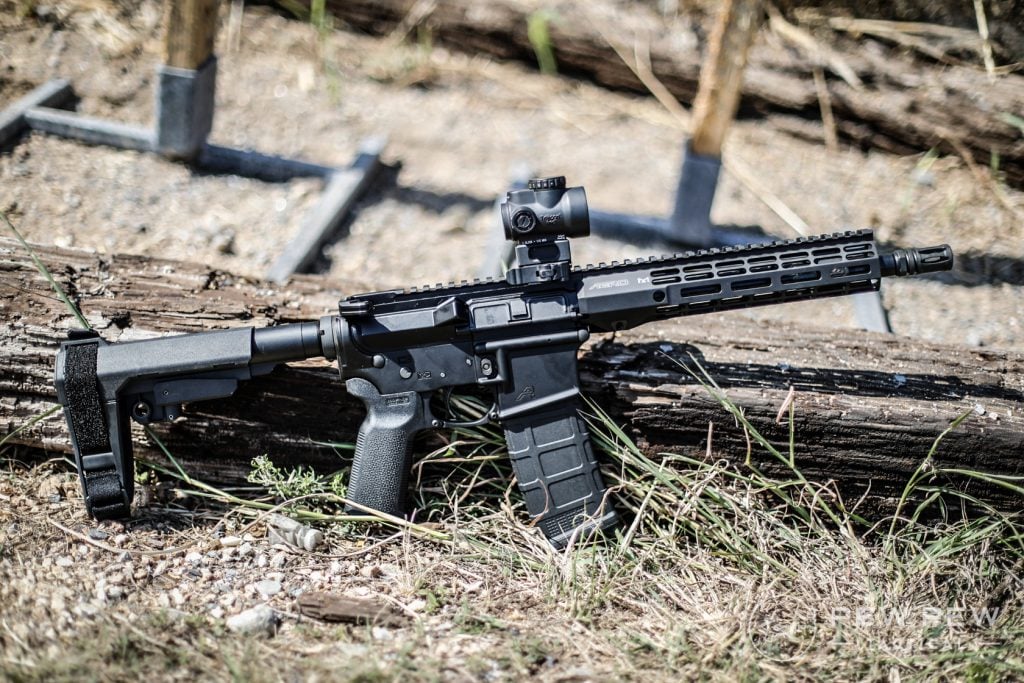
Many, myself included, choose to use a rifle or pistol version of a rifle for home defense.
Rifles offer a more stable, more forgiving firing platform than handguns due to the increased points of body contact with the gun.
Additionally, they typically offer more ammunition to feed and, in most cases, provide increased velocity over handguns.
So, when will a rifle be an advantage over a handgun? If your house is laid out in such a manner that you can create distance, a rifle is going to generally be better than a handgun.
I want to clarify this in that shot placement matters; either way, people can generally fire a rifle better than a handgun at low skill levels. At 15 to 20 yards, both can be effective; it will come down to training and comfort.
Aero AR-15 10.5″ Pistol
In my case, my entire family is housed on the second floor of our home. I can then use a rifle to defend against people coming upstairs and know that it will be effective.
Just like with handguns, a rifle will benefit from a weapon-mounted light. Target identification is still a priority, even more so at greater distances.
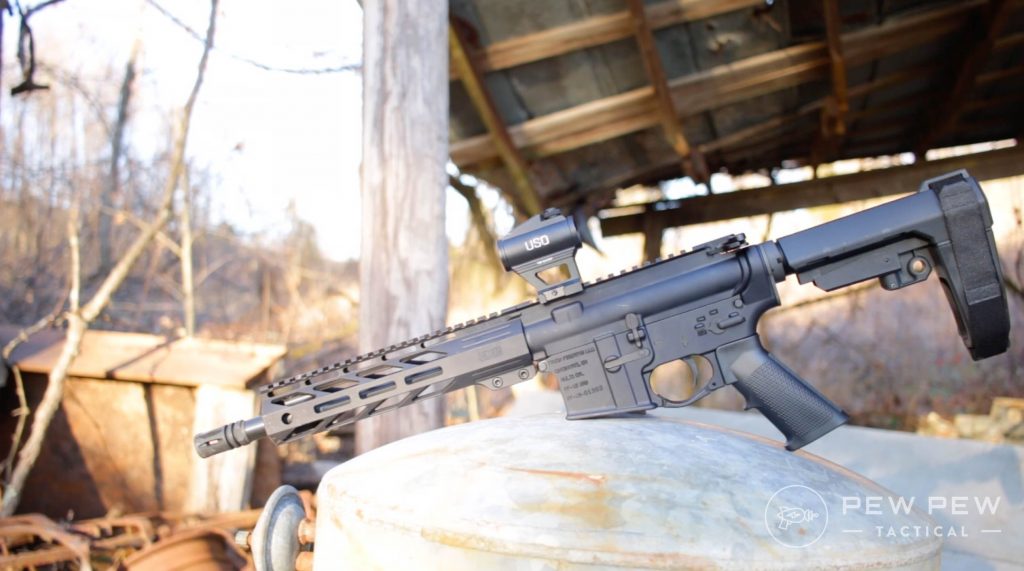
Cloud Defensive OWL
Some form of quality optic is needed as well. I prefer red dots that I can leave on like an Aimpoint CompM5 or T2 so that my gun is ready when I pick it up. I know others that run low-power variable scopes and are very effective.
I would avoid using just iron sights, as you still suffer the same limitations as handgun sights. Invest in a quality optic, stay away from knocks-offs and low-quality products, and prosper.
Faxon Firearms Ascent
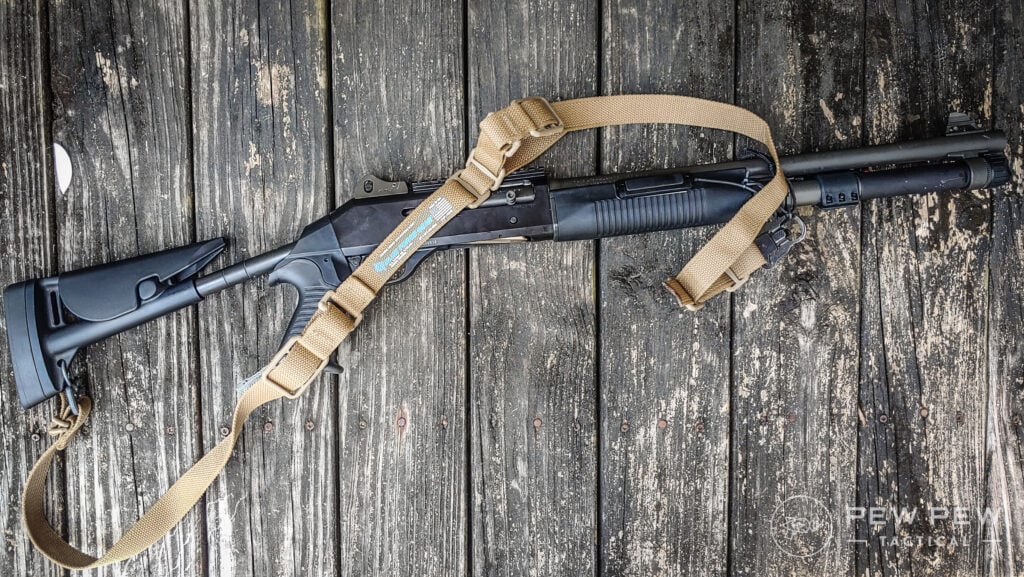
Lastly, a sling is a must-have for a defensive rifle. This allows the user to retain possession of the weapon if hand to hand occurs and allows for retention of the rifle if you need your hands free to pick something or someone up to help.
Rifles are not without their drawbacks, though. That sling that I just mentioned means that the gun is attached to you to some extent. A knowledgeable attacker can use that as leverage against you to control your body and/or throw you.
Pew Pew Tactical Sling
In closer quarters or houses with lots of turns, a longer barrel can be a hindrance in terms of maneuverability.
Ammo selection, along with good shot placement, also plays a huge role in the effectiveness of a rifle. Once again, something like Speer Gold Dot, Federal LE Tactical, or Hornady TAP FDP that are made to have a hollow or soft point allow for better defensive use than a full metal jacket round.
TAP and other fragmenting rounds are especially worth considering if over-penetration is a concern in smaller living spaces. Please understand that fragmenting rounds are different than frangible rounds, and under no circumstances are frangible rounds a go-to for personal protection.
Going back to our average number of people in the break-in, rifles offer more rounds to put on target.
An AR-15 magazine comes in 10-round, 20-round, and 30-round magazines as the most common options. You can get larger capacity drum magazines, but many tend to be lower quality, finicky, and not reliable to consider for a self-defense scenario.
All the mags
As I mentioned above, it may take more than one round to stop someone from attacking you, so having more ammunition to expend in that pursuit is a good thing.
Shotgun Setups for Home Defense
Shotguns for home defense use have become a more heated topic in the last few years.
Search any gun forum or message board, and you’ll encounter people saying…shotguns are the best defensive gun ever, you just need to rack the action to scare away every bad guy in a 3-mile radius, you don’t have to aim, etc.
The truth is that shotguns have their place in home defense, but like anything else, they aren’t a blanket answer to a problem. Sometimes shotguns will be the optimal choice and other times they won’t.
Once you have a good-quality, reliable shotgun, the next step is patterning your ammo.
This involves getting the ammo you intend to use and shooting it at various distances to see how the pellets spread and pattern on a target.
Practicing at the range with your ammo will give you a good idea of how it flies
This is important, as using different types of buckshot with different guns will get you different results. As you are responsible for everything your ammo does after it is fired, you need to know exactly where these pellets will fly, where they end up, and if you will face any unintended damage.
There are two viable shotgun rounds for defense, buckshot, and slugs. Birdshot and snakeshot are not suitable for self-defense, and their use could leave you facing an angry opponent that is still able to function.
12ga Birdshot, Opened
Buckshot utilizes larger pellets that are ideally suited for home defense, but not all of them pattern the same. Depending on your barrel and if you are running a choke or not, Federal Flight Control may be an option, and generally, 8-pellet buckshot is going to be superior to 9-pellet.
Federal FliteControl shell, dissected 2
Slugs are your other option for self-defense. Slugs utilize a solid projectile instead of pellets and were originally designed for use on larger game.
Think of firing a softball instead of marbles. Slugs will be a better choice for defensive rounds at longer distances, as buckshot patterns will spread out more there. Inside of 10 yards, though, buckshot will be better.
12ga Slug, Opened
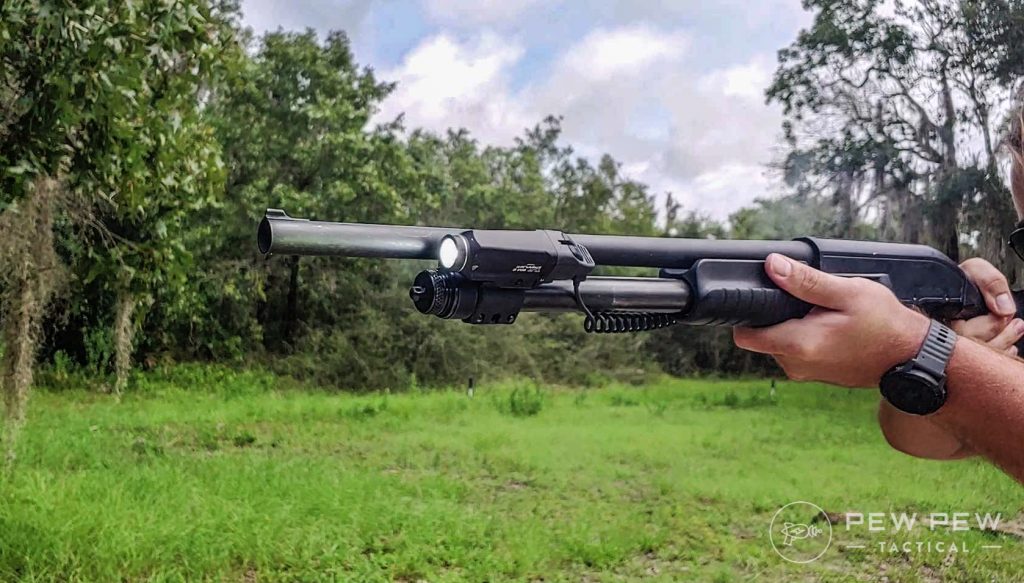
Distance is generally going to be the enemy of a shotgun beyond 30 yards or so. Inside of that range, a shotgun is a devastating tool that will very quickly end engagements.
Contrary to popular myth, you still have to aim a shotgun for it to be effective. To that end, a good quality light for target identification is worth considering. As with other platforms, mounting an optic is not a bad idea.
Blue Force Gear Vickers Sling
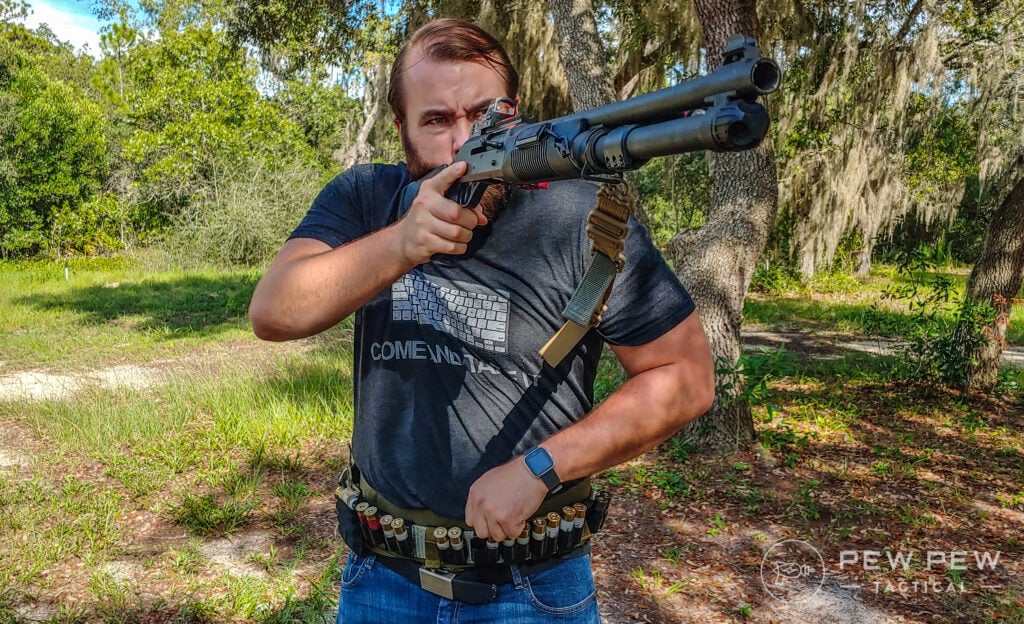
Additionally, a sling is a great idea for the same reason discussed earlier. Also, keep in mind that a shotgun will generally be longer and often heavier than an AR-15 or AK-47.
Shotguns do have their drawbacks, though. Like rifles, movement and mobility can be hindered by the size of the gun.
Additionally, recoil mitigation for follow-up shots is something that must be trained, as some people will find the gun awkward and uncomfortable without adjustments made.
Mossberg Retrograde 590A1
Reloading a shotgun is also a bit more involved than slapping a fresh magazine in, so it is a skill that must be trained to be fast and proficient at it.
Applying shotguns to our two-attacker scenario, this is where things are very different.
Depending on which shotgun model you have, the tube may hold between six and eight rounds without extended tubes.
While this leaves only three or four rounds per assailant within a shotgun’s effective range, one round delivered to an attacker is devastating. The shot must still hit, but if it does, there is a very high probability that the fight is now over and your opponent’s behavior has changed.
Final Thoughts
No two scenarios are the same, and thus no answer will fit universally. Find the self-defense setup that makes sense for you, train with the tools and understand the tactics needed to win the fight.
Also, source out quality information, and do not be afraid to challenge the misconceptions you might have or might have heard.
In the end, defending yourself and those you care about is the only thing that matters, so give yourself as much advantage as possible.
In today’s world, it’s difficult to find unbiased news and get a true sense of what’s going on around you. This applies to widespread topics, like politics or science, as well as more personalized topics, like gaming, sports, or film.
Luckily, you don’t have to scour individual news sites anymore. There are apps dedicated to collecting news from different sources, making it easy for you to keep up with everything you’re interested in and get different viewpoints. Flipboard and Feedly are two of the most popular apps for keeping track of new info, but which is better? Let’s check it out!
Download: Feedly for Android | iOS (Free, in-app purchases available)
User Interface
Overall, Flipboard has a more intuitive user interface that seems more fleshed out for the average, everyday user when compared to Feedly.
Articles and topics of interest are displayed with a large square image that’s more aesthetically pleasing. Flipboard also lets you flip through content on the home screen, similar to the flipping motion of reading an actual magazine.
There’s nothing overly special about Feedly’s user interface. It’s straightforward and fairly easy to use, but a little boring, at least compared to Flipboard. When you see articles on the home screen, there’s less of a focus on the featured image for the article.
MAKEUSEOF VIDEO OF THE DAY
Instead, the article title is bolded, there’s sometimes a brief sentence displayed under the title, and then there’s a small image to the right.
Navigating the News
When you first download Flipboard and set up your account, you’ll be asked to select a variety of hashtags based on what your interests are. You can select as many as you want to, but you have to select at least three.
Then, your home page, or pages, are personalized to the content you’re interested in seeing. You can flip through content on the home page, or head over to your Following tab to see articles with specific hashtags you follow. Being able to navigate the news this way within the Flipboard app makes it much more easily personalized than what Feedly offers.
Feedly does a good job of displaying popular news stories that interest you on the home screen, but you have to do a lot of work behind the scenes to get your home screen looking the way you want it. Whereas Flipboard allows you to add topics by hashtags, Feedly lets you favorite or follow specific websites within a niche.
For example, if you’re interested in keeping up with the latest gaming news, you could search that topic and find multiple sites related to that industry. Then, you need to personally select the sites that you want to read stories from to fill your feed.
If you don’t feel like putting in all the effort to personalize your feed, you can browse through the Explore tab to read some of the most popular stories. Since you browse news by the sites you choose to follow, it’s a bit harder to find fair and balanced news on Feedly than it is on Flipboard.
Sharing the News
Both apps let you share articles on almost every platform you can think of. Want to send a quick link to your mom with a recipe you think she’ll like? Or send the latest sports news to a friend to see what they thought of the game last night?
On Flipboard, when you open an article and tap the share button, you’ll see a list of all your sharing-compatible apps pop up. Select an app and it’ll share the article title and a shortened link.
When you tap the share button on Feedly, you’ll see your most recent or most popular apps show up to quickly share the article. You can, of course, always scroll to the end to view others, but they’re not readily displayed like in the Flipboard app.
Saving Articles For Later
It’s not always possible to read every story that piques your interest as soon as you see it. Luckily, both Flipboard and Feedly allow you to save stories to read them when you find time. You can also use this feature to bookmark articles you want to save for the future or eventually show to a family member or friend.
Flipboard lets you organize articles into your own personal “magazines.” You can customize the titles of your magazines to make it easy to find articles later, as well as reset the cover image to reflect the last article you added.
You can add as many magazines as you want. If you select the Profile tab all the way to the right on the bottom navigation bar, you’ll see all your magazines displayed how you have them organized. By tapping and holding a magazine cover, you can drag it around the screen to reorder it.
You can create magazines simply for collecting and saving stories for you or your followers, for sharing among friends and family, or for mixing together content from Twitter feeds, blogs, and other news sources.
While Flipboard allows you to create custom magazines in addition to a “Save For Later” magazine, the Feedly app only lets you bookmark articles to read later. There’s no way to organize the articles you save. Instead, everything is saved in one long list.
You can change what the article looks like in this list, like a card with a picture, a magazine list, or just text from the article. But you can’t organize articles by topic or create a separate section for recipes, as an example, that you can simply save forever.
Once you’ve read an article that you saved to read later, you can remove the bookmark to take it off your reading list instantly. Or, you can read through all the articles on your list and then mark all of them as read at once.
Finding Reputable News Shouldn’t Be Difficult
Both Flipboard and Feedly make it easy for users to find news on topics that interest them, whether you want to find out what’s going on in other countries or what’s going on in the industry you work in. With such a variety of sources, it’s easy to find balanced stories that offer different opinions on even the most controversial topics.
With either app, you can collect news relevant to you instead of always perusing a single site to find your news.
Browsing an individual site almost always means skipping over stories that just don’t interest you, but by using a personalized app, everything you see will be based on your interests! Between Flipboard and Feedly, I’d say Flipboard is the better news app because it’s more personalized and easier to use.


 As you might know, mysqldump is single-threaded and STDOUT is its default output. As MyDumper is multithreaded, it has to write on different files. Since version 0.11.3 was released in Nov 2021, we have the possibility to stream our backup in MyDumper. We thought for several months until we decided what was the simplest way to implement it and we also had to add support for compression. So, after fixing several bugs, and we now consider it is stable enough, we can explain how it works.