https://media.notthebee.com/articles/6945b388b12cc6945b388b12cd.jpg
Stop what you’re doing and watch this or you’re not an American.
Not the Bee
Just another WordPress site
https://media.notthebee.com/articles/6945b388b12cc6945b388b12cd.jpg
Stop what you’re doing and watch this or you’re not an American.
Not the Bee
Laravel News Links
Detailed MySQL RDS audit logs are non-negotiable for security and compliance standards like PCI-DSS and HIPAA. However, a bloated cloud bill for storing these logs shouldn’t be your default reality.
This blog shows you how to strategically leverage AWS services to maintain full compliance while implementing massive cost savings using the Mydbops RDS LogShift tool. We’ll walk through a real client case where we reduced their annual audit log costs from over $30,000 to under $2,000. The client stayed on Amazon RDS for MySQL as the managed database platform, with no compromise in security or observability.
One of our clients needed to retain MySQL audit logs for five years to meet compliance standards. They had enabled log streaming to Amazon CloudWatch Logs, which seemed like the straightforward solution. However, after seeing their AWS bill climb month after month, they reached out to us for a cost optimization review.
The problem was stark: they were generating 1 TB of audit data monthly, and nobody had looked closely at the retention settings after the initial setup.
Like many AWS users, they had left the CloudWatch Log Group’s default retention policy set to "Never Expire." This meant they were paying premium CloudWatch storage rates indefinitely.
1 TB MySQL RDS audit logs / month
| Cost Component (Monthly for 1 TB) | Calculation | Annual Cost |
|---|---|---|
| CloudWatch Ingestion Fee | 1,024 GB × $0.50/GB | $6,144.00 |
| CloudWatch Storage Fee | 1,024 GB × $0.03/GB | $368.64 |
|
Total Annual Cost (Recurring) Key baseline |
— | $6,512.64 |
| Projected Cost (5 Years, Compounding Storage) | — | $32,563.20 |
Based on 1 TB/month of MySQL RDS audit logs streamed to Amazon CloudWatch Logs with default retention.
If you already stream MySQL RDS logs into CloudWatch, this pattern may look familiar. For a deeper dive into how RDS features impact ongoing cloud cost, you can refer to the Mydbops article on Point-In-Time Recovery in MySQL RDS, which also discusses retention trade-offs and storage impact.
We recommended a different approach: keep only the minimum data required for immediate operational scans in CloudWatch and move everything else to cold storage. Here’s how we cut their RDS audit log costs by 95%.
The first immediate relief came from capping the high-cost storage by managing the CloudWatch retention policy intelligently. The principle is simple: only keep the data you need for active, real-time operational scanning in CloudWatch Logs Insights. Everything else should be pruned.
We navigated to the Log Group in the AWS Console and changed the retention policy to 30 days. This ensured logs were automatically deleted after they passed their high-utility operational phase.
This single change delivered two immediate benefits:
With the operational window contained to 30 days, the next challenge was capturing and storing the long-term compliance data (5 years) cost-effectively.
The optimal solution is Amazon S3 with lifecycle policies. S3 allows data to move seamlessly through storage tiers, eventually landing in S3 Glacier Deep Archive where storage costs drop to approximately $0.00099 per GB—a 97% reduction compared to CloudWatch storage.
The math is compelling, but the real challenge was implementation: how do we get logs from RDS to S3 without continuing to pay those crushing CloudWatch ingestion fees?
In practice, this means the client could store the same 60 TB of cumulative audit logs over five years at a tiny fraction of what CloudWatch would have charged. If you want to see how Mydbops thinks about backups, long-term durability, and recovery windows on RDS, the blog on migrating MySQL data to RDS/Aurora using XtraBackup and the post on MySQL RDS Point-In-Time Recovery show how S3 is used across backup and restore workflows.
The final game-changing step ensured that future log volumes bypass the costly CloudWatch ingestion pipeline altogether and flow directly to S3 for archival. This is where the Mydbops RDS LogShift tool delivered the essential optimization.
By deploying RDS LogShift, we achieved immediate and sustained cost reduction that will compound over the entire 5-year retention period.
The core of our optimization lies in how Mydbops RDS LogShift strategically manages log flow, directly addressing the biggest cost drivers:
Bypassing Ingestion Fees (The Critical Save): This is the game-changer. RDS LogShift can either directly retrieve rotated audit logs from the RDS instance itself or pull existing logs within their short retention period in CloudWatch Logs. By doing this, the tool ensures your long-term archival data circumvents the exorbitant $0.50/GB CloudWatch ingestion fee entirely. This process becomes a simple data transfer, turning a major cost center into a minor operational expense.
Compression and Partitioning: The tool efficiently compresses logs (reducing storage volume) and pushes them to S3 with date-based partitioning. This makes it easy to download and query specific logs when needed for compliance audits or security investigations.
The cumulative savings achieved for our client over the 5-year retention period are substantial:
Cost overview
Same audit log volume, two retention windows.
| Period | Cumulative log volume | CloudWatch cumulative cost | Optimized S3 cumulative cost | Total savings |
|---|---|---|---|---|
| 1 Year | 12 TB | $6,512 | $350 | $6,162 |
|
5 Years near 95% saved |
60 TB | $32,563 | $1,700 | $30,863 |
By implementing the Mydbops RDS LogShift solution, our client gained full compliance while cutting their log costs by 94.7%. They maintained the same security posture and audit capabilities—just at a fraction of the cost.
If you’re storing MySQL RDS audit logs in CloudWatch without a retention strategy, you’re likely overpaying by thousands of dollars annually. The solution doesn’t require compromising on compliance or security—it just requires smarter architecture.
Ready to see your AWS bill drop while maintaining full compliance? Contact Mydbops today to implement the RDS LogShift solution and start saving immediately.
Planet for the MySQL Community
The Meta Quest 3S is back on sale at its all-time low price of $250. That’s $50 off, or a discount of 17 percent, and matches a deal we saw on Cyber Monday. You can get the deal at Amazon and Best Buy, and the latter offers a $50 gift card with purchase.
The 3S is the more affordable model in the company’s current VR headset lineup. It features the same Snapdragon XR2 processor as the more expensive Meta Quest 3, but with lower resolution per eye and a slightly narrower field of view.
In our hands-on review, we gave the Meta Quest 3S a score of 90, noting how impressive the tech was compared to its price. The headset was comfortable to wear during longer gaming periods, and the performance was quick and responsive thanks largely to the upgraded processor and increased RAM from the Quest 2.
We were big fans of the new controllers, which the 3S shares with the more expensive Quest 3. This new generation of controller sports a more refined design, shedding the motion tracking ring and leaving behind a sleek form factor that fits in your hand like a glove.
We did miss the headphone jack, though most users are probably fine with the built-in speakers. You can wirelessly connect headphones for higher quality sound if you feel the need. The Quest 3S also recycles the old Fresnel lenses from the Quest 2, which can lead to some artifacts.
If you were considering a VR headset for yourself or a loved one this holiday season, the Meta Quest 3S offers an excellent value alongside impressive performance.
Follow @EngadgetDeals on X for the latest tech deals and buying advice.
This article originally appeared on Engadget at https://www.engadget.com/deals/the-meta-quest-3s-is-back-down-to-its-cyber-monday-all-time-low-of-250-144027382.html?src=rssEngadget
https://i0.wp.com/askdba.net/wp-content/uploads/2025/12/gemini_generated_image_ilnfp3ilnfp3ilnf.png?fit=1200%2C655&ssl=1&w=640
A lightweight, secure, and extensible MCP (Model Context Protocol) server for MySQL designed to bridge the gap between relational databases and large language models (LLMs).
I’m releasing a new open-source project: mysql-mcp-server, a lightweight server that connects MySQL to AI tools via the Model Context Protocol (MCP). It’s designed to make MySQL safely accessible to language models, structured, read-only, and fully auditable.
This project started out of a practical need: as LLMs become part of everyday development workflows, there’s growing interest in using them to explore database schemas, write queries, or inspect real data. But exposing production databases directly to AI tools is a risk, especially without guardrails.
mysql-mcp-server offers a simple, secure solution. It provides a minimal but powerful MCP server that speaks directly to MySQL, while enforcing safety, observability, and structure.
mysql-mcp-server allows tools that speak MC, such as Claude Desktop, to interact with MySQL in a controlled, read-only environment. It currently supports:
By default, it rejects any unsafe operations such as INSERT, UPDATE, or DROP. The goal is to make the server safe enough to be used locally or in shared environments without unintended side effects.
As more developers, analysts, and teams adopt LLMs for querying and documentation, there’s a gap between conversational interfaces and real database systems. Model Context Protocol helps bridge that gap by defining a set of safe, predictable tools that LLMs can use.
mysql-mcp-server brings that model to MySQL in a way that respects production safety while enabling exploration, inspection, and prototyping. It’s helpful in local development, devops workflows, support diagnostics, and even hybrid RAG scenarios when paired with a vector index.
You can run it with Docker:
docker run -e MYSQL_DSN='user:pass@tcp(mysql-host:3306)/' \
  -p 7788:7788 ghcr.io/askdba/mysql-mcp-server:latest
Or install via Homebrew:
brew install askdba/tap/mysql-mcp-server
mysql-mcp-server
Once running, you can connect any MCP-compatible client (like Claude Desktop) to the server and begin issuing structured queries.
This is an early release and still evolving. Planned additions include:
If you’re working on anything related to MySQL, open-source AI tooling, or database accessibility, I’d be glad to collaborate.
If you have feedback, ideas, or want to contribute, the project is open and active. Pull requests, bug reports, and discussions are all welcome.
Planet for the MySQL Community
https://askdba.net/wp-content/uploads/2025/12/gemini_generated_image_ilnfp3ilnfp3ilnf.png?w=624
A lightweight, secure, and extensible MCP (Model Context Protocol) server for MySQL designed to bridge the gap between relational databases and large language models (LLMs).
I’m releasing a new open-source project: mysql-mcp-server, a lightweight server that connects MySQL to AI tools via the Model Context Protocol (MCP). It’s designed to make MySQL safely accessible to language models, structured, read-only, and fully auditable.
This project started out of a practical need: as LLMs become part of everyday development workflows, there’s growing interest in using them to explore database schemas, write queries, or inspect real data. But exposing production databases directly to AI tools is a risk, especially without guardrails.
mysql-mcp-server offers a simple, secure solution. It provides a minimal but powerful MCP server that speaks directly to MySQL, while enforcing safety, observability, and structure.
mysql-mcp-server allows tools that speak MC, such as Claude Desktop, to interact with MySQL in a controlled, read-only environment. It currently supports:
By default, it rejects any unsafe operations such as INSERT, UPDATE, or DROP. The goal is to make the server safe enough to be used locally or in shared environments without unintended side effects.
As more developers, analysts, and teams adopt LLMs for querying and documentation, there’s a gap between conversational interfaces and real database systems. Model Context Protocol helps bridge that gap by defining a set of safe, predictable tools that LLMs can use.
mysql-mcp-server brings that model to MySQL in a way that respects production safety while enabling exploration, inspection, and prototyping. It’s helpful in local development, devops workflows, support diagnostics, and even hybrid RAG scenarios when paired with a vector index.
You can run it with Docker:
docker run -e MYSQL_DSN='user:pass@tcp(mysql-host:3306)/' \
  -p 7788:7788 ghcr.io/askdba/mysql-mcp-server:latest
Or install via Homebrew:
brew install askdba/tap/mysql-mcp-server
mysql-mcp-server
Once running, you can connect any MCP-compatible client (like Claude Desktop) to the server and begin issuing structured queries.
This is an early release and still evolving. Planned additions include:
If you’re working on anything related to MySQL, open-source AI tooling, or database accessibility, I’d be glad to collaborate.
If you have feedback, ideas, or want to contribute, the project is open and active. Pull requests, bug reports, and discussions are all welcome.
Planet MySQL
https://static0.makeuseofimages.com/wordpress/wp-content/uploads/wm/2025/12/using-borgbackup-for-file-restoration.jpg
I think I’ve had one of the messiest backup strategies for years. I’m constantly testing out new tools, and it takes a toll. I’ve used backup tools like Restic and mainstream options like Google Drive, Microsoft OneDrive, and Apple iCloud, to name a few. These options are robust but usually not totally under your control and often require paid plans for ample storage.
I finally came across BorgBackup (Borg for short), and it’s one tool that can replace all the backup options I’ve tried. It’s open source, my data is practically under my control, and it’s free. But more importantly, it’s a backup option that’s robust enough for daily use. It replaces every part of my previous setup with a single unified system.
Of all the backup tools I’ve used, Borg has the most distinctive and effective approach to handling repeated data. It doesn’t back up entire files or scan for differences at a block level. Borg instead breaks data into variable-sized chunks based on its content. This ensures that even if you make a tiny change inside a massive file, only a few new chunks are stored, and the rest are reused. This approach becomes a long-term space-saving machine, going far beyond incremental backup.
The effect is felt most when you back up several machines to a single repository. It’s agnostic about which system produced the data. For example, if you have two computers that share identical system files, the chunks are referenced by multiple snapshots or machines but stored only once. This is called deduplication, and it recognizes just the data itself and not necessarily how it’s arranged or named.
Borg’s deduplication helps keep costs in check even when the number of devices or snapshots increases. Your storage only grows when something genuinely new is introduced. This is especially valuable to me because I maintain multiple computers.
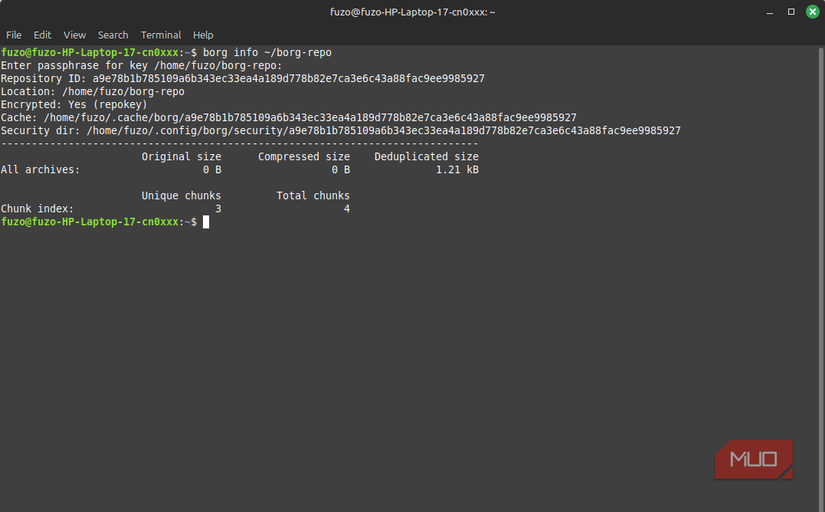
BorgBackup or Borg is a command-line, deduplicating archiver with compression and encryption. It offers space-efficient storage of backups.
Encryption is a checkbox feature on some backup tools I’ve tried, but it’s a core part of Borg’s design. The data you store is encrypted and cryptographically protected against tampering, and your repository can be initialized with authenticated encryption. This way, the client will detect tampering or modification of repository data, and you get real protection even if someone modifies the raw chunks behind your back. The cloud provider has no insight into your files and, at best, will only see unreadable blobs.
I also appreciate that Borg implements a zero-knowledge architecture, and the encryption happens on my machine. I can then use off-site storage, a rented VPS, or a third-party provider as a mere location to deposit encrypted chunks. They don’t participate in encryption, hold the keys, or decrypt my data, even if compelled to do so.
I also love Borg’s approach to key management. It offers passphrase-protected keys and standalone keyfiles, which are great for different threat models. However, you must make proper key backup part of your workflow because losing the key also means losing the ability to restore data. This security model means you don’t need to fully trust a machine to host your backups. Borg’s encryption keeps it safe.
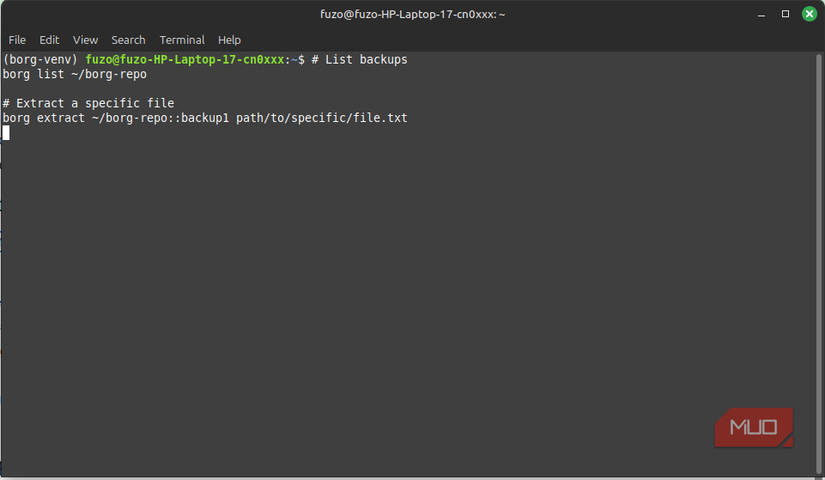
The file restore process is one reason I dread backups. On some tools, I have to extract entire archives, then wait for gigabytes of data to be processed. After that, I still have to sift through folders to find the one file I actually need. Borg lets you mount your repository via FUSE, largely eliminating this friction. It exposes backups as a directory, so every snapshot is accessible like a normal local folder.
You have to open a specific file before Borg downloads or decrypts it. Although it feels like lazy-loading, it lets you inspect archives instantly. Instant restores make Borg an ideal tool for backing up your entire digital life.
After the initial full backup, Borg became remarkably lightweight. Deduplication does most of the work, so incremental runs are fast, and Borg is ideal for scheduled, high-frequency backups. I can run it for hours, and it barely touches my disk or network because it’s only moving tiny bits that have changed, not entire files.
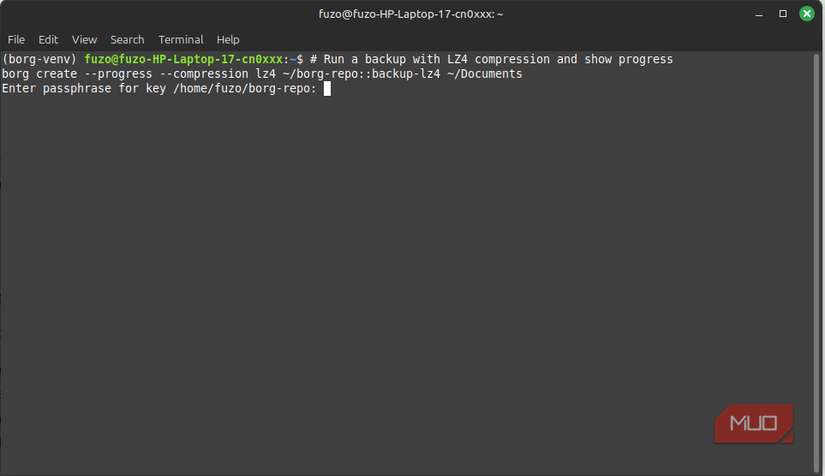
You can choose between LZ4, ZSTD, or GZip, and this adds another layer of efficiency. For large and frequently changing directories, I use LZ4 because it favors speed. ZSTD will typically shrink storage, but won’t hurt performance on modern CPUs. Even though GZip is slower, it’s ideal for archival snapshots that won’t be touched again. Many other tools, unlike Borg, won’t allow you to tune compression per job.
BorgBackup also excels at network-aware scheduling. You can apply upload throttling to prevent Wi-Fi bandwidth from being overwhelmed during backups. These optimizations are more evident on Raspberry Pi NAS units, small VMs, older laptops, or other low-power hardware.
Even though Borg does a great job of creating backups, its biggest strength is in how it maintains them. Automated pruning, compaction, and verification workflows offer constant oversight that keeps the repository healthy.
Borg keeps my entire archive consistent. However, it is a command-line tool, and if you’re non-technical or prefer a graphical user interface (GUI), backup tools like Duplicati may be better fits.
MakeUseOf
https://photos5.appleinsider.com/gallery/66064-138426-macbook-pro-14-inch-1249-deal-xl.jpgBetter-than-Black Friday pricing has hit Apple’s M4 MacBook Pro, with the 14-inch laptop marked down to $1,249.

The $350 discount beats Black Friday pricing by $50, with the laptop in stock in Silver with delivery by Christmas.
Continue Reading on AppleInsider | Discuss on our ForumsAppleInsider News
https://static0.makeuseofimages.com/wordpress/wp-content/uploads/wm/2025/12/discovering-the-web-with-viralwalk.jpg
The World Wide Web is a massive universe that will take multiple lifetimes to completely explore. In fact, by habit, most people confine themselves to just a few selected parts of the web, usually Google, Facebook, YouTube, ChatGPT, and Instagram. That’s why I go out of my way to discover new and exciting websites.
I once discovered a website that allows me to listen to radio stations from around the world for free. But this time, I might have found one that’s even better: Viralwalk, a website that allows me to discover some of the coolest sites on the web. I’d give fair warning: don’t visit this website if you don’t want to waste a few hours.
One of the most authentic and refreshing experiences you can get on the modern web comes from landing on a website that has absolutely no idea who you are. One with no history, tracking, or algorithm waiting to nudge you towards what it believes are your favorite online destinations. That is exactly what Viralwalk does. It does not give you a search bar or a limited set of categories; you simply get the Start Walking button. Clicking it opens up the internet in a way you haven’t experienced for ages.
The first time I used Viralwalk, the experience I got was closer to wandering through an unfamiliar city than actually browsing the internet. I wasn’t looking for anything in particular, but stumbled upon actual gems.
One such gem was the Random Things To Do website. This site gives you ideas for things to do when you’re bored. Here, I spent minutes playing random games, then found drawing and painting prompts and projects to build in Minecraft. I would never have known that such a fun but simple site existed.
Viralwalk gives you a unique way to explore the web. One of my favorites is the Mood category, which gives you a curated set of search moods. A few of the Mood options stand out and easily resonate with me. I love the Late Night Coding Vibes mood. One of the pins on this mood shows trending GitHub repositories. It became an invaluable resource that I use to find new open-source projects to test and write about. I only discovered it by chance, thanks to Viralwalk.
I also love the Digital Reading Nook mood. It has a helpful catalog of reading and writing tools, some of which I already know and use, and others that were new to me. It also has a few newsletters that I’ve now signed up for.
There are also a few other categories that I love. Flow gives a short overview of a bunch of random websites. You can keep scrolling through Flow until you find a website that catches your attention. Then click Open Site to visit it. You need to be logged in to use Flow.
Chill is also an interesting option on Viralwalk. It’s the option that allows you to relax with ambient visuals. When I need to take a break, I navigate to Chill and leave it in full-screen mode. The visuals constantly change, and it has a calming effect, perfect for a break after a long day’s work.
Viralwalk shows you so many interesting corners of the internet, and your first instinct is to save them. This is where the Like button comes in handy. There’s no browsing history that takes you back to familiar paths, but liking a destination saves it in your profile, and you can always come back to browse the list of liked sites.
It also has an Albums feature, which turns your discoveries into something more personal. I have an album of clever mini-projects and another for beautifully designed websites. Whenever I use Viralwalk and stumble on a website I like, I can tag it by including it in albums that are organized by theme. Anyone can browse my albums if I make them public when I create them.
After logging in for the first time, I saw a simple message: "Good morning." The interface had soft colors and rounded cards, and this calm layout set the tone instantly. It felt like I was opening a small creative studio rather than visiting a website.
It has a Quick Note panel on the welcome page, and I didn’t expect to appreciate it as much as I did. Mid-exploration, I keep referring back to Quick Note to jot down ideas, especially when my exploration sparks ideas that I’d love to revisit. Of course, this isn’t as elaborate as dedicated note-taking apps like Joplin, but it is a helpful little feature.
Viralwalk, however, limits you to 20 discoveries per day, and you’ll need to budget $8 per month if you prefer the pro service, which unlocks unlimited site discoveries in Flow/Walk. But the free plan is more than enough for me, since I don’t plan to spend my entire day on Viralwalk.
Viralwalk uniquely brings the feeling of stumbling into something unexpected online. It perfectly recaptures the time when browsing meant exploring, not scrolling. It is one of the few websites I’ve stumbled upon this year. It’s just as much fun as that website that allows you to look through other people’s windows.
MakeUseOf
https://theawesomer.com/photos/2025/12/the_kiffness_snore_t.jpg

The Kiffness made us laugh out loud with his silly remake of the 2011 Awolnation track Sail, which cleverly replaces the original’s synthesizer with the irresistible snoring sounds of a dog deep in slumber. Blame it on his floppy cheeks, baby!
The Awesomer