Recently I had to create a large data export for a project. I like using Spatie’s Simple Excel package to do this as it is very simple to use and works well when exporting large amounts of data to a CSV or Excel file with the ability to stream a download to the browser. This particular project had an additional requirement though, exporting multiple worksheet’s of data at once. Luckily, this package allows you to do this too.
The writer object
The Simple Excel package uses the box/spout package under the hood. In the readme it states that you can get to the underlying writer using ->getWriter().
If we jump to the box/spout package docs, there is a section on Playing with sheets. The docs show we can see how to get the current sheet, set a name for the current sheet and how to create a new sheet.
Naming a worksheet
To name a worksheet we can use getCurrentSheet() to get the current sheet with the writer and then use setName() to set the name.
Now we know how to do the individual tasks we can bring it all together.
Create a streamDownload using SimpleExcelWriter
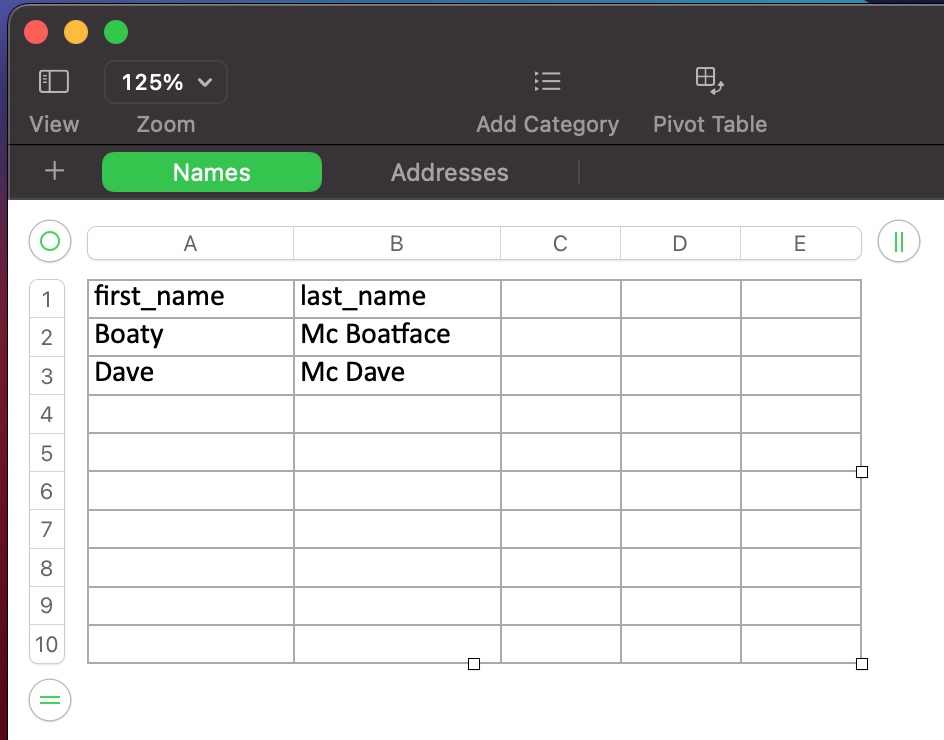
Get the writer, get the current sheet and name it ‘Names’
Add rows of data to the ‘Names’ sheet
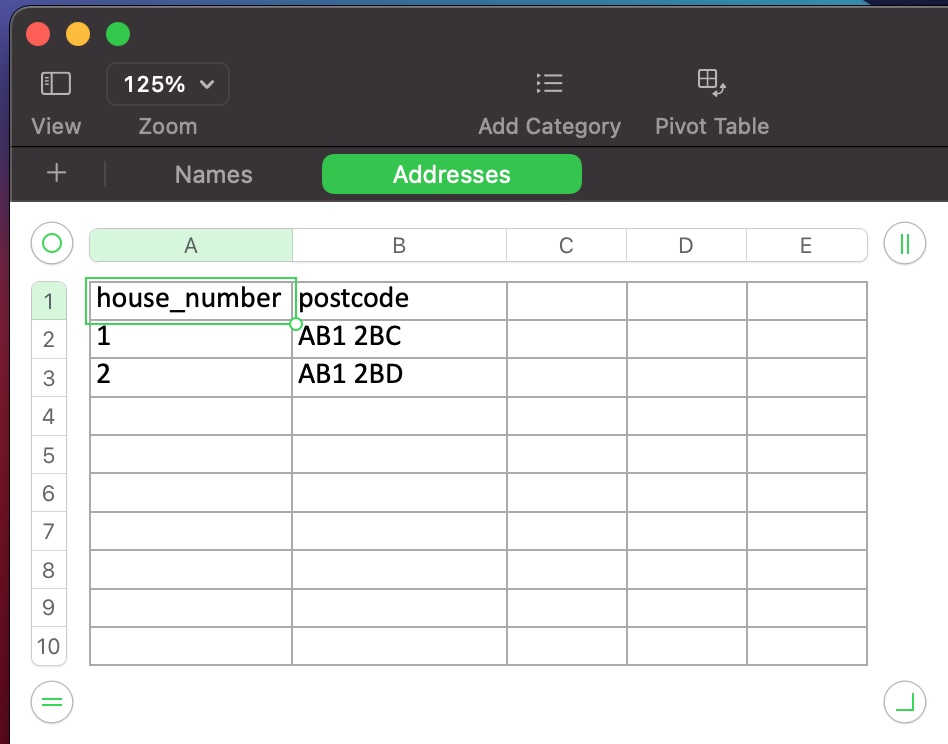
Create a new sheet and make it the current sheet, before naming it ‘Addresses’
Add the header row to ‘Addresses’
Add rows of data to the ‘Addresses’ sheet
Finally, return the stream to the browser
useSpatie\SimpleExcel\SimpleExcelWriter;$stream=SimpleExcelWriter::streamDownload('your-export.xlsx');$writer=$stream->getWriter();// Set the name of the current sheet to Names$nameSheet=$writer->getCurrentSheet();$nameSheet->setName('Names');// Add rows to the Names sheet$stream->addRows([['first_name'=>'Boaty','last_name'=>'Mc Boatface'],['first_name'=>'Dave','last_name'=>'Mc Dave'],]);// Create a new sheet and set the name to Addresses$addressSheet=$writer->addNewSheetAndMakeItCurrent();$addressSheet->setName('Addresses');// Manually add header rows to the Addresses sheet$stream->addRow(['house_number','postcode']);// Add rows to the Addresses sheet$stream->addRows([['house_number'=>'1','postcode'=>'AB1 2BC'],['house_number'=>'2','postcode'=>'AB1 2BD'],]);return$stream->toBrowser();
When creating a single worksheet, the Simple Excel package normally creates the header row for us, but it seems when you create a new sheet you need to define the new headers for your data.
Here are a couple of screenshots of the outputted Excel file:
AmmoLand News can’t get enough of the Kel-Tec CP33 Pistol and soon neither will you.
U.S.A. -(AmmoLand.com)- I always try to be objective in my reviews, but I was obsessed with the Kel-Tec CP33 the moment I saw it; From its Robocop pseudo-subgun/PDW appearance to its capacious 33-round magazine, it was everything the 18-year-old-me ever wanted in a 22 handgun. But now that I’ve had a chance to fire nearly 1,000-rounds through the futuristic little gun, is the honeymoon over, or is the CP33 everything I’ve ever wanted?
If you’re read your fair share of gun reviews in the past, it will likely come as no surprise that the answer isn’t a simple yes or no. But if you’re sitting at the gun counter right now, money in hand, and wondering if you should buy one, I’d say go for it if you’re looking for a fun range toy. But if you have a different role in mind for the CP33, read on.
The Kel-Tec CP33 Pistol – American polymer sitting atop American steel. IMG Jim Grant
Before I get into the details of the review, let’s first take a look under the hood to see how the Kel-Tec works. First off, the CP33 is a standard direct blowback-operated, semi-automatic magazine-fed pistol chambered in .22lr. If you know anything about rimfire auto-loaders, this should come as no surprise. Virtually all semi-automatic rimfire guns are blowback-operated because it’s very simple to produce and generally less ammunition-sensitive than locked-breech firearms. So does this mean the Kel-Tec CP33 is no different than a more traditional-looking rimfire pistol like a Ruger MKIV or Browning Buckmark?
Absolutely not. It may share the same method of operation, but by that same measure, all bolt-action rifles are identical. But it’s not how the mechanics of the actual firearm that separates the Kel-Tec from other handguns, but rather its magazine.
Magical Magazine
It’s not just that the CP33’s magazine holds more rounds than virtually any other traditional rimfire handgun, but how the magazine accomplishes this that makes the new Kel-Tec pistol so interesting.
Most rimfire pistols utilize a single stack magazine to feed cartridges to the chamber. By this, I mean literally, a spring-loaded box that situates a straight row of rounds directly beneath one another, not unlike say an M1911. Higher-capacity centerfire pistols like the Glock utilize a staggered column of rounds inside of a magazine whose internal space is roughly 50% wider than the cartridges themselves, but this isn’t practical for rimfire rounds.
The Kel-Tec CP33 magazine is very unique both in function and appearance. IMG Jim Grant
Why? Because the rims themselves tend to snag on each other, leading to a malfunction referred to as rim-lock. This is why the Soviets utilized a pan magazine on their DP-28 LMG chambered in the rimmed 7.62x54r cartridge, and why the capacity of the British Bren gun is limited to 30-rounds. (Although the British did field a 100-round pan magazine like the Soviets in limited numbers.)
So how did Kel-Tec solve this issue? With a coffin-style, dual-staggered column magazine. It’s basically two staggered column magazines combined into one.
But wait, you just said rimfire rounds don’t play well with staggered column magazines!
Indeed I did. And the solution by the engineers at Kel-Tec was to add open side walls to the magazine to allow shooters to properly align any rounds that tend to work themselves into a rim lock situation.
If that seems like a bandaid solution to a much bigger issue, you’re not wrong. It definitely doesn’t completely prevent the issues of rimfire rounds in a stagger column magazine, but it should allow a shooter to alleviate the problem before it becomes one.
But does it actually work?
Yes, this looks ridiculous, but isn’t that really what the Kel-Tec CP33 is going for anyway? IMG Jim Grant
When loaded properly, absolutely. But that’s a bigger caveat than it sounds. It’s very easy for an inexperienced shooter to load the magazine in such a way that it looks like it’s properly aligned, only to find out 20-rounds in, that some of the lower rounds aren’t quite line up. And because the alignment of one round affects all the rest, performing a standard tap rack bang malfunction clearing procedure will result in another failure to chamber. Truth be told, getting all the rounds perfectly lined up is more difficult than it looks, but with practice becomes pretty simple. The best source for how to do so is in the Kel-Tec CP33’s user manual and spare Kel-Tec CP33 22LR 33rd Magazines are readily available.
But enough about the magazine, let’s get a rundown of all the CP33’s features.
Kel-Tec CP33 Handgun Ergonomics
Starting at the business end, the Kel-Tec CP33 ships with a 5.5-inch, 1/2×28 threaded stainless steel barrel. I tested this barrel with several muzzle devices, and everything from flash-hiders and linear compensators to my favorite new rimfire suppressor (The Rugged Suppressor Mustang 22 from SilencerShop fit and ran flawlessly.
Behind the muzzle, the CP33 includes a set of fiber-optic super-low-profile post and notch iron sights that are clearly designed to get out of the way of any mounted optics. This is because the entire top of the CP33 features a monolithic Picatinny rail. I found that if a shooter isn’t running a brace, then a pistol optic like a Holosun HE507C or Trijicon RMR on the lowest possible mount made for the most natural-feeling setup.
Under the front sight, the Kel-Tec CP33 features an M-Lok slotted dust cover that appears to be the perfect length to not fit any of the M-Lok rail segments I had on hand. So I needed to modify one by cutting off one of the alignment notches and only using a single mounting bolt. This is something I wouldn’t normally advise since it does compromise the mounting strength of the rail. But since the CP33 is only chambered in .22lr, I took that risk and it paid off handsomely. The Streamlight TLR-10 Flashlight I mounted on the handgun never budged, and its laser held zero after a few hundred rounds.
The CP33 features a thumb safety that is easily actuated without shifting the firing grip. IMG Jim Grant
Alternatively, a shooter could simply buy a super short rail segment or an accessory that directly mounts to the M-Lok slot.
But be advised, a hand-stop or angled grip are completely fine, but a vertical grip can get you in hot water with the ATF if you don’t have a tax stamp for the little polymer pistol.
Behind the dust cover, the CP33 features the iconic Kel-Tec molded grip pattern on its oblong grip. Despite the grip’s appearance, it’s actually fairly comfortable to hold, and it positions the shooter’s hands perfectly to toggle the ambidextrous safety lever behind and above it. But there’s one thing conspicuously absent between the grip and the trigger – a magazine release.
That’s because the engineers at Kel-Tec decided to depart from the gun’s overall very futuristic appearance and incorporate an old-school European-style heel release at the bottom of the grip. (Not unlike the one found on the Walther PPK.) I’m not normally a fan of this setup, but given that the CP33 isn’t a combat pistol, it doesn’t bother me.
The Kel-Tec CP33 Pistol’s grip features the iconic Kel-Tec molded panels, and the magazine release is on the heel of the grip. IMG Jim Grant
Above the grip, the CP33 features an ambi bolt-release that some shooters have reported issues with. But the example I reviewed – which wasn’t a T&E from the factory, but a gun I bought at a local shop – never had an issue with the release whatsoever.
At the very back of the handgun is the charging latch that takes more than a few notes from both the AR-15 and the HK MP7 PDW. It’s non-reciprocating, which is awesome, but it is made of very thin steel with polymer handles at the rear. And to be honest, its construction doesn’t inspire a tremendous amount of confidence. And if that really bothers you, there’s a cottage industry of aftermarket parts makers who now offer more robust all-aluminum charging latches.
Performance
Now that you know everything about the gun and its features, let’s talk about how the gun actually ran.
After 1,000 rounds of various types of .22lr ammo, including a half dozen different varieties of standard and high-velocity 22LR ammunition, the Kel-Tec CP33 encountered around 30 malfunctions in my testing. Half of these were first-round failures to chamber either during the first 200 rounds fired through the gun, or after a hundred or so rounds fired suppressed. The former is because the gun needs a little break-in period, while the latter is 100% due to excess carbon build-up from running the gun suppressed.
I even tested the Kel-Tec CP33 with my PVS-14 and PEQ-15, and it was glorious. IMG Jim Grant
On an interesting side note, the gun never malfunctioned on the first round when using the bolt release.
Accuracy was good bordering on great, with the Kel-Tec CP33 easily capable of hitting targets out to 100 yards with a reflex sight attached. Though I suspect the gun would be infinitely more capable with a low-powered magnified optic and a stabilizing brace attached. But as it comes, the CP33 makes short work of tin cans, squirrels, and clay pigeons out to 50 yards.
Something about the Kel-Tec CP33’s design just makes it practically beg to be suppressed with a quality can like this Rugged Suppressors Mustang 22 from SilencerShop.com. IMG Jim Grant
Kel-Tec CP33 Space Gat Verdict
So, is the futuristic polymer pistol worth a buy? With an MSRP of $475 (and in my experience street prices are much lower), the Kel-Tec CP33 Pistol is a solid deal that when babied a little bit, runs like a champ. Yes, the magazine can be problematic if not loaded properly, but with some practice, the CP33 makes a solid plinking pistol that would work well in a role as a hiking gun or varment pistol. Its looks might not appeal to everyone, but for those of us who dream of blasting cyborgs beneath neon signs in a rain-soaked Neo-Tokyo, the CP33 is pretty damn slick.
About Jim Grant
Jim is one of the elite editors for AmmoLand.com, who in addition to his mastery of prose, can wield a camera with expert finesse. He loves anything and everything guns but holds firearms from the Cold War in a special place in his heart.
When he’s not reviewing guns or shooting for fun and competition, Jim can be found hiking and hunting with his wife Kimberly, and their dog Peanut in the South Carolina low country.
Chronosphere co-founders Martin Mao (left, CEO) and Rob Skillington (CTO). (Chronosphere Photo)
Chronosphere has reached unicorn status in less than three years.
The company this week announced a $200 million Series C round, propelling its valuation past $1 billion. It comes nine months after the startup raised a $43 million Series B round.
Founded in 2019 by former Uber and Microsoft engineers, Chronosphere offers “data observability” software that helps companies using cloud-native architecture monitor their data. Customers include DoorDash, Genius Sports, and Cudo. Its annual recurring revenue has grown by 9X in 2021.
Chronosphere CEO Martin Mao and CTO Rob Skillington first met in the Seattle area at Microsoft, where they worked on migrating Office to the cloud-based Office 365 format.
They both later spent time at Uber on engineering teams. Uber couldn’t find any products to meet its growing data demands, so Mao and Skillington helped the company build one. The result was M3, Uber’s open-source production metrics system, which is capable of storing and querying billions of data points per second.
With Chronosphere, Mao and Skillington are building an end-to-end solution on top of M3 that helps companies both gather and analyze their data in the cloud with the help of visualization and analytics tools. The product works across multiple cloud platforms, including AWS and Azure.
Chronosphere recently decided to be remote-first. Its largest hub is in New York City, and there are a handful of employees in Seattle, including Mao. The company has 80 total employees and expects to add another 35 people this year.
General Atlantic led the Series C round. Other backers include Greylock Partners; Lux Capital; Addition; Founders Fund; Spark Capital; and Glynn Capital. Total funding to date is $255 million.
“Sitting at the intersection of the major trends transforming infrastructure software – the rise of open-source and the shift to containers – Chronosphere has quickly become a transformative player in observability,” Anton Levy, managing director at General Atlantic, said in a statement.
It’s no secret that the ammunition market has been volatile (to say the least) since the Covid pandemic took hold, but some calibers seem to be easing off while others rise. Redditor, Chainwaxologist, owns a web-based hunting and fishing retail store, FoundryOutdoors.com, so to keep his ammo cost and supply competitive, he set out to […]
PyTorch comes with powerful data loading capabilities out of the box. But with great power comes great responsibility and that makes data loading in PyTorch a fairly advanced topic.
One of the best ways to learn advanced topics is to start with the happy path. Then add complexity when you find out you need it. Let’s run through a quick start example.
What is a PyTorch DataLoader?
The PyTorch DataLoader class gives you an iterable over a Dataset. It’s useful because it can parallelize data loading and automatically shuffle and batch individual samples, all out of the box. This sets you up for a very simple training loop.
PyTorch Dataset
But to create a DataLoader, you have to start with a Dataset, the class responsible for actually reading samples into memory. When you’re implementing a DataLoader, the Dataset is where almost all of the interesting logic will go.
There are two styles of Dataset class, map-style and iterable-style. Map-style Datasets are more common and more straightforward so we’ll focus on them but you can read more about iterable-style datasets in the docs.
To create a map-style Dataset class, you need to implement two methods: __getitem__() and __len__(). The __len__() method returns the total number of samples in the dataset and the __getitem__() method takes an index and returns the sample at that index.
PyTorch Dataset objects are very flexible â they can return any kind of tensor(s) you want. But supervised training datasets should usually return an input tensor and a label. For illustration purposes, let’s create a dataset where the input tensor is a 3×3 matrix with the index along the diagonal. The label will be the index.
If happen to be working with image data, __getitem__() may be a good place to put your TorchVision transforms.
At this point, a sample is a dict with "x" as a matrix with shape (3, 3) and "y" as a Python integer. But what we want are batches of data. "x" should be a PyTorch tensor with shape (batch_size, 3, 3) and "y" should be a tensor with shape batch_size. This is where DataLoader comes back in.
PyTorch DataLoader
To iterate through batches of samples, pass your Dataset object to a DataLoader:
Both the NumPy arrays and Python integers are both getting converted to PyTorch tensors.
Although we’re fetching individual samples in ToyDataset, the DataLoader is automatically batching them for us, with the batch size we request. This works even though the individual samples are in dict structures. This also works if you return tuples.
The samples are randomly shuffled. We maintain reproducibility by setting torch.manual_seed(1234).
The samples are read in parallel across processes. In fact, this code will fail if you run it in a Jupyter notebook. To get it to work, you need to put it underneath a if __name__ == "__main__": check in a Python script.
There’s one other thing that I’m not doing in this sample but you should be aware of. If you need to use your tensors on a GPU (and you probably are for non-trivial PyTorch problems), then you should set pin_memory=True in the DataLoader. This will speed things up by letting the DataLoader allocate space in page-locked memory. You can read more about it here.
Summary
To review: the interesting part of custom PyTorch data loaders is the Dataset class you implement. From there, you get lots of nice features to simplify your data loop. If you need something more advanced, like custom batching logic, check out the API docs. Happy training!
http://img.youtube.com/vi/qmmnFe_IfKc/0.jpgThis is an updated version of the old video from back in 2017, revised for the Laravel 8, the latest Laravel Excel version, and Tailwind with Laravel Breeze.Laravel News Links
I’ve always said that logistics are the true bellwether of many economic issues. If logistics (a.k.a. the ability to provide enough supply to meet demand) are working, the economy is lubricated and runs smoothly. If they’re not, the economy is in danger of seizing up like an engine running without adequate oil supply. General Omar Bradley‘s famous observation is as true in economic disciplines as it is in military: "Amateurs study tactics. Professionals study logistics."
Let me put the next paragraph in big, bold, black letters to emphasize how serious I am.
Right now, our logistics snarl-up is posing the real danger of seizing up our economy – and the danger is growing worse by the day. The next two to three months are likely to prove absolutely critical. If I were talking about the potential for military conflict, I’d call this article a WAR WARNING. In economic terms, I suppose I’ll have to call it a COLLAPSE WARNING.
Yes, it is getting that bad – and it all boils down to logistics. The problem is that there are too many goods seeking shipment, and not enough containers, vessels, vehicles and aircraft – not to mention people – available to move them. If a container ship is anchored off a Chinese port for a month, waiting to load cargo, then sails across the Pacific to a US port, then anchors off one of our harbors for another month to await unloading, it’s occupied for three to four months with a single cargo. Under normal circumstances, it’d carry three to four cargoes during that same period – but the clogged-up arteries of the world’s transport and logistics system simply can’t cope with that any more.
CNBC offers this overview of the problems being experienced by container ships.
The result of the clogged-up ocean shipping system is that, due to delays and waiting periods, literally hundreds of the biggest cargo ships in the world are forced to carry no more than a quarter of the cargo they’d normally transport during any given year. All those manufacturers and countries that gleefully exported their manufacturing capacity to China or Asia in past years are now sitting with goods overseas that they can’t get to the customers who want them. That’s the living definition of a logistics bottleneck, right there. Some high-value, low-bulk items can be transferred to aircraft for shipment (at much greater expense), but that doesn’t apply to many heavier or bulkier manufactured goods. They have to wait for a ship, or take the railroad from China across Siberia and Russia to Europe, and be distributed there or sent on by ship to the USA and elsewhere – but the ships to carry them are, as mentioned above, in drastically short supply.
Here in the USA, ships are waiting one to two months to get off-loaded; then their containers are sitting in harbors, waiting for rail or road transport to their destinations. However, land transportation is also backlogged, struggling to cope with the huge influx of containers and cargo. It’s not just at the harbors, either. Railroad companies have only so many freight cars, and road transport companies have only so many trucks that can carry containers. They may want to order more, but the companies that make them often rely on raw materials and parts from – guess where? – CHINA, or other overseas manufacturers. (For example, almost every rail car relies on computer chips to control its brakes, send signals to the engine if it has a problem, etc. The chip shortage currently affecting motor vehicle manufacturers is affecting rail car manufacturers, too.)
Here’s a report of how rail congestion in and near Chicago is affecting one small business – and it’s far from alone.
It’s gotten to the point where goods are being delivered to stores in this country, and bought by anxious customers before they’re even put out on the shelves. That happened to me just yesterday. I wanted to buy a couple of 5-gallon cans of kerosene for our newly-purchased heater, but no store in the big city nearby had any in stock – just smaller plastic 1- and 2½-gallon containers. Eventually, Tractor Supply’s national Web site said that its local store had the cans in stock, so I went straight there. The assistants inside all said that no, they were out of stock: but when I insisted, they went to the rear to check – and found that six cans had just been delivered that morning. They brought back two for me, only to find another customer had just arrived, having checked online as I had, and also wanted two. They ended up having only two out of six to put on the shelves, and I learned later those sold within the hour. They don’t know when they’ll be getting more in; they’re dependent on their regional office to send what they can, when they can, and they’re never sure what will arrive on that day’s truck.
These aren’t isolated incidents or rare examples. This sort of thing is happening more and more often, all over the country. The pipelines of supply are clogging up, so that most places can’t get enough of what they want, or know for sure what they’re getting and when they’re getting it. I wrote about a number of examples in my recent articles on supply chain problems, and I’m hearing more and more complaints like that.
If the supply pipeline gets much more clogged – and it’s getting worse almost by the day – there will come a time when nothing can move. The deadweight hanging over the system will squash it flat, and everything will come to a grinding halt.
Let me try to paint the broad picture as best I can by citing several articles that, taken together, provide enough flashing red lights and economic sirens to scare anybody.
Not only were people locked down [during the COVID-19 pandemic], but society and therefore practically the whole economy was forcefully paused. The problem here is that there is no "Pause button" for the economy. It may sound easy for politicians, who have no conception of how the real world works. But you cannot simply pause a business. You also cannot pause the supply chain. If you have ever run a business you know that being an entrepreneur is not a steady state but a changing process. It is a constant struggle to get money to come in so that you can cover costs that you’ve assumed long ago. That’s what entrepreneurs and businesses do. They assume costs and imagine they will be paid for their efforts later, and paid more than the cost they already assumed.
In other words, if you "pause," a business, the costs remain but you get no revenue. How are you going to pay those bills when everything is on pause? You cannot. This is perhaps easy to understand … so easy that even some politicians grasp the concept. So many countries like the United States have offered relief in the form of loans to businesses. Of course, such schemes come with the usual cronyism and favoritism. The loans often do not end up in the hands of those intended. They also shift power and influence away from the market to the bureaucrats in government. Or to put it differently, businesses survive or go under as decided by bureaucrats, not by consumers.
There is more than simply money. Imagine food processing and the beef farmer when the politicians press Pause, which stops businesses from dealing with slaughtering, cutting, processing, and shipping meat. But it doesn’t stop the farming. The farmer’s animals will not stop growing and will not stop eating because the economy is paused. The farmer will go bankrupt because he needs to cover their food, water, and care without being able to sell any beef. Even if he has savings to cover the expense, the meat will lose quality and value as the cows grow older than their prime. At the same time, no meat is reaching the shelves in the stores. So while the farmer is stuck with costs he cannot cover because he cannot sell the meat he produces, consumers cannot find meat in stores. Consequently, we experience a shortage of food, while at the same time farmers and other producers have surpluses that they cannot afford to keep and are unable to sell. What a ludicrous situation.
The effect of this is of course that the farmer will not be able to rise again as the politicians press Play on the economy and beef processing is resumed. He will not have been able to make those continuous investments in his business in order to meet future demand for meat. After all, he was stuck with additional costs and no revenue. So pressing Play will not solve the food shortage.
The same story can be told for other types of businesses as well. You cannot stop the freighter that is on its way around the world. You cannot store logs of timber waiting for the sawmill. You cannot pause mines and smelting plants. And if one task can be paused, it affects the other task in the supply chain. The longer the lockdown, the more businesses would have failed and the supply chains lain in shambles. This is an enormous loss. While it can be rebuilt, it can only be so at an enormous expense. And it still requires that there are people with the know-how and willingness to start such businesses again. Can we rely on them to rise and try again, even after they have been crushed?
This winter, the world will be fighting over something that’s invisible, yet rarely so vital—and in alarmingly shorter supply.
Nations are more reliant than ever on natural gas to heat homes and power industries amid efforts to quit coal and increase the use of cleaner energy sources. But there isn’t enough gas to fuel the post-pandemic recovery and refill depleted stocks before the cold months. Countries are trying to outbid one another for supplies as exporters such as Russia move to keep more natural gas home. The crunch will get a lot worse when temperatures drop.
The crisis in Europe presages trouble for the rest of the planet as the continent’s energy shortage has governments warning of blackouts and factories being forced to shut.
. . .
American exporters are poised to ship more LNG than ever as new projects come online toward the end of the year. But as more gas goes abroad, less will be available at home. Even though gas prices have been notably lower in the U.S. than in Europe and Asia, they are trading near the highest level since 2014. Gas inventories are running below their five-year seasonal average, yet U.S. shale drillers are reluctant to boost production out of concern that would crimp their profitability and put off investors.
Transportation A large part of our personal budgets are consumed by getting from point a to point b. The cost of doing this has risen and will rise even higher. With gasoline prices up a whopping 85% in the past 12 months, commuters are already feeling the bite. Politicians often increase gasoline excise taxes when seeking more revenue. Same with liquor excise taxes. With electric vehicles expected to capture higher market share, these taxes will have to be raised to make up the difference. In addition, tolls will also increase, to pay higher operating and labor costs in running and maintaining highways, bridges and tunnels.
. . .
Food Expect food shortages, supply chain disruptions and weather issues to drive food prices much higher in the months and years to come. There’s a reason that the government excludes food prices from the consumer price index (cpi) and it’s not because they’re going down. Higher fuel costs will also result in higher food prices, as modern farming techniques are energy intensive, not to mention that virtually all food produced must be shipped to market. Fertilizers and pesticides will go right up along with oil and natural gas prices.
Cargo ships anchored off California and New York, and in rail yards and on trucking routes, shipping consumer goods are incredibly backlogged due to a lack of manpower and pandemic restrictions to unload the goods. And now, there are warnings that the supply chain may be on the brink of collapse.
Shipping ports which normally only had one or two ships in dock waiting to be unloaded prior to the pandemic now have dozens lined up, waiting to be unloaded for up to four weeks, slowing the whole chain. In Los Angeles and Long Beach, as many as 73 vessels were waiting to be unloaded last month. The bottlenecks at the ports are also impacting railways and trucking. In Chicago — that has one of the largest rail yards — it was at one point backed up for 25 miles.
The power crunch, on a scale unseen in more than a decade, highlights how some of Beijing’s changing policy priorities, including its effort to limit carbon emissions, can ripple through a global economy that has been reshaped by the pandemic.
"There’ll be a cascading effect," said Mike Beckham, Oklahoma-based co-founder and CEO of Simple Modern, which makes products such as insulated water bottles and backpacks. "As we started to comprehend the ramifications of what’s happening, we realized that this is potentially bigger than anything we’ve seen in our business careers."
Two weeks ago, one of Mr. Beckham’s main suppliers, based in Quzhou city in eastern China, was told by the local government that it could only operate four days a week, instead of the usual six. In addition, it must adhere to a power-usage cap, which cuts the capacity of the factory by about one-third as a result.
Mr. Beckham anticipates U.S. retail prices for many products could increase by as much as 15% next spring, as appetite from retailers stays strong.
. . .
Steve Cooke … said he relies on suppliers who source 80% of their products from China.
Already this year, rising freight costs and supply-chain bottlenecks have pushed up his costs and lengthened delivery times for his customers. He said he expects those pressures to intensify as the power crunch squeezes production.
"We rely so much on China, it’s incredible," Mr. Cooke said.
Seafarers, truck drivers and airline workers have endured quarantines, travel restrictions and complex Covid-19 vaccination and testing requirements to keep stretched supply chains moving during the pandemic.
But many are now reaching their breaking point, posing yet another threat to the badly tangled network of ports, container vessels and trucking companies that moves goods around the world.
China’s central government officials ordered the country’s top state-owned energy companies — from coal to electricity and oil — to secure supplies for this winter at all costs … A severe energy crisis has gripped the country, and several regions have had to curtail power to the industrial sector, while some residential areas have even faced sudden blackouts. China’s power crunch is unleashing turmoil in the global commodities markets, fueling rallies in everything from fertilizer to silicon.
. . .
Volatility in the energy markets is poised to intensify on the order from the central government, said Bjarne Schieldrop, chief commodities analyst at SEB.
China’s statement “to me implies that we are in no way on a verge of a cool-off. Rather it looks like it is going get even more crazy,” he said. “They will bid whatever it takes to win a bidding war for a cargo of coal” or liquefied natural gas.
Dubai’s DP World, one of the biggest global port operators, expects supply chain bottlenecks that have rattled global trade flows to continue at least for another two years … Global supply chains are struggling to keep pace with demand and overcome labor disruptions caused by Covid outbreaks. The world’s largest shipping line, A.P. Moller-Maersk, has also warned bottlenecks may last longer than expected.
If the part that blew out is 0.1% of the entire machine, and the other 99.9% still works perfectly, the entire machine is still dead in the water without that critical component. That is a pretty good definition of systemic vulnerability and fragility, a fragility that becomes much, much worse if there are two or three components which are on indefinite back order.
This is the problem with shipping much of your supply chain overseas: you create extreme systemic vulnerability and fragility even as you rake in big profits from reducing costs.
. . .
The Federal Reserve can print trillions of dollars and the federal government can borrow and blow trillions of dollars, but neither can print or borrow supply chains, scarce skills, institutional depth or competence.
And, to sum up the effect on the "man (or woman) in the street", Gun Free Zone notes:
The family went grocery shopping on Saturday.
Food was abundant, albeit more expensive than in the past, it was the other consumables that we had a hard time finding. Things like shampoo, body wash, mouth wash, cleaning supplies, foot spray, OTC drugs, were low, especially the store brand generics.
Today I went to Walmart at lunch and it took was low on a lot of non-food supplies.
Some specialty food items like Gatorade/sports drinks have been low or empty for weeks.
I haven’t seen store shelves this picked clean since the early lockdown days of COVID over a year ago.
. . .
Manufacturing, transportation, and distribution should be back into near-full swing. The economy should be recovering fast.
Instead, it looks like we’ve rolled the clock back 18 months and we’re about to get ****ed.
I think the bottom is about to out of the market and it’s going to be a disaster.
I wrote recently about steps I was taking to protect my family from the supply chain snarl-up. I can only recommend most strongly that you check your own supplies, make a list of things you need to get through at least the next two to three months, and stock up on them right now, while they’re still to be found. You may find some are already unavailable; if so, look for substitutes, and don’t quibble about getting exactly the brand or variety you wanted.
Right now, we’re bracing for impact. I don’t believe we’re going to make it to Christmas without things getting much, much worse.


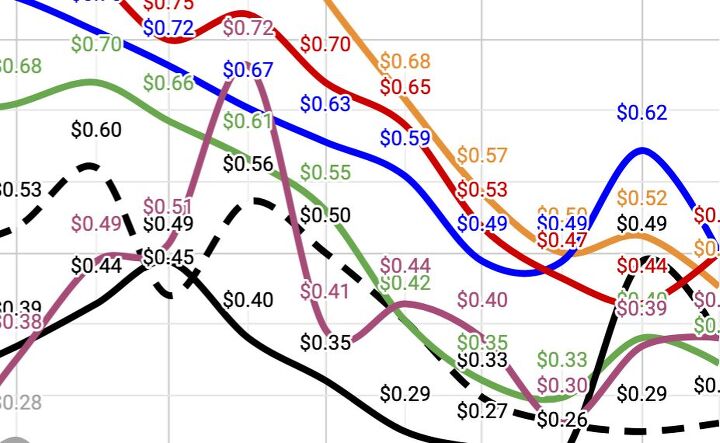 It’s no secret that the ammunition market has been volatile (to say the least) since the Covid pandemic took hold, but some calibers seem to be easing off while others rise. Redditor, Chainwaxologist, owns a web-based hunting and fishing retail store, FoundryOutdoors.com, so to keep his ammo cost and supply competitive, he set out to […]