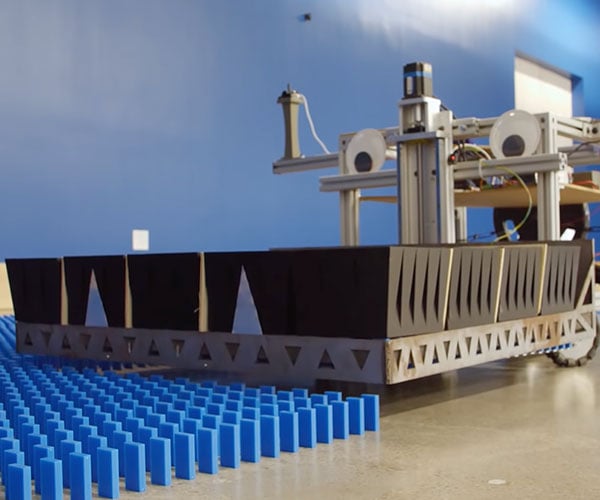
Setting up dominoes can be time-consuming and requires a steady hand. We’ve seen robots that can stand one domino at a time. Mark Rober and his engineering pals presents DOM – a custom-built robot that can set up 300 dominoes at a time. The robot arm and Hot Wheels track loading system is equally awesome.
Setting up dominoes can be time-consuming and requires a steady hand. We’ve seen robots that can stand one domino at a time. Mark Rober and his engineering pals presents DOM – a custom-built robot that can set up 300 dominoes at a time. The robot arm and Hot Wheels track loading system is equally awesome.
Laravel Loggable is a package for eloquent models, which will monitor the changes on the models and log.
It supports two drivers: File and Database.
Features
High-configurable
Two drivers (database and file)
Possibillity to use two drivers at once
Possibillity to select the columns for the model which should be logged
Possibillity to select the actions for the model which should be logged (create, edit, delete)
Facade-based structure to fetch the logs for specific model
Much more
Installation
Install the package.
composer require alkhachatryan/laravel-loggable
Publish the configuration file
php artisan vendor:publish --tag=loggable
Run migration
php artisan migrate
Configuration
Open the configuration file at /config/loggable.php
Set the driver whhich will log the model changes (can be both).
However, it’s recommended to use the database driver so you can fetch the logs in the future.
That’s it!
Usage
classPostextendsModel
{
/** Include the loggable trait */useLoggable;
/** Specified actions for this model */public$loggable_actions = ['edit', 'create', 'delete'];
/** Specified fields for this model */public$loggable_fields = ['title', 'body'];
protected$fillable = ['title', 'body'];
}
In what is, at least so far, the biggest cybersecurity blunder of the Tokyo Olympics, an Italian TV announcer did not realize he was on air when he asked the password for his computer. Motherboard reports: "Do you know the password for the computer in this commentator booth?" he asked during the broadcast of the Turkey-China volleyball game, apparently not realizing he was still on air. "It was too hard to call the password Pippo? Pippo, Pluto or Topolino?" he complained, referring to the Italian names for Goofy, Pluto and Mickey Mouse. The snafu was immortalized in a video posted on Twitter by cybersecurity associate professor Stefano Zanero, who works at the Polytechnic University of Milan. A source who works at Eurosport, the channel which was broadcasting the volleyball game, confirmed that the video is authentic.
A colleague of the announcer can be heard in the background saying the password depends on the Olympics organizers, and asking the announcer if it’s on a paper or post it close-by. Turns out the password was "Booth.03" after the number of the commentator’s booth. "Even the dot to make it more complicated, as if it was NASA’s computer," he said on the air. "Next time they will even put a semicolon." "Ma porca miseria," he concluded, using a popular italian swearing that literally means "pork’s misery" but is more accurately translated to "for god’s sake."
The incorporated Second Amendment affords the people “the right to keep and bear arms.” U.S. Const. amends. II, XIV; McDonald v. City of Chicago, 561 U.S. 742 (2010); District of Columbia v. Heller, 554 U.S. 570 (2008). Despite the clear text and this Court’s precedent, New York’s licensing regime does the opposite. It deprives everyone of that right, only returning it to those select few who manage to first secure a firearm license from the police. For everyone else, possession of a firearm is effectively a “violent felony,” punishable by 3.5 to 15 years in prison. N.Y.
Penal Law §§ 265.03; 70.02(1)(b). New York’s licensing requirements criminalize the exercise of the fundamental Second Amendment right, with rare exception. As a result, each year, we represent hundreds of indigent people whom New York criminally charges for exercising their right to keep and bear arms. For our clients, New York’s licensing regime renders the Second Amendment a legal fiction. Worse, virtually all our clients whom New York prosecutes for exercising their Second Amendment right are Black or Hispanic. And that is no accident. New York enacted its firearm licensing requirements to criminalize gun ownership by racial and ethnic minorities. That remains the effect of its enforcement by police and prosecutors today. The consequences for our clients are brutal. New York police have stopped, questioned, and frisked our clients on the streets. They have invaded our clients’ homes with guns drawn, terrifying them, their families, and their children. They have forcibly removed our clients from their homes and communities and abandoned them in dirty and violent jails and prisons for days, weeks, months, and years. They have deprived our clients of their jobs, children, livelihoods, and ability to live in this country. And they have branded our clients as “criminals” and “violent felons” for life. They have done all of this only because our clients exercised a constitutional right.
Therefore, we ask this Court to answer the question presented in a way that will protect the Second Amendment for all the people: by holding that Petitioners’ license denials violated the Second Amendment because New York’s licensing regime is unconstitutional.
I highly encourage you to read the whole thing.
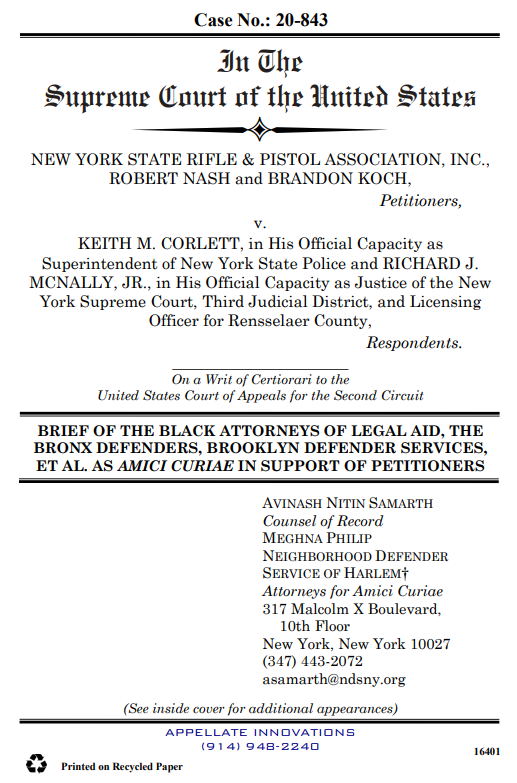
The Black Attorneys of Legal Aid caucus, Bronx Defenders, Brooklyn Defender Services, The Franklin County Public Defender, Monroe County Public Defender’s Office, St. Lawrence Public Defender’s Office, Oneida County Public Defender, The Ontario County Public Defender’s Office, Ontario County Office of the Conflict Defender, and Wayne County Public Defender, all got together to write this amicus brief to the Supreme Court calling the NY gun licensing requirements oppressive, corrupt, racist, and unconstitutional. Which it absolutely is.
This is something I never thought I would see, but reading it, I was reminded that these same groups got together to fight to overturn NY’s gravity knife law which was overwhelmingly being used by the NYPD to arrest black and Hispanic workers for carrying ordinary pocket knives they used for their jobs.
It seems like after watching years and years of government abuse, where rich white celebrities and the politically well connected can bribe their way into a gun license, but minorities who had neither influence nor affluence ended up in prison, they came to the conclusion that hyper-restrictive may issue is just a scheme that allows police and politicians to enrich themselves through corruption and oppress everyone else.
I have been listening to the book Ordinary Men: Reserve Police Battalion 101 and the Final Solution in Poland on Audible on my commute.
It’s a difficult book to listen to.
In chapter 10, the author talks about the clearing of the ghetto at Międzyrzec to send the Jews to Treblinka.
What stuck out at me was that 11,000 Jews were deported and over 900 shot by a cadre of only 350 police.
Moreover, the police, due to the emotional stress of what they were doing (which is hard to consider, almost having to feel empathy for German police having to deal with their own psychological pressure of shooting thousands of Jews by firing squad) were drinking heavily. They often got so drunk they had to shoot Jews multiple times because they would miss the kill zone at near point blank range and wound the Jews instead.
Again, 11,000 Jews were rounded up and deported and 900 were shot by 350 intoxicated German Order Police.
And there wasn’t one report of Jews fighting back.
The Jews were given shovels and picks to dig mass graves while guarded by only a couple of drunk German police, and not one Jew thought to whack a drunk German in the head with a shovel?
The hardest part of listening to this is the overwhelming sense of shame I have that 11,000 Jews, knowing what their fate would be, didn’t fight back with every last improvised weapon that they could get their hands on.
I actually understand the Germans. Throughout history many people have enslaved, oppressed, and massacred others over tribal or religious differences.
What I don’t understand is how the Jews, who do outnumbered the Order Police just accepted their fate.
If you want to understand me and my anger issues, this is at a root of it.
I want to over compensate for the passive cowardness of European Jews with ferocity.
In this post, you’ll learn how to implement an “infinite pagination” component in Laravel with the help of Livewire. The cursor pagination will be used to paginate the data for faster and efficient querying over your model. The steps are very simple so let’s get started.
Full Base Layout Code The full layout should be as follows. If you have an existing layout, do put the “@livewireStyles”, “@livewireScripts” and “” on the necessary location.
2 – Create “InfinitePostListing” Livewire Component Now that you have the layout code ready in place, it’s time to create a new “InfinitePostListing” Livewire component and you can use the command line to generate it.
php artisan livewire:make InfinitePostListing
Upon successfully creating the component you should see the command line output like below.
COMPONENT CREATED  🤙

CLASS: app/Http/Livewire/InfinitePostListing.php
VIEW:  resources/views/livewire/infinite-post-listing.blade.php
3 – Define the Route Endpoints Before we start with the component logic, define the route in “routes/web.php” to provide the access endpoint.
4 – InfinitePostListing Livewire Component Logic Inside the Livewire component, you’ll need to define 3 methods:
mount() – The lifecycle method to initialize the data
loadPosts() – The method to load more posts
render() – The method to render the “views”
public function mount() {}

public function loadPosts() {}

public function render() {}
Other than that you will need to have 3 properties and they are the:
$posts – To hold the posts data
$nextCursor – to hold the next pagination cursor
$hasMorePages – to determine whether there are more records
public $posts;

public $nextCursor;

public $hasMorePages;
The full code example will be as follows. Do note that Laravel Livewire component only accepts PHP “scalar types”, “Models” and “Collection” so other than those types, the component will throw out an error.
<?php

namespace App\Http\Livewire;

use App\Models\Post;
use Illuminate\Pagination\Cursor;
use Illuminate\Support\Collection;
use Livewire\Component;

class InfinitePostListing extends Component
{
    public $posts;

    public $nextCursor;

    public $hasMorePages;

    public function mount()
    {
        $this->posts = new Collection();

        $this->loadPosts();
    }

    public function loadPosts()
    {
        if ($this->hasMorePages !== null  && ! $this->hasMorePages) {
            return;
        }

        $posts = Post::cursorPaginate(12, ['*'], 'cursor', Cursor::fromEncoded($this->nextCursor));

        $this->posts->push(...$posts->items());

        if ($this->hasMorePages = $posts->hasMorePages()) {
            $this->nextCursor = $posts->nextCursor()->encode();
        }
    }

    public function render()
    {
        return view('livewire.infinite-post-listing')->layout('layouts.base');
    }
}
So a little bit explanation of the code above, there’s 5 important flow that you have to know.
When the component is loaded, the “mount()” method will be triggered and the “posts” property is initialized with an empty Laravel Collection.
Then the “loadPosts()” method is triggered to load the “posts” that are retrieved by the “cursorPaginate” method.
The pagination will be determined by the “nextCursor” property which is encoded and decoded every time the “loadPosts” method is called.
The retrieved data is “pushed” to the “posts” collection.
Finally, the “render()” method renders the view for the user to see.
5 – InfinitePostListing Views
The views will loop through the “posts” properties and for this example, simple styling is applied with “TailwindCSS” classes. Assuming the “Post” model has a “title” and “body” column, you can access it as you normally would in Laravel Blade file.
The code for the views will be as follows. Do note that we are including the “skeleton” loading component to show that the post are being loaded when scrolling to the bottom of the page.
Now when you scroll to the end of the page you will see the skeleton component and within a split second the next posts will be loaded.
By now you should be able to implement Laravel Livewire Infinite pagination and If you found this tutorial to be helpful, do share it with your friends, cheers and happy coding 🍻.