Somewhere in the deepest parts of the dark web, there’s a conspiracy afoot. Sewing division, and tearing families apart, the war of the AR 15 Magazine rages on, and it’s not what we think. This isn’t the fight over what makes a high capacity magazine, but over which one is the best. The factions are fuzzy, sometimes blending between polymer and metal construction, other times relying on reputation and history, but the truth about what makes an excellent AR 15 Magazine has to come out, and it’s not for the faint of heart.
We concern ourselves with features such as construction, capacity, cost, and compatibility. The evaluations, however, focus on reliability over time, in harsh environments, and durability, as well as subjective matters including aesthetic and feel. The features can typically be gleaned from the manufacturer’s website, the evaluation, however, cannot.
Each has its purpose. Each has its place.
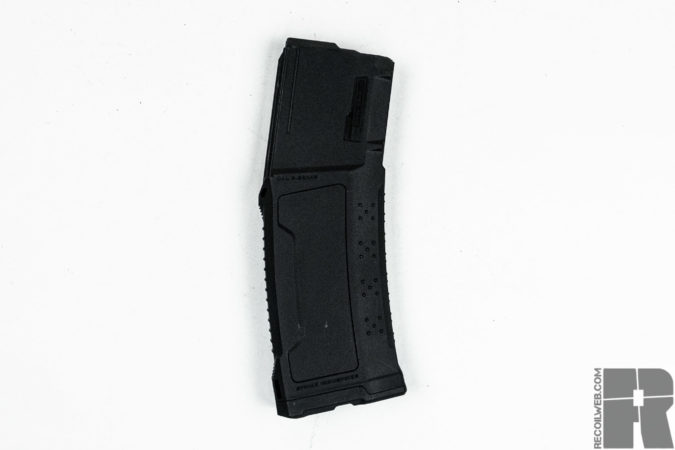
Magpul PMAG
Construction: Reinforced Polymer
Capacity: 10/20/30/40 rounds
Colors: Black, Brown, and Irregular Releases
Cost: ~$12-18 depending on the model, and bulk orders.
Compatibility:
- Gen 2: Colt-STANAG,
- Gen 3: STANAG + HK416, FN SCAR MK16, British SA-80
- Specific Magazines for 300 Blackout
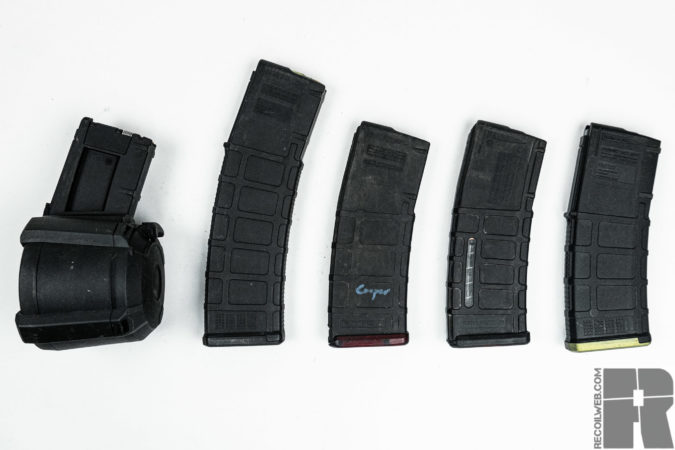
Left to Right: D60 Drum, GEN M3 40 Round, GEN M2 30 Round, GEN M2 30 Round Windowed, GEN M3 30 Round PMAG
The reigning champion of polymer AR15 magazines holds its throne, not only because it has seen war and come home to tell about it, but continues to fit both the needs of the many and the needs of the few. Having improved their initial design to the current standard of 3rd Generation PMAGS, the list includes options for capacity and caliber-specific models. Early to identify the need for a 300 Blackout specific magazine, for both differentiating from mags loaded with .223/5.56 and specifically identifying feed issues specific to the caliber, Magpul continues to fit a niche, even when it has long defined a genre.
The motive behind creating a polymer AR 15 Magazine isn’t as simple and one single choice. Aluminum magazines suffered from bent feed lips for years, and instead of bending, the polymer would simply break, leaving nothing to chance. Polymer could survive and continue in extreme environments where aluminum would shrink and expand depending on the temperature. By manufacturing AR 15 magazines through injection molding, Magpul achieved a disassemblable magazine without the bulk needed with aluminum construction.
Make no mistake, however, PMAGS are made to last as long as possible, but also have a disposable element. An out of spec PMAG should be broken or cracked, relieving the user of having to look for small bends. At the same time, as a testimony to their durability, many remain in use after decades of deployments and competitive abuse.
Website: www.magpul.com
Daniel Defense
Construction: Carbon Fiber Reinforced Polymer
Capacity: 32 rounds
Colors: Black
Cost: ~$19
Compatibility: 5.56 and 300 Blackout
John Lovell of Warrior Poet Society once nearly broke the internet when he suggested that a 30 round AR 15 magazine should only be loaded to 28 or 29 rounds. This practice originated in the military to make seating a magazine easier and more reliable on a closed bolt under stress, so it’s not surprising that when Daniel Defense came out with their own magazine, they set their capacity at 32. Further, they took inspiration from many other magazine accessories common across military and competitive scenes with aggressive texturing and a looped baseplate.
Unlike PMAGs, Daniel Defense Magazines come in one format, and one format only. Both 300 Blackout and .223/5.56 rounds reliably cycle, which makes them a good candidate to add to an already existing stockpile to consistently differentiate between magazines loaded with the caliber.
Website: www.danieldefense.com
Where to Buy: When In Stock, $19 at Gun Mag Warehouse, $22 at Brownell’s, and $22 from Daniel Defense.
Lancer AR 15 Magazine
Construction: Polymer Body with Hardened Steel Feed Lips
Capacity: 5, 10, 20, 30 round options.
Colors: Black, Flat Dark Earth, Clear, Smoke, Translucent Red, Translucent Flat Dark Earth, and other special releases.
Cost: ~$16
Compatibility: .223/5.56 with specific options for 300 Blackout
Additional Features: Couplers Available
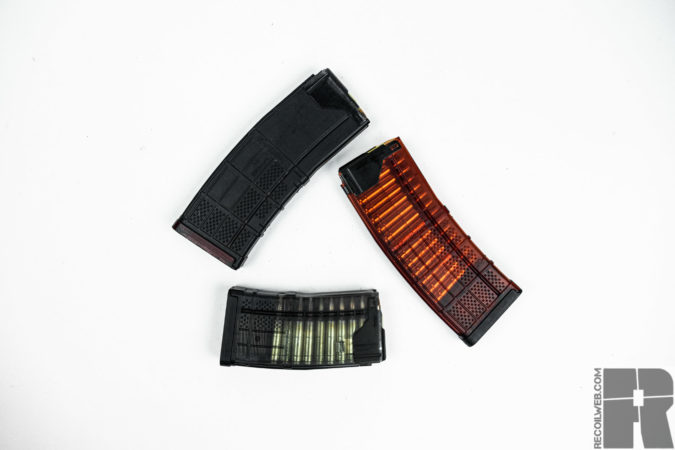
Lancer Systems took the strengths of both metal and polymer magazines and combined them in order to produce a hybrid that combats the weakness of both. The hardened steel feed lips resist distortion better than aluminum and don’t crack like polymer. The lightweight body can be molded for a better grip. Whether for the tactical ability to check rounds or for the Instagram, or to differentiate between mags loaded with 300 Blackout or 2.23/.556, polymer has quickly become the new normal in magazine construction.

Lancer mags come with a suite of useful features. Other than having a long and constantly changing list of color options, Lancer AR 15 Magazines come in different capacities and have propriety couplers for those so inclined. The texture resembles some chequering seen on pistol grips and provides a secure hold when cold and wet while ridges serve as round count indicators with markers at 30 and 20 rounds. Compared to a PMAG, Lancer Mags are a little thinner and slightly closer in dimension to their aluminum predecessors.
URL: https://lancer-systems.com/
Strike Industries AR 15 Magazine
Construction: Glass Reinforced Polymer
Capacity: 32 rounds
Colors: Black
Cost: ~$17
Compatibility: .223/5.56
Similar to Daniel Defense Magazines, the Strike Industries AR 15 Magazine has a capacity of 32 for spring tension. Following their style, it has both aggressive texturing and a slight cyberpunk aesthetic. It’s not all show, as the front and back of the AR 15 Magazine feature the most abrasive surface, leaving the sides slicker to avoid rubbing holes in gear or dragging during a reload.
Strike Industries took extra care in designing their feed ramp, for a secure first-round chambering. Though they are a new player on the AR 15 Magazine field, it is yet to see where they will land, although the pool is large and the demand high. A small but distinguishing feature is the thumb bump on the back spine. Acting as a reference point, it serves as a repeatable spot to index the thumb, especially when drawing from a chest rig or plate carrier. Those familiar with efficiently reloading under Night Vision will immediately relate to this small advantage.
Where to Buy and URL: https://www.strikeindustries.com/si-ar-mag.html
STANAG // GI
Construction: Aluminum or Steel
Capacity: 5, 10, 20, 30, 40 rounds.
Colors: If you can imagine it, someone probably sells it somewhere.
Cost: ~$12-35
Compatibility: Variations are to be expected. STANAG will want to be individually tested for 300 Blackout.
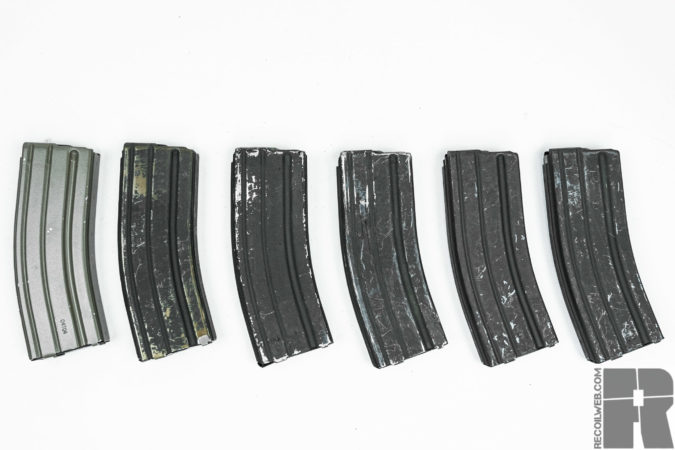
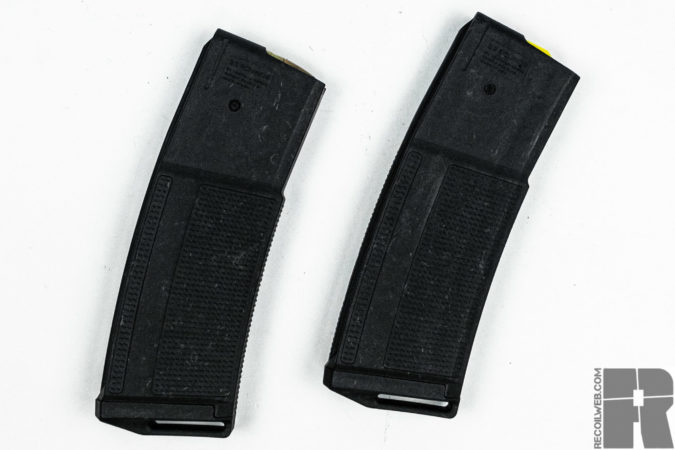
As it stands, aluminum magazines are a world of their own. Variations between companies require a little investigation to determine what the markings truly mean. Like forged AR-15 Lowers, at some point many were made in the same factory, but that does not mean all aluminum magazines are created equal. Derived from the NATO term Standardization Agreement, STANAG pattern magazines are supposed to be able to fit and operate in any firearm designed to the specifications.
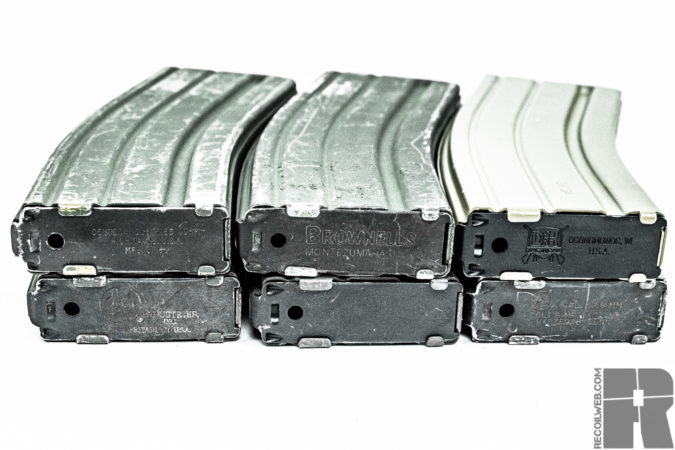
Image enhanced to identify the variety of manufacturers.
There appears, from the outset, to be two different discussions when it comes to aluminum AR 15 Magazines. First, there are the aluminum-versus-polymer wars, which occasionally resemble the old 9mm versus .45 days of yore. Within the aluminum magazine purists, however, you will find another conflict. Which manufacturers are considered worthy, and which should be avoided?
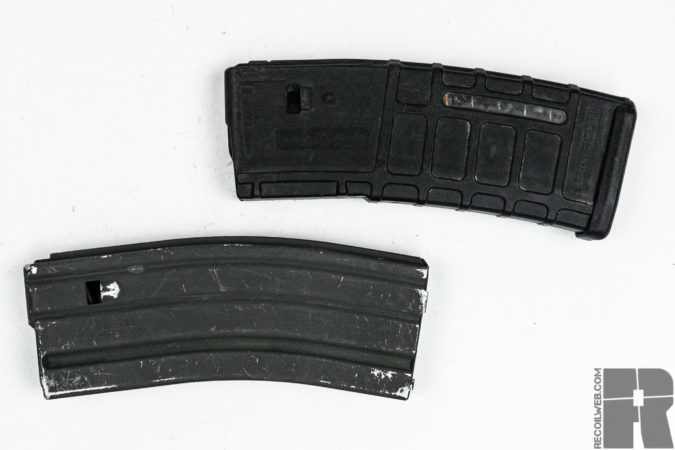
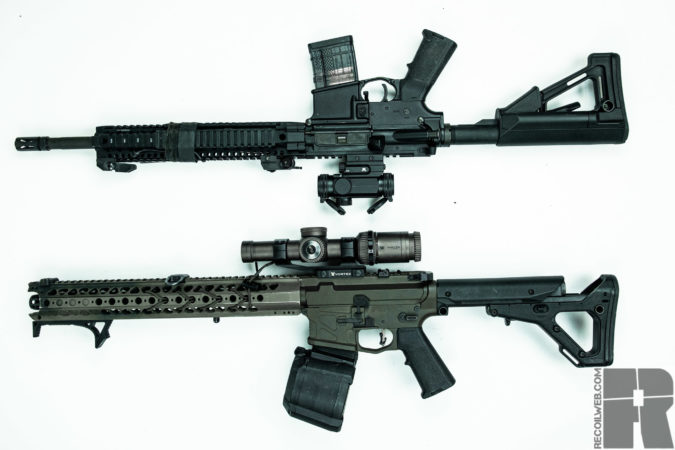
I tell by that look on your face, you’ve seen a lot kid. Top: Magpul Windowed PMAG GEN M2. Bottom: Geniune Colt Mag from who knows when. Both saw combat.
Aluminum magazines differ from polymer, in that their feed lips will bend when plastic will break. This double-edged sword renders polymer magazines disposable, while aluminum AR 15 Mags require maintenance. With routine inspection and regular tuning, aluminum magazines can last for decades and across multiple conflicts. In contrast, however, a bent feed lip can cause malfunctions and Murphy’s Law doesn’t play fair. Those who have carried a firearm professionally have long attested to the importance of magazine maintenance.
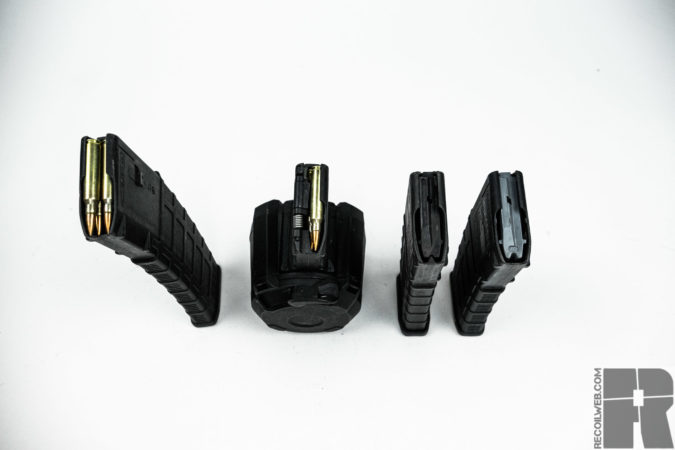
Drum AR 15 Magazine Options:
The AR 15 Drum Magazine has seen a renaissance in recent years and directly challenges the higher capacity box style magazines for capacity and reliability.
Magpul D60
Construction: Reinforced Polymer
Capacity: 60 rounds
Colors: Black
Cost: ~$125
Compatibility: 2.23/.556 only

For years, capacity has always had its drawbacks and it has long been either reliability or weight. Since much of the weight is derived from the ammunition carried, one can only make a 60 round AR 15 magazine so light. The greater challenge of reliability includes not only adverse environments, but drop tests and feeding consistencies. The Magpul D60 moves away from the box style magazine to bring the increased reliability of a drum, and the cost of size and weight.
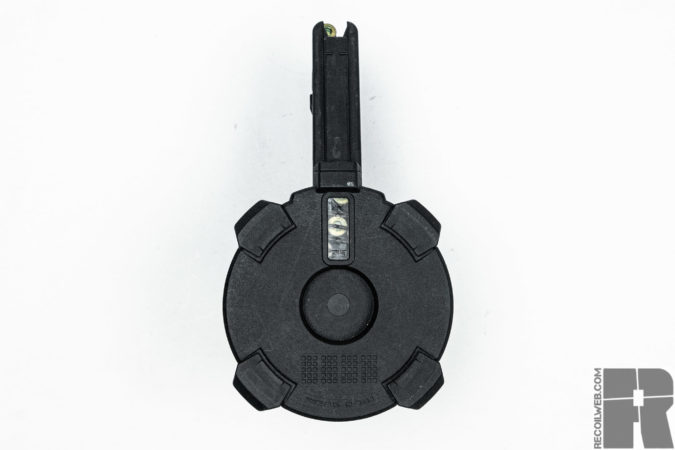
Round after round, the Magpul D60 Ar 15 Magazine continues to chew our ammunition stores and in turn, ammo budget. On top of regularly feeding .223 and 5.56 ammunition, the Magpul D60 also boasts something not always common in drum magazines: it’s user servicable. Magpul recommends that the drum be cleaned and lightly oiled every 1000 rounds, which, if we’re tracking that round count, speaks for itself.
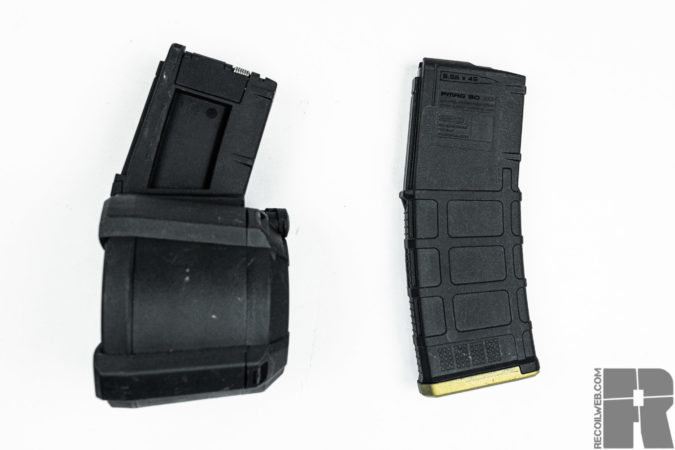
There’s no way to escape the weight of a fully loaded 60 round drum. Though difficult to store on a plate carrier or belt, D60’s find their place in both defensive and competitive uses. A round count window on the rear of drum informs the shooter when the drum is full and when 10 rounds remain.
More on AR-15’s and Magazines
