Laravel News Links
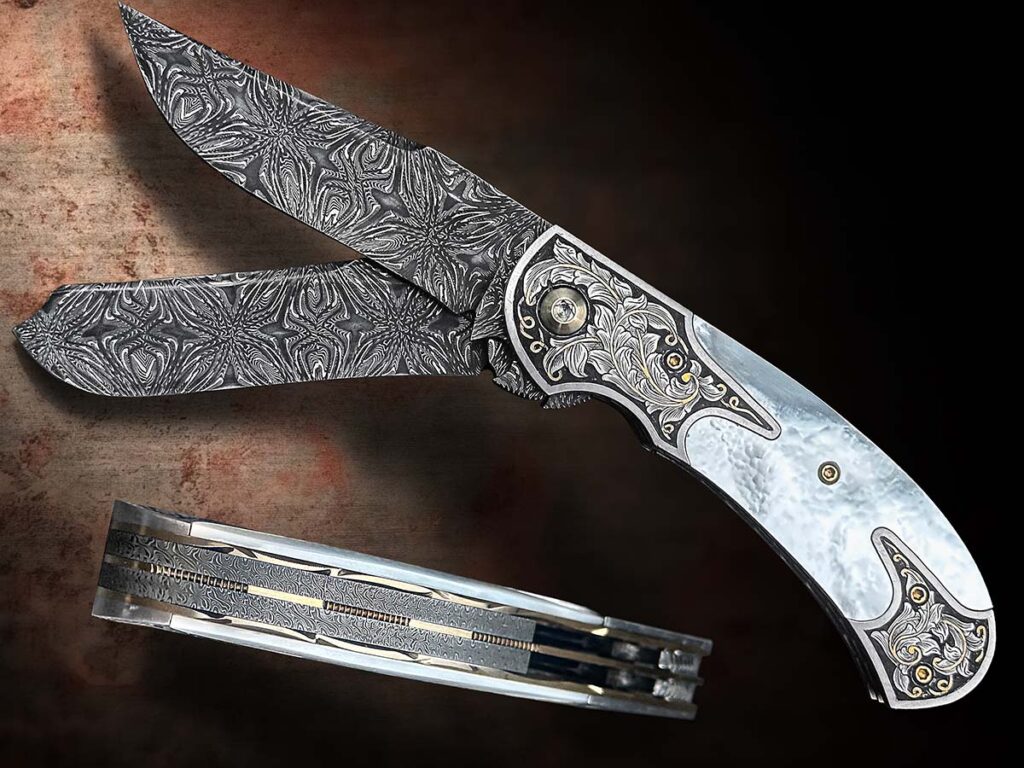
Damascus Flaws: How To Spot Imperfections in Custom Knives
http://blademag.com/wp-content/uploads/Flaws-8.jpg

Learn how to spot flaws in Damascus steel blades, like delamination and inclusions, with expert tips from master bladesmiths.
They may be small and insignificant or obvious and glaring, but the skill that is involved in forging damascus steel and then fashioning blades and furniture that adorn custom knives like no other component naturally produces the potential for flaws in the steel itself.
Ironically, the structure of damascus steel, the allure of its beauty and texture, images and etched artistry, is brought together with the potential for a flaw. The production of billets that contain welded elements of 1080 carbon- and 15N20 nickel-alloy steels or other variations involves the marriage of metals. And like any union there is the possibility of a fault. The flaws may be serious or inconsequential. For the buyer, the ability to spot an imperfection and make a value judgment is highly beneficial in the ownership experience.
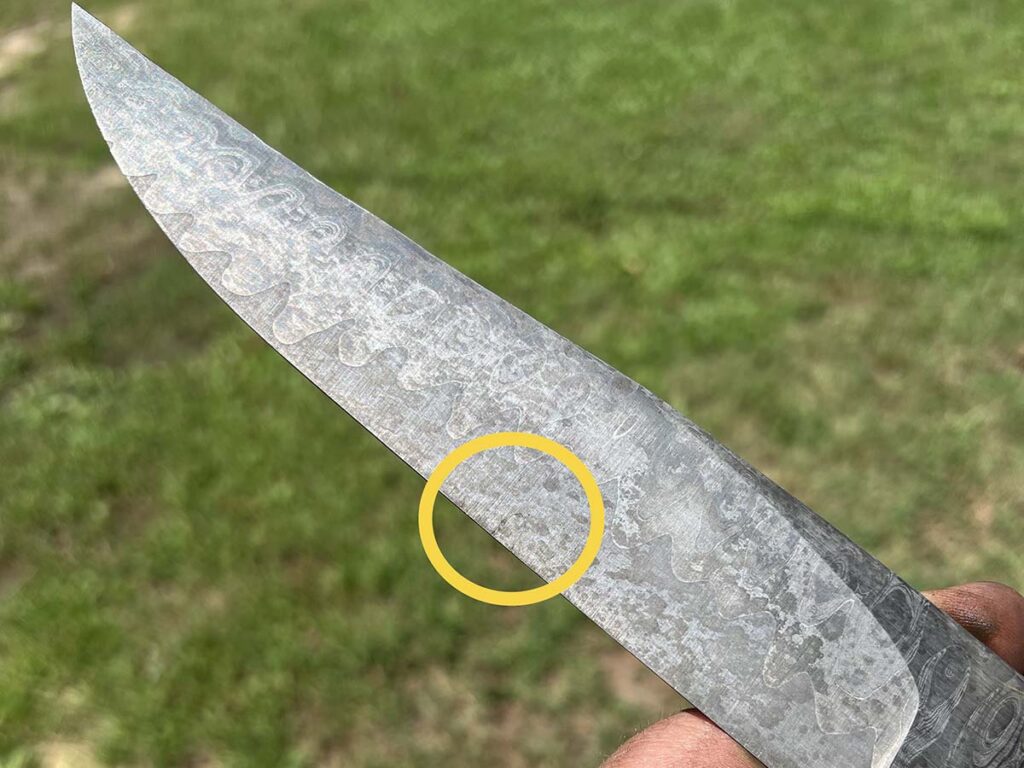
“I would say the most common flaw in a damascus blade is delamination,” ABS master smith Lin Rhea opined. “This shouldn’t be in a knife that is offered for sale. It’s usually evident as a hairline void in the layering and could occur anywhere on a blade. But I see them mostly in the deepest part of the blade as they are revealed in the bevel grinds. I believe this could be prevented by being sure the billet is up to proper welding heat before extracting it from the forge for the first weld in the particular stage of pattern development.”
In a similar perspective, ABS master smith Bill Burke sees imperfections as “a closed shut or incomplete weld that can be found anywhere on the blade. It can be seen as a dark or silvery line in lightly etched damascus or becomes a deep crevasse on heavily etched damascus—and it is caused by the smith not letting a billet soak at heat long enough before welding, or by manipulating a weld that has not been fully set and then working this tear back into the pattern.”
ABS master smith Steve Randall agrees and sees these types of imperfections and other potential flaws as well.
“The most common flaw on a damascus blade is the cold shut or an area where the pieces did not weld,” he observed. “It is not so much where it occurs on the blade such as the tip, edge or spine, but where the two different steels meet in the pattern. It’s the two steels that didn’t weld together that creates the flaw, and sometimes they aren’t noticed until [the maker starts] grinding into the blade.
“I would say another common flaw for damascus, mosaic specifically, would be shadow lines from the tiling process,” Steve continued. “Structurally they don’t change the steel, but they can detract from the mosaic visually.”
Both Rhea and Burke have encountered other flaws related to the fusion of the two steels in damascus.
“Less common is an inclusion of some kind,” Burke explained. “Twenty years ago flux inclusions were fairly common. Now one sees inclusions of weld filler material, though, overall, inclusions are less common now than 20 years ago. Inclusions are always found in between the elements that make up the pattern in a bar of damascus.”
Lin added, “I’ve also seen where the maker has left a bit of welding rod material within the damascus blade. This appears as a cloudy gray area and is pretty distinct in appearance from the hardened damascus. In the event wrought iron or mild steel is mixed with high carbon and the layering is of a relatively low number count, this could be part of the intended pattern, so it might be acceptable.”

According to ABS master smith/BLADE Magazine Cutlery Hall-of-Fame® member Steve Schwarzer, the particular combination of steels might raise the prospects for a flaw to develop, especially when the skills of the maker are evolving. He commented.
“The worst flaws are the delaminations and inclusions,” he said. “These might come from poor welding practices and the choice of alloys involved. Some welds are much easier to make than others and a higher level of skill may be required. Most of it is visual—bad welds are bad welds and don’t have the necessary molecular bond.”
For a potential buyer the ability to spot a flaw is an attribute that pays off when dollars are exchanged for the finished product. Although a flaw may have no impact on the structural integrity of the damascus steel itself, the degree of impairment—if any—ultimately lies with the potential buyer who assesses the level of discrepancy. Approaching a maker’s table, discussing the damascus, and taking a closer look at the blade will sometimes generate relevant conversation and exchange of information. Flaws can show up anywhere in damascus construction, so visual inspection comes with the territory.
Schwarzer advises buyers to check the knife thoroughly.
“Using magnification helps. If the blade doesn’t look right, it probably isn’t. A flaw may show up as a bright spot in a dark area, and some skilled people can reweld their billets. I do that regularly and especially when I do guards and stuff, taking a light hammer and welding heat to fix it, but not everything can be repaired. Sometimes there is no way to repair it, and that is one reason why I hardly ever sell damascus steel—[and if I do] only to skilled professionals.”
Visual Signs
When a buyer’s interest is piqued, the next steps involve courtesy and cordial exchange with the knifemaker.
“Flaws in damascus can range from very hard to see to blaring and obvious,” Burke remarked. “An experienced eye in good light and magnification are the best ways I know to detect them. Some can be felt, but feeling the blade and running your fingers up and down and across it are not reliable and can cause rust and tarnish. If you’re at a show and feel you want to look at the blade under a magnifier, then you should ask the maker if he minds. If he says ‘no’ or gets upset, then thank him and walk away.”

Randall concurs with that point of view.
“Bright light sure helps,” he observed. “It is difficult to find small flaws once a damascus blade has been etched. Running your fingers over the blade won’t tell you anything, and if you’re at a show I advise not doing it. Using a magnifying glass at the maker’s table could be awkward, and I would suggest respectfully asking before doing it.”
Historically, skilled makers and smiths have assessed their own work and identified flaws, correcting them or chalking up a flawed blade to the hazards of the craft. When ABS master smith Mike Quesenberry considers the flaw in context, he is frank in his response.
“The smith sees the weld lines with flaws before the steel is etched. To me that is something the smith has to deal with. I don’t have any problem scrapping a blade if [a flaw] shows up in the process. The hand sanding and grinding are where the time is really invested, and makers should be honest with their work. If you see a flaw, scrap it,” he stressed. “The best way to fix a flaw is to throw that blade away and start over again.”
Schwarzer smiles when he relates the style of an ancient practice.
“Japanese smiths worked out a way to hide a flaw if it didn’t mechanically affect the viability of the blade. They would do a nice little gold inlay. That was done in Persia, too, and a lot of other places. They would put artwork over something that was unseemly. If you have $300 in a blade and there is no mechanical problem, then that is a way to make it go away. It’s been said that the difference between a journeyman and a master smith is the size of the screw-up you can fix.”
Rhea acknowledges the human side of the situation. There may be a temptation to continue working on a knife with a flaw in the damascus, but then comes the realization on the part of the maker that causes him to refrain from that option. “When a buyer sees any odd discoloration in the form of surface treatment, color or texture, ask questions and give the maker the opportunity to explain or rethink his position,” he noted.
Resolving Situations
Bladesmiths and custom makers are genuinely committed to excellence. However, at times there may be a situation involving a flaw. When a purchaser detects something that may or may not be an imperfection, talking with the maker can resolve the situation to mutual satisfaction.
“If you buy a blade and then find a flaw, you should contact the maker and ask them about it,” Burke advised. “If it is something you cannot live with, ask for a refund or allow the maker to replace the flawed knife. In most cases, the maker is going to be unaware of the flaw. If the maker is aware of the flaw or refuses to do anything for you, then you either have to keep it and say, ‘Oh well’ or sell it to someone else with full disclosure of the flaw.”
“When I have a buyer who experiences issues of any kind, I would prefer that they contact me and give me the opportunity to evaluate, discuss and make it right,” Randall noted. “I’m sure most makers would not intentionally sell a knife knowing it had a flaw or without first pointing it out to the buyer.”
Rhea sees the interested parties taking the high road in almost every case. “Most makers will honestly make a sale with good intent and in good faith,” he reasoned. “If there’s a problem just contact the maker and let him or her explain or make it right. Ultimately his reputation is on the line and he deserves the chance to make it an overall pleasant experience.
“When it comes to flaws and issues,” Lin concluded, “we all have them and we handle them in our own ways. To the degree we act to prevent problems for the buyer we also prevent problems for ourselves as makers, as well as enhance our reputation. Leaving flaws in damascus will reflect on our honesty and our attitude toward the buyer. This is something to think about very seriously. So, will there be problems? Yes, but we should go to great effort to prevent them rather than having to correct things that might be perceived as an oversight. In the end, we are human and will want to use common courtesy and humility in our dealings.”
More On Damascus:
 NEXT STEP: Download Your Free KNIFE GUIDE Issue of BLADE Magazine
BLADE’s annual Knife Guide Issue features the newest knives and sharpeners, plus knife and axe reviews, knife sheaths, kit knives and a Knife Industry Directory.
Get your FREE digital PDF instant download of the annual Knife Guide. No, really!
We will email it to you right now when you subscribe to the BLADE email newsletter.
BLADE Magazine
MySQL Commands To Gather Runtime Statistics For Database Performance Assessment
This post explains how to collect metrics on connections, resource usage, query performance and database characteristics.Planet MySQL
Laravel Global Scopes: Automatic Query Filtering
https://picperf.io/https://laravelnews.s3.amazonaws.com/featured-images/12-08-2025-candy-global-scope-export.png

Implement Laravel global scopes to automatically apply query constraints across your entire application. These powerful features ensure data consistency and business rule enforcement while maintaining clean, maintainable code architecture.
The post Laravel Global Scopes: Automatic Query Filtering appeared first on Laravel News.
Join the Laravel Newsletter to get all the latest
Laravel articles like this directly in your inbox.
Laravel News
Optimize Laravel Apps Faster with Query Analytics for MySQL & MariaDB
Laravel News Links
Redneck Star Trek
https://theawesomer.com/photos/2025/08/redneck_star_trek_t.jpg

YouTube channel Neural Derp blends AI slop and stereotypes in the name of laughter. In this clip, titled Beam Me Up, Bubba, they imagine what Star Trek might have been like if it took place in a West Virginia trailer park. We still can’t get over Spock with a mullet and the Gorn playing the fiddle. Oh, there’s also a redneck version of The Next Generation.
The Awesomer
Our Brains Contain Lithium—and Its Loss Might Help Drive Alzheimer’s, Study Finds
https://gizmodo.com/app/uploads/2025/08/MRIs-1200×675.jpg
Alzheimer’s disease is one of the cruelest conditions a person can develop. And even with recent advances, there’s only so much that can be done once its symptoms emerge. Research out this week might highlight a critical and previously missed factor driving the disease, one that could even lead to new treatments.
Scientists at Harvard Medical School led the study, published Wednesday in Nature. By studying human brain samples and mice, they found evidence that our brains naturally contain the element lithium—and that its deficiency can help explain the damage caused by Alzheimer’s. The findings are well supported and may have uncovered an important aspect of the neurological disorder, an outside expert told Gizmodo.
The study researchers “have performed detailed and well-designed studies to investigate how low lithium levels are associated with [Alzheimer’s disease] at the diagnostic, protein, cellular and gene levels,” said Timothy Chang, a neurologist at the University of California, Los Angeles who was not involved with the study. Chang is also director of the California Alzheimer’s Disease Center at UCLA.
The brains of people with Alzheimer’s are different in many ways from others. In particular, they contain high levels of misfolded amyloid beta and tau, two proteins that normally have important functions. But these aren’t the only changes seen in Alzheimer’s. And it was while investigating these other changes that the Harvard researchers made their discovery.
With the help of existing projects that collected postmortem tissue samples, they compared levels of around 30 metals in the brains of people who died along varying stages of cognitive health. The only major difference they found was with lithium. People with cognitively healthy brains had relatively high levels of lithium, whereas those with Alzheimer’s had much lower levels. Importantly, this loss of lithium was apparent even in people who only experienced mild memory problems before dying.
The researchers also studied healthy mice and genetically modified mice that develop a version of Alzheimer’s disease. When they depleted lithium from these mice, it appeared to accelerate the buildup of unhealthy amyloid beta and tau in the brain, along with memory decline. They also found evidence that this loss is caused by amyloid beta plaques binding to the brain’s lithium and that this loss of lithium seems to negatively affect all of the brain’s major cell types.
Though there has been some limited research suggesting a possible connection between lithium and Alzheimer’s, the authors say theirs is the first to show that our brains naturally carry it. What’s more, their findings hint that lithium is essential to good brain health and that its absence is key to the development of Alzheimer’s.
“This is the first study to suggest that lithium deficiency might contribute to Alzheimer’s disease. The reason this has not been proposed is because it was not believed that lithium is a natural substance in the brain with biological effect, just a drug with pharmacological effects at high doses,” senior author Bruce Yankner, professor of genetics and neurology in Harvard Medical School’s Blavatnik Institute, told Gizmodo. “As such, this study is the first to explore the consequences of lithium deficiency in the brain.”
The implications of this study, while still early, could certainly be dramatic. Yankner and his team were also able to identify a lithium-based compound that wasn’t so easily bound by amyloid beta. And when they gave mice (older healthy mice and mice with Alzheimer’s) this compound, it appeared to prevent the damaging brain changes and memory loss normally inevitable with the neurodegenerative condition. Even the best amyloid-based treatments for Alzheimer’s available today, by contrast, only modestly delay its progression.
Other forms of lithium are used in medicine to treat certain mental health disorders, particularly depression. But these versions require high dosages to work as intended and come with many side effects as a result. The team’s compound, however, required a much lower dose to be effective in the mice, and no sign of toxicity was observed at all.
“Further clinical studies in humans would be necessary to evaluate if the right type and dose of lithium can prevent or slow Alzheimer’s disease,” Chang noted.
Yankner and his team are now moving ahead with the research needed to show their compound (or something similar) can be safely tested in human clinical trials. But even before then, the team’s discovery could pay off in other ways. It might be possible to screen for Alzheimer’s risk in the future by measuring people’s lithium levels, for example. And there are still many mysteries left to untangle about lithium and its role in brain health.
“As a neuroscientist, I am excited about exploring the physiology of lithium in the brain,” Yankner said. “I suspect we have just scratched the surface of what will be some very interesting biology.”
Gizmodo
Record and Replay Requests With Laravel ChronoTrace
https://picperf.io/https://laravelnews.s3.amazonaws.com/featured-images/laravel-chronotrace-featured.png
The Laravel ChronoTrace package enables you to record and replay Laravel requests deterministically and generate tests from production traces.
The post Record and Replay Requests With Laravel ChronoTrace appeared first on Laravel News.
Join the Laravel Newsletter to get all the latest
Laravel articles like this directly in your inbox.
Laravel News
This Open-Source File Backup App Is So Good I Can’t Believe It’s Free
https://static1.makeuseofimages.com/wordpress/wp-content/uploads/wm/2025/08/freefilesync-app-open-on-a-benq-monitor-1.jpg
The importance of backing up your files seems obvious, but choosing how gets complicated fast. The built-in Windows backup option is painfully basic, while decent software costs serious money. FreeFileSync claims to solve both problems and does so brilliantly.
Meet FreeFileSync
FreeFileSync is an open-source file synchronization tool that creates exact copies of your folders wherever you need them. Unlike dedicated backup apps such as Duplicati, which store files in compressed archives that require the app to restore, FreeFileSync keeps your files accessible in their original format.
FreeFileSync offers four sync modes:
- Mirror: Creates an exact copy of your source folder
- Two-way: Syncs changes in both directions
- Update: Copies only new or modified files
- Custom: Lets you define exactly how each type of file operation is handled, for greater flexibility
FreeFileSync also handles advanced backup setups with ease. It supports syncing to multiple destinations at once, making it perfect for following the 3-2-1 backup rule—three copies of your data, on two different types of media, with one stored offsite. You can chain multiple sync pairs in a single session, allowing you to back up to a local drive and a network location in one go.
Tools like Duplicati and Macrium Reflect are excellent for full-system backups of your Windows 11 PC. But if you need a fast, no-fuss way to copy key files and folders, FreeFileSync is a much simpler solution.
While the core software is completely free, FreeFileSync also offers a Donation Edition that unlocks extra features, such as faster performance through parallel file operations. For most people, the free version is more than enough, since it includes all essential functions. The donation-only features mainly benefit those who regularly sync giant datasets or work over slow network connections.
How to Use FreeFileSync to Automate File Backups
FreeFileSync isn’t the most intuitive backup tool and requires some technical know-how to get it working. While it’s powerful and flexible, you may find the interface overwhelming and the setup process confusing without referring to the documentation or community forums.
That said, once you get the hang of it, creating a basic backup is straightforward. Let’s walk through a simple example: mirroring up a folder from your primary storage drive to a secondary drive.
In FreeFileSync, click the + icon to select your source folder on the left—this is what you want to back up. Choose your destination on the right—whether that’s an external drive, network location, or cloud sync folder.
Before syncing, check the comparison settings by clicking the gear icon next to Compare (F6). I use the default File time and size option, which is fine in almost all cases. Only switch to File content if you need absolute accuracy and can afford the extra time, as it’s much slower on large folders. Skip File size unless you know what you’re doing.
If you’re backing up photos or videos, turn on Ignore time shift [hours] in the comparison settings. This helps FreeFileSync avoid re-copying files because of small time differences (like when daylight saving time changes or when you’re copying between Windows and a NAS).
Next, configure your sync settings. Click the green Gear icon by the Synchronize tab and select Mirror mode. This creates an exact copy of your source folder and removes files from the backup that no longer exist in the original.
While Mirror mode is useful for keeping your backup clean and preventing old files from piling up, its behavior also means it will copy corrupted files, those locked by ransomware, and similar. And if you delete a file, its "backup" will be deleted as well. To combat this, you’ll need to set up file versioning, as explained below.
Another option is to choose Update mode, which only adds files to your backup folder and will never delete them.
Two-way sync mode has its uses, too, but is more niche. For example, it could be useful to place copies of files into cloud storage, where someone else also works on them.
Setting up Filters (F7) can save both space and time during backups. Click the funnel icon to open the filter settings. Here, you can exclude folders or files that don’t need to be backed up—like temporary files or folders that can be recreated later.
Before running any sync, always click Compare first to preview exactly what changes FreeFileSync will make before anything is copied or deleted.
Enable Versioning to Keep Backup Copies of Changed Files
To protect important files from accidental changes or deletions, enable versioning in FreeFileSync. This feature keeps older versions of files so you can recover them if something goes wrong during sync.
Click the Gear icon next to Synchronization (F8) in the main window to open the sync settings. Select the Versioning option under Delete and overwrite. Then, click Browse and choose a location for the versioning folder, such as E:\Backups\Versions.
Finally, pick a naming style; timestamps are a reliable overall choice. This way, FreeFileSync keeps backup copies of previous versions just in case you accidentally overwrite something important.
Automating and Scheduling Backups
FreeFileSync doesn’t include built-in scheduling, so to automate backups, you’ll need to create a batch file and schedule it using Windows Task Scheduler. While it’s not the most user-friendly process, at least you can set it up once and forget.
After setting up your sync pairs and verifying everything with Compare, click File > Save as Batch Job. This saves your sync configuration as a .ffs_batch file. In the batch job window, you can customize several options—such as whether the sync runs silently in the background, whether errors are shown, and whether a log file is created.
Make sure to check the boxes for Run minimized and Auto-close if you want the task to run without your input. Once saved, this batch file becomes a self-contained script that you can run manually or schedule via Task Scheduler to run automatically.
Save each backup job as a batch file—one for documents (runs daily), another for video projects (runs after each editing session), and a weekly full backup of everything else.
Alternatively, you can use RealTimeSync, part of FreeFileSync, to monitor folders and trigger backups when files change. Unlike Task Scheduler, RealTimeSync detects and copies files in real-time depending on the set interval, so it’s ideal if you want to back up changes as soon as they happen.
While the lack of native scheduling is a limitation, both Task Scheduler and RealTimeSync offer reliable workarounds once set up correctly. Just remember to test your scheduled tasks—there’s nothing worse than discovering your automated backups haven’t run for months.
FreeFileSync also offers a portable version that runs directly from a USB drive, allowing you to set up backups on multiple computers. It’s a convenient, plug-and-play option for quick, hassle-free use.
The Not-So-Good Bits of FreeFileSync
FreeFileSync’s interface feels like it’s stuck in 2010. While it gets the job done, the cluttered layout and technical jargon can overwhelm newcomers. Even simple tasks like setting up filters or understanding sync directions often require digging through documentation or watching tutorials.
Cloud support is another area where FreeFileSync falls short. It natively works with Google Drive and supports FTP and SFTP connections for server-based storage. But if you’re using Dropbox, OneDrive, or other cloud services, the situation is trickier.
You’ll need workarounds, like installing the desktop apps to sync with local folders or using third-party tools such as Mountain Duck to mount cloud storage as drives in File Explorer. For a tool that’s actively maintained in 2025, this setup feels way outdated.
Download: FreeFileSync (Free, premium version availbale)
Despite these quirks, FreeFileSync gets the basics right. It’s reliable, completely free without ads, and gives you total control over your backup strategy. While it focuses on file and folder backup rather than full system imaging, it’s perfect for keeping your documents, photos, and personal data safe.
MakeUseOf
Ask Slashdot: Who’s Still Using an RSS Reader?
alternative_right writes: I use RSS to cover all of my news-reading needs because I like a variety of sources spanning several fields — politics, philosophy, science, and heavy metal. However, it seems Google wanted to kill off RSS a few years back, and it has since fallen out of favor. Some of us are holding on, but how many? And what software do you use (or did you write your own XML parsers)?
Read more of this story at Slashdot.
Slashdot