https://blog.finxter.com/wp-content/uploads/2023/08/pexels-photo-1095601.jpeg
Understanding Timeit in Python
The timeit module is a tool in the Python standard library, designed to measure the execution time of small code snippets. It makes it simple for developers to analyze the performance of their code, allowing them to find areas for optimization.
 The
The timeit module averages out various factors that affect the execution time, such as the system load and fluctuations in CPU performance. By running the code snippet multiple times and calculating an average execution time, it provides a more reliable measure of your code’s performance.
To get started using timeit, simply import the module and use the timeit() method. This method accepts a code snippet as a string and measures its execution time. Optionally, you can also pass the number parameter to specify how many times the code snippet should be executed.
Here’s a quick example:
import timeit

code_snippet = '''
def example_function():
    return sum(range(10))

example_function()
'''

execution_time = timeit.timeit(code_snippet, number=1000)
print(f"Execution time: {execution_time:.6f} seconds")
Sometimes, you might want to evaluate a code snippet that requires additional imports or setup code. For this purpose, the timeit() method accepts a setup parameter where you can provide any necessary preparation code.
For instance, if we adjust the previous example to include a required import:
import timeit

code_snippet = '''
def example_function():
    return sum(range(10))

example_function()
'''

setup_code = "import math"

execution_time = timeit.timeit(code_snippet, setup=setup_code, number=1000)
print(f"Execution time: {execution_time:.6f} seconds")
Keep in mind that timeit is primarily intended for small code snippets and may not be suitable for benchmarking large-scale applications.
Measuring Execution Time
The primary method of measuring execution time with timeit is the timeit() function. This method runs the provided code repeatedly and returns the total time taken. By default, it repeats the code one million times! Be careful when measuring time-consuming code, as it may take a considerable duration.
import timeit

code_to_test = '''
example_function()
'''

elapsed_time = timeit.timeit(code_to_test, number=1000)
print(f'Elapsed time: {elapsed_time} seconds')
When using the timeit() method, the setup time is excluded from execution time. This way, the measurement is more accurate and focuses on the evaluated code’s performance, without including the time taken to configure the testing environment.
Another useful method in the timeit module is repeat(), which calls the timeit() function multiple times and returns a list of results.
results = timeit.repeat(code_to_test, repeat=3, number=1000)
averaged_result = sum(results) / len(results)
print(f'Average elapsed time: {averaged_result} seconds')
Sometimes it’s necessary to compare the execution speeds of different code snippets to identify the most efficient implementation. With the time.time() function, measuring the execution time of multiple code sections is simplified.
import time

start_time = time.time()
first_example_function()
end_time = time.time()

elapsed_time_1 = end_time - start_time

start_time = time.time()
second_example_function()
end_time = time.time()

elapsed_time_2 = end_time - start_time

print(f'First function elapsed time: {elapsed_time_1} seconds')
print(f'Second function elapsed time: {elapsed_time_2} seconds')
In conclusion, using the timeit module and the time.time() function allows you to accurately measure and compare execution times in Python.
The Timeit Module
To start using the timeit module, simply import it:
import timeit
The core method in the timeit module is the timeit() method used to run a specific code snippet a given number of times, returning the total time taken.
For example, suppose we want to measure the time it takes to square a list of numbers using a list comprehension:
import timeit

code_to_test = """
squared_numbers = [x**2 for x in range(10)]
"""

elapsed_time = timeit.timeit(code_to_test, number=1000)
print("Time taken:", elapsed_time)
If you are using Jupyter Notebook, you can take advantage of the %timeit magic function to conveniently measure the execution time of a single line of code:
%timeit squared_numbers = [x**2 for x in range(10)]
In addition to the timeit() method, the timeit module provides repeat() and autorange() methods.
- The
repeat() method allows you to run the timeit() method multiple times and returns a list of execution times, while
- the
autorange() method automatically determines the number of loops needed for a stable measurement.
Here’s an example using the repeat() method:
import timeit

code_to_test = """
squared_numbers = [x**2 for x in range(10)]
"""

elapsed_times = timeit.repeat(code_to_test, number=1000, repeat=5)
print("Time taken for each run:", elapsed_times)
Using Timeit Function
To measure the execution time of a function, you can use the timeit.timeit() method. This method accepts two main arguments: the stmt and setup. The stmt is a string representing the code snippet that you want to time, while the setup is an optional string that can contain any necessary imports and setup steps. Both default to 'pass' if not provided.
Let’s say you have a function called square() that calculates the square of a given number:
def square(x):
    return x ** 2
To measure the execution time of square() using timeit, you can do the following:
results = timeit.timeit('square(10)', 'from __main__ import square', number=1000)
Here, we’re asking timeit to execute the square(10) function 1000 times and return the total execution time in seconds. You can adjust the number parameter to run the function for a different number of iterations.
Another way to use timeit, especially for testing a callable function, is to use the timeit.Timer class. You can pass the callable function directly as the stmt parameter without the need for a setup string:
timer = timeit.Timer(square, args=(10,))
results = timer.timeit(number=1000)
Now you have your execution time in the results variable, which you can analyze and compare with other functions’ performance.
Examples and Snippets
The simplest way to use timeit.timeit() is by providing a statement as a string, which is the code snippet we want to measure the execution time for.
Here’s an example:
import timeit

code_snippet = "sum(range(100))"
elapsed_time = timeit.timeit(code_snippet, number=1000)
print(f"Execution time: {elapsed_time:.6f} seconds")
In the example above, we measure the time it takes to execute sum(range(100)) 1000 times. The number parameter controls how many repetitions of the code snippet are performed. By default, number=1000000, but you can set it to any value you find suitable.
For more complex code snippets with multiple lines, we can use triple quotes to define a multiline string:
Python Timeit Functions
The timeit module in Python allows you to accurately measure the execution time of small code snippets. It provides two essential functions: timeit.timeit() and timeit.repeat().
The timeit.timeit() function measures the execution time of a given statement. You can pass the stmt argument as a string containing the code snippet you want to time. By default, timeit.timeit() will execute the statement 1,000,000 times and return the average time taken to run it.
However, you can adjust the number parameter to specify a different number of iterations.
For example:
import timeit

code_to_test = "sum(range(100))"

execution_time = timeit.timeit(code_to_test, number=10000)
print(execution_time)
The timeit.repeat() function is a convenient way to call timeit.timeit() multiple times. It returns a list of timings for each repetition, allowing you to analyze the results more thoroughly. You can use the repeat parameter to specify the number of repetitions.
Here’s an example:
import timeit

code_to_test = "sum(range(100))"

execution_times = timeit.repeat(code_to_test, number=10000, repeat=5)
print(execution_times)
In some cases, you might need to include additional setup code to prepare your test environment. You can do this using the setup parameter, which allows you to define the necessary setup code as a string. The execution time of the setup code will not be included in the overall timed execution.
import timeit

my_code = '''
def example_function():
    return sum(range(100))

example_function()
'''

setup_code = "from __main__ import example_function"

result = timeit.timeit(my_code, setup=setup_code, number=1000)
print(result)
Measuring Execution Time of Code Blocks
The timeit module provides a straightforward interface for measuring the execution time of small code snippets. You can use this module to measure the time taken by a particular code block in your program.
Here’s a brief example:
import timeit

def some_function():
    # Your code block here

time_taken = timeit.timeit(some_function, number=1)
print(f"Time taken: {time_taken} seconds")
In this example, the timeit.timeit() function measures the time taken to execute the some_function function. The number parameter specifies the number of times the function will be executed, which is set to 1 in this case.
For more accurate results, you can use the timeit.repeat() function, which measures the time taken by the code block execution for multiple iterations.
Here’s an example:
import timeit

def some_function():
    # Your code block here

repeat_count = 5
time_taken = timeit.repeat(some_function, number=1, repeat=repeat_count)
average_time = sum(time_taken) / repeat_count
print(f"Average time taken: {average_time} seconds")
In this example, the some_function function is executed five times, and the average execution time is calculated.
Besides measuring time for standalone functions, you can also measure the time taken by individual code blocks inside a function. Here’s an example:
import timeit

def some_function():
    # Some code here

    start_time = timeit.default_timer()
    # Code block to be measured
    end_time = timeit.default_timer()

    print(f"Time taken for code block: {end_time - start_time} seconds")
In this example, the timeit.default_timer() function captures the start and end times of the specified code block.
Using Timeit with Jupyter Notebook
Jupyter Notebook provides an excellent environment for running and testing Python code. To measure the execution time of your code snippets in Jupyter Notebook, you can use the %timeit and %%timeit magic commands, which are built into the IPython kernel.
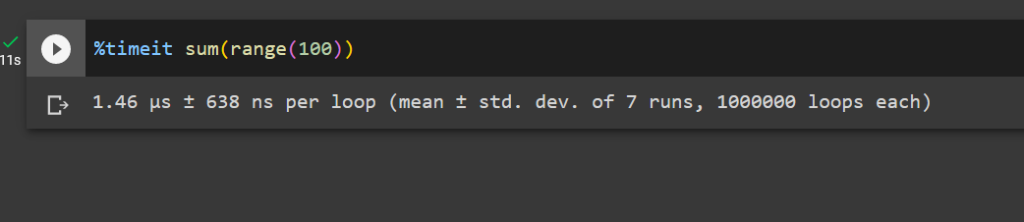
The %timeit command is used to measure the execution time of a single line of code. When using it, simply prefix your line of code with %timeit.
For example:
%timeit sum(range(100))
This command will run the code multiple times and provide you with detailed statistics like the average time and standard deviation.
To measure the execution time of a code block spanning multiple lines, you can use the %%timeit magic command. Place this command at the beginning of a cell in Jupyter Notebook, and it will measure the execution time for the entire cell.
For example:
%%timeit
total = 0
for i in range(100):
    total += i
Managing Garbage Collection and Overhead
When using timeit in Python to measure code execution time, it is essential to be aware of the impact of garbage collection and overhead.
 Garbage collection is the process of automatically freeing up memory occupied by objects that are no longer in use. This can potentially impact the accuracy of
 timeit measurements if left unmanaged.
By default, timeit disables garbage collection to avoid interference with the elapsed time calculations. However, you may want to include garbage collection in your measurements if it is a significant part of your code’s execution, or if you want to minimize the overhead and get more realistic results.
To include garbage collection in timeit executions, you can use the gc.enable() function from the gc module and customize your timeit setup.
Here’s an example:
import timeit
import gc

mysetup = "import gc; gc.enable()"
mycode = """
def my_function():
    # Your code here
    pass
my_function()
"""

elapsed_time = timeit.timeit(setup=mysetup, stmt=mycode, number=1000)
print(elapsed_time)
Keep in mind that including garbage collection will likely increase the measured execution time. Manage this overhead by balancing the need for accurate measurements with the need to see the impact of garbage collection on your code.
Additionally, you can use the timeit.repeat() and timeit.autorange() methods to measure execution time of your code snippets multiple times, which can help you capture the variability introduced by garbage collection and other factors.
Choosing the Best Timer for Performance Measurements
Measuring the execution time of your Python code is essential for optimization, and the timeit module offers multiple ways to achieve this. This section will focus on selecting the best timer for measuring performance.
When using the timeit module, it is crucial to choose the right timer function. Different functions may provide various levels of accuracy and be suitable for different use cases. The two main timer functions are time.process_time() and time.perf_counter().
time.process_time() measures the total CPU time used by your code, excluding any time spent during the sleep or wait state. This is useful for focusing on the computational efficiency of your code. This function is platform-independent and has a higher resolution on some operating systems.
Here is an example code snippet:
import time
import timeit

start = time.process_time()

# Your code here

end = time.process_time()
elapsed = end - start
print(f"Execution time: {elapsed} seconds")
On the other hand, time.perf_counter() measures the total elapsed time, including sleep or wait states. This function provides a more accurate measurement of the total time required by your code to execute. This can help in understanding the real-world performance of your code.
Here’s an example using time.perf_counter():
import time
import timeit

start = time.perf_counter()

# Your code here

end = time.perf_counter()
elapsed = end - start
print(f"Execution time: {elapsed} seconds")
In addition to measuring execution time directly, you can also calculate the time difference using the datetime module. This module provides a more human-readable representation of time data.
Here’s an example code snippet that calculates the time difference using datetime:
from datetime import datetime

start = datetime.now()

# Your code here

end = datetime.now()
elapsed = end - start
print(f"Execution time: {elapsed}")
Frequently Asked Questions
How to measure function execution time using timeit?
To measure the execution time of a function using the timeit module, you can use the timeit.timeit() method. First, import the timeit module, and then create a function you want to measure. You can call the timeit.timeit() method with the function’s code and the number of executions as arguments.
For example:
import timeit

def my_function():
    # Your code here

execution_time = timeit.timeit(my_function, number=1000)
print("Execution time:", execution_time)
What is the proper way to use the timeit module in Python?
The proper way to use the timeit module is by following these steps:
- Import the
timeit module.
- Define the code or function to be timed.
- Use the
timeit.timeit() method to measure the execution time, and optionally specify the number of times the code should be executed.
- Print or store the results for further analysis.
How to time Python functions with arguments using timeit?
To time a Python function that takes arguments using timeit, you can use a lambda function or functools.partial(). For example:
import timeit
from functools import partial

def my_function(arg1, arg2):
    # Your code here

# Using a lambda function
time_with_lambda = timeit.timeit(lambda: my_function("arg1", "arg2"), number=1000)

# Using functools.partial()
my_function_partial = partial(my_function, "arg1", "arg2")
time_with_partial = timeit.timeit(my_function_partial, number=1000)
What are the differences between timeit and time modules?
The timeit module is specifically designed for measuring small code snippets’ execution time, while the time module is more generic for working with time-related functions. The timeit module provides more accurate and consistent results for timing code execution, as it disables the garbage collector and uses an internal loop, reducing the impact of external factors.
How to use timeit in a Jupyter Notebook?
In a Jupyter Notebook, use the %%timeit cell magic command to measure the execution time of a code cell:
%%timeit
# Your code here
This will run the code multiple times and provide the average execution time and standard deviation.
What is the best practice for measuring execution time with timeit.repeat()?
The timeit.repeat() method is useful when you want to measure the execution time multiple times and then analyze the results. The best practice is to specify the number of repeats, the number of loops per repeat, and analyze the results to find the fastest, slowest, or average time. For example:
import timeit

def my_function():
    # Your code here

repeat_results = timeit.repeat(my_function, number=1000, repeat=5)
fastest_time = min(repeat_results)
slowest_time = max(repeat_results)
average_time = sum(repeat_results) / len(repeat_results)
Using timeit.repeat() allows you to better understand the function’s performance in different situations and analyze the variability in execution time.
 Recommended: How to Determine Script Execution Time in Python?
The post Measure Execution Time with timeit() in Python appeared first on Be on the Right Side of Change.
Be on the Right Side of Change