https://content.artofmanliness.com/uploads/2022/09/group2.jpg
Humans are social animals.
Anthropologists argue that humans have been so successful as a species because we’re great at coordinating and cooperating.
This high degree of sociability allowed hunter-gatherer tribes to kill giant mastodons and modern societies to land people on the moon.
When human groups function in a healthy and coherent way, we can do some amazing things.
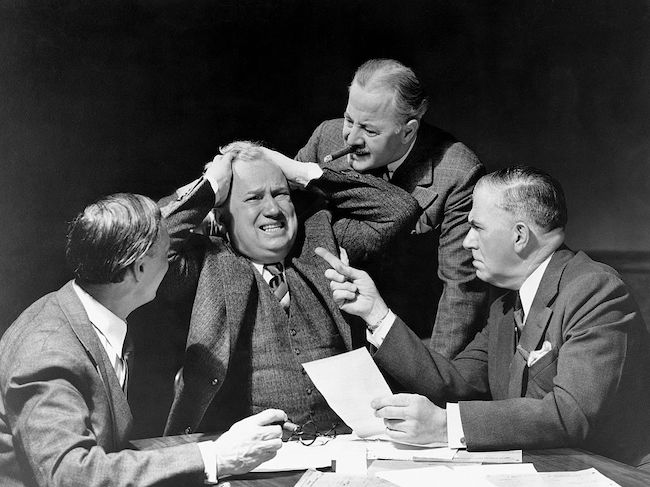
But when a group is dysfunctional, it can create significant discontent and chaos.
A rabbi and family therapist named Edwin Friedman spent a lot of time working with dysfunctional groups, from families to church congregations to global corporations.
He observed that no matter what type of group he worked with or in what country or culture that group was embedded, the dysfunctional ones all shared similar characteristics.
Friedman wrote about these characteristics in a book called A Failure of Nerve: Leadership in the Age of the Quick Fix. Someone recommended this book to me a few years ago, and it’s become one of my “quake books” — a book that fundamentally changed my perspective on things. I think about this book and the ideas contained in it a lot.
A Failure of Nerve was published posthumously in 1997 based on a rough manuscript Friedman had written before his death. While its contents aren’t fully fleshed out, it’s still a highly prescient book. The issues around dysfunctional groups that Friedman highlighted have only intensified in the quarter century since its release.
Below we summarize Friedman’s ideas on what makes for dysfunctional groups. But to understand those ideas, you first need to understand a concept he borrowed from something called the “Bowen family systems theory.”
Chronic Anxiety in Groups
The psychiatrist Murray Bowen developed a systems theory of family therapy back in the 1950s. Instead of focusing on individual family members to understand their problems, Bowen believed that you have to examine the “emotional system” of a family as a whole.
So, for example, if a kid is acting out at school and at home, traditional therapy would focus on the individual child and introduce techniques to help him or her become better adjusted.
In family systems theory, a therapist would take a step back and look at the family as a unit to figure out what might be causing the kid to act up. Maybe mom and dad have some issue that’s causing tension in the family. Perhaps the way the family reacts to this issue is exacerbating the problem. According to Bowen, the family operates out of a particular emotional/psychological system that shapes how its members behave within that family, and you can’t understand the problems of individual family members without understanding that familial milieu.
Friedman took this idea and developed the concept of “chronic anxiety” in a family.
By chronic anxiety, Friedman doesn’t mean mild angst or worry, nor that one or all family members manifest anxiety individually. For him, chronic anxiety is a high level of tension/nervousness that is shared by the family as a whole. It pervades the ether of the familial ecosystem. He puts it like this:
[The expression of chronic anxiety] is not dependent on the time or events, even though specific happenings could seem to trigger it, and it has a way of reinforcing its own momentum. Chronic anxiety might be compared to the volatile atmosphere of a room filled with gas fumes. Any sparking incident could set off a conflagration, yet rather than trying to disperse the fumes, people blame the person who struck the match.
The issues over which chronically anxious systems become concerned, therefore, are more likely to be the focus of their anxiety rather than its causes.
If you’ve been in a dysfunctional family or have seen a dysfunctional family up close, you’ve likely experienced what Friedman describes. Even when things seem okay, there’s an underlying tension that’s simmering beneath the surface. Things just feel off.
Friedman argues in A Failure of Nerve that you can see this debilitating dynamic in groups beyond families. Churches, non-profits, and companies can have this kind of chronic, systemic anxiety too. Friedman also believed that chronic anxiety could consume entire nations. He argued that many of the societal problems faced today in countries like the United States are due to chronic anxiety.
The 5 Characteristics of Highly Dysfunctional Groups
So how does chronic anxiety take hold within a group?
Friedman argued that when leaders aren’t willing to make tough choices — because of a failure of nerve — the following five characteristics emerge within the group. Each forms a vicious circle: anxiety in the group develops the dynamic, and the dynamic only deepens the group’s anxiety.
Reactivity
The vicious cycle of intense reactions of each member to events and to one another.
People in dysfunctional groups viscerally and automatically respond to stressful events and to each other’s responses to those stressful events. Instead of reacting to stressors with the human capacity for calmness and reason, people in dysfunctional groups react with their reptilian brains.
Reactivity in families and other social groups manifests itself in outsized uproars over perceived slights. The threshold of pain from these slights is extremely low. Even the most innocuous statement can be turned into an extreme offense by a highly reactive person. Instead of focusing on the problems they’re facing, reactive groups make things personal.
When discussing issues, members of reactive groups stake out positions along illogical extremes. They think and talk with the cognitive distortions that make people miserable S.O.B.s. They assume ill-will with others and see things in black and white. Charity or forgiveness are not allowed. Giving the benefit of the doubt? That’s for suckers.
People in highly reactive groups lack personal boundaries and are quick to make their problem everyone else’s problem. Reactive people try to diffuse their anxiety by spreading it to those around them.
Friedman argues that reactivity also manifests itself in a lack of playfulness in the group. Everyone becomes incredibly serious. There’s no room for the social benefits of friendly teasing because everyone is so thin-skinned. People begin to form entrenchments to protect themselves.
With reactivity, it doesn’t matter what the problem is. Highly reactive people will make the problem into a bigger deal than it needs to be.
Take a couple that furiously argues about how the dishes should be washed. The problem really isn’t about the dishes. The problem is the maladaptive reactivity the husband and wife have about how the dishes should be washed and the maladaptive reaction each have to each other about this issue. You could substitute any other issue and see the same dynamic play out. The reactivity is the actual issue.
You’ve likely seen this dynamic in other groups you belong to. Some guy at work has a hair-trigger anger issue. Any little thing sets him off. This guy blows a gasket if the coffee pot is empty. He reacts, and you react to him by getting angry yourself or resorting to passive aggression.
While all the characteristics on this list feed back on themselves, the vicious circle effect is particularly strong with reactivity: reactivity creates chronic anxiety, and chronic anxiety only makes people more reactive. The result is a highly fraught group dynamic; everyone is on pins and needles, waiting for the next stupid shoe to drop so they can go at each other again.
Herding
A process through which the forces of togetherness triumph over the forces of individuality and move everyone to adapt to the least mature members.
Groups tend to organize around a weakness.
When a group experiences a threat, they’re apt to circle the wagons. Group cohesion becomes the most important goal.
This instinct to come together with others when we’re feeling anxious and uncertain can be healthy in moderation. But according to Friedman, the herding instinct becomes dysfunctional when togetherness becomes an end in and of itself, rather than a means to group and individual flourishing.
In fact, making unity the sole aim often jettisons the potential for the majority of a group to flourish for the sake of appeasing a minority of the group’s least mature and most troublesome members.
You see this play out in dysfunctional families. Take the family with an alcoholic mom. Instead of telling Mom to get into rehab and get counseling to sort herself out, all the other family members begin to organize their lives around Mom’s problem. The kids walk on eggshells to ensure she doesn’t get stressed or anxious, because when Mom gets stressed and anxious, she starts to drink. Family members don’t share their problems with her and try to solve issues before she’s even aware of them, so she doesn’t start spiraling.
Telling Mom she needs to get her life together is hard and painful — it takes nerve. Hence, family members instead choose to contort themselves into psychological and emotional knots to ensure everything stays copacetic so that Mom doesn’t get upset. They sacrifice their own well-being, not even to make things good, but to keep them from going bad.
Families that organize around a weakness remind me of The Twilight Zone episode “It’s a Good Life.” A little boy named Anthony Freemont can kill anyone just by thinking it. He usually knocks someone off when that person does something that makes him unhappy. His family (and the whole community as well) is naturally terrified of Anthony, so they constantly tiptoe around, trying to keep him happy. They have to pretend he’s a good boy, even when he acts like a monster. They’ve organized themselves around a weakness: Anthony.
You see this same dysfunctional dynamic in groups outside of families. Instead of firing toxic and incompetent employees (which would be hard and painful), many workplaces will just figure out a way to organize themselves so that these people do the least damage. But that doesn’t solve the problem, and the group continues to suffer as a whole.
Or think about a church group where the most annoying and emotionally immature person effectively takes the congregation hostage. This individual complains about the dumbest things and takes extreme offense at minor slights. Instead of telling this member to shape up or ship out, the pastor or the other members of the group, who think of themselves as “nice Christian guys,” try to be “compassionate” and “empathetic” and lovingly reason with the person.
But this person can’t be reasoned with. They’re emotionally unhealthy. There’s a good chance they’ll take advantage of your empathy and reasoning by weaponizing it and turning it back against you.
“Isn’t it the Christian thing to do to help me?! What would Jesus do, brother?”
Friedman doesn’t have a problem with empathy and compassion. He was a rabbi and family counselor, after all. Being empathetic and compassionate was part of the gig. He just had an issue with “unbounded empathy.” You need to combine empathy with reason. When you try to be empathetic with someone who’s emotionally unhealthy, you can end up being un-empathetic to everyone else; in changing the group’s structure or culture to accommodate the demands of a vocal minority, you can sabotage the group’s ability to meet the needs of the majority.
Friedman also doesn’t necessarily have a problem with families or groups organizing around a weakness, as long as it’s done for a healthy purpose. Think of a family in which one of the family members has cancer. That’s a weakness, so it’s good and natural that a family comes together to help that family member out. Schedules will need to be rearranged so that oncology appointments can be attended. Other family members may need to pick up some slack in terms of chores.
But in a healthy family, weakness doesn’t become the main event. They’ll still seek to make life as “normal” as possible for everyone else. Group togetherness is a means to an end: the family and its individual members living a flourishing life.
Think of the herding instinct as an immune response. In a healthy organism, the immune response is calibrated so that when the body is sick, it kicks into gear at the right time and intensity so that it only kills the outside pathogen while doing as little damage to the body as possible. That’s what healthy herding looks like.
Unhealthy herding is like an autoimmune disease in which the immune system is constantly firing and damaging the body and making it sicker. The cure becomes deadlier than the disease.
Blame Displacement
An emotional state in which family members focus on forces that have victimized them rather than taking responsibility for their own being and destiny.
Friedman observed that when dysfunctional families have an underlying group anxiety issue, instead of each member taking responsibility for themselves and making changes to themselves to reduce the anxiety, they blame other members of the family.
“Well, I wouldn’t be so angry if the kids weren’t so annoying!”
Besides shifting blame onto their fellow members, dysfunctional families and groups will also shift the responsibility for their chronic anxiety onto outside people or institutions. Suppose Gunnar is having a behavioral problem in school. In that case, a dysfunctional family won’t look within to see what they can do to help little Gunnar but instead will cast aspersions on the school’s teachers and administrators and place all the blame on them.
Quick-Fix Mentality
A low threshold for pain that constantly seeks symptom relief rather than fundamental change.
Mom and dad are always fighting, and brother and sister are constantly bickering. So Dad plans a big vacation to Disneyland to bring the family together and distract them from their problems. The family does have fun, but since they didn’t solve the underlying problem of chronic anxiety in their family, it rears its ugly head again once they get back home. So Dad buys the family a new flatscreen TV. On and on the cycle of quick-fixes goes.
You also see this dysfunctional dynamic in struggling companies or volunteer organizations that develop “programs” to pull the group out of a rut. They’ll spend tons of money on team-building retreats or consultants that provide communication tools that will supposedly create better group cohesion.
These programs and initiatives might temporarily relieve the tension and discontent in the group, but because they’re not tackling the underlying issue — chronic anxiety — nothing changes in the long run. Members are still unmotivated, cynical, and untrusting.
Lack of Well-Differentiated Leadership
A failure of nerve that both stems from and contributes to the first four characteristics.
According to Friedman, the most significant characteristic that leads to and drives debilitating, chronic anxiety in a family or group is an absence of real leadership.
A lack of leadership — the lack of nerve to make hard decisions — creates the kind of uncertainty and disorganization that generates anxiety in an organization in the first place. As anxiety increases, the impulse towards all the above characteristics rises, and these dynamics deepen the anxiety.
This first vicious circle creates a second: Poor leadership creates dysfunction; a dysfunctional group struggles to attract good leaders; a lack of leadership exacerbates the dysfunction.
Friedman argues that the essence of poor leadership is the degree to which a leader embodies and exemplifies the characteristics of dysfunction.
Poor leaders are highly reactive and spend most of their time putting out the latest fire.
Poor leaders are reluctant to take decisive action for the good of the group when a group member is making everyone else miserable. Instead, they’ll try to make sure everyone “feels” good, even if that means the group’s most immature person feels good and doesn’t feel left out, while everyone else suffers.
Poor leaders won’t take responsibility for the problems of a group and instead will shift blame to other members of the group or outside people or institutions. The buck never stops with them.
Poor leaders will implement gimmicky programs or initiatives that might temporarily boost morale but do nothing to solve the underlying issue of chronic anxiety.
In contrast to the poor leader who gets caught up in the same reactivity, herding, blame-shifting, and quick-fix-thinking that the rest of the group’s members struggle with, an effective leader is what Friedman calls “well-differentiated.” He’s able to differentiate himself — separate himself — from these anxieties and maladaptive behaviors. A well-differentiated leader maintains a “non-anxious, well-principled presence” in the face of the stressors swirling outside and within the group.
How do you become this kind of well-differentiated leader?
We’ll answer that question next.
The post The 5 Characteristics of Highly Dysfunctional Groups appeared first on The Art of Manliness.
The Art of Manliness

 From Nazi-occupied Poland to 3D printers in your basement, we take a look at some of the most interesting zip guns ever made!Recoil


