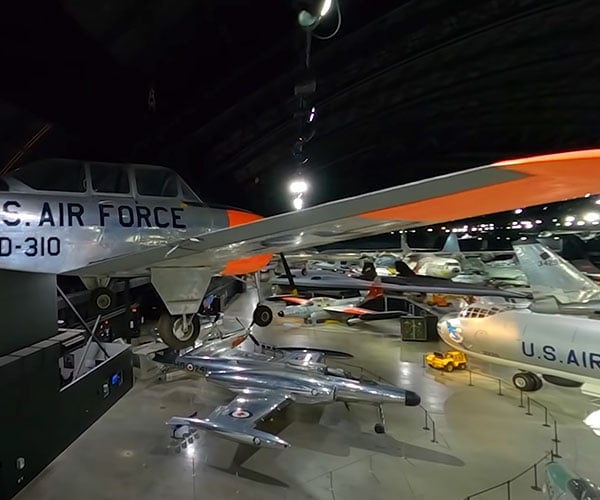
If you’re going to take a tour of Ohio’s National Museum of the U.S. Air Force, it might as well be from the air, right? Well thanks to NURK FPV, we can take a first-person drone flight through the museum’s awesome collection of aviation marvels without having to leave our homes.
Add a personal touch to your digital projects by turning your handwriting into a custom font. It’s a lot easier than you might think thanks to a web app called Calligraphr. And there are plenty of creative uses for you to explore.
In this article, we’ll show you how to make your handwriting a font with Calligraphr for free. You can add letter variants for a natural style, adjust the alignment and spacing, and even export the end product as a standard font format. And it only takes ten minutes.
What Is Calligraphr
Formerly MyScriptFont, Calligraphr is a free web app that lets you scan your handwriting to create a custom font. It’s easy to use and offers loads of features that help you get your font just right.
Export your custom font as TTF or OTF formats to use it with Windows or macOS computers. You might want to use your custom font to add a personal touch to invitations, design calligraphic artwork, or to write a webcomic.
Calligraphr offers the following features to help perfect your font:
Choose the exact character sets you want to include in your font, including accented letters, symbols, and numbers.
Upload variants for each letter to create a random authenticity to your handwriting.
Edit individual characters after uploading to darken the lines, adjust the size, and tweak the alignment.
Save fonts in the browser so you can return to keep editing them over multiple sessions.
Calligraphr Pro Subscription
You can use Calligraphr to create and export a custom handwriting font for free. But a Pro subscription unlocks extra features to help you make your handwriting into the best font possible.
Calligraphr Pro costs $8/month, although you can get a 50 percent discount if you pay for six months at once. With a Pro subscription, Calligraphr lets you work on more than one font at a time, up to a maximum of 12. It also lets you add up to 480 characters to each font.
You can also add more than two variants for each character, up to a maximum of 15. A variant is an alternate version of a particular letter or number. The finished font uses different variants at random to make your font look more natural.
Another major upgrade that comes with a Pro subscription is the ability to add ligatures to your font. In case you aren’t familiar with common typography terms, a ligature is a line that connects two letters in joined handwriting.
Do I Need Calligraphr Pro to Make a Custom Font?
Calligraphr Pro offers great benefits to font creation, but you can turn your handwriting into a perfectly good font without paying for anything.
The main downside to using Calligraphr for free is that your font is limited to 75 characters. That’s enough space for upper and lower case letters, every number, and common punctuation marks, but not much else.
You’re also limited to two variants per character. However, this still adds enough randomization to your font to make it more natural than most.
Finally, you can’t add ligatures with Calligraphr Free. But if you don’t join your handwriting up anyway, it won’t make a difference.
How to Use Calligraphr to Turn Your Handwriting Into a Font
To get started, head to the Calligraphr website and click the Get Started For Free button to create an account. There’s no need to upgrade to a Pro account unless you want more than two variants or ligatures.
After signing up and logging in, click the Start App button to load the Calligraphr web app. Then follow the steps below to turn your handwriting into a font.
Step 1. Create a Font Template
First you need to create a template for your custom font. This is essentially a grid of boxes with one box for each character you want to include in your font. After creating the template and printing it out you need to handwrite each letter into the boxes. Then scan it back into your computer to create the font.
Calligraphr gives you a huge amount of control over the template, letting you choose exactly which characters you do and don’t want to include in your font. With a free account, you can have up to 75 characters in a single font.
Click the Templates button in the top-left corner to create a new template, then choose the characters you want from the sidebar. We suggest you add Minimal English and Minimal Numbers, which brings you up to 70 characters.
Click a character you don’t want to and Delete it from the template. Then add more character sets from the sidebar. If you signed up for a Pro account and want to include ligatures, select it from the Miscellaneous section.
Step 2. Print and Complete Your Template
After adding all the characters you want in your font, click the Download Template button. Choose a file name and format for the template.
Adjust the slider to change the size of the template cells. These are the boxes you need to write your letters in. If you have particularly large or small handwriting, you might want to adjust the size accordingly. You also might want to make the boxes bigger if you plan to create a calligraphic font. Otherwise, leave it as the default.
Finally, choose if you want helplines and background characters. We recommend adding helplines to make sure you write each letter in the same place at the same size. However, it might mean you need to erase them manually after scanning your template. We don’t recommend background characters because they make it harder to create a unique style.
When you’re happy, click Download to save your template, then print it out.
Now use a black pen to fill out the template, drawing a single character into each box. A felt tip pen is better than a ballpoint, but either should be fine so long as you make sure each line is clearly drawn.
Step 3. Upload and Edit Your Handwriten Font
After completing the font template, scan it or take a clear photo, then save that file to your computer. In the Calligraphr web app, click My Fonts followed by Upload Template. Select the picture of your font template, then wait for Calligraphr to process it.
After the processing is complete, Calligraphr shows an overview of each character in your custom font. You can delete characters from this page, but we suggest you see if you can fix mistakes from the edit page rather than deleting anything.
Choose to Add Characters to Your Font to finish the upload.
Click a character and select Edit Character to make adjustments. You can draw new lines using various brush shapes and sizes or click the Erase button to clean up the scan. Make sure you edit each of your characters for the best custom font.
You should also use the Adjust Baseline/Size menu to ensure each character is the same height and size as all the others. This screen shows your selected character in a row with the rest of the font. Use the arrows to adjust the baseline or size for better consistency.
Step 4. Build and Export Your Custom Font
After editing each of your characters, click the Back button and choose to Build Font to turn your handwriting into a font.
If you chose to add variants—which you can do by uploading multiple font templates one after another—enable the option to Randomize Characters. That way your font doesn’t use the same variants too often.
Click Build and wait for Calligraphr to finish turning your handwriting into a font. When it’s complete, make sure it looks good in the preview, then download the TTF or OTF file.
Open the font file on your computer and follow the prompts to Install it. After this, it should be available in all your apps. You can also install fonts on your iPhone or iPad.
Get More Free Fonts to Add to Your Collection
Now you know how to make your handwriting a custom font. Use it to personalize everything from wedding invitations to business cards. But don’t feel you need to use it for everything.
Calligraphr lets you create as many custom fonts as you like, so you could repeat the steps above for multiple different handwriting styles. If you don’t have that much creativity in you, take a look at the best free font websites to use other people’s fonts instead.
Apple’s Magic Keyboard works so well that it blurs the line between iPads and full-blown Macs. Now, iFixit has taken a closer look at what’s inside its keys as well as its sturdy, elegant trackpad, which we called one of Magic Keyboard’s biggest selling points in our review. Apparently, the trackpad uses a lever system with just one button at the center. That means you’re clicking that one button wherever you press on the trackpad, whether it’s the corners, the edges or the center of the structure.
Unfortunately, iFixit has yet to dismantle the whole keyboard due to social distancing rules — the trackpad was the only part of the device its team could take apart easily. They used X-ray to scan the inside of the keyboard, though, and found scissor (instead of butterfly) switches. It also has large metal plates where your palms typically rest likely to prevent bending and serve as weights to stabilize the device when attached to an iPad.
The Magic Keyboard will set you back $299 (11-inch) or $349 (12.9-inch) and comes as a case that attaches to an iPad Pro. It’s definitely going to cost you, so getting a look at what’s inside could help you decide whether it’s worth it.
Art of Engineering explains how the tall construction cranes used to build skyscrapers are able to increase their own height. The process, known as “climbing” a tower crane requires precision and patience, and can be incredibly dangerous if not done properly.
Supervolcanoes, solar flairs, terrorists, zombies, Boogaflu… oh my!
The idea of “bugging out” is a hotly debated one in the survival, prepper, and gun owner communities.
While we each have our own reasons for wanting a bug out bag(s)…this list should get you started on the essentials.
Man with the last roll of TP, unknown apocalyptic event, Philadelphia, 1976, colorized
I’ll cover what scenarios require a bug out bag (BOB), different types of BOBs, the actual backpacks, and all the goodies to include.
By the end you’ll have a great understanding (and shopping list) to create your own for your specific situation.
Table of Contents
Loading…
What Is “Bugging Out”?
The act of “bugging out” is leaving your home or other location as quickly as possible probably due to an emergency of some kind.
What kind of emergency?
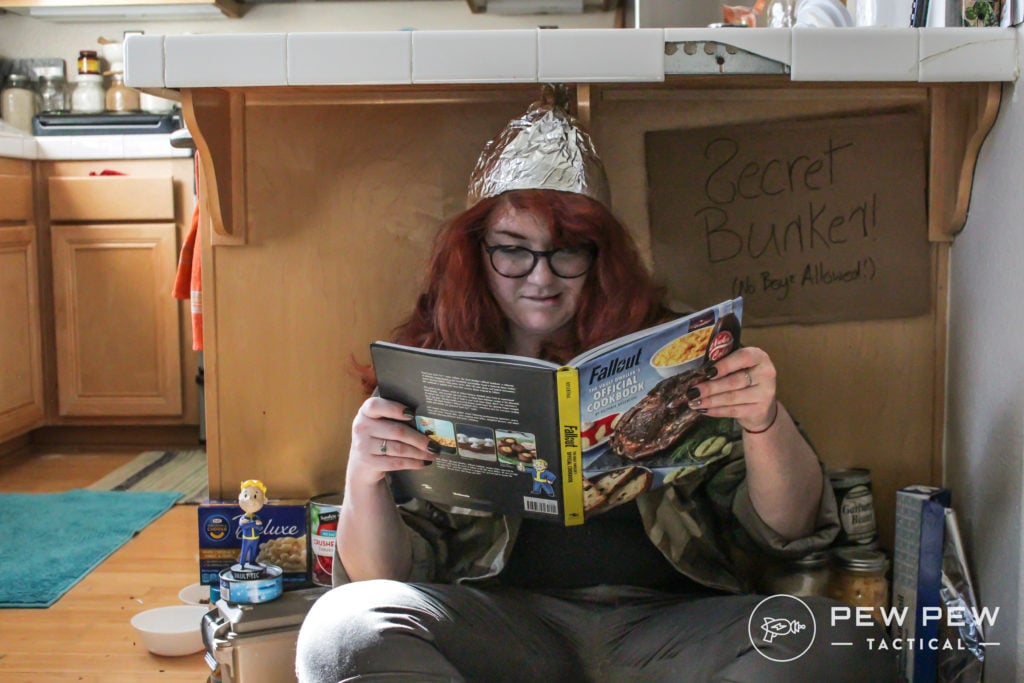
While the tinfoil hat in all of us might want to prepare for zombies, terrorists, or Russians–the reality is that we’re far, far more likely to need a survival or bug out bag due to natural disasters.
What kind though depends on where you live.
California lyfe
These bags are designed to sit waiting for when you need them.
You don’t have time to pack, you don’t have time to grab one more item, you have exactly the amount of time it takes to get your family, your dog and your bag.
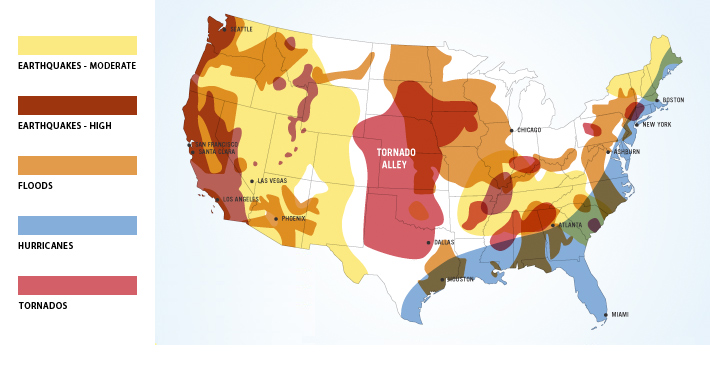
What Disaster Do I Prepare for?
This largely depends on where you live. Where I am in the desert of California, tornados are not on my list of things I need to worry about. But wildfires and earthquakes are VERY high on my list!
That map should at least give you an idea, I would highly recommend that you poke around the internet for your location and see what else might be in store for you.
What you prep for changes how you prep!
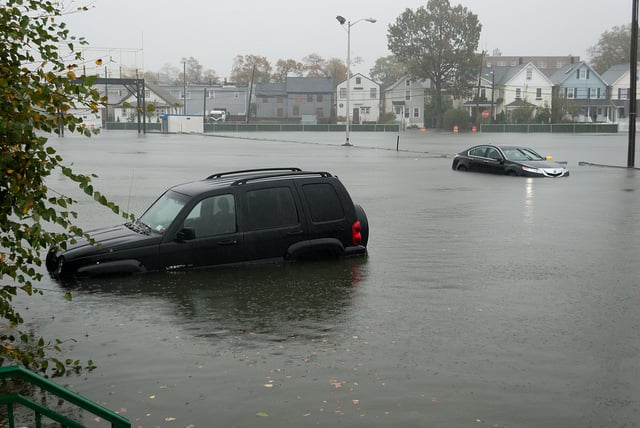
Flood
Flooding rarely comes as a complete surprise. If you are in an area where flooding is a concern, the best thing you can do is be ready to leave when the evacuation notice comes.
Since this normally comes before the flood, your bug out bag can be more orderly. Think of it as being packed for a wet vacation.
Water water, everywhere, better have at least a gallon to drink.
There are still some extras that you should consider including in your bags. Communications, ID, money, medications, and more.
Something most other disasters won’t leave you time for is priceless items, family pictures, baby’s first teeth, rare heirloom firearms, and more. Knowing exactly what is important enough for you to take with you will save a lot of time when it comes time to leave.
Earthquake
While infrastructure design has improved over the last several decades, much of our nation’s infrastructure is in poor repair. Freeway interchanges, bridges, and overpasses are highly susceptible to an earthquake.
Plan your bug out route or your route home with this in mind. Even if the freeway you normally take home is still intact, it might be massively overcrowded due to other failures and closed roads.
Damage after the 6.7 Northridge quake, 1994, source CNN
This might also force you on foot rather than driving. While this can free you from being reliant on roads, it does mean a radical change to your path.
Dust and other particulates might be in the air due to buildings coming down, a respirator can come in handy!
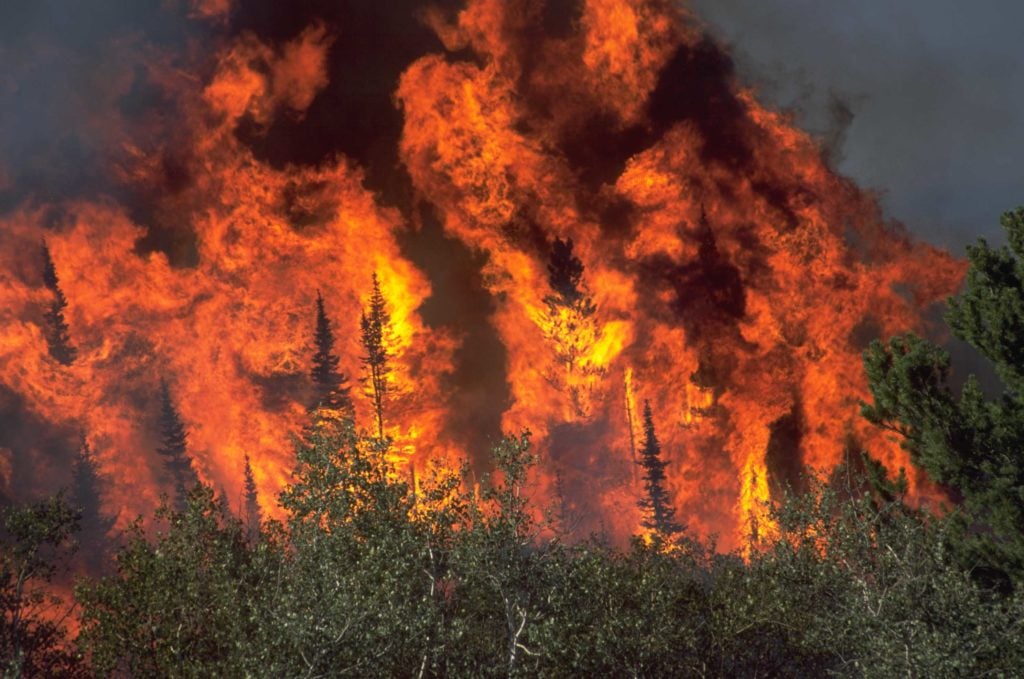
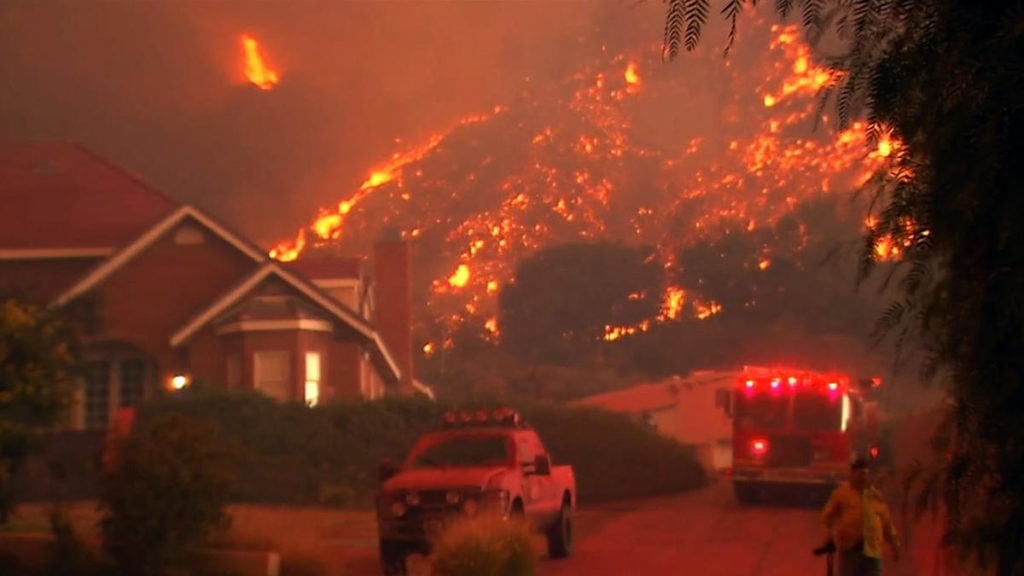
Wildfire
Two major concerns when it comes to wildfires–speed and breathing.
Fire can move unpredictably and it can move very quickly, the physics behind it is actually really cool but the point is that 15 mph or more is not impossible for fire.
If you look out the window and see this, you should have left already.
Speed in leaving the area is critical and so a well-stocked bag is a must. Don’t waste time trying to find one more item, just have it in the bag!
With fire comes wind, again cool physics come into play, but the result is that wildfires can create winds in excess of 125mph. This throws a lot of ash, dust, and bad stuff into the air and can spread for miles outside of the fire itself.
A great respirator and mask is a prime recommendation.
Hurricane
Hurricanes rarely pop up and surprise you, there are normally at least a few days for a hurricane to develop and then travel to make landfall in the USA.
The best defense against a really bad hurricane is to not be there when it hits. But for more mild ones, it’s not unreasonable to just ride them out–as long as you’re prepared and do so safely.
As totally badass as this gif is, don’t be this dude when a hurricane comes
Listen to the weather service and follow their recommendations, when they say it’s time to leave then it’s time to leave. When they say that it’s too late to leave… well, I hope you’re already in a safe area.
Keep a go-bag ready, but also keep a stock of supplies on hand for when you’re bugging in.
Make sure you know how and where to go when the time comes to leave. Know the route, know alternate routes, have maps that cover those routes and more.
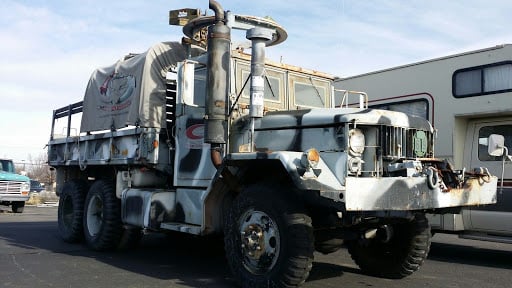
Keep your vehicle in ready condition. If you’re going to use your day-to-day ride keeping it in good condition is easier–but if you have a dedicated bug-out vehicle, make sure you strictly adhere to a maintenance schedule.
Wait, you don’t have a customized deuce and a half bug out truck? Pfft… casual.
Please don’t forget to check your ego at the door. Just because you were born and raised on the coast of Florida doesn’t actually make you immune to a CAT 5 hurricane.
Oh, and make sure you have copies of your insurance paperwork in a safe location outside of the normal areas hit by hurricanes. Physical or digital copies will come in handy once it is time to go home and rebuild.
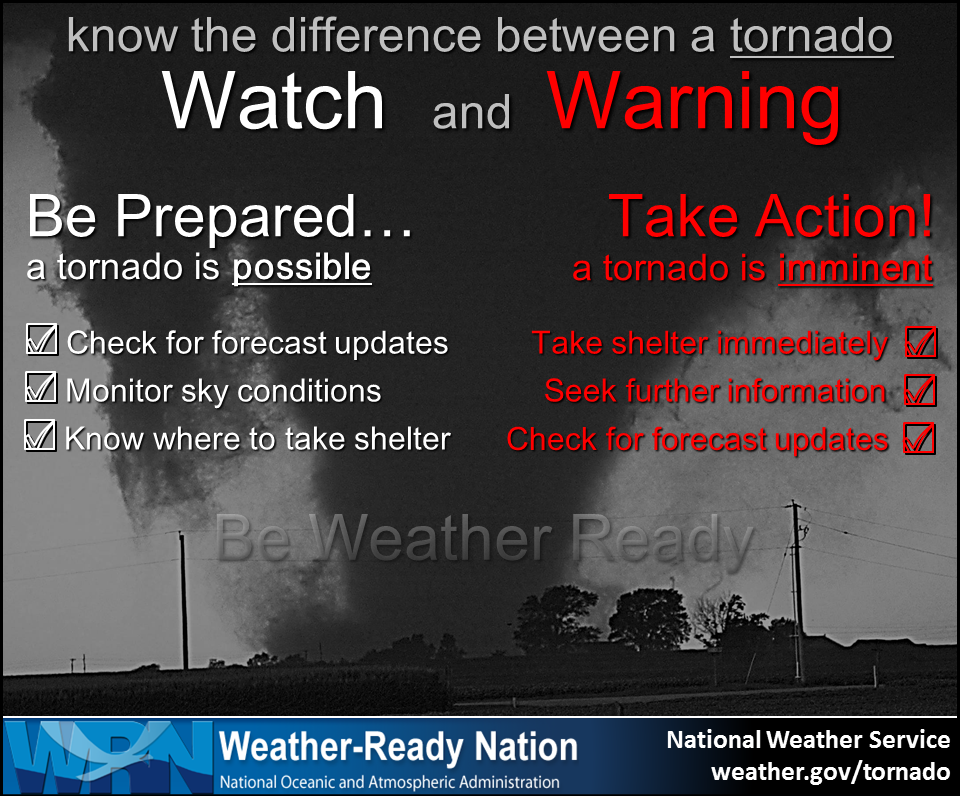
Tornado
Unlike hurricanes, tornados can come out of nowhere and hit hard when they do.
The only reasonable method of prepping for a tornado is to have a bug-in plan. They come too often and with too little warning to effectively plan and enact a bug-out.
Oh my
Have your space ready for use at a moment’s notice. Have supplies stored in place and secured safely–just imagine how embarrassing it would be to have a basement set up for a tornado just for you to be done in by a can of soup falling off the top shelf and hitting you in the head. Don’t be that guy!
Read up on the warning signs of a tornado, sign up for your local weather alerts, and have a plan for if you are not at home (or wherever your safe location is) and a tornado hits.
Make a plan with your family for communication if you’re in different locations. Where will you meet up after? How will you get in touch? Plan ahead.
24-Hours, 48-Hours, 72-Hours
There are a lot of different kinds of survival or bug out bags. The very broad general categories we’re going to talk about mostly fall into three types.
24-Hour Bag
48-Hour Bag
72-Hour Bag
There are a bunch of names for these bags, Get Home Bag, Bug Out Bag, Leave Home Bag, War Bag, etc. The problem with these names is that there is no real definition behind them.
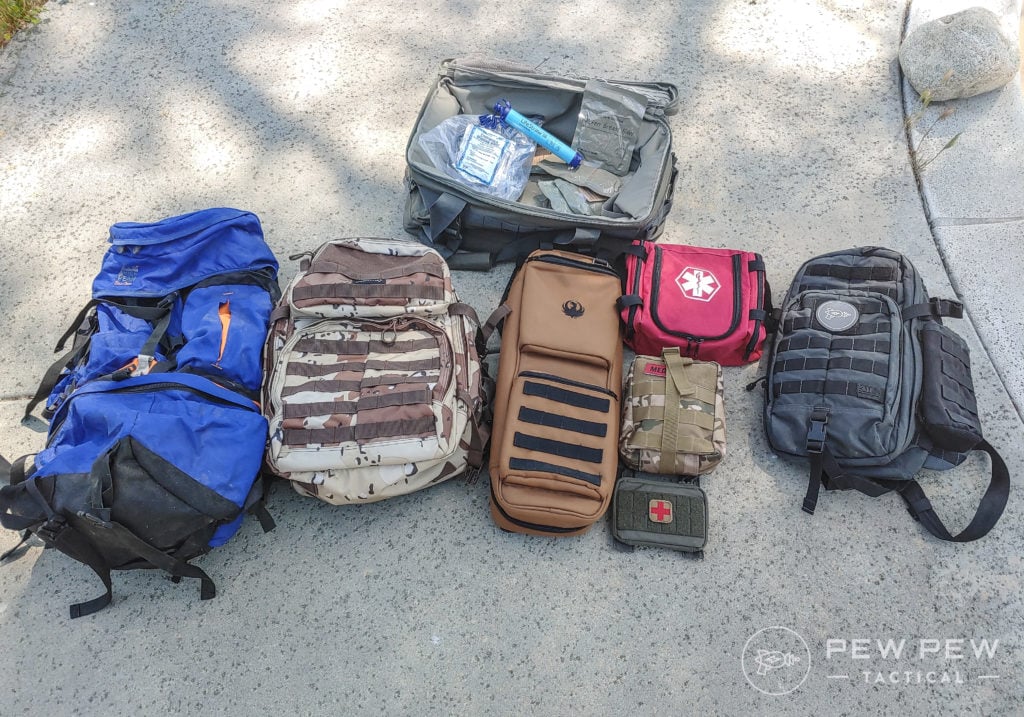
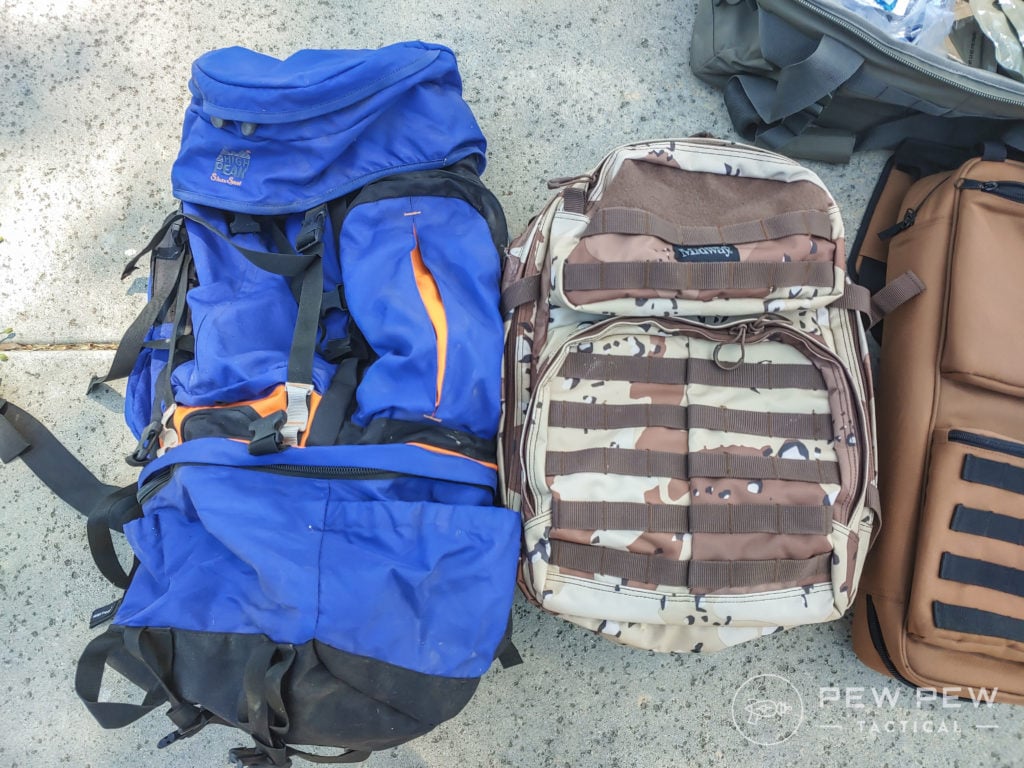
Some of my personal Bug Out Bags (top, left to right) 5.11 Range Master, High Peak Internal Frame, MidwayUSA 3-day assault pack, Ruger 10/22 takedown backpack, medical packs, 5.11 MOAB 10
What I call a Bug Out Bag you might call a Get Home Bag. Neither is wrong, but it does cause some communication issues.
We’re keeping it simple and just calling the bag based on the number of hours it is designed for.
This also makes it easy to understand and assess what your bag can and can’t do.
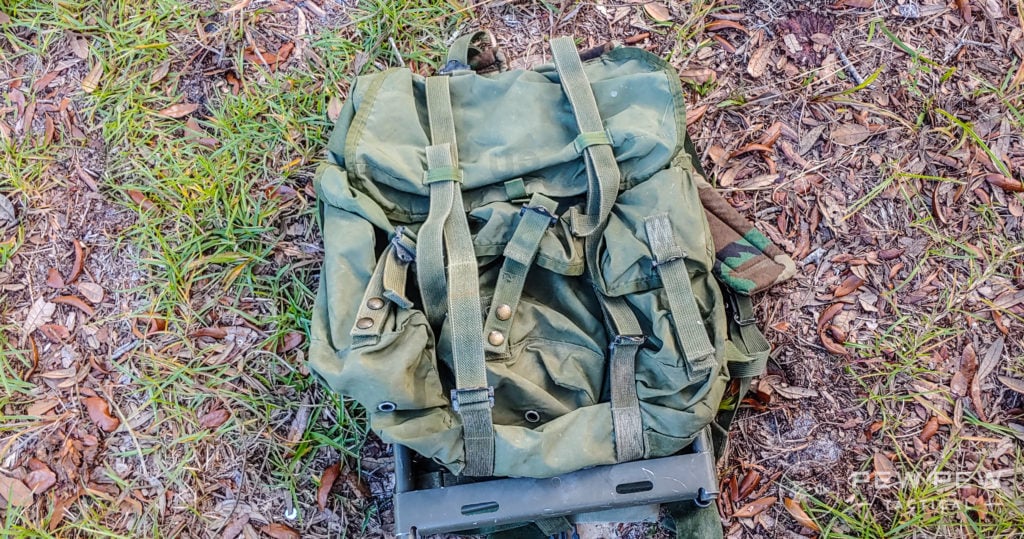
A little old school, but a surplus Alice Pack makes for a great bug out bag.
There are some things to consider with each bag type and we’ll share what our plan is for each type also. This will help you at least get an idea of what to do with each. But again, it’s going to be up to you to choose what is right for you.
24-Hour Bag
Often stored at a secondary location, such as your vacation home, worksite/office, or mother-in-law’s home, etc. this bag is normally just enough to get you from point A to home.
Generally speaking, these bags are meant for one person and to give you everything you might need for around 12- to 24-hours.
You can bug out with it, but you’ll be really limited. Its main goal is to just hold you over long enough to reach a safe location. And that location needs to be fairly close by. It gives up longevity for mobility.
Some questions to ask yourself while building this bag:
Where am I storing it?
How far from home am I?
Can I get home in <24-hours? (keep in mind that depending on the event, roads, bridges, tunnels, etc. might be closed)
Will I be alone or with someone?
Personally, I keep my 24-Hour Bag simple and very portable. I built my bag for getting from the office back to home after a massive earthquake that has taken out bridges, roads, and cut communication.
With that in mind, my bag is lightweight and holds stuff I need for about 24-hours of walking.
48-Hour Bag
I normally don’t really consider the 48-Hour Bag to be a real Bug Out bag, for me it falls into a dead zone of time frames. If I need to bug out, I need longer than 48-hours of gear. If I need to just get somewhere safer, I can do it faster than 48-hours.
Your situation might be different though, only you can decide.
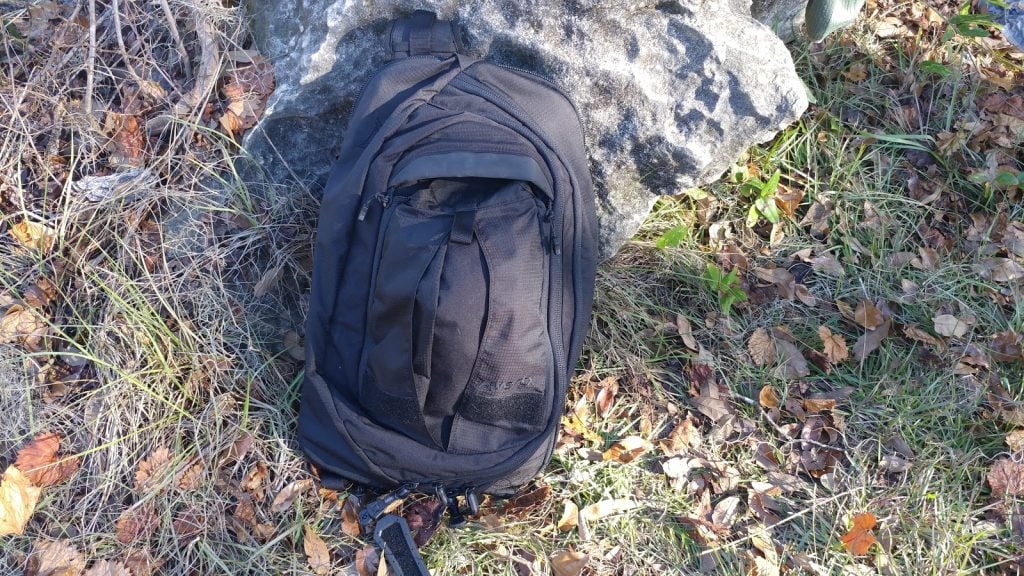
Vertx Commuter Bag, simple, understated, enough size to fit what you need for a couple of days.
However, the 48-hour bag is perfect for the weekend or for responding to a situation that you know will have supplies on hand.
Sometimes called a “War Bag” or a “Go Bag” this version of the 48-Hour bag is meant more for the professional than it is the survivor. Basically, this is a bag that you can grab and walk out of the house with to get on a plane/boat/train/camel to go to a location and do your job.
Now if you’re an accountant, you might not have much use for that kind of bag. Tax season rarely involves needing to go across the country.
Unless you’re The Accountant… who actually had a very impressive bug out set up!
However, this isn’t just for duty work like police or military. Many firefighters I know keep a Go Bag, oil and gas workers, electricians, and more are often needed in large numbers and far away so keeping a Go Bag can be a handy thing.
My first experience with Go Bags actually goes back to 9/11. While I was only a kid at the time, several members of my family were volunteer police chaplains in Southern California.
The morning of 9/12, over 1,000 chaplains from around the nation started traveling to NYC to assist. More than 75 of those were from my local area and I personally knew most of them.
Almost none of them had Go Bags.
All of them built a Go Bag after they returned home several weeks later.
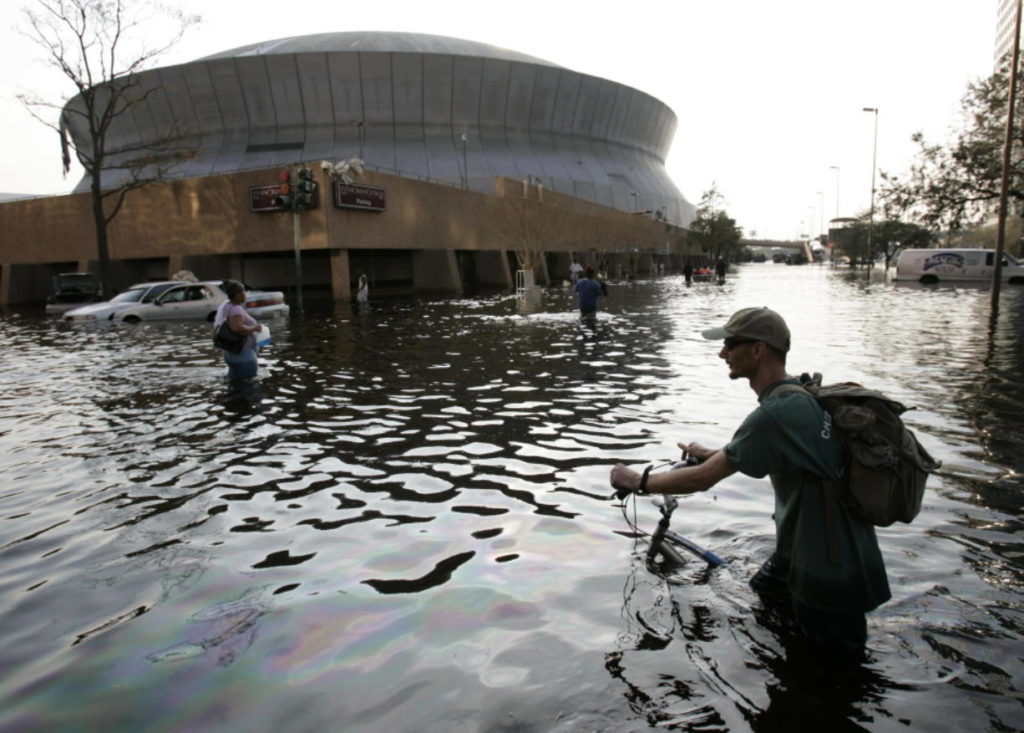
Many of them used their Go Bag only a few years later when they responded to assist in the aftermath of Hurricane Katrina.
Flooded Superdome in the Aftermath of Hurricane Katrina
For a Go Bag, I try to keep mine ready for at least 48-hours of self-reliance. This is a great middle-ground between the bare-bones and the overpacking and generally is lightweight and easy to fit in a carry-on size backpack.
What Goes In My Go Bag?
This is highly dependent on you and what it is you do. A firefighter needs different things than an oil and gas repairman.
What do you use daily? What do you use during a workday when Murphy’s Law strikes? Put it in your Go Bag!
Also consider that if you have a Go Bag, will you need to fly with it? And if so, will you have to get past TSA with it? If so, maybe don’t pack that 9″ knife or that Glock 17.
This is what most people think of when they think of a survival bag. A bag, or pack, that you can pick up and leave with and be self-sufficient for 48- to 72-hours.
(left) My High Peak backpack I bought used off eBay 11 years ago. It’s my camping bag and one of my 72-hour bags. It has hundreds of miles of camping and hiking on it and is still going strong.
Personally, I built mine on a 72-hour plan. I assume I’ll be on foot, so I keep it fairly lightweight, and I assume that I might need to defend myself.
Consider your situation while you build a bag. Children, pets, other family members–their ages and ability all are things to consider when building not only your bag, but their bags also.
However, a 72-hour bag is a bit large. FEMA recommends that you have at least 3 days worth of supplies in case of a major disaster and I would tend to agree.
But some of us are just not able to pack that much gear and still walk.
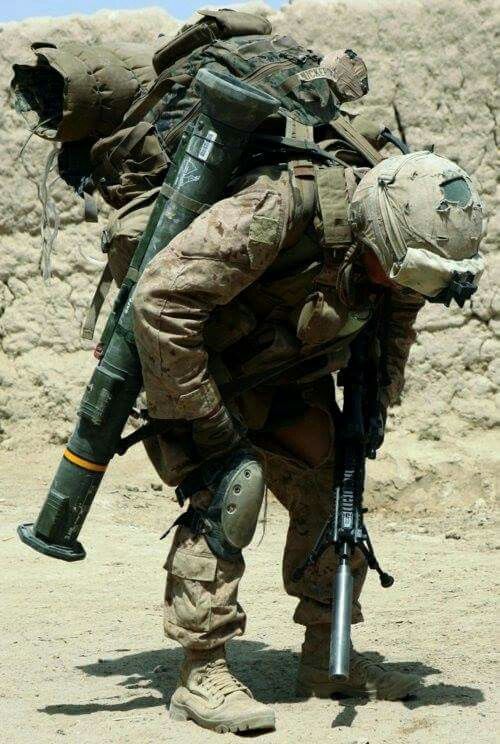
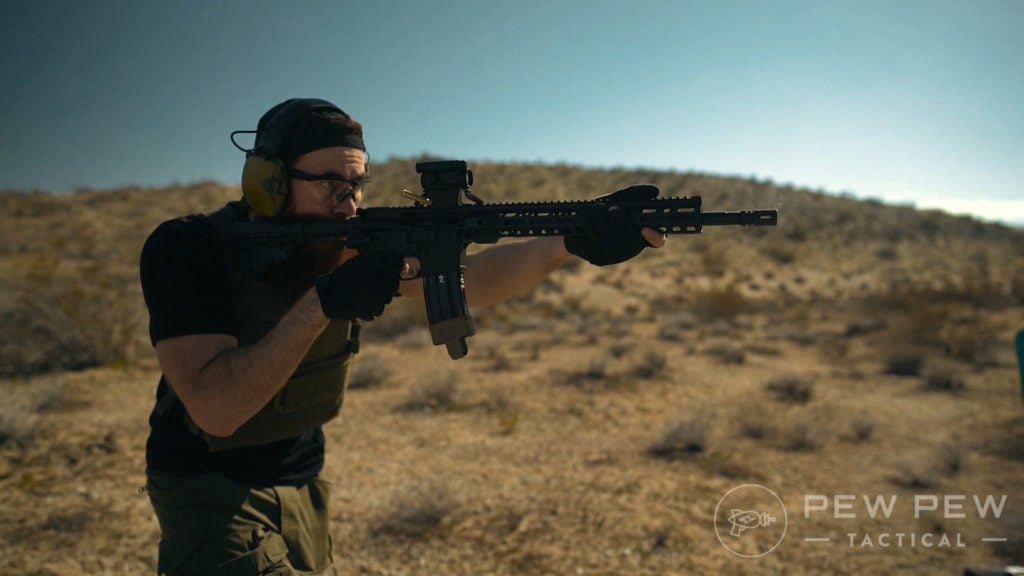
If you’re going out on patrol, it makes sense to carry everything. But make sure you have the physical ability to do it!
If so, maybe a smaller 48-hour bag is more in line with what you can do.
Non-Standard Bags
I would recommend that most bug out bags be built using packs of some kind, but not all of them need to be.
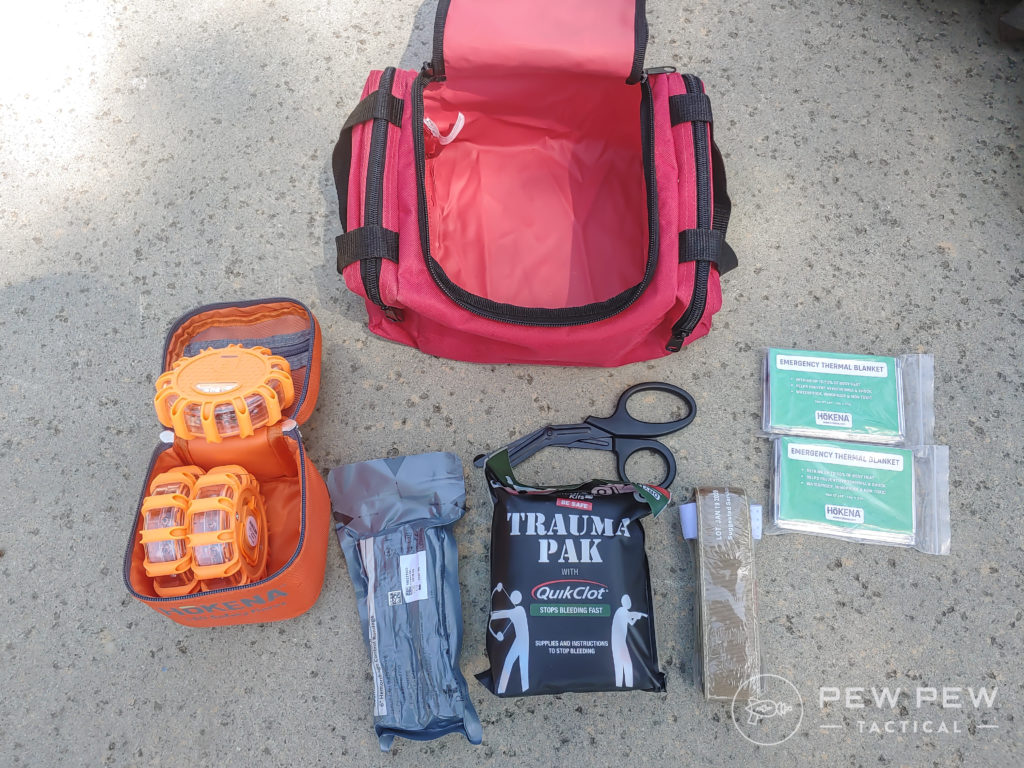
While I wouldn’t recommend keeping all of your gear in packs that are hard to carry on foot, keeping some of it in plastic containers or range bag style bags can make storage a lot easier.
This is a fairly simple bag that I keep next to my spare tire. Bright red, easy to use, one large compartment. In it, I have medical supplies, shears, and battery-powered road flares.
Survival Bags (The Actual Bag Itself)
There are several great bag manufactures out there and there are a lot more really crappy bag makers.
There are good knock-offs and horrible knock-offs.
MidwayUSA 3-Day Assault Pack (center), very similar to a half-dozen other bags. Did they copy Midway or did Midway copy them? You be the judge.
And the prices range from “clearly a bad idea” to “oh my god, my first car was less than that”
Look for a bag that is easy to use and really durable. Quality stitching, reinforced areas, and smooth zippers are critical.
Always get a bag at least a little larger than you think you’ll need. These bags have a tendency to grow as you remember things to add and empty space is never a bad thing, but a bursting full bag is terrible.
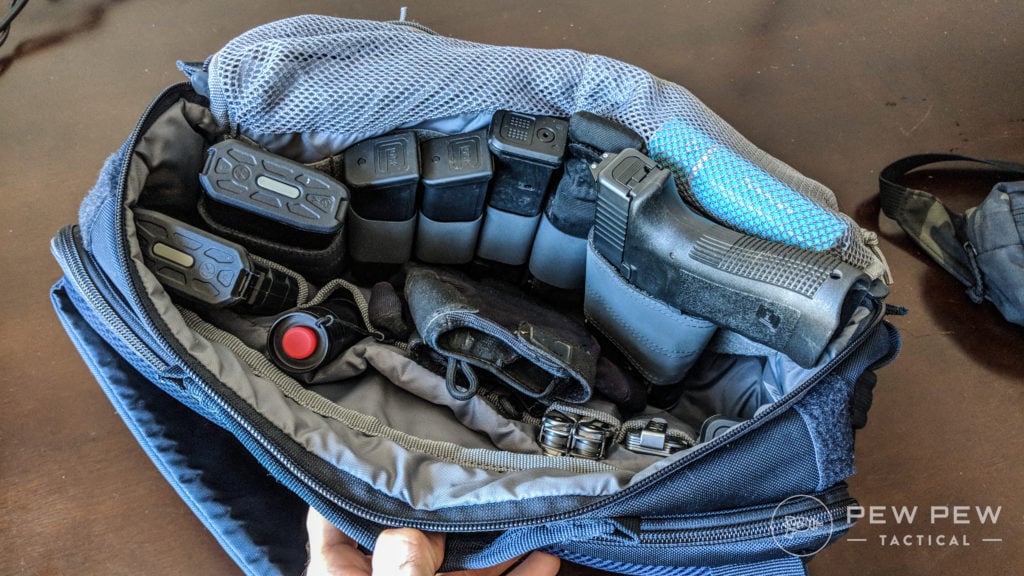
5.11 LV10 Sling Pack loaded with a Glock 17, a half dozen spare mags, AR-15 mags, light, multitool, and a lot more. Plus room to spare!
As a general guide, there are a few brands I really like:
All of these will serve you well, but I do have some favorites.
5.11
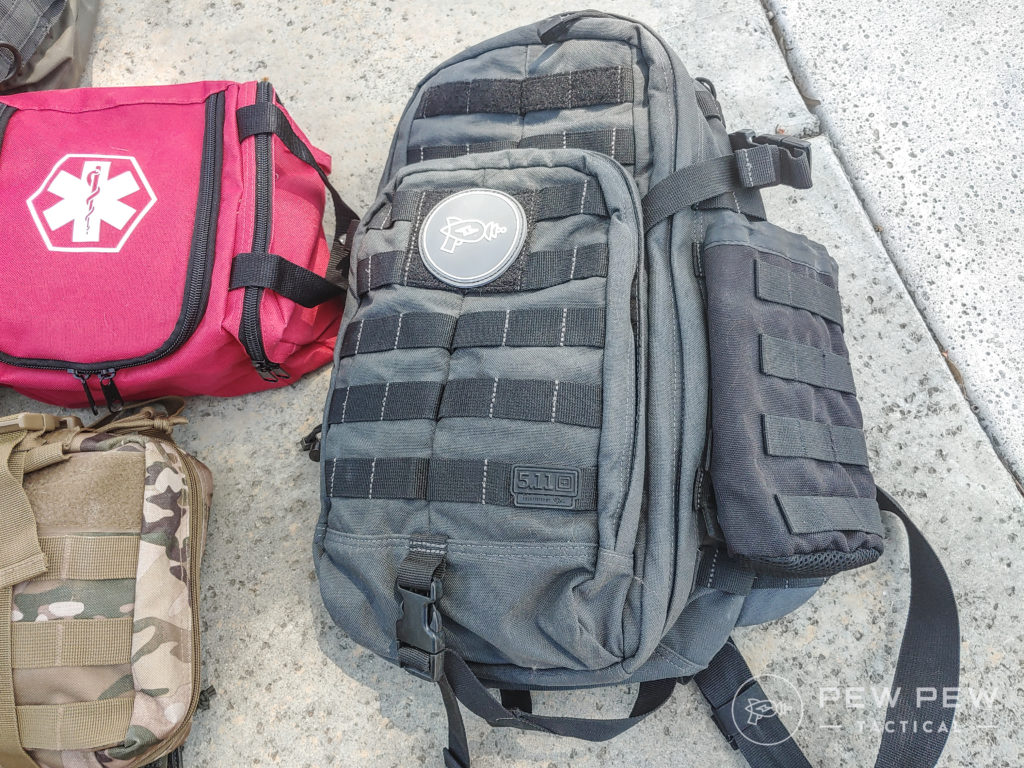
The RUSH series of bags are perfect for a range of Bug Out Bags. The MOAB 10 is my EDC work bag and my Get Home bag while the RUSH72 is one of my 72-hour bags.
They are well made, durable, and really handy. I highly recommend them.
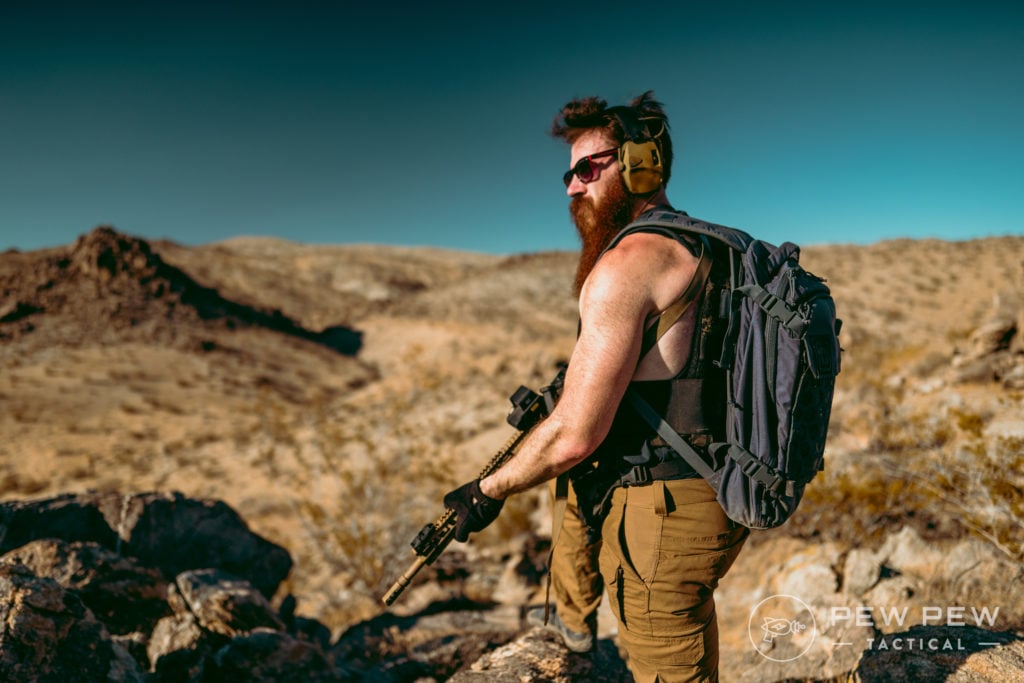
Mystery Ranch
Super popular with hunters and backpackers, Mystery Ranch has been around making amazing bags for a long time. Most of these are fram-backpacks, either internal or external frames.
All of them are built like tanks, lightweight, and many of them have special holders for a rifle or bow. If you need a bag that you can hike 50 miles in while carrying everything you need to survive, Mystery Ranch is my go to pick.
Survival Bag Items List
These items are not the end-all, be-all. Some of them you need, some of them you don’t. Depending on what you prep for you might need things not on this list, my point is–this is to get you started.
This is also all of the items we recommend. If you’re building a smaller bag, you won’t need a large portion of this list. Even if you are building a full bug out bag, you’ll want to pick and choose.
Refine, plan, and prepare further after consulting this list!
And… some of these won’t be in stock. That’s the nature of Amazon right now.
Water/Hydration
Canteen
A hard water bottle gives you something to not only hold water in but also to purify water in. I like to have at least two so that I can be purifying water in one and drinking water in another.
I like a standard US Military style canteen. They’re lightweight, hold a decent amount of water, cheap, and there are about 5,000 holders on the market for attaching them to a belt, pack, or anything else.
Nalgene Water Bottle
Alternatively, a Nalgene bottle is my runner-up since they are indestructible and have a much wider mouth. The wide mouth comes in handy for things like refilling, cooking, purification, and more.
But I’ve spent years trying to find a handy way of carrying my Nalgene and I still have yet to find a method that I actually like. Bottom line–I hate hiking with one, but I often have one clipped to my bag empty for use around camp.
There are a lot of options when it comes to what exact model you get, but I use the single bottle kind–these do leave an aftertaste, but it’s simpler and lighter to pack than the two-bottle system that removes the aftertaste.
Embrace the suck or use some drink mix to make the water taste better.
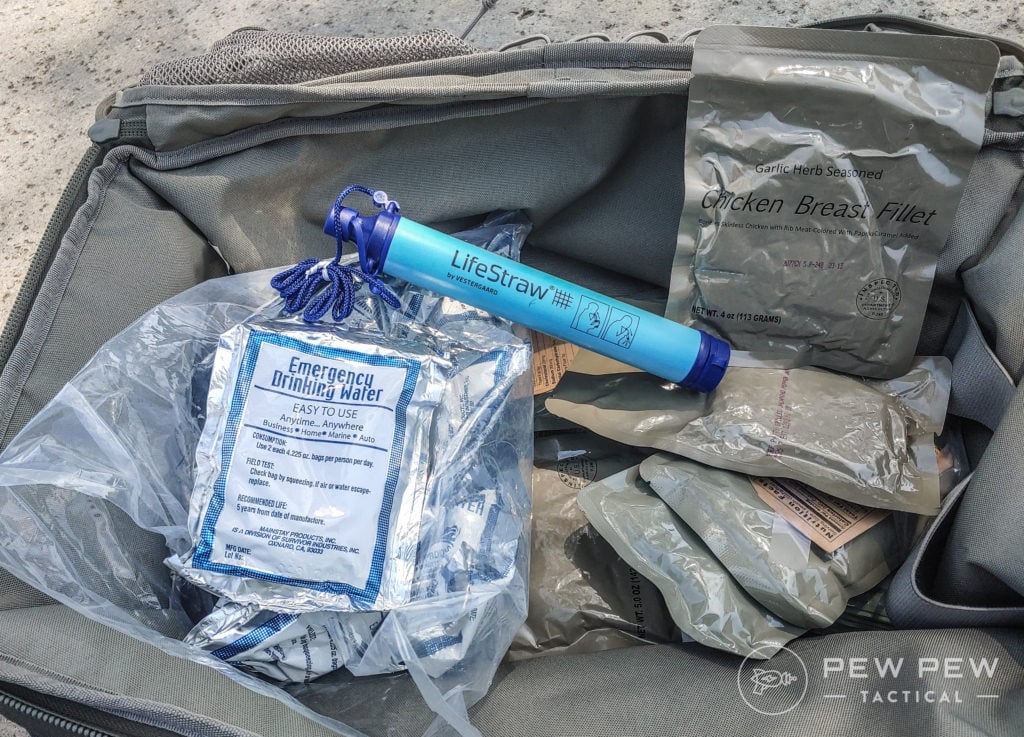
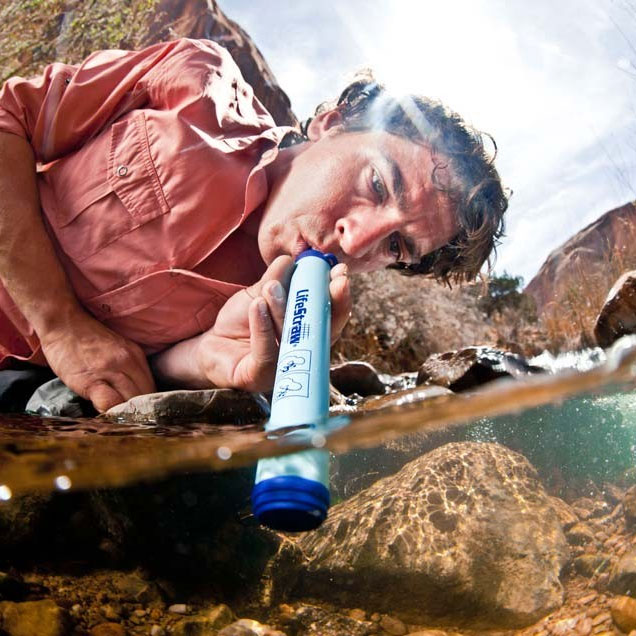
LifeStraw
Perfect for drinking water on the go, the LifeStraw filters out everything bad that might be in your water while you drink it. This means no weird aftertaste but does mean one more thingy to carry.
Lifestraw in use… yum?
LifeStraws filter at least 1,000gal of water each, so getting one per person is an easy way of making sure you’ll have water to drink almost no matter what.
Sawyer Mini Water Filtration will clean over 100,000gal of water! Working much like the LifeStraw this is easy to handle, quick to filter and makes everything clean and safe.
Food/Food Prep
S.O.S. Emergency Rations
These are… well they will keep you alive and active. And they have a 5-year shelf life. And they taste… okay.
They pack small, last a long time, are lightweight, and carrying enough to feed a family for a week is easy to do. But they don’t taste amazing and they aren’t super filling.
Emergency rations are meant to keep you alive, not to keep you happy. Still, a pack of these should be in every survival bag.
Larabar Mini
Everyone needs to snack, I love these because they taste good, they have a lot of flavor options, they last a long time, and they are surprisingly filling.
I actually keep these in my EDC briefcase just for normal snacking also.
Drink mix is critical for a survival bag. It makes water taste better, especially if it tastes weird due to purification, it gives you some extra oomph, and it’s just a nice comfort sometimes to drink something tasty.
There are a lot of options for this kind of thing, but Emergen-C Energy+ fills a lot of roles in one. It makes water taste good, it gives you a vitamin boost (something you’ll likely be running low on), and it gives you a solid dose of caffeine without overwhelming your system.
Caffeine in survival is a double-edged sword. On the one hand, it helps to keep you going. On the other hand, it can make sleeping and downtime harder. And you do need to sleep.
MSR PocketRocket 2
A small stove is nice to have but not critical. Depending on your bag and what you pack for food, it might not be useful.
But if you’re planning on keeping any kind of freeze-dried food in your bag, a backpacking stove is nice.
It also is great for winter conditions where snow might need to be converted to water.
MSR PocketRocket is a classic in the backpacking community, I’ve used one personally on a lot of trips. Simple, lightweight, and works.
TOAKS Titanium Long Handle Spoon
A spoon or spork is all you really need to eat with. Long handled spoon has the advantage of being perfect for MREs or other meals-in-a-bag, also nice for stirring things in a pot.
However, if you’re bugging out in a more family-style way then the small amount of normalcy that comes from everyone eating together off of plates might be good for the kids and for morale in general.
Clothing
Merrell Men’s Moab 2
While these are the shoes I would recommend, the reality is that there are a LOT of options and what is best is going to be totally personalized for you.
A great set of shoes is one of the most important things you can put in your bag, so choose wisely. Keep in mind that you might need these to travel over long distance, over bad ground, and very possibly over broken bits of anything and everything.
Hiking shoes give you some ankle protection and support without adding too much weight to the shoe itself.
While things like combat boots will give you the most protection and support, actually hiking with them is a beast if you’re not conditioned to the extra weight.
It’s warm, lightweight, resists water and wind well, and has so far served me very well in the two years or so I’ve used it.
We have a full review of it in the Best Tactical Jackets along with some other great options for you to consider!
5.11 Taclite Cap
Okay–it’s a ballcap. I know. Your favorite baseball team, a random hat you got at that one concert that one time, or this cap from 5.11–all of them will fill this role about as well as the next.
I like the booney over a ballcap though since it also gives you the ability to do the classic fly fisherman thing of using the hat to store things like fish hooks, sewing needle, and safety pins in it.
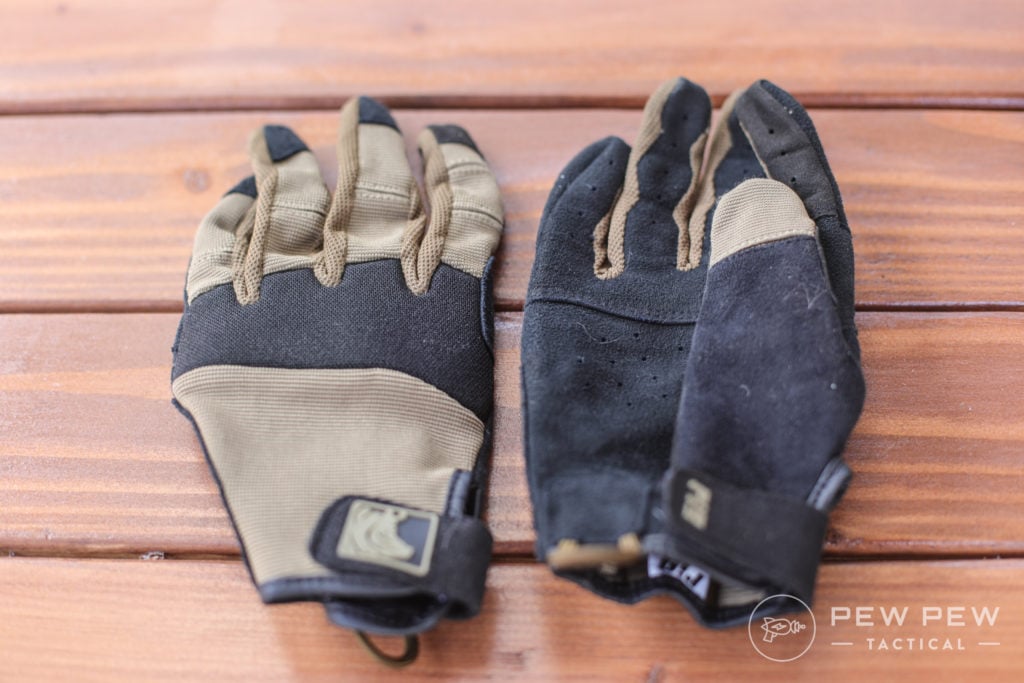
PIG Full Dexterity Tactical (FDT) Alpha Gloves
We cover these gloves in-depth in our Best Shooting Gloves review and I highly recommend you give it a read!
SKD FDT Alpha
The short story though is that these gloves rock. Superb dexterity, thick padding, tight-fitting, duel-joint fingers, and touch-screen compatible–these gloves are simply awesome.
Almost the entire PPT team uses these gloves and we bought them ourselves, so that should tell you how much we approve of them.
A good tarp and some rope are all you need to make a great shelter in a hurry. It’s also great for sleeping on, turning into a field stretcher, collecting water, and a whole lot more.
There are two ways you can go with your tarp–easy to see and hard to see. If this is your bag that you want to use in case of natural disaster, then an easy to see shelter might help rescue workers find you.
And in that case, the WildVenture Tent Tarp is a great option for durability, visibility, and ease of use.
Aqua Quest Defender Tarp
On the other hand, if you are planning to use this bag in case of zombies, war, or other apocalyptic situations–maybe having your shelter be easy to see isn’t such a great thing.
The first question you should ask yourself before picking a sleeping bag is: Do you really need one?
Depending on how long you want to survive using your bug out bag, what the weather might be, and how much weight you want to carry–a sleeping bag might not be a great choice.
However, if it might be very cold, or you want to live out of this bag for a longer period of time, then a sleeping bag can provide much-needed warmth and comfort.
Coleman will always be near the top of our list for great bags on a budget.
However, this Coleman is rather heavy–not a great idea if you need to pack this a long distance.
Hyke & Byke Quandary Sleeping Bag
If you can expand your budget though, there are better options for sleeping bags–such as the Hyke & Byke Quandary. Rated for 15 degrees Fahrenheit this bag will keep you warm under most conditions.
If you really want to trim weight, there are options that are in the 1lb range–but you can expect to shell out a huge amount of cash for those.
Klymit Static V Sleeping Pad
Unlike what most people think, a sleeping pad isn’t just for comfort. It’s mostly about keeping you off the ground and helping you to retain warmth. Also, it’s comfier.
Another item that you might not really need but should at least consider is the ground pad/sleeping pad.
I can say though from experience that a ground pad really makes a difference and that I would often choose to pack one even if I didn’t pack a tent and/or sleeping bag.
Back in my day, I used a 99 cent beach ball and a pillowcase as a pillow on backpacking trips. Nowadays though, you can get this thing that actually lasts more than 1 night!
Granted–do you really need it though? Again that will be up to you, but it is super lightweight at only 3.4oz, it is fairly cheap, and a night of good sleep is an amazing thing when you’re dealing with the stress of bugging out.
If you have back or neck issues, you might want to seriously consider adding this to your bag since it is more adjustable and contoured than sleeping on your bag or a pile of clothes might be.
ALPS Mountaineering Lynx 1-Person Tent
A bugout bag based on natural disasters is likely going to be dealing with inhospitable weather.
Even if your natural disaster is something like a wildfire or volcano, these can change weather patterns and cause some nasty events on top of what you’re already dealing with.
In any case, a sleep mask can be nice. Again, depends on you if you want to spend the money and carry weight.
Heat Source
Zippo Typhoon Matches and Match Kit
There are a lot of “waterproof” matches on the market, but in my experience. most of them don’t work. Zippo Typhoon matches have never let me down though and the small case they come in is outstanding.
The striking surface is protected so it won’t wear off in your bag, the whole case is waterproof and floats, and the matches themselves are coated in an extra thick layer of flammable material to help them burn hot and stay lit.
Zippo Emergency Fire Kit
One problem with matches is that they rely on your ability to find, have, or make dry tinder. This isn’t always possible, especially if you might be using your bag during a storm or after a flood.
This fire kit solves that problem by including dry tinder right in the case–but you only have 5 rolls of tinder material so you’re limited on the number of fires you’ll be able to start.
But it does take some practice and know-how. If you haven’t started a campfire before with flint and steel, please take a weekend to go camping and try it out before relying on it in your survival bag.
Emergency Foil Mylar Thermal Blanket
Mylar blankets keep you warm in the cold, keep you cool in the sun, they’re lightweight, cheap, and can work as a reflective surface for signaling.
If you can spare the weight, having one or two hand warmers can go a long way in making you a bit more comfortable or in extreme situations stave off frostbite.
If you’re in the cold, these are high on the list.
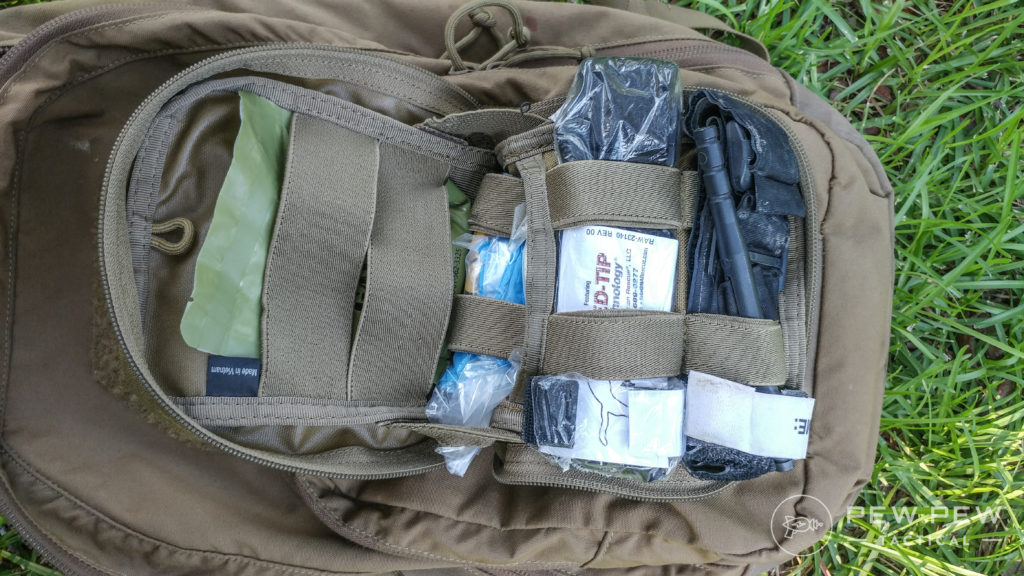
The Best IFAKs article has a lot more information and detail, we recommend you take a look before choosing your IFAK. At the bare minimum, you’ll need a tourniquet, Quikclot, sterile bandages, sterile gloves, and EMT shears.
Lifeline 30 Piece First Aid Emergency Kit
A small “boo-boo” kit is nice for the small stuff. Do you need a dedicated kit though?
Not really, a ziplock and some alcohol wipes and BandAids are good enough, but a kit like this is easier to carry and more secure if you have the room.
Bug spray isn’t just to keep the bugs away because you don’t want to swat at them–bugs spread disease and if scratched the bites can lead to open wounds that might become infected. And infection is at a higher chance since you’ll likely be dirty.
Especially in a situation where standing water and disease might be running rampant, bug spray moves from being mundane to being life-saving.
Prescription and Non-Prescription Medications
Ibuprofen to keep the aches and pains away and antacids to settle the stomach is high on my list. After that, just make sure you bring whatever it is you might need. Make sure to also replace them regularly–never take expired medication!
If you’re not sure how you can store your prescription medication for a survival bag, consult your doctor.
Hygiene
Surviveware Biodegradable Wet Wipes
Wet wipes keep you clean, can be used to clean off gear, and help just make your life a little nicer while you’re battling the elements.
Teeth are important. Keep them clean. These tablets are cinnamon flavored and do an amazing job at covering up or removing bad tastes that might be leftover from purified water or MREs.
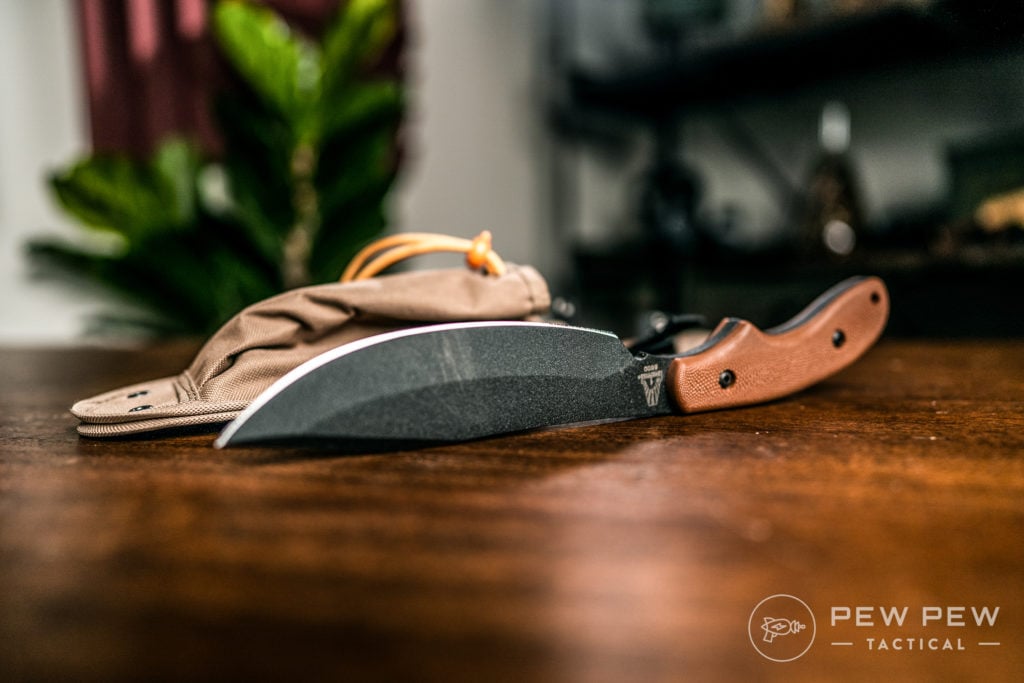
I love this knife because it has some meat to it, thick spine for strength, full tang, a grip that doesn’t slip, lanyard loop, and the Kukri point means there is more weight at the tip of the knife–perfect for chopping.
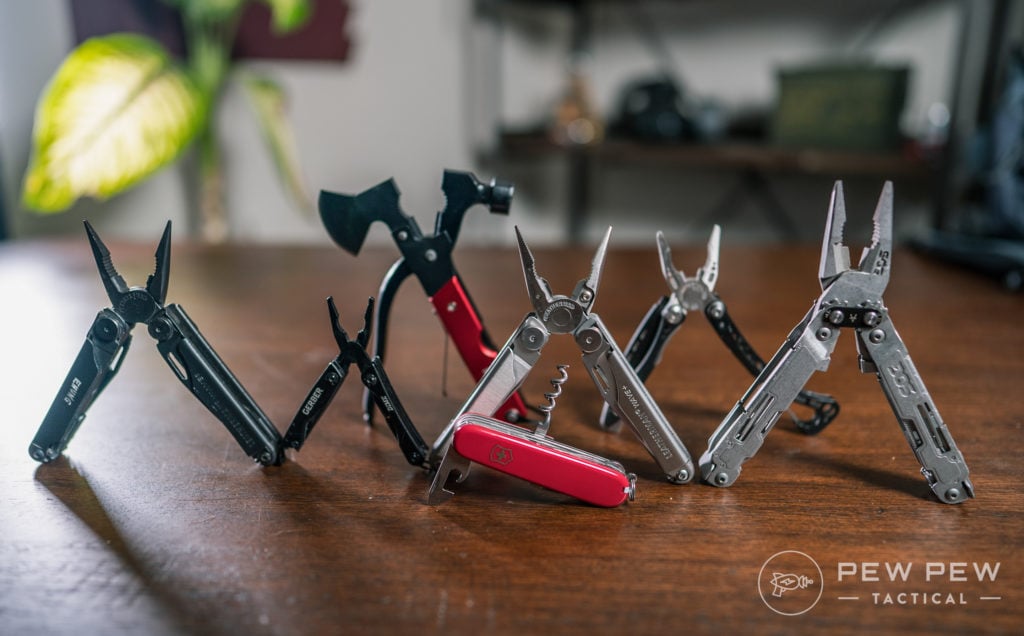
The problem with a multitool is they are heavy, but the tools might come in handy if you think you’ll need them.
If you’re preparing for a flood and know you might be traveling by small boat then a multitool is a must. If you’re going to be bugging out walking across the desert, is it really needed?
For a flashlight, you want something that really pumps out the lumens, has a strobe setting for signaling but also has lower settings to conserve battery for when you don’t need to turn night into day.
Fenix PD25 is our pick–make sure to bring extra batteries!
5.11 Response XR1 Headlamp
One downside to flashlights is that you need a spare hand to work it. Headlamp solves that problem!
Choose what you think is best, but the same rules for flashlights apply to headlamps–get something with at least two power settings and bring extra batteries!
I really like the Response XR1 from 5.11, it’s durable, useful, and with a ton of modes to choose from including flood, red light, and multiple power settings for the primary light.
Chem lights glow passively for hours making them great for singling, marking an area, or leaving as bread crumbs.
UCO 9-Hour White Candles
Another one of the “is it worth the weight?” items but it is something you should consider. Candles are bright, last for hours, can be used to help light a campfire, provide some warmth if a campfire isn’t possible, and candlelight is comforting. Keeping morale up is important.
Yes, I can, when you call on a SatPhone. This is a pricey item and one that you really can go without, but if you want the best of the best–a SatPhone can’t be beaten.
A much more economical option–a prepaid smartphone gives you an option not based on your normal phone. Grab one on a different carrier and you double the chances you’ll have phone access.
Plus, you know it has a battery when you need it. You’ll need minutes though, get data and texting too.
Fun fact: texting takes less reception than phone calls do. Even on zero bars when you can’t make a phone call, you can sometimes get a text out. So get texting too!
Travel
Personal ID and Pictures
You need your ID. Hopefully, you’ll have your wallet and your normal ID with you already–but expired ID is decent for keeping in a survival bag so that you at least have something with your face and your name on it.
Pictures of friends and family isn’t just so you can look at it at night and remember better times.
If you’re separated from loved ones or looking for someone that is injured, a picture to show other people is a lot more effective than a description.
Cash
Maybe you need to buy snacks from a vending machine, maybe you need to bribe a guard, maybe you just want to play some poker after a long day of survival–cash is king.
We recommend $200 at least if you can spare it. Don’t bring two 100-dollar bills though. A mix of 1s, 5s, 10s, and 20s is a lot more useful.
In my opinion, this is a little on the tin foil hat side, but you might want to consider some gold or silver also.
If your bag is for when the Russians invade, maybe skip the reflective vest. But think back to any hurricane or wildfire or tornado you’ve watched on the news–visibility is often nil and if emergency services are looking for you then a reflective vest is critical.
The nice thing about a vest like this is that it is hyper lightweight and easy to take on and off for when you do and don’t want to be seen.
SUUNTO A-30 Compass
Don’t cheap out on your compass. I know a $5 compass is tempting, but a good compass is worth it. Well made, easy to rotate, magnifier, and glows in the dark.
Take some time and learn how to use a compass though, it’s more complex than “the red arrow points north.”
If you really want to not take the cheap route, upgrade to the M-3. The differences are a bit subtle and really won’t make a major impact for most people, but if you know what to do with a compass–this has some nice pluses.
20-degree tilt margin, metric and imperial UTM scale, stronger, more options.
Maps
You have some options here. Topographical maps from the USGS (United States Geological Survey) can be found for most areas, these are great if you can get them since they show a huge amount of information such as terrain, water, hazards, etc.
But they aren’t available for everywhere.
A very general, but very handy, option is the National Geographic Road Atlas. If you don’t want to take that much weight, consider pulling out the relevant pages for your area and putting them in protective plastic or laminating them.
I strongly recommend this especially if you’re in an urban area. You cannot rely on your normal ways of getting from point A to point B and you should assume GPS will be down.
A good map will assist you in navigating around traffic, hazards, downed freeway overpasses, etc.
You… you do know how to read a map… right?
Extras
These are very much in the vein of “Is it worth it?”
Depending on your preparations, what you want to use the bag for, and your capabilities–some of these are great, some of them aren’t. Take a look and think about it.
RAVPower Solar Charger
Recharging your batteries is really nice to have. While you can go for crank rechargers–those take a lot of effort. Try recharging your phone off one and you’re in for one helluva workout.
A whole lot stronger. Great for packing trash, carrying firewood, cutting and using for shelter, lots of options. Bringing 2 or 3 is a strong recommendation.
OUTDOOR Paracord Planet
Rope has proven to be critical to humanity’s survival and advancement for millennium. Paracord is right along with that same line.
Get the strong stuff so you can hoist food to safe levels, build shelter, set traps for game, the list goes on.
3M Particulate Mask
In case of a tornado, dust storm, collapsed buildings, etc. there is going to be particulates in the air. Those can kill you outright or they can help kill you years later. Either way, breathing in bad stuff is bad.
We could write whole articles just on this section, but I’ll keep this as short as possible.
There is a lot of good arguments to make for a huge range of firearms and less lethal self defense options, almost all of them are reasonable depending on what approach you use.
What works for you and your situation is something you’ll have to decide–for me, I choose to carry lethal and less than lethal tools and to keep all of my choices 100% legal.
Before you make your choice you need to consider what you are going to be defending yourself against.
Red Dawn scenario? Being stuck in a crappy high school gym for 5 days with all of the other evacuees? 4-legged threats while you hike out to your secret bunker? Living off of small game for the next… forever? General civil unrest?
All of these would or could alter what might be the best defense option for you. But here are some recommendations for you to consider.
Less Lethal
SABRE S-1005 Dual Stun Gun
Perfect for if you want a simple and last-ditch tool to defend yourself with. Ergonomic, doubles as a flashlight, and simple to use.
Downside? You need to charge it. So if you’re thinking you’re going to be without a power source for weeks… maybe choose a defense tool of the chemical combustion variety.
Take a look at a full review along with other options in the Best Stun Guns!
SABRE 3-in-1 Pepper Spray
This is one I choose for almost all of my bags. No matter what situation my bag is designed for, some pepper spray isn’t a bad idea.
It’s small, lightweight, easy to use, cheap, and legal everywhere I’ve ever been. Oh, and it has a safety so it doesn’t discharge in your bag. Trust me, that’s important.
Any of these four pistols are my absolute top recommendations. They are each totally reliable, super durable, accurate, high capacity firearms that will serve you very well.
Major points to the M9 and M17 if your bag is designed for a Red Dawn type end of the world (think about it, what guns are you going to find laying on the ground? Yeah…)
The Glock 19 or 17 are great options if one of those is already your EDC. This makes it easy to stock up on magazines and extra parts plus cuts down training time. Plus they are a decent amount less weight than the M9 or M17.
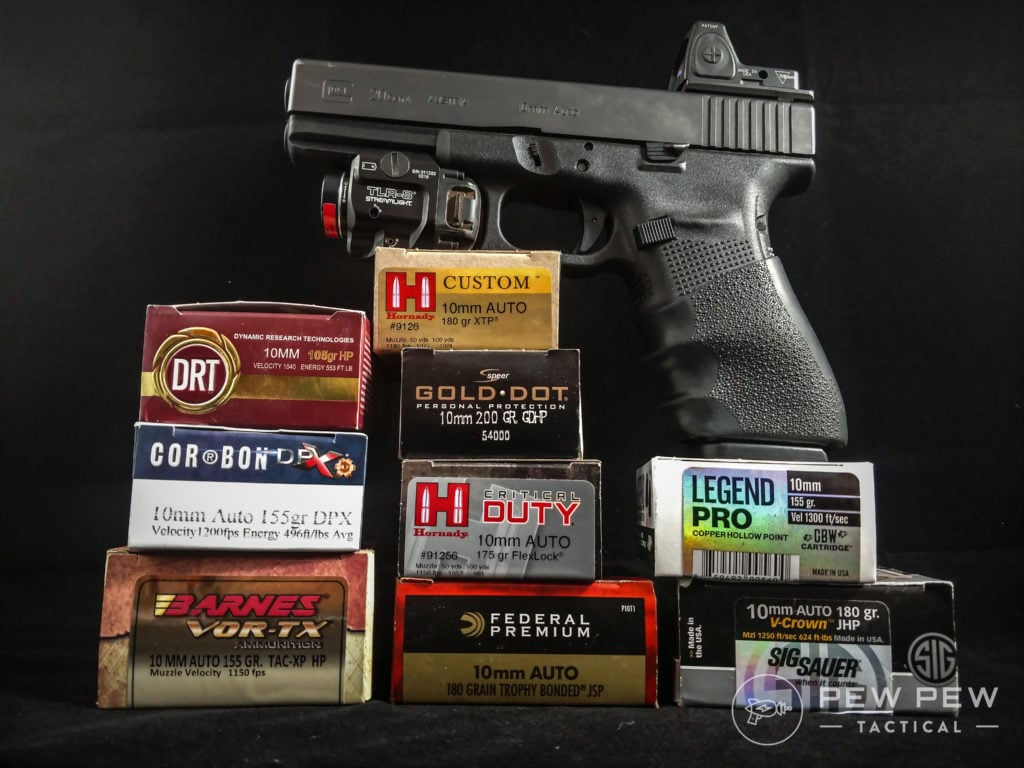
Glock 20
Worried about threats on four-legs? Get a Glock 20. Hands down the best option.
Glock 20 with Trijicon RMR
10mm isn’t a super common cartridge, so finding resupplies after the end of the world won’t be easy. It’s also not cheap to train with and requires more training than anything 9mm.
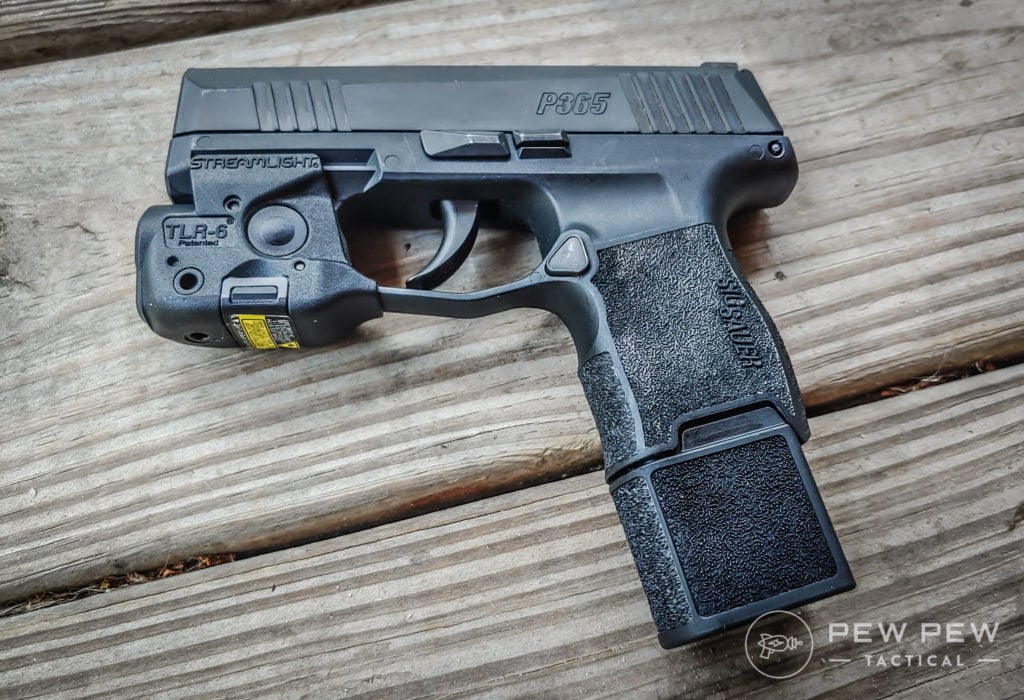
Personally, I would choose the P365XL with a standard magazine plus two or three 15-round mags.
P365 Upgrades Great Big Magazine!
Rifles
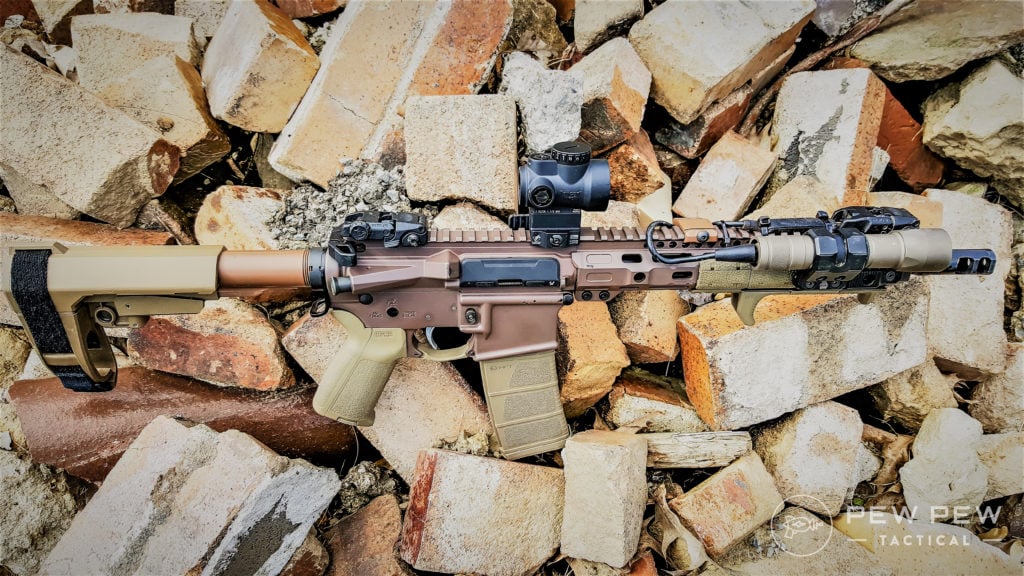
AR-15
This is the only rifle option, but there are dozens of manufactures and hundreds of configurations to choose from.
RE Factor Tactical Advanced Slickster Desert Shooting AR-15
First–why the AR-15? Simple, it is by far the most versatile and “uniform” option you will find in the United States. Any end of the world situation you can think of, the AR-15 can be used for it.
A good AR-15 will last you tens of thousands of rounds, be reliable in dust, rain, cold, hot, sand, mud, and be more durable than any of it’s users will be.
No matter what AR-15 you get it should be in 5.56 NATO, have a white light, a sling, an optic, backup iron sights, and extra magazines.
If you have a secondary location to store supplies, consider some extra complete uppers and ammo for them.
A suppressed .300 BLK upper is great for being quiet. A .22LR dedicated upper means an endless supply of small game. A 6.5 Grendel upper will take deer at further range than .300 BLK or 5.56 NATO.
Please, don’t forget to train with your rifle. Having it means nothing if you can’t hit with it.
Holy crap, you read all of that? You made it to the end? Dude, high-five yourself because that was… long.
This article was a long time in the making, the idea was approved in late 2018 if we remember right. Even with over a year of research and writing, the collective input of a half-dozen people, more than 8,000 words, and a lot more–we’ve only scratched the surface of this topic.
I strongly recommend that you do additional research, consider everything I’ve said, ask questions, and choose what is right for you.
If you only learn one thing from this article I hope it is this: Gear cannot replace skills. Gear helps, but a $5,000 rifle means nothing if you miss. The best bag loaded with all of the best gear won’t keep you warm if you can’t make a fire.
If you’re this excited by making a camp fire, you didn’t spend enough time learning how to do it!
Enough medical equipment to start your own trauma room won’t save your life if you can’t clean and bind a cut before it gets infected. It doesn’t matter if you have the best kicks if you get lost on your way home because you can’t read a map.
Train, learn, survive.
I might come to regret asking this but: What would you add to a Bug Out Bag that isn’t on this list? How many hours per year of training do you seek out? Any hands-on classes you would recommend? Let us know in the comments! If you want a TON of info on Bugging In, take a look at the Prepping 101 Guide!
Inkscape, the free and open-source vector graphics editor, has released version 1.0 for Linux, Windows, and macOS. It comes after three years in development and over 16 years after Inkscape’s initial release. BetaNews reports: "Built with the power of a team of volunteers, this open source vector editor represents the work of many hearts and hands from around the world, ensuring that Inkscape remains available free for everyone to download and enjoy. In fact, translations for over 20 languages were updated for version 1.0, making the software more accessible to people from all over the world. A major milestone was achieved in enabling Inkscape to use a more recent version of the software used to build the editor’s user interface (namely GTK+3). Users with HiDPI (high resolution) screens can thank teamwork that took place during the 2018 Boston Hackfest for setting the updated-GTK wheels in motion," explains the developers.
The devs further explain, "The extensions system has undergone some fundamental changes in version 1.0. Over the years, Inkscape users have become used to working with third-party extensions, such as various ones used for laser cutting and exporting to file formats which are not a native part of Inkscape. While outreach to extension developers was undertaken as Inkscape migrates towards Python 3 and a more logical and fully tested extensions API (now hosted in a separate repository), not all third-party extensions have been brought forward to be compatible yet. This will mean that 1.0 may not allow some users to continue with their normal extensions workflow." The blog post, official release notes, and download page are available at their respective links.
I was listening to the news and there was a person on air talking about the other, less well known, effects of the Coronavirus outbreak.
One was that the focus on the people of China has caused the pandas to be ignored. Pitty the poor Chinese panda.
Honestly, I couldn’t give less than a fuck about the giant panda.
It is a bear that is so retarded it can only sit around and eat grass.
Not kidding.
This has nothing to do with humans. In the early Holocene epoch, there were multiple proto-panda species. A DNA bottleneck from some natural disaster occurred and now all pandas are cousins.
Every other species of bear around the world is omnivorous, with the exception of the polar bear which is an obligate carnivore, and many are apex predators.
The panda, on the other hand, has the dentition and digestive tract of a carnivore but only eats bamboo, and has to eat it for 13 hours a day because they only digest 17% of what they consume. Cows only eat for 6 hours a day because nearly every other grass-eating mammal is a cud-chewing, four-chamber stomach having rumened, evolved for eating grass. Pandas transitioned to eating grass because they got to be too mentally and physically handicaped for anything else.
The greatest species of bear is the brown bear or Ursus Arctos, which is such a bear that its name means “bear bear,” first in Latin then in Greek. The king of bears is the North American subspecies of brown bear, known as the Grizzley whose scientific name is “horrible bear bear” (Ursus Arctos Horribilis).
That’s a bear.
The first rule of nature in North America is “don’t get between a mama Grizzly and her cub.”
You don’t have to worry about that with the panda because the panda probably doesn’t have cubs. The female is in heat for two days of the year and the male has a three-week mating ritual. By the time he’s gotten it up, there is a good chance she is no longer in the mood.
Panda mating is such complicated bullshit that we have to show pandas in captivity porn to teach them how to breed. They are too dumb to screw.
Evolutionary, this is a fucking failure of a species, long destined by the fate of some natural disaster twenty-thousand years ago for the ash heap of history.
But because of some fluke of evolution, they look cute so we do everything we can to delay the inevitable extinction of a useless species.