Set after Star Wars Episode 3, Vader is Star Wars Theory’s fan-made series about the transformation of Anakin Skywalker into Darth Vader. In the first episode, Vader is sent on a mission to defeat a powerful Jedi while he’s still grieving from Padme’s death.
Everything from the tools you need to how often you should be doing it, we’ll take you step-by-step through the whole process.
Various Polymer 80 Glocks
And also how to detail strip it for when it gets really dirty.
We have a great video below based off official Glock instructions, but also tons of pictures below if you want to go at your own pace:
Table of Contents
Loading…
How Often Should I Clean?
A Glock is the AK-47 of pistols…it will keep on chugging no matter what you throw at it. But for us, we still field strip and at least wipe down after each range session. After about 1,000 rounds, we will do a detailed strip.
Of course, you should also clean your gun anytime you see a major shift in accuracy or if something happens, like dropping it in the mud or spending a day in the rain or dust.
Glock Field Stripping & Cleaning
Field stripping just means disassembling a gun into its major components for routine cleaning and maintenance. It’s super easy on the Glock since it breaks down into four main parts in a matter of seconds.
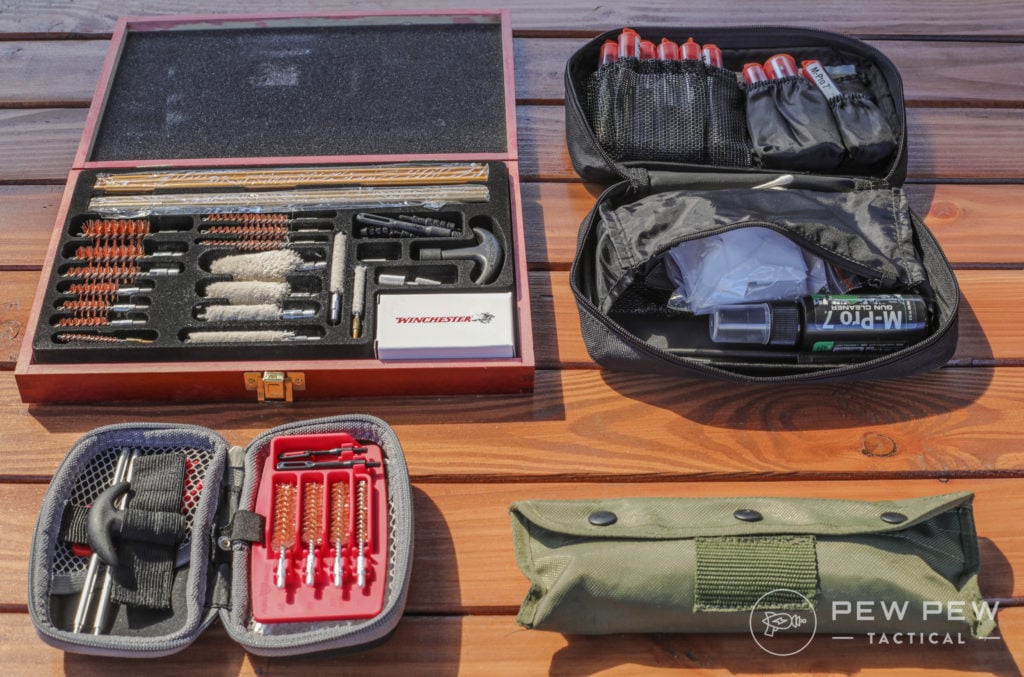
We recommend the following tools for cleaning our Glocks and other guns, conveniently all of these tools, cleaners, and lube is found in the M-Pro 7 Cleaning Kit.
Now that you have your tools, find a decent place to work – a counter, table, or workbench all work great.
Ensure any and allammunition is removed from the area before you start cleaning your firearm!
I like to lay down a towel or neoprene mat to soak up any spilled solvents and to catch the carbon, copper, and gunk that is cleaned from the weapon.
Field Strip
Before we strip, make sure your Glock is clear of any ammo – remove the magazine, rack the slide several times, then visually and tactilely (use your finger) to make absolutely sure the chamber is clear and your Glock is unloaded.
Feel the chamber to make sure it is clear.
Point your Glock in a safe direction and pull the trigger to dry fire it, once you hear the click – you’re ready to field strip.
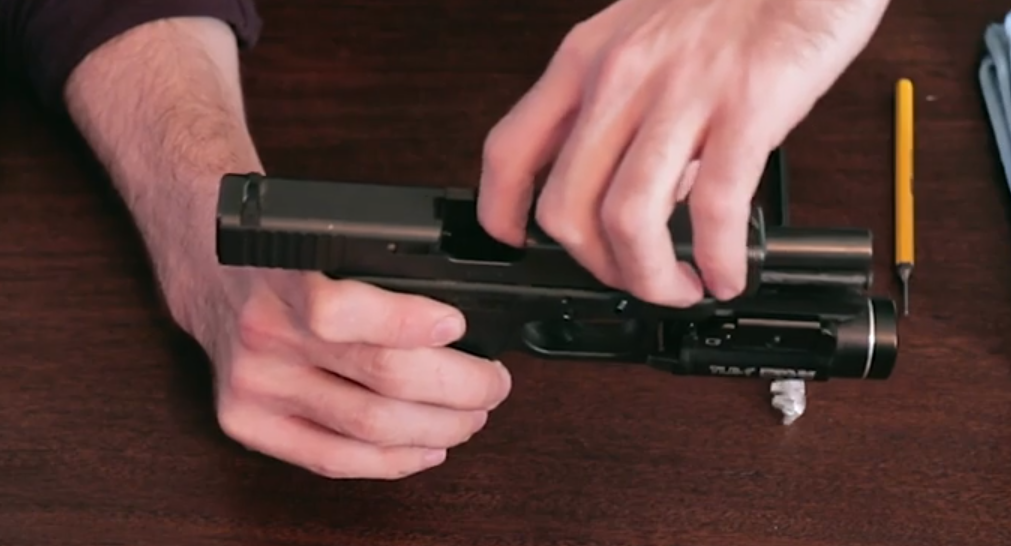
Pull back slightly on the slide while at the same time pulling down on the tabs that are on either side of the frame right above and forward of the trigger
See the tab? Both of John’s index fingers are pointing to it. Easy!
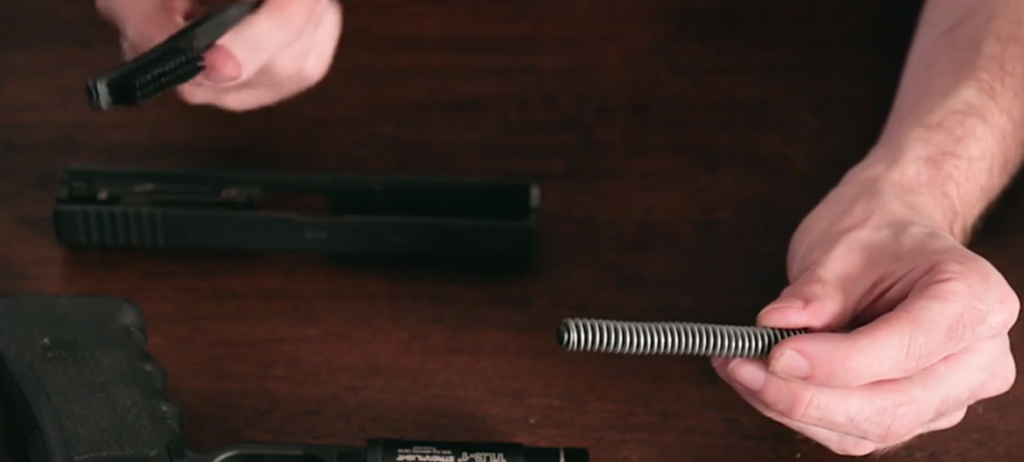
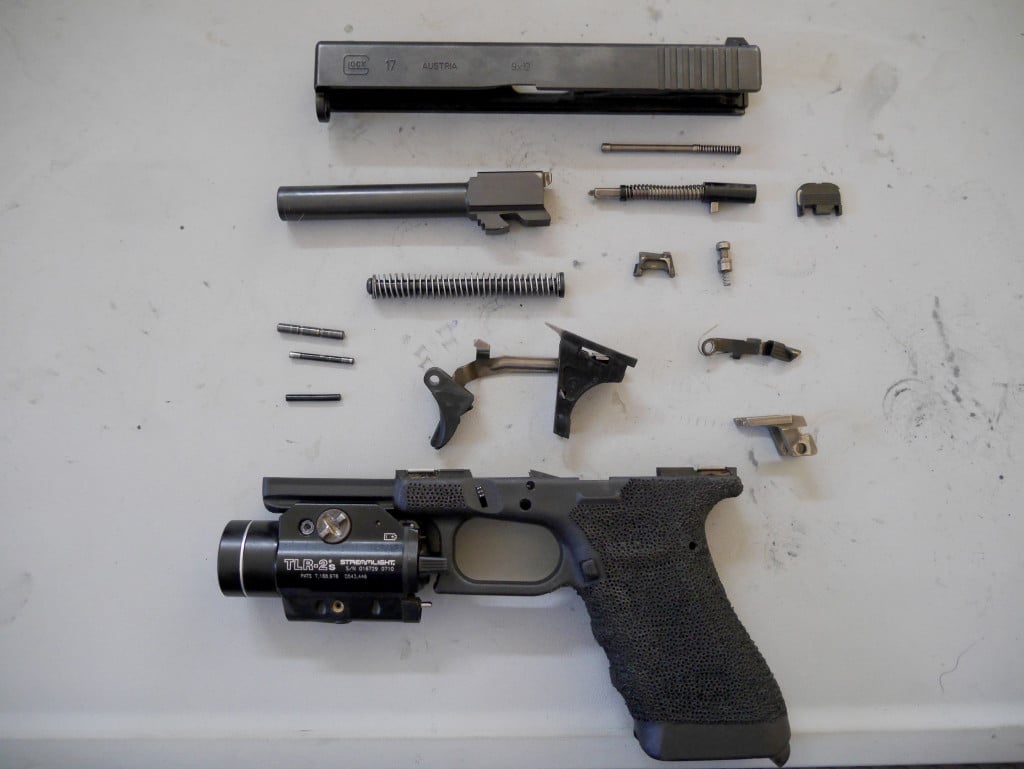
Once you pull down on the tabs, allow the slide to move forward and slip off of the frame. From here it is very simple to break down your Glock into it’s four main parts: Barrel, Frame, Slide, and Recoil Spring & Guide Rod.
Glock 17 Field Striped: (top) Slide, (middle-left) Barrel, (middle-right) Guide Rod & Recoil Spring, (bottom) Frame.
Cleaning the Barrel
The barrel of your Glock is where the VAST majority of the dirt, carbon, and grim will hide – so that is what you want to clean first.
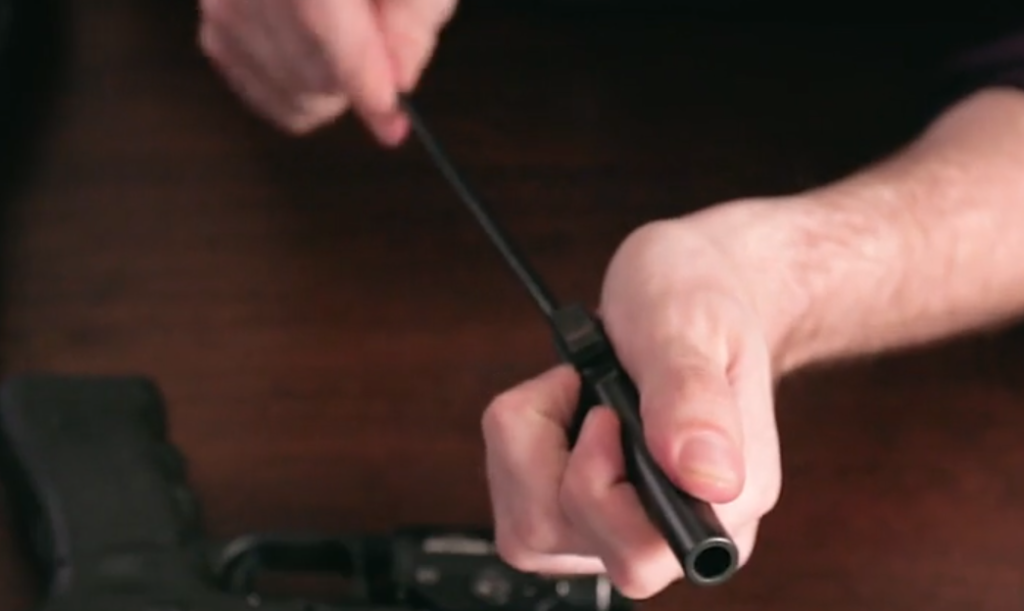
Start with using a dry brush to push most of the crud out of your barrel. Make sure to always push the brush forward from the chamber to the muzzle.
Run your brush back and forth at least 5 to 8 times or until you stop getting chunks of stuff.
Dry Brush pushing from chamber to muzzle
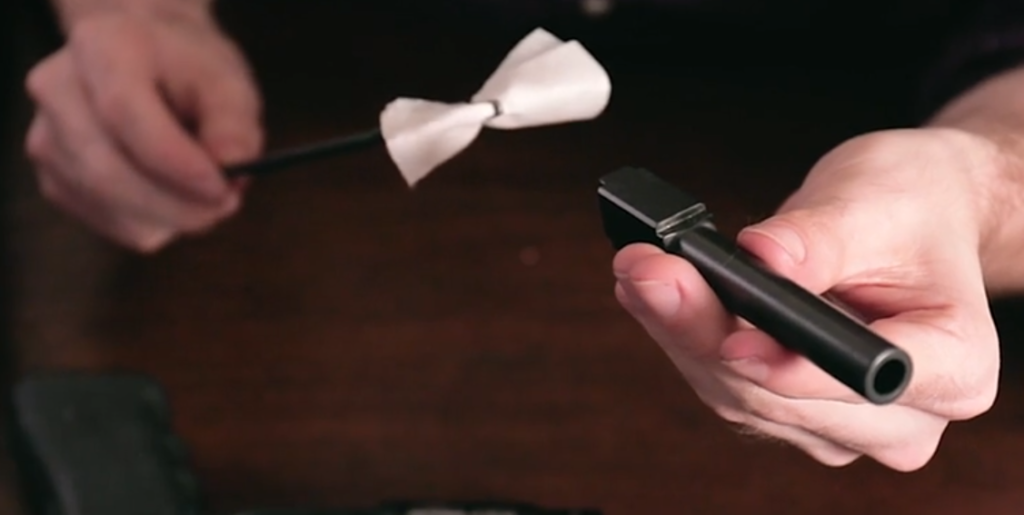
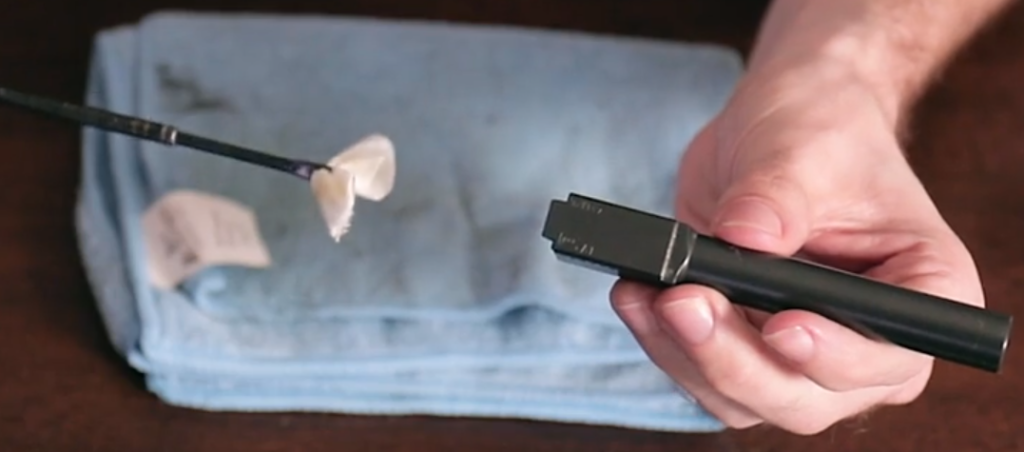
Next, take a gun cleaning patch and spray (or dribble, depending on what you’re using) some of your gun cleaner onto the patch – in our case, using the M-Pro 7 Gun Cleaner.
Repeat by running the patch through your barrel from chamber to muzzle 7 to 10 times.
Gun cleaning patch
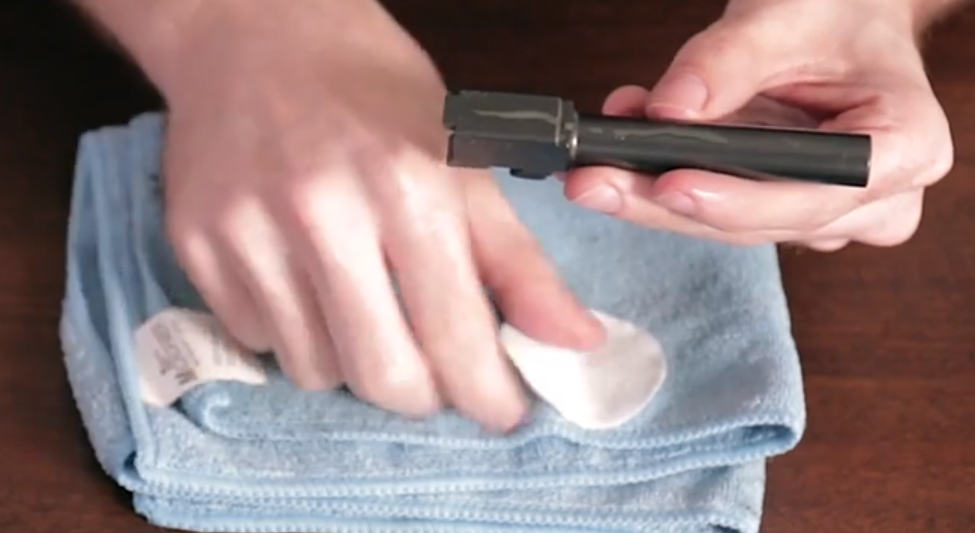
Take a clean patch and spray some cleaner on it, use that patch to just wipe down the outside of the barrel and to clean the feed ramps of the chamber – the feed ramps are the important part!
See the ramp at the bottom of the barrel? That part is important! Clean it!
Once the barrel is all shiny, inside and out, take a microfiber towel and wipe down the outside of the barrel to remove any excess cleaner, follow that by running some dry cleaning patches through the barrel until they start coming out clean the other end – this might take a couple of dry patches to accomplish.
Clean patch! Ready to move on…
Look down the barrel and visually check to make sure all the fowling has been removed, if you see a couple of stubborn dark spots – don’t sweat it and don’t go crazy trying to remove them. But for the most part, the barrel should be shiny and uniform.
Once clean, put your barrel aside and clean the slide!
Cleaning the Slide, Recoil Spring, and Guide Rod
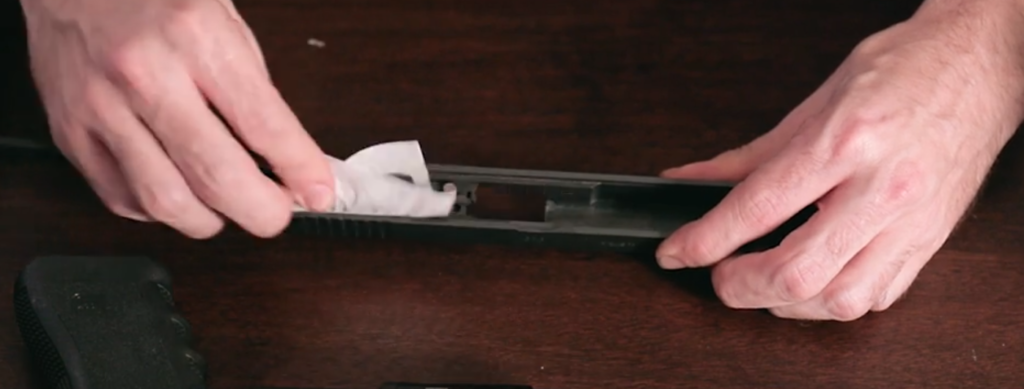
Take a brush and wrap the bristles with a gun cleaning patch, using that scrub/wipe down the inside of the slide focusing on the rear – this is where the important parts of the slide are and are where fowling will likely build up.
Wrap your brush, helps make your brushes last longer!
You’ll want to make sure you get the inside of the rails as well, this might require using a Q-Tip to really get in there. While not always required, taking the time to do the details now will ensure your Glock never malfunctions due to poor maintenance.
Clean the rails, clean ’em good!
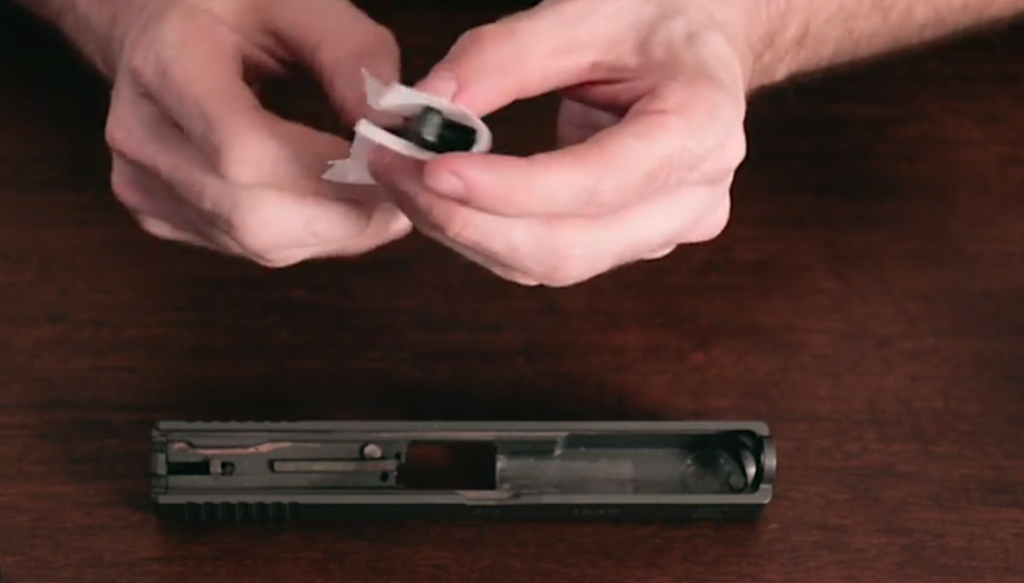
Take the slide and point the muzzle end down toward the floor, using the brush clean the breech face – be sure to not tilt the slide around too much while doing this, the goal is to keep the fowling away from the rear of the slide and to knock it away from the breech face.
Muzzle down, clean the breech face.
Brushing down the recoil spring and guide rod is easy, just take the brush and…brush it. Once done, wipe it down using a towel or rag.
Brush the recoil spring and guide rod.
Cleaning the Frame and Magazine
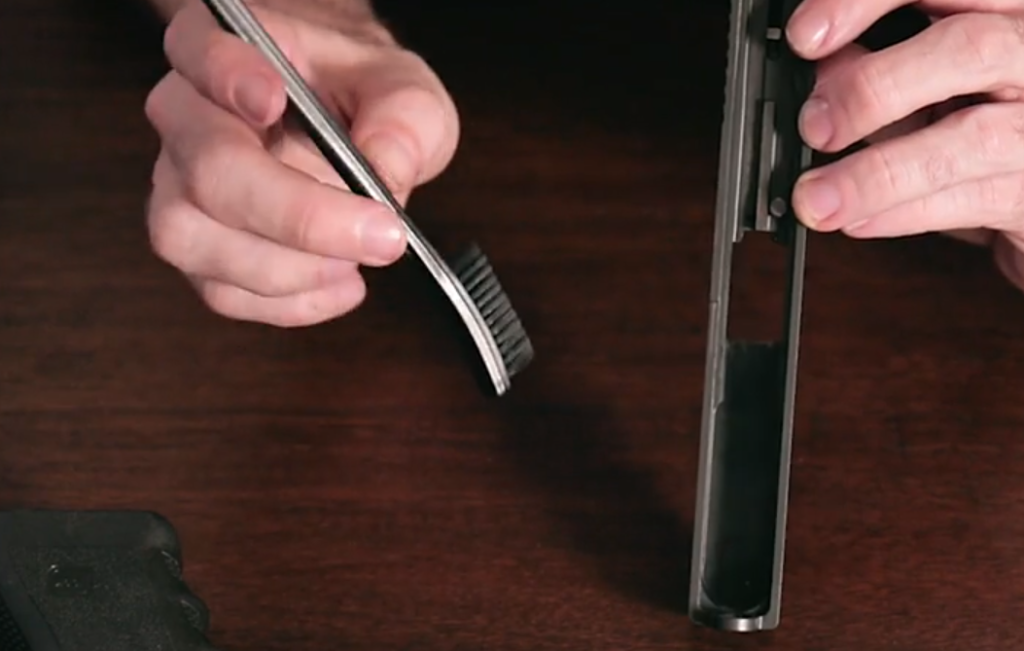
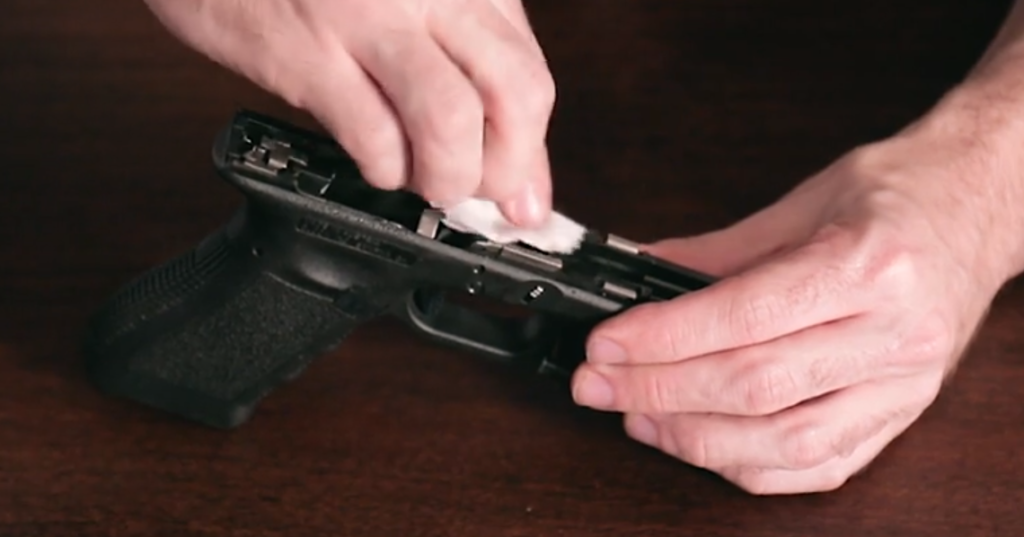
The hard parts are over now! Cleaning the frame might look like a lot of nooks and crannies, but really it just needs a good scrub and wipe down. Take a brush and scrub the top of the frame, focus on the slide rails in the front and the trigger bar in the back.
Clean the rails with cleaner if needed.
If fowling is really built up on your slide rails, you may need to take a patch and cleaner to it. Don’t be scared to give it a really good scrub down. Don’t forget to use a towel or rag to wipe off the cleaner after!
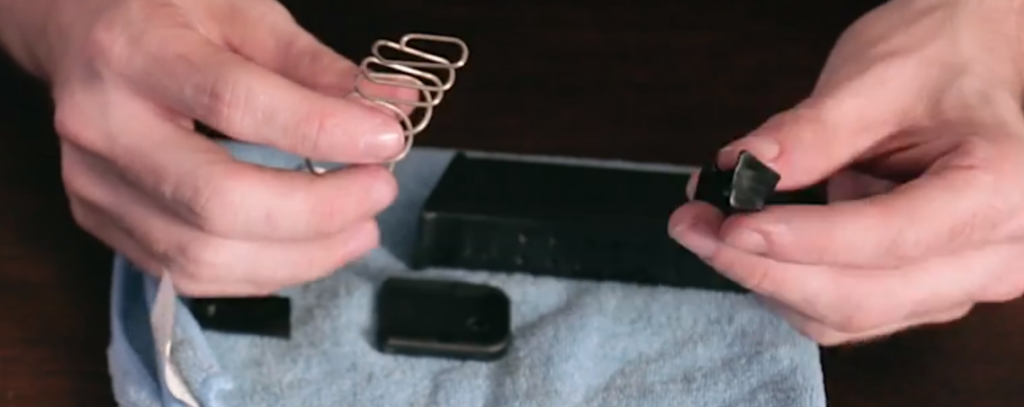
Magazines are often forgotten when it comes to cleaning and truth be told, they very rarely need it. And most of the time that they do need it, it’s because they were dropped in mud or dirt and a hose can normally take care of that type of cleaning.
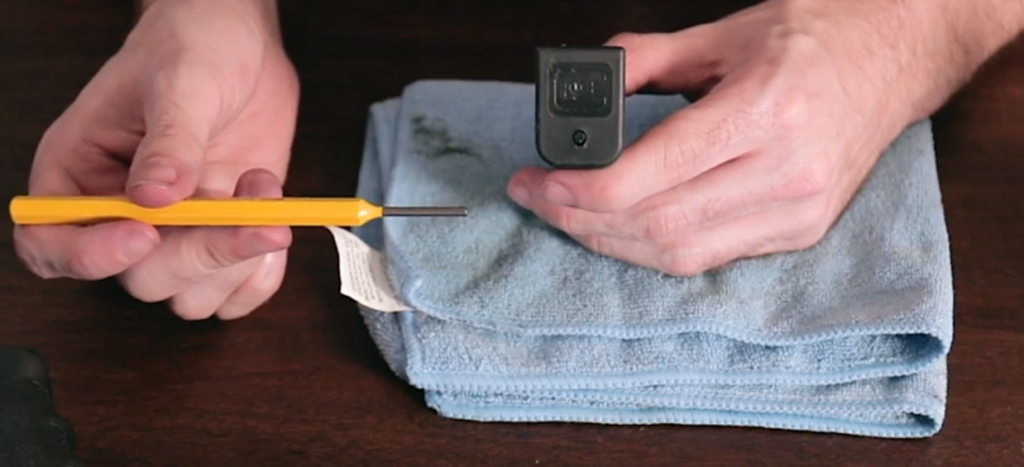
But at least once in a while, it’s a good idea to disassemble your mags and give them the cleaning they deserve.
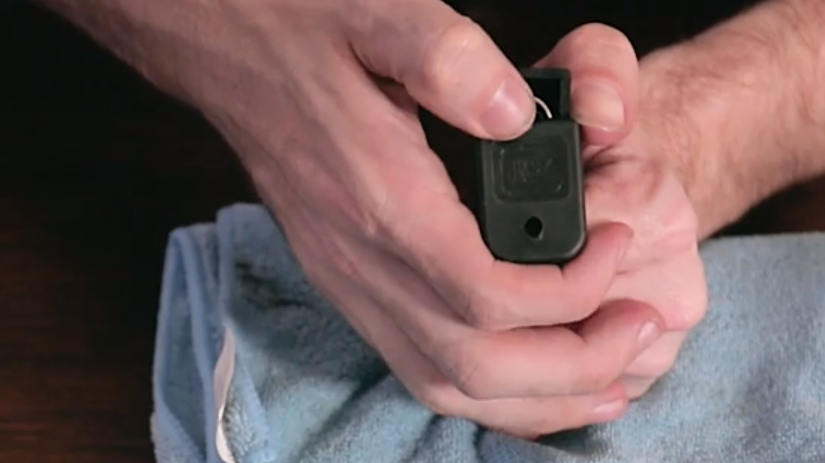
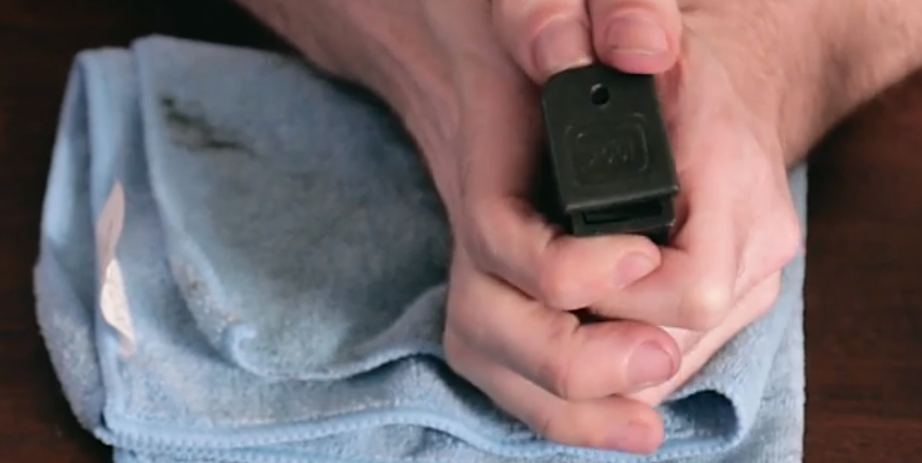
Be careful and make sure that while removing the plate you keep your thumb over the exposed spring to prevent it from flying across the room once the plate is removed.
Keep your thumb over the spring
Once disassembled – simply take your brush and scrub down the inside and outside of the magazine, brush and wipe down the spring, and scrub the follower. If you’re feeling really detailed – go ahead and wipe down the baseplate and insert.
To reassemble you’ll want to first make sure that you replace the follower on the correct end of the spring (the small end!).
Follower goes on the SMALL END of the magazine spring!
Then just push the spring back in, insert the retaining insert, and close it up by sliding the baseplate back into place.
Slide the Glock baseplate back into place
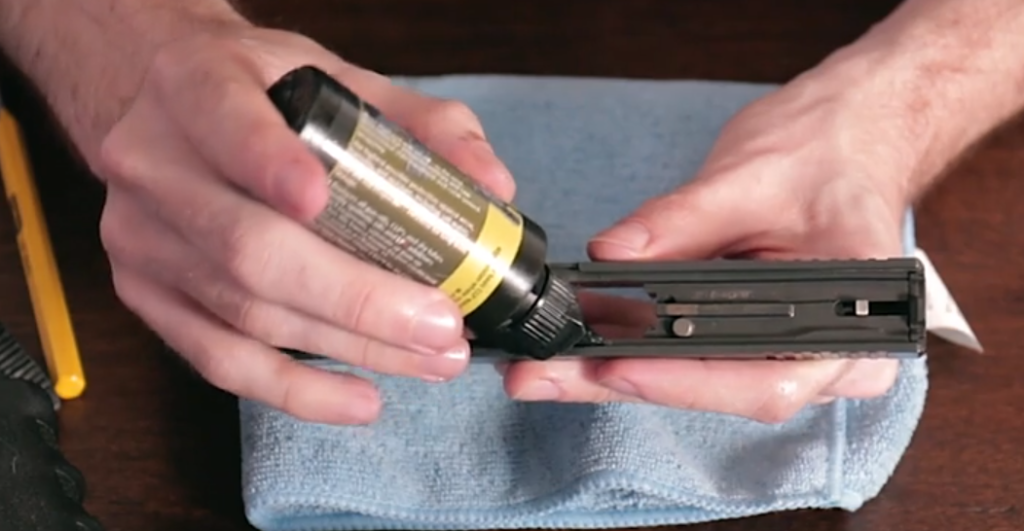
Lubricating your Glock
Repeat after me: Less is more.
Some people like to gun their firearms “wet” and while some guns truly need that, a Glock is not one of them. In fact, excess lubricate can hinder reliability as it holds on to more filth and grime.
So, less is more. A light coating of lube is all you need on any of the parts.
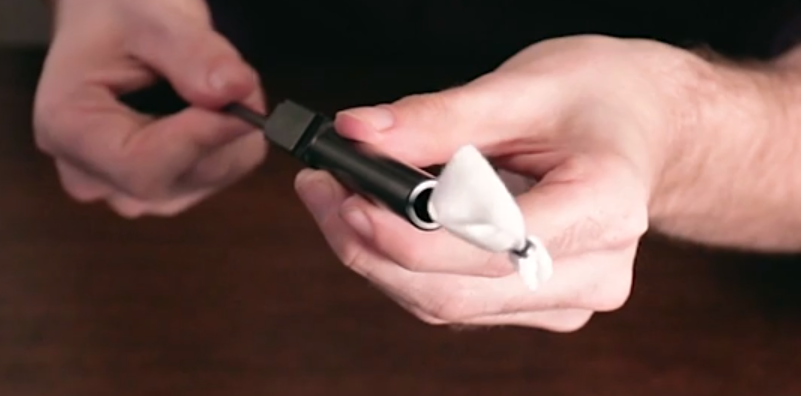
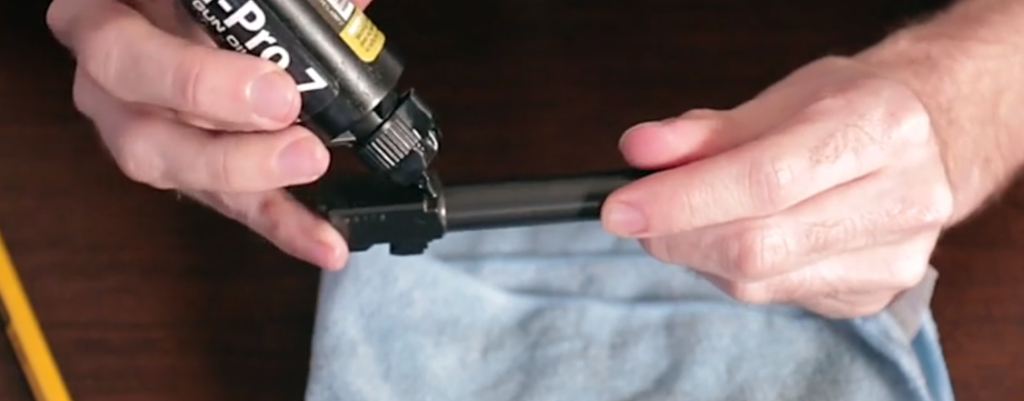
Start with the barrel – apply some lubricant to a cleaning patch and run it through your barrel using the same chamber to muzzle method 4 or 5 times – you might pick up some last bits of fowling doing this, feel free to ignore it.
Oiled cleaning patch down the barrel 4 or 5 times
Follow that with a dry patch to remove the extra lube.
Next comes the outside of the barrel, just apply some lube to the barrel itself and use a patch to wipe it across the entire outside surface.
Oil the barrel – see, less is more!
And you guessed it, use your towel to wipe down the barrel to remove excess lube!
Now you’ll want to do some targeted lubeing where it is needed the most, the space between lugs on the bottom of the barrel…
Oil the underside between the lugs
And on the top of the barrel where the barrel interfaces with the slide…
Oil the top of the barrel
Then, once again, wipe up the excess with your towel.
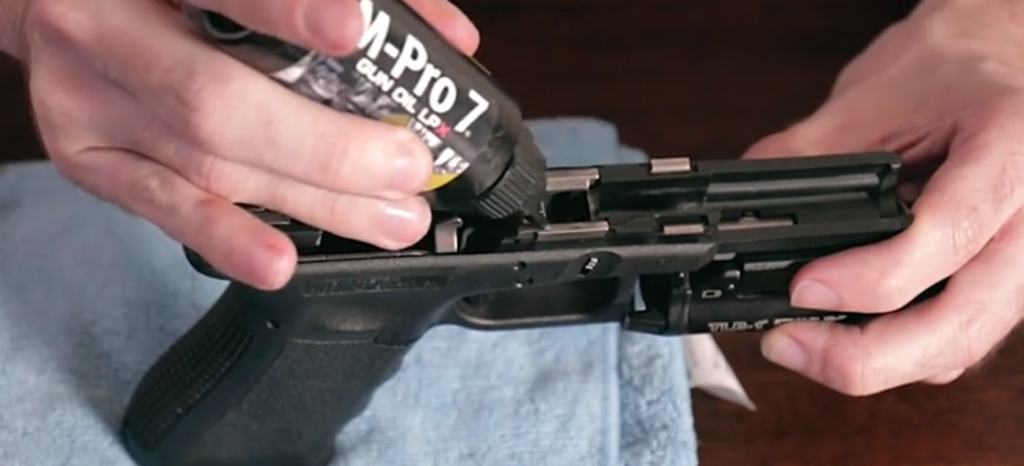
Now the slide!
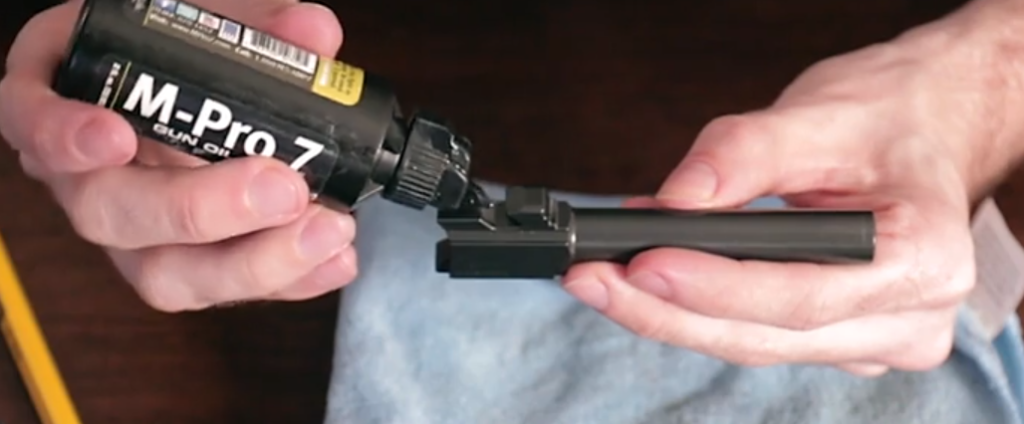
Dab of lube on the top rear of the slide where it interfaces with the barrel…
Oil top rear part of the slide
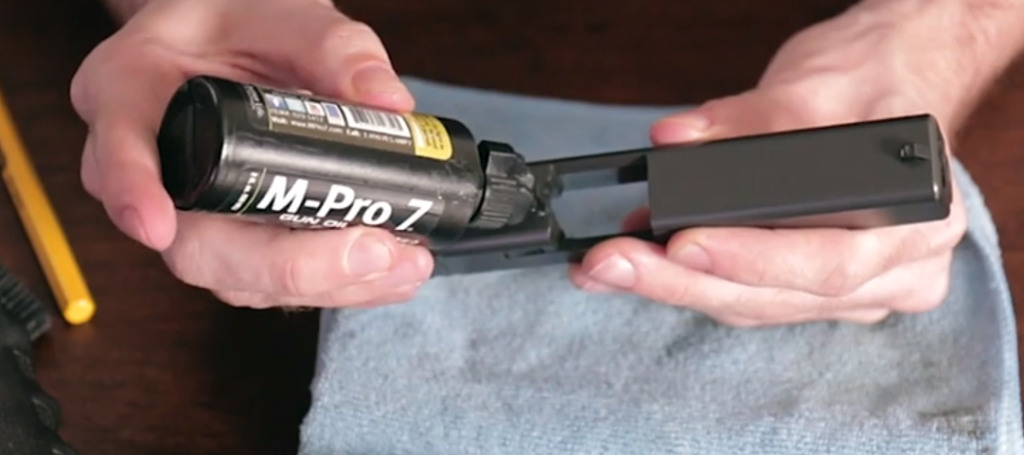
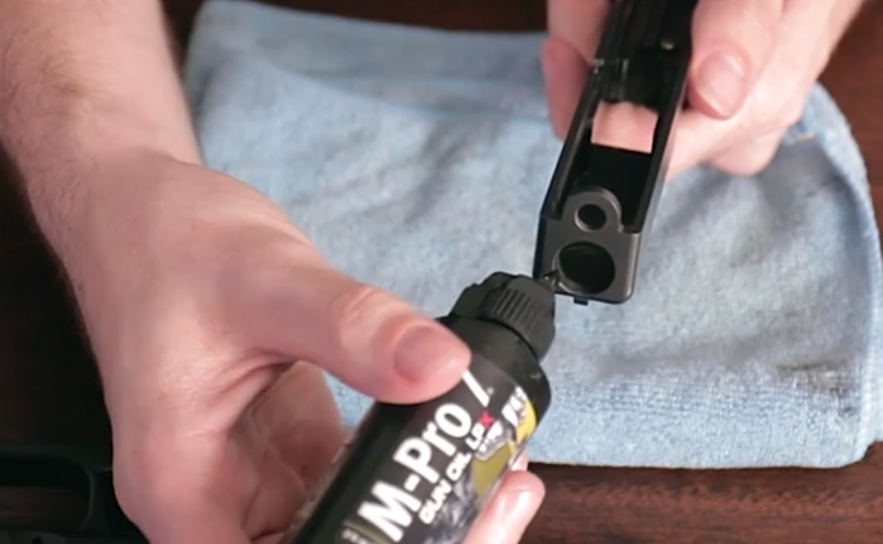
And on the front of the slide where the barrel will poke through – you’ll likely see some wear marks, that tells you where you need to lube.
Oil where the barrel goes through the front of the slide itself
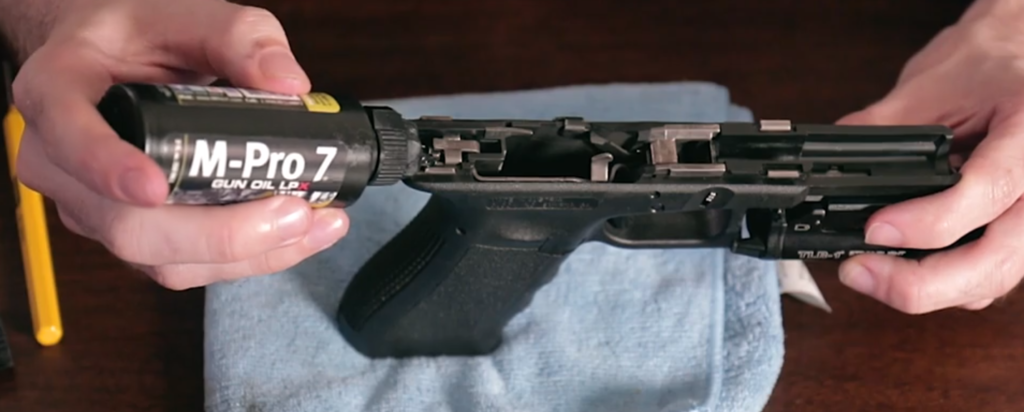
Wipe up the excess lube before moving on to the inside of the slide.
Just a touch of lube on the slide rails, 1 drop per side. You’ll want to use your finger or a patch to wipe it down and spread the lube around evenly.
Drop of oil on slide rails
Annnd again, remove excess with towel.
Now for the frame!
You may have hear this before – lube the slide rails!
Oil the rails of the frame
Also, add a bit of lube to the raised metal part in the rear of the frame that interfaces with the trigger bar.
Oil the raised part of the trigger bar
Wipe off excess one last time and you’re done! To assemble, insert your barrel, guide rod & recoil spring back into the slide and slide the slide back onto the frame.
Assemble your Glock once all the parts are clean and lubed!
FINALLY, point your gun in a safe direction and dry fire your weapon, rack the slide and dry fire again. Confirm that your weapon is functioning, your trigger is resetting as expected, and that nothing is gritty or out of place.
That’s it! You’re done. Congratulations on a clean and well-maintained firearm.
This great video below goes into how to fully strip down the Glock. Pay special attention to the removal and assembly of the pins, since there is a correct order. We clean everything with our M-Pro 7 and oil the moving parts.
Parting Shots
Cleaning your firearms is an important part of shooting, it keeps them running, it preserves them, and it’s relaxing to do. While the Glock is legendary for reliability and ease of maintenance, it’s still a good idea to clean it regularly.
Now that you’re more familiar with the inside of your Glock, maybe it’s time to make some upgrades to it! Take a look at our Best Glock Upgrades & Add-onsguide.
How often do you clean your Glock? Let us know in the comments!
Many founders believe in the myth that the first steps of starting a business are the hardest: Attracting the first investment, the first hires, proving the technology, launching the first product and landing the first customer. Although those critical first steps are difficult, they are certainly not the most difficult on the arduous path of building an iconic company. As early and late-stage funding becomes more abundant, founders and their early VC backers need to get smarter about how to position their companies for a looming valley of death in-between. As we’ll learn below, it’s only going to get much, much harder before it gets easier.
Money will have the look, and heft, of dumbbells as the economic cycle turns. Expect an abundance of small, seed checks at one end, an abundance of massive checks for clear, breakout companies at the other, and a dearth of capital for expanding companies with early proof points and market traction. Read more on how to best prepare for this inevitable future. (Image courtesy Flickr/CircaSassy)
There will be an abundance of capital at the two ends of the startup spectrum. At one end, hundreds of seed and micro VCs, each armed with dozens of $250,000-$1 million checks to write every year, are on the prowl for visionary founders with pedigrees and resumes. At the other end, behemoths like SoftBank, sovereigns, as well “early-stage” firms raising larger funds are seeking breakout companies ready for checks that are in the mid-tens to hundreds of millions. There will be a dearth of capital to grow companies from a kernel of a business, to becoming the clear market-defining leader. In fact, we’re already seeing deal volume decreasing significantly as dollars increase, likely evidence of larger checks going into fewer companies.
Even as the overall number of deals decrease below 2012 levels, the overall dollars invested into startups continue to soar. The 200+ “seed-stage” funds formed since 2012 will continue to chase nascent companies. Meanwhile, the increasing number of mega-funds will seek breakout companies into which to make $100 million+ investments. Companies with early traction seeking ~$20 million to grow will be abundant and have difficulty accessing capital.
Founders should no longer assume that their all-star seed and Series A syndicates will guarantee a successful follow-on financing. Progress on recruiting and product development, though necessary, are no longer sufficient for B-rounds and beyond. Founders should be mindful that investors that specialize in leading $20-50 million rounds will have a plethora of well-funded, well-mentored, well-staffed startups with slick presentations, big visions and some early market traction from which to choose.
Today, there is far more capital chasing fewer quality companies. Fewer breakout companies and fear of missing out is making it easy to raise growth rounds with revenue growth, which may not be scalable or even reflective of an attractive business. This is creating false realities and prompting founders to raise big rounds at high prices — which is fine when there is an over-abundance of capital, but can cripple them when capital later becomes scarce. For example, not long ago, cleantech companies, armed with very preliminary sales, raised massive financings from VCs eager to back winners toward scaling into what they characterized as infinite demand. The reality is that the capital required to meet target economics was far greater and demand far smaller. As the private markets turned, access to cash became difficult and most faltered or were acquired for pennies on the dollar.
There is a likely future where capital grows scarce, and investors take a harder look at the underpinnings of revenue, growth and (dis)economies of scale.
What should startup leadership teams emphasize in an inevitable future where the $30 million rounds will be orders of magnitude harder than their $5 million rounds?
A business model representative of the big vision
Leadership teams put lots of emphasis on revenue. Unfortunately, revenue that’s not representative of the big vision is probably worse than no revenue at all. Companies are initially seeded with the expectation that the founding team can build and sell something. What needs to be proven is the hypothesis that the company can a) build a special product that b) is inexpensive to convince customers to pay for, and c) that those customers represent a massive market. It should be proven that it is unattractive for customers to switch to the inevitable copycats. It should be clear that over time, customers will pay more for additional features, and the cost of acquiring new customers will go down. Simply selling a product to customers that don’t represent that model is worse than not selling anything at all.
Recruiting talent that’s done it
Early founding teams are cognitively diverse individuals that can convince early investors that they can overcome the incredible odds of building a company that until now, shouldn’t have existed. They build a unique product, leveraging unique tools satisfying an unmet need. The early teams need to demonstrate the big vision, and that they can recruit the people that can make that vision a reality. Unfortunately, more founders struggle when it comes to recruiting people that have real experience reducing a technology to practice, executing on a product that customers want and charting the path to expand their market with improving unit economics. There are always exceptions of people that do the above for the first time at startups; however, most of today’s iconic startups knew what kind of talent they needed to execute and succeeded in bringing them on board. Who’s on your team?
Present metrics that matter
The attractive SaaS valuation multiples behoove all founders to apply its metrics to their businesses even if they aren’t really SaaS businesses. Sophisticated later-stage investors see right past that and dismiss numbers associated with metrics that are not representative. Semiconductors are about winning dedicated sockets in growing markets. Design tools are about winning and upselling seats in an industry that’s going to be hooked on those tools. Develop a clear understanding of how your business will be measured. Don’t inundate your investor with numbers; present a concise hypothesis for your unfair advantage in a growing market with your current traction being evidence to back it.
Find efficiencies by working in massive markets
“Pouring fuel on the fire” is a misleading metaphor that leads some into believing that capital can grow any business. That’s just as true as watering a plant with a fire hose or putting TNT in your Corolla’s gas tank: most business models and markets simply are not native to the much-sought-after venture growth profile. In fact, most later-stage startups that fail after raising large amounts of capital fail for this reason. Most markets are conducive to businesses with DIS-economies of scale, implying dwindling margins with scale, which is why many businesses are small, serving local, fragmented markets that technology alone cannot consolidate. How do your unit economics improve over time? What are the efficiencies generated by economies of scale? Is there a real network effect that drives these economies?
Image courtesy Getty Images
I expect today’s resourceful founders to seek partners, whether it’s employees, advisors or investors, to help them answer these questions. Together, these cognitively diverse teams will work together to accelerate past any metaphoric valley and build the iconic companies taking humanity to its fantastic future.
Reader Beeftopia shares a report: Research published in a major medical journal concludes that a parachute is no more effective than an empty backpack at protecting you from harm if you have to jump from an aircraft. But before you leap to any rash conclusions, you had better hear the whole story. The gold standard for medical research is a study that randomly assigns volunteers to try an intervention or to go without one and be part of a control group. For some reason, nobody has ever done a randomized controlled trial of parachutes. In fact, medical researchers often use the parachute example when they argue they don’t need to do a study because they’re so sure they already know something works. Cardiologist Robert Yeh, an associate professor at Harvard Medical School and attending physician at Beth Israel Deaconess Medical Center, got a wicked idea one day. He and his colleagues would actually attempt the parachute study to make a few choice points about the potential pitfalls of research shortcuts. They started by talking to their seatmates on airliners. […] In all, 23 people agreed to be randomly given either a backpack or a parachute and then to jump from a biplane on Martha’s Vineyard in Massachusetts or from a helicopter in Michigan. Relying on two locations and only two kinds of aircraft gave the researchers quite a skewed sample. But this sort of problem crops up frequently in studies, which was part of the point Yeh and his team were trying to make. Still, photos taken during the experiment show the volunteers were only too happy to take part. The drop in the study was about 2 feet total, because the biplane and helicopter were parked. Nobody suffered any injuries. Surprise, surprise. So it’s technically true that parachutes offered no better protection for these jumpers than the backpacks.
Vader, facing his own blade. Image: Screencap via YouTube
“Vader Episode 1: Shards of the Past” is the first installment in a fan film series by the Star Wars Theory YouTube channel, and it’s a good ‘un. Taking place in the early months of the Empire—after the full fall of the Republic but before the Clones were replaced with cheaper Stormtroopers—the film focuses on Darth Vader, forced to carry out the Emperor’s will even amidst deep resentment and confusion.
It’s fertile ground for a Star Wars story, as the recent comics have shown, and the creators of this film do some interesting things with it. It opens with a lengthy fantasy sequence, featuring Vader acting out all his fury at himself and his Master, before setting up a conflict that seems like it should be impossible.
Really, though, the star here is the visual design, which captures a live-action Star Wars look perfectly. It’s particularly thrilling to see Clone Wars-style clone armor in live action. It’s well worth a watch for that alone.
No word on when we’ll see more of this story, but I’ll be keeping a lookout.
For more, make sure you’re following us on our new Instagram @io9dotcom.
(PG-13: Language) While walking down the street one morning, Ed Lawson spotted the aftermath of what appears to have been a very intoxicated driver side-swiping parked cars. But this clip is far less about the destruction and more about the Lawson’s genius commentary.
There are few things more frustrating than wasting ammo trying to get your rifle zeroed. If you just can’t find the paper or can’t seem to chase that zero down, turning expensive ammunition into nothing but noise gets old real fast. Since I’m constantly bolting optics onto loaner rifles, I thought I’d share how I get zeroed at 100 yards with as few rounds fired as possible.
Jeremy S. for TTAG
First and foremost — non-negotiable to this process, actually — is a rock-solid rifle rest. Jon Wayne Taylor and I have gravitated to the Caldwell Stinger this year, but there are many Lead Sled options and other inexpensive ones that use straps and clamps to keep things stable.
Keep in mind you don’t actually have to shoot from this rest. You do need to shoot in as accurate a manner as you and your rifle are capable of, but the rest is only needed for holding the rifle absolutely steady while you’re making adjustments to your optic.
Jeremy S. for TTAG
Bore Sighting
Your first step is to establish a rough zero. The only goal of this step is to land your first bullet anywhere at all on the target.
If you’re shooting a bolt action rifle, remove the bolt. If you’re shooting an AR platform rifle, remove the upper receiver, then remove the bolt carrier. With the rifle or upper (or whatever assembly contains the barrel and mounted optic) on the rest or otherwise held absolutely as rock steady as physically possible, look right down through the barrel.
Jeremy S. for TTAG
The chamber end will be a larger circle and the muzzle end a smaller one. To ensure you’re looking straight down the centerline of the bore, center that muzzle circle in the chamber circle.
Adjust your rifle rest set up until you have the target — visible through the barrel — centered in the bore. It’s more difficult to be precise with this if you have a short barrel with a large bore rather than a long barrel with a small bore, though seeing the target while using the barrel as a zero-magnification telescope is easier. Try to get your eye closer to the chamber if you’re having difficulty seeing your target through the barrel.
Once your barrel is on target, it’s time to get your rifle scope on target. DO NOT MOVE the rifle AT ALL during this process, or it won’t work.
Run the turrets until the reticle is centered on the bullseye. Usually that’s clockwise on the elevation turret to move the reticle up and clockwise on the windage turret to move the reticle right, but knowing which is which doesn’t much matter. Just turn ’em and watch the reticle move and move it to the center of the target.
Confirm that the target is still in the center of the bore when you look through the barrel.
You’re now bore sighted. This is a [very] rough zero. You can also use a laser bore sighter to accomplish this, but they’re often very difficult to spot at 100 yards in daylight. If it’s visible, though, it’s even easier than looking down the bore.
Jeremy S. for TTAG
Firing and Adjusting
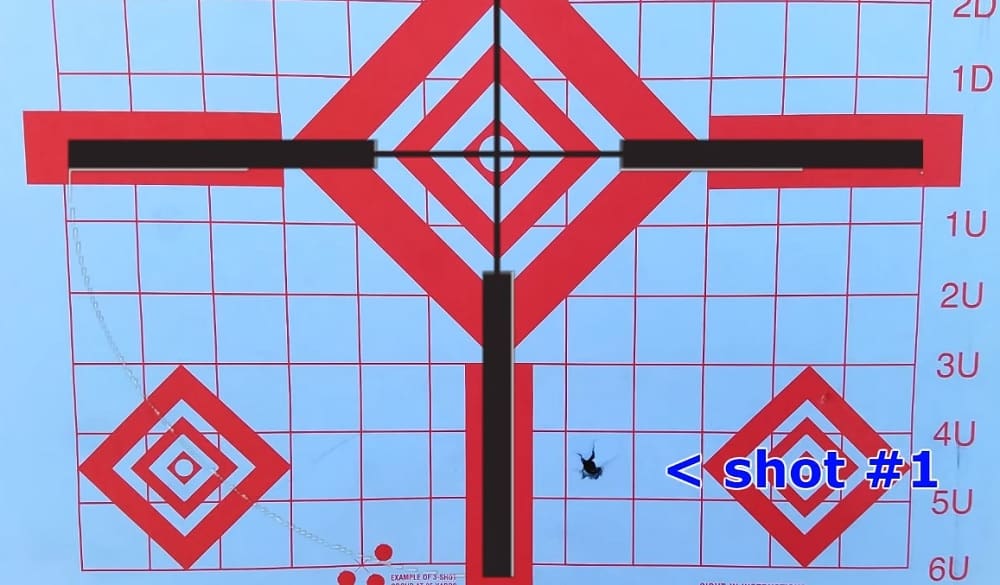
Get stable — remember those fundamentals — and fire a shot. If you know your rifle and ammo combination is extremely accurate and feel confident you made a good shot, one round can suffice. If it’s a new gun or a gun that puts up a bit of a spread, fire three to five shots to create a group. You’ll use the center of this group for the next step.
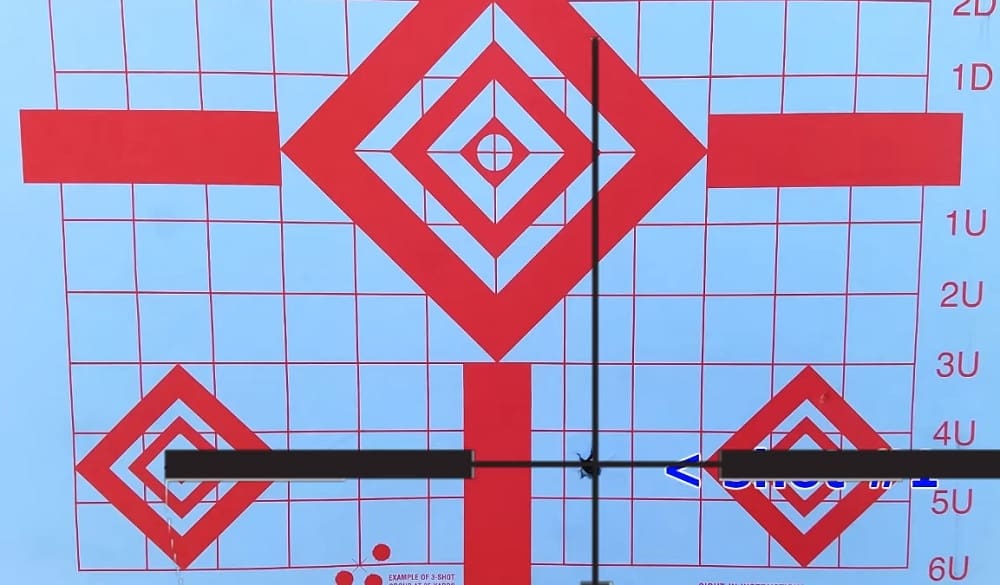
Re-adjust the rest (or put the rifle back on it if you weren’t shooting from it) so the reticle is, once again, perfectly centered in the bullseye.
Jeremy S. for TTAG
Now, dial the turrets until the crosshair is on your bullet hole (or centered in your shot group).
You’re zeroed!
At least, in theory. You’ve matched up your rifle scope’s point of aim with your rifle’s point of impact, and that’s what this game is all about. It may be nice to confirm things with another shot(s), though, and do any fine-tuning that’s needed.
You may also want to consider tapping your turrets with a little tool or a round of ammo or something. Not enough to move the rifle at all, of course, but enough to unstick the widgets inside the scope just in case your hardware is old, cheap, etc. Then make sure it’s still centered on that bullet hole.
Jeremy S. for TTAG
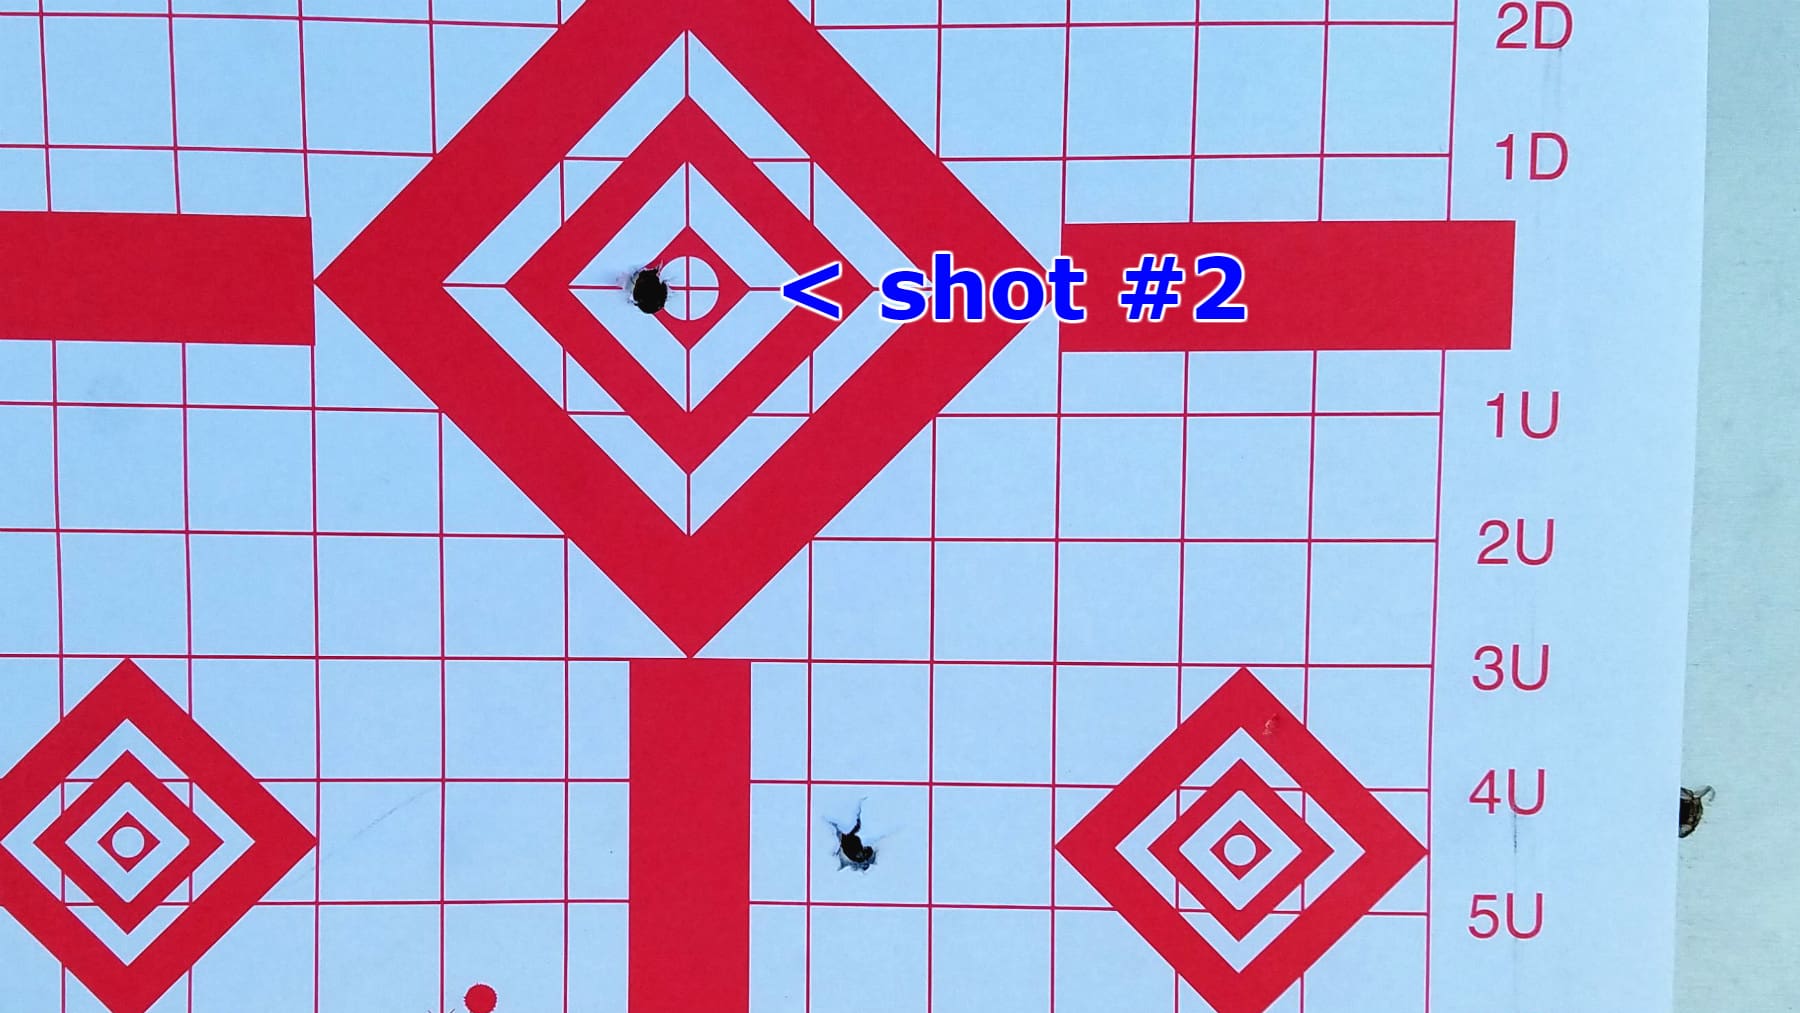
Bingo! I got quite lucky when I chose to go through this process on camera for the video above — the confirmation shot was effectively dead-on with this ~1 MOA rifle (which I’d normally give the 5-shot group treatment). “In real life” I expect to do a final fine-tuning if I want the rifle and ammo combo to be truly dead-on zeroed.
There you have it: a straightforward zeroing process for jumping right to 100 yards, sighting in, getting your first shot on paper, and zeroing your scope quickly. And all while using as few as one single round of ammo.
This video from NightHawkInLight talks about an interesting fireproof material named Starlite, which was invented by a hairdresser, which should have changed the world, but didn’t… because the inventor was so secretive that he refused to even let samples of Starlite out of his sight, and as far as we know, he told his formula to nobody before he died in 2011.
The video host noticed that Starlite produced a foam in response to flame, which reminded him of some experiments he’d done in the past… so he went to work and came up with a formula that can be made using common household ingredients that you might have in your home right now:
Baking soda
Corn starch
Elmer’s glue
Mix up a batch that’s 90% corn starch and 10% baking soda, then add enough white glue to turn it into a putty. You’re done!
He places a thin layer on a flimsy plastic cup and shows us that a blowtorch flame won’t conduct heat through his newly-made putty.
Afterward, he tells viewers why it works… and explains why it becomes cool enough to touch just seconds after a flame has been removed from it.
Has he re-created Starlite? Nobody knows… but it’s still a really interesting material that’s easy to make, and could be just the thing for insulating a home forge — or even just blocking the heat from a soldering torch during home plumbing repairs, so you don’t set your house on fire.
Or use it along with a camp stove while backpacking, camping, etc. The possibilities, as they say, are astounding.
The Laravel team released Laravel Cashier v9.0 this week requiring an upgrade of PHP and upping the minimum Laravel version to Laravel v5.7. Learn more about the latest major release of Laravel Cashier.