https://www.percona.com/blog/wp-content/uploads/2024/03/best-practices-database-security.jpeg Anyone working with databases knows that data is the driving force behind every online activity, and data security is always a top concern. Seeing as how they store and manage vast amounts of sensitive and valuable data, ranging from financial records to personal information and intellectual property, a lapse in database security measures can trigger […]Percona Database Performance Blog
PhotoCube PD+ aims to make physical backups of your phone photos a breeze
https://2.img-dpreview.com/files/p/E~C68x0S864x648T1200x900~articles/8009359209/image-5.png
 |
| Image: Photofast |
Backing up your smartphone images usually involves sending them to the cloud or manually syncing them to a computer. Seamless? Maybe, until you have to start paying monthly storage fees. And while you can plug a hard drive into many modern smartphones, it isn’t quite user-friendly or universal across all smartphones.
Recent Videos
PhotoCube PD+, launched via Kickstarter and Indiegogo by Hong Kong electronics company Photofast, aims to make cloud-free physical backups of phone photos more straightforward.
Built for USB-C devices, the PhotoCube PD+ attaches directly to your smartphone or tablet and is compatible with both iOS and Android. It accepts microSD cards with up to 2TB of storage space, and you can interchange your cards if needed.
Supporting SD cards up to 2TB in size, the PhotoCube PD+ can be configured to automatically back up photos when plugged in, as well as additional data like contacts, without the need for additional cables.
An obvious downside is that the device won’t work with iPhones older than the iPhone 15 or any other device that doesn’t have a USB-C port. Android users shouldn’t have an issue using the portable device, even with slightly older handsets.
While there’s no monthly fee, PhotoCube PD+ obviously costs money upfront. Also, PhotoCube PD+ doesn’t come with built-in storage or a card included, so prepare to bring your own.
The device is currently available for preorder, with two devices at an early bird price of $115 (USD) through Indiegogo with an estimated ship date of August 2024. As with all crowdfunded campaigns (and preorders in general), caveats apply. Crowdfunded products are no stranger to delays or quality control issues. The company’s previous model eventually came to Amazon. Presumably, this one will too. Whether it’s worth the gamble to get an early bird discount is up to you.
Note/disclaimer: Remember to do your research with any crowdfunding project before backing it. Pledges to crowdfunding campaigns are not pre-orders. DPReview does not have a relationship with this, or any such campaign, and we publicize only projects that appear legitimate, and which we consider will be of genuine interest to our readers. You can read more about the safeguards Kickstarter has in place on its ‘Trust & Safety‘ page.
Articles: Digital Photography Review (dpreview.com)
Formula 1 Chief Appalled To Find Team Using Excel To Manage 20,000 Car Parts
An anonymous reader quotes a report from Ars Technica: Starting in early 2023, Williams team principal James Vowles and chief technical officer Pat Fry started reworking the F1 team’s systems for designing and building its car. It would be painful, but the pain would keep the team from falling even further behind. As they started figuring out new processes and systems, they encountered what they considered a core issue: Microsoft Excel. The Williams car build workbook, with roughly 20,000 individual parts, was "a joke," Vowles recently told The Race. "Impossible to navigate and impossible to update." This colossal Excel file lacked information on how much each of those parts cost and the time it took to produce them, along with whether the parts were already on order. Prioritizing one car section over another, from manufacture through inspection, was impossible, Vowles suggested.
"When you start tracking now hundreds of thousands of components through your organization moving around, an Excel spreadsheet is useless," Vowles told The Race. Because of the multiple states each part could be in — ordered, backordered, inspected, returned — humans are often left to work out the details. "And once you start putting that level of complexity in, which is where modern Formula 1 is, the Excel spreadsheet falls over, and humans fall over. And that’s exactly where we are." The consequences of this row/column chaos, and the resulting hiccups, were many. Williams missed early pre-season testing in 2019. Workers sometimes had to physically search the team’s factory for parts. The wrong parts got priority, other parts came late, and some piled up. And yet transitioning to a modern tracking system was "viciously expensive," Fry told The Race, and making up for the painful process required "humans pushing themselves to the absolute limits and breaking."
The idea that a modern Formula 1 team, building some of the most fantastically advanced and efficient machines on Earth, would be using Excel to build those machines might strike you as odd. F1 cars cost an estimated $12-$16 million each, with resource cap of about $145 million. But none of this really matters, and it actually makes sense, if you’ve ever worked IT at nearly any decent-sized organization. Then again, it’s not even uncommon in Formula 1. When Sebastian Anthony embedded with the Renault team, he reported back for Ars in 2017 that Renault Sport Formula One’s Excel design and build spreadsheet was 77,000 lines long — more than three times as large as the Williams setup that spurred an internal revolution in 2023.
Every F1 team has its own software setup, Anthony wrote, but they have to integrate with a lot of other systems: Computational Fluid Dynamics (CFD) and wind tunnel results, rapid prototyping and manufacturing, and inventory. This leaves F1 teams "susceptible to the plague of legacy software," Anthony wrote, though he noted that Renault had moved on to a more dynamic cloud-based system that year. (Renault was also "a big Microsoft shop" in other areas, like email and file sharing, at the time.) One year prior to Anthony’s excavation, Adam Banks wrote for Ars about the benefits of adopting cloud-based tools for enterprise resource planning (ERP). You adopt a cloud-based business management software to go "Beyond Excel." "If PowerPoint is the universal language businesses use to talk to one another, their internal monologue is Excel," Banks wrote. The issue is that all the systems and processes a business touches are complex and generate all kinds of data, but Excel is totally cool with taking in all of it. Or at least 1,048,576 rows of it. Banks cited Tim Worstall’s 2013 contention that Excel could be "the most dangerous software on the planet." Back then, international investment bankers were found manually copying and pasting Excel between Excel sheets to do their work, and it raised alarm.
Read more of this story at Slashdot.
Slashdot
Formula 1 chief appalled to find team using Excel to manage 20,000 car parts
https://cdn.arstechnica.net/wp-content/uploads/2024/03/GettyImages-2046007199-760×380.jpg
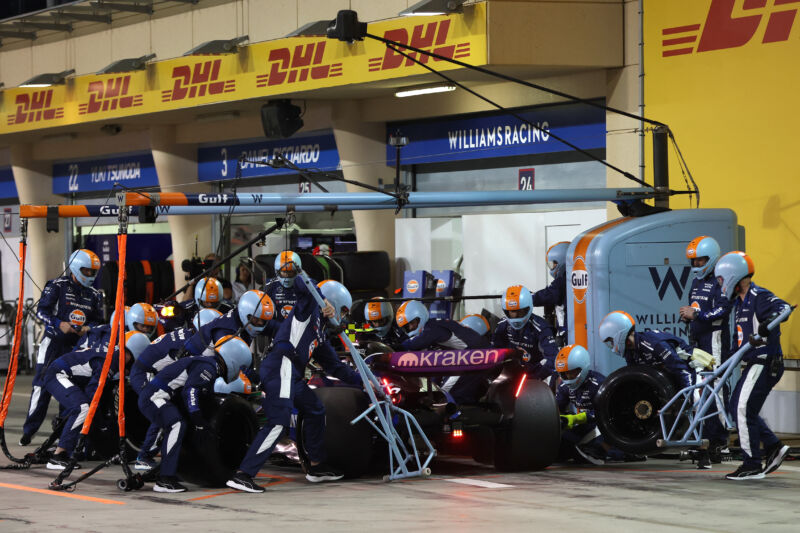
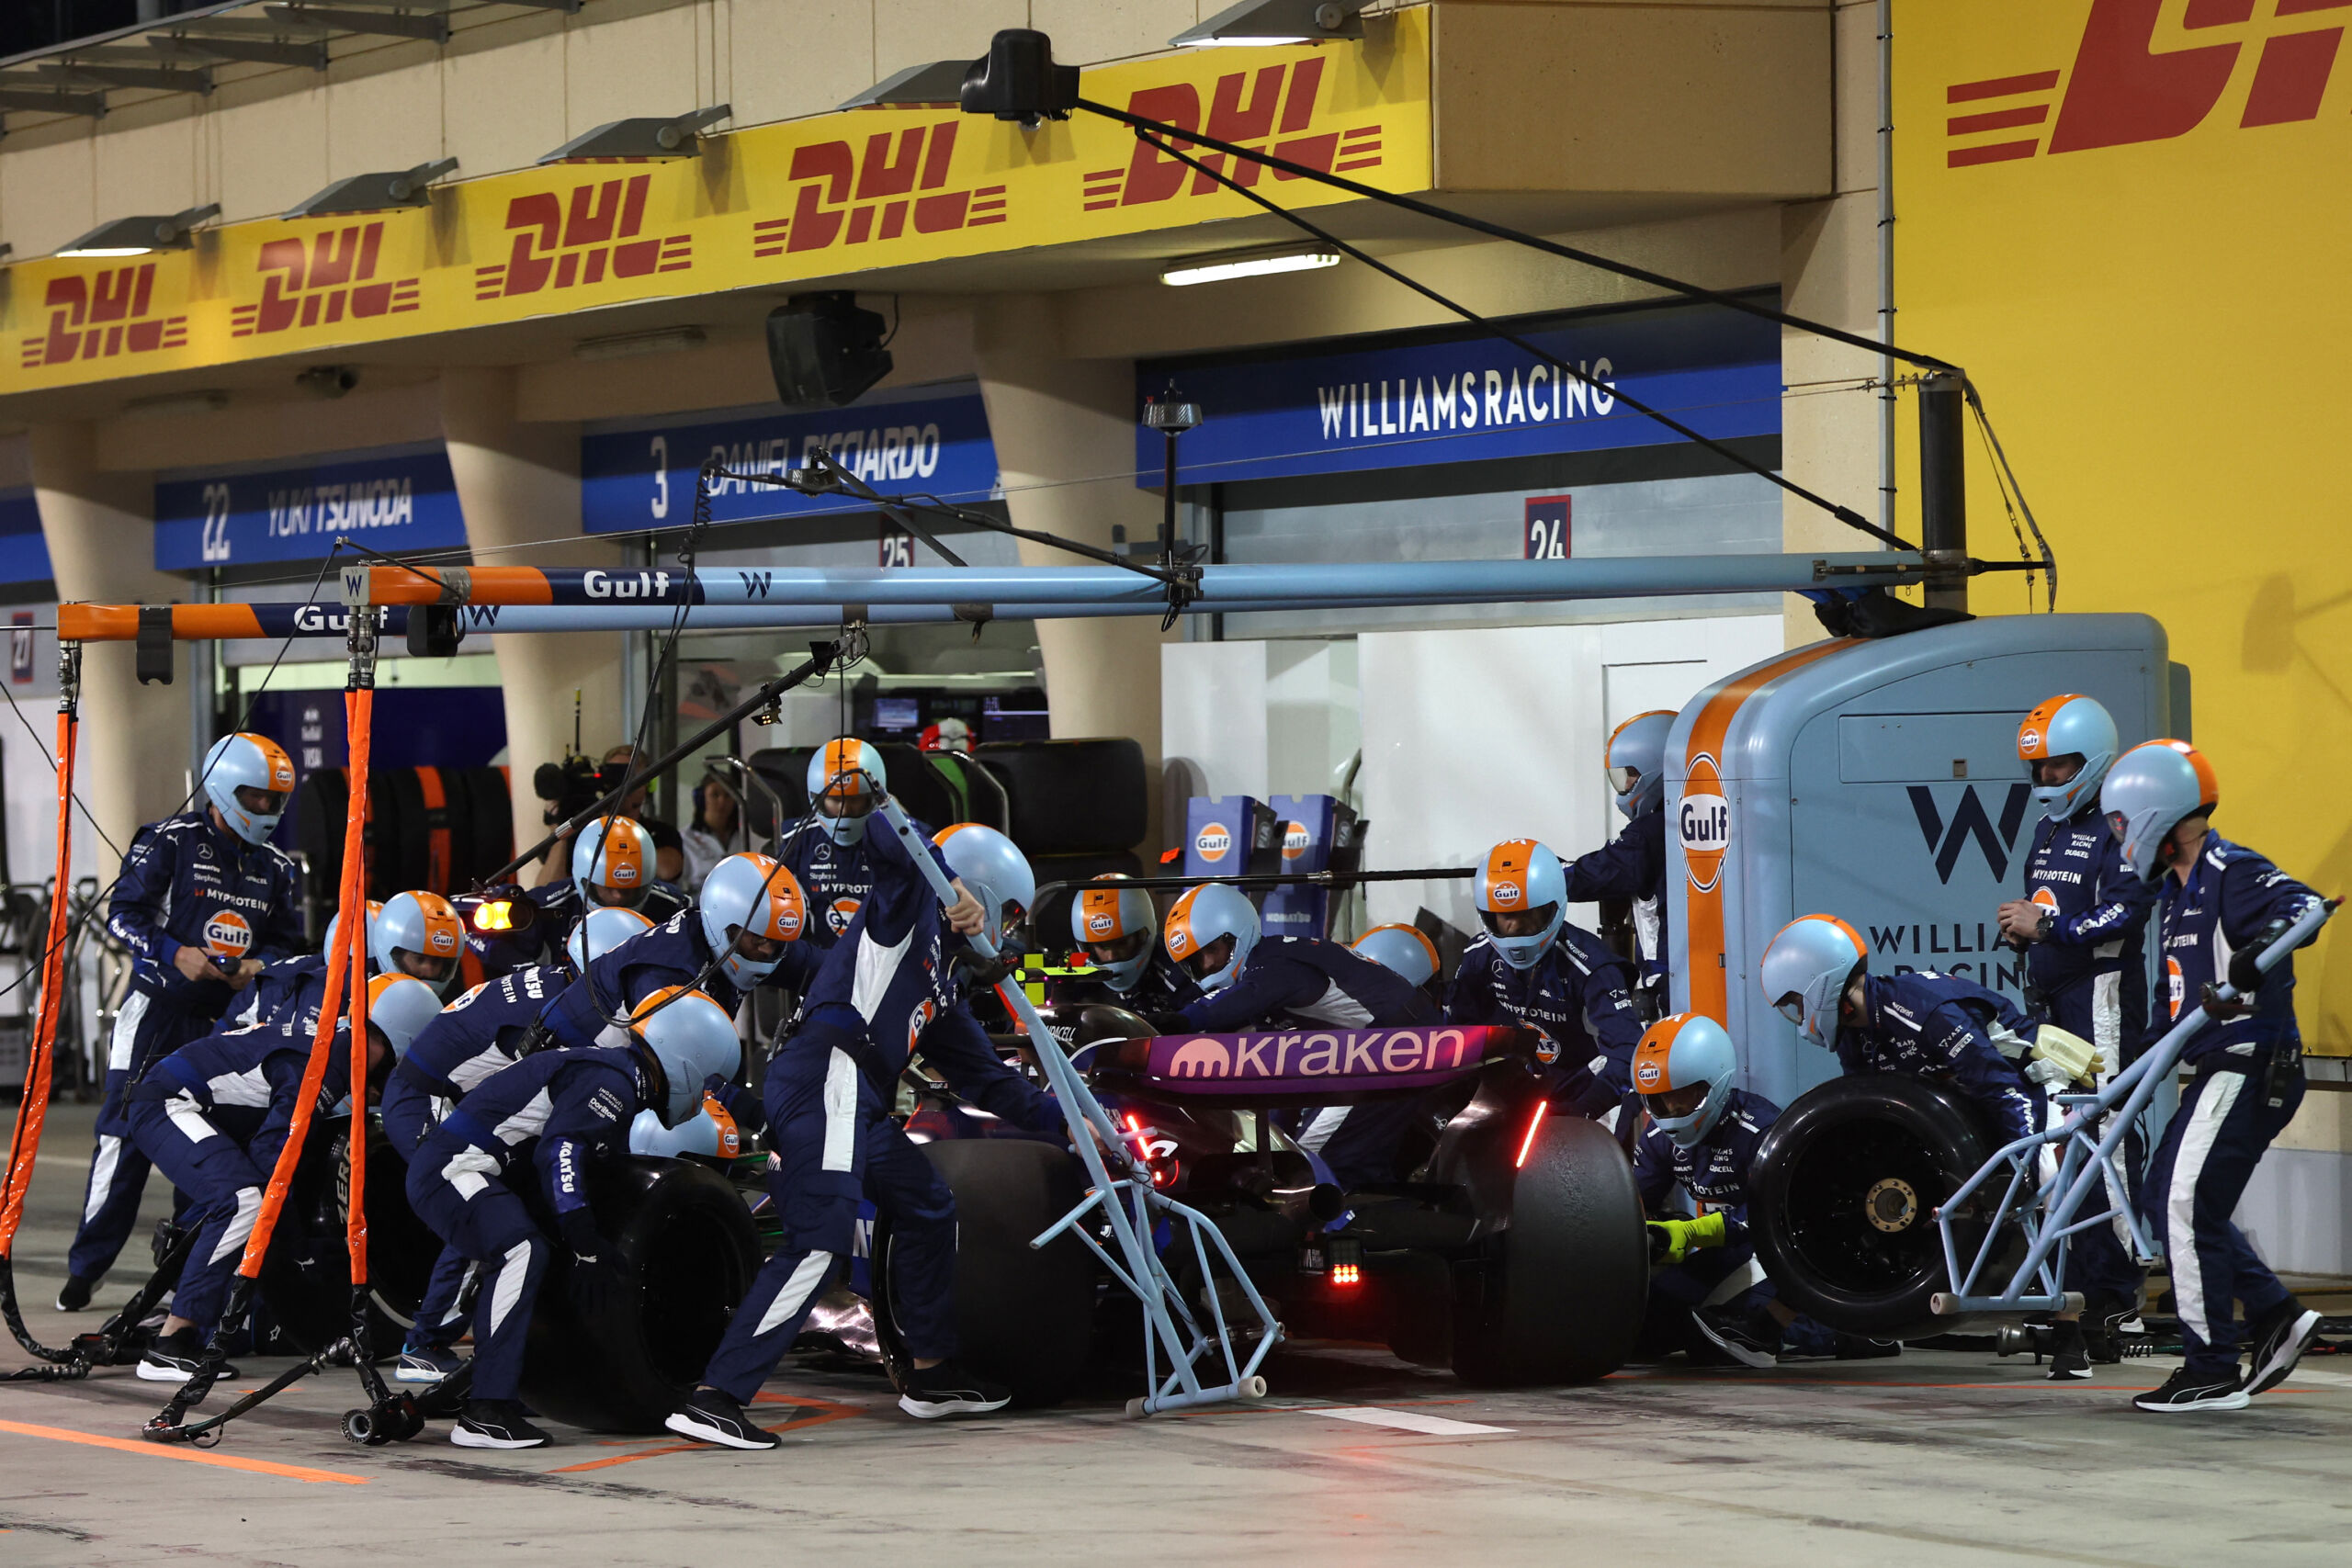
Enlarge / A pit stop during the Bahrain Formula One Grand Prix in early March evokes how the team’s manager was feeling when looking at the Excel sheet that managed the car’s build components.
ALI HAIDER/POOL/AFP via Getty Images
There’s a new boss at a storied 47-year-old Formula 1 team, and he’s eager to shake things up. He’s been saying that the team is far behind its competition in technology and coordination. And Excel is a big part of it.
Starting in early 2023, Williams team principal James Vowles and chief technical officer Pat Fry started reworking the F1 team’s systems for designing and building its car. It would be painful, but the pain would keep the team from falling even further behind. As they started figuring out new processes and systems, they encountered what they considered a core issue: Microsoft Excel.
The Williams car build workbook, with roughly 20,000 individual parts, was "a joke," Vowles recently told The Race. "Impossible to navigate and impossible to update." This colossal Excel file lacked for information on how much each of those parts cost and the time it took to produce them, along with whether parts were already on order. Prioritizing one car section over another, from manufacture through inspection, was impossible, Vowles suggested.
"When you start tracking now hundreds of 1000s of components through your organisation moving around, an Excel spreadsheet is useless," Vowles told The Race (which uses British spellings). Because of the multiple states each part could be in—ordered, backordered, inspected, returned—humans are often left to work out the details. "And once you start putting that level of complexity in, which is where modern Formula 1 is, the Excel spreadsheet falls over, and humans fall over. And that’s exactly where we are."
The consequences of this row/column chaos, and the resulting hiccups, were many. Williams missed early pre-season testing in 2019. Workers sometimes had to physically search the team’s factory for parts. The wrong parts got priority, other parts came late, and some piled up. And yet transitioning to a modern tracking system was "viciously expensive," Fry told The Race, and making up for the painful process required "humans pushing themselves to the absolute limits and breaking."
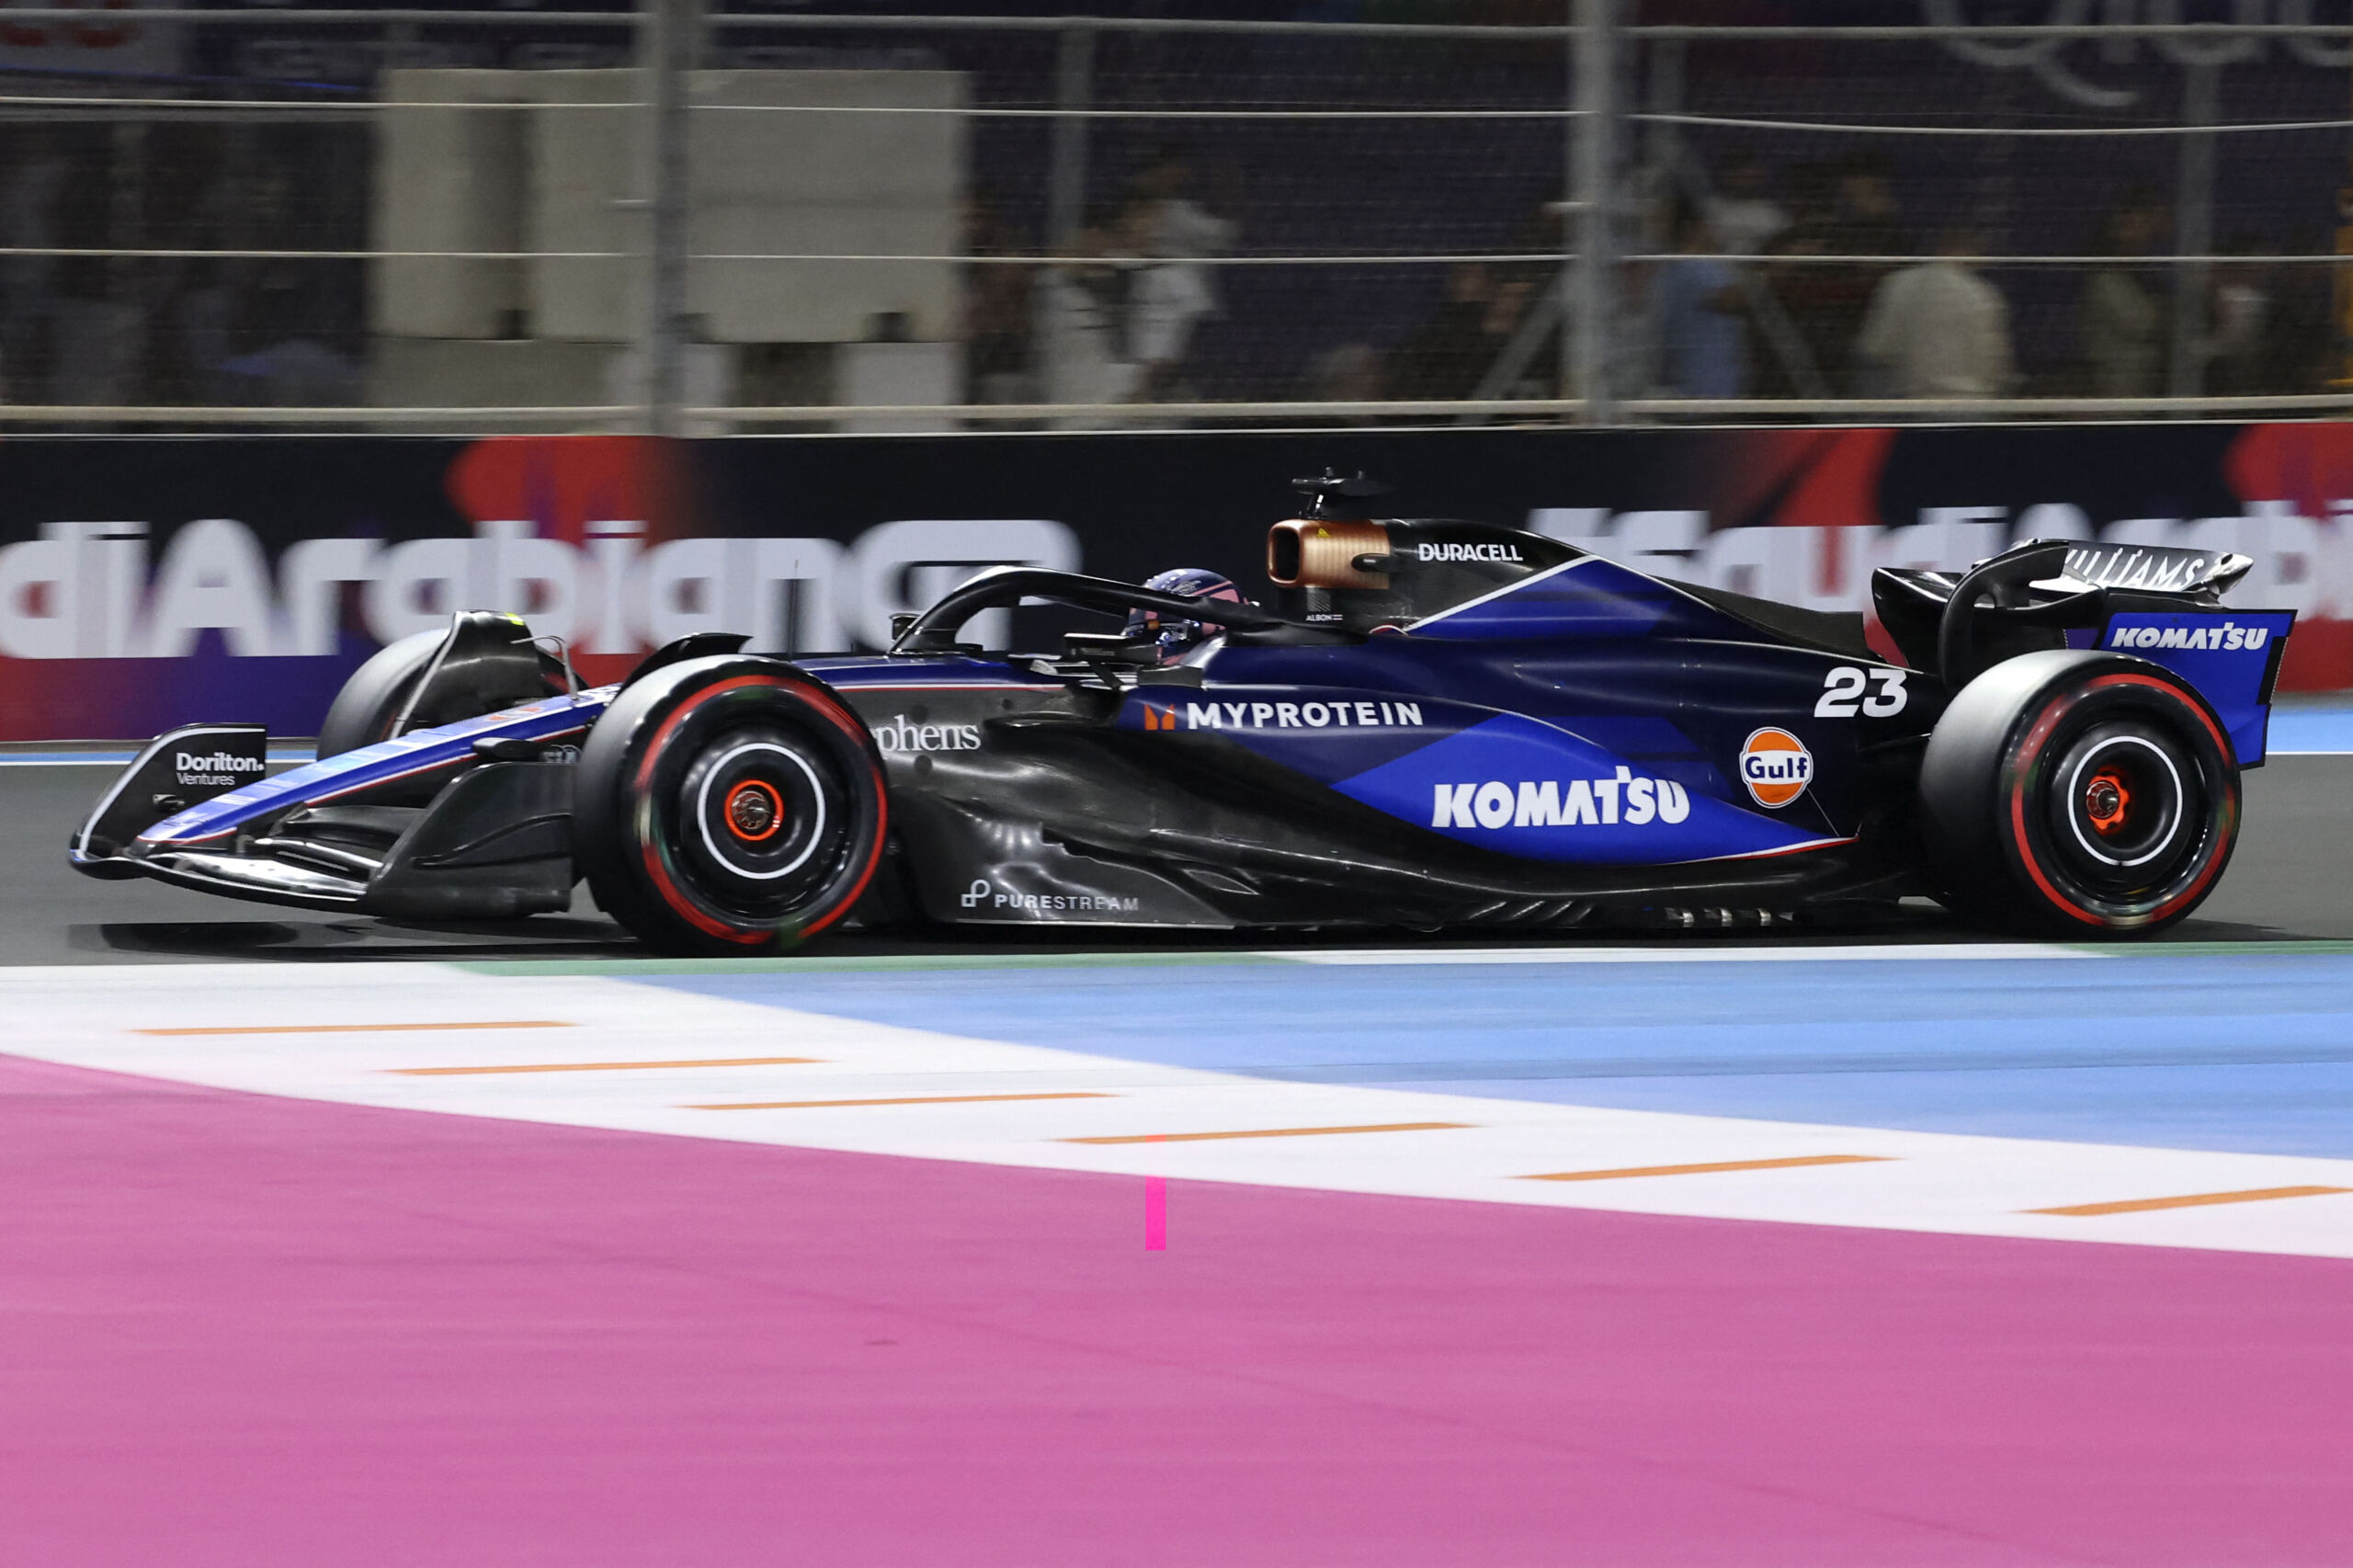
Williams’ driver Alexander Albon drives during the qualifying session of the Saudi Arabian Formula One Grand Prix at the Jeddah Corniche Circuit in Jeddah on March 8, 2024.
Joseph Eid/AFP via Getty Images
The devil you know strikes again
The idea that a modern Formula 1 team, building some of the most fantastically advanced and efficient machines on Earth, would be using Excel to build those machines might strike you as odd. F1 cars cost an estimated $12-$16 million each, inside a resource cap of about $145 million. But none of this really matters, and it actually makes sense, if you’ve ever worked IT at nearly any decent-sized organization.
Then again, it’s not even uncommon in Formula 1. When Sebastian Anthony embedded with the Renault team, he reported back for Ars in 2017 that Renault Sport Formula One’s Excel design and build spreadsheet was 77,000 lines long—more than three times as large as the Williams setup that spurred an internal revolution in 2023.
Every F1 team has its own software setup, Anthony wrote, but they have to integrate with a lot of other systems: Computational Fluid Dynamics (CFD) and wind tunnel results, rapid prototyping and manufacturing, and inventory. This leaves F1 teams "susceptible to the plague of legacy software," Anthony wrote, though he noted that Renault had moved on to a more dynamic cloud-based system that year. (Renault was also "a big Microsoft shop" in other areas, like email and file sharing, at the time.)
One year prior to Anthony’s excavation, Adam Banks wrote for Ars about the benefits of adopting cloud-based tools for enterprise resource planning (ERP). You adopt a cloud-based business management software to go "Beyond Excel." "If PowerPoint is the universal language businesses use to talk to one another, their internal monologue is Excel," Banks wrote. The issue is that all the systems and processes a business touches are complex and generate all kinds of data, but Excel is totally cool with taking in all of it. Or at least 1,048,576 rows of it.
Banks cited Tim Worstall’s 2013 contention that Excel could be "the most dangerous software on the planet." Back then, international investment bankers were found manually copying and pasting Excel between Excel sheets to do their work, and it raised alarm.
But spreadsheets continue to show up where they ought not. Spreadsheet errors in recent years have led to police doxxing, false trainee test failures, an accidental $10 million crypto transfer, and bank shares sold at sorely undervalued prices. Spreadsheets are sometimes called the "dark matter" of large organizations, being ever-present and far too relied upon despite 90 percent of larger sheets being likely to have a major error.
So Excel sheets catch a lot of blame, even if they’re just a symptom of a larger issue. Still, it’s good to see one no longer connected to the safety of a human heading into a turn at more than 200 miles per hour.
Ars Technica – All content
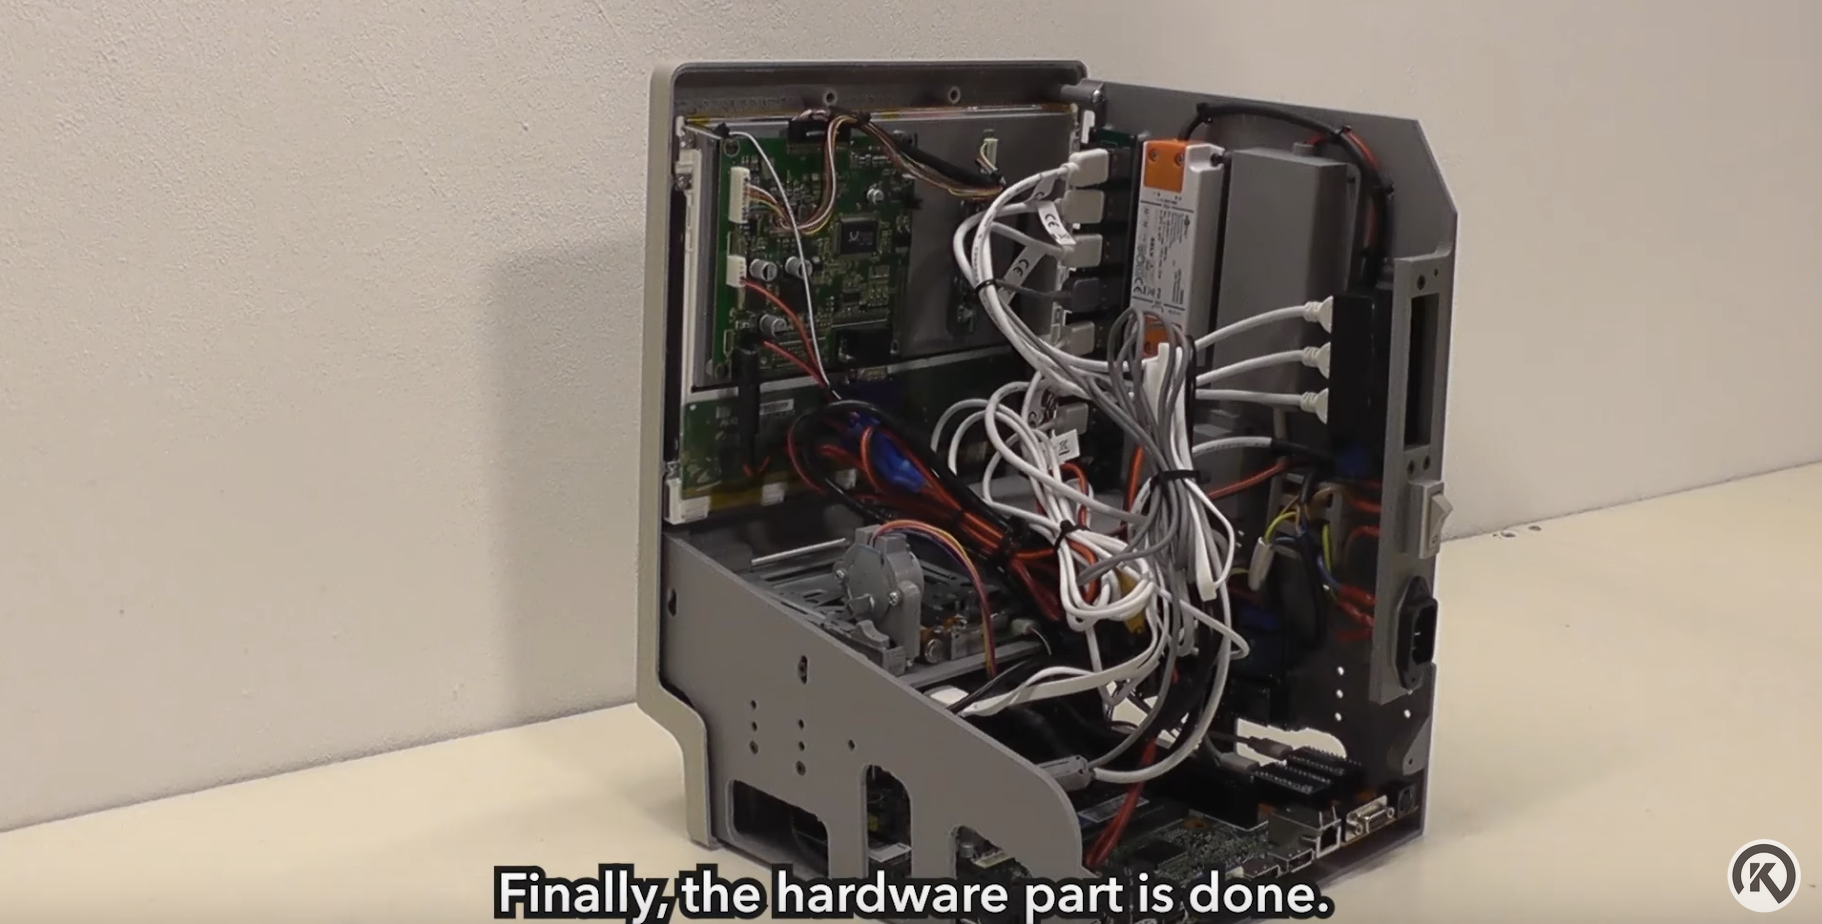
3D-printed Mac replica is a maker masterwork inside an entirely accurate shell
https://cdn.arstechnica.net/wp-content/uploads/2024/03/booted_mac_replica-760×380.jpg
Kevin Noki
Have you ever worked on a hobby project where modifying and compiling the source code for a Linux-based emulator was possibly the easiest and most straightforward part of the whole thing?
Kevin Noki really, really wanted a functioning Macintosh Plus, complete with a functioning, auto-ejecting disk drive that it could boot from. The German maker already had a Mac Plus (1Mb) from eBay, but it had both a busted power supply and floppy drive. Rather than carve out the busted Plus’ one-of-a-kind internals and slap a Raspberry Pi in there like some DIY slacker, Noki went … a different path.
47 minutes and 25 seconds of a tour-de-force of modern maker technology.
Noki 3D-printed his own Macintosh, the "Brewintosh." I would like you to consider what you think that last sentence means and then wipe your expectations clean. I have watched the entire 48-minute journey of Noki’s Brewintosh, which is both very soothing on some ASMR-adjacent gut level and also low-key maddening for the way it plays down all the individual accomplishments along the way. Any one of the Brewintosh’s pieces would be my entire weekend, and my spouse would not enjoy my mood while I was sunk into it.
-
The design part of the Brewintosh, which you only see in super-fast time-lapse summary, but which is pretty, pretty notable.
-
Now the custom board-building, circuit design, and internal space configuration can begin!
-
The tiny two-part board Noki built to rework serial and ADB input to USB is pretty much its own project (and video).
-
Detail on the Brewintosh sticker and corner of the finished project.
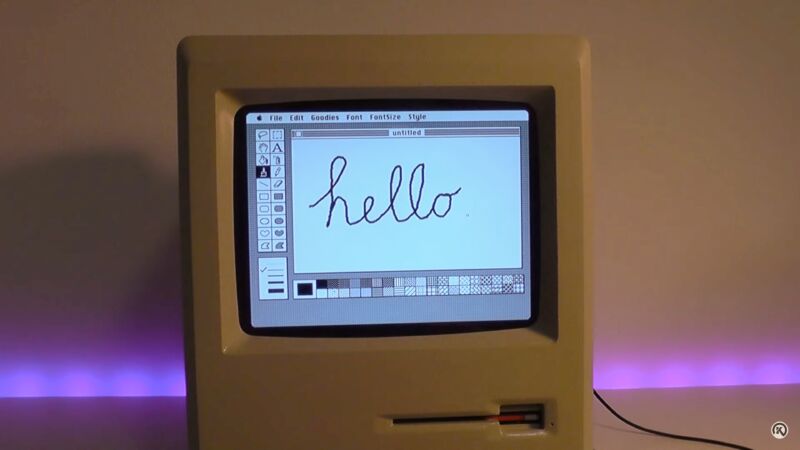
But Noki, over what he reports as "months," essentially works backward from 2024, using every kind of maker tool and skill to get back to a working 1986 Mac. Not just "classic Mac OS on a properly sized AliExpress monitor," mind you. We are talking a properly sized, colored, and textured box, which takes wall power, swallows 3.5-inch disks, works with both telephone-cord and ADB Apple keyboards and mice, has a screen dimmer, and makes the startup sound (the beep, not the chord). It’s not a "loving" tribute, it’s uncanny and potentially unnerving.
If you wanted a non-historic but ultra-authentic Mac like Noki’s, this is the somehow-not-exhaustive list of 29 things for which you would have to have the tools, skills, and patience:
- Meticulously measuring every single surface and angle of a Macintosh Plus
- Re-create those measurements and model them in AutoDesk Fusion 360
- Print the Mac case in four parts using a modified Ender-3 with gray PLA filament
- Apply one-part plastic filler and sand down the planes where the case pieces would join
- Drill registration holes in the case parts for metal pin connectors
- Use cyanoacrylate (CA) glue to join pieces and repeatedly sand every part with 3D layers showing
- Spray-paint both a primer and final beige color on the outward-facing parts
- Use a vinyl cutter to protect the case parts that should be smooth
- Apply textured clear-coat to replicate the Mac’s rough texture
- Disassemble a 10-inch screen that was a thrift-store find
- Replace the screen’s CCFL with LED lighting
- Rewire and solder a dimmer knob onto the screen to create a dimming control
- De-solder and modify a laptop charging brick to make a power assembly
- Modify a powered USB hub and its AC adapter
- Dye a physical power switch to match its proper case color
- Use WAGO connectors to connect power components safely
- Disassemble a $13 thin client computer and replace its power jack with an XT60
- Wire in a resistor to make that power supply work with an outside adapter
- Replace the thin client’s power button with an Arduino-controlled relay
- Build a front keyboard and mouse connector out of a Teensy USB dev board, RJ11 jack, and TMK keyboard firmware.
- Solder and wire in an internal speaker
- Rebuild a USB floppy drive reader with an Arduino-controlled stepper motor (that you coded) to eject disks from software controls
- Built an ADB peripheral board with a KiCAD design, a Teensy board, and an Arduino Pro Micro
- Configure an ATtiny85 to control mainboard and screen power, and play the startup sound
- Build a modified Mini vMac emulator inside a Linux system
- Design your own Brewintosh raised-text stereotype and apply foil to it with a laminator
- Create custom-designed Brewintosh multicolor stickers, print them, apply UV resin for a glossy finish, and cure them
- Design and print a replica sticker of the original Mac’s back panel
- Record yourself doing all these things and edit them into an engaging video.
I didn’t include the smaller ("smaller") things Noki 3D-printed in that list because I respect your scroll fingers. You also have to design and accurately print at least 12 other components. That list includes the feet in resin, a screen board holder, an inner frame, power assembly cover, power cabling routing box, audio jack holder, USB port and SD card holder, internal speaker chassis, disk drive stepper motor attachment, manual disk eject, the brightness control dial, and probably a dozen tiny things Noki doesn’t even mention.
I am not actually suggesting anybody with a biologically limited lifespan attempt what Noki has done here. If you tackled each component and 3D-printed part as individual weekend projects, it adds up to more than 40 weeks. Mind you, printing the 3D parts alone took 48 hours, according to Noki. But even that spread presumes that you’re starting from the obvious familiarity Noki has with all his printers, cutters, and tools. He doesn’t include any mistakes or missteps in his video, but you just know in your heart that you would reach a certain point in the assembly and realize that something just doesn’t fit at all, so you must go back and do it, and possibly two or three other whole things, again.
Watching this video did a number on me. Seeing the astounding number of skills on display, paired with the Steven Jobs-like attention to detail, can be overwhelmingly intimidating or simply affirming and wonderful, depending on how you take it in. Someone in the YouTube comments points out a little bit that Noki himself doesn’t even mention in his subtitle text: that the monitor stays off until the vMac emulator has started and produced the tiny smiling Mac icon. All of that, just to get to the point where you can play 3D chess or use MacPaint in a little beige time machine.
Ars Technica – All content
Laravel Cloudflare Cache – Serve millions of requests by caching with Cloudflare
https://repository-images.githubusercontent.com/734458925/b9ca4a63-95b7-4a98-9197-692272ff35b4
You can serve millions of requests with this package. This package provides cacheable routes for Cloudflare. Thanks to Cloudflare, your static pages are served efficiently, reducing the load on your servers if they are cached for the TTL (Time to Live) duration. You can purge the cache whenever you need with this package.
You can install the package via composer:
composer require yediyuz/laravel-cloudflare-cache
You can publish the config file with:
php artisan vendor:publish --tag="cloudflare-cache-config"
Add environment variables to .env file
CLOUDFLARE_CACHE_EMAIL=info@example.com #Cloudflare account email address
CLOUDFLARE_CACHE_KEY=XXXXXXX #Cloudflare API_KEY
CLOUDFLARE_CACHE_IDENTIFIER=XXXXXXX #ZONE_ID
CLOUDFLARE_DEFAULT_CACHE_TTL=600 #10 minutes
CLOUDFLARE_CACHE_DEBUG=false
To active caching on static pages, you need to add page rule OR cache rule on Cloudflare.
For page rule:
- If the URL matches:
www.example.com/* - Setting: Cache Level
- Value: Cache Everything
For the cache rule:
- Field: hostname
- Operator: equals
- Value:
example.com - Then: Eligible for cache
https://developers.cloudflare.com/cache/how-to/cache-rules/create-dashboard/
You can use cache groups for your static contents.
Route::cache()->group(function () {
    Route::get('/content', function () {
        return 'content';
    });
});
You can use cache tags, so you can clear your caches easily. Specify custom ttl for expire time in seconds. When you do not pass ttl, it will use default ttl given in the config.
Route::cache(tags: ['tag1', 'tag2'], ttl: 600)->group(function () {
    Route::get('/content_with_tags', function () {
        return 'content';
    });
});

Route::cache(tags: ['staticPages'])->group(function () {
    //
});
Warning
Be careful caching your routes! Do not cache your dynamic pages such as admin panel or form based pages!
https://developers.cloudflare.com/cache/how-to/purge-cache/purge-everything/
CloudflareCache::purgeEverything()
https://developers.cloudflare.com/cache/how-to/purge-cache/purge-by-single-file/
CloudflareCache::purgeByUrls([
    'https://example.com/hello',
])
https://developers.cloudflare.com/cache/how-to/purge-cache/purge_by_prefix/
CloudflareCache::purgeByPrefixes([
    'www.example.com/foo',
])
https://developers.cloudflare.com/cache/how-to/purge-cache/purge-by-tags/
CloudflareCache::purgeByTags([
    'staticPages',
])
https://developers.cloudflare.com/cache/how-to/purge-cache/purge-by-hostname/
CloudflareCache::purgeByHosts([
    'www.example.com',
    'images.example.com',
])
Post update example to clear cache
<?php

namespace App\Http\Controllers;

use App\Http\Requests\UpdatePostRequest;
use App\Models\Post;
use Yediyuz\CloudflareCache\Facades\CloudflareCache;

class PostController extends Controller
{
    public function update(Post $post, UpdatePostRequest $request)
    {
        $post->update($request->validated());

        CloudflareCache::purgeByUrls([
            route('post.show', $post->id)
        ]);

        return back()->with('message', 'Post updated and url cache purged');
    }
}
Please see CHANGELOG for more information on what has changed recently.
Please see CONTRIBUTING for details.
If you’ve found a bug regarding security please mail security@yediyuz.com instead of using the issue tracker.
The MIT License (MIT). Please see License File for more information.
Laravel News Links
The problem with using a UUID primary key in MySQL
https://planetscale.com/assets/blog/content/the-problem-with-using-a-uuid-primary-key-in-mysql/the-problem-with-using-a-uuid-primary-key-in-mysql-social.jpgUnderstand the different versions of UUIDs and why using them as a primary key in MySQL can hurt database performance.Planet MySQL
Watch Disney’s official trailer for Star Wars: The Acolyte
http://img.youtube.com/vi/BtytYWhg2mc/0.jpg
Based on the synopsis for Star Wars: The Acolyte, you can expect more than just the typical action scenes and sci-fi world building from the show. It seems to have a mystery-thriller slant to it that you could find appealing even if you’re not a Star Wars fan but love that particular genre — and now Disney+ has released its official trailer to give you an idea of what you can expect. Star Wars: The Acolyte’s story is set at the end of the High Republic era, around a century before the events of Star Wars: Episode I: The Phantom Menace.
It revolves around a former padawan played by Amandla Stenberg (Everything, Everything and The Hate U Give) who reunites with her old Jedi Master (Lee Jung-jae from Squid Game) to investigate a series of crimes. They, of course, unearth more and more clues as they look into the crime spree, which Disney says will lead them "down a dark path where sinister forces reveal all is not what it seems…" As a big fan of mystery and detective stories, it sounds promising, and I’d love it if Disney can nail the execution to give us a satisfying (and unpredictable) ending, as well.
Star Wars: The Acolyte will be available for streaming on Disney+ starting on June 4.
This article originally appeared on Engadget at https://www.engadget.com/watch-disneys-official-trailer-for-star-wars-the-acolyte-150246523.html?src=rssEngadget
The evolution of large scale data storage solutions
https://www.datasciencecentral.com/wp-content/uploads/2024/03/big-data-solutions.jpg
The data storage journey is as old as computing, tracing a path from the earliest days of room-sized machines to today’s cloud-based ecosystems. Large-scale data storage has evolved dramatically to meet the ever-increasing demands of information technology. Understanding this evolution is not just about acknowledging past innovations but appreciating the complexities and challenges that have… Read More »The evolution of large scale data storage solutions
The post The evolution of large scale data storage solutions appeared first on Data Science Central.
Data Science Central
Build a Web Shop From A-Z: Cart Navigation Menu and Counter
Lets next add our "Cart" to the navigation area, and display the number of items inside the…Laracasts