
Quick start for Laravel Orchid

Quick start for beginners
This quick start guide provides a basic introduction to the infrastructure and includes information. about screens and form elements. To select the basic set of functions, we will create a simple utility for sending emails.
At this stage, it is necessary that you have already installed the framework and the platform, created the database and started the webserver.
First, you need to create a screen to display the submission form, using the command:
php artisan orchid:screen EmailSenderScreenA new file EmailSenderScreen.php will be created in the app/Orchid/Screens directory:
namespace App\Orchid\Screens; use Orchid\Screen\Screen; class EmailSenderScreen extends Screen { /** * Name and description properties are responsible for * what name will be displayed * on the user screen and in headlines. */ public $name = 'EmailSenderScreen'; public $description = 'EmailSenderScreen'; /** * A method that defines all screen input data * is in it that database queries should be called, * api or any others (not necessarily explicit), * the result of which should be an array, * appeal to which his keys will be used. */ public function query(): array { return []; } /** * Identifies control buttons and events. * which will have to happen by pressing */ public function commandBar(): array { return []; } /** * Set of mappings * rows, tables, graphs, * modal windows, and their combinations */ public function layout(): array { return []; } }The main difference of the screen from the controller is the structure defined in advance, which serves only one-page defining data and events.
Like the controller, the screen needs to be registered in the route file, Define it in the file for the admin panel routes/platform.php:
use App\Orchid\Screens\EmailSenderScreen; $this->router->screen('email', EmailSenderScreen::class)->name('platform.email');After we have registered a new route, you can go to the browser at /dashboard/email, to look at the empty screen, fill it with the elements.
Add a name and description:
/** * Display header name. * * @var string */ public $name = 'Email sender'; /** * Display header description. * * @var string */ public $description = 'Tool that sends ad-hoc email messages.';To display the input fields, we describe them in the Layouts method:
/** * Views. * * @return Layout[] */ public function layout(): array { return [ Layout::rows([ Input::make('subject') ->title('Subject') ->required() ->placeholder('Message subject line') ->help('Enter the subject line for your message'), Relation::make('users.') ->title('Recipients') ->multiple() ->required() ->placeholder('Email addresses') ->help('Enter the users that you would like to send this message to.') ->fromModel(User::class,'name','email'), Quill::make('content') ->title('Content') ->required() ->placeholder('Insert text here ...') ->help('Add the content for the message that you would like to send.') ])->with(70) ]; }Now our page has some elements but does not produce any action. to define them you need to create a new public method and specify a link to it in commandBar:
namespace App\Orchid\Screens; use App\User; use Illuminate\Http\Request; use Illuminate\Mail\Message; use Illuminate\Support\Facades\Mail; use Orchid\Screen\Fields\Input; use Orchid\Screen\Fields\Quill; use Orchid\Screen\Fields\Relation; use Orchid\Screen\Layout; use Orchid\Screen\Actions\Button; use Orchid\Screen\Screen; use Orchid\Support\Facades\Alert; class EmailSenderScreen extends Screen { /** * Display header name. * * @var string */ public $name = 'Email sender'; /** * Display header description. * * @var string */ public $description = 'Tool that sends ad-hoc email messages.'; /** * Query data. * * @return array */ public function query(): array { return []; } /** * Button commands. * * @return Link[] */ public function commandBar(): array { return [ Button::make('Send Message') ->icon('icon-paper-plane') ->method('sendMessage') ]; } /** * Views. * * @return Layout[] */ public function layout(): array { return [ Layout::rows([ Input::make('subject') ->title('Subject') ->required() ->placeholder('Message subject line') ->help('Enter the subject line for your message'), Relation::make('users.') ->title('Recipients') ->multiple() ->required() ->placeholder('Email addresses') ->help('Enter the users that you would like to send this message to.') ->fromModel(User::class,'name','email'), Quill::make('content') ->title('Content') ->required() ->placeholder('Insert text here ...') ->help('Add the content for the message that you would like to send.') ])->with(70) ]; } /** * @param Request $request * * @return \Illuminate\Http\RedirectResponse */ public function sendMessage(Request $request) { Mail::raw($request->get('content'), function (Message $message) use ($request) { $message->subject($request->get('subject')); foreach ($request->get('users') as $email) { $message->to($email); } }); Alert::info('Your email message has been sent successfully.'); return back(); } }After that, can to send email messages to addresses.
Note that by default the
smtpdriver is enabled for sending mail, You can change it in the.envfile tologfor verification.
Since our utility is mixed up, we can dream up and imagine that our boss asked us to put the title of our messages like “Campaign news for July”, but be able to change it. To do this, add the key to the query method with the name of our element:
/** * Query data. * * @return array */ public function query(): array { return [ 'subject' => date('F').' Campaign News', ]; }Now the field with the name subject automatically fits the value from the result.
All this time, to display the screen, it was necessary to specify an explicit page in the browser, add a new item to the menu, for this in the composer file at app/Orchid/Composers/MainMenuComposer.php we add the declaration:
$this->dashboard->menu ->add(Menu::MAIN, ItemMenu::label('Email sender') ->icon('icon-envelope-letter') ->route('platform.email') ->title('Tools') );Now our utility is displayed on the left menu and is active when visiting. Navigation can be carried out not only through transitions from the menu but also through bread crumbs, to add them to our screen you need to add a new ad in the routes/breadcrumbs.php by route name
Breadcrumbs::for('platform.email', function ($trail) { $trail->parent('platform.index'); $trail->push('Email sender'); });Congratulations, you should now understand how the platform works! This is a very simple example, but the development process will be identical in many aspects. Now we recommend to going the Screens section to learn more about the possibilities that are in your hands.
It will kill….and then some.
Quoting from the source:
Dan Keffeler’s winning run at the 2019 BladeSports National Championships. If you’re not familiar with Dan’s work, he also makes some impressive swords and choppers in modern high alloy tool steel.
Damn… that is an impressive blade. Notice it is not pointy which makes it totally cool in the formerly Great Britain.
Lessons from The Art of War: Good Leaders vs. Bad Leaders
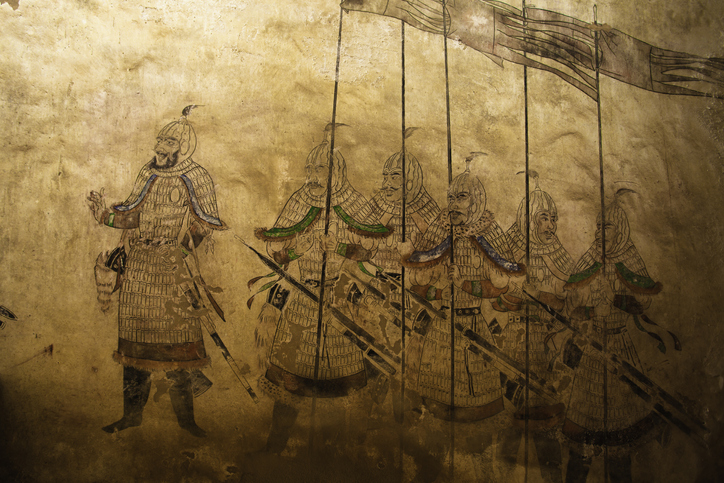
Editor’s Note: The following is adapted from The Ultimate Art of War by Antony Cummins, in which the author offers a fresh translation as well as a distillation and commentary of Sun Tzu’s teachings. The excerpt below provides a short summary of the qualities that Sun Tzu thought made up bad leaders versus good leaders.
The Qualities of a Bad Leader
Sun Tzu lists the following five characteristics that, if found to dominate a leader’s personality, will bring the downfall of that leader’s army:
1. Recklessness. Leaders who move forward to fight at every opportunity and see all situations as reason for a battle will get their army killed in the end.
2. Over-Cautiousness. Leaders who always avoid fights, look for the way out and are preoccupied by a wish to return home safely will end up being cornered and captured, because the enemy will find a way to chase them into a trap.
3. Hot-Headedness. Leaders who are easily angered can be provoked into declaring war without a plan in place.
4. Vanity. Leaders who have a high self-esteem and a desire to preserve their noble reputation at all costs can be manipulated through character assassination and slander.
5. Excessive Compassion. Leaders who care too much about the welfare of their people can lose sight of their objectives. Hard as it may sound, you have to be prepared to accept a certain amount of collateral damage in a campaign. If the enemy suspects that you are trying to avoid incurring any casualties whatsoever, they may try to manipulate you by targeting civilians knowing that this will throw you into confusion.
The above five characteristics exist in all humans, but none of them should be dominant. Do not let your personality become an obvious target for the enemy.
War Tip: Do not be too quick to battle or too quick to retreat. Do not anger in haste or place too much importance on your personal honor. Learn to accept that there will be casualties in war.
The Qualities of a Good Leader
Sun Tzu [says] that an army must be commanded by a single person who makes each soldier feel as if they were being led personally by the hand. This is how to make the army work as one.
The perfect leader will have the following qualities:
1. Calmness. A good leader is neither angry nor forceful. “Power” is not “force” and an army cannot be kept together for long through intimidation. Therefore, remain calm most of the time and only show your teeth when it is really necessary.
2. Unpredictability. Do not make the obvious move, and avoid leaving a pattern in your past activities. The enemy should not be able to identify what you will do in the future from what you did in the past. Do not take predictable routes, change your camp position . . . keep the enemy guessing.
3. Inscrutability. You also need to be unreadable, so that even if an enemy spy succeeds in infiltrating your camp and observes you from close quarters they still cannot read your thoughts.
4. Self-Discipline. There is a difference between obedience, discipline, and self-discipline. Many people are obedient, some have discipline forced upon them, but few are self-disciplined. While others rest and relax, the good leader works and only rests when it is the correct time.
5. Secrecy. There is a delicate balance between keeping plans secret and involving your command team. Too much secrecy and the command team will be alienated; too little and plans will be leaked. It appears Sun Tzu prefers more secrecy and to keep his command team loyal in other ways.
6. Leading By Example. Always be there with your troops (but maybe not always at the front), be observable, and earn the respect of the soldiers by sharing their hardships. Sun Tzu uses various images here to back up his point that the commander is “with the troops.” The first image he gives is of the commander leading the troops up a ladder that is then kicked away, allowing for no return. Alternatively, the army is represented as a great herd of animals moving as one with the leader in the center directing them all in a way that cannot be predicted from the outside. Be with the troops in all dangerous situations, but remain unknown to the enemy.
7. Responsibility. As leader you must confidently assume responsibility for the whole force. Be at the center of everything and use your troops in the most efficient way with the best results.
War Tip: A perfect leader is calm, unpredictable, unreadable, self-disciplined, discreet, is in the thick of it with the troops and is in total command from the center.
_____________________
Taken from The Ultimate Art of War, text copyright © Antony Cummins, Watkins Media 2019.
The post Lessons from The Art of War: Good Leaders vs. Bad Leaders appeared first on The Art of Manliness.
via The Art of Manliness
Lessons from The Art of War: Good Leaders vs. Bad Leaders
How Rubber Balls Are Made

Ever wonder how they make basketballs or other bouncy rubber balls? It’s not as simple as just blowing up a rubber balloon. Science Channel’s How It’s Made visited a ball factory to walk us through the fascinating process, which includes making an inflatable bladder, then wrapping it in nylon thread and a segmented rubber skin.
80s/90s Commercial Mix

If you grew up any time in the 1980s or early 1990s, you’ll appreciate this epic compilation of commercials from the era. K. Huntington dug up many of these clips from old Betamax tapes a few years back. Even if you don’t have four hours to kill, it’s worth skipping around a bit to check out some random retro goodness.
Dark Empire: Episode 1

The first episode of animator Ian Wilkins‘ Star Wars fan series is here, and it’s every bit as good as we hoped it would be. Many years after the fall of Vader and the Emperor at Endor, remaining members of the Rebel Alliance must once again defend against the Empire as they regain strength against the New Republic.
bumbummen99/shoppingcart
LaravelShoppingcart
This is a fork of Crisane’s LaravelShoppingcart extended with minor features compatible with Laravel 6.
Installation
Install the package through Composer.
Run the Composer require command from the Terminal:
composer require bumbummen99/shoppingcart Now you’re ready to start using the shoppingcart in your application.
As of version 2 of this package it’s possibly to use dependency injection to inject an instance of the Cart class into your controller or other class
Overview
Look at one of the following topics to learn more about LaravelShoppingcart
Usage
The shoppingcart gives you the following methods to use:
Cart::add()
Adding an item to the cart is really simple, you just use the add() method, which accepts a variety of parameters.
In its most basic form you can specify the id, name, quantity, price and weight of the product you’d like to add to the cart.
Cart::add('293ad', 'Product 1', 1, 9.99, 550);
As an optional fifth parameter you can pass it options, so you can add multiple items with the same id, but with (for instance) a different size.
Cart::add('293ad', 'Product 1', 1, 9.99, 550, ['size' => 'large']);
The add() method will return an CartItem instance of the item you just added to the cart.
Maybe you prefer to add the item using an array? As long as the array contains the required keys, you can pass it to the method. The options key is optional.
Cart::add(['id' => '293ad', 'name' => 'Product 1', 'qty' => 1, 'price' => 9.99, 'weight' => 550, 'options' => ['size' => 'large']]);
New in version 2 of the package is the possibility to work with the Buyable interface. The way this works is that you have a model implement the Buyable interface, which will make you implement a few methods so the package knows how to get the id, name and price from your model. This way you can just pass the add() method a model and the quantity and it will automatically add it to the cart.
As an added bonus it will automatically associate the model with the CartItem
Cart::add($product, 1, ['size' => 'large']);
As an optional third parameter you can add options.
Cart::add($product, 1, ['size' => 'large']);
Finally, you can also add multipe items to the cart at once. You can just pass the add() method an array of arrays, or an array of Buyables and they will be added to the cart.
When adding multiple items to the cart, the add() method will return an array of CartItems.
Cart::add([ ['id' => '293ad', 'name' => 'Product 1', 'qty' => 1, 'price' => 10.00, 'weight' => 550], ['id' => '4832k', 'name' => 'Product 2', 'qty' => 1, 'price' => 10.00, 'weight' => 550, 'options' => ['size' => 'large']] ]); Cart::add([$product1, $product2]);
Cart::update()
To update an item in the cart, you’ll first need the rowId of the item. Next you can use the update() method to update it.
If you simply want to update the quantity, you’ll pass the update method the rowId and the new quantity:
$rowId = 'da39a3ee5e6b4b0d3255bfef95601890afd80709'; Cart::update($rowId, 2); // Will update the quantity
If you want to update more attributes of the item, you can either pass the update method an array or a Buyable as the second parameter. This way you can update all information of the item with the given rowId.
Cart::update($rowId, ['name' => 'Product 1']); // Will update the name Cart::update($rowId, $product); // Will update the id, name and price
Cart::remove()
To remove an item for the cart, you’ll again need the rowId. This rowId you simply pass to the remove() method and it will remove the item from the cart.
$rowId = 'da39a3ee5e6b4b0d3255bfef95601890afd80709'; Cart::remove($rowId);
Cart::get()
If you want to get an item from the cart using its rowId, you can simply call the get() method on the cart and pass it the rowId.
$rowId = 'da39a3ee5e6b4b0d3255bfef95601890afd80709'; Cart::get($rowId);
Cart::content()
Of course you also want to get the carts content. This is where you’ll use the content method. This method will return a Collection of CartItems which you can iterate over and show the content to your customers.
This method will return the content of the current cart instance, if you want the content of another instance, simply chain the calls.
Cart::instance('wishlist')->content();
Cart::destroy()
If you want to completely remove the content of a cart, you can call the destroy method on the cart. This will remove all CartItems from the cart for the current cart instance.
Cart::weight()
The weight() method can be used to get the weight total of all items in the cart, given there weight and quantity.
The method will automatically format the result, which you can tweak using the three optional parameters
Cart::weight($decimals, $decimalSeperator, $thousandSeperator);
You can set the default number format in the config file.
If you’re not using the Facade, but use dependency injection in your (for instance) Controller, you can also simply get the total property $cart->weight
Cart::total()
The total() method can be used to get the calculated total of all items in the cart, given there price and quantity.
The method will automatically format the result, which you can tweak using the three optional parameters
Cart::total($decimals, $decimalSeparator, $thousandSeparator);
You can set the default number format in the config file.
If you’re not using the Facade, but use dependency injection in your (for instance) Controller, you can also simply get the total property $cart->total
Cart::tax()
The tax() method can be used to get the calculated amount of tax for all items in the cart, given there price and quantity.
The method will automatically format the result, which you can tweak using the three optional parameters
Cart::tax($decimals, $decimalSeparator, $thousandSeparator);
You can set the default number format in the config file.
If you’re not using the Facade, but use dependency injection in your (for instance) Controller, you can also simply get the tax property $cart->tax
Cart::subtotal()
The subtotal() method can be used to get the total of all items in the cart, minus the total amount of tax.
The method will automatically format the result, which you can tweak using the three optional parameters
Cart::subtotal($decimals, $decimalSeparator, $thousandSeparator);
You can set the default number format in the config file.
If you’re not using the Facade, but use dependency injection in your (for instance) Controller, you can also simply get the subtotal property $cart->subtotal
Cart::discount()
The discount() method can be used to get the total discount of all items in the cart.
The method will automatically format the result, which you can tweak using the three optional parameters
Cart::discount($decimals, $decimalSeparator, $thousandSeparator);
You can set the default number format in the config file.
If you’re not using the Facade, but use dependency injection in your (for instance) Controller, you can also simply get the subtotal property $cart->discount
Cart::initial()
The initial() method can be used to get the total price of all items in the cart before discount.
The method will automatically format the result, which you can tweak using the three optional parameters
Cart::initial($decimals, $decimalSeparator, $thousandSeparator);
You can set the default number format in the config file.
If you’re not using the Facade, but use dependency injection in your (for instance) Controller, you can also simply get the subtotal property $cart->initial
Cart::count()
If you want to know how many items there are in your cart, you can use the count() method. This method will return the total number of items in the cart. So if you’ve added 2 books and 1 shirt, it will return 3 items.
Cart::count(); $cart->count();
Cart::search()
To find an item in the cart, you can use the search() method.
This method was changed on version 2
Behind the scenes, the method simply uses the filter method of the Laravel Collection class. This means you must pass it a Closure in which you’ll specify you search terms.
If you for instance want to find all items with an id of 1:
$cart->search(function ($cartItem, $rowId) { return $cartItem->id === 1; });
As you can see the Closure will receive two parameters. The first is the CartItem to perform the check against. The second parameter is the rowId of this CartItem.
The method will return a Collection containing all CartItems that where found
This way of searching gives you total control over the search process and gives you the ability to create very precise and specific searches.
Cart::setTax($rowId, $taxRate)
You can use the setTax() method to change the tax rate that applies to the CartItem. This will overwrite the value set in the config file.
Cart::setTax($rowId, 21); $cart->setTax($rowId, 21);
Cart::setGlobalTax($taxRate)
You can use the setGlobalTax() method to change the tax rate for all items in the cart. New items will receive the setGlobalTax as well.
Cart::setGlobalTax(21); $cart->setGlobalTax(21);
Cart::setGlobalDiscount($discountRate)
You can use the setGlobalDiscount() method to change the discount rate for all items in the cart. New items will receive the discount as well.
Cart::setGlobalDiscount(50); $cart->setGlobalDiscount(50);
Cart::setDiscount($rowId, $taxRate)
You can use the setDiscount() method to change the discount rate that applies a CartItem. Keep in mind that this value will be changed if you set the global discount for the Cart afterwards.
Cart::setDiscount($rowId, 21); $cart->setDiscount($rowId, 21);
Buyable
For the convenience of faster adding items to cart and their automatic association, your model has to implement the Buyable interface. You can use the CanBeBought trait to implement the required methods but keep in mind that these will use predefined fields on your model for the required values.
<?php namespace App\Models; use Gloudemans\Shoppingcart\Contracts\Buyable; use Illuminate\Database\Eloquent\Model; class Product extends Model implements Buyable { use Gloudemans\Shoppingcart\CanBeBought; }
If the trait does not work for on the model or you wan’t to map the fields manually the model has to implement the Buyable interface methods. To do so, it must implement such functions:
public function getBuyableIdentifier(){ return $this->id; } public function getBuyableDescription(){ return $this->name; } public function getBuyablePrice(){ return $this->price; } public function getBuyableWeight(){ return $this->weight; }
Example:
<?php namespace App\Models; use Gloudemans\Shoppingcart\Contracts\Buyable; use Illuminate\Database\Eloquent\Model; class Product extends Model implements Buyable { public function getBuyableIdentifier($options = null) { return $this->id; } public function getBuyableDescription($options = null) { return $this->name; } public function getBuyablePrice($options = null) { return $this->price; } }
Collections
On multiple instances the Cart will return to you a Collection. This is just a simple Laravel Collection, so all methods you can call on a Laravel Collection are also available on the result.
As an example, you can quicky get the number of unique products in a cart:
Cart::content()->count();
Or you can group the content by the id of the products:
Cart::content()->groupBy('id');
Instances
The packages supports multiple instances of the cart. The way this works is like this:
You can set the current instance of the cart by calling Cart::instance('newInstance'). From this moment, the active instance of the cart will be newInstance, so when you add, remove or get the content of the cart, you’re work with the newInstance instance of the cart. If you want to switch instances, you just call Cart::instance('otherInstance') again, and you’re working with the otherInstance again.
So a little example:
Cart::instance('shopping')->add('192ao12', 'Product 1', 1, 9.99, 550); // Get the content of the 'shopping' cart Cart::content(); Cart::instance('wishlist')->add('sdjk922', 'Product 2', 1, 19.95, 550, ['size' => 'medium']); // Get the content of the 'wishlist' cart Cart::content(); // If you want to get the content of the 'shopping' cart again Cart::instance('shopping')->content(); // And the count of the 'wishlist' cart again Cart::instance('wishlist')->count();
You can also use the InstanceIdentifier Contract to extend a desired Model to assign / create a Cart instance for it. This also allows to directly set the global discount.
<?php namespace App; ... use Illuminate\Foundation\Auth\User as Authenticatable; use Gloudemans\Shoppingcart\Contracts\InstanceIdentifier; class User extends Authenticatable implements InstanceIdentifier { ... /** * Get the unique identifier to load the Cart from * * @return int|string */ public function getInstanceIdentifier($options = null) { return $this->email; } /** * Get the unique identifier to load the Cart from * * @return int|string */ public function getInstanceGlobalDiscount($options = null) { return $this->discountRate ?: 0; } } // Inside Controller $user = \Auth::user(); $cart = Cart::instance($user); N.B. Keep in mind that the cart stays in the last set instance for as long as you don’t set a different one during script execution.
N.B.2 The default cart instance is called default, so when you’re not using instances,Cart::content(); is the same as Cart::instance('default')->content().
Models
Because it can be very convenient to be able to directly access a model from a CartItem is it possible to associate a model with the items in the cart. Let’s say you have a Product model in your application. With the associate() method, you can tell the cart that an item in the cart, is associated to the Product model.
That way you can access your model right from the CartItem!
The model can be accessed via the model property on the CartItem.
If your model implements the Buyable interface and you used your model to add the item to the cart, it will associate automatically.
Here is an example:
// First we'll add the item to the cart. $cartItem = Cart::add('293ad', 'Product 1', 1, 9.99, 550, ['size' => 'large']); // Next we associate a model with the item. Cart::associate($cartItem->rowId, 'Product'); // Or even easier, call the associate method on the CartItem! $cartItem->associate('Product'); // You can even make it a one-liner Cart::add('293ad', 'Product 1', 1, 9.99, 550, ['size' => 'large'])->associate('Product'); // Now, when iterating over the content of the cart, you can access the model. foreach(Cart::content() as $row) { echo 'You have ' . $row->qty . ' items of ' . $row->model->name . ' with description: "' . $row->model->description . '" in your cart.'; }
Database
Configuration
To save cart into the database so you can retrieve it later, the package needs to know which database connection to use and what the name of the table is. By default the package will use the default database connection and use a table named shoppingcart. If you want to change these options, you’ll have to publish the config file.
php artisan vendor:publish --provider="Gloudemans\Shoppingcart\ShoppingcartServiceProvider" --tag="config" This will give you a cart.php config file in which you can make the changes.
To make your life easy, the package also includes a ready to use migration which you can publish by running:
php artisan vendor:publish --provider="Gloudemans\Shoppingcart\ShoppingcartServiceProvider" --tag="migrations" This will place a shoppingcart table’s migration file into database/migrations directory. Now all you have to do is run php artisan migrate to migrate your database.
Storing the cart
To store your cart instance into the database, you have to call the store($identifier) method. Where $identifier is a random key, for instance the id or username of the user.
Cart::store('username'); // To store a cart instance named 'wishlist' Cart::instance('wishlist')->store('username'); Restoring the cart
If you want to retrieve the cart from the database and restore it, all you have to do is call the restore($identifier) where $identifier is the key you specified for the store method.
Cart::restore('username'); // To restore a cart instance named 'wishlist' Cart::instance('wishlist')->restore('username'); Merge the cart
If you want to merge the cart with another one from the database, all you have to do is call the merge($identifier) where $identifier is the key you specified for the store method. You can also define if you want to keep the discount and tax rates of the items.
// Merge the contents of 'savedcart' into 'username'. Cart::instance('username')->merge('savedcart', $keepDiscount, $keepTaxrate); Exceptions
The Cart package will throw exceptions if something goes wrong. This way it’s easier to debug your code using the Cart package or to handle the error based on the type of exceptions. The Cart packages can throw the following exceptions:
| Exception | Reason |
|---|---|
| CartAlreadyStoredException | When trying to store a cart that was already stored using the specified identifier |
| InvalidRowIDException | When the rowId that got passed doesn’t exists in the current cart instance |
| UnknownModelException | When you try to associate an none existing model to a CartItem. |
Events
The cart also has events build in. There are five events available for you to listen for.
| Event | Fired | Parameter |
|---|---|---|
| cart.added | When an item was added to the cart. | The CartItem that was added. |
| cart.updated | When an item in the cart was updated. | The CartItem that was updated. |
| cart.removed | When an item is removed from the cart. | The CartItem that was removed. |
| cart.stored | When the content of a cart was stored. | – |
| cart.restored | When the content of a cart was restored. | – |
Example
Below is a little example of how to list the cart content in a table:
// Add some items in your Controller. Cart::add('192ao12', 'Product 1', 1, 9.99); Cart::add('1239ad0', 'Product 2', 2, 5.95, ['size' => 'large']); // Display the content in a View. <table> <thead> <tr> <th>Product</th> <th>Qty</th> <th>Price</th> <th>Subtotal</th> </tr> </thead> <tbody> <?php foreach(Cart::content() as $row) :?> <tr> <td> <p><strong><?php echo $row->name; ?></strong></p> <p><?php echo ($row->options->has('size') ? $row->options->size : ''); ?></p> </td> <td><input type="text" value="<?php echo $row->qty; ?>"></td> <td>$<?php echo $row->price; ?></td> <td>$<?php echo $row->total; ?></td> </tr> <?php endforeach;?> </tbody> <tfoot> <tr> <td colspan="2"> </td> <td>Subtotal</td> <td><?php echo Cart::subtotal(); ?></td> </tr> <tr> <td colspan="2"> </td> <td>Tax</td> <td><?php echo Cart::tax(); ?></td> </tr> <tr> <td colspan="2"> </td> <td>Total</td> <td><?php echo Cart::total(); ?></td> </tr> </tfoot> </table>
Metatags
")
Metatags
A Laravel package to fetch all metadata of a webpage.
Installation
Perform the following operations in order to use this package
-
Run
composer require "mobiosolutions/metatags"in your terminal -
Add Service Provider Open
config/app.phpand addmobiosolutions\metatags\Providers\MetatagsProvider::class,to the end ofprovidersarray:'providers' => array( .... mobiosolutions\metatags\Providers\MetatagsProvider::class, ),Next under the
aliasesarray:'aliases' => array( .... 'Metatags' => mobiosolutions\metatags\Facades\MetatagsFacade::class ),
Requirements
- You need to install the DOM extension.
How to use
-
After following the above steps,
// Add to your controller to get all metatags data use Metatags; $metadata = Metatags::get("https://example.com/"); print_r($metadata);Get only OG ( Open Graph ) Metatages data
$getOGTags = true; $metadata = Metatags::get("https://example.com/",$getOGTags); OR $metadata = Metatags::get("https://example.com/",true); print_r($metadata);
8 Tools & Tips to Deliver Laravel Projects Quicker
Have you ever been late on a project delivery? Yeah, I know that stress feeling. At QuickAdminPanel, we see our mission as helping developers to deliver projects quicker. There are many ways to save valuable hours, generating or reusing existing code instead of writing it from scratch. In this article, I will share the tools and processes that helped me in my own Laravel developer journey, to deliver quicker.
via Laravel News Links
8 Tools & Tips to Deliver Laravel Projects Quicker