Jeff Lutzow at Pizzeria Bebu in ChicagoPhoto: Tim McCoy, Illustration: Libby McGuire
Welcome to Pizza School, in which pizza-making amateur Gwen Ihnat learns the secrets from pizza-making pros.
Pizza is one of those foods that chefs on TV are always like, “Oh, just make your own! It’ll be quicker than delivery!” And we all know that a homemade pizza, carefully crafted to your individual specifications, can be an object of beauty, even better than whatever would be brought to us by the friendly driver from our favorite 30-minutes-or-under.
Advertisement
But what’s the best way to go about constructing one? What’s the secret behind those successful pizzerias? Those of us who have suffered gummy or soggy doughs, not-quite right sauce, and too much or too little toppings at home would like to know the secret behind perfect homemade pizza. Also, do we really need to invest in a pizza stone?
So I—being a hopeless pizza maker but eager to learn—sought out the experts, in my hopes of breaking down pizza into its primary components so that I can one day craft the perfect pie. This week: dough. Next week: sauce. Hold on to your garlic knots.
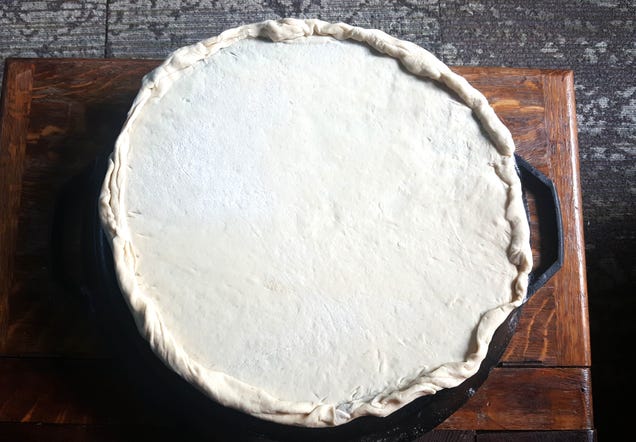
In my attempt to understand pizza dough, I headed to Pizzeria Bebu, a year-old restaurant in Chicago’s Lincoln Park neighborhood. The restaurant’s artisanal pizzas are known for their crust, which deviates from the usual Chicago thin/pan/thick crust formats. It’s thin, but a notch above that typical “cracker crust.” As chef Jeff Lutzow puts it: “It’s definitely still a thin crust, but it’s different from a New York thin crust or even a Chicago-style thin crust where it’s like, pressed into a cracker.”
A Pizzeria Bebu pie: half-potato, half-pepperoniPhoto: Gwen Ihnat
Lutzow’s love for pizza goes way back, as growing up, he was a notoriously picky eater, subsisting mostly on cheese pizza and mac ‘n’ cheese. (This is music to the ears of those of us with picky-eater offspring.) “By my teenage years, I started to realize how much money I was spending on really bad food. I started trying to make pizza… Turns out after a while, I could do it better.” During his years of pizza experimentation, Lutzow experimented with different doughs, different surfaces, even creating his own oven out of a grill.
Advertisement
Naturally, after all this trial and error, Lutzow has a few tips for us. First, “Always weigh out your ingredients for it. Don’t do it by volume. Percentage-wise, [dough should be] around 65 percent water. Flour is your 100-percent ingredient. 1000 g flour, 650 g water.” About that flour: “King Arthur all-purpose flour is very nice, very consistent.” (King Arthur’s has a higher protein level than most all-purpose flour, which gives it a good gluten structure.) Even before that step, though, many pizza doughs start out with dissolving a packet of yeast in warm water. This step intimidates some people, like a chemistry experiment that’s bound to go awry. Lutzow reassures us all: “You just have to dump the yeast in the water and let it sit there. It’ll be fine.”
After five minutes of watching the yeast dissolve, you need to spend some more time letting your dough rise. Lutzow says that the greatest mistake of the home pizza maker is not giving it enough time. Sure, he says, you can make pretty good pizza in an hour. “But if you give it the time to sit overnight and proof, you actually create all that CO2 in the dough, and you end up with a result that mimics more like what you would get in the pizzeria.”
Once you’ve let your dough double in size over several hours, you still may want to wait a bit. Says Lutzow: “When you’re about to make your pizza, pulling the dough out [of the fridge] an hour or two ahead of time lets it temper, makes it a lot easier to handle. You ever run into an issue where you’re trying to roll out the pizza and it just keeps snapping back?” Lord, yes. “Let it get to room temperature and it’ll roll out a lot easier.” Also, he suggests adding some olive oil to your hands—“don’t be afraid if it’s sticky.” He also suggests flouring your board and rolling pin, if you’re using one.
Advertisement
What about flipping the dough up in the air like a classic pizza maker? Lutzlow says no to that: Keep your working of the dough minimal. “I like to keep these air bubbles inside, so the less you knock it around the better.” So why do people throw pizza dough in the air in the first place? “For show. Who doesn’t like seeing the guy throwing dough in the air?”
But what to spread the dough out on? Turns out that pizza stone might be a good investment after all. Lutzow advises using “either a baking steel, cast-iron pan, baking tile, or pizza stone.” Smith says he leans toward “masonry” (stone over steel), because it “draws the moisture out to make it crispier.” You can find a really decent pizza stone in finer cooking stores for under $50.
Once the dough is spread out, to avoid a soggy pizza bottom, adhere to Lutzow’s rules of topping a pizza: “The way I always top pizza is that you should be able to see everything on the pizza just looking down on it. You should be able to see the sauce, all the cheese that’s on it, all the toppings that are on it.” Too much cheese covering everything, too much sogginess.
Advertisement
Once your pizza is all set, crank your oven up to as high as it can possibly go: 500 degrees, if possible. Then bake from 10 to 15 minutes until the cheese is melted and the crust is browned.
Photo: Gwen Ihnat
I was excited to try out Lutzow’s tips at home, and they definitely kicked my pizza up to the next level. I carefully rolled out the raised dough. I didn’t have a pizza stone, but fortunately, my husband loves cast iron almost as much as he loves me, so we had a giant cast-iron skillet on hand. As Lutzow suggested, I flipped the skillet over and used it to lay out my pizza dough on. (The super-heavy rolling pin the kids got me for mother’s day after my various pie experiments worked extremely well.) The result was hands-down the best pizza that has ever been crafted in my kitchen.
Advertisement
After all, as Smith told me, “It’s not rocket science. It’s basically bread shaped differently than a loaf.” So as long as you don’t rush your yeast or dough rising, you should be good to go. And even if you’re not, take it from a pizza master like Lutzow, who maintains: “I strongly stand by the statement that even bad pizza is good pizza.”
Homemade Pizza Crust
one packet yeast
200 g warm water (about 3/4 cup)
300 g King Arthur all-purpose flour (about 2 cups)
1 tsp. salt
olive oil and extra flour
(Editor’s note: I can’t stress how important it is to buy an electronic scale. It’s one of the best $20 investments you can make for your kitchen.)
Advertisement
Dissolve yeast in warm water and let stand for 5 minutes. Then mix into flour. Form the dough into a ball, and place in a bowl brushed with olive oil. Put dough in large plastic bag and let refrigerate overnight.
Photo: Gwen Ihnat
The next day, take dough out and put in bowl topped with tea towel for a few hours. Then roll out the dough with a rolling pin or your hands to desired thickness (put some olive oil on your hands, and extra flour on the rolling pin and table where you’re rolling out). Use your fingers to pinch a crust at the outside edge. Add sauce, then cheese and toppings, taking care not to overload. Bake at 500 degrees for 10 to 15 minutes, until the cheese melts and the crust is browned.
Seven o’clock in the evening is a global sweet spot for wanting to order take-away food, says an international study of internet traffic. From a report:
Academics have examined patterns of looking for food online, such as pizza or Chinese meals, across the UK, US, Canada, Australia and India. They found that a similar “twin peaks” pattern appeared in all countries – at 7pm in the evening and then at 2am. The study suggests ancient “foraging” behaviour has now switched online. This big data research from biologists at the University of Aberdeen, to be published by the Royal Society, has tracked how the search for food takes place online.
Our latest look at the film adaptation of the cyberpunk manga Battle Angel Alita. Alita has no memories of her past and a relatively frail body. Just as she starts to discover who she really is, her potential makes her a target for those who want her power.
Handwriting is becoming a lost art. Many schools in the United States don’t teach it anymore. And maybe you’ve noticed your handwriting getting sloppy over the years.
Kids aren’t the only ones who should learn and practice good handwriting—adults should too. Free handwriting worksheets could help you do just that.
Here are some awesome websites where you can download free worksheets for cursive handwriting practice.
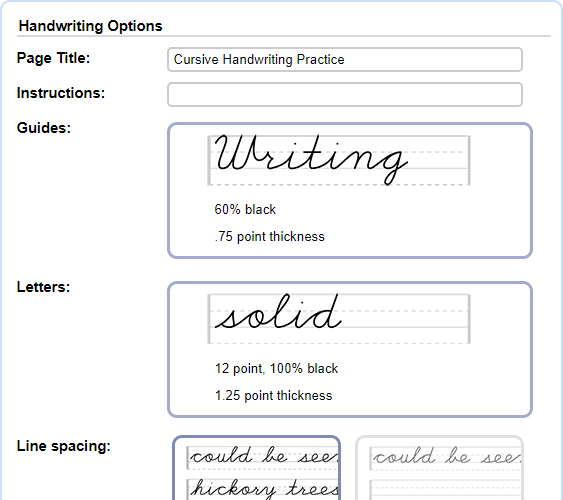
WorksheetWorks.com allows you to create a custom worksheet for cursive handwriting practice.
Customize your practice worksheet with the Handwriting Options and custom text will be rendered using traditional cursive lettering.
The website is in Public Beta Preview, so there may be some quirks and many parts are not available yet. You may notice some features and resources may move or be removed for a while.
They provide this service for free, but not all materials are available for free. They encourage you to sign up for an annual membership for $14.95. Membership supports the site and gives you access to all the materials on the site.
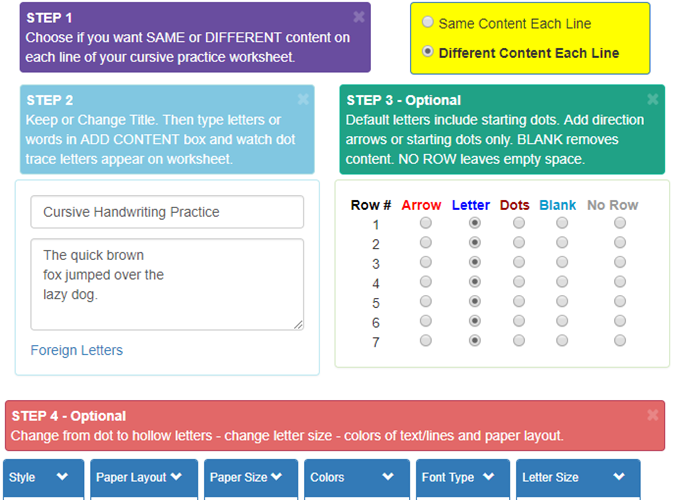
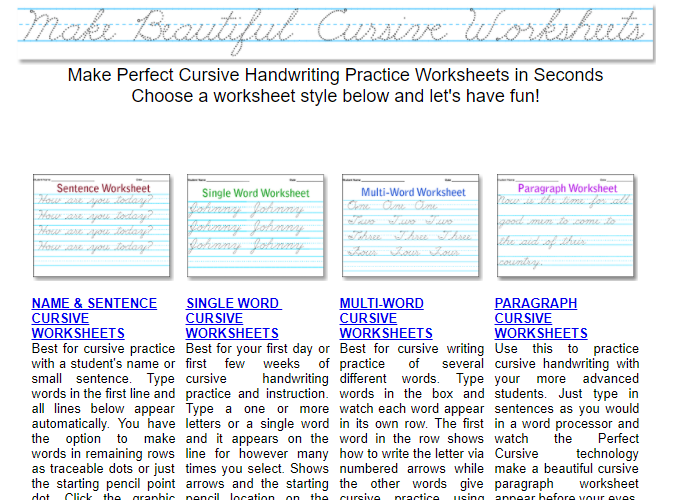
HandwritingPractice.net provides many ways to customize cursive handwriting practice worksheets. You can create the letters from dots for tracing or make hollow, outlined letters to trace inside.
Add a title and the text you want for tracing and watch it appear on the worksheet. Change the letter style and size or the color of the text, lines, and arrows.
. No matter what you type, the cursive letters are correctly connected. Their program analyzes each letter you type and perfectly connects it to the previous letter. And each letter appears on the worksheet in real time.
You have control over your worksheet’s appearance. Customize the letter size and color, line color, and whether you want to show arrows on your letters or starting dots to show where to start.
Add a single word, a name and a sentence, several different words, or a paragraph to your worksheet. Then, send the worksheet to your printer, or print it to PDF.
If you’re looking for a quick solution for a cursive handwriting practice worksheet, Studenthandouts.com have a few ready-made ones available. They have a large list of worksheets you can print, some for practicing printed handwriting and some for cursive handwriting.
These worksheets cannot be customized.
You can print the PDF files in your browser or download them (right-click on the link and select the option to save it).
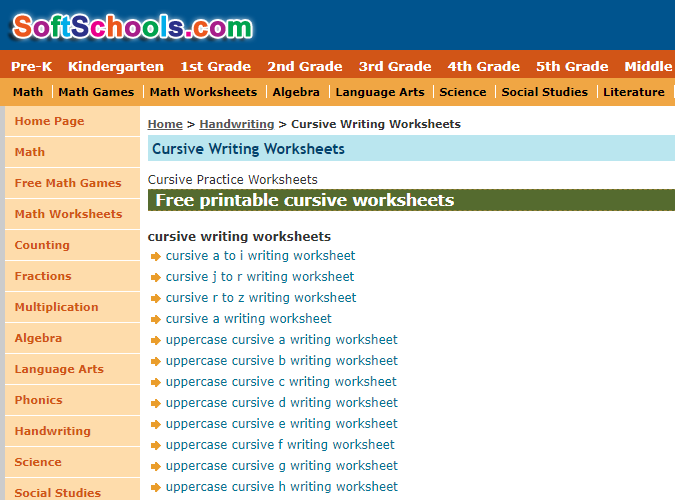
SoftSchools.com offers many types of free worksheets, including math worksheets, math games, grammar quizzes, and handwriting worksheets.
The handwriting worksheets are not customizable. Scroll through the list and click the one you want. It displays in a box on the current tab where you can either download or print it.
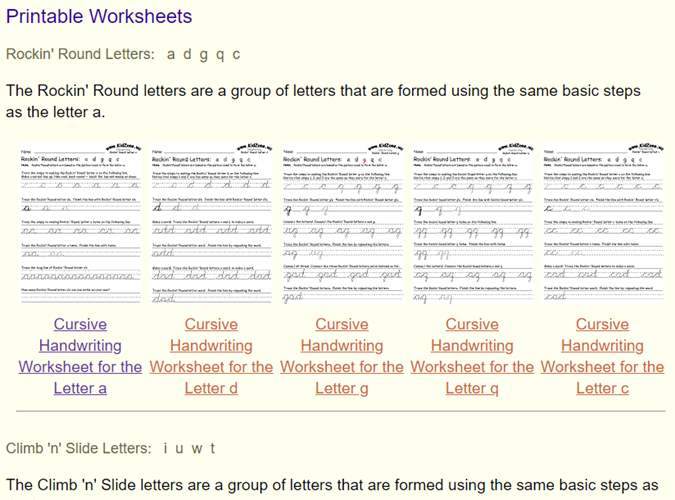
Kidzone.ws provides ready-to-use printable cursive handwriting practice worksheets. You can’t customize these worksheets, but they are organized in groups that are formed in a similar manner, like round letters, loopy letters, and lumpy letters.
If you’re teaching, use the worksheets in the order listed on the site. Each worksheet builds on the previous ones, which is important when learning cursive, so your students correctly learn to connect the cursive letters.
The cursive practice worksheets at k12reader.com provide practice writing each cursive letter in capital and lowercase form multiple times on one line each. Then the letter is combined as letter pairs and as words.
You can download or print a worksheet for each letter in PDF format.
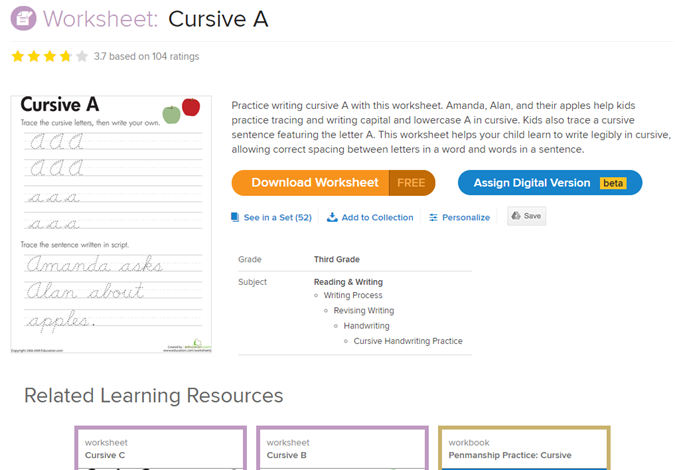
The cursive handwriting practice worksheets on Education.com provide practice writing each letter of the alphabet in uppercase and lowercase and a sentence featuring the letter.
You can have your students apply their new cursive handwriting skills with their writing sentences worksheets.
Like k12reader.com and Education.com, Allkidsnetwork.com provides free cursive handwriting practice worksheets for each letter of the alphabet. But they also offer several that allow students to practice writing sentences using the cursive letters they learned.
You can preview, download, and print each worksheet.
CursiveLogic.com works differently than the other websites we’ve listed here. You sign up for free and receive cursive handwriting practice worksheets in your email inbox on a regular basis.
The CursiveLogic program teaches the essential structure of the cursive alphabet, rather than having students memorize the cursive alphabet. They teach similarly shaped letters together, having students connect the letters as they write them. Students never write letters on their own, disconnected from other letters. Letters are always written as a connected string.
Handwriting is important and cursive handwriting should be taught to kids. It keeps them connected to family members, like parents and grandparents, through their notes, letters, and journals.
If you are looking for a more structured course, then Udemy offers a handwriting course called Improve Your Handwriting: Improve Your Life, which can be enrolled in for as little as $9.99 when it’s on sale.
Do you handwrite faster than you can type on your phone? You can handwrite notes on paper and then convert your handwriting to text using optical character recognition (OCR).
Recently I received three different emails from readers and former students regarding Ohio’s often confusing knife laws. If I’m getting this many inquiries on the same topic, an explanatory article is in order.
Keep in mind, I am not a lawyer. As such, this is not legal advice. After 22 years as a cop in Ohio, I do have some experience arresting people for carrying weapons. Don’t consider this legal advice, consider it my best recommendations for not ending up in handcuffs in the back seat of my police car. I am eminently qualified to provide that kind of information. Also, like any other information on this site, this is my personal opinion and does not reflect the opinion or interests of my cop bosses or the city which employs me.
The primary confusion about the knife law in Ohio is that there is minimal clear cut statutory guidance about the difference between a common pocketknife carried for utilitarian purposes and a “deadly weapon” that is illegal under the law.
Let’s start with the basics. In the Ohio Revised Code, section 2923.12 deals with the laws regarding the carrying of concealed weapons. The law states:
2923.12 Carrying concealed weapons.
A) No person shall knowingly carry or have, concealed on the person’s person or concealed ready at hand, any of the following:
1) A deadly weapon other than a handgun;
2) A handgun other than a dangerous ordnance;
3) A dangerous ordnance.
Since knives aren’t “handguns” or “a dangerous ordnance“, the legality of carrying a concealed blade falls on whether or not that knife is considered a “deadly weapon.”
In the Weapons Control definitions section of the Ohio Revised Code a “deadly weapon” is defined as follows:
” “Deadly weapon” means any instrument, device, or thing capable of inflicting death, and designed or specially adapted for use as a weapon, or possessed, carried, or used as a weapon.”
This is what is the biggest issue for most people. Under this definition, almost anything could be considered a “deadly weapon” under Ohio law. If I ram a sharpened #2 pencil into your eye socket, it may be “capable of inflicting death.” In using a pencil in this manner, I have most certainly “adapted it for use as a weapon.” Thus, under Ohio law, it may be illegal to carry a concealed pencil. With such broad definitions it makes it difficult for citizens to know what is legal and what is not.
Here is my best advice…
First, the easiest option is to avoid concealing the knife. Look at the law again. In order for a deadly weapon to be illegal, it must be concealed. Open carry of deadly weapons is legal under Ohio law. Just like open carrying a pistol is legal, open carry of any type of knife is legal as well.
The entire knife doesn’t have to be visible in order for it to be considered “unconcealed.” Various pieces of case law generated throughout the state have noted that if any part of the knife is visible, it is not concealed. For most people, carrying a folding knife clipped to a pocket while walking in public is essentially “open carry” and considered legal.
It is only when the knife is “concealed” does the issue come down to whether or not the knife is a “deadly weapon.” If your knife is considered a “deadly weapon” it is illegal to carry concealed under Ohio law. Unfortunately, we don’t have clear cut guidelines differentiating a utility tool from a “deadly weapon.” The cop who is arresting you will make that judgement and ultimately, it will depend on the opinion of the judge or jury at your trial.
In talking to thousands of cops about this issue in more than 15 years of teaching knife classes, here is a list of features that many cops might use to classify your knife as a “deadly weapon.” Keep in mind that this list (like the law itself) is very subjective and depends on the individual cop on the scene.
The name. If your knife is called the “Throat Cutter 6000“, the cop might consider it a weapon. Contrast a name like that with the model name for the knife I carry (the Delica). “Delica” sounds much more innocuous than “Throat Cutter 6000.”
Blade length. The longer the blade, the more likely it will be considered a weapon. Although there are no blade length limits in the state law, I would advise keeping the blade length of any knife you carry under four inches or so.
Features such as a double edge or automatic opening.
How it is carried. If you have an elaborate shoulder rig for your knife or are carrying a fixed blade in a custom inside the waistband sheath, it’s going to look more like a weapon than a pocket knife used for utility purposes.
Even more important than your knife’s features is how you intend to use it. If your knife is “possessed, carried, or used as a weapon,” it is a deadly weapon under Ohio law. If that weapon is concealed, you can be arrested.
When the cop asks you why you are carrying the blade, you MUST have an innocuous reason. If you admit that you are carrying the knife as a defensive weapon, by default, your knife qualifies as a “deadly weapon” under Ohio law!
Your knife can be used to open mail, cut string, or peel fruit. A fixed blade knife might be a hunting or skinning knife, a “wire stripper,” or an “emergency seatbelt cutter.” I don’t care what your reason for carrying the knife is, when the cop asks you, you should have an innocuous explanation, even if you are carrying the blade as a defensive tool.
When the cop asks you “Do you have any weapons?” you should not disclose your knife. Remember, if you are carrying a knife as a weapon in Ohio, it meets the definition of a “deadly weapon.” A better answer to the question might be “I don’t have any weapons, but I have this pocketknife I use to open boxes I get in the mail.” Do not state that you are carrying your blade as a weapon, even if that is its intended use.
In practice, 99% of street cops are not trying to arrest you for carrying a knife clipped to your pocket. If you don’t threaten the cop or anyone else with your blade, most cops won’t make an issue out of carrying a knife, even if you are carrying it as a weapon. In all my years of being a cop, I’ve never seen a normal, law abiding citizen arrested solely for carrying a knife at my department. Knife charges almost always are “leverage charges” added on after an arrest for some other criminal act.
Here’s an example. Let’s say you get drunk and punch someone in a bar fight. The cop arrives and arrests you for assault. The cop knows that a misdemeanor assault charge is likely to be plead down to something more minor like “disorderly conduct.” He doesn’t want that to happen. While searching you incident to the arrest, he finds a concealed knife. He then tacks on a “carrying concealed weapons” charge on to the assault. Now the prosecutor has leverage. The prosecutor can offer a deal like “plead guilty to the assault and we’ll drop the weapons charge.” All the cop wanted was the original assault charge anyway. He doesn’t care that you have a knife. He just adds it to the list so the prosecutor has some leverage to ensure the assault charge sticks when it’s deal making time.
That’s how I see knife laws being enforced most often in Ohio. If you don’t do something stupid to get yourself arrested in the first place, the concealed knife seldom becomes an issue. This is especially true concerning folks with a concealed handgun license. Most cops understand the irony of arresting you for having a concealed Swiss Army knife when you are legally allowed to have as many loaded pistols as you desire hidden on your person. It just doesn’t make much sense to arrest someone for having a pocket knife when they are legally allowed to carry a concealed handgun that is a far more dangerous weapon.
Please note, however, that this advice applies to the state law. Individual cities may have more restrictive local ordinances that limit blade length or other knife characteristics. It’s always smart to check on your local laws in addition to the state laws I mention here.
Ohio knife law is very subjective. It is confusing and difficult both to obey and to enforce. The bottom line is that if you carry a reasonably sized knife, have an innocuous reason as to why you are carrying it, and avoid committing any other crimes that can get you arrested, you are unlikely to have any issues carrying a defensive knife in the state of Ohio.
Greg Ellifritz is the full time firearms and defensive tactics training officer for a central Ohio police department. He holds instructor or master instructor certifications in more than 75 different weapon systems, defensive tactics programs and police specialty areas. Greg has a master’s degree in Public Policy and Management and is an instructor for both the Ohio Peace Officer’s Training Academy and the Tactical Defense Institute.
Boss: I recently learned that everything we have been doing is stupid. Dilbert: Does that mean we’ll be changing what we do? Boss: Let’s see how far we can get by demonizing our critics first.
There’s nothing like a high-resolution satellite image to convey how beautiful our Earth is. They are also wonderful educational tools to explore the geographical changes our planet goes through.
But where can you find them? And if you were to find them, could these satellite images be downloaded to your desktop? Actually, yes! There are several geospatial websites that can help us out. Try these three free solutions.
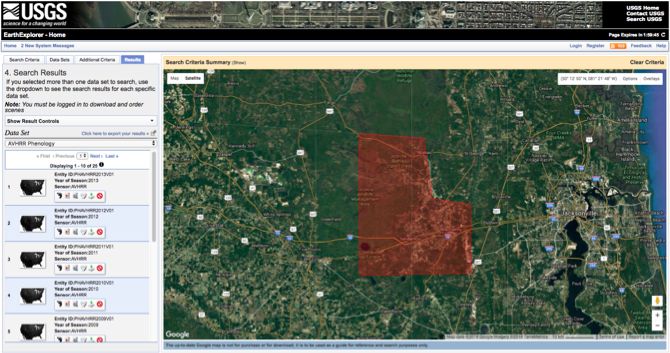
Earth Explorer is run by the US Geological Service. The high-resolution maps and datasets are specific to the country but are detailed and informative. The information is collated from sources like the Landsat remote sensing programme as well as NASA’s Land Data Products and Services.
You can use a combination of query options to comb through the United States Geological Survey (USGS) archives and download the datasets.
The European Commission (EC) along with the European Space Agency (ESA) launched the world’s largest global Earth observation program. Data from the Sentinel satellites is provided free of cost through an open access hub on the site. You do need to register to download the satellite images.
The high-resolution images are offered to the general public under a Creative Commons IGO license. The quality is better than the images from the USGS.
Also look into the Sentinel Hub Playground which helps you to use a GIS interface and explore and download full-resolution images from Sentinel-2.
Worldview is a powerful application that allows you to browse high-resolution satellite images almost in real-time. As the screenshot above shows, you can use the features on the site to set a timeline and download the map with its underlying datasets.
Also, try the unique nighttime layer (Earth at Night) to explore how Earth looks after sunset with lights switched on. Take a snapshot and download the imagery to your desktop.
Katarzyna Siminiak, Waiting Beauty (Thalia, Nova Scotia duck tolling retriever, Poland). Katarzyna won second prize in the "Dog Portrait" category.
With the dog days of Summer coming up fast—it was so humid here yesterday the air was practically dripping—it’s fitting that the prizes for Dog Photographer of the Year have been announced. Huffington Post has a nice and fairly extensive portfolio that is worth a visit if you like dogs.
Mike
Original contents copyright 2018 by Michael C. Johnston and/or the bylined author. All Rights Reserved. Links in this post may be to our affiliates; sales through affiliate links may benefit this site.
Cris from Get Hands Dirty has published a quick video on how she sharpens her knives and chisels. There are so many videos, so many techniques, and so many hard-held opinions on what’s the best way is to sharpen a blade. Here is one method.
Cris uses a hard, flat piece of kitchen marble, 4 grades of high-quality sandpaper that she affixes to the stone, and a honing guide to achieve the right sharpening angle. Sanding her way through the paper grades (from coarse to fine) with water, she finishes the blade with a final stropping on leather with some chromium-oxide paste.
If you use a similar technique, or an entirely different one, I’d love to hear about it in the comments.