Welcome to Pizza School, in which pizza-making amateur Gwen Ihnat learns the secrets from pizza-making pros.
Pizza is one of those foods that chefs on TV are always like, “Oh, just make your own! It’ll be quicker than delivery!” And we all know that a homemade pizza, carefully crafted to your individual specifications, can be an object of beauty, even better than whatever would be brought to us by the friendly driver from our favorite 30-minutes-or-under.
Advertisement
But what’s the best way to go about constructing one? What’s the secret behind those successful pizzerias? Those of us who have suffered gummy or soggy doughs, not-quite right sauce, and too much or too little toppings at home would like to know the secret behind perfect homemade pizza. Also, do we really need to invest in a pizza stone?
So I—being a hopeless pizza maker but eager to learn—sought out the experts, in my hopes of breaking down pizza into its primary components so that I can one day craft the perfect pie. This week: dough. Next week: sauce. Hold on to your garlic knots.
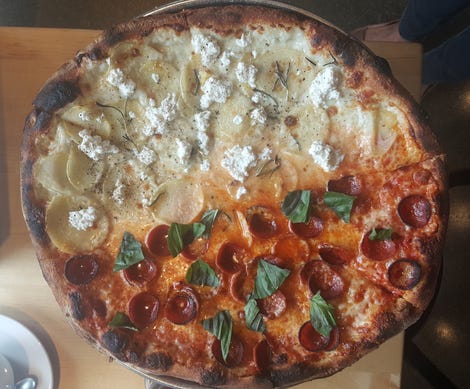
In my attempt to understand pizza dough, I headed to Pizzeria Bebu, a year-old restaurant in Chicago’s Lincoln Park neighborhood. The restaurant’s artisanal pizzas are known for their crust, which deviates from the usual Chicago thin/pan/thick crust formats. It’s thin, but a notch above that typical “cracker crust.” As chef Jeff Lutzow puts it: “It’s definitely still a thin crust, but it’s different from a New York thin crust or even a Chicago-style thin crust where it’s like, pressed into a cracker.”
Lutzow’s love for pizza goes way back, as growing up, he was a notoriously picky eater, subsisting mostly on cheese pizza and mac ‘n’ cheese. (This is music to the ears of those of us with picky-eater offspring.) “By my teenage years, I started to realize how much money I was spending on really bad food. I started trying to make pizza… Turns out after a while, I could do it better.” During his years of pizza experimentation, Lutzow experimented with different doughs, different surfaces, even creating his own oven out of a grill.
Advertisement
Naturally, after all this trial and error, Lutzow has a few tips for us. First, “Always weigh out your ingredients for it. Don’t do it by volume. Percentage-wise, [dough should be] around 65 percent water. Flour is your 100-percent ingredient. 1000 g flour, 650 g water.” About that flour: “King Arthur all-purpose flour is very nice, very consistent.” (King Arthur’s has a higher protein level than most all-purpose flour, which gives it a good gluten structure.) Even before that step, though, many pizza doughs start out with dissolving a packet of yeast in warm water. This step intimidates some people, like a chemistry experiment that’s bound to go awry. Lutzow reassures us all: “You just have to dump the yeast in the water and let it sit there. It’ll be fine.”
After five minutes of watching the yeast dissolve, you need to spend some more time letting your dough rise. Lutzow says that the greatest mistake of the home pizza maker is not giving it enough time. Sure, he says, you can make pretty good pizza in an hour. “But if you give it the time to sit overnight and proof, you actually create all that CO2 in the dough, and you end up with a result that mimics more like what you would get in the pizzeria.”
Once you’ve let your dough double in size over several hours, you still may want to wait a bit. Says Lutzow: “When you’re about to make your pizza, pulling the dough out [of the fridge] an hour or two ahead of time lets it temper, makes it a lot easier to handle. You ever run into an issue where you’re trying to roll out the pizza and it just keeps snapping back?” Lord, yes. “Let it get to room temperature and it’ll roll out a lot easier.” Also, he suggests adding some olive oil to your hands—“don’t be afraid if it’s sticky.” He also suggests flouring your board and rolling pin, if you’re using one.
Advertisement
What about flipping the dough up in the air like a classic pizza maker? Lutzlow says no to that: Keep your working of the dough minimal. “I like to keep these air bubbles inside, so the less you knock it around the better.” So why do people throw pizza dough in the air in the first place? “For show. Who doesn’t like seeing the guy throwing dough in the air?”
But what to spread the dough out on? Turns out that pizza stone might be a good investment after all. Lutzow advises using “either a baking steel, cast-iron pan, baking tile, or pizza stone.” Smith says he leans toward “masonry” (stone over steel), because it “draws the moisture out to make it crispier.” You can find a really decent pizza stone in finer cooking stores for under $50.
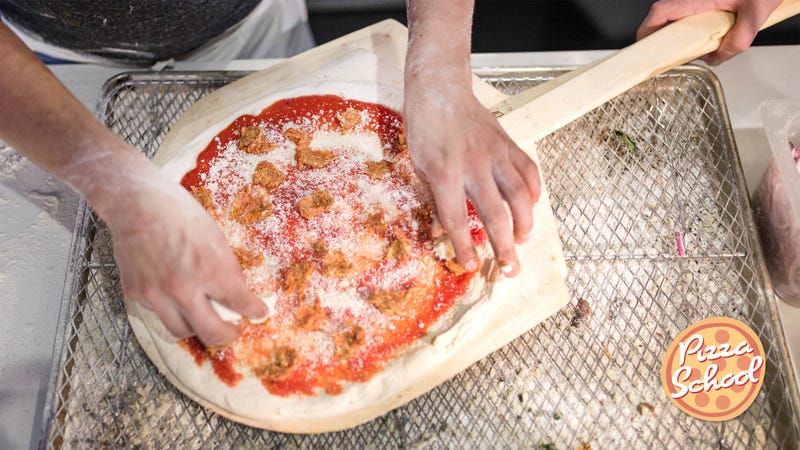
Once the dough is spread out, to avoid a soggy pizza bottom, adhere to Lutzow’s rules of topping a pizza: “The way I always top pizza is that you should be able to see everything on the pizza just looking down on it. You should be able to see the sauce, all the cheese that’s on it, all the toppings that are on it.” Too much cheese covering everything, too much sogginess.
Advertisement
Once your pizza is all set, crank your oven up to as high as it can possibly go: 500 degrees, if possible. Then bake from 10 to 15 minutes until the cheese is melted and the crust is browned.
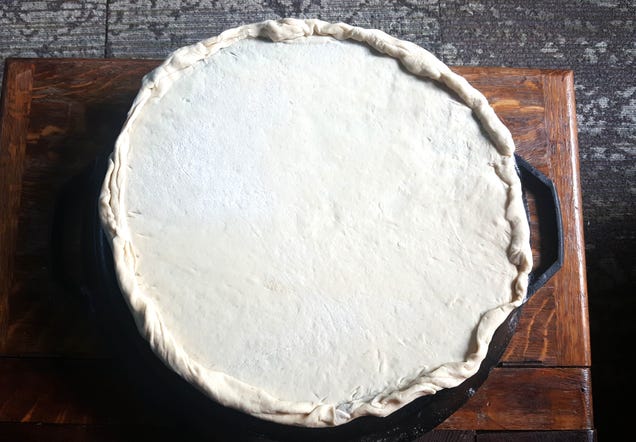
I was excited to try out Lutzow’s tips at home, and they definitely kicked my pizza up to the next level. I carefully rolled out the raised dough. I didn’t have a pizza stone, but fortunately, my husband loves cast iron almost as much as he loves me, so we had a giant cast-iron skillet on hand. As Lutzow suggested, I flipped the skillet over and used it to lay out my pizza dough on. (The super-heavy rolling pin the kids got me for mother’s day after my various pie experiments worked extremely well.) The result was hands-down the best pizza that has ever been crafted in my kitchen.
Advertisement
After all, as Smith told me, “It’s not rocket science. It’s basically bread shaped differently than a loaf.” So as long as you don’t rush your yeast or dough rising, you should be good to go. And even if you’re not, take it from a pizza master like Lutzow, who maintains: “I strongly stand by the statement that even bad pizza is good pizza.”
Homemade Pizza Crust
- one packet yeast
- 200 g warm water (about 3/4 cup)
- 300 g King Arthur all-purpose flour (about 2 cups)
- 1 tsp. salt
- olive oil and extra flour
(Editor’s note: I can’t stress how important it is to buy an electronic scale. It’s one of the best $20 investments you can make for your kitchen.)
Advertisement
Dissolve yeast in warm water and let stand for 5 minutes. Then mix into flour. Form the dough into a ball, and place in a bowl brushed with olive oil. Put dough in large plastic bag and let refrigerate overnight.
The next day, take dough out and put in bowl topped with tea towel for a few hours. Then roll out the dough with a rolling pin or your hands to desired thickness (put some olive oil on your hands, and extra flour on the rolling pin and table where you’re rolling out). Use your fingers to pinch a crust at the outside edge. Add sauce, then cheese and toppings, taking care not to overload. Bake at 500 degrees for 10 to 15 minutes, until the cheese melts and the crust is browned.
Next week: Secrets to sauce.
via Lifehacker
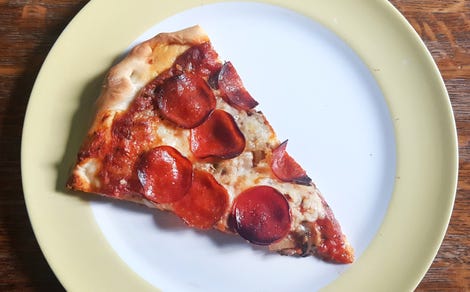
If I can make the best pizza dough of my life, you can too