Making a boat anchor is easy: Just buy a heavy cast-iron vise, neglect it for 27 years and boom, you’ve got a rusty piece metal that can serve no other function.
Unless, that is, you’re the Swiss tinkerer behind the My Mechanics Youtube channel. He acquired an old, rusted and hopelessly frozen Gressel vise for $20 and was determined to bring it back to its original glory and function. To do so required a lot of creative problem-solving, including building some clever little jigs and contraptions to get the darn thing apart:
I sat through the entire video and didn’t get bored once. However, if you’re sneaking peaks at the office and the boss is about, here are some time codes for jump-cutting:
“I wanted them to feel buying a Marvel book was like visiting an old friend.” The House of Ideas’ executives remember Stan Lee’s legacy. Stan captured the imaginations of people all over the world while championing equality, diversity and social change.
Best price on .22 Long Rifle we have seen all year!!!
Federal Black Label 22 Long Ammo 1600pc Rebate Deal
USA –-(Ammoland.com)-Brownell’s is having a special on Federal Black Label .22 Long Rifle Ammo that gets you down to $0.024 each after a coupon code for FREE shipping, and a MFG’s rebate.
To get this deal you have to order at Brownells and apply the coupon code “VB5” for free shipping and pay $59.99 at check out then apply for the rebate online, link below. No one can touch this price for Federal 22 Long Rifle ammunition that is $44.00 dollars of the normal retail. If you follow ammo price trends you know that 22 Long Rifle averages around $0.07 a round. This will sell out.
PS: This rebate and code work on other Federal ammo products as well.
Federal Blaser Black Label Rebate Info Click Image for more info.
Federal Black Label 22 Long Ammo 1600pc Cart Check 11/16/2018:
Federal Black Label 22 Long Ammo 1600pc Cart Check
Daily Gun Deals are the short-term money saving deals AmmoLand News’ Editors search out each day on the world wide web. Be forewarned that many of these deals will sell quickly or expire by the time you read them, but hey we tried. When we find sweet deals on gun products, we need we will be passing along those tips to AmmoLand News readers so you can save cash too. We have your back. Click the product name link for more info and to buy online.
Ammoland Editors are scouring the web to find you the deal that will save you money. So good are these deals that they do not last long so pay attention to the publish date and do not delay, take advantage of this deal as soon as we publish it for our readers.
Consider checking our Gun Deals Coupon page and our past featured Daily GunDeals page for additional savings from your favorite industry partners. Thank you very much for your support and I hope we save you some money by highlighting these sweet daily deals. Enjoy!
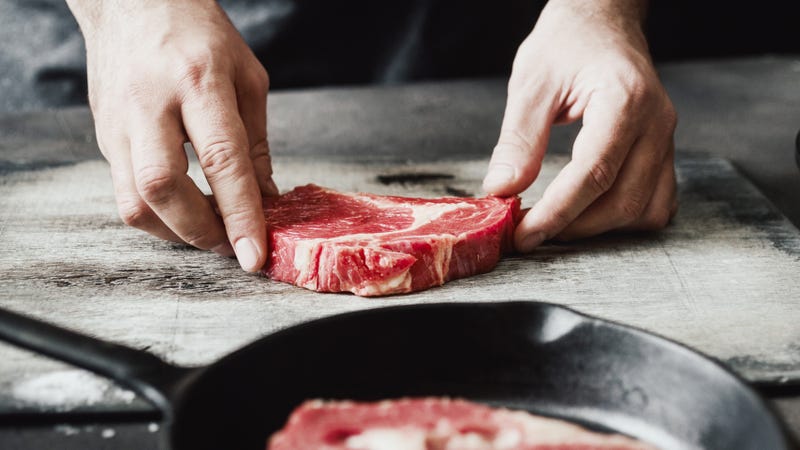
In an effort to bring better quality meat from small family farms to my community, I opened a butcher shop in Chicago called The Butcher & Larder. For eight years I’ve been helping people with everything from Thanksgiving dinner to how to cook a steak.
When they’re gazing wistfully at the steaks in the case, customers often say, “I’d really love to cook one of those for myself, but I just don’t know how. I’ve tried cooking steak at home, but I just ruin them…” In the past, I’d try and dig into their cooking psyche and figure out from where the block stemmed, but these days, I build up their confidence, and then arm them with a simple formula.
Advertisement
Before we get to the formula, though, I’d like to bust a few myths about cooking steak (or most meat, for that matter).
First: Rid yourself of the notion that high heat is what makes a great steak, or that you need a “rippin’ hot pan” to “seal in the juices.” The pan matters, but the heat less so. Searing a steak is great for flavor. Look up the Maillard reaction to see what I mean in detail, but for brevity’s sake, when it comes to meat, brown = flavor.
How you do your browning is key, because while brown is good, gray is bad. Gray is the sad, unintentionally over cooked portion of the interior of the steak. When you sear in, say, “a rippin’ hot pan, bro!” you get great browning on the outside, but just under that sear is a layer of gray that takes away from the steak’s flavor and juiciness. The other myth I’m most asked about—whether steaks should be room temperature before cooking—might seem to make sense, but science says otherwise. It’s not a bad habit, but not totally necessary, either.
Photo: Lisovskaya (iStock)
My method for cooking the average steak (average steak means your basic ½-to-1-inch thick ribeye or New York strip, not a 3-inch Fiorentina or 47-ounce tomahawk-mancave-beast-mode behemoth) is a 16 minute commitment: 1 minute to season, 10 minutes to cook, five minutes to rest.
Advertisement
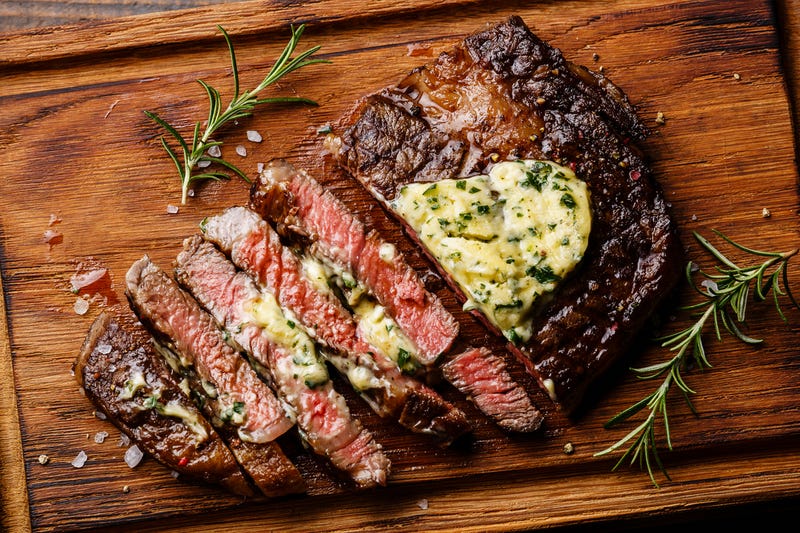
I call it the 3-3-2-2 method as that’s an easy thing to remember if you’re at a butcher counter with nothing to write on, and it results in a perfectly browned, medium-rare steak. Seasoning doesn’t matter. I’m a salt and pepper guy, but if you like Guy Fieri’s Santa Maria steak rub, go for it.
Here’s how it works:
Put your heaviest skillet over medium heat (yes, medium—335 degrees or thereabouts Fahrenheit). Cast iron is great, but any heavy pan will do. After a few minutes on the fire, add a couple tablespoons of oil (olive, grapeseed, sunflower, etc) and lay your steak in the pan. Resist the temptation to slide, poke, wiggle, or move the steak. Just leave it there for an agonizing three minutes. Flip and repeat for three more minutes. It will seem like forever, but remember what Tom Petty said, “The waiting is the hardest part.” Flip again, but this time for two minutes and again for another two minutes. Remove your steak from the pan and rest for five minutes.
Advertisement
This works because three minutes over medium heat is just enough to get some nice brown on the meat while warming the steak through to the center, but you turn it in time to avoid any of the nasty gray we are trying to avoid. The two-minute cycle continues to brown the surface gently while getting your steak cooked to temperature. If you like your steak a little more done, add a minute or so to the cook time. If you like it closer to well done, add another minute. I wouldn’t suggest any longer, though. The important thing here is that the times have to be even so the steak isn’t more done on one side than the other. Keep the heat modest so everything stays nicely seared and juicy—see? Simple.
Rob Levitt’s 3-3-2-2 Steak Method
Preheat heavy pan over medium heat for a few minutes, add oil
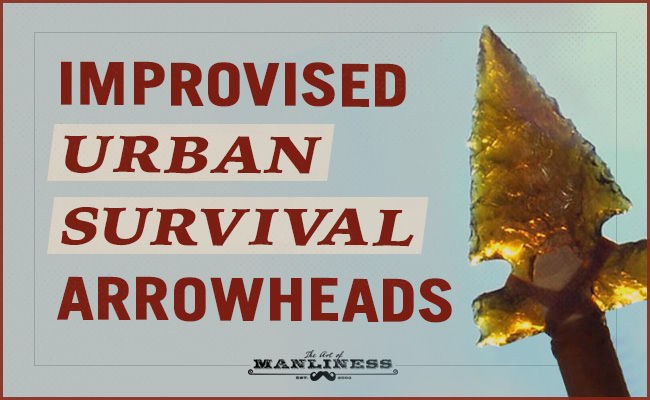
The original arrowheads were made from organic materials — often through the process of “knapping” rocks like obsidian, chert, and flint. The sharp flakes of stone which resulted were then affixed to arrow shafts, and shot from bows by primitive hunters to take down game and battle their human enemies.
Still today, stone arrowheads are made by bushcrafters, and they can be life-savers in wilderness survival situations.
But what if you need to make an arrowhead in an urban environment, where stones that are good for knapping may not be abundant? What improvised materials can be marshaled to create projectile points that can be used to make arrows for hunting and self-defense?
Here are 4 different materials/methods to try:
1. Arrowhead From a Glass Bottle
Supplies needed:
Glass bottles (ideally with a flat bottom)
Pressure flaker (antler bone or a nail hammered into a wooden dowel)
Obsidian, from which arrowheads have been made for thousands of years, is volcanic glass, so it shouldn’t come as any surprise that you can make your own arrowheads from man-made glass. In fact, such glass is easier to work with than obsidian (or other rocks), and of course is easier to come by, especially in an urban location.
You can use any kind of glass with a flat section, and that includes an ordinary soda/beer bottle. You make an arrowhead from a bottle pretty much the same way you’d make it from a rock: by breaking apart your source material, and then taking a large flake of it — in this case the bottom of the bottle, which is thicker and flatter — and carefully chipping off tiny flakes from its edges to shape and sharpen it up. The text instructions here, which includes diagrams, are helpful in understanding the semi-intricate process.
Since shaping glass into arrowheads is easier than shaping stone, this is a good way of learning the skill of knapping rock.
2. Arrowhead From a Nail
Supplies needed:
Hammer
Nail
Pliers
File
If the knapping process feels a bit too meticulous for you, try a more brute-force method: making an arrowhead from a common nail. Basically, you just pound it on alternate sides until it flattens out, and then use a file to create a sharp edge/point. They’re not the sturdiest arrowheads, but will get the job done. With a bigger hammer, you can pound a 1/4″ bar stock into a true broadhead that’s able to penetrate and take down a deer.
3. Arrowhead From a Spoon
Supplies:
Spoon
Hammer
File
The basic process for making an arrowhead from a spoon is to hammer it til it’s flat, draw the arrowhead shape you want on the flattened spoon head, and then remove the material around that outline until you have your broadhead triangle. The process is made easier if you have some higher-tech tools like a blow torch (for heating up the spoon before you hammer it) and something like a Dremel tool for cutting away the extra material. But in a survival situation you may not have access to those things (or to electricity). Fortunately, though it takes more effort, you can create the same end product simply by hammering a cold spoon and then using a file to remove the extra metal from the spoon head; you can even rub it against a block of concrete should you not have a file.
4. Arrowhead From the Lid of a Tin Can
Supplies needed:
Tin can
Multi-tool with can opener and pliers
Probably the easiest method, and one that involves the least supplies (if you have a handy multi-tool). You simply take the lid off a tin can, fold it in half, bending it back and forth til it breaks. Then you do the same thing with a half piece until you have a quarter section of the lid. Then fold that in half and make some manipulations with your pliers.
As you can see, in an urban survival situation, materials from which to make improvised arrowheads can be found everywhere, from a trash can to a kitchen pantry. Once you’ve sourced and made your arrowheads, you’ll of course need to attach (haft) them to the arrow’s shaft; the essential process goes like this: you’ll cut a notch in the end of the shaft, insert your arrowhead into the slot with some glue/resin, wrap the arrowhead in sinew/cord to further secure it, and then top the wrapping with some glue for good measure. Then string your improvised bow (a subject for another day) with your improvised arrow, and prepare to bag some game or defend your domain.
As I wrote almost a year ago, every church should have one or more good guys with guns protecting the flock. Every synagogue, temple and mosque. Anyplace people gather to worship should have a ballistic response ready for the worst case scenario. Does yours have one? It should to improve church safety.
The first step in creating a safer house of worship involves recognizing that evil does exist. And that sometimes worldly evil will invade sacred locations. Only fools expect bad people to honor society’s norms in and outside of churches. Burying one’s head in the sand doesn’t keep anyone safe. Just ask the do-gooder couple who hiked through ISIS-controlled territory.
Some folks think that creating a security team for their church simply involves finding volunteers to carry guns to church services. Not so. While that’s better than nothing, when well-meaning people only have a hammer, every problem can ten to look like a nail.
Want to get a church security team off the ground in your house or worship? First off, get off on the right foot. Call it a “safety team.” Good word choice will help keep your flock from becoming alarmed. Most folks don’t want to think about the need for armed security in their church, but everyone can rally behind “safety.”
Once you have a team willing to do more than carry a gun, spend some money on good communications. Get radios. Issue them to ushers, greeters and security folks. Greeters and ushers can discretely report potential problems. In fact, your greeters stand as the congregation’s eyes and ears, evaluating everyone at the entry points as they welcome them at services. They will often identify potential problems first – including both security- and health-related issues.
Conversely, if security detects a problem and can communicate instantly, ushers and greeters can immediately help direct the flock away from that threat.
Surveillance cameras help too. Church congregations face a greater risk of criminal violence (robbery) in the parking lots than they do when sitting in the pews. Watching cameras can detect suspicious behavior from non-church members. In larger churches, roving patrols in cars or golf carts can go a long way to deter criminal activity.
Just like schools, churches should lock their doors shortly after services begin. A greeter can welcome latecomers at a locked door. However, why make it easy for a lunatic to invade the sanctuary at an unmanned, unlocked door when everyone’s attention is directed at the preacher?
Included in the safety plan: good first aid skills. Frankly, knowing some basic first aid and how to use an AED or perform CPR will likely save far more lives than that gun on the hip.
Frankly, safety team members should have good skills at de-escalating potential violence, too. Knowing the basics of talking people down while taking steps to lessen one’s personal risk help. And if the verbal judo fails, knowing some hands-on tactics can help quickly restrain troublemakers for police without the need for a full-on brawl.
Ideally, off-duty local law enforcement members of the congregation will join the team.
Lastly, those select safety team members with guns should face a vetting process with church leaders. Yes, while anyone legally able mayshould carry during a church service, safety team members represent the church to some degree. And the last thing any house of worship needs is an ill-trained, gun-toting “security team” member pulling a gun over a mildly-heated child custody dispute near the kids’ area during or after a service.
I still remember after the Sutherland Springs church shooting in Texas, people approached me asking about the legality of carrying without a license in church here in Illinois. God bless those Christians for volunteering.
On one hand, these well-meaning men and women expressed a willingness to protect their family and friends from bad people. On the other hand, they didn’t even know the law on carrying on private property in Illinois. Will they have a good handle on the nuances of deadly force law to keep themselves out of jail afterwards? I hope so, but I doubt it.
I would think some training on the legal use of deadly force is reasonable and prudent. Especially for those who wish to formalize their role providing security in their church.
While I’d prefer well-trained (and well-armed) gun owners in a time of trouble, I would eagerly welcome even any gun owner over a whole passel of hysterical Moms Demanding Action cowering under pews or desks. And you should too.
The last time we looked at a home built inside a former missile silo, it was Matthew and Leigh Ann Fulkerson’s "Subterra" home, which was then listed on AirBNB. But the Fulkersons have nothing on developer Larry Hall, who purchased a decommissioned Atlas missile silo in Kansas and converted it into 15 stories’ worth of Luxury Survival Condos.
Take a look inside, and note that many of the condos are already sold:
I do like how they call it an "undisclosed location" in Kansas, yet if you Google "luxury survival condo" the address pops right up.
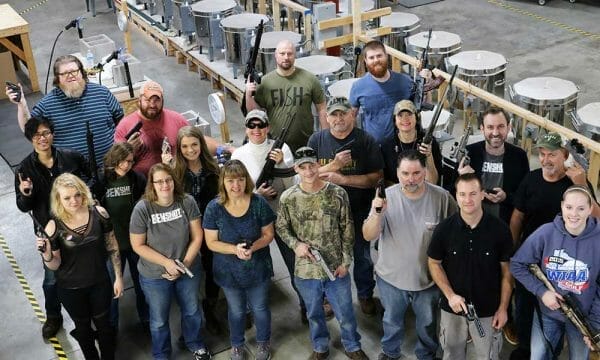
This year’s Christmas gift was one to remember at BenShot. Every employee received a handgun of their choice.
“We are a small, close-knit team at BenShot. I want to make sure all of employees are safe and happy – a handgun was the perfect gift” -Ben Wolfgram, son from the Father and Son team at BenShot.
BenShot makes the original bulletproof shot glasses.
About BenShot:
BenShot (www.BenShot.com) is a father and son team which designs and makes glassware with bullets embedded into the side. It makes an extensive line of glasses, including the original bulletproof shot glass, whiskey, and beer glasses. BenShot’s unique product has sent them on a fast growth trajectory and currently ranks #1 of over 1,000,000 handmade products on Amazon. BenShot started making glasses in a small garage workshop in 2015 and now employs 16 full time people, including veterans, in their glass shop in Hortonville, WI.
BenShot sells on 30 military bases and have partnerships in the UK, Europe, Japan, and Australia. This local business prides itself on their work with non-profits including: conversation groups, military organizations, and police and fire departments.