Real Python: Python and PyQt: Creating Menus, Toolbars, and Status Bars
https://ift.tt/3kI1ZXi
When it comes to developing graphical user interface (GUI) applications with Python and PyQt, some of the most useful and versatile graphical elements that youâll ever use are menus, toolbars, and status bars.
Menus and toolbars can make your applications look polished and professional, presenting users with an accessible set of options, while status bars allow you to display relevant information about the applicationâs status.
In this tutorial, youâll learn:
- What menus, toolbars, and status bars are
- How to create menus, toolbars, and status bars programmatically
- How to populate Python menu and toolbar using PyQt actions
- How to use status bars to display status information
In addition, youâll learn some programming best practices that you can apply when creating menus, toolbars, and status bars with Python and PyQt. If youâre new to GUI programming with PyQt, then you can check out Python and PyQt: Building a GUI Desktop Calculator.
You can download the code and resources for the sample application that youâll build in this tutorial by clicking on the box below:
Download the sample code: Click here to get the code youâll use to learn how to add menus, toolbars, and status bars to your GUI applications using Python and PyQt.
Building Python Menu Bars, Menus, and Toolbars in PyQt
A menu bar is a region of a GUI applicationâs main window that holds menus. Menus are pull-down lists of options that provide convenient access to your applicationâs options. For example, if you were creating a text editor, then you might have some of the following menus in your menu bar:
- A File menu that provides some of the following menu options:
- New for creating a new document
- Open for opening an existing document
- Open Recent for opening recent documents
- Save for saving a document
- Exit for exiting the application
- An Edit menu that provides some of the following menu options:
- Copy for copying some text
- Paste for pasting some text
- Cut for cutting some text
- A Help menu that provides some of the following menu options:
- Help Content for launching to userâs manual and help content
- About for launching an About dialog
You can also add some of these options to a toolbar. A toolbar is a panel of buttons with meaningful icons that provide fast access to the most commonly used options in an application. In your text editor example, you could add options like New, Open, Save, Copy, and Paste to a toolbar.
Note: In this tutorial, youâll develop a sample application that implements all the above menus and options. You can use this sample application as a starting point to create a text editor project.
In this section, youâll learn the basics of how to add menu bars, menus, and toolbars to your GUI applications with Python and PyQt.
Before going any further, youâll create a sample PyQt application that youâll use throughout this tutorial. In each section, youâll add new features and functionalities to this sample application. The application will be a main windowâstyle application. This means that itâll have a menu bar, a toolbar, a status bar, and a central widget.
Open your favorite code editor or IDE and create a Python file called sample_app.py. Then add the following code to it:
import sys

from PyQt5.QtCore import Qt
from PyQt5.QtWidgets import QApplication, QLabel, QMainWindow

class Window(QMainWindow):
    """Main Window."""
    def __init__(self, parent=None):
        """Initializer."""
        super().__init__(parent)
        self.setWindowTitle("Python Menus & Toolbars")
        self.resize(400, 200)
        self.centralWidget = QLabel("Hello, World")
        self.centralWidget.setAlignment(Qt.AlignHCenter | Qt.AlignVCenter)
        self.setCentralWidget(self.centralWidget)

if __name__ == "__main__":
    app = QApplication(sys.argv)
    win = Window()
    win.show()
    sys.exit(app.exec_())
Now sample_app.py contains all the code that you need for creating your sample PyQt application. In this case, Window inherits from QMainWindow. So, youâre building a main windowâstyle application.
Note: Unfortunately, PyQt5âs official documentation has some incomplete sections. To work around this, you can check out either the PyQt4 documentation or the original Qt documentation.
In the class initializer .__init__(), you first call the parent classâs initializer using super(). Then you set the title of the window using .setWindowTitle() and resize the window using .resize().
Note: If you arenât familiar with PyQt applications and how to create them, then you can check out Python and PyQt: Building a GUI Desktop Calculator.
The windowâs central widget is a QLabel object that youâll use to show messages in response to certain user actions. These messages will display at the center of the window. To do this, you call .setAlignment() on the QLabel object with a couple of alignment flags.
If you run the application from your command line, then youâll see the following window on your screen:
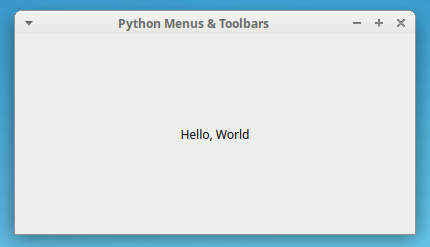
Thatâs it! Youâve created a main windowâstyle application with Python and PyQt. Youâll use this sample application for all the upcoming examples in this tutorial.
Creating Menu Bars
Read the full article at https://realpython.com/python-menus-toolbars/ »
[ Improve Your Python With ð Python Tricks ð â Get a short & sweet Python Trick delivered to your inbox every couple of days. >> Click here to learn more and see examples ]
Python
via Planet Python https://ift.tt/1dar6IN
November 16, 2020 at 11:50AM