The last episode of season two of The Mandalorian was truly amazing, and Luke’s return was truly epic. Bugzkilla synced up the sequence with Bonnie Tyler’s ’80s classic Holding Out for a Hero, and it suits the scene perfectly. They followed it up with My Heart Will Go On for Din and Grogu’s teary-eyed farewell.
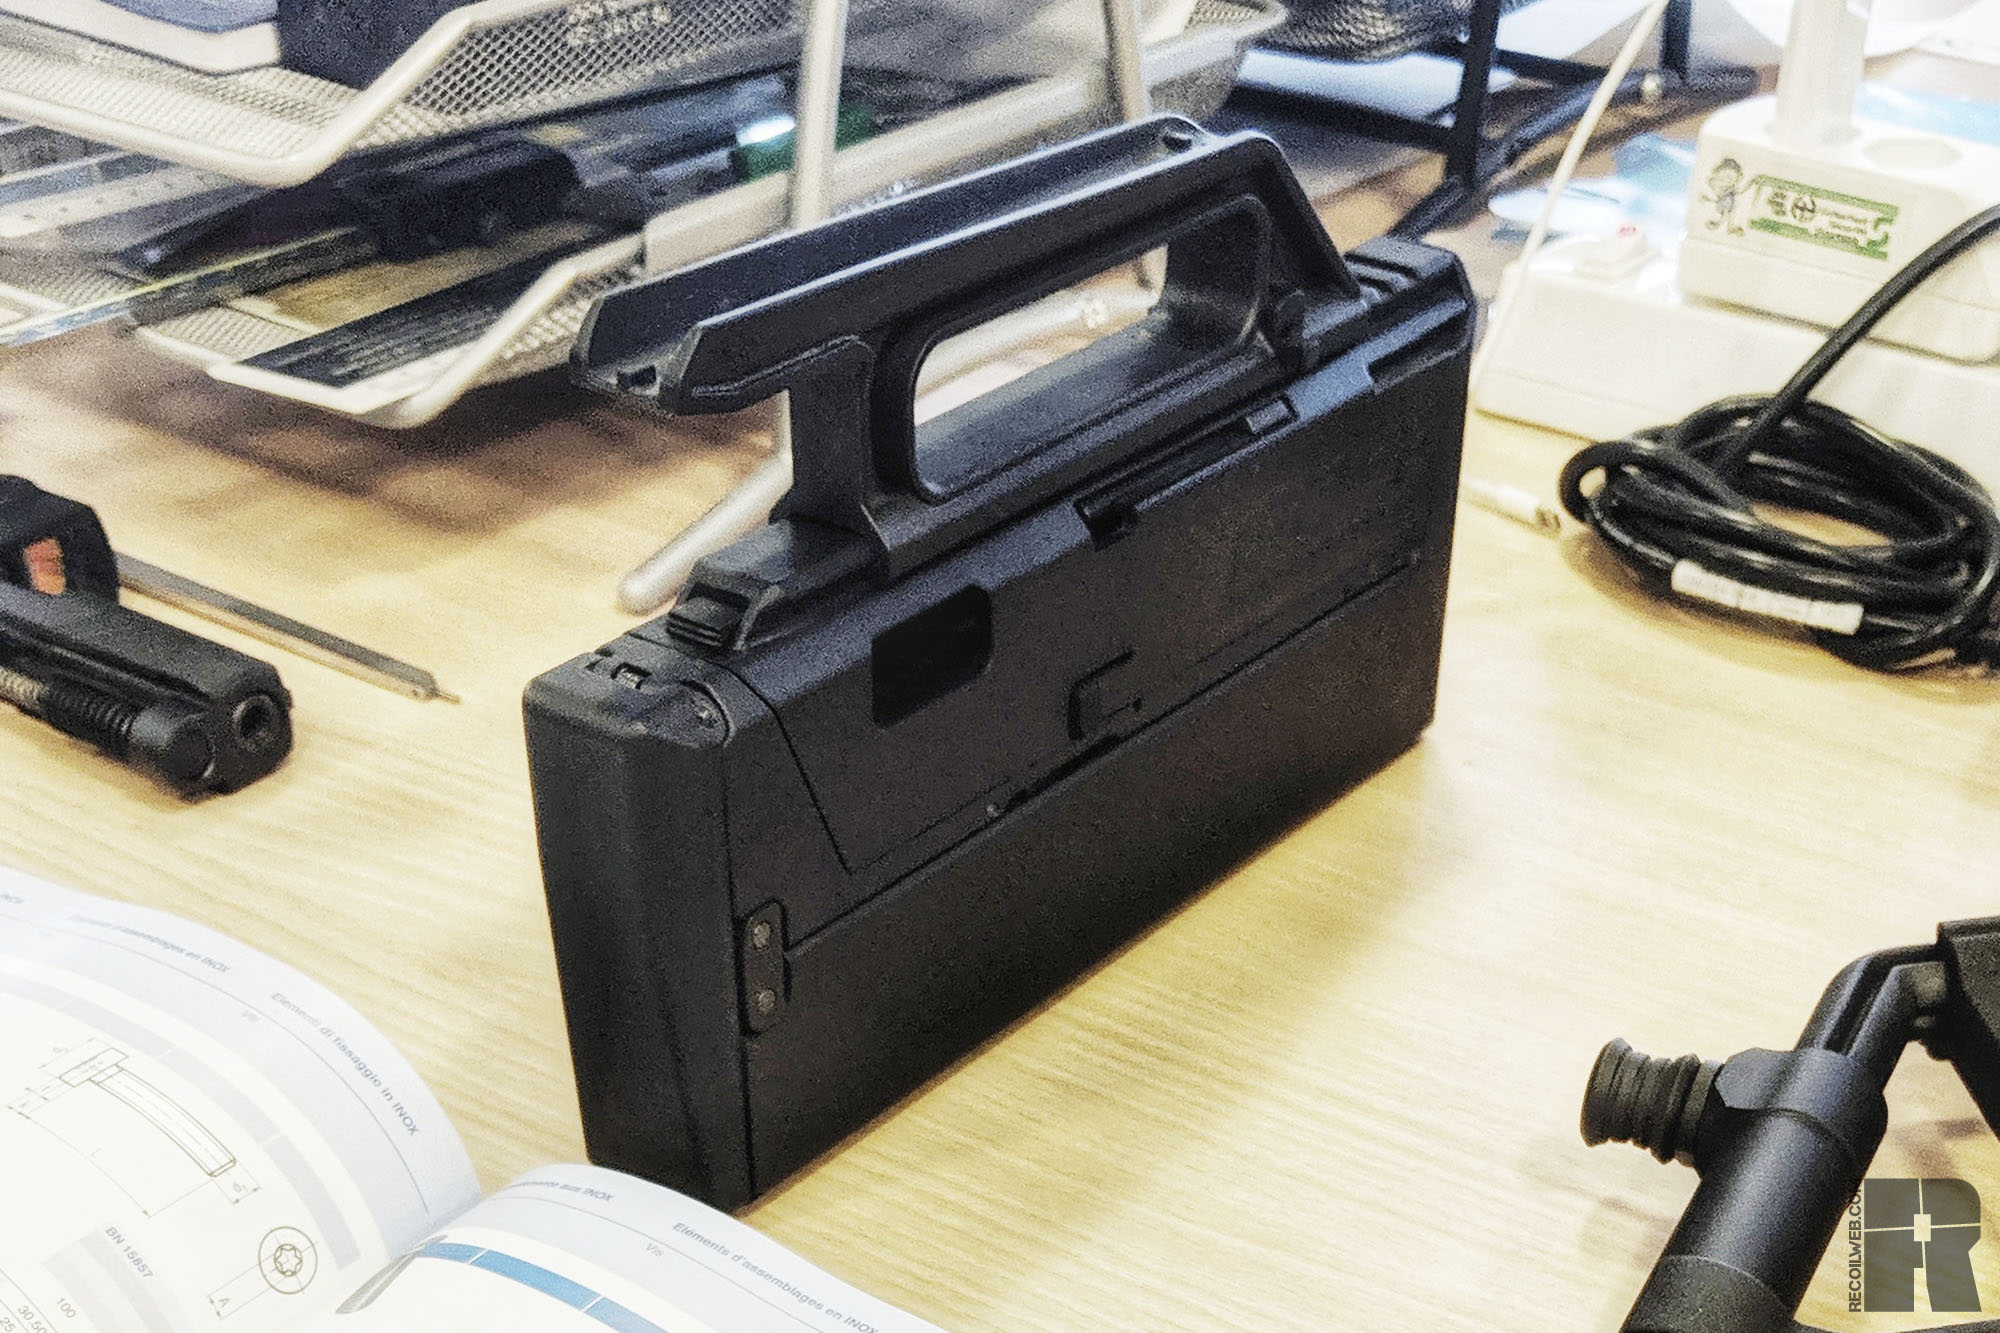
In 2008, The Dark Knight was #1 at the box office, a recession would start, and someone threw his shoes at President Bush. And at SHOT Show 2008, the internet broke with the folding Magpul FMG-9 subgun. Clearly inspired by other covert firearms such as the ARES FMG and the UC-9/DEB M21, the Magpul FMG-9 initially appears to be a large flashlight. And while a flashlight that large in 2020 is unusual, it still wouldn’t garner more than a quick glance. Realistically, it just has to look not like any sort of weapon. While there were a handful of working models produced (we even ran into one at B+T in Switzerland) it mostly saw life in videogames and airsoft. But now? Years after Magpul scrubbed any presence of the Magpul FMG-9 from their webpage, they’ll be bringing it to market. Magpul teamed up with premium firearms producer ZEV Technologies to bring the Magpul FMG-9 out of videogames and into your hands on the range. It won’t be called the FMG-9, but the FDP-9 and FCP-9.
FDP-9 / FDC-9
That is Folding Defensive Pistol and the Folding Defensive Carbine, both chambered in 9mm. ZEV took their modular OZ9 (read our review here) internals and paired them up with the Magpul chassis. The FDP-9 is a “large format” pistol–so what of the carbine?
After receiving an approved BATFE Form 1 (here’s a walkthrough) you’ll be able to legally assemble conversion kit parts to bring it to its covert-carbine glory. Yes, we fully anticipate that nearly each and everyone will be converted to an SBR–ours certainly will. There is a possibility that ZEV will produce factory SBR FDC-9s as well.
Magpul will not be selling them directly, they’ll only be available from ZEV Tech themselves or a stocking dealer. And unfortunately, it will be 2022 until we see one. Pricing will be released in Q3 2021.
Here’s what Magpul has to say about it:
At SHOT Show 2008, Magpul® introduced a folding concept gun based on the Glock® operating system. It deployed single-handedly from a compact, simple form factor into a short-barreled carbine that was easier to handle and easier to employ accurately than many typical handguns. It also provided its own safe storage method by folding into itself to form a case. At the time, this concept firearm was intended to be just that…a concept.
In 2019, ZEV Technologies® released their OZ9 modular pistol, which is compatible with Glock-style operating systems, using a unique receiver block that’s independent of the pistol’s grip and allows users to change grip frames to suit their needs.
Shortly thereafter, Magpul and ZEV began working together to bring the folding gun concept to life using a proprietary variant of the ZEV OZ9 operating system and a Magpul chassis. Since then, we’ve been refining designs and obtaining required legal approvals. The result: The ZEV Technologies Folding Defensive Pistol-9 (FDP-9) and Folding Defensive Carbine-9 (FDC-9), both offered in 9x19mm.
The intent, with preliminary ATF approvals in place, is for ZEV Technologies to offer the FDP-9 firearm as a complete, large-format pistol. From there, the purchaser can enjoy the firearm as a self-enclosing large-format pistol. They may also choose to file the appropriate ATF Form 1 and, after approval, purchase a conversion kit to legally assemble it into the FDC-9. It will then be classified as a short-barreled rifle (SBR) and subject to all NFA laws. Although not certain at this time, the FDC-9 might also be offered straight from ZEV and would transfer to the purchaser as an SBR on an ATF Form 4 through their local dealer. The FDP-9 and FDC-9 will not be available from Magpul; they will be available from ZEV Technologies and through distributors and dealers that carry ZEV Firearms.
The ZEV FDP-9 and FDC-9 firearms won’t be ready until next year, but we wanted to share them with the world a little early. We’ve already crossed the most significant hurdles to bringing this concept to life, and we’ll be sharing a lot more about it throughout the upcoming year.
The ZEV Technologies FDP-9 and FDC-9, brought to you by ZEV and Magpul. Coming in 2022.
Quick Q&A from Magpul
Q: What is the FDP-9? A: The ZEV Technologies FDP-9 (Folding Defensive Pistol) is a cased, folding pistol that can be safely stored off-body and immediately put into operation by the user. The FDP-9 is a handgun based on the Glock operating system and will be purchased in the same manner as any other handgun. The FDP-9 does not have an arm brace functionality.
-Q: What is the FDC-9? A: The ZEV Technologies FDC-9 (Folding Defensive Carbine) is a carbine derivative of the FDP-9. The FDC-9 is an NFA-classified SBR and will require a $200 transfer tax. It incorporates a buttstock into the folding storage cover to enhance accuracy and stability.
Q: What calibers will be available? A: The FDP-9/FDC-9 will be available in 9x19mm.
Q; What magazines does the FDP-9/FDC-9 take? A: Glock 17-round pattern double-stack 9mm Magazines. The FDP-9/FDC-9 will fold into the stowed position with a Magpul PMAG® 27 GL9® – Glock® installed. It will not work with Glock 19-pattern (or shorter) magazines.
Q: Can I buy a kit to convert my existing ZEV OZ9? A: No. While the receiver is OZ9-based, it is modified from the original and is proprietary to the FDP-9/FDC-9. The FDP-9/FDC-9 will only be available as a complete firearm.
Q: Can I convert my FDP-9 to an FDC-9? A: Yes, upon receipt of an approved ATF Form 1. FDC-9 conversion kits will be available to retrofit your existing FDP-9 cover to a stock. A factory SBR version may be offered in the future.
Q: Does the FDP-9/FDC-9 have a safety? A: Yes, it has a manual safety that can be applied in the folded or unfolded position.
Q: Who makes the FDP-9/FDC-9? A: ZEV Technologies is the firearms manufacturer. Magpul makes the chassis components; ZEV makes the key firearms components and assembles the firearm. The complete firearm will be sold by ZEV and will be available through their network of dealers and distributors.
Q: How much will the FDP-9/FDC-9 cost? A: Pricing is not set at this time. Pricing info will be available around Q3 2021
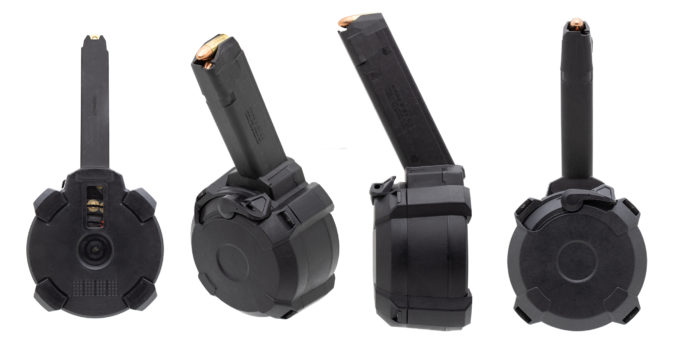
For those searching for a Glock Drum Mag, and are familiar with the reliability of the D50 and D60 series of drum magazines, new for 2021 is the Magpul D50 GL9. Distinct from the Magpul D50 GL9-PCC, the D50 GL9 prioritizes and reinforces sections particular to Glock-esque Frames.
Read more on the New Glock Drum Mag, the Magpul D50 GL9:
Lightweight but incredibly strong, our PMAG D50 GL9 is a highly reliable, 9x19mm Parabellum, 50-round drum magazine optimized for double-stack 9mm GLOCK handguns.
The PMAG D-50 GL9 boasts many of the proven features of our other 9mm drums, the PMAG D-50 GL9 – PCC and the PMAG D-50 EV9™. Providing 50-round capacity, the unique drum configuration keeps the height of the magazine manageable, allowing for easier storage. For easy loading, it includes a ratcheting loading lever that removes tension from the internal spring.
To keep track of your available firepower, we’ve included a rounds-remaining rear window, a high-visibility follower and a capacity indication roller.
Easily disassembled for cleaning and featuring an innovative bolt hold-open feature, the D-50 GL9 reliably locks the bolt back on empty when used with firearms designed to lock back on GLOCK pattern magazine followers.
It is recommended that you install a new OEM magazine release on Gen 1-3 GLOCK handguns to support the extra weight of the magazine. Gen 4 GLOCK handguns will require an aftermarket metal magazine release. Installation of a new recoil spring assembly to ensure reliable feeding is strongly recommended. Individual variations between firearms may result in an extra power recoil spring being required.Use of the D-50 GL9 in pistol caliber carbines (PCC) is not recommended, because the increased length of the feed tower will be partially unsupported in most pistol caliber magazine wells. This unsupported condition may cause premature wear on the feed tower magazine catch, and (in firearms which deviate from factory magazine well specifications) may result in improper round presentation and failures to feed.
Made in the USA.
Features
50-round capacity
Next-generation impact and crush-resistant polymer construction
Robust stainless internals withstand corrosion and long-term storage while loaded with no loss of function, spring fatigue, or reliability concerns
Ratcheting lever for ease of loading
Easy disassembly for cleaning and maintenance
High-visibility follower and rounds-remaining window
Paint Pen Dot Matrix
Compatibility
Double-stack 9mm GLOCK Handguns
Use of this magazine in PCCs and large-format pistols is strongly discouraged. For a GLOCK-pattern PCC/large-format pistol compatible magazine, see PMAG D-50® GL9® – PCC (MAG1137)
Gen 4 GLOCK handguns require an aftermarket metal magazine release to support the increased weight of the magazine
It is recommended to install a new OEM magazine release on GEN 1-3 GLOCK handguns to support the increased weight of the magazine
Installation of a new recoil spring assembly to ensure reliable feeding is strongly recommended. Individual variations between firearms may result in an extra power recoil spring being required
SPECS
Unloaded Weight: 17.1 oz.
Height: 8.7″
Width: 4.2″
Depth: 3.5″
Colors:BLK Price: $119.95
MORE FROM MAGPUL
For those using magnified optics, Magpul has Offset Iron Sights.Read more here.
Magpul released two new stocks to their already diverse lineup in 2020.Read more.
There are some basic life skills that everyone should have…how to change a tire, how to sharpen a knife, how to steal the Declaration of Independence.
Nick Cage knows what’s up.
Sure, you could have someone do it for you — but it’s better to just learn the skill yourself.
The same can be said for zeroing your rifle scope.
It’s quick, it’s easy, and you’ll never need to rely on someone else to do it for you.
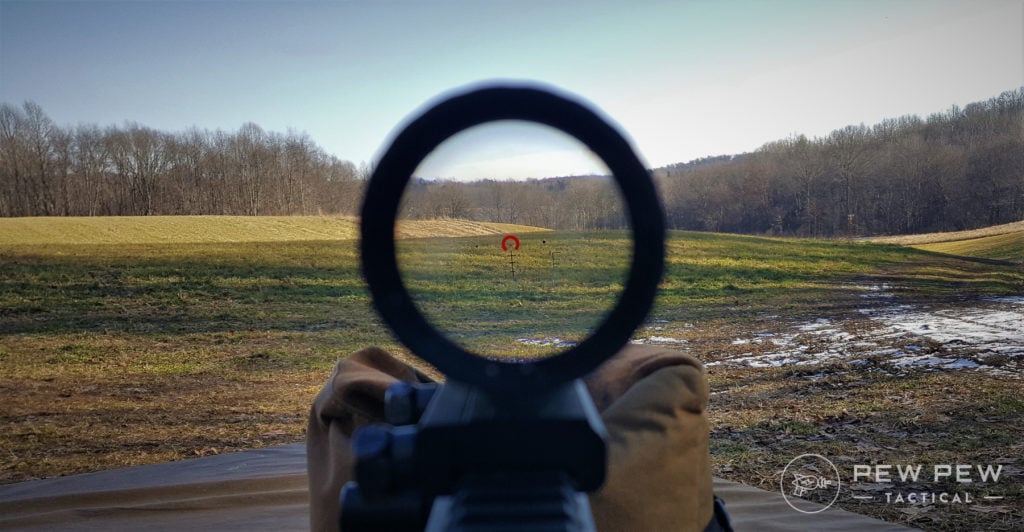
View through the Primary Arms 1-8x SLx on a bright day.
In this article, we’re going to cover the important aspects of zeroing you need to know.
From basic terminology to the actual steps involved in getting your rifle on target, you’ll get a good grasp on what it takes to zero any scope.
So, read on to learn more…
Table of Contents
Loading…
Basic Terms And Important Info
If you want to learn to zero a scope, I’m going to bet that you’re either a very new shooter or at least very new to optics.
Either way, let’s cover some terms and other basic info that will help you out down the road.
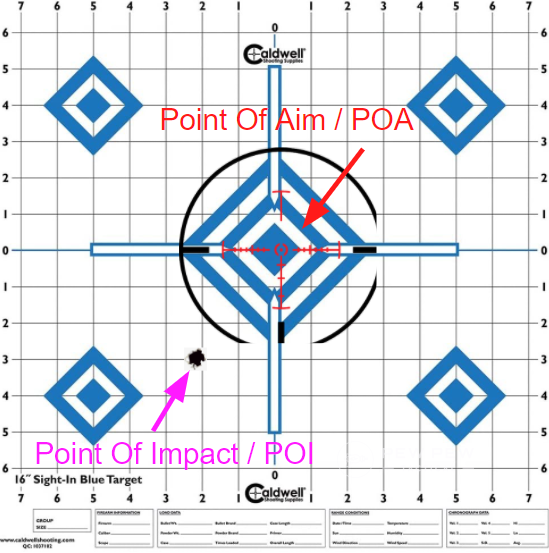
POI vs. POA
Very simple, your point of impact and your point of aim.
They are both exactly what they sound like.
Point of impact (POI) is where your round hits the target.
Point of aim (POA) is where your reticle or sight is on the target.
POI Vs. POA
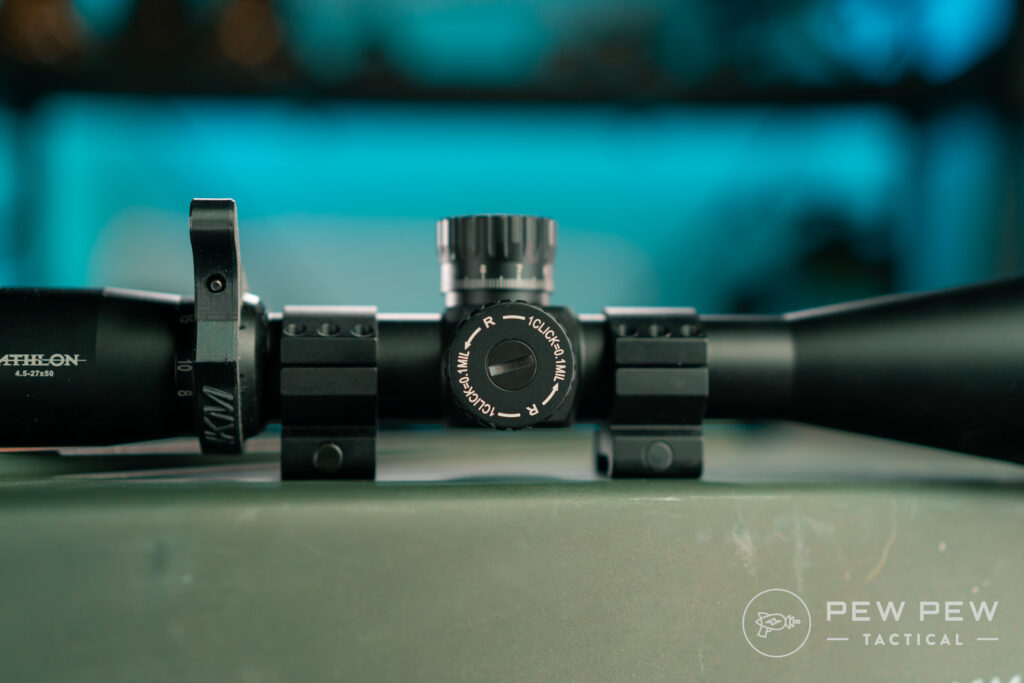
Turrets
They come in many flavors but they should have some common characteristics. Turrets turn and should be marked with hash marks and maybe numbers.
Each mark should be one “click” and you should be able to feel the turret’s detent literally click as you turn the turret.
Some are more clicky than others though. The cheaper the scope the less likely you’ll get good firm clicks.
Each of those marks and clicks correspond to how much your reticle moves. While it depends on your scope, the most common adjustment increments are 1/4 MOA, 1/2 MOA, and 0.1 MILs.
Normally on your turret or on the cap for the turret, it will tell you how much your clicks are.
Athlon BTR Gen II, 1 click = 0.1 MIL
MOA vs. MIL
For zeroing your scope it really doesn’t matter if you’re in MILs or MOA.
If you’re counting and trying to math your way to a zero, then you’ll need to know what your scope is calibrated in.
But that’s about it.
Yards vs. Meters
Kind of like MOA and MIL, it’s not critical what unit of measurement you use.
Keep in mind that MOA and MILs are angler measurements. They can BOTH be used with EITHER yards or meters. It just changes the math a bit.
Normally — MOA is going to be in yards and this is the most common measurement in general.
Whatever unit you pick, stick with it. It’s important to keep things consistent so that you don’t have to do conversion after conversion.
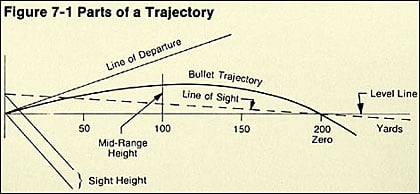
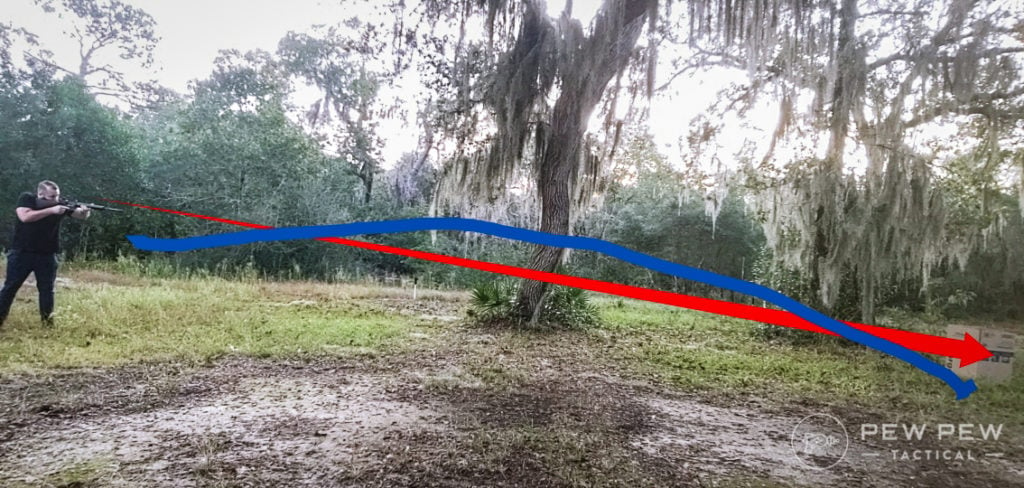
Bullets Travel in an Arc! (kind of but not really)
Something you might have been told or might think yourself is that bullets travel in an arc. That’s…not really true. Kind of.
If you’re aiming level, your bullet will not rise significantly before falling. Gravity is going to do what gravity does and start pulling that bullet down to earth as soon as it leaves the barrel.
A bullet fired level to the ground and a bullet dropped from the same height will hit the ground at the same time.
Where the arc comes from is in how we aim. Because we know gravity is a thing and it’s constant, it’s easy to account for.
Gravity, yo
When you zero a rifle, you’re generally zeroing it so that the barrel is angled up and away from you. While your line of sight remains flat and on target, the barrel is pointed slightly up.
When you fire, the bullet leaves the barrel traveling upward first — then starts to fall thus giving an “arc.”
We can exploit this for our own gain, but more on that later.
What Distance Should I Zero?
Before you hit the range, think about what distance you want to zero your rifle.
The normal standard is generally 100-yards for a centerfire rifle and 25/50-yards for a .22 LR rimfire rifle.
If you’re not sure what to zero your rifle at or want to make it easy, just pick one of those.
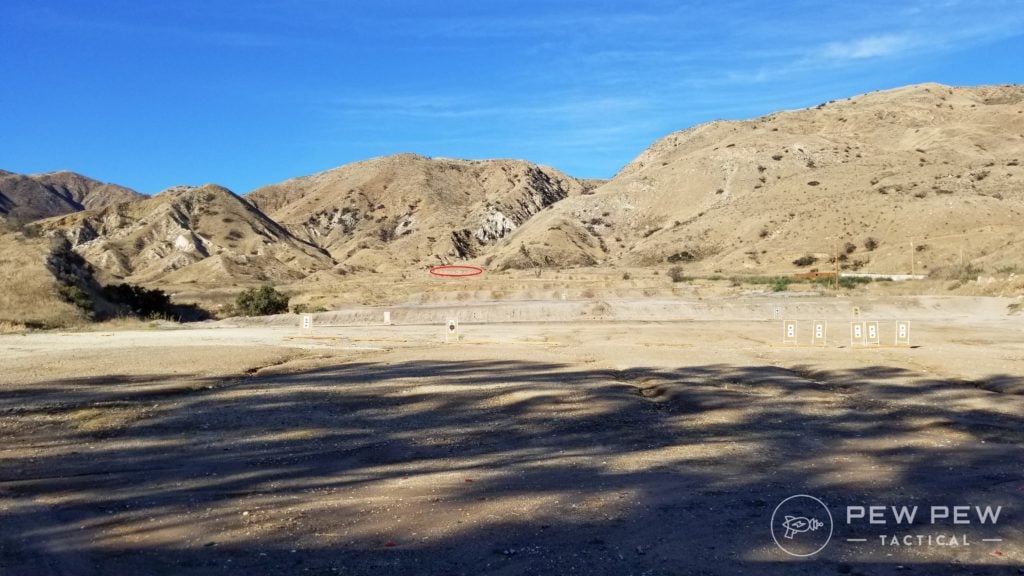
600-yards at Angeles Range. We still zero at 100!
Honestly, unless you’re trying to be fancy, it doesn’t matter which one you choose.
If you want to go a little deeper though, you might consider the Maximum Point Blank Range method.
Maximum Point Blank Range
Remember six sentences ago when I said we could exploit the arc for our gain? Well, this is how.
Draw a straight line through your ballistic arc and the lines will intersect twice — once closer to you and once further away. This gives you two zero points such as a 25/300, 36/300, etc.
Bullet trajectory vs line of sight…not to scale!
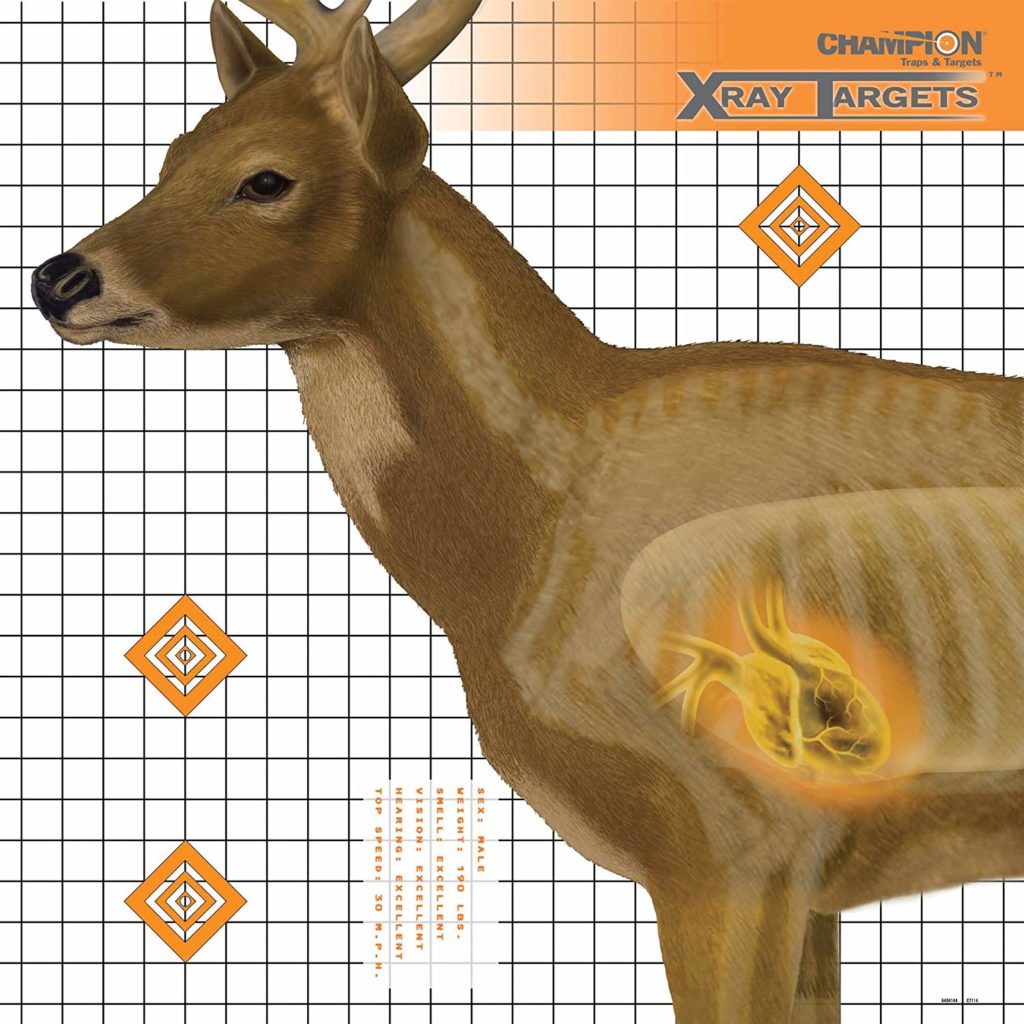
MPBR is the range that your rifle can shoot with minimal elevation change. Note, this is not for precision shooting. This is for kill-shot shooting.
Think of it this way: if a whitetail deer’s heart and lung area is roughly a 7-inch circle, it’s not critically important if you hit the top, bottom, or center of that circle.
If you’re getting ready for deer season, targets like this can help too.
With a little ballistic math, you can zero your rifle so that at any distance out to 200-, 300-, or even 400-yards your shot elevation will be within that circle.
When you’re in the field, just account for wind and point and click on the center of your target to fill your freezer.
This is also how military zeros work, normally called Battlesight Zeros. 25/300-meters and 36/300-yards are the US Army and USMC standards for 5.56 NATO and work the same way as an MPBR.
If it’s good enough for the military, it’s good enough for us.
Keep in mind that an MPRB only works if you have good data and use the same ammo consistently.
If you zero with .30-06 M2 ball and then hunt with .30-06 Hornady ELD-X, your zero is going to be wrong.
If you want to dive into the why and how behind it all, take a look at the Best AR-15 Battlesight Zero. But for now, just trust the magic.
I use an MPBR for my home defense rifle off a 25/225-yard zero.
From 0-yards to 250-yards, I’m never more than 3-inches high or low from my point of aim. My rifle has a red dot, so 250-yards is at the upper limit that I would push the rifle.
What About REALLY Long Range?
100-yards for centerfire, 25/50 for rimfire.
Unless you’re shooting ELR at something crazy like 2,000+ yards, just zero at 100-yards.
100-yards is an adequate distance to zero.
There is no real advantage at zeroing past 100-yards even for long-range shooting and 100-yards gives you an easy base to go off of.
Unless…you can’t. If you’re using a 20, 30, or more MOA base — you might have a problem.
20, 30, 40 MOA Bases, Rails, and Rings
Okay, we’re starting to get in the weeds here but bear with me.
If your scope rings, base, or rail says it is 20, 30, 40, or really anything more than zero MOA this means it’s machined on an incline to allow for you to use more of your scope’s internal elevation adjustment.
For centerfire 20 MOA is pretty common, for rimfire 20-40 MOA can be found.
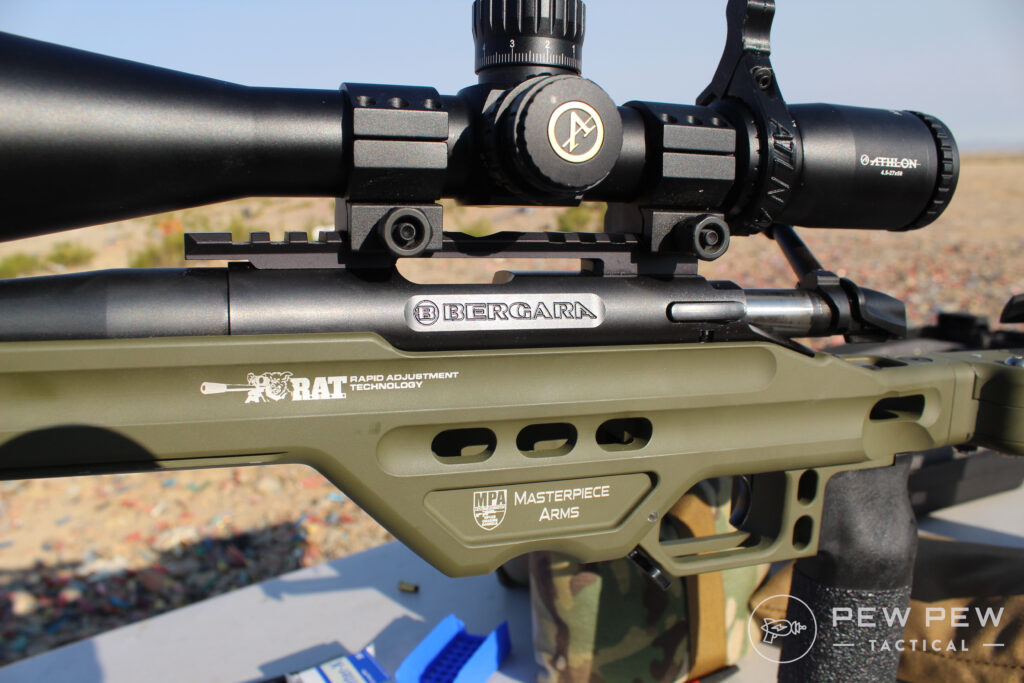
You can’t really tell just from looking, but this is a 40 MOA 1913 rail on this Bergara B-14r .22 LR rifle
If your bases/rail/rings don’t mention MOA or say zero MOA, then they are machined normally and you don’t have to worry about this.
Generally, I would recommend that you simply avoid the issue unless you know that you need it. If you’re not sure, then assume you don’t need it.
If you do use one and cannot zero at 100-yards, zero for 200.
How To Zero Your Scope
There are probably two dozen or so different ways of zeroing your scope. None of them are wrong and some of them are easier than others.
All of them are pretty quick and painless though so it really comes down to personal preference.
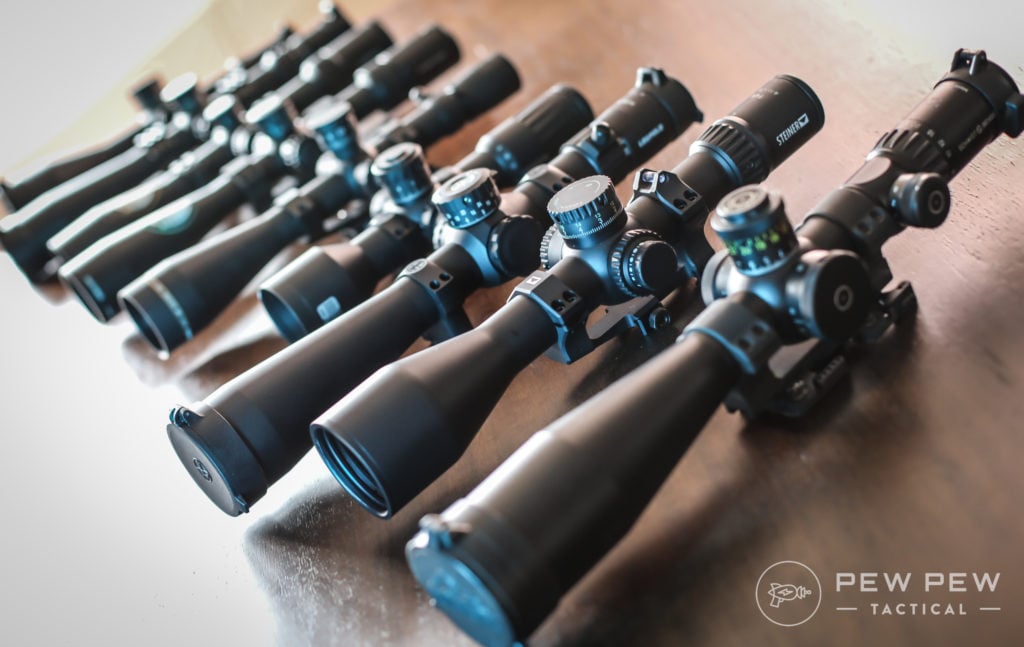
So many scopes…
Having zeroed loads of optics in my time at Pew Pew, I’ve tried many of the methods and have gradually built what I like best.
1. The No-Tech Method
Regardless of where your final zero will land, your first step is to just get your rifle on paper.
“On paper” meaning your point of aim and your point of impact is close enough that you’re at least on the target.
We’re trying to get shots on the actual target.
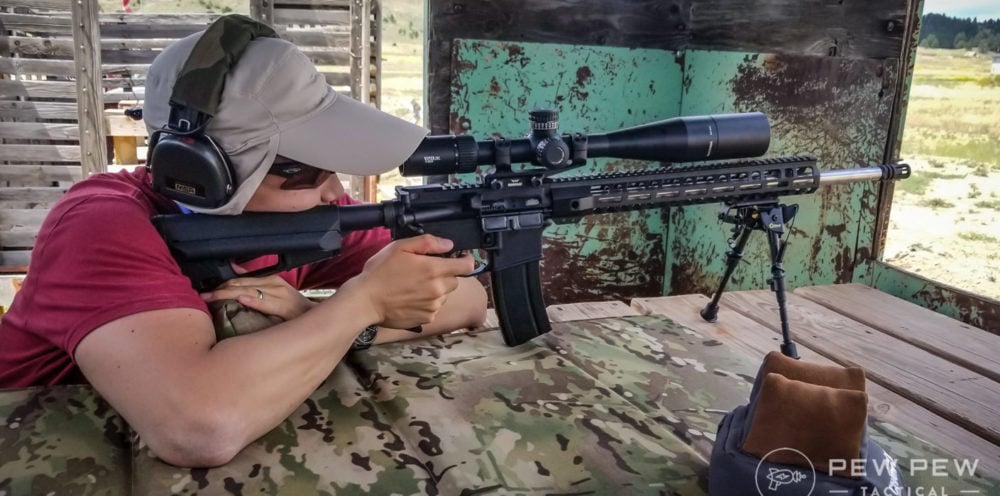
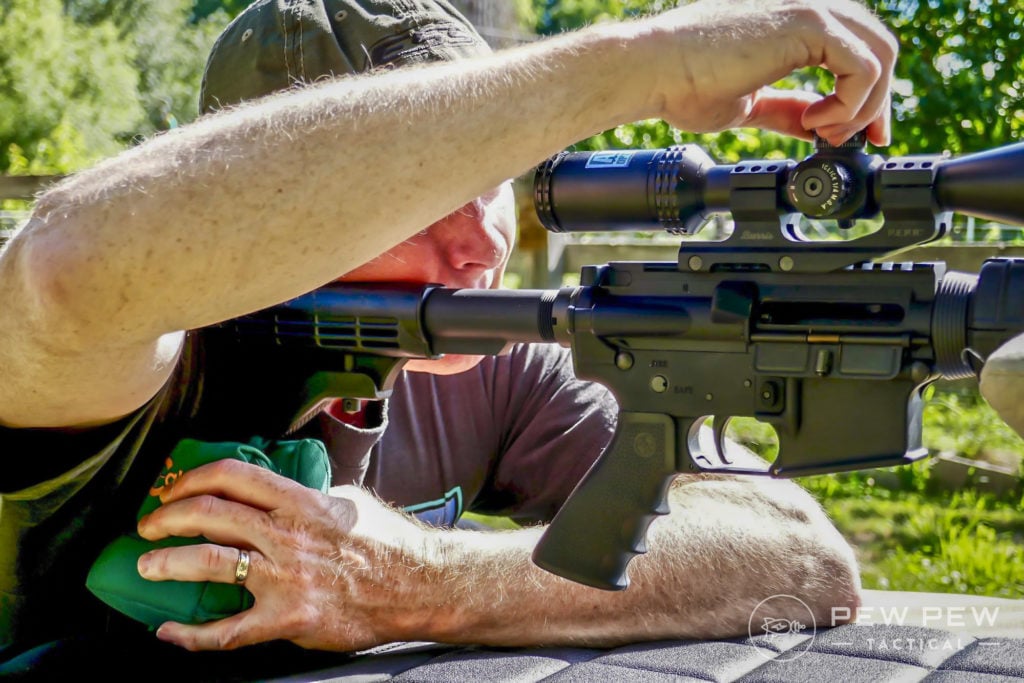
It’s always best to zero a scope using a firm rest. Don’t try to do this off-hand or unsupported. Get some bags and shoot off them, use a shooting bench, use a shooting rest, use whatever you want — just do it supported.
PSA .224 Valkyrie At High Bar Homestead, bipod and rear bag for support
I normally use a front bag or bipod and a rear bag in either a sitting at a bench rest or prone position.
The simple way of doing this is to shoot first at a relatively short range and then work your way back to your zero distance. If I’m going no-tech, I start with 25-yards.
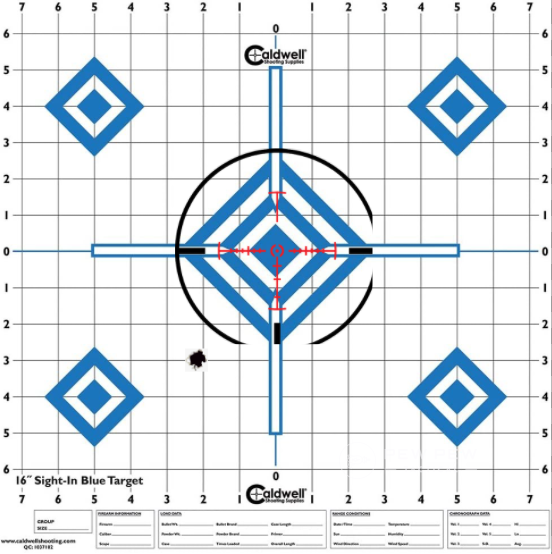
Aim for a bullseye, take a shot, and with the rifle still in a rested and secure position place your crosshair back on the bullseye. Then adjust your turrets until they are over the shot while moving the rifle as little as possible.
Not to scale example of shooting at 25-yards.
This takes a firm and steady hand, but once you do it a couple of times it’s super easy. Aim at the bullseye again and take a shot to confirm zero and readjust as needed.
Do it right and you can zero a rifle with just two shots.
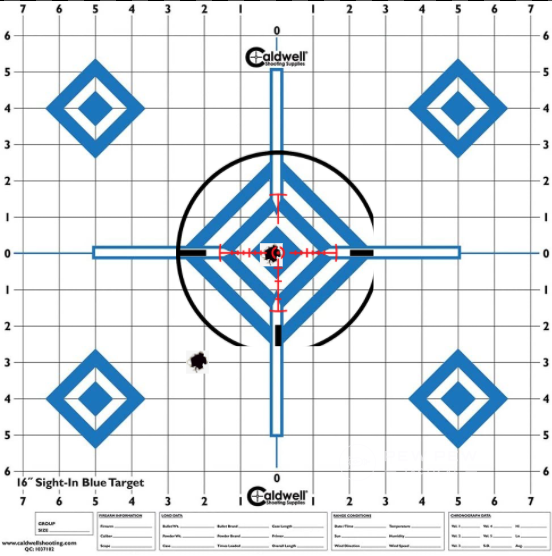
Again, not to scale — but you get the idea now
Once you’re on at 25-yards, you can normally move your target back to wherever you want your final zero to be and zero at that range.
Math And Counting
If you find that your hand isn’t steady enough for this method, then switch to a target that has a grid on it.
A target with a grid makes counting inches a LOT easier.
We like easy.
Once you can count how far off your point of impact is from your point of aim, you can just convert that number into clicks and adjust your scope based on that.
For example, let’s say you’re using an MOA scope with .25 MOA click adjustments at 25-yards and your shot was 3-inches low and 2-inches to the left.
Using this as our example again, the grid lines make it easy to work out how much and what direction we need to adjust
1-inch at 100-yards is (roughly) 1 MOA. At 25-yards 1 MOA is 1/4-inch. 3-inches at 25-yards would be 12 MOA low.
12 times 4 is 48 clicks.
Adjust “up” (normally counter-clockwise but check your scope and follow the up arrow) 48 clicks.
For the 2-inches to the left, 8 clicks “right” and you should be pretty on target.
Making adjustments.
Now personally, I hate this method because…numbers and math and counting and ugh. But hey, if your brain works better with numbers — go for it.
If you want to learn more about MOA or learn about MILs, take a look at the MOA Vs. MRAD article!
2. The Low-Tech Method
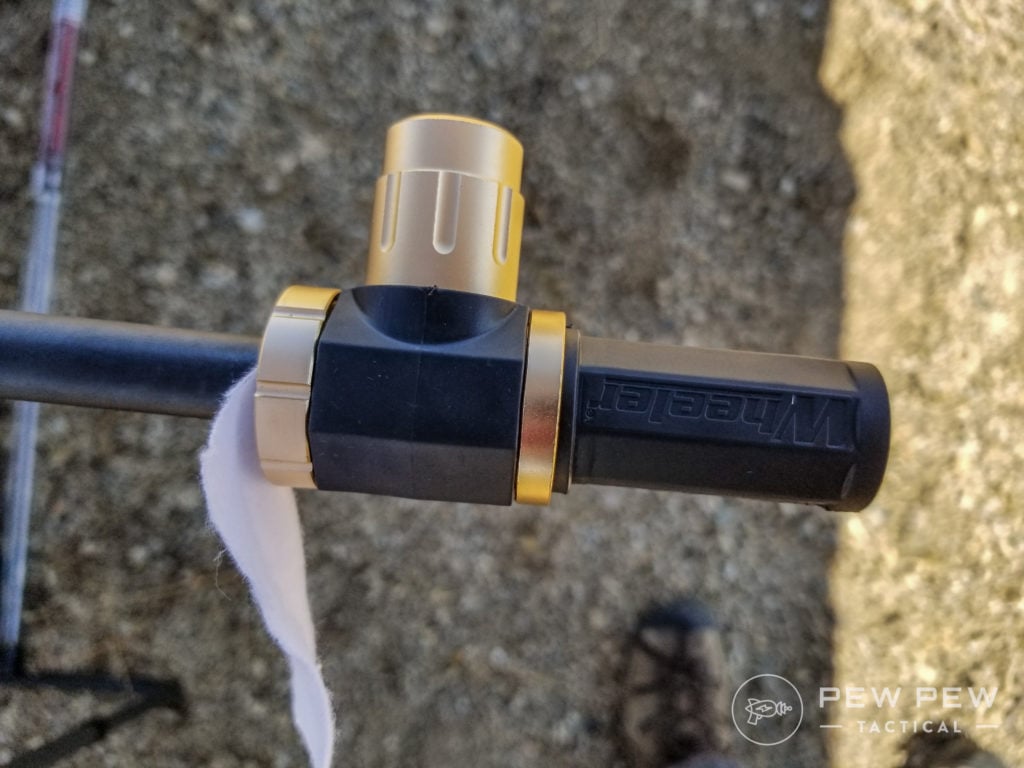
If you want to skip needing to paper the gun at a shorter range you might want to look at getting a bore sight.
For me, I have to zero and re-zero a LOT of guns and a LOT of scopes — so I have a Wheeler Pro Bore Sight and it was worth every penny of the $100 I spent. YMMV.
Wheeler Pro Bore Sight
If you want a cheaper option, there are some decent ones in the $20ish range.
With this, you should be pretty close to a true zero and most definitely on paper.
Then just zero your scope like normal and you’re good to go.
So which method do I use?
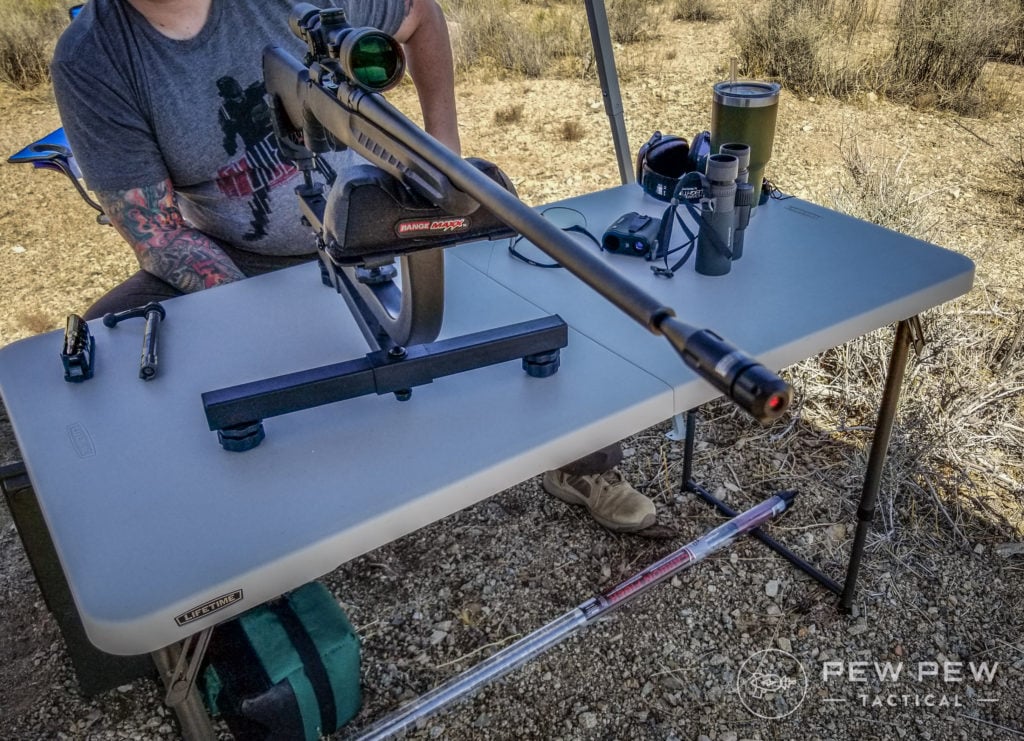
As you can probably guess, I use a bore sight and the 2-shot zero method. I normally bore sight at home and then final zero at the range.
I have a back wall that is exactly 55-yards away from my backdoor. It’s easy for me to stand in the dining room with a rifle pointed at a piece of paper I keep in a ziploc on a stick at the base of the wall.
A Bushnell Boresight mounted on the .270 Win.
No disturbing the neighbors, no having to bore sight at the range, and I can almost always zero a rifle with literally two shots once I’m at the range.
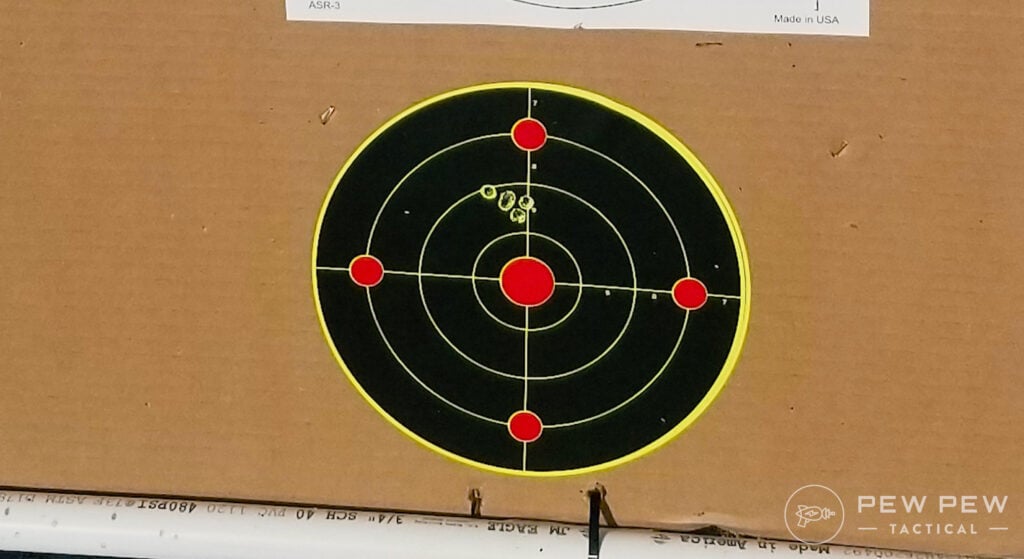
Once I have my zero I always confirm with a 10-shot group.
Conclusion
Zeroing a rifle is easy to talk about and pretty easy once you do it once or twice, but that first time can be a ride. Maybe you’ll get it in a few shots, maybe you won’t.
If you don’t, it’s okay. If you need to reset and restart, do it.
Keep at it and you’ll be a zeroing pro in no time!
While none of us like to admit it, most of us screw up zeroing our rifles at one time or another. So take it slow and don’t be too hard on yourself.
What’s your preferred zeroing method? Share your thoughts in the comments below. Meanwhile, check out our guide to the Best Rifle Scopes for All Budgets to find the perfect model for you.
These 6 browser extensions will protect your privacy online
https://ift.tt/3sc4LZO
The internet is not a private place. Ads try to learn as much about you to sell your information to the highest bidder. Emails know when you open them and which links you click. And some of the biggest internet snoops, like Facebook and Amazon, follow you from site to site as you browse the web.
But it doesn’t have to be like that. We’ve tried and tested six browser extensions that will immediately improve your privacy online by blocking most of the invisible ads and trackers.
These extensions won’t block every kind of snooping, but they will vastly reduce your exposure to most of the efforts to track your internet activity. You might not care that advertisers collect your data to learn your tastes and interests to serve you targeted ads. But you might care that these ad giants can see which medical conditions you’re looking up and what private purchases you’re making.
By blocking these hidden trackers from loading, websites can’t collect as much information about you. Plus by dropping the unnecessary bulk, some websites will load faster. The tradeoff is that some websites might not load properly or refuse to let you in if you don’t let them track you. You can toggle the extensions on and off as needed, or you could ask yourself if the website was that good to begin with and could you not just find what you were looking for somewhere else?
HTTPS Everywhere
We’re pretty much hardwired to look for that little green lock in our browser to tell us a website was loaded over an HTTPS-encrypted connection. That means the websites you open haven’t been hijacked or modified by an attacker before it loaded and that anything you submit to that website can’t be seen by anyone other than the website. HTTPS Everywhere is a browser extension made by the non-profit internet group the Electronic Frontier Foundation that automatically loads websites over HTTPS where it’s offered, and allows you to block the minority of websites that don’t support HTTPS. The extension is supported by most browsers, including Chrome, Firefox, Edge, and Opera.
Privacy Badger
Another extension developed by the EFF, Privacy Badger is one of the best all-in-one extensions for blocking invisible third-party trackers on websites. This extension looks at all the components of a web page and learns which ones track you from website to website, and then blocks them from loading in the browser. Privacy Badger also learns as you travel the web, so it gets better over time. And it requires no effort or configuration to work, just install it and leave it to it. The extension is available on most major browsers.
uBlock Origin
Ads are what keeps the internet free, but often at the expense of your personal information. Ads try to learn as much about you — usually by watching your browsing activity and following you across the web — so that they can target you with ads you’re more likely to click on. Ad blockers stop them in their tracks by blocking ads from loading, but also the tracking code that comes with it.
uBlock Origin is a lightweight, simple but effective, and widely trusted ad blocker used by millions of people, but it also has a ton of granularity and customizability for the more advanced user. (Be careful with impersonators: there are plenty of ad blockers that aren’t as trusted that use a similar name.) And if you feel bad about the sites that rely on ads for revenue (including us!), consider a subscription to the site instead. After all, a free web that relies on ad tracking to make money is what got us into this privacy nightmare to begin with.
If you thought hidden trackers in websites were bad, wait until you learn about what’s lurking in your emails. Most emails from brand names come with tiny, often invisible pixels that alerts the sender when you’ve opened them. PixelBlock is a simple extension for Chrome browsers that simply blocks these hidden email open trackers from loading and working. Every time it detects a tracker, it displays a small red eye in your inbox so you know.
Most of these same emails also come with tracking links that alerts the sender which links you click. ClearURLs, available for Chrome, Firefox and Edge, sits in your browser and silently removes the tracking junk from every link in your browser and your inbox. That means ClearURLs needs more access to your browser’s data than most of these extensions, but its makers explain why in the documentation.
Firefox Multi-Account Containers
And an honorary mention for Firefox users, who can take advantage of Multi-Account Containers, built by the browser maker itself to help you isolate your browsing activity. That means you can have one container full of your work tabs in your browser, and another container with all of your personal tabs, saving you from having to use multiple browsers. Containers also keep your private personal browsing separate from your work browsing activity. It also means you can put sites like Facebook or Google in a container, making it far more difficult for them to see which websites you visit and understand your tastes and interests. Containers are easy to use and customizable.
Video: A behind-the-scenes look at how Kodak manufactures its film
https://ift.tt/3hSKtzF
For anyone wondering what the inside of the Kodak film factory looks like Bill Manning’s video tour of parts of the plant might offer a bit of an insight. Bill, from film-enthusiast website Studio C-41, was invited to see the film manufacturing process at the company’s Rochester headquarters and made a video that combines a little history of the Yellow Giant as well as some behind the scenes footage that shows some of the steps.
In the film a Kodak guide explains what is going on and what certain machines do, while cut-away footage introduces the Kodak founder as well as some of the company’s historic cameras. While obviously the emulsion coating is done in the dark and can’t be shown, we do get to see preparation of the film base, the film in its cut form and parts of the process for making the film canisters.
Studio C-41 also has a podcast interview with Kodak staff from 2018 that goes into more depth about how its film is made.
photography
via News: Digital Photography Review (dpreview.com) https://ift.tt/2burdFr
Scrape a Website With This Beautiful Soup Python Tutorial
https://ift.tt/38hRUx0
Beautiful Soup is an open-source Python library. It uses navigating parsers to scrape the content of XML and HTML files. You need data for several analytical purposes. However, if you’re new to Python and web scraping, Python’s Beautiful Soup library is worth trying out for a web scraping project.
With Python’s open-source Beautiful Soup library, you can get data by scraping any part or element of a webpage with maximum control over the process. In this article, we look at how you can use Beautiful Soup to scrape a website.
How to Install Beautiful Soup and Get Started With It
Before we proceed, in this Beautiful Soup tutorial article, we’ll use Python 3 and beautifulsoup4, the latest version of Beautiful Soup. Ensure that you create a Python virtual environment to isolate your project and its packages from the ones on your local machine.
To get started, you must install the Beautiful Soup library in your virtual environment. Beautiful Soup is available as a PyPi package for all operating systems, so you can install it with the pip install beautifulsoup4 command via the terminal.
However, if you’re on Debian or Linux, the above command still works, but you can install it with the package manager by running apt-get install python3-bs4.
Beautiful Soup doesn’t scrape URLs directly. It only works with ready-made HTML or XML files. That means you can’t pass a URL straight into it. To solve that problem, you need to get the URL of the target website with Python’s request library before feeding it to Beautiful Soup.
To make that library available for your scraper, run the pip install requests command via the terminal.
To use the XML parser library, run pip install lxml to install it.
Inspect the Webpage You Wish to Scrape
Before scraping any website you’re not familiar with, a best practice is to inspect its elements. You can do this by switching your browser to the developer’s mode. It’s pretty easy to use Chrome DevTools if you’re using Google Chrome.
However, it’s necessary to inspect a webpage to know more about its HTML tags, attributes, classes, and ids. Doing that exposes the core elements of a webpage and its content types.
It also helps you develop the best strategies you can use to get the exact data you want from a website and how you can get it.
How to Scrape a Websites’ Data With Beautiful Soup
First off, let’s see how the requests library works:
from bs4 import BeautifulSoup import requests website = requests.get('http://somewebpages.com') print(website)
When you run the code above, it returns a 200 status, indicating that your request is successful. Otherwise, you get a 400 status or some other error statuses that indicate a failed GET request.
Remember to always replace the website’s URL in the parenthesis with your target URL.
Once you get the website with the get request, you then pass it across to Beautiful Soup, which can now read the content as HTML or XML files using its built-in XML or HTML parser, depending on your chosen format.
Take a look at this next code snippet to see how to do this with the HTML parser:
How to Scrape the Content of a Webpage by the Tag Name
You can also scrape the content in a particular tag with Beautiful Soup. To do this, you need to include the name of the target tag in your Beautiful Soup scraper request.
For example, let’s see how you can get the content in the h2 tags of a webpage.
In the code snippet above, soup.h2 returns the first h2 element of the webpage and ignores the rest. To load all the h2 elements, you can use the find_all built-in function and the for loop of Python:
from bs4 import BeautifulSoup
import requests
website = requests.get('http://somewebpages.com/')
soup = BeautifulSoup(website.content, 'html.parser')
h2tags = soup.find_all('h2')
for soups in h2tags:
 	print(soups)
That block of code returns all h2 elements and their content. However, you can get the content without loading the tag by using the .string method:
from bs4 import BeautifulSoup
import requests
website = requests.get('http://somewebpages.com/')
soup = BeautifulSoup(website.content, 'html.parser')
h2tags = soup.find_all('h2')
for soups in h2tags:
 	print(soups.string)
You can use this method for any HTML tag. All you need to do is replace the h2 tag with the one you like.
However, you can also scrape more tags by passing a list of tags into the find_all method. For instance, the block of code below scrapes the content of a, h2, and title tags:
from bs4 import BeautifulSoup
import requests
website = requests.get('http://somewebpages.com/')
soup = BeautifulSoup(website.content, 'html.parser')
tags = soup.find_all(['a', 'h2', 'title'])
for soups in tags:
 	print(soups.string)
How to Scrape a Webpage Using the ID and Class Name
After inspecting a website with the DevTools, it lets you know more about the id and class attributes holding each element in its DOM. Once you have that piece of information, you can scrape that webpage using this method. It’s useful when the content of a target component is looping out from the database.
You can use the find method for the id and class scrapers. Unlike the find_all method that returns an iterable object, the find method works on a single, non-iterable target, which is the id in this case. So, you don’t need to use the for loop with it.
Let’s look at an example of how you can scrape the content of a page below using the id:
from bs4 import BeautifulSoup
import requests
website = requests.get('http://somewebpages.com/')
soup = BeautifulSoup(website.content, 'html.parser')
id = soup.find(id = 'enter the target id here')
print(id.text)
To do this for a class name, replace the id with class. However, writing class directly results in syntax confusion as Python see it as a keyword. To bypass that error, you need to write an underscore in front of class like this: class_.
In essence, the line containing the id becomes:
my_classes = soup.find(class_ = 'enter the target class name here')
print(my_classes.text)
However, you can also scrape a webpage by calling a particular tag name with its corresponding id or class:
data = soup.find_all('div', class_ = 'enter the target class name here')
print(data)
How to Make a Reusable Scraper With Beautiful Soup
You can create a class and put all the previous code together into a function in that class to make a reusable scraper that gets the content of some tags and their ids. We can do this by creating a function that accepts five arguments: a URL, two tag names, and their corresponding ids or classes.
Assume you want to scrape the price of shirts from an e-commerce website. The example scraper class below extracts the price and shirt tags with their corresponding ids or classes and then returns it as a Pandas data frame with ‘Price’ and Shirt_name as the column names.
Ensure that you pip install pandas via the terminal if you’ve not done so already.
import pandas as pd
class scrapeit:
	try:
		def scrape(website=None, tag1=None, id1=None, tag2=None, id2=None):
			if not (website and tag1 and id1 and tag2 and id2)==None:
				try:
					page = requests.get(website)
					soup = BeautifulSoup(page.content, 'html.parser')
					infotag1 = soup.find_all(tag1, id1)
					infotag2 = soup.find_all(tag2, id2)
					priced = [prices.text for prices in infotag1]
					shirt = [shirts.text for shirts in infotag2]
					data = {
					'Price':priced,
					'Shirt_name':shirt}
					info = pd.DataFrame(data, columns=['Price', 'Shirt_name'])
					print(info)
				except:
					print('Not successful')
			else:
				print('Oops! Please enter a website, two tags and thier corresponding ids')
	except:
		print('Not successful!')
The scraper you just made is a reusable module and you can import and use it in another Python file. To call the scrape function from its class, you use scrapeit.scrape(‘Website URL’, ‘price_tag’, ‘price_id’, ‘shirt_tag’, ‘shirt_id’). If you don’t provide the URL and other parameters, the else statement prompts you to do so.
To use that scaper in another Python file, you can import it like this:
from scraper_module import scrapeit
scrapeit.scrape('URL', 'price_tag', 'price_id', 'shirt_tag', 'shirt_id')
Note:scraper_module is the name of the Python file holding the scraper class.
You can also check the Beautiful Soup documentation if you want to dive deeper into how you can make the best use of it.
Beautiful Soup Is a Valuable Web Scraping Tool
Beautiful Soup is a powerful Python screen scraper that gives you control over how your data comes through during scraping. It’s a valuable business tool, as it can give you access to competitor’s web data like pricing, market trends, and more.
Although we’ve made a tag scraper in this article, you can still play around with this powerful Python library to make more useful scraping tools.
Manufacturing: How Do They Get the Bristles Into a Toothbrush?
https://ift.tt/2L7lJrs
You probably realize toothbrush handles are injection-molded pieces of plastic. But how do they get the nylon bristles into the head? And without using adhesive, how do they get the bristles to stay put?
Here’s how. This is a shot of the machine that loads the bristles into the heads, at actual speed:
Here’s the process from a different angle, slowed down:
The close-up in slow motion, below, provides the answer. The tool that grabs the bristles also folds them in half (off camera) and binds them into a bunch by wrapping them with wire near the fold. In this shot below, you can see the wire binding that’s holding the butt end of the bristles.
The wire binding provides a friction fit in the molded holes, both keeping the bristles together and preventing them from falling out.