10 Best Advanced Python Cheat Sheets

10 Best Advanced Python Cheat Sheets

https://ift.tt/37rlhMC

Hey Finxters! I have another set of cheat sheets for you! This time, I am going to focus on the more advanced aspects of Python and what you can do with it! As you know Python is a flexible language used in web development, games, and desktop applications. I am not going to waste too much of your time so let’s hop right to it and dive into these more advanced Python cheat sheets!

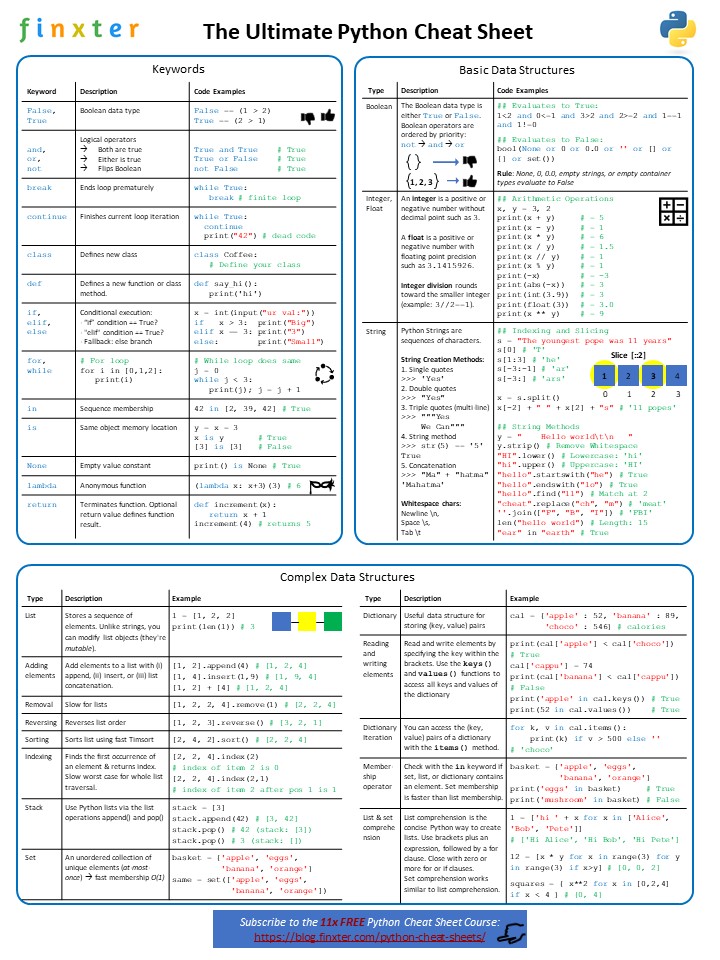
Cheat Sheet 0: Finxter Full Cheat Sheet Course

Python Ultimate Cheat Sheet

Cheat Sheet 1: DataQuest

This cheat sheet is from DataQuest and it shows all of the intermediate Python

Regular expressions, date/time module, and counter. This is one you will want to have pinned to the wall or in your developers binder to keep handy as you work.

Pros: Great for budding Python developers, keep it handy as you work.

Cons: None that I can see.

Cheat Sheet 2: DataCamp

It is important to know how to import data during your career no matter what stage you are at. As an intermediate Pythoner, you should keep this cheat sheet handy when working an entry level job of data entry and developing you own projects.

Pros: Great for learning importing data sets in Python.

Cons: None that I can see.

Cheat Sheet 3: DataCamp

You have to import data and you have to be able to plot it as a visual representation for businesses to understand and use to their benefit. This cheat sheet will help you to learn matplotlib and write some amazing graphical visualizations with Python.

Pros: Great to have for matplotlib development.

Cons: None that I can see.

Cheat Sheet 4: GitHub

This cheat sheet is for Machine learning and one you will want to keep in your developers binder as you work. Machine learning and Python go together like peanut butter and jelly, and Scikit is going to be your best friend. If your developers journey takes you to machine learning then make sure to keep this cheat handy for yourself.

Pros: Scikit is easily learnable with this cheat sheet

Cons: None that I can see.

Cheat Sheet 5: DataCamp

SQL is a database system used in programming for all kinds of data sets and is extremely scalable. Keep this cheat sheet handy to you! BI and other business applications rely on you being able to use SQL!

Pros: Rated ‘E’ for everyone. Easy to read and implement

Cons: None that I can see.

Cheat Sheet 6: Pytorch

This cheat sheet is more a tutorial that will teach you pytorch for deep learning projects. Here you will get hands on practice on pytorch.

Pros: You will get a deep understanding pytorch and how it used

Cons: It is an online tutorial.

Cheat Sheet 7: DataCamp

Yet another from Datacamp!! This one is called SpaCy and allows you to understand the natural text from documents. This is one I have in my development folder and is used for Natural language programming.

Pros: Rated ‘E’ for everyone.

Cons: None that I can see.

Cheat Sheet 8: Ask Python

This cheat sheet is also more a tutorial for you to learn image processing in Python. The best way to learn is to get your hands dirty! Ask Python is good for doing that so you can learn what you need to and boost your skills.

Pros: Rated ‘E’ for everyone.

Cons: None that I can see.

Cheat Sheet 9: TutorialsPoint

This cheat sheet is also a tutorial on learning database access with Python. This is an incredibly important skill when you freelance your skills or end up working for a company at a data entry position.

Pros: Rated ‘E’ for everyone. This tutorial is one I have used myself! It includes code snippets to learn from.

Cons: It is a tutorial, not a cheat sheet to print.

Cheat Sheet 10: FullStack Python

This is also a tutorial for you to learn from. This particular cheat sheet discusses Deployment of web applications in Python!! It has explanations that go into depth with tools, resources and learning checklist which is started off with an introductory on deployment what it is and why it is necessary.

Pros: Rated ‘E’ for everyone. This is important to know if you are a Pythoner in Web development.

Cons: Needs to be bookmarked on your browser.

These are the cheat sheets and tutorials I think you will find helpful as a Pythonista developing in your particular field. As you can see this time, I wanted to really give you a wide berth of cheat sheets that intermediate Pythonista use with their career choices. I hope at least one of these  cheat sheets or tutorials is useful to you on your journey! Thank you once again for joining me and I can’t wait to see you again! 😉😉

The post 10 Best Advanced Python Cheat Sheets first appeared on Finxter.

Python

via Finxter https://ift.tt/2HRc2LV

February 18, 2021 at 10:42AM

‘Never Gonna Give You Up’ in 4K Is an Eye-Melting Way to Rickroll Someone

‘Never Gonna Give You Up’ in 4K Is an Eye-Melting Way to Rickroll Someone

https://ift.tt/37qGDtC


As powerful workstations slowly but surely work to remaster all the world’s old film and video footage to higher resolutions and frame rates using machine learning techniques, you’d assume that one piece of footage would have been a top priority. But apparently Rick Astley’s “Never Gonna Give You Up” music video has only just been given the 4K, 60 FPS upgrade, and your eyes may never forgive you.

Watching the original music video again, which boasts a respectable 871,696,897 views on YouTube at the time of writing, it looks like “Never Gonna Give You Up” was shot on professional-grade video tape, presumably Sony’s Betacam format, giving it that recognizable ‘80s video look.

The remastered version, which was created using Topaz Video Enhance AI to boost the resolution to 4K and the Flowframes video interpolation tool to boost the frame rate to 60 frames per second, looks like it was filmed on a modern smartphone just yesterday. We now have the ability to Rickroll someone so that they’re not only inconvenienced, but also feel like they’re actually on set with Astley while this video was being shot. Astley may never desert you, but your eyes will want to.

geeky,Tech

via Gizmodo https://gizmodo.com

February 18, 2021 at 12:21PM

Laravel Api Controller

Laravel Api Controller

https://ift.tt/3s8XNUx


Laravel Api Controller

For Laravel 5
Build Status
Coverage Status
Packagist
Packagist
Packagist
Github Issues

Basic CRUD API Methods that can be extended for your models by default has a list, show, update, add and delete endpoint to interact with your model.

Installation

Install via composer

composer require phpsa/laravel-api-controller

Publish Configuration File (optional – if you need to change any of the default configurations)

php artisan vendor:publish --provider="Phpsa\LaravelApiController\ServiceProvider" --tag="config"

Usage

CLI Commands

  • artisan make:api {ControllerName} to generate the controller
  • artisan make:api:policy to generate a policy file
  • artisan make:api:resource to geneate the response resource

This will create a Api/ModelNameController for you and you will have the basic routes in place as follows:

  • GET api/v1/{model_name} – list all/paged/filtered (class::index)
  • GET api/v1/{model_name}/$id – Show a specified id (class::show)
  • POST api/v1/{model_name} – Insert a new record (class::store)
  • PUT api/v1/{model_name}/$id – Update an existing record (class::update)
  • DELETE api/v1/{model_name}/$id – Delete an existing record (class::destroy)

You can override the methods by simply putting in your own methods to override – method names in braces above

Events

  • POST (class::store) – triggers a new Phpsa\LaravelApiController\Events\Created Event which has the new record available as $record
  • PUT (class::update) – triggers a new Phpsa\LaravelApiController\Events\Updated Event which has the updated record available as $record
  • DELETE (class::destry) – triggers a new Phpsa\LaravelApiController\Events\Deleted Event which has the deleted record available as $record

Policies

Policies: https://laravel.com/docs/6.x/authorization#generating-policies

Generate with php artisan make:policy PostPolicy --model=Post

  • Get list – calls the viewAny policy
  • Get single – calls the view policy
  • Post New – calls the create policy
  • Put Update – calls the update policy
  • Delete item – calls the delete policy

Query/Data modifiers in policies for the api endpoints

  • qualifyCollectionQueryWithUser($user, $repository) -> return void – add any queries to the repository (ie ->where(‘x’,’))
  • qualifyItemQueryWithUser($user, $repository)-> return void – add any queries to the repository (ie ->where(‘x’,’))
  • qualifyStoreDataWithUser($data) – return the updated data array
  • qualifyUpdateDataWithUser($data) – return the updated data array

Resources / Collections (Transforming)

Resources: https://laravel.com/docs/6.x/eloquent-resources

Generate with
php artisan make:apiresource UserResource and php artisan make:resource UserCollection

Change the Resource to extend from:

use Phpsa\LaravelApiController\Http\Resources\ApiResource for your resource
use Phpsa\LaravelApiController\Http\Resources\ApiCollection for your resource collection

in your controller override the following params:

	protected $resourceSingle = UserResource::class;
	protected $resourceCollection = UserCollection::class;

Snake vs Camel

  • middleware to convert all camel to snake: Phpsa\LaravelApiController\Http\Middleware\SnakeCaseInputs
  • set request header X-Accept-Case-Type to either snake or camel to alter your data response

Filtering

For the get command you can filter by using the following url patterns

Seperator Description Example Result
= Equals ?filter[field]=hello select … where field = ‘hello’
!= Not Equals ?filter[field!]=hello select … where field != ‘hello’
<> Not Equals (alt) ?filter[field<>]=hello select … where field != ‘hello’
> Greater Than ?filter[field>]=5 select … where field > 5
>= Greater Or Equal to ?filter[field>=]=5 select … where field >= 5
< Less Than ?filter[field<]=5 select … where field <> 5
<= Less Or Equal to ?filter[field<=]=5 select … where field <= 5
~ Contains (LIKE with wildcard on both sides) ?filter[field~]=hello select … where field like ‘%hello%’
^ Starts with (LIKE with wildcard on end) ?filter[field^]=hello select … where field like ‘hello%’
$ Ends with (LIKE with wildcard on start) ?filter[field$]=hello select … where field like ‘hello%’
!~ Not Contains (LIKE with wildcard on both sides) ?filter[field!~]=hello select … where field not like ‘%hello%’
!^ Not Starts with (LIKE with wildcard on end) ?filter[field!^]=hello select … where field not like ‘hello%’
!$ Not Ends with (LIKE with wildcard on start) ?filter[field!$]=hello select … where field not like ‘hello%’

In / Not In

You can pass to the filters an array of values
ie: filter[user_id]=1||2||||4||7 or filter[user_id!]=55||33

Null / Not Null (introduced 1.23.0)

If you need to filter on whether a field is null or not null, you can use the filter param as of version 1.23.0 EG: filter[age]=NULL or filter[age!]=NULL. Note that NULL must be uppercase.

Older versions
Add a scope to your model: eg

public function scopeAgeNull(Builder $builder, $isNull = true){
  $isNull ? $builder->whereNull('age') : $builder->whereNotNull('age');
}

Add to your allowedScopes and can then be called in url as ?ageNull=1 for where null and ?ageNull=0 for where age not null

Scopes

In addition to filtering, you can use Laravel’s Eloquent Query Scopes to do more complex searches or filters.
Simply add an $allowedScopes to your ApiResource, and that scope will be exposed as a query parameter.

Assuming you have a scopeFullname defined on your Eloquent Model, you can expose this scope to your API as follows:

protected static $allowedScopes = [
  'fullname'
];

Given the above $allowedScopes array, your API consumers will now be able to request ?fullname=John. The query parameter value will be passed to your scope function in your Eloquent Model.

Filtering on related models

You can easily filter using any related model that is configured for include. Simply specify ?filter[model.field]=123 in your query string. The same filter options above apply to related fields.

Fields, Relationships, Sorting & Pagination

Fields

By default all fields are returned, you can limit that to specific fields in the following ways:

  • Api Controller parameter $defaultFields default as protected $defaultFields = ['*']; – switch to include an array of fields
  • fields param in url querystring: ie fields=id,name,age = will only return those, this will also override the above.
  • in your response resource you can set the static::allowedFields to lock down which fields are returnable
  • addfields and removefields params in url querystring will work with these.
  • Use laravel eloquent model $appends property to automatically include custom attribute accessors.

Relationships

  • Using the relationships defined in your models, you can pass a comma delimited list eg include=join1,join2 which will return those joins (one or many).

Simply add a protected static $mapResources to your Resource to define which resources to assign your related data. E.e., for a one to many relationship, you should specify a collection, and a one-to-one relationship specify the related resource directly. This will allow the API to properly format the related record.

    protected static $mapResources = [
        'notes' => NotesCollection::class,
        'owner' => OwnerResource::class
    ];
  • You can automatically update and create related records for most types of relationships. Just include the related resource name in your POST or PUT request.

For BelongsToMany or MorphToMany relationships, you can choose the sync strategy. By default, this will take an additive strategy. That is to say, related records sent will be ADDED to any existing related records. On a request-by-request basis, you can opt for a sync strategy which will remove the pivot for any related records not listed in the request. Note the actual related record will not be removed, just the pivot entry.

To opt for the sync behavaiour, set ?sync[field]=true in your request.

Sorting

  • Sorts can be passed as comma list aswell, ie sort=age asc or sort=age asc,name desc,eyes – generates sql of sort age asc and sort age asc, name desc, eyes asc respectively
  • Default sort can also be added on the controller using by overrideing the protected $defaultSort = null; parameter

Pagination

  • pagination can be enabled/disbled on the controller by overriding the protected $defaultLimit = 25; on the controller
  • pagination can also be passed via the url using limit=xx&page=y
  • pagination can also be limited to a max per page by overriding the protected $maximumLimit = false; parameter

Validation

  • When Posting a new record, validation can be done by adding a rulesForCreate method to your controller returning an array eg
[
    'email' => 'required|email',
    'games' => 'required|numeric',
]

see https://laravel.com/docs/5.8/validation#conditionally-adding-rules

  • for updating a record, add a method rulesForUpdate per above.

Defaults

The following parameters are set in the Base Api controller and can be overwritten by your Controller on a case by case basis:

  • DEPRECATED protected $resourceKeySingular = 'data';

  • DEPRECATED protected $resourceKeyPlural = 'data';

  • protected $resourceSingle = JsonResource::class; Collection to use for your single resource

  • protected $resourceCollection = ResourceCollection::class; Collection to use for your resource collection

  • protected $defaultFields = ['*']; Default Fields to respond with

  • protected $defaultSort = null; Set the default sorting for queries.

  • protected $defaultLimit = 25; Number of items displayed at once if not specified. (0 = maximumLimit)

  • protected $maximumLimit = 0; Maximum limit that can be set via $_GET[‘limit’]. – this ties in with the defaultLimit aswell, and if wanting to disable pagination , both should be 0. ) will allow all records to be returned in a single call.

  • protected $unguard = false; Do we need to unguard the model before create/update?

Scopes

SoftDeleted Records

add the Phpsa\LaravelApiController\Model\Scopes\WithSoftDeletes trait to your model,
add to your resource file:

class MyModelResource extends ApiResource
{

 protected static $allowedScopes = [
        'withTrashed',
        'onlyTrashed'
    ];

you can now append withTrashed=1 or onlyTrashed=1 to your query.

Responses

you can override responses for each point by overriding the following protected methods:

  • handleIndexResponse
  • handleStoreResponse
  • handleShowResponse
  • handleUpdateResponse
  • handleDestroyResponse

Security

If you discover any security related issues, please email
instead of using the issue tracker.

Credits

Sponsors

programming

via Laravel News Links https://ift.tt/2dvygAJ

February 17, 2021 at 10:39PM

Fidgity Stand + Spin Desk Mat

Fidgity Stand + Spin Desk Mat

https://ift.tt/37obwip

Fidgity Stand + Spin Desk Mat

 | Buy

Standing at your desk is known to have major health benefits. The Fidgity desk mat furthers that by giving your feet and legs comfort, exercise, and fidgeting opportunities. It’s made from anti-fatigue materials and has a 360º rotating platform, stretching wedges, deep-tissue massage balls, and a foot roller/balance bar.

fun

via The Awesomer https://theawesomer.com

February 17, 2021 at 03:30PM

Learn how to code in 2021 with training on the 12 most popular programming languages

Learn how to code in 2021 with training on the 12 most popular programming languages

https://ift.tt/3u8BVdt

The more dependent we become on apps, the more demand there’ll be for skilled programmers. It just so happens that learning how to code is easier than ever in 2021. In fact, we’ve rounded up 12 amazing deals on courses and training programs that will teach you the skills you need to start creating your own software, and they’re on sale for a limited time!

Learn Google Go – Golang Programming for Beginners

Learn Google Go - Golang Programming for Beginners

Go, or GoLang, is Google’s open-source programming language that’s designed to simplify many programming tasks. This course is perfect for beginners, as Go is one of the fastest-growing languages in the industry thanks to its ease of use and familiar syntax.

Get Learn Google Go – Golang Programming for Beginners for $15 (reg. $119).

The Complete C# Programming Bundle: Lifetime Access

The Complete C# Programming Bundle: Lifetime Access

C# is an object-oriented programming language that’s incredibly popular for Windows, Android and iOS development, but it also finds its way into game design. This bundle comes with seven courses that will cover special features in C#, such as including pointers, header files and null-terminated strings. You’ll even learn how to build games in Unity.

Get The Complete C# Programming Bundle: Lifetime Access for $29 (reg. $1,393).

Kotlin for Android: Beginner to Advanced

Kotlin for Android: Beginner to Advanced

If you want to specialize in Android development, then you shouldn’t overlook Kotlin. At the beginning of the course, you’ll learn programming fundamentals like variables, strings and collections, but you also find advanced content such as how to build a Slack clone and submitting your apps to the Google Play Store as you progress.

Get Kotlin for Android: Beginner to Advanced for $19 (reg. $199).

The Complete R Programming Certification Bundle

The Complete R Programming Certification Bundle

R isn’t particularly easy to learn, but it’s essential if you want to work in statistics or data analysis. These courses by bestselling Udemy instructor and data scientist, Minerva Singh, will show you how to use data science packages such as caret, tidyverse, dplyr and ggplot while working with data. 

Get The Complete R Programming Certification Bundle for $29 (reg. $1,200).

The Essential PHP Coding Bundle

The Essential PHP Coding Bundle

PHP is a hallmark language if you want to become a web developer. In fact, almost every website that you use is built on PHP. Here, you’ll learn how to set up your own server, create homepages and activate emails, create an R/L system and much more.

Get The Essential PHP Coding Bundle for $30 (reg. $516).

The C++ Programming Bundle: Beginner to Expert

The C++ Programming Bundle: Beginner to Expert

C++ can be hard to pick up, but doing so is worthwhile; you’ll find it in everything from server-side programming to game development, making it one of the most versatile languages you can learn. This bundle by software developer John Purcell features three C++ courses for students at a beginner, intermediate and advanced skill level, so you don’t need any prior experience in order to master this language. 

Get The C++ Programming Bundle: Beginner to Expert for $15 (reg. $600).

The Complete 2021 Python Programming Certification Bundle

The Complete 2021 Python Programming Certification Bundle

Python is growing in popularity due to its machine learning and deep learning applications, but it’s also widely used to create desktop apps and websites. These courses will teach you practical Python programming skills with hands-on projects such as building a name generator, neural networks and even data visualization apps.

Get The Complete 2021 Python Programming Certification Bundle for $50 (reg. $3,285).

The 2021 Java Bootcamp Bundle

The 2021 Java Bootcamp Bundle

Java is yet another in-demand language that’s used in practically every tech niche. This boot camp serves as a great introduction to Java as it covers concepts like inheritance, classes, flow control structures and more. 

Get The 2021 Java Bootcamp Bundle for $36 (reg. $990).

The Complete Ruby on Rails 6 Bootcamp Certification Bundle

The Complete Ruby on Rails 6 Bootcamp Certification Bundle

Ruby isn’t as popular as some of the other languages on this list, but it’s incredibly easy to learn and is currently on the rise among web developers. Here, you’ll find five courses and over 42 hours of content ranging from Ruby on Rails fundamentals to building feature-rich applications from scratch. 

Get The Complete Ruby on Rails 6 Bootcamp Certification Bundle for $36 (reg. $1,000).

The Complete MATLAB Programming Certification Bundle

The Complete MATLAB Programming Certification Bundle

MATLAB is quite different from the other languages featured here, as it’s primarily used to build programs that scientists and engineers use for data analysis. If you’re particularly interested in numerical computing and building algorithms, this seven-course bundle is for you.

Get The Complete MATLAB Programming Certification Bundle for $35 (reg. $3,000).

The iOS 14 & SwiftUI Bootcamp Bundle

The iOS 14 & SwiftUI Bootcamp Bundle

Anyone who wants to build a successful mobile app empire should absolutely add Swift to their repertoire, and that’s exactly what you’ll learn in this bundle. You’ll discover Swift fundamentals such as using a declarative user interface and developing apps for everything from iPhones and iPads to Apple TV. 

Get The iOS 14 & SwiftUI Bootcamp Bundle for $65 (reg. $600).

The Premium Learn to Code 2021 Certification Bundle

The Premium Learn to Code 2021 Certification Bundle

Not sure which language you should learn, or perhaps you want to be the master of all trades? This massive 27-course bundle offers lessons on just about every popular language you can think of. 

Get The Premium Learn to Code 2021 Certification Bundle for $60 (reg. $4,056).

Prices are subject to change.

Engadget is teaming up with StackSocial to bring you deals on the latest headphones, gadgets, tech toys, and tutorials. This post does not constitute editorial endorsement, and we earn a portion of all sales. If you have any questions about the products you see here or previous purchases, please contact StackSocial support here.

Tech

via Engadget http://www.engadget.com

February 17, 2021 at 11:03AM

The Tailwind CSS team released a new free course – Tailwind CSS: From Zero to Production

The Tailwind CSS team released a new free course – Tailwind CSS: From Zero to Production

https://ift.tt/3u7xn7d

The Tailwind CSS team released a brand new free course, Tailwind CSS: From Zero to Production, a new screencast series that teaches you everything you need to know to get up and running with Tailwind CSS v2.0 from scratch.

The post The Tailwind CSS team released a new free course – Tailwind CSS: From Zero to Production appeared first on Laravel News.


Join the Laravel Newsletter to get Laravel articles like this directly in your inbox.

programming

via Laravel News https://ift.tt/14pzU0d

February 16, 2021 at 01:25PM

7 Underground Torrent Sites for Getting Uncensored Content

7 Underground Torrent Sites for Getting Uncensored Content

https://ift.tt/2NswW6T

Everyone loves Google and Bing, but normal search engines only brush the surface of the internet. To dive into the underground internet, you need to use underground search engines.

In many cases, these search engines are tapped into what is currently termed the invisible web, also known as the dark web. It contains information available on the internet that standard search engines don’t have access to because they are buried behind query forms or directory requests.

The following specialized underground search engines let you access all those hidden areas of the internet, like a legal torrent search engine or public records. Note that none of these can get you in trouble.

1. The Best Torrent Search Engines

If you aren’t familiar with torrents, it’s essentially a shared file that other nodes (computers) on the network can download. People access these networks using torrent clients like BitTorrent or uTorrent. Downloads take place in pieces so that even if you shut down your computer in the middle of a download, you can continue your download later.

With that said, finding available torrent files isn’t easy. To help, you can use a torrent search site like the ones on the list.

However, if you use any of the following popular torrent sites, you’ll have little trouble finding what you need.

The Pirate Bay


The Pirate Bay has been a source for searching torrents for a long time. While other torrent search sites have shut down, this one remains.

You can search for anything from music and TV shows, to games, and applications.

For listings, you’ll see links to launch your torrent client to download.


Limetorrents


Limetorrents is another one that’s been around for many years.

If you click on the Other or Browse links, you can sift through available torrent files (there are millions).

When you start browsing through the available torrent files, you’ll be surprised at the wide assortment of files available.

Torrent networks get a bad rap because of the illegal content you’ll find there, but you can also find useful things like free e-books, manuals, and other hard-to-find content.


There’s even an anime category!

RARBG [No Longer Available]


RARBG has been a favorite among torrent fans for some time. You can click on the Torrents tab to use the torrent search engine (or browse the list of new additions).

Or you can browse specific categories by clicking any of the links along the left side of the main page. You’ll also find a frequently updated top 10 list or read any recent torrent news.

Torrentz2


Torrentz2 has been around since around 2016 and sprung up when the original Torrentz site shut down. It’s what’s known as a "meta-search" engine, meaning that it scours through results from multiple torrent search engines so you don’t have to.

The main page touts over 61 million files in its database. So whether you’re looking to find something specific, or you’re just looking to browse, you’re likely to find what you want here.

Search results show you download size, user rating, and the estimated download time (based on the number of peers that are sharing).

AIO Search


AIO Search is another meta-search engine for torrent files.

What makes it unique is that you can select specific torrent search engines that you want to include.

The list of torrent sites this search engine plugs into is impressive. The results show up almost like an embedded web browser, with an individual tab showing search results from the individual torrent search engine.

You can also use it to search secret torrent search engines for images, videos, sub-titles, shared files, and even your favorite show.

Other Free Torrent Search Engines You Can Try:

2. Hidden Bargains and Deals

If you search Google for cheap laptops or other gadgets, you’re likely to see results from standard corporate entities like Amazon or eBay.

However, there are databases of extremely cheap (or free!) stuff buried inside a multitude of website directories.

Prospector


Prospector has been around for many years.

It’s like a massive yard sale where everyone is giving away stuff for free.

The site boasts thousands of links to websites that offer things like free file hosting, free stock photos, and free applications.

Bargains on Facebook


What’s the best way to get actual free goods from your local neighbors? Since most of them are on Facebook, the answer seems obvious.

Just visit Facebook Marketplace, and search for "free stuff" to see what your neighbors are giving away.

Since Facebook already knows where you live, all the listings are in your local area. Or you can set the search area by changing the location field.

If you don’t mind paying a little bit of money for even better stuff, just adjust the price min and max fields to add a price filter.


With so much waste in the world already, why let your neighbors throw away things that you need?

Free Stuff on Craigslist


It would be foolish to overlook Craigslist if you’re looking for free stuff.

Nearly every community on Craigslist has a free category under the for sale section.

Instead of going to Walmart to buy something, why not check Craigslist to reuse someone else’s?

It’s better than adding even more items to the world’s growing landfills.

Other Good Freebie Sites You Can Try:

3. Search for House Sales and Foreclosures

One of the easiest ways to get into a home at a below-market price is to shop for foreclosures.

There are piles of these properties sitting in official databases throughout the web, but no easy way to find them with Google.

Foreclosure Free Search


Foreclosure Free Search is a search engine that sifts through various sources of foreclosure listings from across the country (U.S. only).

Unlike the paid sites—it offers price, address, and other information about the property.

Foreclosure Free Search is one of the unsung heroes of free foreclosure search engines.

Trulia


Trulia has been around for many years now. It’s a real estate search engine that provides real estate information from various sources.

To get the best bargains, search in your desired neighborhood, and then click All For Sale from the menu. Choose Foreclosures.


If you prefer to avoid foreclosures, Trulia also shows recent price fluctuations up or down. This way you can jump on a good deal the moment a seller drops their price.

4. Public Records Search Engines

Another common search that isn’t easy to find are public records. Most public records search engines are disguised commercial companies trying to sell paid public records as search results to you.

The following search engines give you access to "secret" databases where you can search public records for free.

Public Record Center 


The Public Record Center is different. It’s more of an underground "portal" to government websites than a search engine.

However, it’s organized so well that it’ll save you a lot of time if you’re not sure where to go to find the public database.

Using the Public Record Center you can find government databases for court judgments and liens, conduct asset searches, and even look up copyright and trademark information.

The Public Record Authority


Like the Public Record Center, the Public Record Authority is a trustworthy resource for links to your local and state public databases.

The site offers browsable lists of court records, federal agency databases, and unclaimed funds.

Make sure to check your state records for unclaimed funds under your name. You never know what might turn up!

Other Public Records Portals You Can Try:

5. Legal Search Engines

Ever hear of a search engine that lets you dig up legal information from the web?

Neither did I, until I discovered Cornell’s Legal Information Institute.

This amazing little search engine digs through the institute’s extensive legal library and pulls out any information that you might need. This could include family law, criminal law, labor law and much more.


There are search engines buried throughout this excellent legal resource providing court opinion information, constitutional insights, and much more.

If you have any interest in law at all, take some time to check this one out.

Other Legal Search Engines You Can Try:

6. Paranormal Search Engine and UFO Sightings

If you’re into UFOs, you’ll love the amazing stories you’ll read about in all the underground databases for UFO sightings.

All the private national UFO sightings centers maintain meticulous records of everyone who calls in a report.

MUFON Case Management System


The Mutual UFO Network (MUFON) is one of the nation’s central clearinghouses for UFO sightings.

MUFON investigators receive calls about sightings and then head out on field investigations. They then enter the information they gather into their reporting database.

This database is completely open to the public and searchable only through this case search form. Google has no idea any of these stories exist.

UFO Stalker


One of the most entertaining UFO databases is UFO Stalker. At this site, you’ll see an interactive map that shows most of the recent UFO sightings.

If the sighting was a UFO, it’ll have a UFO icon. If it’s a black triangle, it’ll show a stealth fighter… I mean a black triangle UFO, and so on.

When you click on any of the icons, you can click on the title to read the story.

Many of these sightings include lots of great blurry videos and photos as evidence!

Other UFO Databases You Can Try:

Searching the Underbelly of the Internet

I hope you’ve enjoyed strolling through the deep, dark, depths of the underground internet.

If you’re hungry for more, continue on by exploring our list of the best dark web websites online with TOR search engines. Just remember that once you head down the rabbit hole, there’s no turning back.

non critical

via MakeUseOf.com https://www.muo.com

February 15, 2021 at 06:03PM

Laravel Livewire Crud Tutorial

Laravel Livewire Crud Tutorial

https://ift.tt/3dhw1Ro


What is Livewire?

Livewire is a full-stack framework for Laravel that makes building dynamic interfaces simple, without leaving the comfort of Laravel. Livewire relies solely on AJAX requests to do all its server communications. Livewire completely sends Ajax requests to do all its server-side communication without writing any line of Ajax script.

In this blog, we have described a step-by-step guide for Creating CRUD (Create, Read, Update, Delete) Application in the Laravel 8 framework by using the Livewire package.

Table Of Contents
  1. Create Laravel Application
  2. Configure Database Details
  3. Install Livewire Package
  4. Create Model and Migration
  5. Create Livewire Component and View
  6. Define Routes
  7. Run Project

Step 1: Create Laravel Application

First, open Terminal and run the following command to create a fresh laravel project:

composer create-project --prefer-dist laravel/laravel larawire-crud-app

or, if you have installed the Laravel Installer as a global composer dependency:

laravel new larawire-crud-app

Step 2: Configure Database Details

After, Installation Go to the project root directory, open .env file, and set database detail as follow:

DB_CONNECTION=mysql 
DB_HOST=127.0.0.1 
DB_PORT=3306 
DB_DATABASE=<DATABASE NAME>
DB_USERNAME=<DATABASE USERNAME>
DB_PASSWORD=<DATABASE PASSWORD>

Step 3: Install Livewire Package:

composer require livewire/livewire

Step 4: Create Model and Migration:

php artisan make:model Category -m

-m this argument will create Migration in Single Command.

Now, Open migration file of category from database/migration and replace code in up() function:

public function up()
{
    Schema::create('categories', function (Blueprint $table) {
        $table->id();
        $table->string('name')->nullable();
        $table->text('description')->nullable();
        $table->timestamps();
    });
}

Migrate the database using the following command:

php artisan migrate

Now, Open Category.php model from app/Models and update code into Category.php Model:

namespace App\Models;

use Illuminate\Database\Eloquent\Factories\HasFactory;
use Illuminate\Database\Eloquent\Model;

class Category extends Model
{
    use HasFactory;

    protected $fillable = [
        'name', 'description'
    ];

    public $timestamps = true;
}

Step 5: Create Livewire Component and View

Run the below command to create a livewire view and component.

php artisan make:livewire category

After running this command you will find two files in the following path app/Http/Livewire/Contact.php and resources/views/livewire/contact.blade.php

Now, open app\Http\Livewire\Category.php and update the following code into that file:

namespace App\Http\Livewire;

use Livewire\Component;
use App\Models\Category as Categories;

class Category extends Component
{
    public $categories, $name, $description, $category_id;
    public $updateCategory = false;

    protected $listeners = [
        'deleteCategory'=>'destroy'
    ];

    // Validation Rules
    protected $rules = [
        'name'=>'required',
        'description'=>'required'
    ];

    public function render()
    {
        $this->categories = Categories::select('id','name','description')->get();
        return view('livewire.category');
    }

    public function resetFields(){
        $this->name = '';
        $this->description = '';
    }

    public function store(){

        // Validate Form Request
        $this->validate();

        try{
            // Create Category
            Categories::create([
                'name'=>$this->name,
                'description'=>$this->description
            ]);
    
            // Set Flash Message
            session()->flash('success','Category Created Successfully!!');

            // Reset Form Fields After Creating Category
            $this->resetFields();
        }catch(\Exception $e){
            // Set Flash Message
            session()->flash('error','Something goes wrong while creating category!!');

            // Reset Form Fields After Creating Category
            $this->resetFields();
        }
    }

    public function edit($id){
        $category = Categories::findOrFail($id);
        $this->name = $category->name;
        $this->description = $category->description;
        $this->category_id = $category->id;
        $this->updateCategory = true;
    }

    public function cancel()
    {
        $this->updateCategory = false;
        $this->resetFields();
    }

    public function update(){

        // Validate request
        $this->validate();

        try{

            // Update category
            Categories::find($this->category_id)->fill([
                'name'=>$this->name,
                'description'=>$this->description
            ])->save();

            session()->flash('success','Category Updated Successfully!!');
    
            $this->cancel();
        }catch(\Exception $e){
            session()->flash('error','Something goes wrong while updating category!!');
            $this->cancel();
        }
    }

    public function destroy($id){
        try{
            Categories::find($id)->delete();
            session()->flash('success',"Category Deleted Successfully!!");
        }catch(\Exception $e){
            session()->flash('error',"Something goes wrong while deleting category!!");
        }
    }
}

Now, Create resources/views/home.blade.php and update the following code into that file:

<!DOCTYPE html>
<html lang="en">
<head>
    <meta charset="UTF-8">
    <meta name="viewport" content="width=device-width, initial-scale=1.0">
    <meta http-equiv="X-UA-Compatible" content="ie=edge">
    <title>Livewire Crud Example - TechvBlogs</title>

    <link href="https://cdn.jsdelivr.net/npm/[email protected]/dist/css/bootstrap.min.css" rel="stylesheet" integrity="sha384-giJF6kkoqNQ00vy+HMDP7azOuL0xtbfIcaT9wjKHr8RbDVddVHyTfAAsrekwKmP1" crossorigin="anonymous">
    @livewireStyles
</head>
<body>
    <nav class="navbar navbar-expand-lg navbar-dark bg-dark">
        <div class="container-fluid">
            <a class="navbar-brand" href="/">Livewire Crud Example - TechvBlogs</a>
        </div>
    </nav>

    <div class="container">
        <div class="row justify-content-center mt-3">
            <div class="col-md-8">
                <div class="card">
                    <div class="card-header text-center">
                        <h2>Livewire Crud Example - TechvBlogs</h2>
                        <a href="https://techvblogs.com?ref=LivewireCrudApp" target="_blank">Visit Site</a>
                    </div>
                </div>
            </div>
        </div>
        <div class="row justify-content-center mt-3">
            @livewire('category')
        </div>
    </div>
    
    @livewireScripts
</body>
</html>

Next, Open resources/views/livewire/category.blade.php and update the following code into that file:

<div>
    <div class="col-md-8 mb-2">
        <div class="card">
            <div class="card-body">
                @if(session()->has('success'))
                    <div class="alert alert-success" role="alert">
                        
                    </div>
                @endif

                @if(session()->has('error'))
                    <div class="alert alert-danger" role="alert">
                        
                    </div>
                @endif

                @if($updateCategory)
                    @include('livewire.update')
                @else
                    @include('livewire.create')
                @endif
            </div>
        </div>
    </div>

    <div class="col-md-8">
        <div class="card">
            <div class="card-body">
                <div class="table-responsive">
                    <table class="table">
                        <thead>
                            <tr>
                                <th>Name</th>
                                <th>Description</th>
                                <th>Action</th>
                            </tr>
                        </thead>
                        <tbody>
                            @if (count($categories) > 0)
                                @foreach ($categories as $category)
                                    <tr>
                                        <td>
                                            
                                        </td>
                                        <td>
                                            
                                        </td>
                                        <td>
                                            <button wire:click="edit()" class="btn btn-primary btn-sm">Edit</button>
                                            <button onclick="deleteCategory()" class="btn btn-danger btn-sm">Delete</button>
                                        </td>
                                    </tr>
                                @endforeach
                            @else
                                <tr>
                                    <td colspan="3" align="center">
                                        No Categories Found.
                                    </td>
                                </tr>
                            @endif
                        </tbody>
                    </table>
                </div>
            </div>
        </div>
    </div>

    <script>
        function deleteCategory(id){
            if(confirm("Are you sure to delete this record?"))
                window.livewire.emit('deleteCategory',id);
        }
    </script>
</div>

Now, Create resources/views/livewire/create.blade.php and add the following code into that file:

<form>
    <div class="form-group mb-3">
        <label for="categoryName">Name:</label>
        <input type="text" class="form-control @error('name') is-invalid @enderror" id="categoryName" placeholder="Enter Name" wire:model="name">
        @error('name') <span class="text-danger"></span>@enderror
    </div>
    <div class="form-group mb-3">
        <label for="categoryDescription">Description:</label>
        <textarea class="form-control @error('description') is-invalid @enderror" id="categoryDescription" wire:model="description" placeholder="Enter Description"></textarea>
        @error('description') <span class="text-danger"></span>@enderror
    </div>
    <div class="d-grid gap-2">
        <button wire:click.prevent="store()" class="btn btn-success btn-block">Save</button>
    </div>
</form>

Next, Create resources/views/livewire/update.blade.php and update the following code into that file:

<form>
    <input type="hidden" wire:model="category_id">
    <div class="form-group mb-3">
        <label for="categoryName">Name:</label>
        <input type="text" class="form-control @error('name') is-invalid @enderror" id="categoryName" placeholder="Enter Name" wire:model="name">
        @error('name') <span class="text-danger"></span>@enderror
    </div>
    <div class="form-group mb-3">
        <label for="categoryDescription">Description:</label>
        <textarea class="form-control @error('description') is-invalid @enderror" id="categoryDescription" wire:model="description" placeholder="Enter Description"></textarea>
        @error('description') <span class="text-danger"></span>@enderror
    </div>
    <div class="d-grid gap-2">
        <button wire:click.prevent="update()" class="btn btn-success btn-block">Save</button>
        <button wire:click.prevent="cancel()" class="btn btn-danger">Cancel</button>
    </div>
</form>

Step 6: Define Routes

Open routes/web.php and update the following code into that file:

Route::get('/',function(){
    return view('home');
});

Step 7: Run Project

Now all are set to go, open a terminal and run the following command into your terminal.

php artisan serve

Now you can open bellow URL on your browser:

http://localhost:8000

It’d be a good idea to follow along with the simple demo app that can be found in this GitHub repo.

Read Also: Build Crud App with Laravel and Vue.js

If you have any queries or doubts about this topic please feel free to contact us. We will try to reach you.

programming

via Laravel News Links https://ift.tt/2dvygAJ

February 14, 2021 at 10:09PM

Build REST API with Laravel

Build REST API with Laravel

https://ift.tt/3d64faz


With the rise of Mobile Development and JavaScript frameworks, using a RESTful API is the best option to build a single interface between your data and your client.

PHP has been the most popular web language in the present times by being simple to maintain, and quick to create feature-rich web applications. Websites that are dynamic, interactive, secure, and efficient need a powerful toolset to create and consume APIs.

In this article, you will learn how to build a modern RESTful API in Laravel.

Now let’s look at building a PHP RESTful API with Laravel.

Table of Contents:

  1. Prerequisites
  2. Understanding Our Application
  3. Setup New Laravel App
  4. Create MySQL Database
  5. Create Model and Migration
  6. Create Controller and Request
  7. Setup CRUD (Create, Read, Update and Delete)

Step 1: Prerequisites

Let’s look at these technologies as we build our API:

Step 2: Understanding Our Application

You will build a CRUD API. CRUD means Create, Read, Update, and Delete. Our API will have the following endpoints:

Method URI Name Description
GET api/posts Index All posts return. 
GET api/posts/{id} Show Detail of a particular post by ID. 
POST api/posts Store Create a new post. 
PUT api/posts/{id} Update Update a particular post by ID. 
DELETE api/posts/{id} Destroy Delete a particular post by ID. 

Step 3: Setup New Laravel App

To get started, create a Laravel application. To do this, run the following command in your terminal:

composer create-project laravel/laravel rest-api

or, if you have installed the Laravel Installer as a global composer dependency:

laravel new rest-api

Next, start up the Laravel server if it’s not already running:

php artisan serve

You will visit your application on http://localhost:8000.

Build REST API with Laravel - TechvBlogs

Step 4: Create MySQL Database

Create a new database for your application.

Login into MySQL and run the following command:

mysql -u<username> -p<password>
Welcome to the MySQL monitor.  Commands end with ; or \g.
Your MySQL connection id is 1791
Server version: 8.0.22-0ubuntu0.20.04.3 (Ubuntu)

Copyright (c) 2000, 2020, Oracle and/or its affiliates. All rights reserved.

Oracle is a registered trademark of Oracle Corporation and/or its
affiliates. Other names may be trademarks of their respective
owners.

Type 'help;' or '\h' for help. Type '\c' to clear the current input statement.

mysql>

For Create a new Database, run the following command:

CREATE DATABASE `rest-api`;

Build REST API with Laravel - TechvBlogs

Step 5: Create Model and Migration

We can create a Model along with migration, run the following command:

php artisan make:model Post -m

-m this argument will create Migration in Single Command.

A new file named Post.php will be created in the app directory.

<?php

namespace App;

use Illuminate\Database\Eloquent\Model;

class Post extends Model
{
    protected $table = 'posts';

    protected $fillable = [
    	'name', 
    	'image', 
    	'description'
    ];
}

A migration file will be created in the database/migrations directory to generate the table in our database. Modify the migration file to create a column for name, description, and image, these all are fields that accept string value.

<?php

use Illuminate\Database\Migrations\Migration;
use Illuminate\Database\Schema\Blueprint;
use Illuminate\Support\Facades\Schema;

class CreatePostsTable extends Migration
{
    /**
     * Run the migrations.
     *
     * @return void
     */
    public function up()
    {
        Schema::create('posts', function (Blueprint $table) {
            $table->id();
            $table->string('name');
            $table->string('image');
            $table->text('description');
            $table->timestamps();
        });
    }

    /**
     * Reverse the migrations.
     *
     * @return void
     */
    public function down()
    {
        Schema::dropIfExists('posts');
    }
}

Open the .env file and update the credentials to access your MySQL database:

DB_CONNECTION=mysql
DB_HOST=127.0.0.1
DB_PORT=3306
DB_DATABASE=<your-database-name>
DB_USERNAME=<your-database-username>
DB_PASSWORD=<your-database-password>

Next, you will run your migration using the following command:

php artisan migrate 

Build REST API with Laravel - TechvBlogs

Step 6: Create Controller and Request

Create a resource Controller, run the following command:

php artisan make:controller PostController -r

Resource controllers make it painless to build RESTful controllers around resources.

This is the initial content of PostController.php:

<?php

namespace App\Http\Controllers;

use Illuminate\Http\Request;

class PostController extends Controller
{
    /**
     * Display a listing of the resource.
     *
     * @return \Illuminate\Http\Response
     */
    public function index()
    {
        //
    }

    /**
     * Show the form for creating a new resource.
     *
     * @return \Illuminate\Http\Response
     */
    public function create()
    {
        //
    }

    /**
     * Store a newly created resource in storage.
     *
     * @param  \Illuminate\Http\Request  $request
     * @return \Illuminate\Http\Response
     */
    public function store(Request $request)
    {
        //
    }

    /**
     * Display the specified resource.
     *
     * @param  int  $id
     * @return \Illuminate\Http\Response
     */
    public function show($id)
    {
        //
    }

    /**
     * Show the form for editing the specified resource.
     *
     * @param  int  $id
     * @return \Illuminate\Http\Response
     */
    public function edit($id)
    {
        //
    }

    /**
     * Update the specified resource in storage.
     *
     * @param  \Illuminate\Http\Request  $request
     * @param  int  $id
     * @return \Illuminate\Http\Response
     */
    public function update(Request $request, $id)
    {
        //
    }

    /**
     * Remove the specified resource from storage.
     *
     * @param  int  $id
     * @return \Illuminate\Http\Response
     */
    public function destroy($id)
    {
        //
    }
}

Next, create a Request file, run the following command:

php artisan make:request PostStoreRequest

As many of you already know, there are many ways to validate request in Laravel. Handling request validation is a very crucial part of any application. Laravel has some outstanding feature which deals with this very well. This is the initial content of PostStoreRequest.php:

<?php

namespace App\Http\Requests;

use Illuminate\Foundation\Http\FormRequest;

class PostStoreRequest extends FormRequest
{
    /**
     * Determine if the user is authorized to make this request.
     *
     * @return bool
     */
    public function authorize()
    {
        return false;
    }

    /**
     * Get the validation rules that apply to the request.
     *
     * @return array
     */
    public function rules()
    {
        return [
            //
        ];
    }
}

HTTP Status Codes

We’ve also added the response()->json() call to our endpoints. This lets us explicitly return JSON data and send an HTTP code the client can parse. The most common codes you’ll be returning will be:

  • 200 : OK. The standard success code and default option.
  • 201 : Created. Object created. Useful for the store actions.
  • 204 No Content. When the action was executed successfully, but there is no content to return.
  • 206 : Partial Content. Useful when you have to return a paginated list of resources.
  • 400 : Bad Request. The standard option for requests that cannot pass validation.
  • 401 : Unauthorized. The user needs to be authenticated.
  • 403 : Forbidden. The user is authenticated but does not have the permissions to perform an action.
  • 404 Not Found. Laravel will return automatically when the resource is not found.
  • 500 : Internal Server Error. Ideally, you will not be explicitly returning this, but if something unexpected breaks, this is what your user is going to receive.
  • 503 : Service Unavailable. Pretty self-explanatory, but also another code that is not going to be returned explicitly by the application.

Step 7: Setup CRUD (Create, Read, Update and Delete)

1. Setup Routes

Note: All API requests will need the header Accept: application/json.

Add the routes to the API routes file, to access all the functions we wrote.

Now, open routes/api.php and update the following code into that file:

Route::get('posts', "[email protected]"); // List Posts
Route::post('posts', "[email protected]"); // Create Post
Route::get('posts/{id}', "[email protected]"); // Detail of Post
Route::put('posts/{id}', "[email protected]"); // Update Post
Route::delete('posts/{id}', "[email protected]"); // Delete Post

or you can add a resource route like this:

Route::resource('posts','PostController');

Now, open app\Http\Controllers\PostController.php and update the following code into that file:

2. Read All Post

For, get the list of all posts. Update the following code into that file:

/**
 * Display a listing of the resource.
 *
 * @return \Illuminate\Http\Response
 */
public function index()
{
   // All Posts
   $posts = Post::all();

   // Return Json Response
   return response()->json([
      'posts' => $posts
   ],200);
}

Build REST API with Laravel - TechvBlogs

Get the detail of the post by ID. Update the following code into that file:

/**
 * Display the specified resource.
 *
 * @param  int  $id
 * @return \Illuminate\Http\Response
 */
public function show($id)
{
   // Post Detail 
   $post = Post::findOrFail($id);
   if(!$post){
     return response()->json([
        'message'=>'Post Not Found.'
     ],404);
   }

   // Return Json Response
   return response()->json([
      'post' => $post
   ],200);
}

Build REST API with Laravel - TechvBlogs

3. Create Post

Now, open app\Http\Requests\PostStoreRequest.php and update the following code into that file:

<?php

namespace App\Http\Requests;

use Illuminate\Foundation\Http\FormRequest;

class PostStoreRequest extends FormRequest
{
    /**
     * Determine if the user is authorized to make this request.
     *
     * @return bool
     */
    public function authorize()
    {
        return true;
    }

    /**
     * Get the validation rules that apply to the request.
     *
     * @return array
     */
    public function rules()
    {
        if(request()->isMethod('post')) {
            return [
                'name' => 'required|string|max:258',
                'image' => 'required|image|mimes:jpeg,png,jpg,gif,svg|max:2048',
                'description' => 'required|string'
            ];
        } else {
            return [
                'name' => 'required|string|max:258',
                'image' => 'nullable|image|mimes:jpeg,png,jpg,gif,svg|max:2048',
                'description' => 'required|string'
            ];
        }
    }

    /**
     * Custom message for validation
     *
     * @return array
     */
    public function messages()
    {
        if(request()->isMethod('post')) {
            return [
                'name.required' => 'Name is required!',
                'image.required' => 'Image is required!',
                'description.required' => 'Descritpion is required!'
            ];
        } else {
            return [
                'name.required' => 'Name is required!',
                'description.required' => 'Descritpion is required!'
            ];   
        }
    }
}

Now, open app\Http\Controllers\PostController.php and update the following code into that file:

/**
 * Store a newly created resource in storage.
 *
 * @param  \Illuminate\Http\Request  $request
 * @return \Illuminate\Http\Response
 */
public function store(PostStoreRequest $request)
{
    try {
        $imageName = Str::random(32).".".$request->image->getClientOriginalExtension();

        // Create Post
        Post::create([
            'name' => $request->name,
            'image' => $imageName,
            'description' => $request->description
        ]);

        // Save Image in Storage folder
        Storage::disk('public')->put($imageName, file_get_contents($request->image));

        // Return Json Response
        return response()->json([
            'message' => "Post successfully created."
        ],200);
    } catch (\Exception $e) {
        // Return Json Response
        return response()->json([
            'message' => "Something went really wrong!"
        ],500);
    }
}

Build REST API with Laravel - TechvBlogs

4. Update Post

/**
 * Update the specified resource in storage.
 *
 * @param  \Illuminate\Http\Request  $request
 * @param  int  $id
 * @return \Illuminate\Http\Response
 */
public function update(PostStoreRequest $request, $id)
{
    try {
        // Find Post
        $post = Post::findOrFail($id);
        if(!$post){
          return response()->json([
            'message'=>'Post Not Found.'
          ],404);
        }

        $post->name = $request->name;
        $post->description = $request->description;

        if($request->image) {
            // Public storage
            $storage = Storage::disk('public');

            // Old iamge delete
            if($storage->exists($post->image))
                $storage->delete($post->image);

            // Image name
            $imageName = Str::random(32).".".$request->image->getClientOriginalExtension();
            $post->image = $imageName;

            // Image save in public folder
            $storage->put($imageName, file_get_contents($request->image));
        }

        // Update Post
        $post->save();

        // Return Json Response
        return response()->json([
            'message' => "Post successfully updated."
        ],200);
    } catch (\Exception $e) {
        // Return Json Response
        return response()->json([
            'message' => "Something went really wrong!"
        ],500);
    }
}

Build REST API with Laravel - TechvBlogs

5. Delete Post

Delete post by ID. Update the following code into that file:

/**
 * Remove the specified resource from storage.
 *
 * @param  int  $id
 * @return \Illuminate\Http\Response
 */
public function destroy($id)
{
    // Post Detail 
    $post = Post::findOrFail($id);
    if(!$post){
      return response()->json([
         'message'=>'Post Not Found.'
      ],404);
    }

    // Public storage
    $storage = Storage::disk('public');

    // Iamge delete
    if($storage->exists($post->image))
        $storage->delete($post->image);

    // Delete Post
    $post->delete();

    // Return Json Response
    return response()->json([
        'message' => "Post successfully deleted."
    ],200);
}

Build REST API with Laravel - TechvBlogs

You may or may not be aware that there is an artisan command to create the symbolic link from the storage folder to the public folder.

What it does is, it allows us to access the files. By default, laravel wants you to store your files in the storage directory keeping the public directory clean only for your public files.

This command helps us to generate symbolic links.

php artisan storage:link

It’d be a good idea to follow along with the simple demo app that can be found in this GitHub repo.

Thank you for reading this article!!

Read Also: Laravel Livewire Crud Tutorial

If you have any queries or doubts about this topic please feel free to contact us. We will try to reach you.

programming

via Laravel News Links https://ift.tt/2dvygAJ

February 12, 2021 at 09:45AM