Mortal Kombat begins by seeding its biggest rivalry.Photo: Warner Bros.
From the very beginning of the new Mortal Kombat, it’s clear the filmmakers are trying something different with this particular video game adaptation. But, instead of us explaining that, why don’t you just watch it for yourself?
Warner Bros. just released seven minutes from the very, very beginning of the new film, which hits theaters and HBO Max on Friday. It reveals the start of arguably Mortal Kombat’s most famous rivalry, between Sub Zero (Joe Taslim) and Scorpion (Hiroyuki Sanada). However, it’s handled with a nice dash of emotion, a sign of how the rest of the film plays out too.
You can watch the footage below. Sort of. Since there’s a a lot of violence in it (Mortal Kombat is a very hard R-rated film) you have to watch it on YouTube. But we hope you’ll come back and discuss after you do.
Without spoiling too much, from the moment this clip cuts off, the fight between the two continues, reaches a conclusion, and the ramifications of that echoes centuries later, when the film picks up in the present day. Then, once that’s all established? Get ready for a massive showdown between Earth Realm and Outworld.
Another thing to notice is the music during the big action beats around five minutes in. If you got a little taste of the unforgettable Mortal Kombat song “Techno Syndrome” by the Immortals in there, you’d be right; the film’s composer, Ben Wallfisch, uses bits and pieces of it throughout.
See more when Mortal Kombat is released April 23.
For more, make sure you’re following us on our Instagram @io9dotcom.
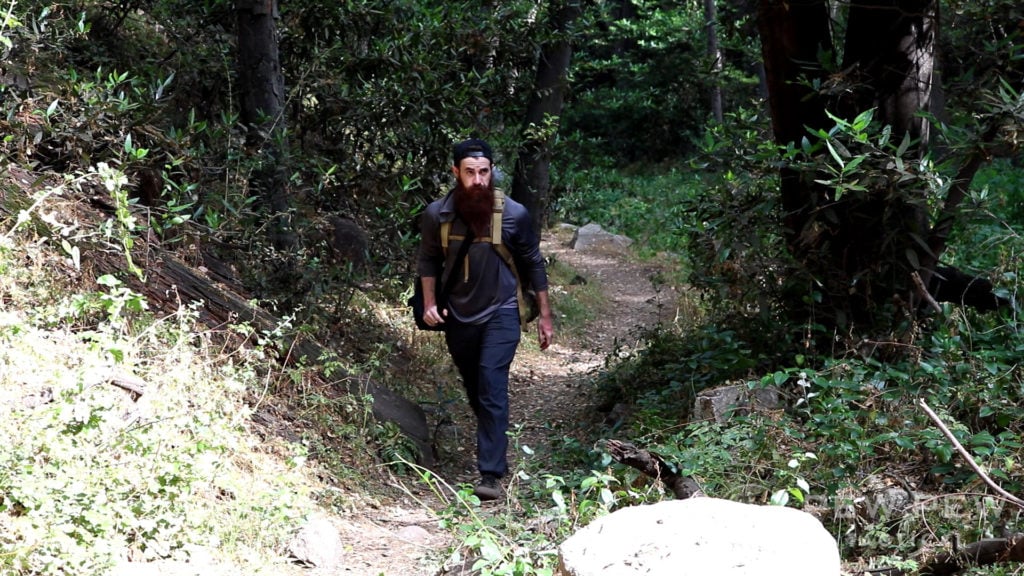
If there’s one place you don’t want something bad to happen, it’s when you’re 20 miles into the woods, and there are no signs of civilization anywhere.
The woods aren’t exactly an inherently safe place.
What lurks in these woods?
That’s not to say that you’re walking into a green death trap every time you hit a trail, but it is to say that nature (and people) can be a beast.
As such, it’s best to be prepared to face whatever curveball may get thrown your way.
Unfortunately, I’ve spent enough years in the woods to see people placing themselves in bad situations.
But having a bit of pre-planning in place means the difference between life and death.
Out in the woods, you’re truly on your own, and you need to be able to do what it takes to keep yourself alive.
Thankfully, there are a number of steps that we can take to ensure that we’ve done what we can to stay safe as we enjoy the beauty of the woods.
I mean, c’mon. You don’t get this in the city.
And guess what – we’ve narrowed down some of this advice for you.
So without further ado (sorry, I’ve been reading Shakespeare lately), here are the top tips to consider before your next hike.
Ways to Stay Alive on Hikes
1. Tell Someone Where You’re Going and When You’ll Be Back
Arguably, this is one of the most important things you can do to stay alive while out in the woods.
If you’ve ever seen 127 Hours — that movie where the guy has to cut his arm off with a dull multitool knife– it was the violation of this principle that caused such a drastic decision and outcome
I really have no problem with people hiking solo.
That’s the whole reason to go out in the woods in the first place, is it not? To get away from people?
But by always telling somebody where you’re going, and an approximate time you’ll be back home, followed by a quick message once you get back home you’ll have maintained a very important lifeline for yourself perchance something should go wrong.
If nobody knows where you’re at, then nobody will come for you.
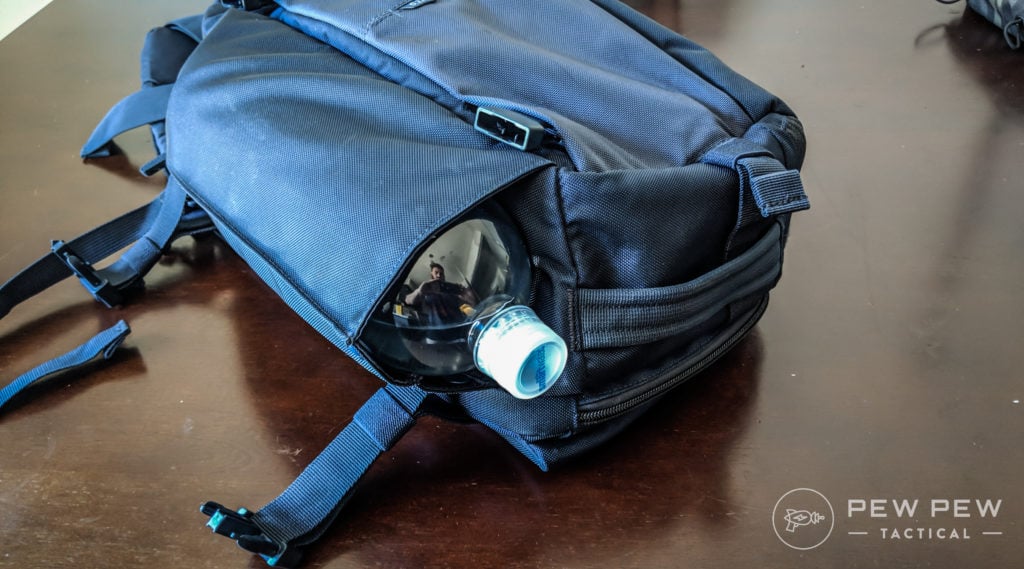
2. Pack Some Food and Water
This is a pet peeve of mine.
If you’re going to go out in the woods – even for a really quick day trip – at least bring some water and perhaps a granola bar with you out there.
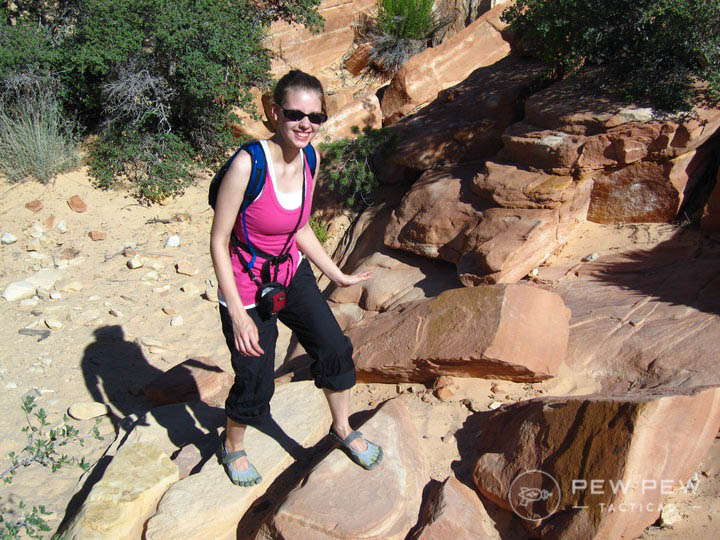
PPT’s Jacki on a short saunter in the Las Vegas desert with a backpack style Camelback.
I know that the idea of not having anything to carry seems appealing, but water, in particular, could potentially save your life.
We tend to underestimate Mother Nature when we go outside. And an incredibly hot day of hiking can dehydrate you very quickly.
Bring water!
This, in turn, can lead to some brutal headaches, an inability to make good decisions, and eventually, heat exhaustion or heat stroke.
Going out into the woods for relaxation and then ending up miserable because you couldn’t bring something as simple as a water bottle rather defeats the purpose.
3. No Cotton!
“Cotton kills” goes the famous backpacking adage. And there’s a good reason for that.
Once cotton gets wet, it completely loses any insulative qualities that it had prior. You may as well be walking around naked.
These clothes are NOT suitable for hiking.
Aside from the weather often changing very quickly while you’re out in the woods, there’s also always the chance of slipping during a stream crossing or some other similar water accident.
By wearing clothes made of nylon, polyester, or some other water-resistant material, you’ll be much safer while you’re out.
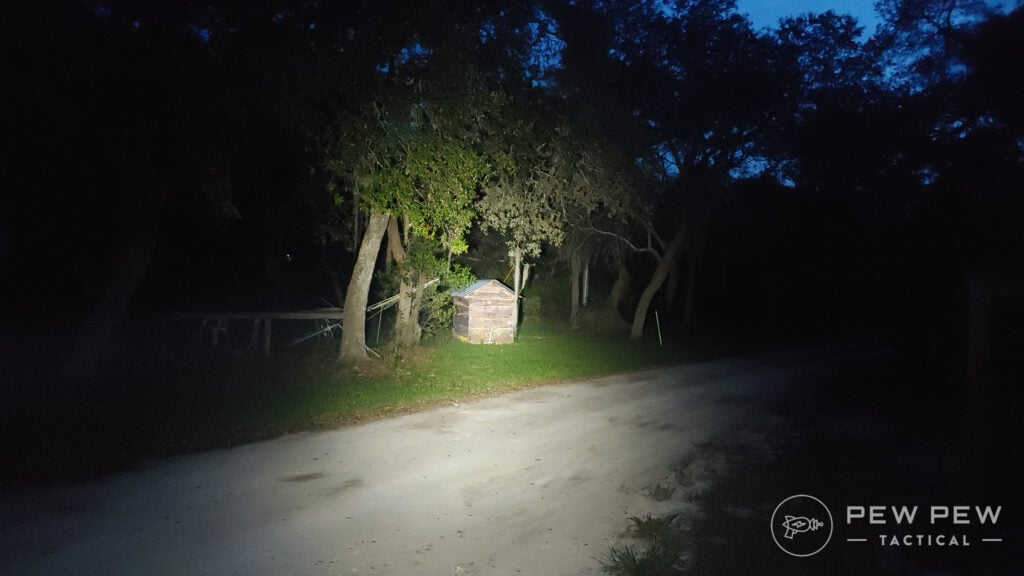
4. Bring a Flashlight
Personally, I enjoy hiking at night. The peace of the woods is incredible in the dark, the stars are like nothing you’ve ever seen, and it’s just fun.
However, a lot of people end up night hiking by accident.
A light comes in handy at night.
What I mean by this is that mountains and trails can often be rather deceiving. What we think should only be a 3-hour hike where you will be back home in time for dinner can easily turn into a 5-hour hike where you don’t get home till well after dark.
There’s nothing wrong with this but attempting to hike in the dark without a flashlight is a good way to end up breaking an ankle.
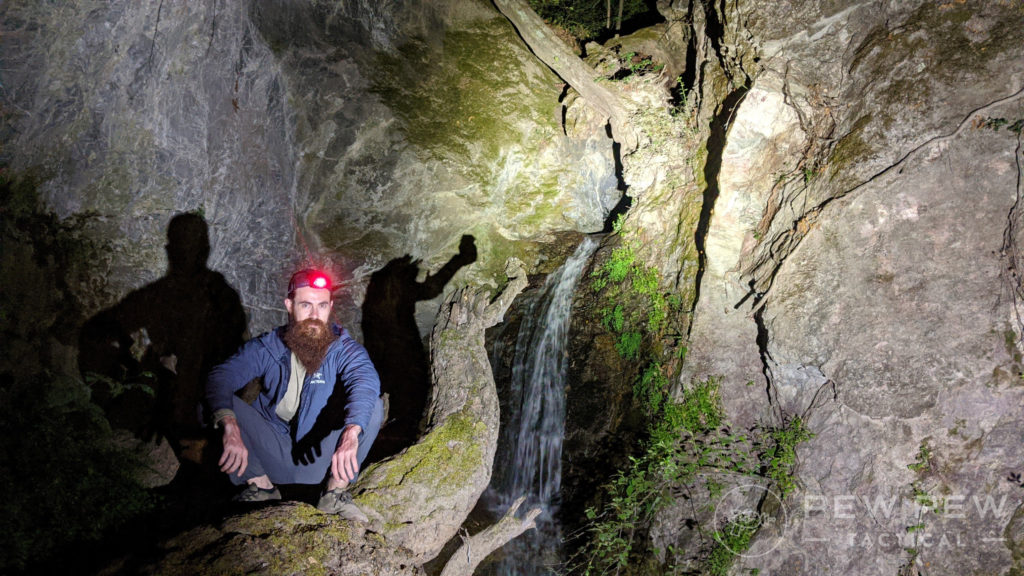
So, make sure that you have a flashlightof some sort with you when you go out in the woods. Better yet, bring a headlamp.
Headlamps come in handy when you find cool waterfalls too!
This will leave both of your hands-free for trekking poles or supporting yourself on nearby trees as you climb and descend.
5. Don’t Do Stupid Stuff
Being safe should be a given.
But while out in the woods, I’ve witnessed a girl attempting to catch a baby bear and even somebody hanging off a 300-foot cliff for a photo, to name just a few…
Yeah, don’t do this…
I’ve also rock jumped at an area where a 20-something girl broke her hip and needed a hip replacement (she hit an underwater rock shelf). Then another 20-something ended up paralyzed from the neck down, followed by another 20-something found dead about a year after he’d gone missing.
Needless to say, I quit rock jumping there.
So have fun while you’re out there, but make sure that it’s safe fun as well.
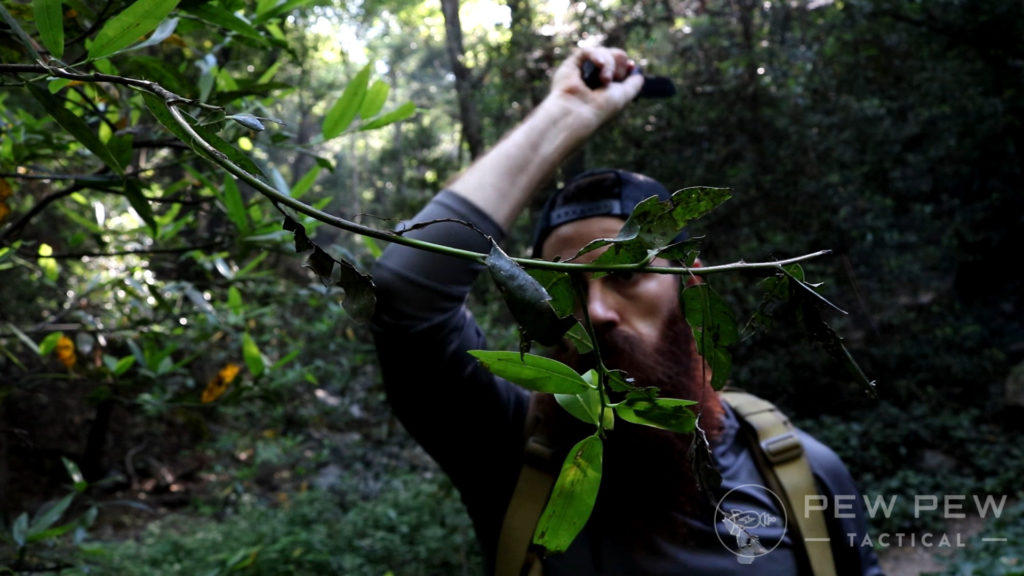
6. Always Carry a Knife
I truly don’t understand people who go out into the woods without a knife on their person.
Perhaps this is just part of being a Southerner – where granddad’s old pocketknife is just a part of our pants.
So, to not have some means of cutting things while out in the woods is foolish to me.
Knives are pretty useful in general.
If you carry one regularly, you understand just how often you end up pulling the thing out daily.
But if you’re in the woods, the benefits of a knife improve substantially.
Perchance you do end up in a survival situation while out in the bush, you’ll greatly improve your odds of making it through the wild in one piece with a quality blade on your person.
Wacking at bushes with the Gerber Strongarm
Making traps, skinning game, filleting fish, cutting paracord, making bandages, and crafting a shelter are but a few of the benefits derived from carrying a knife out in the woods.
So, make sure that you have one.
7. Have a Weapon
You may want to consider your local laws on this one — as everywhere is different — but I highly recommend traveling with a weapon of some sort.
There are weirdos out in the woods, too, and fighting off rabid bobcats with your hands doesn’t sound fun to me.
In case you think I’m fearmongering, just know that within the past 10 years, we’ve witnessed: a man attacking people on the Appalachian Trail with a machete, murders on various trails, clowns in the woods, bobcats attacking people, cougar attacks, and much more.
If you’re looking for more information on the legality of carrying within a National Park, check out our article here.
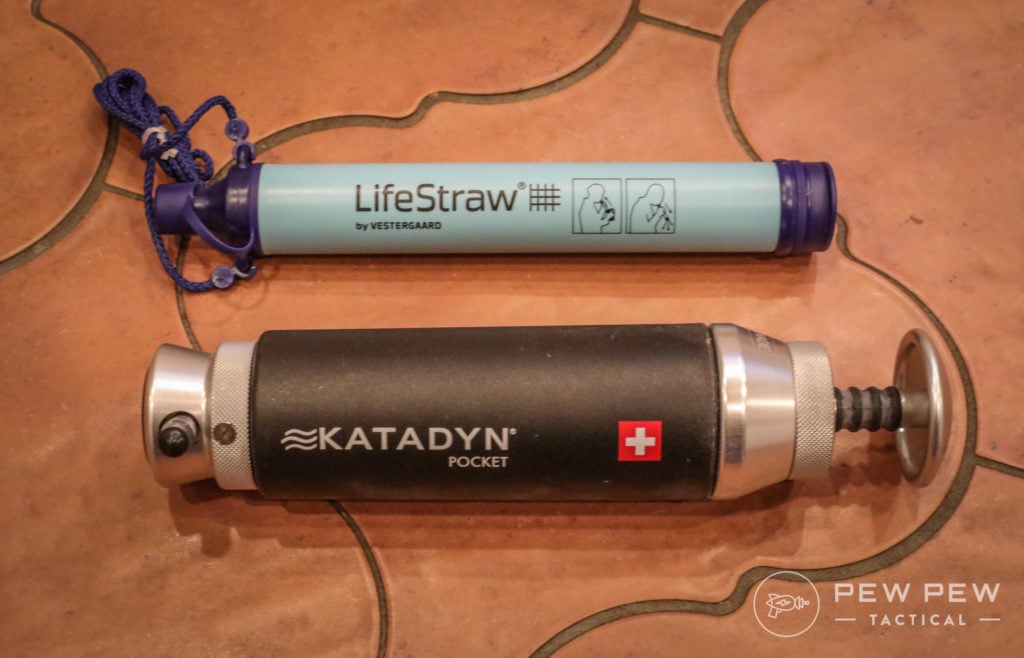
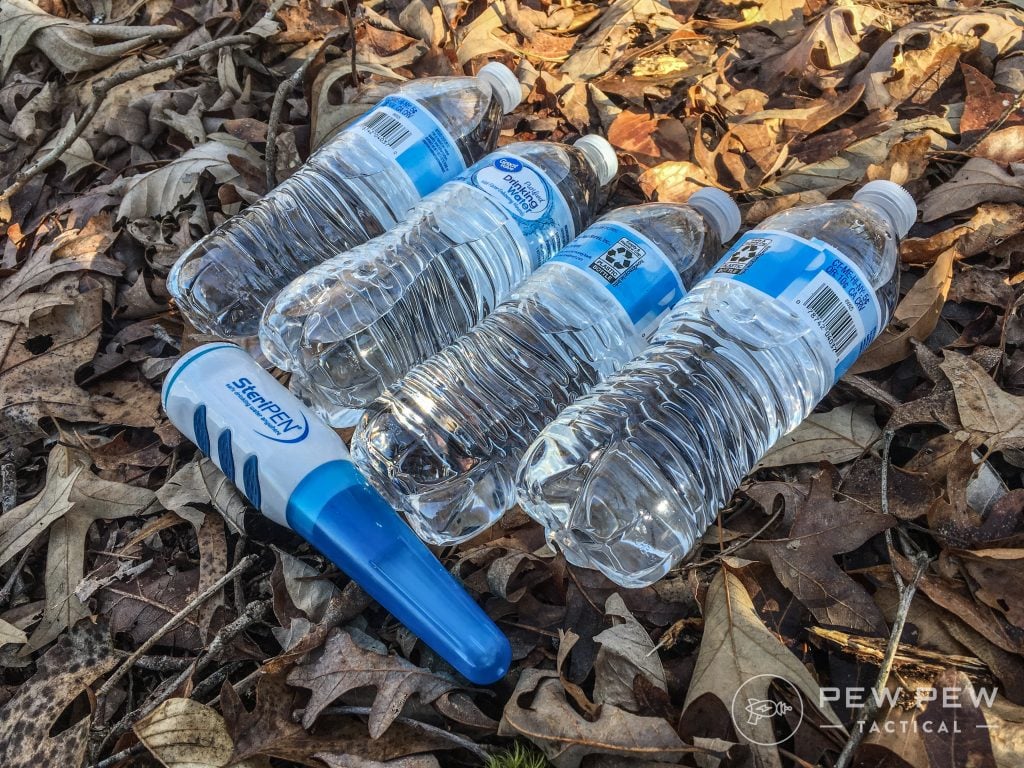
8. Carry Some Means of Water Purification
To go out into the woods without some means of purifying water is just plain stupid.
Water is essential to life, and if you attempt to drink straight out of a stream or creek, you’re virtually guaranteed to end up with a debilitating form of diarrhea.
LifeStraw and Katadyn
And that makes a bad situation much, much worse.
Besides, who wants to hike out to safety with brown pants?
No, it’s best to have some means of preventing such from ever happening in the first place. There are several convenient, light, and non-expensive means of doing such.
Steri-Pen
I personally prefer a SteriPen to purify my water, but a much more affordable option would be to take a LifeStraw out into the woods with you.
At roughly $25, here’s simply no reason not to have one of these on your person.
You can read all about hiking and water purification in our article here!
9. Know How to Read a Map
Another requirement for hiking — carrying a high-quality topographic map of the region you’re traveling through.
Not only does this make the hike much more interesting (you’re able to determine just what exactly you’re looking at in the distance), but it also provides an incredible level of safety should you get lost.
Learning to read a map is an important skill!
However, you first must know how to read a map, which is fast becoming a forgotten skill set.
I consider the best maps on the market to be the National Geographic topo maps. They’re waterproof, beautiful, pretty tough, and pack down really well.
Having one of these on your person and having watched a couple of YouTube videos on reading a topo map will serve you well for the rest of your life.
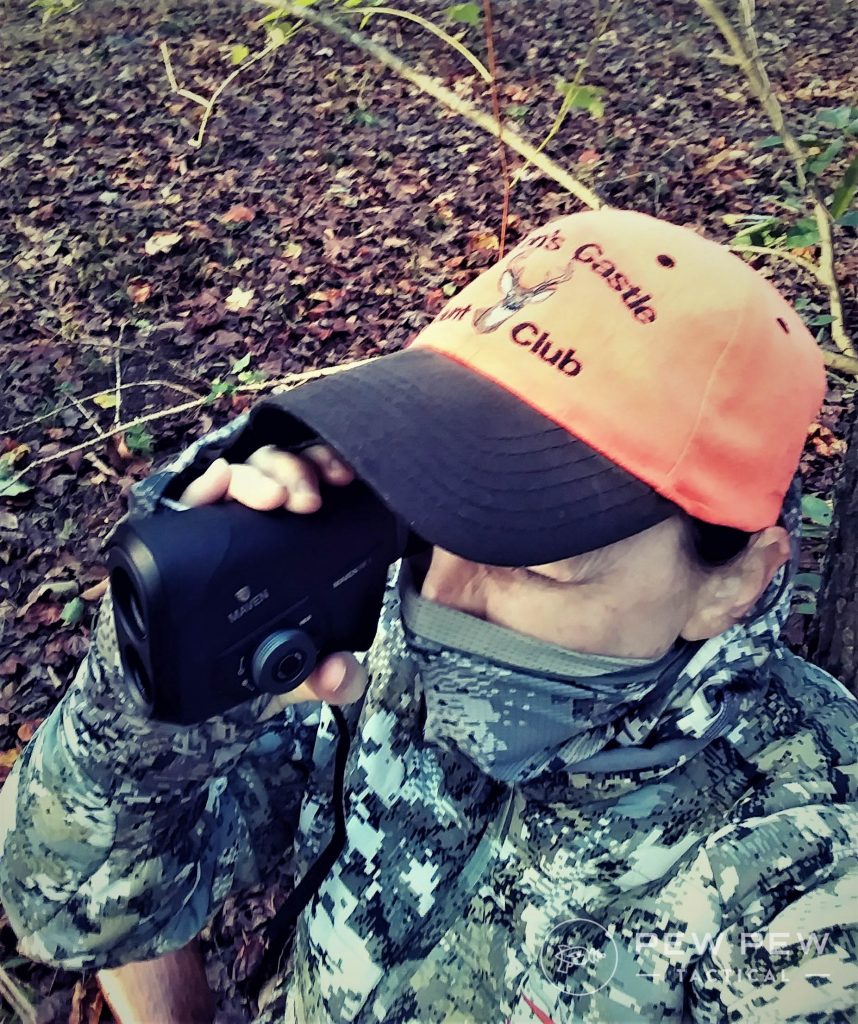
10. Know When It’s Hunting Season
Did you know that a lot of national parks actually allow hunting on them?
There’s nothing quite like being mistaken for a deer during rifle season. On the plus side, getting hit with a rifle round is a great way to lose weight!
Make sure to pack some orange so you stand out!
However, if that’s not your preferred method of weight loss, I highly recommend knowing when hunting season is in your area.
Figure out where people are likely to be hunting and make sure to wear blaze orange, stick to the trail, and make noise as you hike.
11. Avoid Thunderstorms Like the Plague
Lightning is a lot more terrifying when you don’t have a house to run into.
Surprise turns in the weather have suddenly caught me unaware at the peak of a mountain in the middle of a thunderstorm in the past.
This doesn’t look good…
If such should happen to you, you need to do everything in your power to descend the mountain and get away from tall objects as fast as possible. Your life truly could depend upon it.
Don’t shelter underneath a tree or in a cave either.
A tree is a natural lightning rod as it is, and if you shelter in a cave, lightning can easily travel through the rock and blow you away.
That would be a bad day….
If you have no other options for shelter (e.g., a trail shelter) and you must find some way to ride the storm out while you’re out in it, you should do the following:
Find a low-lying area and get in it. Whether this is a hollow, ditch, or root hole doesn’t matter. You just need to not be the tallest thing around.
Take off your pack, put it on the ground, and then crouch down on it. You don’t want to lay down on the ground as lightning could easily travel through the wet earth to get to you. By crouching into a little ball while standing on your pack, you help to insulate yourself against ground-traveling electricity as much as possible.
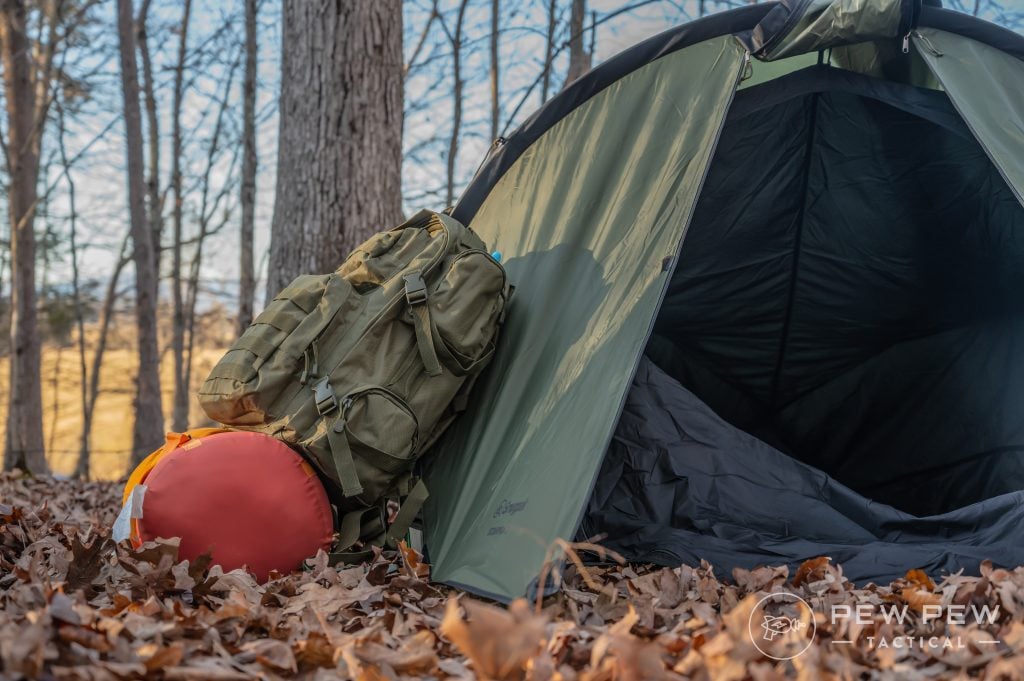
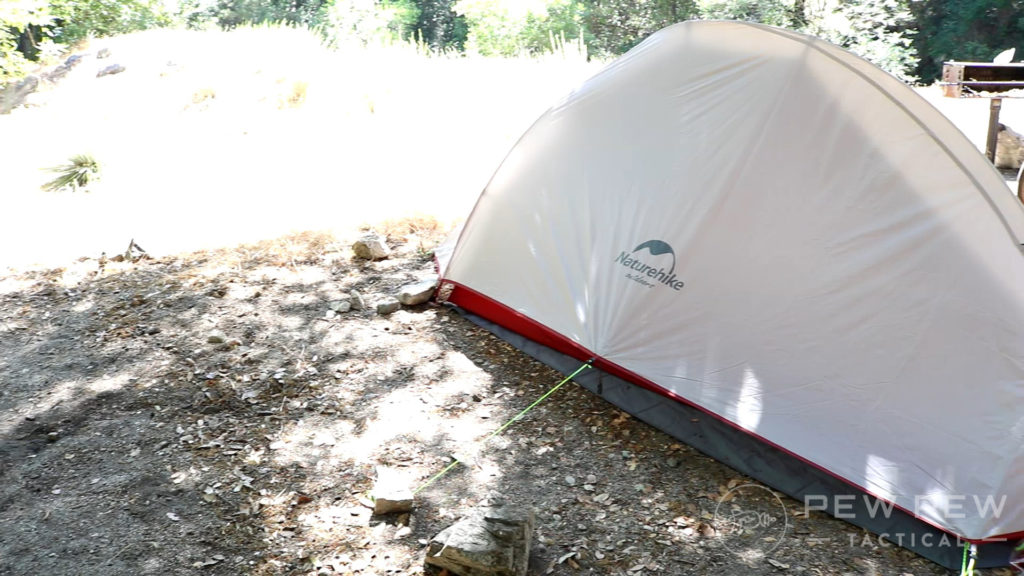
12. Don’t Camp Near Roads
Aside from the noise disturbances, camping near a road brings the possibility for somebody to walk up to your tent in the middle of the night.
Call me paranoid, but I purposefully plan to spend the night as far away from any nearby road as possible when I go backpacking into the woods.
Pick a place off the road.
We’ve had some murders just off the road in the mountains, and I guess they’ve always stuck with me.
It’s because of this that I make my tent as difficult to find for some serial killer taking an evening stroll.
Part of this is choosing a tent color that blends in with your surroundings. I highly recommend the Snugpack Scorpion 2 in part for this reason — in other part because it straight up rocks.
By this point, you probably don’t post to social media that you’re on vacation at the beach while you’re on vacation at the beach.
Why? Because it tells the whole world that you’re not at home!
In the same vein, you’re going to want to avoid telling strangers your plans while you’re out on the trail.
Letting somebody who you’ve never met in on the details of where you plan to sleep – in the middle of the woods with nobody else around – is probably a bad idea. Just sayin’.
Conclusion
I don’t want you to walk away from this article with the idea that hopping onto a trail in the woods is the beginning of a death trap. It’s not.
Instead, I want to help you provide a layer of security while you hike.
As such, it only makes sense to do what we can to mitigate the risk that we’ll face things happen.
Whether you’re going on a day hike or staying the night, stay safe, friends!
Our list truly isn’t difficult to follow and is most certainly not expensive either. You most likely have all of the gear already that you would need, and the rest is just active decision-making.
So, do what you can to take care of yourself and your family while you’re out in the woods.
You’ll enjoy yourself more freely with the knowledge that you have the means to take care of yourself should things go south.
https://opengraph.githubassets.com/6e36e884e6502b1c7a8e72f3288b5bdf3b55f42aab33ab347fdeed1936d81264/level39/dranzerDranzer is an open source Laravel app that allows you to scaffold production ready Laravel apps.Laravel News Links
I’m proud to announce that our team has released a new package called spatie/laravel-stats. This package is a lightweight solution for summarizing changes in your database over time.
Instead of manually increasing and decreasing the stat, you can directly set it. This is useful when your particular stat does not get calculated by your own app but lives elsewhere. Using the subscription example, let’s imagine that subscriptions live elsewhere and that there’s an API call to get the count.
By default, that increase, decrease and sets methods assume that the event that caused your stats to change happened right now. Optionally, you can pass a date time as a second parameter to these methods. Your stat change will be recorded as if it happened at that moment.
The implementation of this package is simple. The basic principles of event sourcing are being used: we don’t store a result, but only the changes.
The package stores all “events” in the stats_event table
Inside the StatsQuery class, you’ll find the heart of the package. In its get function, you can see that all events for a given period are retrieved, summarized and mapped to DataPoint classes.
We are going to use laravel-stats in Flare, our exception tracker for Laravel/PHP/JavaScript projects, to keep tracker of changes in subscribers and other key metrics. We hope that the package can be helpful in your projects as well.
Laravel Sanctum provides a featherweight authentication system for SPAs (single page applications), mobile applications, and simple, token-based APIs. Sanctum allows each user of your application to generate multiple API tokens for their account. These tokens may be granted abilities/scopes which specify which actions the tokens are allowed to perform. Here are some reasons you might want to choose Sanctum over Passport:
Passport is implemented with OAuth2 authentication. If you are not using that, then Sanctum is your go-to for issuing API tokens.
Sanctum is a featherweight, meaning it is light and simple to implement.
Sanctum works with SPAs (Single Page Applications like Vue, Angular, and React) and supports mobile application authentication.
Getting started
First, open Terminal and run the following command to create a fresh laravel project:
To use tokens for users, add the HasApiTokens trait inside the User model.
Open the app/Models/User.php file and add the following modifications:
namespace App\Models;

use Illuminate\Contracts\Auth\MustVerifyEmail;
use Illuminate\Database\Eloquent\Factories\HasFactory;
use Illuminate\Foundation\Auth\User as Authenticatable;
use Illuminate\Notifications\Notifiable;
use Laravel\Sanctum\HasApiTokens;

class User extends Authenticatable
{
    use HasFactory, Notifiable, HasApiTokens;
}
Setup Middleware
Edit your app/Http/Kernel.php file to add Sanctum’s middleware into your API middleware group.
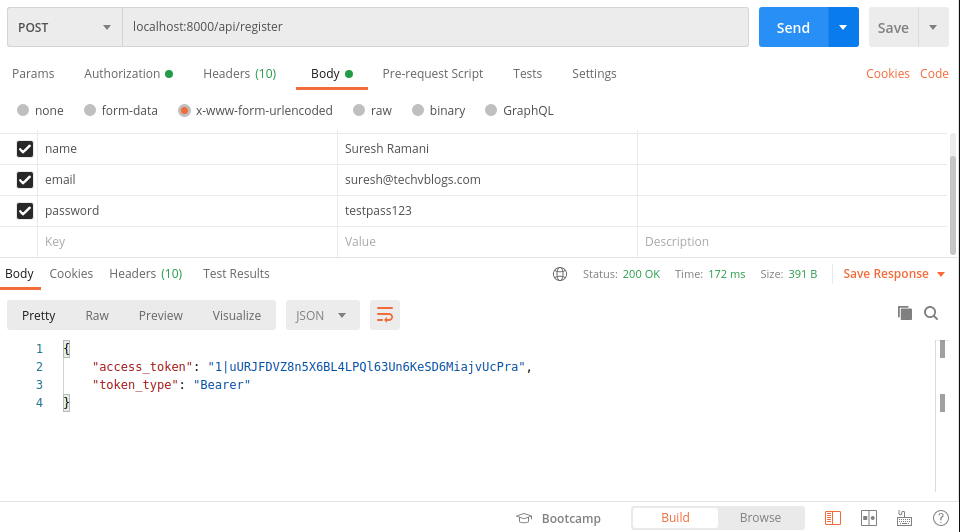
Let’s start with registering for an account. In your terminal create the controller responsible for authentication by running the following Artisan command:
php artisan make:controller AuthController
Now open the routes/api.php file to create the route for registering a user:
use App\Http\Controllers\AuthController;

Route::post('/register',[AuthController::class,'register']);
Open app/Http/Controllers/AuthController.php and create a method to register a user:
First, we validate the incoming request to make sure all required variables are present. Then we persist the supplied details into the database. Once a user has been created, we create a new personal access token for them using the createToken() method and give the token a name of authToken. Because createToken() will return an instance of Laravel\Sanctum\NewAccessToken, we call the plainTextToken property on the instance to access the plain-text value of the token. Finally, we return a JSON response containing the generated token as well as the type of the token.
Next, create a route for the login user, open routes/api.php, and update the following code into a file:
use Illuminate\Support\Facades\Auth;

public function login(Request $request){
    if (!\Auth::attempt($request->only('email', 'password'))) {
        return response()->json([
            'message' => 'Invalid login details'
        ], 401);
    }

    $user = User::where('email', $request['email'])->firstOrFail();

    $token = $user->createToken('authToken')->plainTextToken;

    return response()->json([
            'access_token' => $token,
            'token_type' => 'Bearer',
    ]);
}
Add the routes that require authentication inside the middleware group. As the login route doesn’t use the authentication middleware, it goes outside the middle group.
routes/api.php
<?php

use Illuminate\Http\Request;
use Illuminate\Support\Facades\Route;

use App\Http\Controllers\AuthController;

Route::post('/register',[AuthController::class,'register']);
Route::post('/login', [AuthController::class, 'login']);

Route::middleware('auth:sanctum')->get('/user', function (Request $request) {
    return $request->user();
});
Now, All sets to go, and Let’s test API routes.
Create a new User
Login User
Get Authenticated User
Thank you for reading this article.
It’d be a good idea to follow along with the simple demo app that can be found in this GitHub repo.
Generate migrations from existing database structures, an alternative to the schema dump provided by Laravel. A primary use case for this package would be a project that has many migrations that alter tables using ->change() from doctrine/dbal that SQLite doesn’t support and need a way to get table structures updated for SQLite to use in tests.
Another use case would be taking a project with a database and no migrations and turning that database into base migrations.
You can also clear the directory with the --empty-path option:
php artisan generate:migrations --empty-path
Configuration
Each database driver can have separate configs, as specified in config/laravel-migration-generator.php.
Want to customize the migration stubs? Make sure you’ve published the vendor assets with the artisan command to publish vendor files above.
Stubs
There is a default stub for tables and views, found in resources/stubs/vendor/laravel-migration-generator/.
Each database driver can be assigned a specific migration stub by creating a new stub file in resources/stubs/vendor/laravel-migration-generator/ with a driver-prefix, e.g. mysql-table.stub for a MySQL specific table stub.
Stub Naming
Stubs can be named using the (table|view)_naming_scheme in the config. See below for available tokens that can be replaced.
Table Stubs
Table stubs have the following tokens available for the naming scheme:
[TableName] – Table’s name, same as what is defined in the database
[TableName:Studly] – Table’s name with Str::studly() applied to it (useful for standardizing table names if they are inconsistent)
[TableName:Lowercase] – Table’s name with strtolower applied to it (useful for standardizing table names if they are inconsistent)
[Timestamp] – The standard migration timestamp format, at the time of calling the command: Y_m_d_His
[Timestamp:{format}] – Specify a format for the timestamp, e.g. [Timestamp:Y_m]
Table schema stubs have the following tokens available:
[TableName] – Table’s name, same as what is defined in the database
[TableName:Studly] – Table’s name with Str::studly() applied to it, for use with the class name
[Schema] – The table’s generated schema
View Stubs
View stubs have the following tokens available for the naming scheme:
[ViewName] – View’s name, same as what is defined in the database
[ViewName:Studly] – View’s name with Str::studly() applied to it (useful for standardizing view names if they are inconsistent)
[ViewName:Lowercase] - View's name with strtolower` applied to it (useful for standardizing view names if they are inconsistent)
[Timestamp] – The standard migration timestamp format, at the time of calling the command: Y_m_d_His
[Timestamp:{format}] – Specify a format for the timestamp, e.g. [Timestamp:Y_m]
View schema stubs have the following tokens available:
[ViewName] – View’s name, same as what is defined in the database
[ViewName:Studly] – View’s name with Str::studly() applied to it, for use with the class name
Think of how strong a steel chain can be. Then imagine the forces that must be necessary to shape and connect its links. In this video from Engineering and Architecture, we get an up-close look at a specialized machine that takes lengths of steel wire, then scores, cuts, bends, and presses the pieces together.
Most of today’s internet traffic is spent streaming online video, with YouTube taking up a massive chunk. Over 400 hours of video content is uploaded to YouTube every minute, and YouTube has a greater reach in the 18-49 demographic than even cable TV.
And then you have to consider other video streaming sites like Vimeo, Dailymotion, Metacafe, Twitch, and so on. That’s a lot of data flowing around—and if your ISP caps your monthly data allowance, then all this video streaming can be expensive.
The solution is to capture or download online videos to watch offline, allowing you to re-watch as many times as you want without wasting data.
Here are some of the best tools for capturing and downloading streaming video from websites online so you can watch them offline.
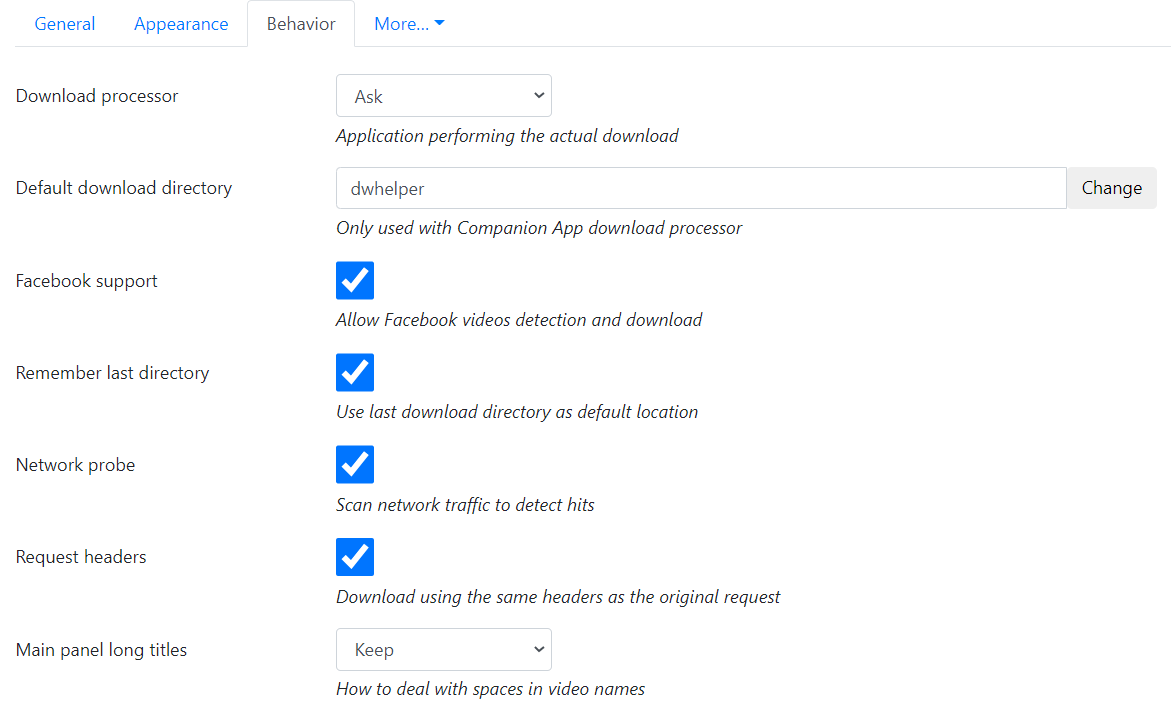
Supported sites: YouTube, Facebook, Instagram, Vimeo, Dailymotion, Lynda, Twitter, Udemy, and hundreds of other sites.
Video DownloadHelper is easily one of the most useful browser extensions for downloading streaming video that you’ll ever install. The downside (sort of) is that you have to install it on your browser; if you already run a lot of extensions, the last thing you need is another one making Chrome even slower. But if you download a lot of videos on a day-to-day basis, Video DownloadHelper is definitely worth it.
The extension adds a button next to your browser’s address bar. Whenever you come across an online video, just click the button to download any video on the current page. Use the pop-up box to decide where to save it on your computer.
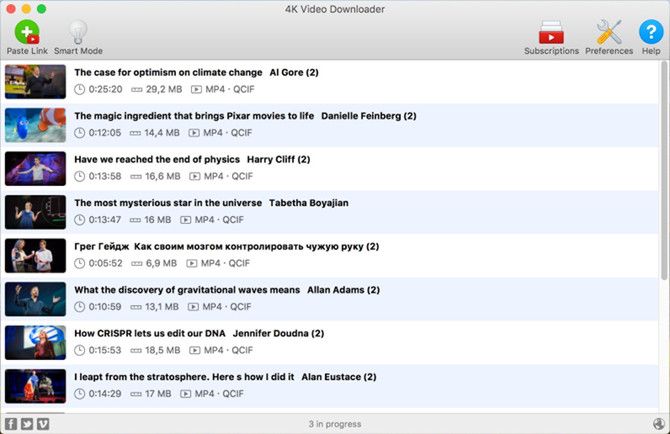
Supported sites: YouTube, Facebook, Vimeo, Flickr, Dailymotion, and several other sites.
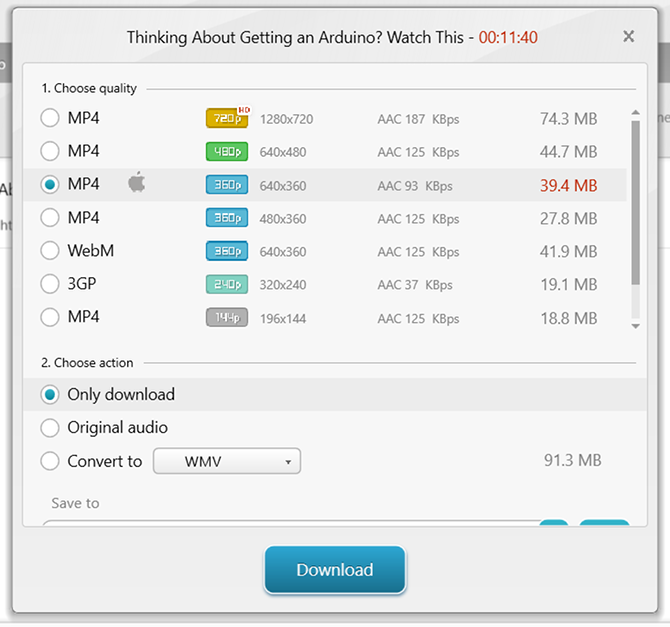
4K Video Downloader is the simplest and most straightforward tool to capture video from a website. We recommend it if you want a no-hassle option that requires close to zero effort on your part. It works extremely quickly and doesn’t throttle your download, plus it’s really easy to get to grips with.
Just copy the URL of an online video and paste it into 4K Video Downloader. You can paste links to YouTube playlists or YouTube channels to download every video available, and you can even subscribe to YouTube channels and auto-download new videos as they’re made available. You can also download the annotations and subtitles in YouTube videos.
Video downloads are available in 8K, 4K, 1080p, or 720p (as long as the source video was uploaded at that resolution, of course). Videos can be downloaded in MP4, MKV, and FLV formats. Or you can download only the audio portion in MP3 or M4A formats.
Supported sites: YouTube, Facebook, Liveleak, Veoh, Vimeo, Dailymotion, and dozens of other sites.
Freemake Video Downloader is one of the most popular video downloading tools out there. It’s completely free, easy to use, and relatively flexible as far as quality and format options are concerned. The one big downside is that it’s only available on Windows.
Videos can be downloaded in a handful of formats, including AVI, FLV, MKV, MP4, and WMV. Videos can also be downloaded in MP3 format if you only want the audio portion. The actual process only requires the URL of the video—just copy and paste it in.
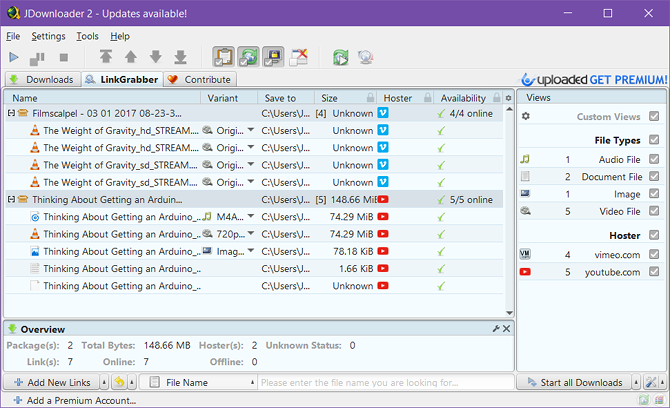
Supported sites: Nearly any site with streaming video.
JDownloader is like Freemake Video Downloader but with a twist. You take the URL of any page that has a streamed video on it, paste it into the app, and it will scan the page for all the videos it can detect. You get to pick which of the detected videos you want to download.
The nice thing about JDownloader is that you don’t need the direct URL of a specific video. Take a MakeUseOf article with five embedded videos, for example, and all of them will be detected. No need to fumble around finding out the direct URL of the video. This makes it very easy to capture several videos at once.
However, be aware that the installer comes with bundleware, which is where other programs are pushed on you that you don’t need. When you run the installer, you’ll come across a page that offers to install "Bing Search" or something else. On this page, the buttons will change to Decline and Accept. Ensure you click Decline, because this will prevent bundleware from being installed on your system.
Supported sites: YouTube, Facebook, HBO, Metacafe, Vimeo, Dailymotion, and thousands of other sites.
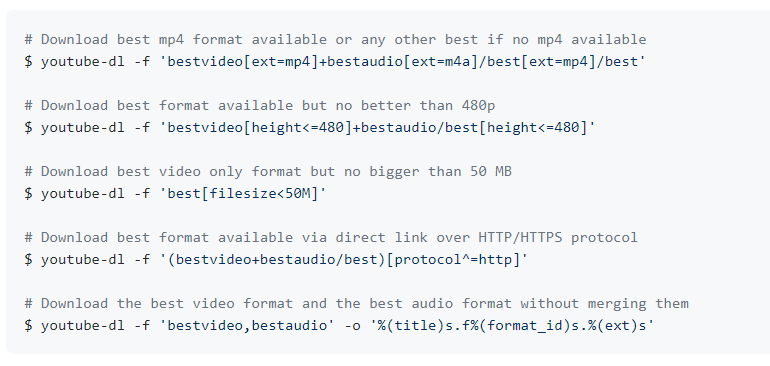
youtube-dl is a tool for advanced users who are comfortable using the command line. If you prefer graphical interfaces, save yourself the headache and just use one of the ones listed above.
But if you’re okay with command line utilities, then youtube-dl offers the most flexibility of any video downloading tool. It’s complicated enough to have a non-trivial learning curve though, so prepare to read the documentation, or else you’ll be lost.
You could also try youtube-dl-gui, which is an unofficial front-end user interface that’s available for Windows and Linux.
Features include several video selection and quality parameters, playlist processing, download rate limit, batch video downloading, automatic naming of files, inclusion of ads, and downloading subtitles (for sites like YouTube).
The following formats are supported: 3GP, AAC, FLV, M4A, MP3, MP4, OGG, WAV, and WEBM.
The Last Resort for Capturing Online Videos
If you encounter a video that isn’t supported by any of the above tools, the last resort is to play the video in full screen mode and record your screen as it plays.
It’s not a perfect solution, but it normally works when nothing else does. Keep in mind, however, that some sites and apps (especially TV streaming services) will not let a screen recorder capture the footage. When you go to play the video back again, you will just be faced with a blank screen.
If you can get the direct URL of an online video, you can also use VLC to play and record online videos as a kind of streaming video recorder.


 Login User
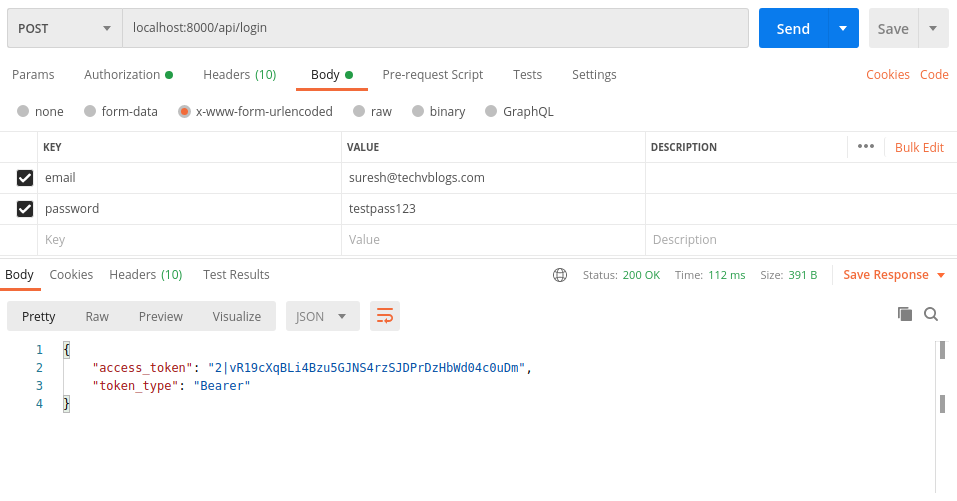 Get Authenticated User
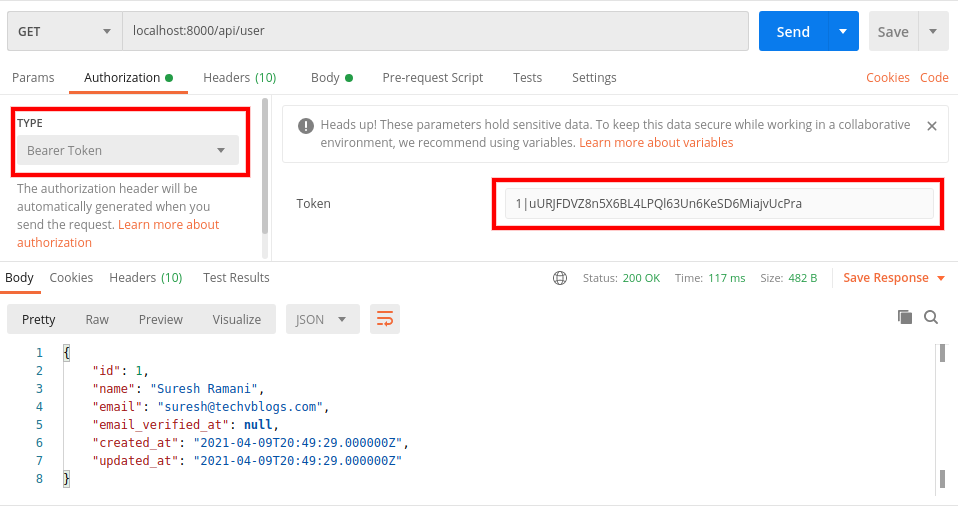

 Dilbert Daily Strip