[How-To] Install a Handguard on an AR-15

https://www.pewpewtactical.com/wp-content/uploads/2021/04/Barrel-installed-2048×2048.jpg

Installing a handguard is one of the steps in building an AR that people seem to fall short of.

The overall process is straightforward, but there are little details in every step that make or break a proper install.

But that’s why you have us, right?

350 legend midwest slh handguard
Are you ready to change things up with a new handguard?

For this article, we’ll cover the steps of installing a handguard on a new receiver using a barrel nut — not a delta ring.

So, let’s get down to the nitty-gritty of installing a handguard on your AR.

Table of Contents

Loading…

Tools You’ll Need

There are a few key tools you’ll need on hand to install your handguard.

Bonus Items

For more parts and tools you might want to have for future tweaks and builds, head over to our AR-15 Parts & Tools List.

Removing Existing Handguard & Hardware

Step 1: Take Off Old Handguard

If you are starting fresh with no handguard, then skip on down to installing your handguard.

However, if you’ve already got a handguard in place that you need to swap out, start here.

Best AR-15 Handguards
Regardless of which handguard you choose, you gotta remove the old one from your AR.

You’ll need to first remove the existing handguard with a handguard removal tool.

Step 2: Separate the Upper & Lower

To make the installation process easier, go ahead and remove the lower receiver and set it aside.

From here, you can use a vise grip to clamp down on the upper receiver.

Step 3: Remove Muzzle Device, Gas Block & Barrel Nut

Continue the disassembly process by removing any existing muzzle device and hardware, gas block, and barrel nut.

You’ll need to tap out the gas tube roll pin with a #2 pin punch. From here, take a look at the front sight gas block. If it has tapered pins, you’ll need to go ahead and drive them out. 

If you opt for a clamp-on style block, use a hex key to loosen the set screws.

Remove the gas tube.

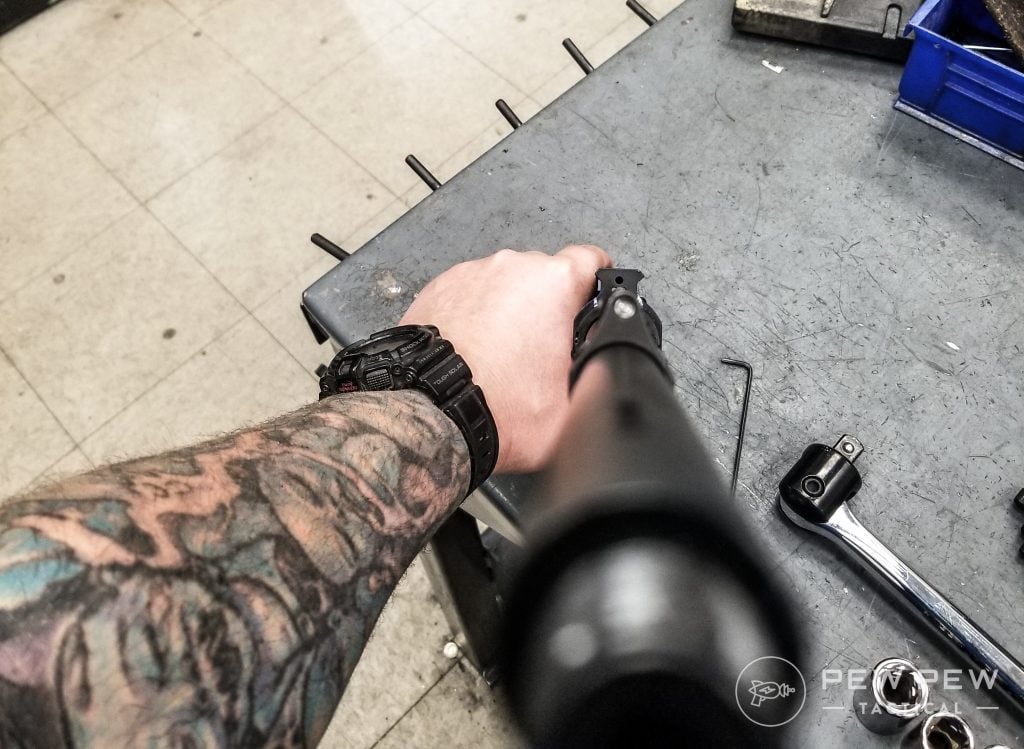
Finally, remove the original barrel nut with an armorer’s wrench.

Then make sure everything is properly cleaned and degreased.

Installing a New Handguard

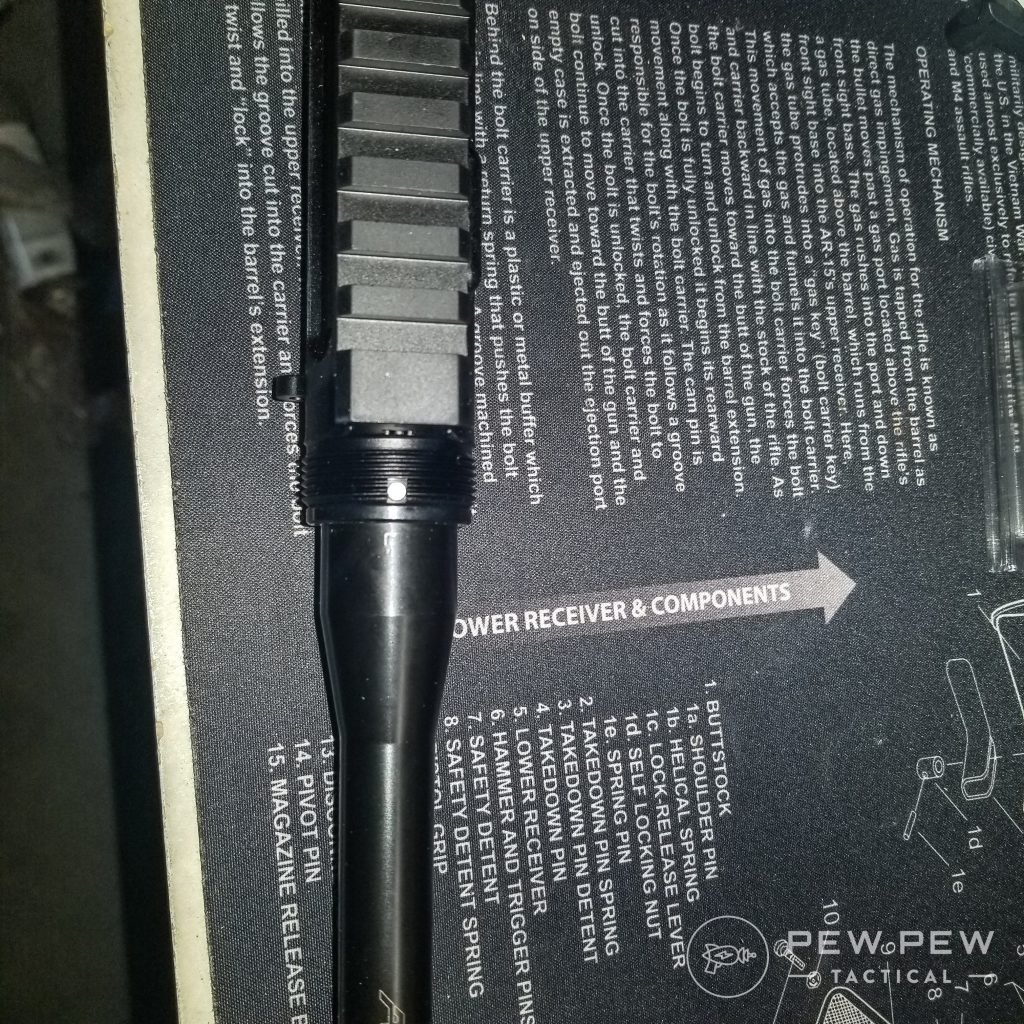
Step 1: Test Fit Barrel

The first steps of an install will be the foundation for success.

So, let’s start off right by test fitting your barrel into the receiver.

This may require some thermal fitting, depending on the brands you use. As such, I wait until after I test fit before degreasing.

Barrel installed
Barrel installed.

If the barrel installs without any heat needed, remove it, and degrease the receiver threads and the barrel nut for your handguard.

I will note that wearing some sort of latex or synthetic gloves will help to prevent more oil from your skin from corrupting your work.

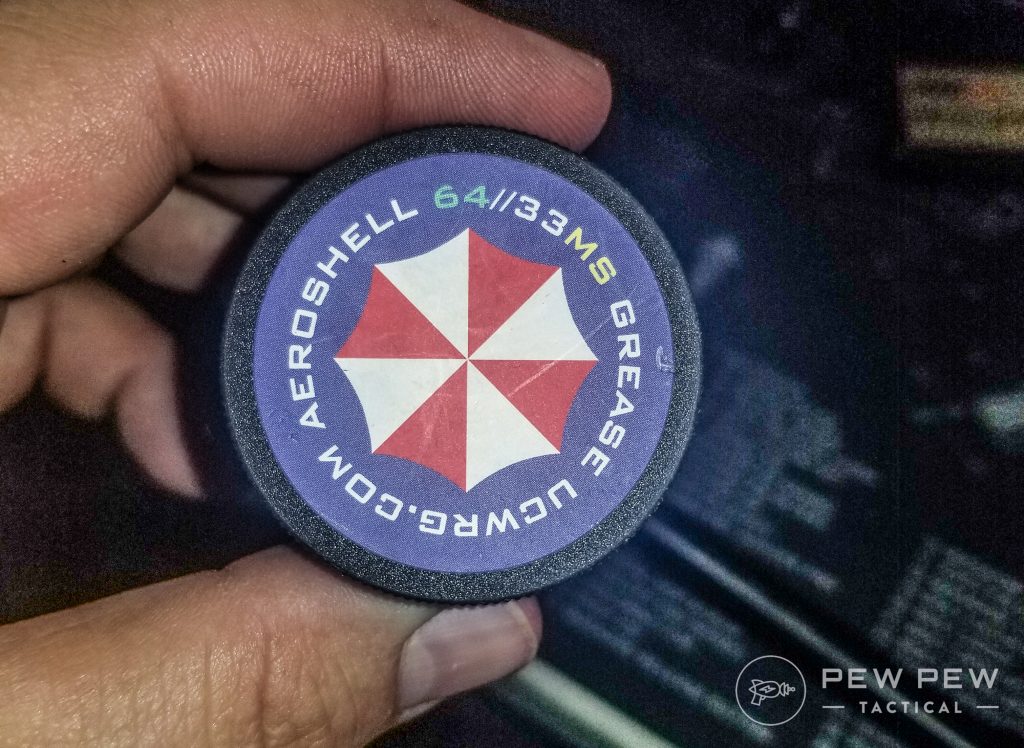
Step 2: Install Barrel & Apply Aeroshell 33MS/Aeroshell 64

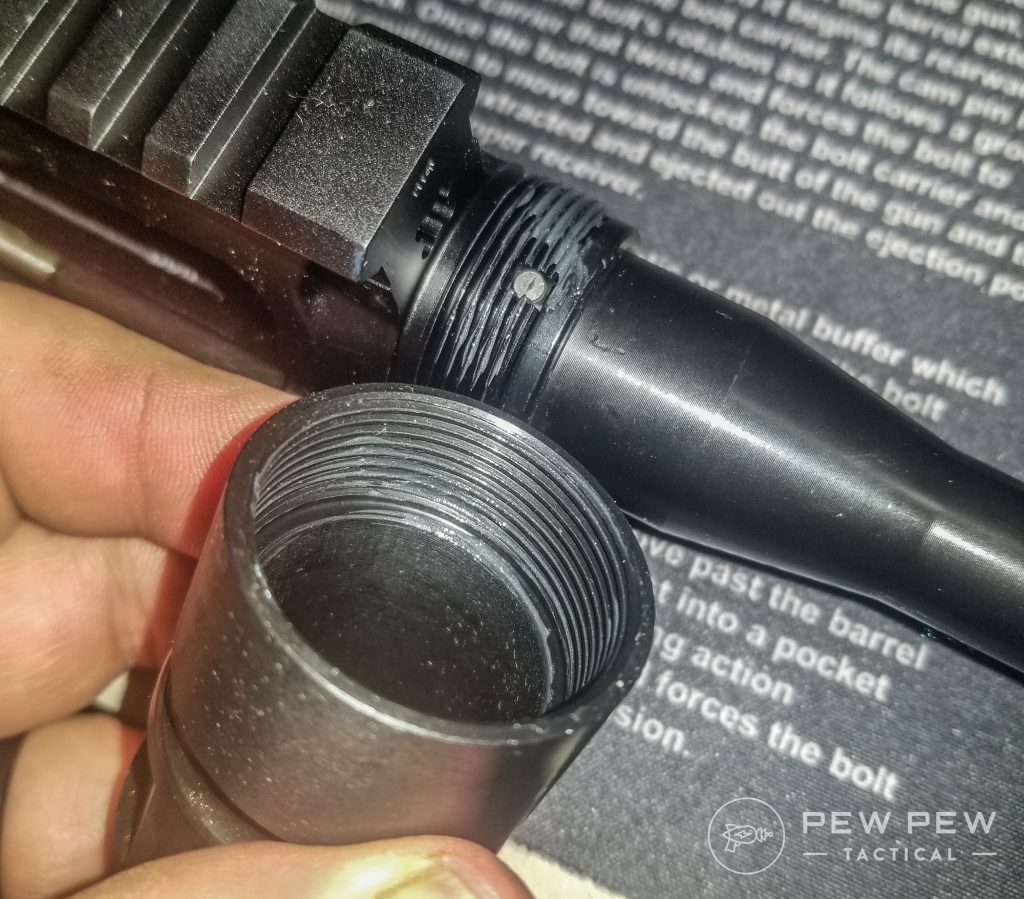
Once the parts are degreased and have dried, install your barrel.

Apply some Aeroshell 33MS/Aeroshell 64 to the receiver threads and the barrel nut threads.

The use of Aeroshell is one detail that is often overlooked.

Aeroshell
Aeroshell

First, the torque values given here are wet values, meaning they need some sort of lubrication to properly achieve those numbers.

Equally as important are fighting galvanic corrosion and making sure the barrel nut doesn’t seize over time.

Galvanic corrosion can occur when two different metals are in contact, and an electrolyte causes one to corrode in preference to the other.

Now, depending on the area of the world you are in, this may not be much of an issue; here in the Nevada desert, it isn’t a huge risk, but I’d rather be safe.

Applying Aeroshell
Applying Aeroshell

One further note: There is a difference between Aeroshell 33MS/Aeroshell 64 and anti-seize, such as that for ball-bearings or Permatex.

Many anti-seize agents contain graphite which is counter-intuitive to what we are trying to do here as graphite can promote galvanic corrosion.

Stick to the proper agent, as Aeroshell is readily available.

9

at Amazon

Prices accurate at time of writing

Prices accurate at time of writing

Step 3: Attach Barrel Nut & Torque Down

After you have properly applied your Aeroshell, the next step is going to be attaching the barrel nut and then torquing it down.

Slide the barrel nut over your barrel and hand tighten it a few turns to get it engaged on the threads.

At this point, I am a huge fan of using the Midwest Industries Upper Receiver Rod for the remainder of the process.

95

at Brownells

Prices accurate at time of writing

Prices accurate at time of writing

With the spine built into the URR, it allows for proper torque without much risk of damaging your barrel index pin or receiver.

Using your armorer’s wrench or a barrel nut wrench that came with your handguard, apply some torque, back it off to loosen, and repeat this a few times to season the threads.

Torquing barrel nut
Torquing barrel nut

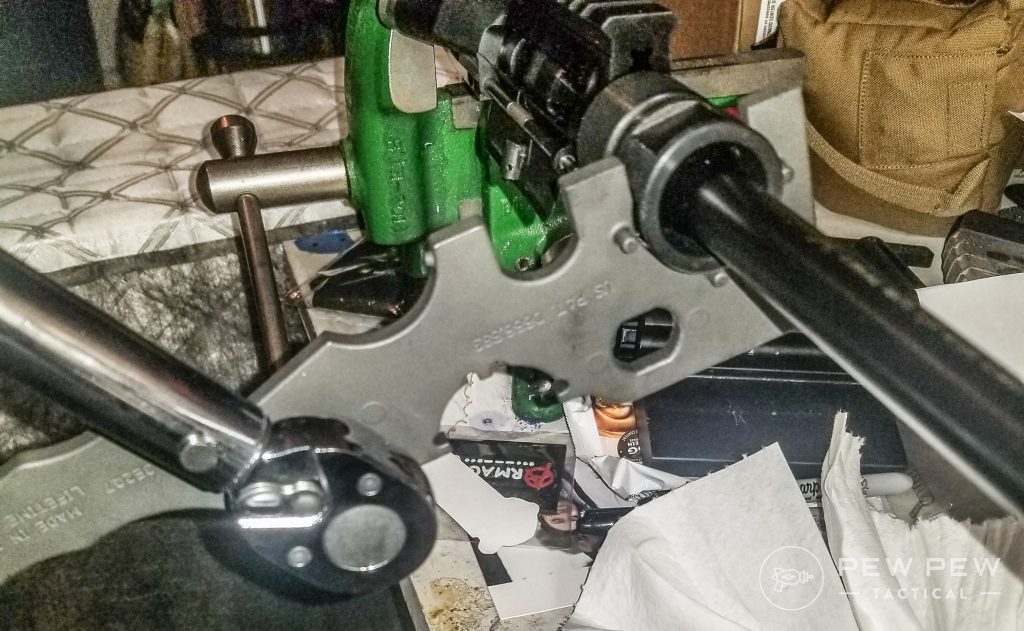
After three to five low torque value tightenings, you will hand tighten the barrel nut.

Using a torque wrench, tighten to your final value. This can range from 30- to 80-foot-pounds of torque depending on the barrel nut.

Pro tip: Read the instructions from the manufacturer on the appropriate torque value.

Step 4: Install Gas Block

With your barrel nut properly greased and torqued, the next step is installing your gas block and then your handguard.

Again, there are some small details here that often get missed. They can make a huge difference in the final product.

Checking gas block alignment
Reinstall your gas block and make sure to check its alignment.

For help installing your gas block, check out our article here.

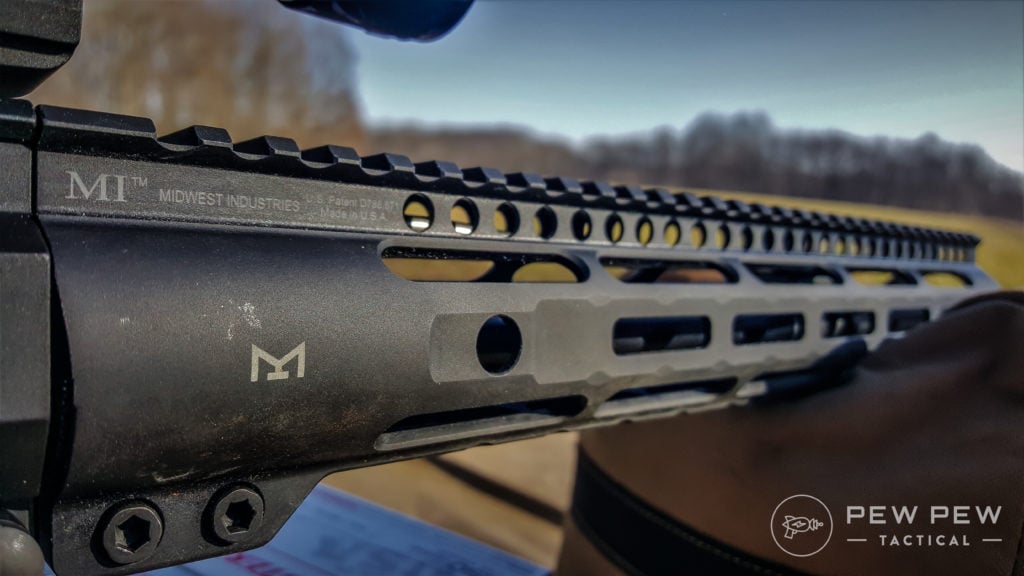
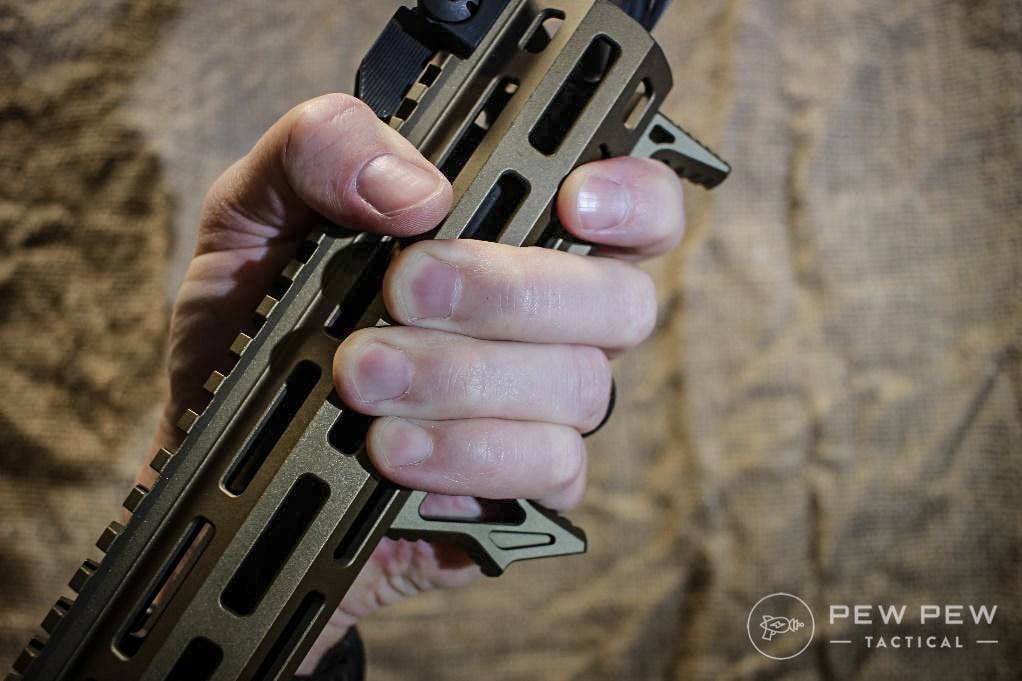
Step 5: Install Handguard

With your gas block properly installed, you’ll slide the handguard over the barrel and gas block, seating it against the receiver.

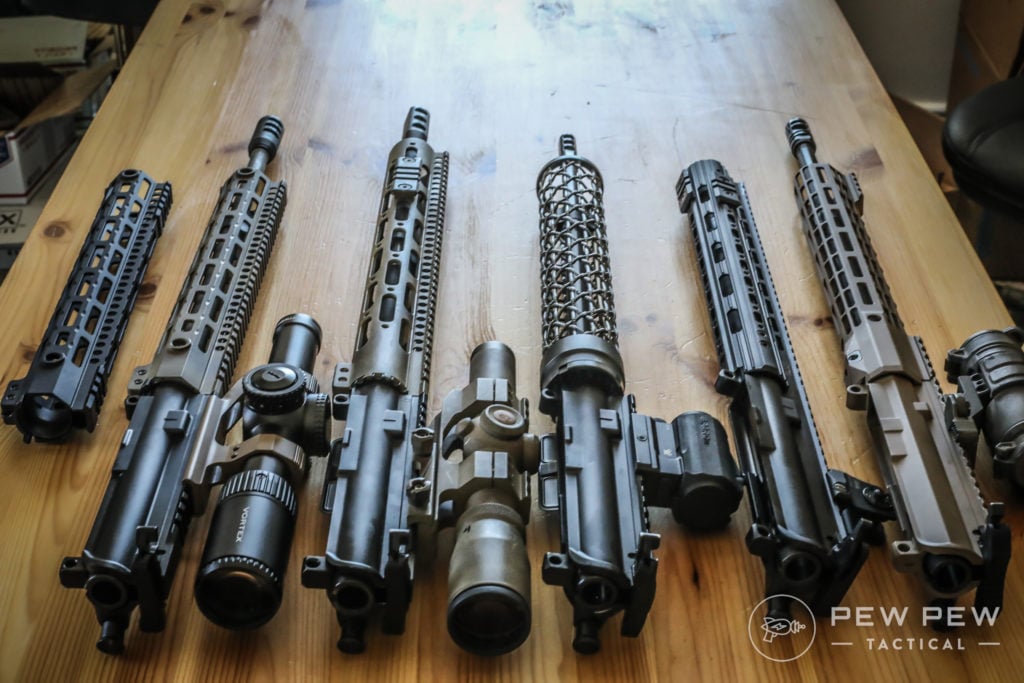
The number of handguards and styles available in the market results in many variables on this next step.

Double-check the alignment of the handguard to the top Picatinny rail of the receiver.

checking top rail alignment
Checking top rail alignment.

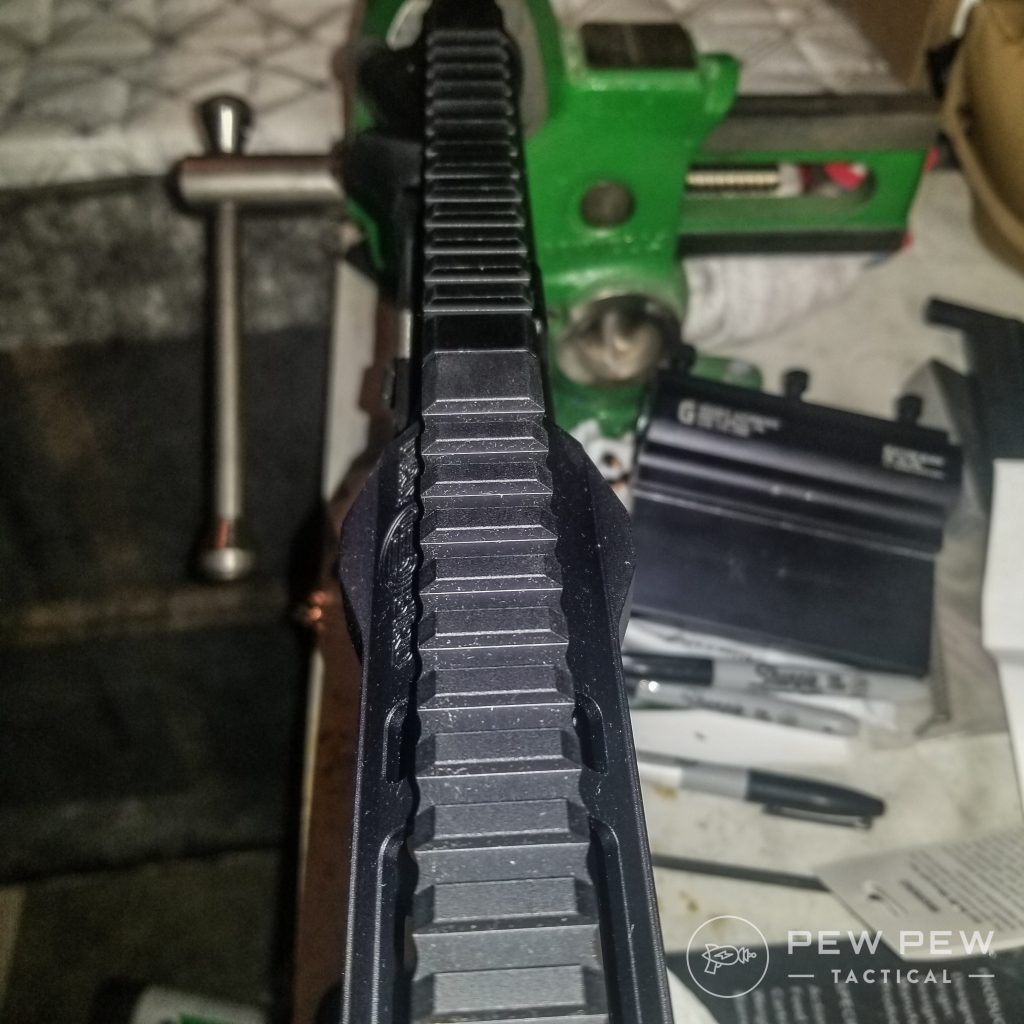
They should line up equally without any change to the angle of the Picatinny rails.

Some handguards use indexing tabs or anti-rotation tabs to keep things aligned. Others use mounting hardware designed to achieve the same result.

Regardless, ensure that the Picatinny rails line up properly before moving on.

Step 6: Secure Handguard

With your handguard indexed properly, so the Picatinny rails line up, you’ll want to secure it with the mounting hardware.

This can vary greatly from one manufacturer to the next but will almost always involve using screws.

Make sure the screws, as well as the screw holes, are properly degreased and dried before moving on.

I will stress one important note for the next step.

Applying blue loctite to mounting screws
Applying blue Loctite to mounting screws.

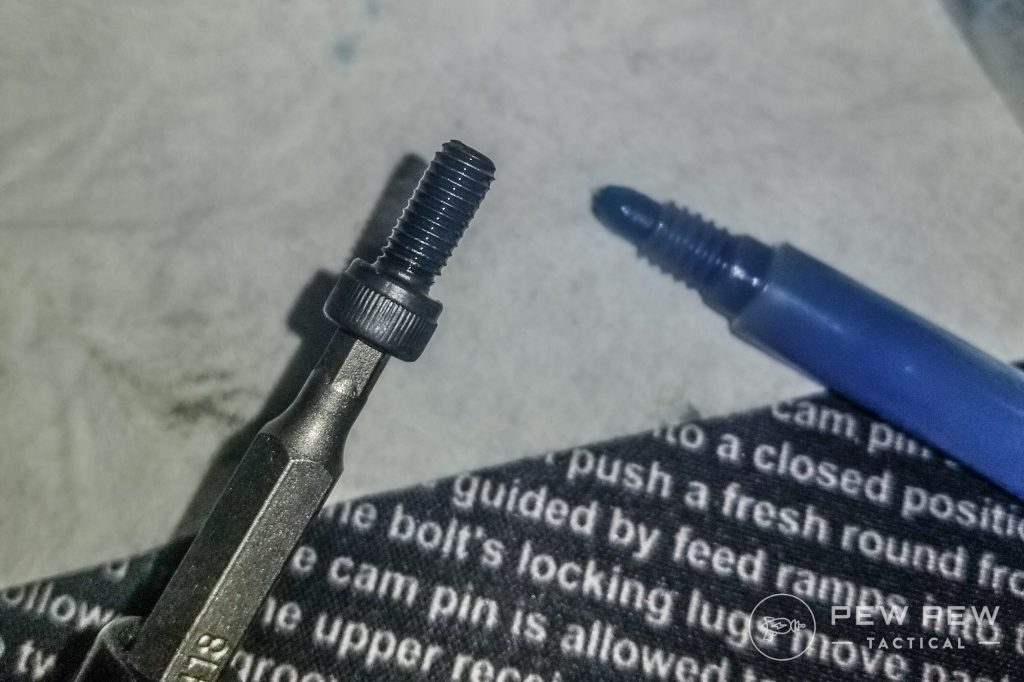
Thread locker has been an issue of some debate lately. For handguard mounting screws, I have always used Loctite Blue 242 with great success.

Others say you should use Loctite Red 271 or Vibratite VC3.

I have not found heat causing screws to loosen on a handguard to be an issue if properly torqued.

If you do see an issue, use the Red 271 and understand that heat will have to be used if you ever need to change things.

5

at Amazon

Prices accurate at time of writing

Prices accurate at time of writing

The only exception to using thread locker that I have come across is installing the Centurion Arms CMR rails — which I highly recommend.

Installation instructions specifically note that the use of thread locker on mounting screws for this rail will void the warranty. So, again, always read manufacturer instructions before you install.

Using an appropriate thread locker on the mounting screws, you’ll want to install them snug but not torqued down in a criss-cross pattern.

As you install the screws, check to make sure the position of the top rails has not shifted and things still line up.

Proper mounting hardware

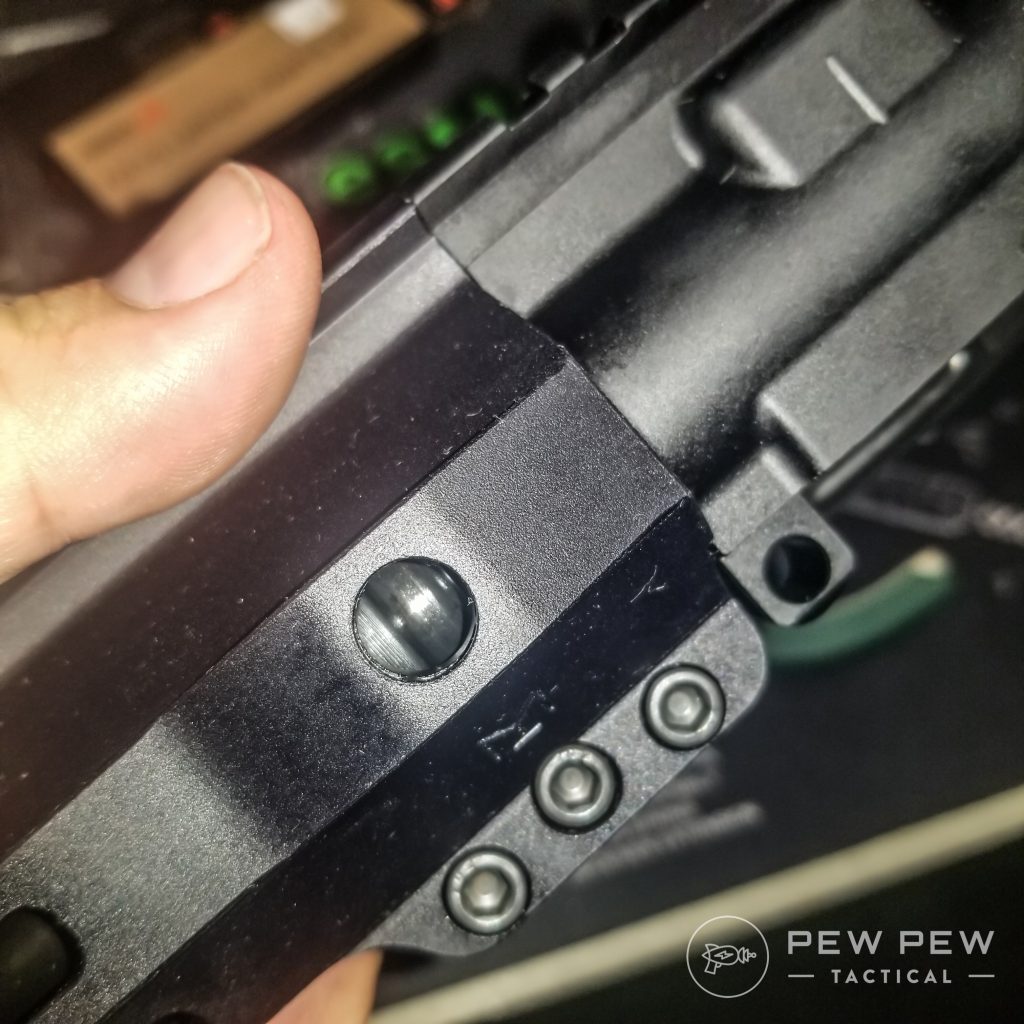
Once all the screws are in and hand snug, you’ll begin the process of torquing them down in the same pattern — still checking the top rail alignment has not shifted. 

The torque value on these screws can vary but usually falls somewhere in the 25- to 45-inch-pounds of torque.

I feel like I’ve said this before, but…read the manufacturer’s installation instructions for proper values.

In some cases — such as the Centurion CMR or the Dirty Bird Industries SMRS — there will not be an alternating pattern to the screws but rather a few on the bottom.

229

at Brownells

Prices accurate at time of writing

Prices accurate at time of writing

So, make sure you know which screws should be tightened down first and to what torque value.

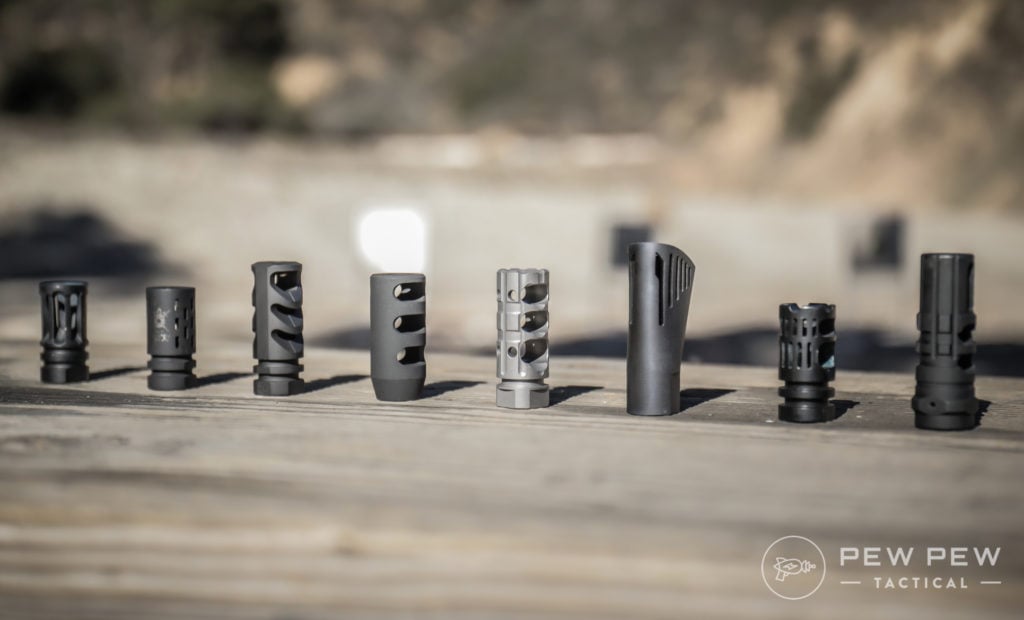
Step 7: Install Muzzle Device & Accessories

With the handguard attached and the mounting hardware torqued down, the only things left are to install the muzzle device and any attachments you desire.

Timing a muzzle device is something that is better suited for another article. But the main point to monitor would be to degrease the barrel thread and muzzle device threads before applying Rocksett. Then torque to manufacturer specifications.

Tested Muzzle Brakes
Needs some recs on the best muzzle brakes? Read our article here!

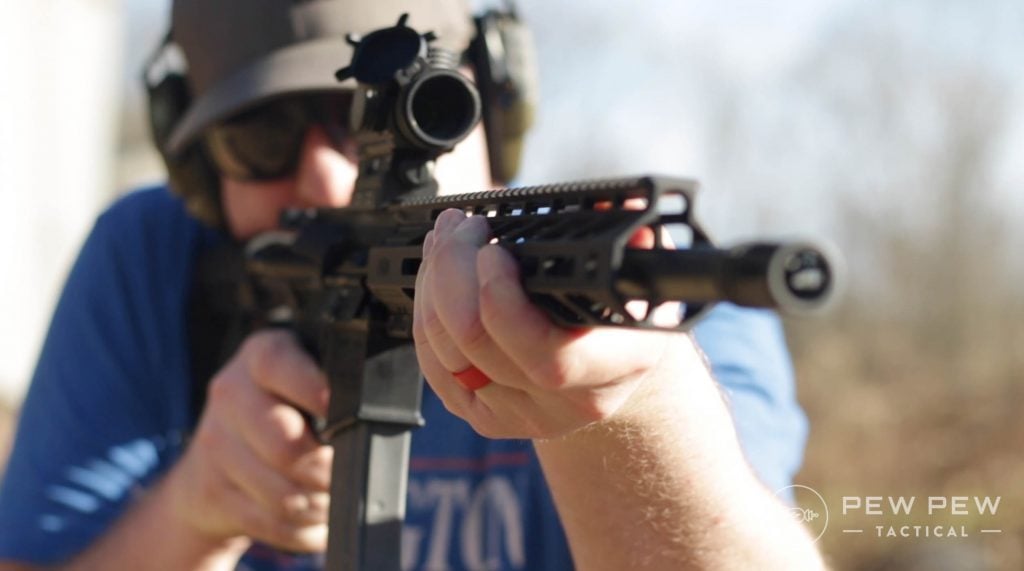
When installing accessories, have a rough idea of where you want things like foregrips, flashlights, and slight attachment points to go.

Planning out locations before you start installing things ensures they don’t interfere with components under the rail.

I’m here to tell you that size does matter in some cases. People frequently try to install foregrips but end up hitting the gas block with mounting screws.

Sometimes small location changes are required.

Strike Industries LINK Curved Foregrip (2)
Strike Industries Curved Foregrip.

After your components are attached, and thread locker has cured, you are done!

All that’s left to do is toss the lower receiver and upper receiver back together.

Conclusion

Installing a handguard doesn’t have to be a scary process. Using the steps above, you can easily add a handguard to your AR build.

Faxon Firearms Ascent AR-15
Have fun!

Good luck and have fun with your AR build!

As always, feel free to drop questions in the comments sections. Need handguard recommendations? Head over to the Best AR-15 Handguards and for more on AR builds, check out our list of the Best Upgrades to outfit your AR build!

The post [How-To] Install a Handguard on an AR-15 appeared first on Pew Pew Tactical.

Pew Pew Tactical

Laravel Livewire Tables 1.0

https://rappasoft.com/storage/43/pYZpwfeu0xjvRpT6wjCdbVUhyA5D53-metaTGFyYXZlbCBMaXZld2lyZSBUYWJsZXMgLSBJbWd1ciAoMSkucG5n-.png

I finally finished a 1.0 version of my Laravel Livewire Tables plugin.

This version was a ground up rebuild with a bunch of new features + Tailwind CSS support, multi column sorting, definable filters, bulk actions, and more.

Here are some screenshots of the Tailwind UI (Bootstrap is nearly identical):

So please check it out and give it a try! Feel free to submit PR’s or feature requests.

Laravel News Links

Deploy using Laravel Forge

https://lorisleiva.com/img/asset/YXNzZXRzL2FydGljbGVzLzIwMjEvMDQxMC1kZXBsb3llci02LWZvcmdlL2NvdmVyLmpwZw==?p=seo_pro_og&s=dd07398c08755b1efd87ccf2ae3576d9

In this series, we’ve seen how to deploy a Laravel application from scratch by creating our server manually. Whilst it’s good to know how to do it ourselves to understand the mechanics of our server, it can be a pain to maintain in the long run.

That’s why SaaS applications such as Laravel Forge and Ploi exist. They provide an abstraction layer between you and your server by automating its provisioning, its maintenance and by allowing you to configure it directly inside a user interface.

This article focuses on creating a server using Laravel Forge and deploying to it using Deployer. The next one will focus on Ploi.

Preparations

Before we start, I’m going to assume you already have a Laravel Forge account and that you’ve configured it appropriately.

If you’re going to follow along, make sure the following points are configured.

  • Add a Digital Ocean provider by generating an API key first. We’ll use Digital Ocean again here to create our server but feel free to choose any of the alternative providers.
  • Add your SSH key to your account. This will ensure your key is automatically added to every server created. Alternatively, make sure you add it to your server configurations after creating it.
  • Add a Git provider to your account. Even though we’ll be deploying using Deployer that already knows your repository URL, we’ll need to provide our repository when creating a site in order to unlock part of the UI.

All of these configurations can be found on your account page on Laravel Forge.

Screenshot of the "Account" page on Forge

Create your server on Forge

Alright, let’s get started. We’ll create a new server directly on the Laravel Forge interface.

Select the server provider of your choice — in our case, we’ll use Digital Ocean — select your credentials, select the “App Server” type and fill the rest of the form however you like.

Screenshot of the page to create a new server on Laravel Forge.

Notice how you can select the PHP version of your choice before creating the server. Additionally, you’ll be able to upgrade or downgrade PHP versions later on with only one click. That’s much easier than having to do it ourselves as we did in the second episode of this series.

Don’t forget to provide a database name and — when you’re done — click “Create Server”.

As soon as you do, you’ll receive two important passwords that you’ll see only once so make sure to save them in an app like 1Password or something.

Screenshot of the "Server Credentials" modal on Laravel Forge providing us with our "Sudo Password" and our "Database Password".

  • The first one is the password you’ll be asked to enter whenever you enter a sudo command on your server.
  • The second one is the database password of the forge user. We’ll need this to access our production database later on.

When they’re all saved, click “Close” and you should see your server listed below with the badge “Provisioning”. This means your server is being created on Digital Ocean and Laravel Forge is running a bunch of scripts on it to install everything we need for our Laravel applications.

If you click on your server you should see a detailed list of what it’s doing and what’s left to do before your server is ready.

Screenshot the server's page on Laravel Forge whilst it is provisioning. It shows a long list of tasks that are either "Finished", "Running" or "Pending".

Now this may take a little while so, whilst we’re waiting, let’s point our domain name to our new server.

Configure your domain

As we’ve seen in episode 2, we need to add a record in our DNS configurations for our domain name to point to the IP address of our server.

In this tutorial, we’ve already assigned jollygood.app to the server we manually created in episode 2. Thus, I am going to use the subdomain forge.jollygood.app to point to our new server created by Forge. Of course, feel free to use any domains and/or subdomains for your new server.

Screenshot of the Digital Ocean "Domains" page. It shows a new record being created with the "forge" subdomain, pointing to the new server we created directly on Forge.

Once that’s done, it may take a few minutes or even hours for the changes to be live so it’s better to do this as soon as we’ve got the IP address of our server.

With any luck, the DNS changes should be live by the time the server has finished being configured on Laravel Forge.

Add a site to your server

Once our server has been successfully provisioned, we should be able to add sites to it.

First, we enter the domain of our application that matches the DNS record we’ve just created on Digital Ocean — in our case forge.jollygood.app. If we added more than one DNS records, feel free to add the others inside “Aliases”.

Next — and that’s important — replace the “Web Directory” field with /current/public. This is because, as we’ve seen in episode 4, when deploying with Deployer, a subfolder named current will be created pointing to the latest stable release. This will ensure our Nginx configuration points to the right directory.

Finally, I’m not going to tick “Create Database” since we’ve already created one when creating our server. However, if this is the second site you create on the same server, you might want to tick it so your second database is ready for you.

Screenshot of the page to create a new site inside a server on Laravel Forge. The field "Web Directory" is highlighted and contains "/current/public/".

After clicking on “Add Site”, you should be able to see your new site listed below. If you click on it, you should see the following page.

Screenshot of the site page after creating it on Laravel Forge. It shows three big buttons: "Git Repository", "WordPress" and "phpMyAdmin". The "Git Repository" button is highlighted.

Laravel Forge is asking us to provide a Git repository so it can clone it inside the server for us.

Technically, we’ve got no need for that since we’ll be deploying using Deployer who already knows our repository URL. However, if we don’t, the user interface for our new site will be locked in this state which is not very helpful to maintain it.

Thus, we’re going to play the game and add our Git repository even though we’ll re-deploy using Deployer in a minute.

Choose the Git provider of your choice and enter your repository details. There’s also no need to tick “Install Composer Dependencies” since we’re going to re-deploy in a minute.

Screenshot of the site page after selecting "Git Repository" on Laravel Forge.

Next, there’s a little adjustment we need to make to our Nginx configuration file. If you remember, in episode 2, we mentioned that the SCRIPT_FILENAME and DOCUMENT_ROOT FastCGI parameters had to be overridden to use the real absolute path to avoid symlink paths being incorrectly cached. Since Laravel Forge does not expect us to use Deployer by default, its Nginx configuration does not account for that. But that’s fine we can update this directly inside the UI.

At the very bottom of your site’s page, click on “Files” then “Edit Nginx Configuration” and add the following lines after include fastcgi_params.

fastcgi_param SCRIPT_FILENAME $realpath_root$fastcgi_script_name;
fastcgi_param DOCUMENT_ROOT $realpath_root;

Screenshot of the "Edit Nginx Configuration" modal on Laravel Forge.

After that, make sure to restart Nginx to apply your changes.

Screenshot showing where the "Restart Nginx" button is on Laravel Forge. At the very end of your server page, click on the "Restart" button which will open a dropdown containing the "Restart Nginx" button.

If you’re planning on using Deployer for a lot of sites in the future, you may also create a new Nginx template that will be used instead of the default one. To do that, go to your server’s page, click on “Nginx Templates” on the sidebar and create a new template by adding the two lines above.

Screenshot of the "Create Nginx Template" page on Laravel Forge.

Finally, let’s make sure our domain is available via HTTPS. Laravel Forge makes this super easy for us. On your site’s page, click on “SSL” on the sidebar and select “LetsEncrypt”.

Then make sure you enter the right domains and click “Obtain Certificate”. And that’s it.

Screenshot of the "New Certificate" page on Laravel Forge. The "LetsEncrypt" button is highlighted.

A Laravel Forge friendly deploy.yaml

Okay, now that our server and our site are ready, let’s make sure we can deploy using Deployer.

For this article, I will use the same configuration file we ended up with after episode 4. However, I’m going to update the host configurations slightly so it works with Laravel Forge.

  • By default, we can access servers created on Laravel Forge using the forge user so we’ll use this as remote_user.
  • Then, we’ll use forge.jollygood.app as the hostname since we’ve created a DNS record that points to the IP address of our server.
  • Finally, Laravel Forge installs our sites in the home directory of the forge user and uses the site’s domain to name the site’s folder. So we’ll use the same convention here and deploy to /home/forge/forge.jollygood.app which can be simplified to ~/.

Additionally, we need to make sure the php_fpm_version matches the PHP version of our server.

Thus, we end up with the following deploy.yaml file.

import:
  - recipe/laravel.php
  - contrib/php-fpm.php
  - contrib/npm.php

config:
  application: 'blog-jollygood'
  repository: '[email protected]:lorisleiva/blog-jollygood.git'
  php_fpm_version: '8.0'

hosts:
  prod:
    remote_user: forge
    hostname: 'forge.jollygood.app'
    deploy_path: '~/'

tasks:
  deploy:
    - deploy:prepare
    - deploy:vendors
    - artisan:storage:link
    - artisan:view:cache
    - artisan:config:cache
    - artisan:migrate
    - npm:install
    - npm:run:prod
    - deploy:publish
    - php-fpm:reload
  npm:run:prod:
    script:
      - 'cd && npm run prod'

after:
  deploy:failed: deploy:unlock

Deploy once

Okay now we should be ready to deploy but before we do let’s delete the folder generated by Laravel Forge when we created our site.

Deployer will be generating a different folder structure with a releases folder and a current symlink. If we don’t delete the existing folder, we’ll end up with a strange fusion of Deployer and a traditional deployment.

Let’s SSH into our server by running dep ssh, then go to the home directory ~ and run rm -rf forge.jollygood.app or whatever your domain is.

Screenshot of the terminal output of "dep ssh", "ls", "rm -rf forge.jollygood.app", "ls".

Alright, now we’re finally ready to deploy. Simply exit the server and run dep deploy. You should see the following familiar console output.

Screenshot of the terminal output of "dep deploy". All tasks ran successfully except for the "artisan:migrate" task showing the warning: "Your .env file is empty! Skipping...".

If you remember, the artisan:migrate did not run because our .env file has been generated in Deployer’s shared folder but it is empty. So let’s fix this.

First, we’ll copy the .env.example file and generate an application key randomly.

# SSH into your server.
dep ssh

# Prepare the .env file.
cp .env.example .env
php artisan key:generate

# Exit your server.
exit

Now, if you remember, in episode 4, we had to edit our .env file directly inside our server using vim.

We can still do that, but Laravel Forge provides a nice interface for us to update our .env directly from their application. Simply go to our site’s page and click on “Environment” on the sidebar. Make sure to update your production variables appropriately and use the database password provided earlier when creating the server.

Screenshot of the "Environment" page on Laravel Forge.

Deploy twice

Now that our production environment is ready, let’s deploy a second time to ensure our database is migrated. Simply run dep deploy and with any luck, you should see the following output.

Screenshot of the terminal output of "dep deploy". This time, all tasks ran successfully.

And that’s it! You should now be able to see your application live if you visit its URL. 🥳

Screenshot of a browser visiting the page at forge.jollygood.app. It shows the boilerplate of a newly created Laravel application.

Update env variables

Okay, we’ve successfully deployed our application using Laravel Forge and Deployer but there are still a few points I’d like to mention.

The first point is that, once your application is deployed, you’ll likely want to update some environment variables from time to time

Since Laravel Forge has a dedicated page to do so, it can be easy to forget that our configuration files are cached — due to the artisan:config:cache task we added to our deployment flow.

That means, whenever you update your .env file, the changes won’t be live until the next deployment.

That being said, if you want to regenerate the configuration cache without having to redeploy the application, you may do that by running php artisan config:cache on your server.

A nice touch from Laravel Forge is that it allows you to run such commands directly from the UI. On your site’s page, click on “Commands” on the sidebar and enter your command right here.

However, since it will run your command in the parent directory of the current release, make sure to enter php current/artisan config:cache so it runs in the right directory.

Screenshot of the "Commands" page on Laravel Forge. It shows a "Command" field containing the following value: "php current/artisan config:cache".

Delete the default server

The second point is that Laravel Forge generates a “default” site for every new server created. That site does not have a domain associated with it but is accessible if you enter the IP address of your server in your navigator.

This is nice for making sure your server is up and running after creating it but not very secure in the long run so it is recommended to delete it once your real sites are ready.

You may do this directly in the interface by clicking on “Delete Site” at the bottom of the “default” page.

Screenshot of the "default" site page on Laravel Forge. The "Delete Site" button at the end of the page is highlighted.

Bonus: Deploy via the deploy script

Finally, my last point is optional but can be useful if you’d like to trigger a Deployer deployment directly from the Laravel Forge interface.

You might think that all you need to do for it to work is to add dep deploy inside your Laravel Forge deploy script and be done with it.

Unfortunately, it’s not that simple. When running dep deploy from our local machine, it works by connecting via SSH to all our hosts.

Therefore, whoever ends up running dep deploy needs to be able to access all hosts configured inside our deploy.yaml file via SSH.

That means, if we add this to our Laravel Forge deploy script, our server suddenly needs to access itself via SSH and any other server we might have.

I wouldn’t recommend doing this if you have more than one server configured in your deploy.yaml file since it becomes a messy deployment process where each server has to know about each other. However, if you’ve got only one server and like the convenience of deploying at the click of a button, then that could be useful. Thus, from now on, I’m going to assume we’ve only got one server to deploy to.

Alright, things are going to get a bit weird so bear with me.

The first thing to do for the server to connect via SSH to itself is to add the server’s SSH key to its own list of trusted SSH keys.

So, connect to your server — dep ssh — and copy its public key — cat ~/.ssh/id_rsa.pub.

Screenshot of the terminal output for "dep ssh" and "cat ~/.ssh/id_rsa.pub".

Then, on the Laravel Forge interface, paste that public key to the server’s trusted SSH keys. I usually call it “Self”.

Screenshot of the "SSH Keys" page on Laravel Forge. It shows a form to add a new key where the name is "Self", the user is "forge" and the public key is what was copied from the previous command.

Now, if we try to run dep deploy inside the server it still won’t work because the hostname has not yet been added to the server’s trusted hosts.

The simplest way to do this is to manually run dep ssh inside the server so we can say “yes” to the question “Do you trust this host?”. Concretely, that’s how we do it:

  • Run dep ssh once to connect to your server from your local machine. You should end up in your current release.
  • Run vendor/bin/dep ssh again to connect to your server from your server. Inception much.
  • Say yes to add the hostname to the server’s trusted hosts.

Screenshot of the terminal output for "dep ssh" followed by "vendor/bin/dep ssh".

Don’t forget to double exit your server now.

Screenshot of the terminal output for "exit" and "exit" again.

Okay, now we can edit our deploy script so that it immediately delegates to Deployer via dep deploy.

A few notes though.

  • First, make sure you update the cd line to point to the current release.
  • Next, use vendor/bin/dep instead of dep since Laravel Forge doesn’t add ./vendor/bin into our PATH variable for us.
  • Finally, manually provide the branch you’d like to deploy using -o branch=my-branch. This is because deployed releases don’t have git initialised inside them. Instead, Deployer uses a cached repository inside the .dep folder. That means Deployer cannot guess the branch we want to deploy so we have to provide it explicitly.

You should end up with the following deploy script.

cd /home/forge/forge.jollygood.app/current
vendor/bin/dep deploy -o branch=main

Screenshot of the site page with the updated Deploy Script.

And now, finally, if we click “Deploy Now” you should see the following deployment log indicating that we’ve successfully deployed using Deployer.

Screenshot of the "Deployment Log" modal showing a successful Deployer deployment.

Conclusion

Alright, I hope this article was useful for Laravel Forge users and also for those who are looking for a solution to help them create and maintain servers.

If that bonus section above felt a bit overkill just to deploy using a button, I can understand. Feel free to discard it if you’re not comfortable with it but hopefully it thought you something new that you can do with Laravel Forge and Deployer.

As usual, you can find the deploy.yaml file updated for this episode on GitHub by click on the link below.

See deploy.yaml on GitHub

As an alternative to Laravel Forge, you might also want to consider Ploi which I will talk about in the next episode.

I have no personal preference between the two and so I’m actually a customer of both because I’m a very indecisive person. 😅 Hopefully, these two articles will help you decide on which one suits you best.

After these two episodes about Laravel Forge and Ploi, I will provide a complete checklist of this entire series as a gift for my wholesome sponsors. This will be the perfect article to come back to when you’re ready to get your hands dirty and want a quick list of things to do to deploy your Laravel app from scratch.

Laravel News Links

Deploy using Ploi

https://lorisleiva.com/img/asset/YXNzZXRzL2FydGljbGVzLzIwMjEvMDQxMC1kZXBsb3llci03LXBsb2kvY292ZXIuanBn?p=seo_pro_og&s=e52fb81562c9b7c58b70fe9e1a55d0be

In this series, we’ve seen how to deploy a Laravel application from scratch by creating our server manually. Whilst it’s good to know how to do it ourselves to understand the mechanics of our server, it can be a pain to maintain in the long run.

That’s why SaaS applications such as Laravel Forge and Ploi exist. They provide an abstraction layer between you and your server by automating its provisioning, its maintenance and by allowing you to configure it directly inside a user interface.

This article focuses on creating a server using Ploi and deploying to it using Deployer. The previous one focused on Laravel Forge.

Preparations

Before we start, I’m going to assume you already have a Ploi account and that you’ve configured it appropriately.

If you’re going to follow along, make sure the following points are configured.

  • Add a Digital Ocean provider by generating an API key first. We’ll use Digital Ocean again here to create our server but feel free to choose any of the alternative providers.
  • Add your SSH key to your account. This will ensure your key is automatically added to every server created. Alternatively, make sure you add it to your server configurations after creating it.
  • Add a Git provider to your account. Even though we’ll be deploying using Deployer that already knows your repository URL, we’ll need to provide our repository when creating a site in order to unlock part of the UI.

All of these configurations can be found on your profile pages on Ploi.

Screenshot of the "Profile" page on Ploi

Create your server on Ploi

Alright, let’s get started. We’ll create a new server directly on the Ploi interface.

Select the server provider of your choice — in our case, we’ll use Digital Ocean.

Screenshot of the first section called "Select provider" on the page to create a new server on Ploi.

Then, select your credentials, select “Server” as a “Server type” and fill the rest of the form however you like.

Screenshot of the second section called "Details" on the page to create a new server on Ploi.

Notice how you can select the PHP version of your choice before creating the server. Additionally, you’ll be able to upgrade or downgrade PHP versions later on with only one click. That’s much easier than having to do it ourselves as we did in the second episode of this series.

When you’re done, click “Create server” and you should see a “Server installation” page showing you the progress in percents. This means your server is being created on Digital Ocean and Ploi is running a bunch of scripts on it to install everything we need for our Laravel applications.

Screenshot the server's page on Ploi whilst it is provisioning.

Now this may take a little while so, whilst we’re waiting, let’s point our domain name to our new server.

Configure your domain

As we’ve seen in episode 2, we need to add a record in our DNS configurations for our domain name to point to the IP address of our server.

In this tutorial, we’ve already assigned jollygood.app to the server we manually created in episode 2. Thus, I am going to use the subdomain ploi.jollygood.app to point to our new server created by Ploi. Of course, feel free to use any domains and/or subdomains for your new server.

Screenshot of the Digital Ocean "Domains" page. It shows a new record being created with the "ploi" subdomain, pointing to the new server we created directly on Ploi.

Once that’s done, it may take a few minutes or even hours for the changes to be live so it’s better to do this as soon as we’ve got the IP address of our server. Whilst Ploi will not tell you the IP address of your server until it is fully configured, you should be able to see it fairly quickly on Digital Ocean.

With any luck, the DNS changes should be live by the time the server has finished being configured on Ploi.

Finish configuring your server

As soon as the server has been successfully installed and configured, you should receive an email from Ploi with important and confidential credentials.

Screenshot of the email sent by Ploi after provisioning a server. It contains the following data: "Server IP", "User", "Sudo password", "Database user" and "Database password".

  • The first one is the password you’ll be asked to enter whenever you enter a sudo command on your server.
  • The second one is the database password of the ploi user. We’ll need this to access our production database later on.

Speaking of databases, we’ll need one for our application, so let’s create one right now. On your server page, click on “Databases” on the sidebar and create a new database. We’ll call ours jollygood for this article.

Screenshot of the "Databases" page on Ploi. It shows a "New database" form where only the field "Name" has been filled with "jollygood". The other optional fields "User", "Password" and "Description" are empty.

Add a site to your server

Now that our server has been successfully configured, let’s add a site to it by going on the “Sites” page accessible via the sidebar.

First, click on “Advanced settings” to have access to all fields.

Then, enter the domain of your application that matches the DNS record created on Digital Ocean — in our case ploi.jollygood.app.

Finally — and that’s important — replace the “Web directory” and “Project directory” fields with /current/public and /current respectively. This is because, as we’ve seen in episode 4, when deploying with Deployer, a subfolder named current will be created pointing to the latest stable release. This will ensure Ploi knows where to run commands in our application and update the Nginx configuration accordingly.

Screenshot of the page to create a new site inside a server on Ploi. The fields "Web directory" and "Project directory" are highlighted and contain "/current/public/" and  "/current" respectively.

After clicking on “Add site”, you should see the following page.

Screenshot of the site page after creating it on Ploi. It shows four big buttons: "Install repository", "Install WordPress", "Install OctoberCMS" and "Install Nextcloud".

If we ignore the “1-click installation” options, Ploi is asking us to provide a Git repository so it can clone it inside the server for us.

Technically, we’ve got no need for that since we’ll be deploying using Deployer who already knows our repository URL. However, if we don’t, the user interface for our new site will be locked in this state which is not very helpful to maintain it.

Thus, we’re going to play the game and add our Git repository even though we’ll re-deploy using Deployer in a minute.

Choose the Git provider of your choice and select your repository. There’s no need to tick “Install composer dependencies” since we’re going to re-deploy in a minute.

Screenshot of the site page after selecting "Git Repository" on Ploi.

Next, there’s a little adjustment we need to make to our Nginx configuration file. If you remember, in episode 2, we mentioned that the SCRIPT_FILENAME and DOCUMENT_ROOT FastCGI parameters had to be overridden to use the real absolute path to avoid symlink paths being incorrectly cached. Since Ploi does not expect us to use Deployer by default, its Nginx configuration does not account for that. But that’s fine we can update this directly inside the UI.

On your site’s page, click on “Manage” from the sidebar. From there, you’ll have a bunch of buttons to manage your site including “Edit NGINX configuration”. Click on that button to open a modal allowing you to edit your Nginx config file.

Then, add the following lines after include fastcgi_params and remove the line before it since we’re already overriding it.

- fastcgi_param SCRIPT_FILENAME $document_root$fastcgi_script_name;
  include fastcgi_params;
+ fastcgi_param SCRIPT_FILENAME $realpath_root$fastcgi_script_name;
+ fastcgi_param DOCUMENT_ROOT $realpath_root;

Screenshot of the "Edit NGINX configuration" modal on Ploi.

After that, make sure to restart Nginx to apply your changes. Go to your server’s page, click on “Manage” on the sidebar and click on the “Restart NGINX” button.

Screenshot of the "Server > Manage" page with the "Restart NGINX" button hightlighted.

If you’re planning on using Deployer for a lot of sites in the future, you may also create a new Nginx template that will be used instead of the default one. To do that, go to your profile’s page, click on “Webserver templates” on the sidebar and create a new template by adding the two lines above and removing the overridden line.

Screenshot of the "Create webserver template" page on Ploi.

Finally, let’s make sure our domain is available via HTTPS. Ploi makes this super easy for us. On your site’s page, click on “SSL” on the sidebar and select “LetsEncrypt”.

Then make sure you enter the right domains and click “Add certificate”. And that’s it.

Screenshot of the "Site > SSL" page on Ploi. "LetsEncrypt" is selected and the domain field contains "ploi.jollygood.app".

A Ploi friendly deploy.yaml

Okay, now that our server and our site are ready, let’s make sure we can deploy using Deployer.

For this article, I will use the same configuration file we ended up with after episode 4. However, I’m going to update the host configurations slightly so it works with Ploi.

  • By default, we can access servers created on Ploi using the ploi user so we’ll use this as remote_user.
  • Then, we’ll use ploi.jollygood.app as the hostname since we’ve created a DNS record that points to the IP address of our server.
  • Finally, Ploi installs our sites in the home directory of the ploi user and uses the site’s domain to name the site’s folder. So we’ll use the same convention here and deploy to /home/ploi/ploi.jollygood.app which can be simplified to ~/.

Additionally, we need to make sure the php_fpm_version matches the PHP version of our server.

Thus, we end up with the following deploy.yaml file.

import:
  - recipe/laravel.php
  - contrib/php-fpm.php
  - contrib/npm.php

config:
  application: 'blog-jollygood'
  repository: '[email protected]:lorisleiva/blog-jollygood.git'
  php_fpm_version: '8.0'

hosts:
  prod:
    remote_user: ploi
    hostname: 'ploi.jollygood.app'
    deploy_path: '~/'

tasks:
  deploy:
    - deploy:prepare
    - deploy:vendors
    - artisan:storage:link
    - artisan:view:cache
    - artisan:config:cache
    - artisan:migrate
    - npm:install
    - npm:run:prod
    - deploy:publish
    - php-fpm:reload
  npm:run:prod:
    script:
      - 'cd && npm run prod'

after:
  deploy:failed: deploy:unlock

Deploy once

Okay now we should be ready to deploy but before we do let’s delete the folder generated by Ploi when we created our site.

Deployer will be generating a different folder structure with a releases folder and a current symlink. If we don’t delete the existing folder, we’ll end up with a strange fusion of Deployer and a traditional deployment.

Let’s SSH into our server by running dep ssh, then go to the home directory ~ and run rm -rf ploi.jollygood.app or whatever your domain is.

Screenshot of the terminal output of "dep ssh", "ls", "rm -rf ploi.jollygood.app", "ls".

Whilst we’re in our server, there’s something extra we should install that was not provided by Ploi out-of-the-box. By default, Deployer uses the acl library to manage permissions which has to be installed on the server. Thus, we need to run the following command on our server to install it. Make sure to provide the sudo password received by email when the server was created.

sudo apt install acl

Alright, now we’re finally ready to deploy. Simply exit the server and run dep deploy. You should see the following familiar console output.

Screenshot of the terminal output of "dep deploy". All tasks ran successfully except for the "artisan:migrate" task showing the warning: "Your .env file is empty! Skipping...".

If you remember, the artisan:migrate did not run because our .env file has been generated in Deployer’s shared folder but it is empty. So let’s fix this.

First, we’ll copy the .env.example file and generate an application key randomly.

# SSH into your server.
dep ssh

# Prepare the .env file.
cp .env.example .env
php artisan key:generate

# Exit your server.
exit

Now, if you remember, in episode 4, we had to edit our .env file directly inside our server using vim.

We can still do that, but Ploi provides a nice interface for us to update our .env directly from their application. Simply go to the “Site > General” page and you should see an “Edit environment” button on the right.

Screenshot of the "Site > General" page on Ploi. The "Edit environment" button is highlighted.

Make sure to update your production variables appropriately and use the database password provided earlier in the email.

Screenshot of the "Environment" modal on Ploi.

Deploy twice

Now that our production environment is ready, let’s deploy a second time to ensure our database is migrated. Simply run dep deploy and with any luck, you should see the following output.

Screenshot of the terminal output of "dep deploy". This time, all tasks ran successfully.

And that’s it! You should now be able to see your application live if you visit its URL. 🥳

Screenshot of a browser visiting the page at ploi.jollygood.app. It shows the boilerplate of a newly created Laravel application.

Update env variables

Okay, we’ve successfully deployed our application using Ploi and Deployer but there are still a couple of points I’d like to mention.

The first point is that, once your application is deployed, you’ll likely want to update some environment variables from time to time

Since Ploi has a dedicated page to do so, it can be easy to forget that our configuration files are cached — due to the artisan:config:cache task we added to our deployment flow.

That means, whenever you update your .env file, the changes won’t be live until the next deployment.

That being said, if you want to regenerate the configuration cache without having to redeploy the application, you may do that by running php artisan config:cache on your server.

A nice touch from Ploi is that it allows you to run such commands directly from the UI. On your site’s page, click on “Laravel” on the sidebar and you’ll have access to many php artisan commands that you can run by clicking a button. You may even add your own commands inside that dashboard by clicking the “Custom commands” button.

In our case, all we need to do is click the config:cache button and our environment variable will be live.

Screenshot of the "Site > Laravel" page on Ploi. It shows a grid of buttons that trigger php artisan commands. The button "config:cache" is highlighted.

About the deploy script

My last point is about the “Deploy Script” available on the “Site > General” page.

If you’ve read the previous article on Laravel Forge, you’ve seen us work out a bit of magic to trigger a Deployer deployment directly from the Laravel Forge interface. Concretely, we ended up with a deploy script calling dep deploy.

Unfortunately, at this time, it is not possible to do that in Ploi since it runs more than our deploy script behind the scenes. If you remove all the lines from the deploy script, you should see the following error fatal: not a git repository (or any of the parent directories): .git. This is because deployed releases don’t have git initialised inside them. Instead, Deployer uses a cached repository inside the .dep folder.

That wasn’t a problem for Laravel Forge since it just executed what we told it to execute. However, Ploi runs some extra commands behind the scenes trying to access git and therefore making this not possible.

On the other hand, it is worth noting that — starting from a certain plan — Ploi supports its own zero-downtime deployment system out-of-the-box. So with Ploi, you could ditch Deployer altogether, click on a button and have zero-downtime deployments configured.

That being said, you’ll need to configure your entire deployment flow inside the deploy script. I prefer using Deployer since it allows us to create powerful deployment flows via reusable recipes and custom tasks written in PHP but — if you have a simple deployment flow — it might be worth considering.

Conclusion

Alright, I hope this article was useful for Ploi users and also for those who are looking for a solution to help them create and maintain servers.

As usual, you can find the deploy.yaml file updated for this episode on GitHub by click on the link below.

See deploy.yaml on GitHub

As an alternative to Ploi, you might also want to consider Laravel Forge which I have talked about in the previous episode.

I have no personal preference between the two and so I’m actually a customer of both because I’m a very indecisive person. 😅 Hopefully, these two articles will help you decide on which one suits you best.

In the next episode, I will provide a complete checklist of this entire series as a gift for my wholesome sponsors. This will be the perfect article to come back to when you’re ready to get your hands dirty and want a quick list of things to do to deploy your Laravel app from scratch.

Laravel News Links

Site of Harriet Tubman’s Family Home Uncovered in Maryland

https://i.kinja-img.com/gawker-media/image/upload/c_fill,f_auto,fl_progressive,g_center,h_675,pg_1,q_80,w_1200/wf4n0sfm51goszguzbmz.jpg

Harriet Tubman, in a photo dating back to between 1860-75.
Image: Library of Congress (AP)

The site of a 19th-century cabin belonging to the family of Harriet Tubman has been uncovered in Maryland. It’s a significant find, as the location of the site, along with the discovery of numerous artifacts, could offer fresh insights into the abolitionist hero’s formative years.

Archaeologists working for the Maryland Department of Transportation, State Highway Administration, uncovered the site near Church Creek, which is close to the state’s eastern shore. Found next to a marsh, the site once hosted a cabin owned by Ben Ross, the father of renowned abolitionist Harriet Tubman, born Araminta Ross. Tubman escaped slavery and later lead many others to freedom via the Underground Railroad.

“The significance of the discovery of the homesite of my great-great-great-grandfather Ben Ross, and of a spellbinding assortment of artifacts that were once held in the hands of the man himself, but have since been long-inhumed in the soggy Dorchester County soil, is truly inestimable,” Douglas Mitchell, a descendant of Ben Ross, said in a press release.

Various artifacts found at the site.
Image: Maryland Department of Transportation

The finding is significant, he said, because it holds the “promise of both deepening and broadening our understanding of the remarkable life not only of the patriarch and his beloved wife, but also, of course, that of his legendary daughter and heroine, Harriet Tubman.”

G/O Media may get a commission

The remnants of this former home were discovered on property recently acquired by the U.S. Fish and Wildlife Service and added to the Blackwater National Wildlife Refuge in Dorchester County, Maryland. Ross acquired the 10 acres of property in a will in the early 1840s.

The team working at the site.
Image: Maryland Department of Transportation

Historical documents, including wills and deeds, led the archaeologists, headed by Julie Schablitsky, to the general area of the former cabin. Searches with metal detectors began last November, resulting in the discovery of a coin dating back to 1808, as The Guardian reports. A return visit in March yielded a trove of 19th-century artifacts, including nails, bricks, glass, dish fragments, and a button. A subsequent analysis of these artifacts tied them to the Ross home, and an official announcement about the discovery was made on April 19 at the Harriet Tubman Underground Railroad Visitor Center.

“The importance of discovering Ben Ross’ cabin here is the connection to Harriet Tubman. She would’ve spent time here as a child, but also she would’ve come back and been living here with her father in her teenage years, working alongside him,” explained Schablitsky in the press release. “This was the opportunity she had to learn about how to navigate and survive in the wetlands and the woods. We believe this experience was able to benefit her when she began to move people to freedom.”

Much of the Ross home is either gone or buried, but the surroundings still provide a glimpse of how it looked during Tubman’s time. The newly discovered site will now be added to the Harriet Tubman Underground Railroad Byway—a 125-mile (200-km) self-guided scenic drive highlighting more than 30 sites associated with Harriet Tubman. Artifacts found at the site will eventually go on display at the nearby Harriet Tubman Underground Railroad Visitor Center.

More: Three African skeletons found in Mexico show the horrors of early slavery in the New World.

Gizmodo

Can Velveeta Cheese Stop a Bullet?

https://theawesomer.com/photos/2021/04/velveeta_vs_bullets_t.jpg

Can Velveeta Cheese Stop a Bullet?

Link

We’re pretty sure you can stop a bullet with enough layers of any substance. DemolitionRanch took a bunch of Kraft’s processed cheese bricks and fired into them to see how much it would take to stop various ammunition in its tracks. Spoiler alert: it’s possible he needs a lot more cheese.

The Awesomer

WATCH: Columbus PD Shoots 16-Year-Old Girl Trying to Stab Another Girl

https://cdn.athlonoutdoors.com/wp-content/uploads/sites/8/2014/12/riverside-police-know-your-limit-breathalyzer.jpg

Tragedy struck Columbus, Ohio, yesterday, again involving police and the death of a Black suspect. In this case, a Columbus Police officer shot and killed 16-year-old Ma’Khia Bryant Tuesday. However, body cam footage clearly shows Bryant wielding a knife, attempting to cut another girl.

Riverside Police Know Your Limit program breathalyzer

RELATED STORY

Riverside Police’s ‘Know Your Limit’ Program Allows For Free Breathalyzers

16-Year-Old Ma’Khia Bryant Wielded Knife Before Fatal Shooting

The fatal incident occurred just before the reading of the Derek Chauvin guilty verdict in Minnesota. Locally, the shooting comes two months after another officer faced indictment for the fatal shooting of 47-year-old Andre Hill, also Black. The connections caused immediate reaction across the country, criticizing law enforcement.

“As we breathed a collective sigh of relief today, a community in Columbus felt the sting of another police shooting,” Tweeted Ben Crump, George Floyd’s family attorney.

But this incident appears different from others. It began when police arrived, finding a group of teens in a driveway. Footage shows one teen move on another, threatening with a knife. An officer clearly yells several commands, but the suspect lunges anyway. He then fires several shots, ultimately killing Bryant.

“We know based on this footage, the officer took action to protect another young girl in our community,” Columbus Mayor Andrew Ginther said at the news conference, reported CNN. “But a family is grieving tonight and this young (16)-year-old girl will never be coming home.”

Snapping Back at Critics

But former law enforcement officer and conservative media personality Brandon Tatum went further, calling the shooting “justified.” Tatum posted a video where he provides expert analysis. He immediately points out how this large crowd of people fail to disperse upon police arrival. He illustrates one man kicking a female in the head. Tatum then shows slow-motion proof of the suspect lunging at another female with a knife.

“She pulls out a knife in front of the cops,” Tatum said. “She pulls out a knife. Look at what she does with the knife! Look at what she does with the knife! She’s going for this girl’s throat, with the knife. She’s trying to stab her in the head, with this knife. And the officer shot her.”

But Tatum makes an even greater point, hitting the very message critics drive home. A 16-year-old girl dead; some critics of law enforcement simply won’t accept she should be shot by police. It’s just too horrific for some to comprehend. But in this instance, Tatum says one life taken, however tragic, saved another.

“An officer has an obligation to preserve the life of other people, not just the police officer,” Tatum said. “So if you see a person going to kill another person, which is what she’s doing with this knife, when you see a person attempting to kill another person, you have to use deadly force to save this person’s life.”

The post WATCH: Columbus PD Shoots 16-Year-Old Girl Trying to Stab Another Girl appeared first on Tactical Life Gun Magazine: Gun News and Gun Reviews.

Tactical Life Gun Magazine: Gun News and Gun Reviews