https://gunfreezone.net/wp-content/uploads/2021/06/E3CvjzoXoAAU_-H.jpeg

Just another WordPress site
https://gunfreezone.net/wp-content/uploads/2021/06/E3CvjzoXoAAU_-H.jpeg
http://img.youtube.com/vi/y02TBgkBUhg/0.jpg

Wheeling Heritage Media takes us inside The Ziegenfelder Company for a look at their TwinPop popsicle factory. You’ll see a ballet of machines moving colorful liquids through tubes and into molds which slowly freeze their contents before popsicle sticks are placed at just the right time to form the perfect frozen treat.
The Awesomer
https://postsrc.com/storage/wtHARZBtmJKIIrXErGWJwTviMvI6K8yuvO535YaR.jpg
In this post, you’ll be learning how to implement RSS Feed in Laravel. The steps are very simple so do follow along and you will have it implemented in no time. To achieve this we’ll be using a Laravel Package by
Laravelium called Laravel Feed
.
Setup
To get started install the package into your application by running the code below.
composer require laravelium/feed
By default, it will take the latest version but if you are using the old version of Larave do explicitly specify it in your composer.json file. If you need to change the default views/template provide by the package do publish the view that’s provided by the package.
php artisan vendor:publish --provider="Laravelium\Feed\FeedServiceProvider"
Implementation
To generate the RSS Feed, you will have to define a new route in web.php and just call it “rss-feed” which essentially is the URL user has to call to view the RSS feed.
Route::get('rss-feed', function () {
    // create new feed instance
    $feed = app("feed");
});
Once you have defined that you’ll need to query the modal that you want to generate as RSS Feed. In this example let’s assume “post” is the resource so let’s query 20 posts but make sure it’s already published.
$posts = Post::query()
    ->whereNotNull('published_at')
    ->take(20)
    ->get();
To create the main structure of the RSS feed we need to call some of the helper methods provided by the feed instance. It will roughly look like below. Do note that you ensure all of the data is accurate since it’s very important to ensure that your subscriber are getting the right data.
// set your feed's title, description, link, pubdate and language
$feed->title = 'Your site name here';
$feed->description = 'Your site description here';
$feed->logo = 'https://your-site-url.test/img/logo.png';
$feed->link = 'https://your-site-url.test';
$feed->setDateFormat('datetime'); // 'datetime', 'timestamp' or 'carbon'
$feed->pubdate = $posts[0]->published_at;
$feed->lang = 'en';
$feed->setShortening(true); // true or false
$feed->setTextLimit(100); // maximum length of description text
Now since the main structure is already in place, to load the resource do loop it through and add it to the feed using “addItem” method. It will look like the following but do change it with your own data structure.
$posts->each(fn ($post) => $feed->addItem([
    'title' => $post->title,
    'author' => 'Your Name',
    'url' => $post->url,
    'link' => $post->url,
    'pubdate' => $post->published_at,
    'description' => $post->summary,
    'content' => $post->body
]));
Once everything is ready, now you can render the feed data by calling the render and specify the type which in this case is “rss”. Do not that the “application/xml” is necessary to set the right document encoding for the browser to render.
$feed->ctype = "application/xml";

return $feed->render('rss');
Final Code
The final code will look like the following and once it’s ready, try to view it on the browser by visiting “rss-feed” path.
Route::get('rss-feed', function () {
    // create new feed
    $feed = app("feed");

    $posts = Post::query()
        ->whereNotNull('published_at')
        ->take(20)
        ->get();

    // set your feed's title, description, link, pubdate and language
    $feed->title = 'Your site name here';
    $feed->description = 'Your site description here';
    $feed->logo = 'https://your-site-url.test/img/logo.png';
    $feed->link = 'https://your-site-url.test';
    $feed->setDateFormat('datetime'); // 'datetime', 'timestamp' or 'carbon'
    $feed->pubdate = $posts[0]->published_at;
    $feed->lang = 'en';
    $feed->setShortening(true); // true or false
    $feed->setTextLimit(100); // maximum length of description text

    $posts->each(fn ($post) => $feed->addItem([
        'title' => $post->title,
        'author' => 'Your Name',
        'url' => $post->url,
        'link' => $post->url,
        'pubdate' => $post->published_at,
        'description' => $post->summary,
        'content' => $post->body
    ]));

    $feed->ctype = "application/xml";

    return $feed->render('rss');
});
I hope this tutorial is helpful for you and if there’s any question, do comment out below and let’s start the discussion. Also, don’t forget to share it with your friend as well and I would appreciate it a lot. Cheers and have a good try.
Laravel News Links
https://i1.wp.com/toolguyd.com/blog/wp-content/uploads/2021/06/Husky-Steel-Hammer-Top.jpg?resize=600%2C708&ssl=1

I’ve been working on some DIY tool kit buying guides, with Home Depot sponsoring the project (thank you!). This is something I’ve been eager to do for a while, and a couple of reader requests finally pushed this to the front of my attention.
There’s one tool that everyone needs – a good hammer.
I feel that, for most users, a 16 ounce claw hammer is a good place to start, and sometimes a 20 ounce rip claw hammer is a good alternative.
In part two of this series – 5 DIY Tool & Workshop Upgrades Everyone Will Love – I posted about the Husky 27 oz dead blow hammer, a lighter weight dead blow that I have been really enjoying using. That’s definitely on my recommendations list, but everyone also needs a good claw hammer.

I picked up a hammer on my first shopping run, and then a couple of others on my second and third trips to Home Depot.
There’s an inexpensive Anvil/Stanley – the hammers look to be identical but branded differently depending on the store – for testing out for the lowest budget tier, a Dewalt 20 oz I like as a general good-for-everyone quality recommendation (I’ve used this one before), and I also wanted to test out this Husky steel-handle hammer.
I should point out that I own or have tested nearly all of these tools before, but I needed current versions to ensure the their quality hasn’t changed, and for clean photo samples.

Frankly, this Husky steel handle claw hammer surprised me, as it wasn’t part of the plan.
I picked up an Estwing to mirror my preference for lighter nail hammers for more casual tasks, the Dewalt as the more premium experience option, and the entry-level wood-handled hammer as the “for the person who doesn’t want to spend a lot” option. If any further recommendations or suggestions were needed, I have a pile of highly-regarded hammers in my own kit and in my test box from last year.
There were two rows of this Husky hammer at the store, but I didn’t see the price. I picked one up and wow, it’s lighter than I thought. A couple of air swings later, and wow, I like the balance of this hammer.
Not all 16 oz hammers feel the same, this one had a lighter feel to it, or rather a lighter and easier swing.
It looks like the hammers were just put out, and they were waiting for a pricing tag. I looked it up on my phone – $10.
$10? That cannot be right. $10 for a fiberglass-handle hammer? Maybe, but that one’s $12. This steel-handled hammer cannot be $10.
I added it to my bucket, was surprised to see it ring up at $10, and brought it home.
Wow. This is the bargain of the year.

There’s something wrong with this price – I’m sure of it. A $10 hammer with a magnetic nail-starter? That seems unheard of.
What’s more, it was *perfectly* implemented.
A couple of years ago, Kobalt came out with a then-new high velocity hammer. Since then, if I’m at a store and checking out claw or rip hammers that have built-in nail-starter magnets, I check out all the hammers in a row to see if they’re installed properly and consistently.
Aside from some loose and easily cleanable metal shavings, everything here looked good.

The bent nail claw looked good, with nothing notable to report.

Ah, I found the catch.
So when looking through the hammers on the shelf, there seemed to be different levels of grinding attention given to the transition between the strike face and central body. Meaning, some hammers had more defined (sharper-looking) transition steps, while others were finished a little better.
Basically, some hammers are a little prettier than others. This doesn’t seem consequential at all, and so I grabbed a hammer and was done with it.
I brought the hammer home, drove in some test nails, and WOW, it was a life-changing experience! Sorry, that’s not true. This is a well-made hammer and I like its balance and feel. I wouldn’t call it amazing, but it’s also definitely not a generic nail hammer.
I also like the axe-style handle flare, a feature that helps to keep my hand on-position. This can be a polarizing opinion, with some people for it, others against it, and I’m sure there are plenty of people who don’t have any preference.
I’ve been trying to figure out how to plainly discuss this hammer, and it’s been difficult. Quite simply put, this is the best hammer I’ve ever used for under $20.
Was the price a mistake, with someone at Home Depot forgetting to add a “1” in front of the $9.97? Is this a special buy? How is this just $10?! I cannot figure it out!
I cannot formally review it yet, as that might take a few months of project use, but initial testing showed me that it won’t disintegrate upon contact with a nail – not that this was ever a real concern.
I prefer 16 ounce nail hammers to have a claw hammer – as opposed to a rip claw. Steel handles are more durable than other materials, and this one doesn’t seem to have added heft. I like the weight, balance, and feel. There’s a magnetic nail-starter, a typically more premium feature found on pricier hammers. The handle is great, the claw is great, everything about this hammer says “this is a good hammer.”
The only cost-cutting measure seems to be slight inconsistencies involving a cosmetic transition grind.
Wait – is the strike face malformed? No – it’s as perfectly circular as I’ve seen. (That’s always equally disappointing and amusing, whenever I check a hammer at a store and find its strike face to be oval in shape, but not this one.)
So… yeah, Home Depot has hidden this (new?) Husky steel-handled hammer on store shelves, and at just $10 it’s an absolute steal.
I cannot find any other name-brand steel-handled hammer even close to this price.
I’m giving up on trying to understand it.
So how do I share about this hammer? I’m embarrassed to say it’s taken me a couple of weeks and I still cannot find an eloquent way to sum everything up.
On one hand, this is a good hammer – I put it in my shopping bucket before I verified the price. On the other hand, this is a fantastic bargain at just $10. How can it be both?
Check it out at your next visit to Home Depot, maybe even give it a controlled air swing (something I hope becomes commonplace so it’s less unusual when I do it), and tell me what you think.
Price: $9.97
Lastly, I should point out that Husky has a lifetime “no receipt required, no questions asked” hand tool warranty.
ToolGuyd
http://img.youtube.com/vi/kZOgH3-0Bko/0.jpgI often get asked about roles, permissions, gates, policies in Laravel, so I decided to shoot a separate video about the core concepts.Laravel News Links
https://static1.makeuseofimages.com/wordpress/wp-content/uploads/2021/05/Amazon-echo.jpg
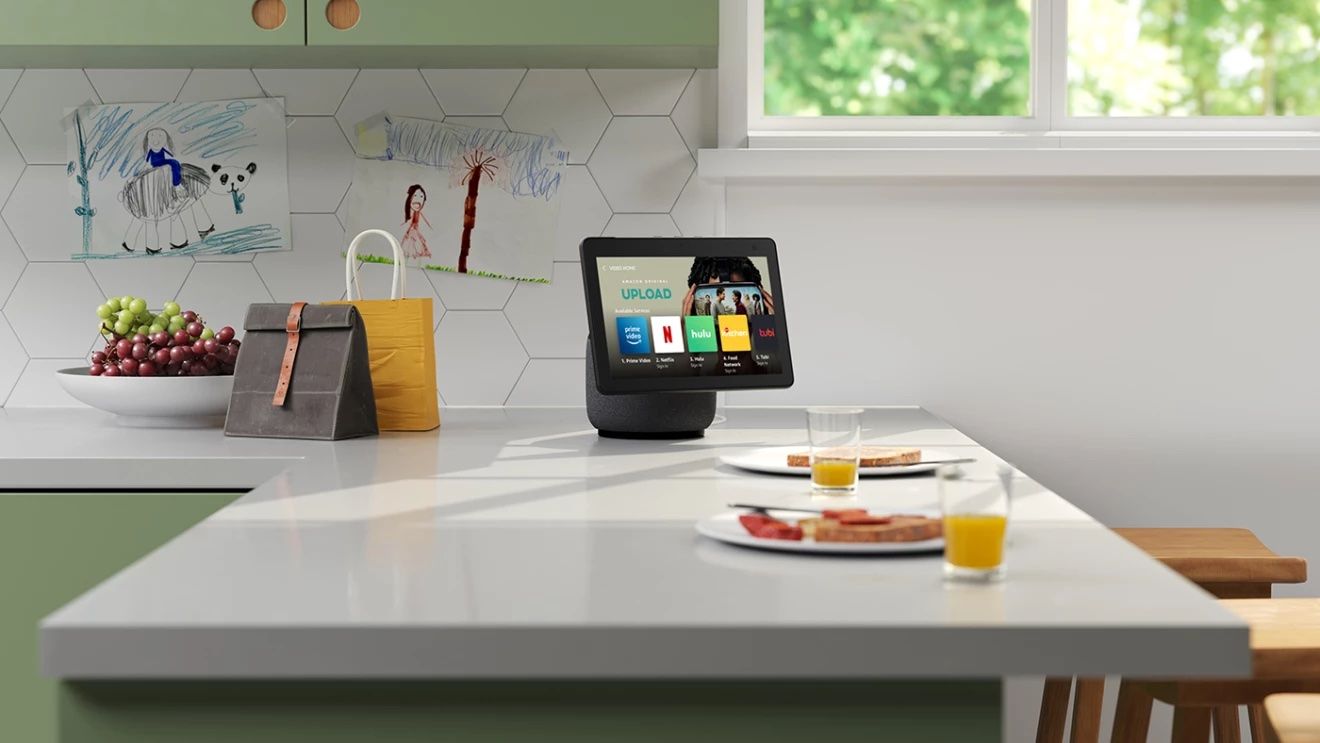
The connectivity of smart home devices is short range due to the limitations of a Wi-Fi or Bluetooth network. When the devices don’t have any network connection, they won’t function.
All that has changed with the Amazon Sidewalk as it extends the network connectivity of your smart home devices for your convenience, safety, and comfort.

Unveiled in 2019, Amazon Sidewalk helps to keep your low-powered home devices connected, using a small portion of your Wi-Fi’s bandwidth. Designed for low-cost and easy-to-use devices, it sustains the network connection of devices over long distances.
With Sidewalk, your smart home devices like an Amazon Echo, Ring security cameras, motion sensors, outdoor lights, and more can operate beyond the confines of your immediate environment.
The technology doesn’t require any new hardware as Amazon has added Sidewalk compatibility to a number of popular devices.
Related: What Is Amazon Sidewalk and How Does It Work?
Sidewalk leverages a Wi-Fi network to operate in the background. Instead of having the connectivity of your devices restricted to your front door, Sidewalk takes it farther—across your neighborhood.
The strength of the Sidewalk network is impacted by the number of connected devices. When more people in your neighborhood connect to the network, it becomes stronger.
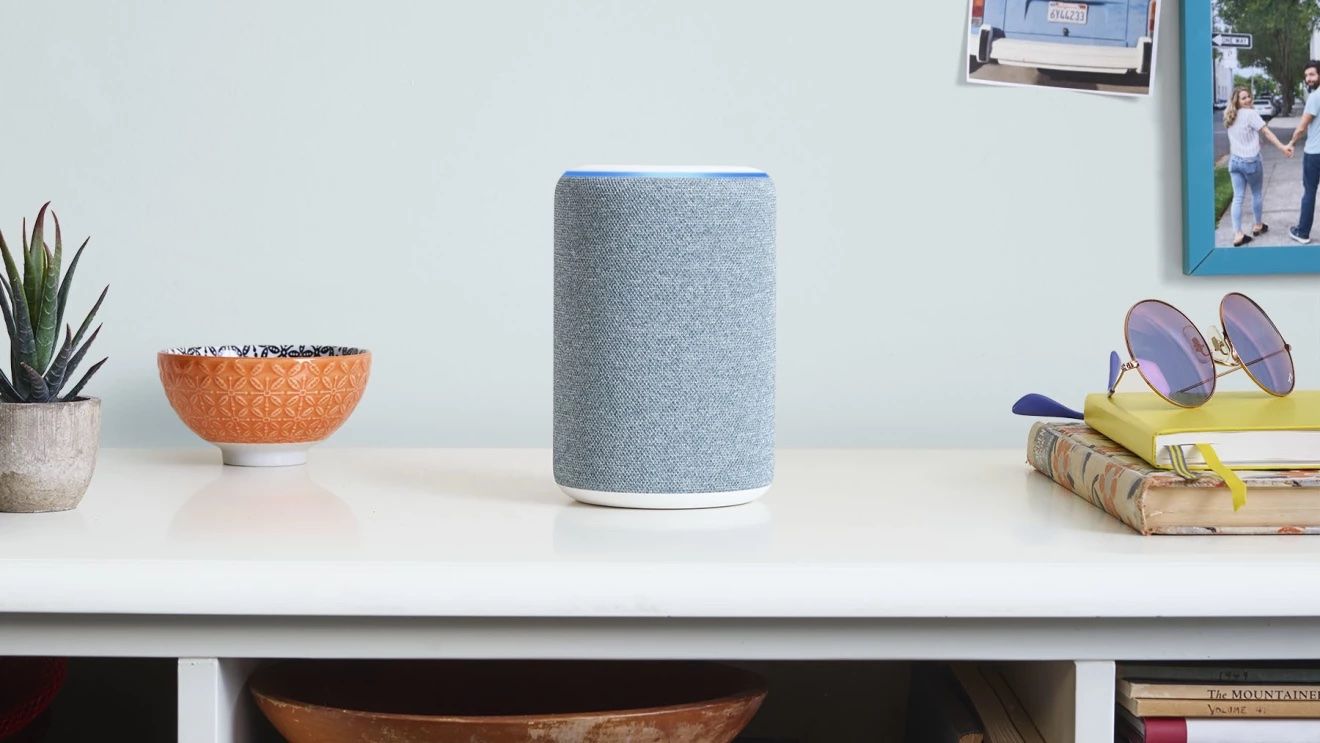
There are two categories of Sidewalk devices—Sidewalk Bridges and Sidewalk-enabled devices. Sidewalk Bridges supply network connections to Sidewalk-enabled devices.
Sidewalk Bridges include newer Amazon Echo models and Ring cameras.
Sidewalk’s use is restricted to devices with low bandwidth. You can’t use the feature for activities requiring high bandwidth such as streaming.
Amazon Sidewalk is turned on on your Echo and Ring devices by default. If you have any reservations about using Sidewalk, you can disable it with a few simple steps. Should you change your mind about using the feature, you can enable it at any time.
To disable Amazon Sidewalk, log into the Alexa app on your iOS or Android device, and follow the following steps. Navigate to More > Settings > Account Settings > Amazon Sidewalk and switch it off.
If you want to enable Sidewalk at any point, here’s how to do it. Open the Alexa app, navigate to More > Settings > Account Settings > Amazon Sidewalk and switch it back on.
Using Amazon Sidewalk comes with several benefits.
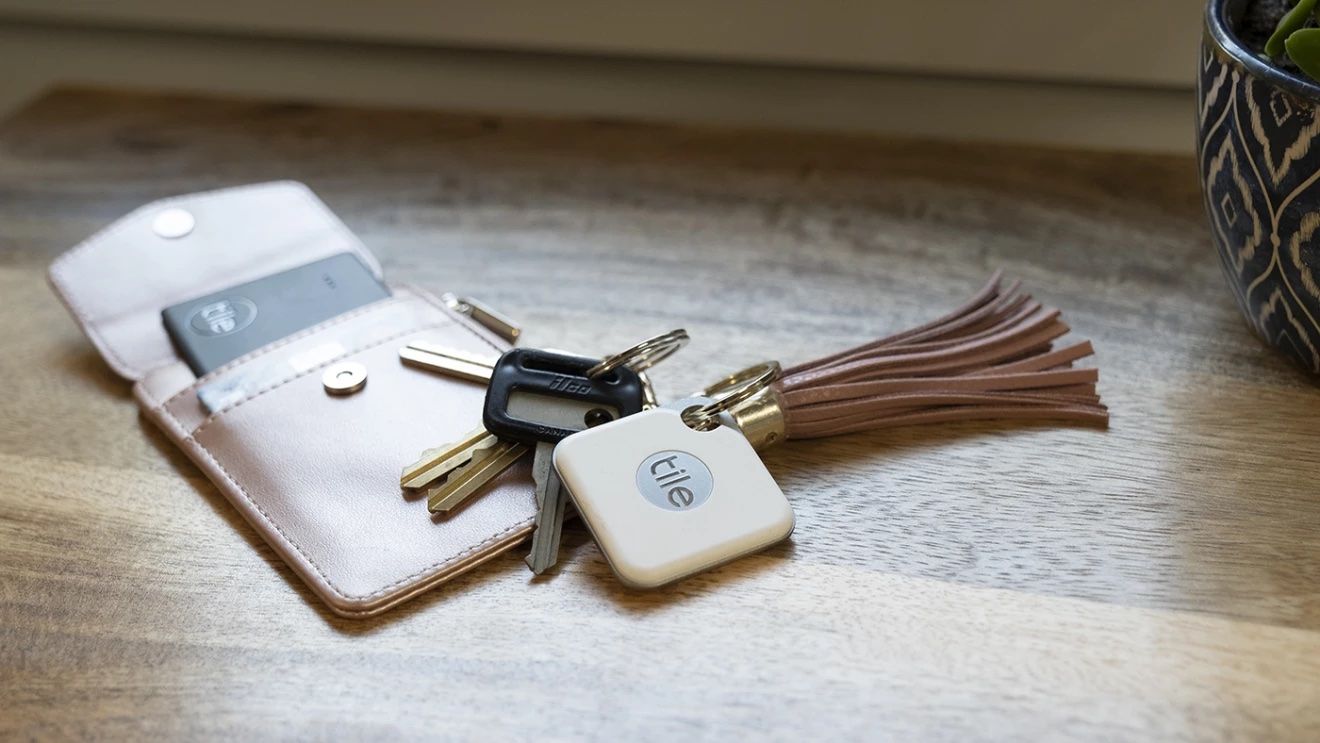
Sidewalk helps you to keep devices around your home connected at all times and track their locations, giving you peace of mind. You can track your devices even when they are out of a Wi-Fi connection using the Sidewalk-enabled tracker, Tile.
If the Wi-Fi connection to your Sidewalk bridge device is lost, Amazon Sidewalk restores the connection by reconnecting it to your router.
Amazon has been heavily criticized for the lack of privacy regarding shared data on Sidewalk, but it assures you that your privacy is protected. Sidewalk is designed with advanced security to keep your personal information secured.
According to Amazon, data shared on Sidewalk is protected with three levels of encryption as well as other security measures such as cryptographic algorithms, rotating device IDs, and one-way hashing.
Although Amazon Sidewalk creates more value for your home devices, you might have security concerns about having your information on a shared network.
If it’s any consolation, Amazon says that its servers only authenticate and route your data to intended places without reading or collecting it. The company recently released a whitepaper that addresses the security concerns of Sidewalk.
In the end, the decision to use Sidewalk is yours to make.
MUO – Feed
https://1.bp.blogspot.com/-we1ntVlnD8g/YK34cPZOC3I/AAAAAAAAHLY/cyjy9D6JjUE7mWIKEWcxrQvAGaJJ3nYMgCNcBGAsYHQ/s0/Laravel-8-Spatie-Medialibrary.png
Hi Guys,
Nowadays, I can study you the way to use spatie medialibrary in laravel 8 application,we are able to show example of laravel spatie medialibrary.you can easliy use spatie media library laravel eight.this package use to add a image or an avatar. in this academic we will show you an smooth manner to feature it, using Spatie’s Media Library bundle.
In this post, let’s move over the well-known laravel medialibrary package deal evolved by way of Spatie. This bundle deal can accomplice all sorts of documents together with your Eloquent models.
Here, I’m able to give you full example for spatie media library laravel eight as bellow.
Step 1 : Install Laravel 8
In the first step, we need to get fresh laravel 8 version application So let’s open terminal and run bellow command to install fresh laravel project.
composer create-project --prefer-dist laravel/laravel post
Step 2 : Database Configuration
>In second step, we will make database Configuration for example database name, username, password etc. So lets open .env file and fill all deatils like as bellow:
.env
DB_CONNECTION=mysql
DB_HOST=127.0.0.1
DB_PORT=3306
DB_DATABASE=here your database name(post)
DB_USERNAME=here database username(root)
DB_PASSWORD=here database password(root)
Step 3 : Install Spatie Medialibrary
In this step, we need laravel/Spatie Medialibrary package. you can install Spatie Medialibrary package using bellow command so let’s run bellow command
composer require "spatie/laravel-medialibrary:^9.6.0"
After the package is installed, run the following command to copy the migration file from to package directory to your project directory and also to run the fresh migration command.
php artisan vendor:publish --provider="Spatie\MediaLibrary\MediaLibraryServiceProvider" --tag="migrations"
php artisan migrate
Step 4: Create Model and Migration
here this step, we will create one model and migration name post. Use the below following command and create it
php artisan make:model post -m
Next,Open post migration file and put the below code.
here following path of migration file
Path: /database/migrations/2020_05_27_095534_create_posts_table.php
<?php

use Illuminate\Database\Migrations\Migration;
use Illuminate\Database\Schema\Blueprint;
use Illuminate\Support\Facades\Schema;

class CreatePostsTable extends Migration
{
    /**
     * Run the migrations.
     *
     * @return void
     */
    public function up()
    {
        Schema::create('posts', function (Blueprint $table) {
            $table->id();
            $table->string('title');
            $table->text('body');
            $table->timestamps();
        });
    }

    /**
     * Reverse the migrations.
     *
     * @return void
     */
    public function down()
    {
        Schema::dropIfExists('posts');
    }
}
Next, go to app/post.php and open post model file and put the below code.
here following path of model fille
Path:/app/Models/Post.php
<?php

namespace App\Models;

use Illuminate\Database\Eloquent\Factories\HasFactory;
use Illuminate\Database\Eloquent\Model;
use Spatie\MediaLibrary\HasMedia;
use Spatie\MediaLibrary\InteractsWithMedia;

class Post extends Model implements HasMedia
{
    use HasFactory,InteractsWithMedia;

    /**
     * The attributes that are mass assignable.
     *
     * @var array
     */
    protected $fillable = [
        'title',
        'body',
    ];
}
Step 5: Create Route
Create two routes one for show form and the second route send data to the server:
here following path of route fille
Path:/routes/web.php
<?php

use Illuminate\Support\Facades\Route;
use App\Http\Controllers\PostController;

/*
|--------------------------------------------------------------------------
| Web Routes
|--------------------------------------------------------------------------
|
| Here is where you can register web routes for your application. These
| routes are loaded by the RouteServiceProvider within a group which
| contains the "web" middleware group. Now create something great!
|
*/
Route::get('post',[PostController::class,'index'])->name('post');
Route::get('post/create',[PostController::class,'create'])->name('post.create');
Route::post('post/store',[PostController::class,'store'])->name('post.store');
Step 6:Create Controller
In this step,we will create a controller. Use the below command for generate controller
php artisan make:controller PostController
Here this step,we will create two methods inside the controller first index method is used to display post form and second store method is used to store data in the mysql database and image upload Medialibrary to storge folder
here following path of Controller fille.
Path:/app/Http/Controllers/postController.php
<?php

namespace App\Http\Controllers;

use Illuminate\Http\Request;
use App\Models\Post;

class PostController extends Controller
{
    /**
     * Write code on Method
     *
     * @return response()
     */
    public function index()
    {
        $posts = Post::latest()->get();

        return view('post.index',compact('posts'));
    }

    /**
     * Write code on Method
     *
     * @return response()
     */
    public function create()
    {
        return view('post.create');
    }

    /**
     * Write code on Method
     *
     * @return response()
     */
    public function store(Request $request)
    {
        $input = $request->all();

        $post = Post::create($input);

        if($request->hasFile('image') && $request->file('image')->isValid()){
            $post->addMediaFromRequest('image')->toMediaCollection('images');
        }

        return redirect()->route('post');
    }
}
Step 7:Create a blade view
In this step, we will create two blade file name post/index.blade.php and post/create.blade.php.
here following path of index.blade fille
Path:/resources/views/post/index.blade.php
<html>
<head>
    <title>Laravel Spatie Medialibrary Example</title>
    <link rel="stylesheet" href="https://cdnjs.cloudflare.com/ajax/libs/twitter-bootstrap/5.0.1/css/bootstrap.min.css" />
</head>
<body class="bg-dark">
<div class="container">
    <div class="row">
        <div class="col-md-8 offset-2">
            <div class="card mt-5">
                <div class="card-header">
                    <div class="row">
                        <div class="col-md-10">
                            <h5>Laravel 8 Spatie Medialibrary Example</h5>
                        </div>
                        <div class="col-md-2 text-center">
                            <a href="" class="btn btn-success btn-sm">Create</a>
                        </div>
                    </div>
                </div>
                <div class="card-body">
                    <table class="table table-bordered">
                        <thead>
                            <tr>
                                <th>No</th>
                                <th>Title</th>
                                <th width="25%">Image</th>
                            </tr>
                        </thead>
                        <tbody>
                            @foreach($posts as $key=>$post)
                                <tr>
                                    <td></td>
                                    <td></td>
                                    <td><img src="" / width="100%"></td>
                                </tr>
                            @endforeach
                        </tbody>
                    </table>
                </div>
            </div>
        </div>
    </div>
</div>
</body>
</html>
Next following path create a create.blade fille
Path:/resources/views/post/create.blade.php
<!DOCTYPE html>
<html>
<head>
    <title>Laravel Spatie Medialibrary Example</title>
    <link rel="stylesheet" href="https://cdnjs.cloudflare.com/ajax/libs/twitter-bootstrap/5.0.1/css/bootstrap.min.css" />
</head>
<body class="bg-dark">
<div class="container">
    <div class="row">
        <div class="col-md-8 offset-2">
            <div class="card mt-5">
                <div class="card-header">
                    <div class="row">
                        <div class="col-md-10">
                            <h5>Laravel 8 Spatie Medialibrary Example</h5>
                        </div>
                        <div class="col-md-2 text-center">
                            <a href="" class="btn btn-info btn-sm">Back</a>
                        </div>
                    </div>
                </div>
                <div class="card-body">
                    <form action="" method="post" enctype="multipart/form-data">
                        @csrf
                        <div class="row">
                            <div class="col-md-12 mb-3">
                                <div class="form-group">
                                    <label for="">Title:</label>
                                    <input type="" name="title" class="form-control" placeholder="Enter Title">
                                </div>
                            </div>
                        </div>
                        <div class="row">
                            <div class="col-md-12 mb-3">
                                <label for="">Body:</label>
                                <textarea name="body" id="" class="form-control" rows="3"></textarea>
                            </div>
                        </div>
                        <div class="row">
                            <div class="col-md-12 mb-3">
                                <label for="">Image:</label>
                                <input type="file" name="image" class="form-control">
                            </div>
                        </div>
                        <div class="row">
                            <div class="col-md-12 mb-3 text-center">
                                <button class="btn btn-success btn-block">Submit</button>
                            </div>
                        </div>
                    </form>
                </div>
            </div>
        </div>
    </div>
</div>
</body>
</html>
After Note that to view the files in the browser you need to make the files public that is stored in the storage directory, you need to run the following command on your project root in terminal/command-line.
php artisan storage:link
next change .env file in APP_URL path
......
APP_URL=http://localhost:9000
......
Now, we will use the php artisan serve command.
php artisan serve --port=9000
Now we are ready to run our example so run bellow command to quick run.
http://localhost:9000/post
It will help you…
Laravel News Links


