https://postsrc.com/storage/images/snippets/how-to-add-server-timing-header-information-for-laravel-application.jpeg
To get the server timing information and pass it in the response header in the Laravel application you can make use “
” package by beyondcode. This package allows you to get the total number of milliseconds the application takes to bootstrap, execute and run.
Add Server-Timing header information from within your Laravel apps.
Step 1: Install the package using Composer
First, you will have to install it using composer using the command below.
composer require beyondcode/laravel-server-timing
Step 2: Add the Middleware Class
To add server-timing header information, you need to add the \BeyondCode\ServerTiming\Middleware\ServerTimingMiddleware::class, middleware to your HTTP Kernel. In order to get the most accurate results, put the middleware as the first one to load in the middleware stack.
\BeyondCode\ServerTiming\Middleware\ServerTimingMiddleware::class
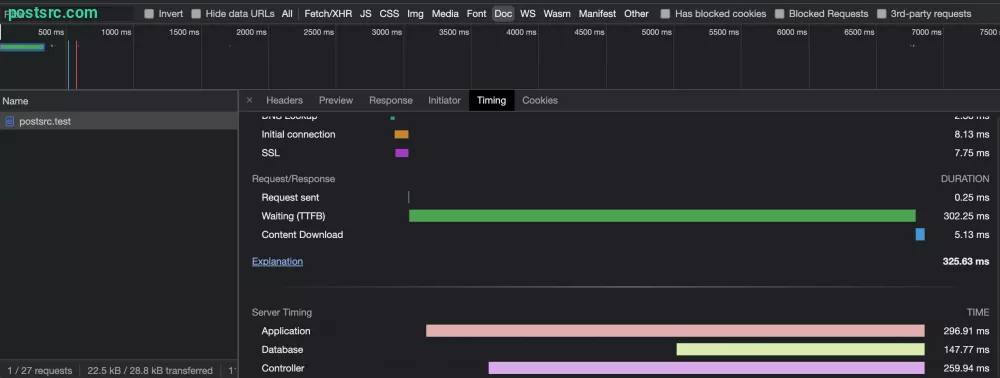
Step 3: View the timing from the browser
To view the timing you can view your browser inspect window and see the Server Timing tabs.
Adding Additional Requirements
Sometimes you might also add additional requirements by using the code below. By doing so you will be able to know how long the codes take to execute and whether it requires more optimization for speedy performance.
ServerTiming::start('Running expensive task');

// do something

ServerTiming::stop('Running expensive task');
Optional: Publish the configuration
You can also publish the configuration by running the code below.
php artisan vendor:publish --tag=server-timing-config
In addition to the default configuration, you can add the value of the timing.php is as follows to ensure it syncs with the .env variable.
<?php

return [
    'enabled' => env('SERVER_TIMING', false),
];
Laravel News Links