https://www.honeybadger.io/images/pull_image.png
In the past 5 years, both Docker and Laravel have exploded in popularity. In this step-by-step tutorial, we will dive into how to dockerize an existing Laravel app to run it on local and then make it ready to run on a production environment. We will also deploy it to Google Cloud Run without getting into Kubernetes or any YAML configs. Let’s get started
What are containers?
Containers simply put, are a way of packaging an application in a way that in addition to the application code and its dependencies the whole stack including the language, file system, and operating system can be shipped together. Another added bonus of this form of packaging is the specific version of the language and operating system can be specified in each build.
There are multiple ways to define what containers and containerization are and how they operate. But without going to the details of virtualization and hypervisors the above way to understand them is simpler.
Photo by Ian Taylor on Unsplash
If you want to refer to the shipping containers analogy, be my guest. The benefits of using containers include small size, speed, efficiency, and portability.
To oversimplify things, you can think of containers as an improved virtual machine that is smaller, faster, and more resource-efficient.
What is docker?
So if containers enable us to ship the whole stack on each deployment after a successful build of course, where does this Docker thing come into play? Docker is an open-source platform (and a company Docker Inc) that enables software engineers to package applications into containers.
Therefore, Docker is a software that lets us build, package and run our applications as containers. But it is not the only option.
Think of Docker as the AWS of the container world in terms of popularity, there is another container platform called rocket (rkt) which can be considered something like Vultr in this analogy.
The open container initiative looks at the standardization and governance of container runtimes.
Next up we will park these terms and theory here and jump into running some commands in the command line to meet our goal of creating development and production-ready containers for an existing Laravel application.
Prerequisites
Before we dive into the code and docker commands, it would be great to make sure of the following things:
- You have docker and docker-compose running on your machine
- A general familiarity with how Laravel works will be needed
- You are aware of how containers work and the need to build them and push them to a container registry.
- To deploy the application you will need a Google cloud account.
Time to go deeper into dockerizing the Laravel app.
Example application
For this post as we want to dockerize an existing Laravel application, we will use the Student CRUD app built with Laravel by Digamber Rawat. The application is open source and he has a great tutorial explaining how the app was built.
It is a relatively simple Laravel 8 application using MySQL as the database. We will fork this application and dockerize it to run it on production not only on the dev environment. I would like to thank him for his amazing work on this application.
Dockerize for local dev environment with Laravel sail
First, we will use Laravel Sail to run the application locally on our dev environment. There are unofficial Docker environments for Laravel like Laradock but Sail is the official docker dev environment for Laravel. Sail is is a wrapper on top of docker compose.
To Sail-ize our existing student CRUD app, we will run the following command after cloning the repository:
cd laravel-crud-app
cp .env.example .env
composer require laravel/sail --dev && php artisan sail:install
After the command ran, we should select 0 for MySQL to install MySQL as part of the docker-compose file created by Laravel sail as seen below:
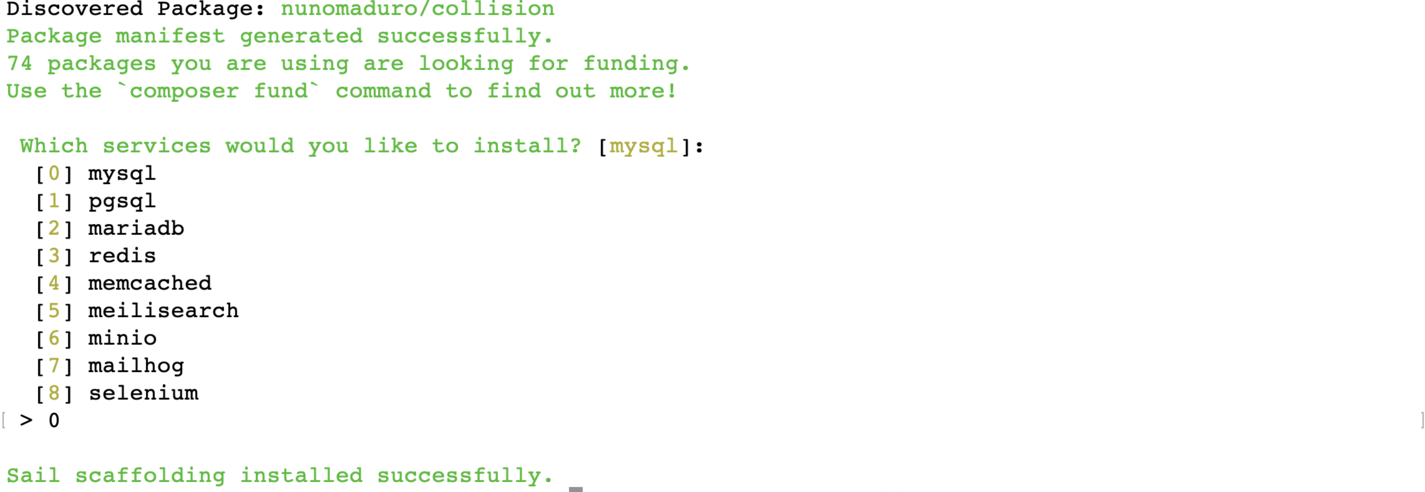
At this point, make sure we have the docker-compose.yml file created at the root of the project. If the file is created, we can run the following command to build and run the needed containers:
COMPOSE_DOCKER_CLI_BUILD=1 DOCKER_BUILDKIT=1 ./vendor/bin/sail build
As Laravel Sail is a wrapper on top of Docker compose, what I have done here is instructed docker-compose to build the needed containers with BuildKit.
Docker BuildKit is build enhancement available in the newer versions of Docker that makes the docker build faster and efficient. We will see the following output when the build process is done:
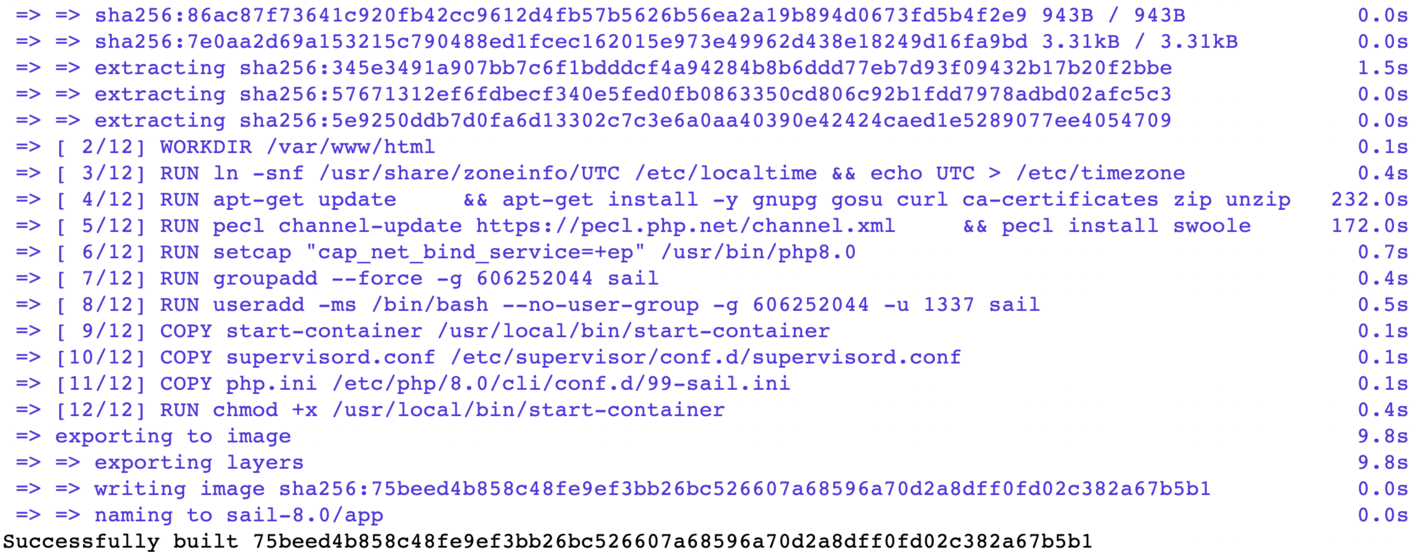
Even with Docker BuildKit enabled the build process will take 5-10 minutes depending on the internet speed. To run the containers we will run the following command:
We will see an output towards the end of the command as follows:
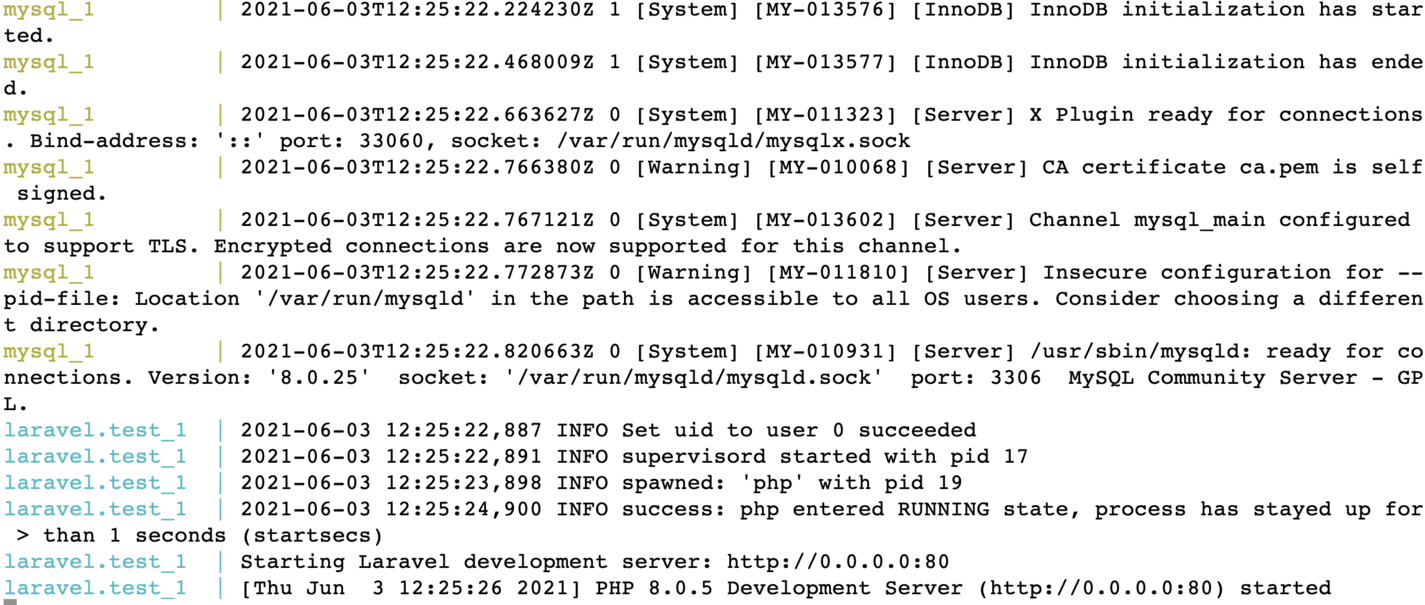
We will have to add the APP key in the .env running the following command after the container are running:
./vendor/bin/sail artisan key:generate
We will also need to change the database credentials in the .env file like below to make the app work.
DB_CONNECTION=mysql
DB_HOST=mysql
DB_PORT=3306
DB_DATABASE=laravel
DB_USERNAME=root
DB_PASSWORD=
By default, the MySQL container has a root user with no password, the above configuration will work. After that to create the database structure we will need to run the migrations with:
./vendor/bin/sail artisan migrate --force
Next, when we hit http://localhost/students we should see the empty list, we can go in and add a student to have an output that looks similar to below:

Congrats! Our app is running locally with Laravel sail. Time to check production readiness for the Laravel sail container.
Is Laravel sail’s docker image ready for production
A quick check on the image size with docker images | grep sail reveals that the docker image is 732 MB.

It is not only the size on a deeper inspection of the Docker file at ./vendor/laravel/sail/runtimes/8.0/Dockerfile it reveals that the supervisor file is using:
command=/usr/bin/php -d variables_order=EGPCS /var/www/html/artisan serve --host=0.0.0.0 --port=80 user=sail
That does not look like a production-ready web server, it is good for local development but running PHP as a production web server is not a good idea.
The images is built on top of an Ubuntu image not the official PHP docker image. It also has Node.js 15 (not a LTS version of Node.js), yarn and composer that will not be needed for a lean production image. It has been built with the development usecase in mind.
Therefore we will create a new Dockerfile and a new docker-compose file to test out a production-ready Docker image for Laravel. As the next step we will rename the current docker-compose.yml to docker-compose-dev-sail.yml with:
mv docker-compose.yml docker-compose-dev-sail.yml
Similarly, the sail up command will change to:
./vendor/bin/sail -f docker-compose-dev-sail.yml up
And if we hit the URL http://localhost/students again it should work as it was working earlier. All the changes done till now are in this pull request for your reference. Next up we will create a production-ready docker file and a docker-compose file to make it easy to test.
Dockerize the application to be production-ready
To dockerize our Student CRUD app built on Laravel we will work on the following assumptions:
- For a production environment we will be using a database as a service something like AWS RDS or Google Cloud SQL. For this demo, I will use a free remote MySQL database.
- We will only use official docker images to avoid any compatibility issues or security risks.
- The official PHP Apache image will be used to keep the complexity low and avoid having multiple containers.
- We will be using PHP 8.0 with opcache and Just In Time JIT for speed.
- Docker multi-stage build and BuildKit will be used to make images smaller and build faster.
- The database credentials are “open” for this demo in
.env.prodfile, it would be best to use environment variables to fill them up on runtime.
As the assumption are clear, we can jump to adding the docker file.
Production friendly Dockerfile for Laravel app
We can start by adding a Dockerfile like below on the root of the project:
FROM composer:2.0 as build
COPY . /app/
RUN composer install --prefer-dist --no-dev --optimize-autoloader --no-interaction

FROM php:8.0-apache-buster as production

ENV APP_ENV=production
ENV APP_DEBUG=false

RUN docker-php-ext-configure opcache --enable-opcache && \
    docker-php-ext-install pdo pdo_mysql
COPY docker/php/conf.d/opcache.ini /usr/local/etc/php/conf.d/opcache.ini

COPY --from=build /app /var/www/html
COPY docker/000-default.conf /etc/apache2/sites-available/000-default.conf
COPY .env.prod /var/www/html/.env

RUN php artisan config:cache && \
    php artisan route:cache && \
    chmod 777 -R /var/www/html/storage/ && \
    chown -R www-data:www-data /var/www/ && \
    a2enmod rewrite
Let’s have a look at how the image will be built using this multi-stage dockerfile.
First off, we use the official composer 2.0 image as the build stage. In this stage, we copy the whole application to /app of the container. Then we run composer install with parameters like --no-dev and --optimize-autoloader which are well suited for a production build. The production stage doesn’t have composer as we don’t need composer to run our application, we need it to install dependencies only.
Consequently, in the next stage named production, we start from the official PHP 8.0 apache image. After setting the two environment variables, APP_ENV to “production” and APP_DEBUG to false, we enable opcache with the following configuration placed at ./docker/php/conf.d/opcache.ini:
[opcache]
opcache.enable=1
opcache.revalidate_freq=0
opcache.validate_timestamps=0
opcache.max_accelerated_files=10000
opcache.memory_consumption=192
opcache.max_wasted_percentage=10
opcache.interned_strings_buffer=16
opcache.jit_buffer_size=100M
Opcache improves PHP performance by storing precompiled script bytecode in shared memory. This means the same PHP sprint does not need to be loaded and parsed on each request. As it is a cache, it will speed up the response but it will be a problem if used in development as the changes won’t reflect until the cache is refreshed.
Subsequently, we copy the whole app and its composer dependencies downloaded in the build stage to the production stage at /var/www/html the default document root for the official PHP Apache docker image. After that, we copy the Apache configuration from ./docker/000-default.conf to /etc/apache2/sites-available/000-default.conf inside the container. The Apache configuration we copied in the container looks like below:
<VirtualHost *:80>

  ServerAdmin webmaster@localhost
  DocumentRoot /var/www/html/public/

  <Directory /var/www/>
    AllowOverride All
    Require all granted
  </Directory>

  ErrorLog ${APACHE_LOG_DIR}/error.log
  CustomLog ${APACHE_LOG_DIR}/access.log combined

</VirtualHost>
Next, we copy the .env.prod file that has the configs and credentials we need to run the application. We have used MySQL configuration from a database at Remote Mysql.
Test out the Dockerfile with docker-compose
At this juncture, we can test our docker file. A way to do it is with a docker build command and pass lots of parameters. To make our lives easy, we will use the following docker-compose file and we can run docker-compose build or docker-compose up and not worry about remembering all the lengthy docker build parameters. Our ./docker-compose.yml file looks like below:
version: '3'
services:
  app:
    build:
      context: ./
    volumes:
      - .:/var/www/html
    ports:
      - "80:80"
    environment:
      - APP_ENV=local
      - APP_DEBUG=true
Great! We have the docker-compose file ready too. We are using version 3 of the docker-compose definition. We have a single service called app which builds from the docker file at ./. We are adding all the files from the current directory to /var/www/html this will sync the files. Next up we are exposing the docker port 80 to our local machine’s port 80. To debug things, we are setting up two environment variables APP_ENV as local and APP_DEBUG as true.
Before we build and run our docker container, let’s not forget about .dockerignore.
Don’t forget the Docker ignore
Same as .gitigore the .dockerigore is also a very handy docker feature. Similar to git ignore file a docker ignore file will ignore files from the local machine or build environment to be copied to the docker container when building the container. Our small docker ignore file looks like below:
Depending on your need you can add more things to the docker ignore file. I will leave that decision up to you on what should not land up in the docker image. People tend to ignore the Dockerfile and docker-compose.yml too, it is a choice.
File changes in this pull request.
Build and run on prod mode locally
As we have all the needed files in place, we can build our production-ready Laravel docker container with the following command:
COMPOSE_DOCKER_CLI_BUILD=1 DOCKER_BUILDKIT=1 docker-compose build
It will give us an output that looks something like below after some minutes depending on your internet speed:

As the next step, we can check how big is the image that we just created with docker images | grep app. In my case it was 457 MB compared to 732 MB for the sail one:

Of course, the image is not very small at 457 MB. Still, it is much smaller than the sail one. If your concern is the image size, it would be great to explore using alpine base images with FPM and serve the application with Nginx. For the scope of this tutorial, we will not venture into that path that has two containers.
As the container is built, we can run it with the following command:
It will give us the following output:
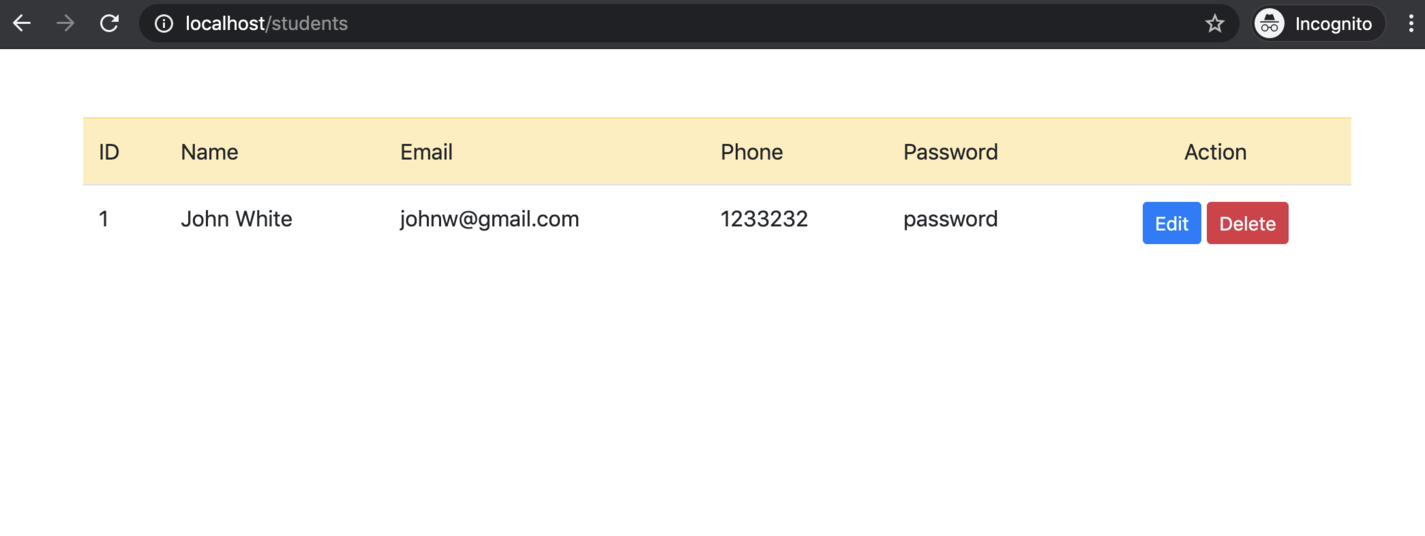
One important thing to note here is the database migrations have already been run on the database we are working on. In case they were not run, we would need to run the following so that the tables are created:
docker-compose exec app php artisan migrate --force
This will run the database migration inside the container. It can also be executed with a simple docker run.
We can choose from multiple ways to run this migration. As this is an idempotent action, we can run it as part of the start script of the container, but it would be better to put it as part of the deployment process with docker run. If you plan to deploy this app on Kubernetes, the migration can be set up as an init container too.
Deploy it on Google Cloud Run
Creating a production-ready container and running it only locally would not be much interesting for us. So we will deploy our Dockerized Laravel Student CRUD app on Google Cloud Run. Cloud Run is a service to deploy containers in a serverless way. Yes, we can deploy containers that can scale up to 1000 instances without hearing the words Kubernetes and Pods. Below is a quick way to run our app on production:
- Make sure you are logged into your Google Cloud Account. If you don’t have one, get one with $300 credit for 90 days at $0.
- Go to https://github.com/geshan/laravel-crud-app
- Click on the “Run on Google Cloud” – that big blue button
- It will open up Google Cloud Shell
- Check the
trustcheckbox and then click confirm – image 09:54 - It might take a bit for the cloud shell to warm up, it will ask us to authorize the gcloud command, click
Authorize - Then we will need to select the Project of Google cloud
- After that we will need to select the region, I generally go with
us-central-1
The process will look like below till now:
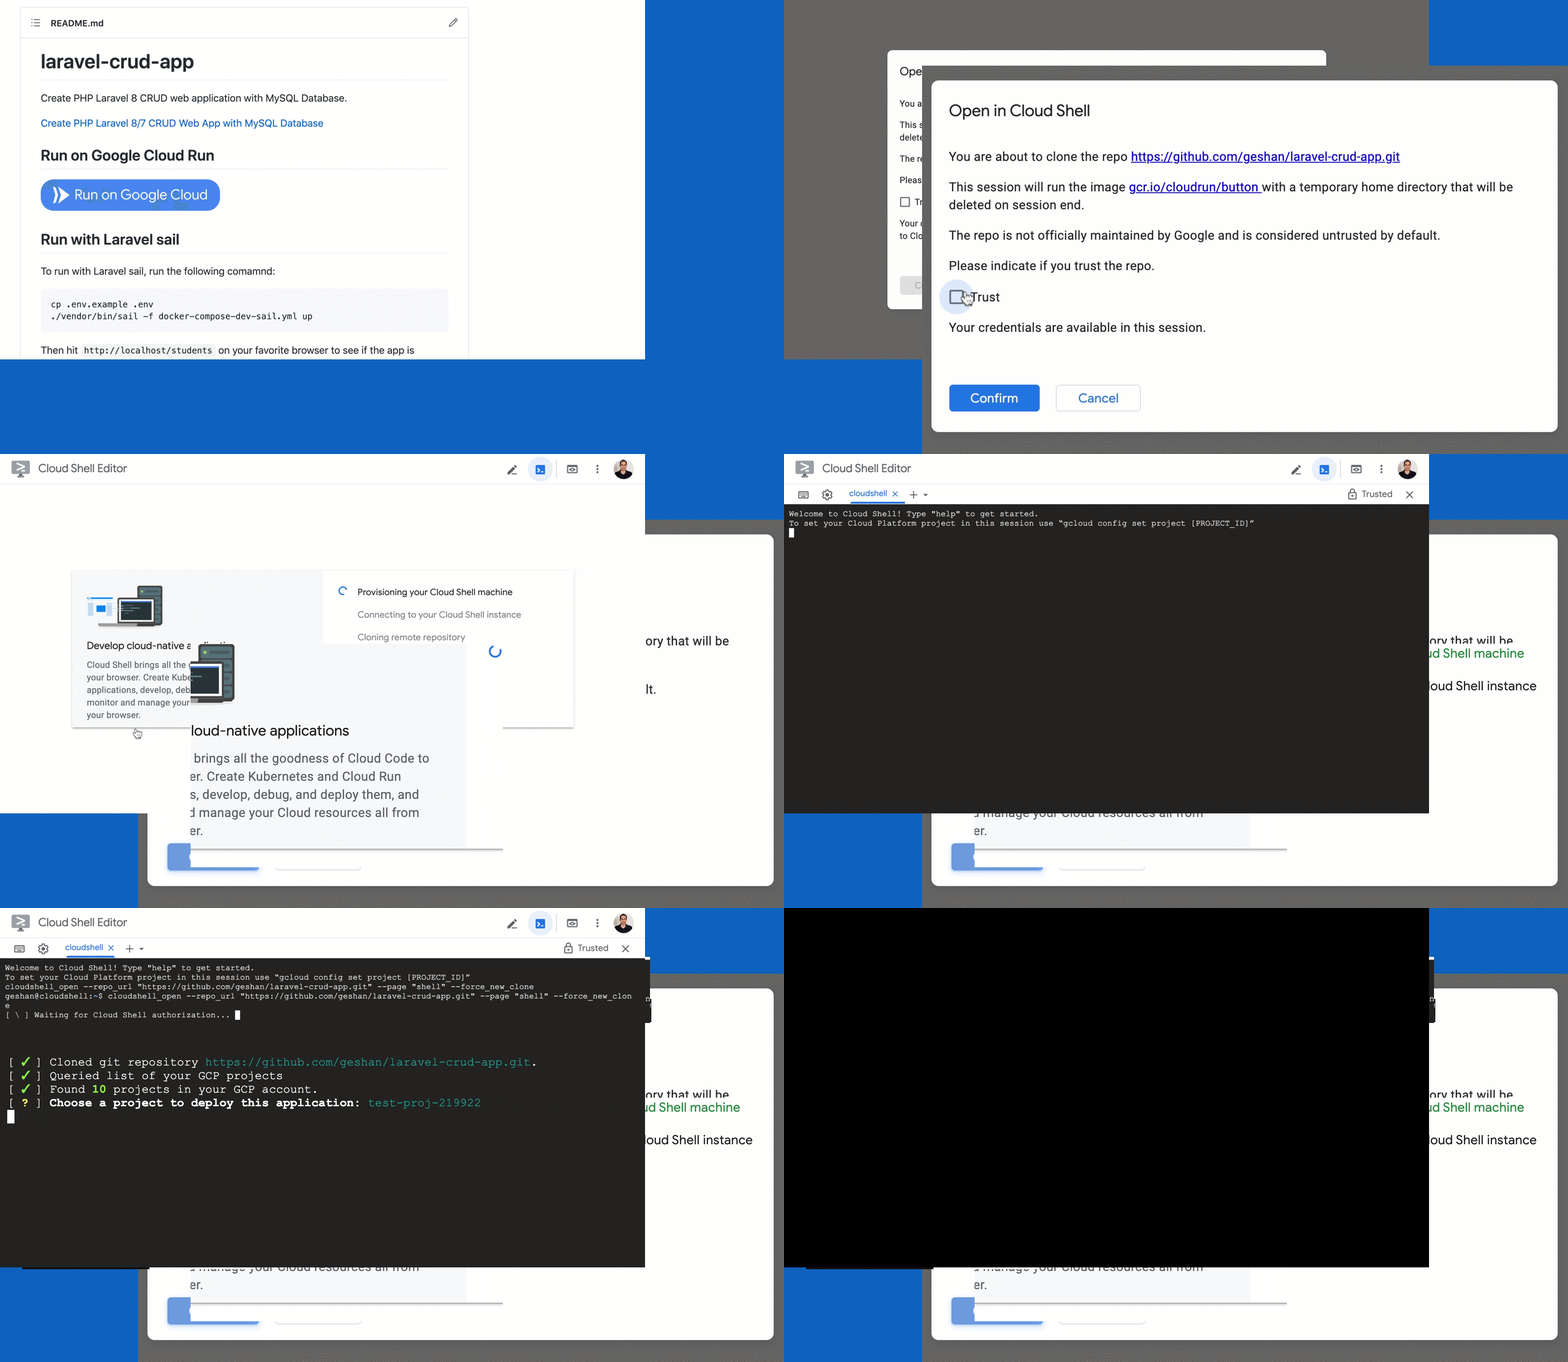
- It will take some time for the container to build and push it to the Google Container Registry (GCR)
- Consequently, it will deploy the container for us on Google Cloud Run using gcloud CLI.
- After the whole process is done, it will print the URL of our new cloud run service in green which ends in
a.run.app. We can click it and see our app running on Cloud Run.
The process for the last three steps will look like below:
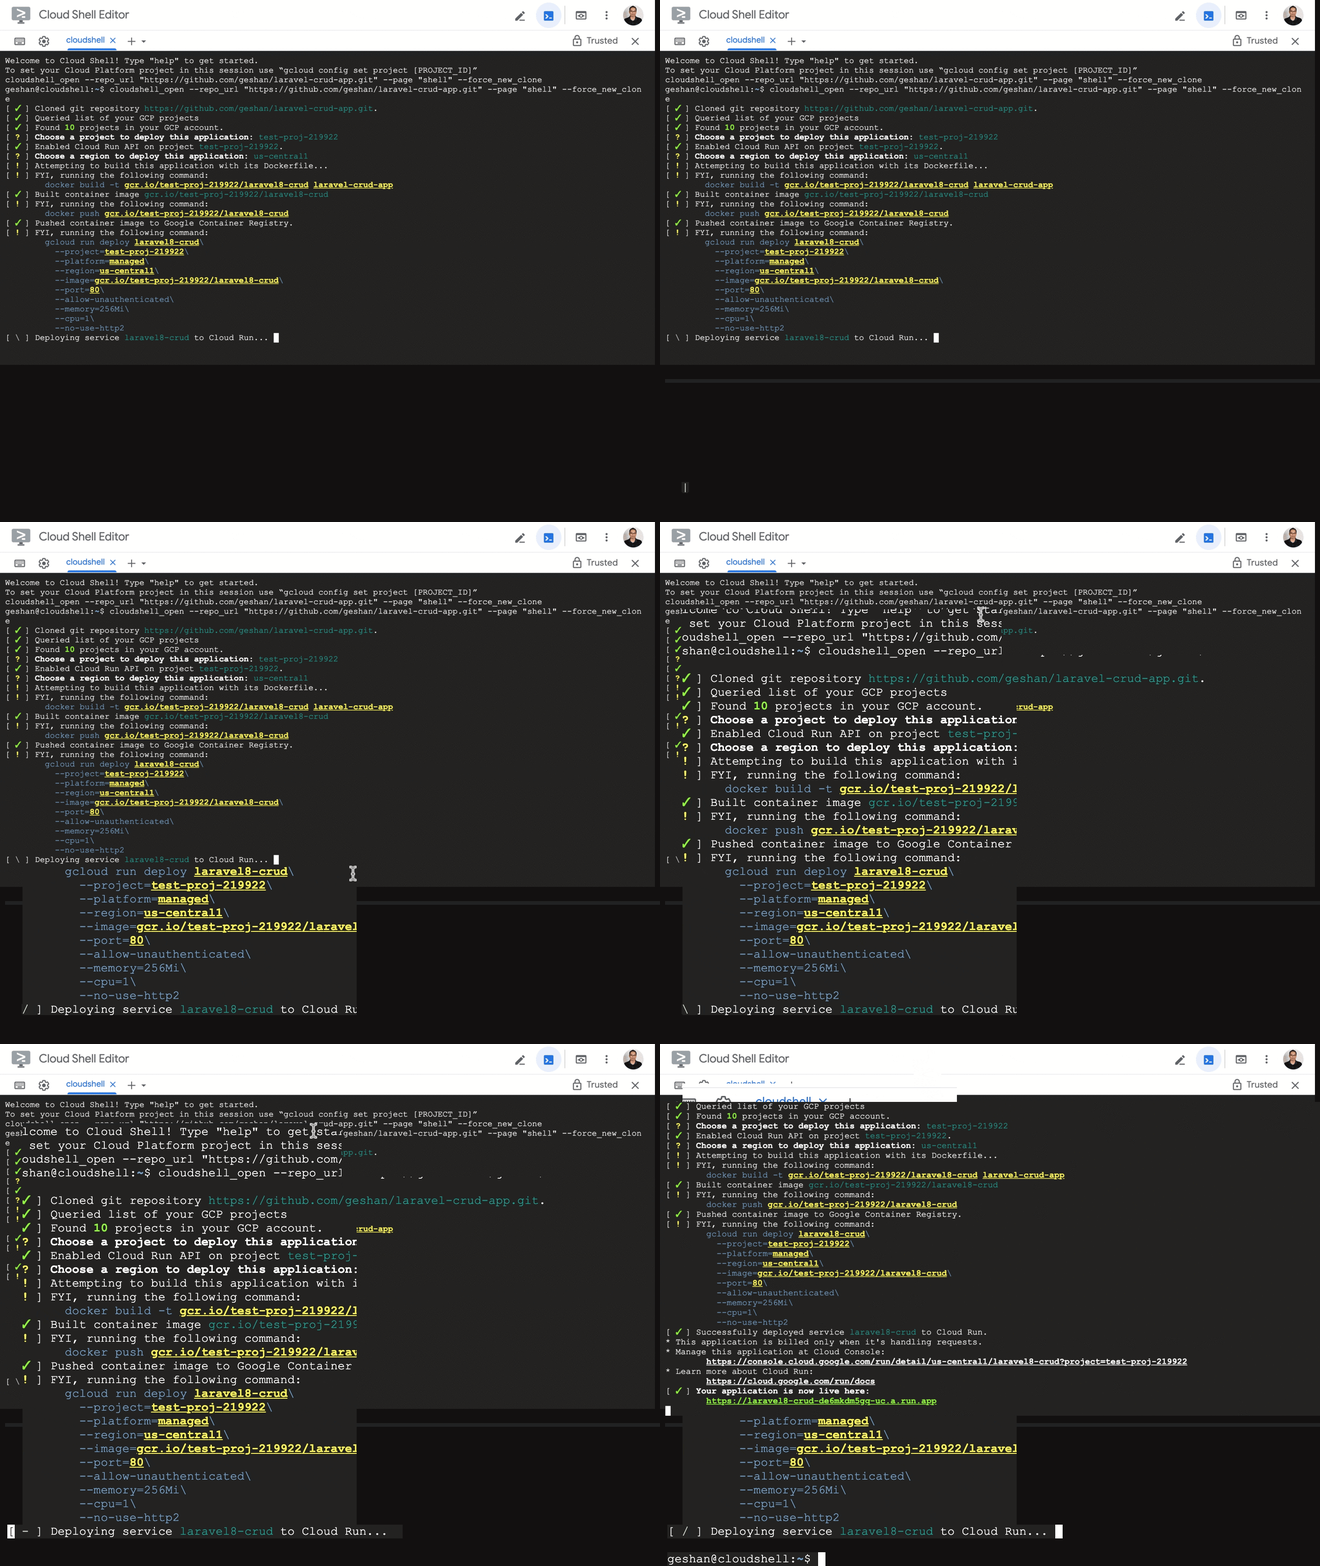
Then if we hit the service URL in green with /students added to it we will see our Laravel App running on Google Cloud Run like below:
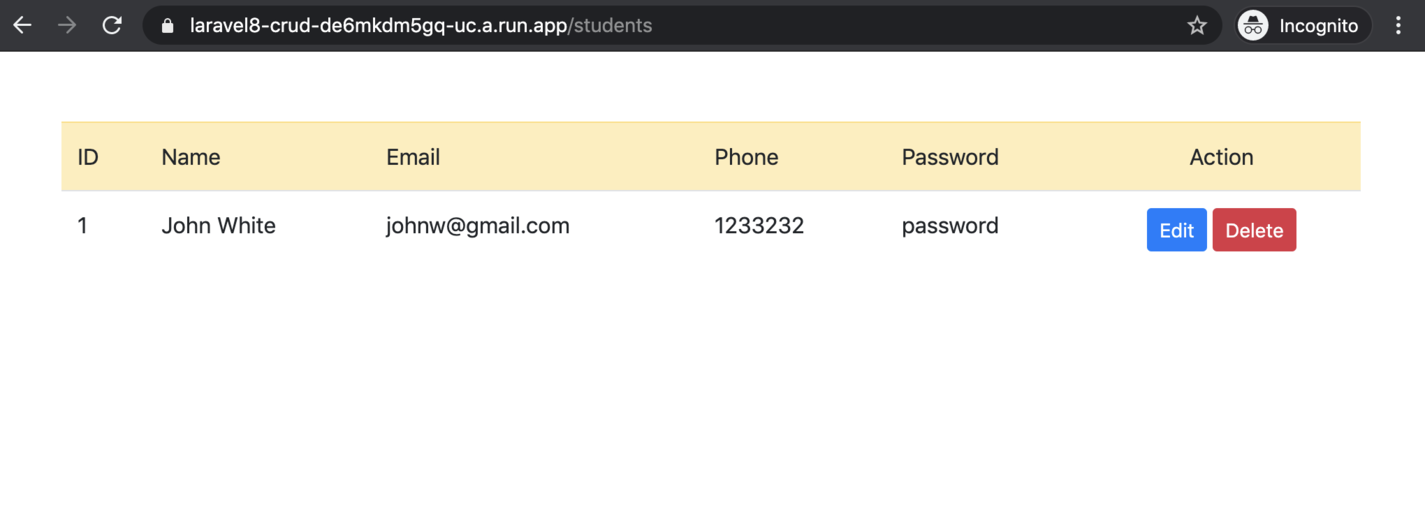
Congrats! There we have it, a Laravel app dockerized and then running on Google Cloud Run. It is time for you to explore Google Cloud Run a bit more.
Cloud Run is very simple and efficient in managing serverless containers.
Autoscaling, redundancy, security, HTTPS URL, and custom domains are some of the amazing features of Cloud Run you can surely leverage upon.
If you are interested in how it can be deployed so easily on cloud run, please do have a look at this pull request which uses the deploy to Cloud Run button.
Other things to consider
It is great that your containerized Laravel app is deployed on a Google cloud service without writing a single line of YAML configuration. Since this is a demo tutorial we can surely make it better. One of the things that can be much better is surely secret management with proper environment variables for better security.
Other things that can be better for performance are using Gzip compression and HTTP caching headers on Apache. Again these are things that will be for you to explore further.
Conclusion
We have seen how to dockerize a Laravel application for local development with Laravel sail. Then we re-dockerized the same application to be much more production-oriented. Finally, we deployed the app on super scalable and feature-rich Google Cloud Run which is surely ready for prime time. If Cloud run can handle IKEA’s workload it can surely handle yours, kudos to serverless containers.
Honeybadger has your back when it counts.
We’re the only error tracker that combines exception monitoring, uptime monitoring, and cron monitoring into a single, simple to use platform. Our mission: to tame production and make you a better, more productive developer.
Laravel News Links