https://assets.njoguamos.me.ke/cdn-cgi/image/f=webp,w=1200,h=630,fit=cover/ogs/how-to-use-cloudflare-r2-with-laravel-file-storage.jpg
Laravel offers a powerful filesystem abstraction using Flysystem, a file storage library for PHP by Frank de Jonge. Flysystem provides one interface to interact with many filesystems, including Amazon Web Services (AWS) S3-compatible object storage. There are multiple S3 API compatible object storage in the market today – starting with Amazon S3, Digital Ocean Spaces, Linode Object Storage, Cloudflare R2 among others.
When deciding which S3 object storage service to use, several factors comes into play. These factors include project requirements, available features, location, and cost. For most users, including myself, the decision often comes down to the cost. I always choose Cloudflare R2 as my preferred option due to its affordability and zero egress fee.
Let me show you how can start using Cloudflare R2 object storage in your Laravel project.
Prerequisites
Before we proceed, you may need to have some basic understanding of Laravel Storage, well at least know what it is and why we need it. To subscribe to Cloudflare R2, you will need a Credit Card or PayPal. R2 comes with a free tier, and you will only pay as you go once you exceed the limit. You can estimate your cost using R2 cost calculator.
Create a Cloudflare account
To create a Bucket, you must purchase R2 from the Cloudflare dashboard. Therefore, you must sign up for a Cloudflare account. If you already have an account, skip this section.

On signing up, click Explore all products link. You will redirect you to Cloudflare dashboard. You must verify your email before you can start using Cloudflare services.

Create a new R2 bucket
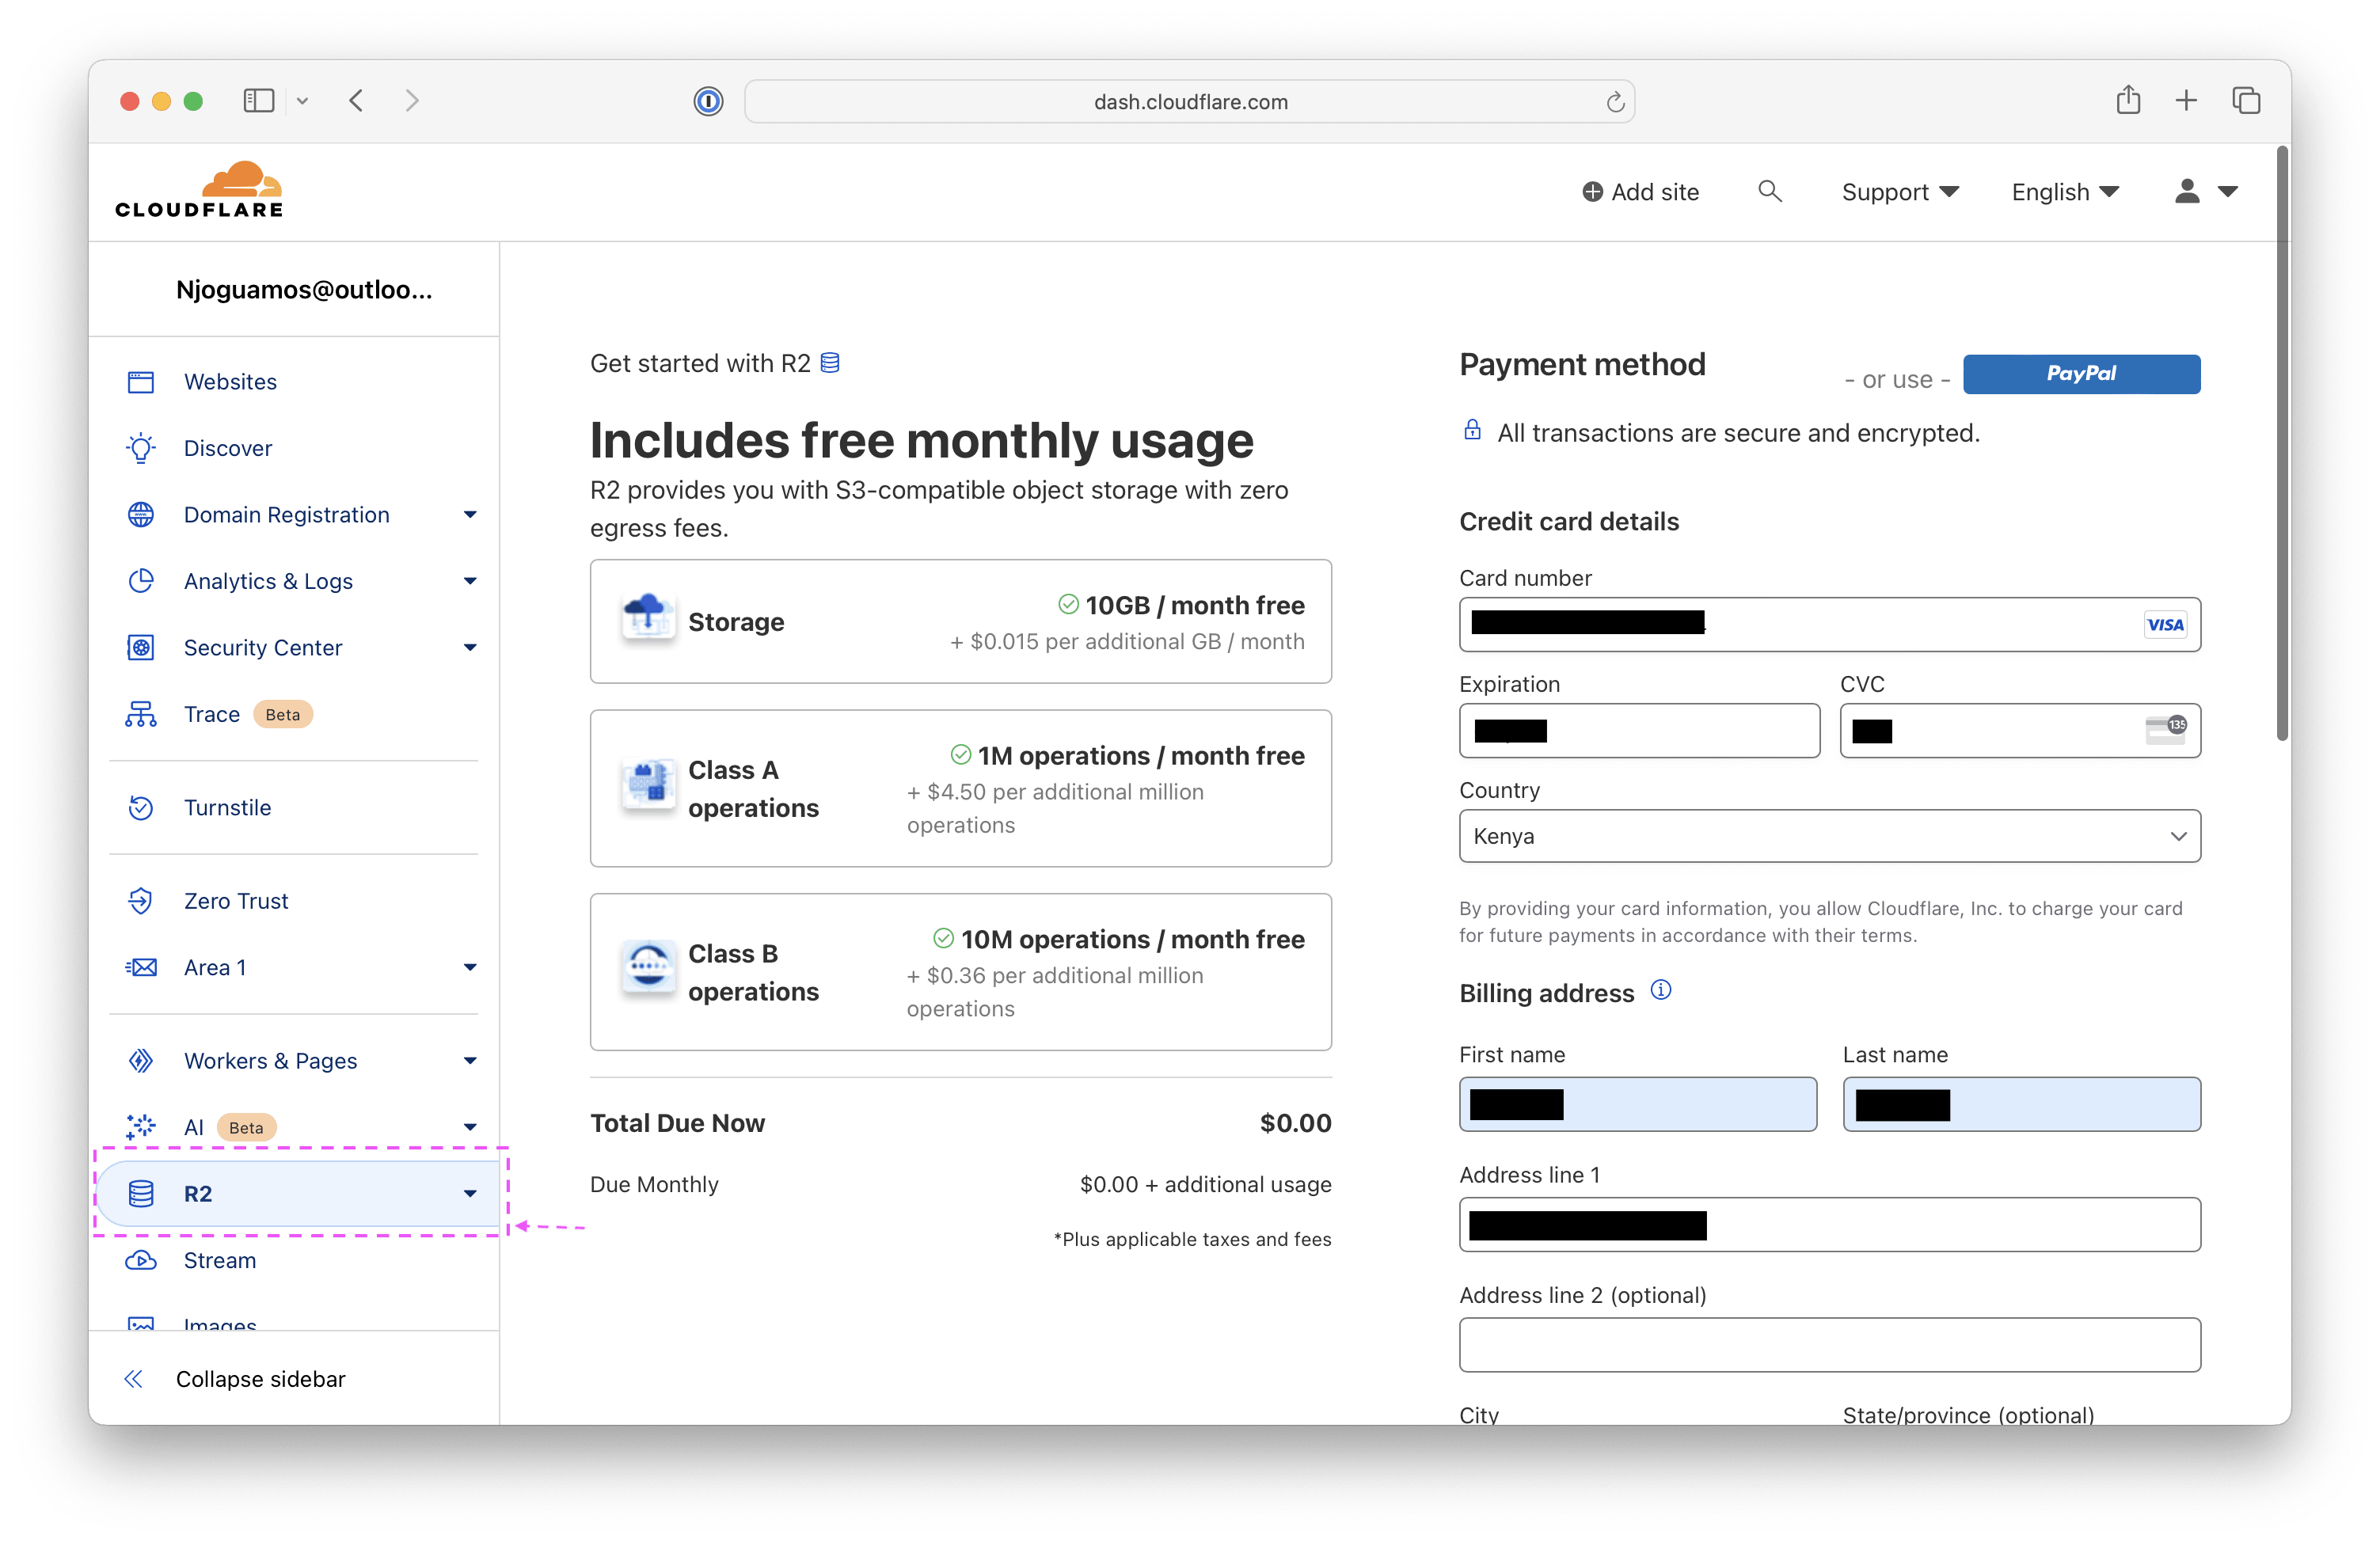
Create a new bucket – a file space on the server containing objects. Open the Cloudflare dashboard and select R2 on the left sidebar. You will be presented with an R2 subscription form. Fill in the billing details and credit card details, or use PayPal. If you already have a bucket, skip this section.
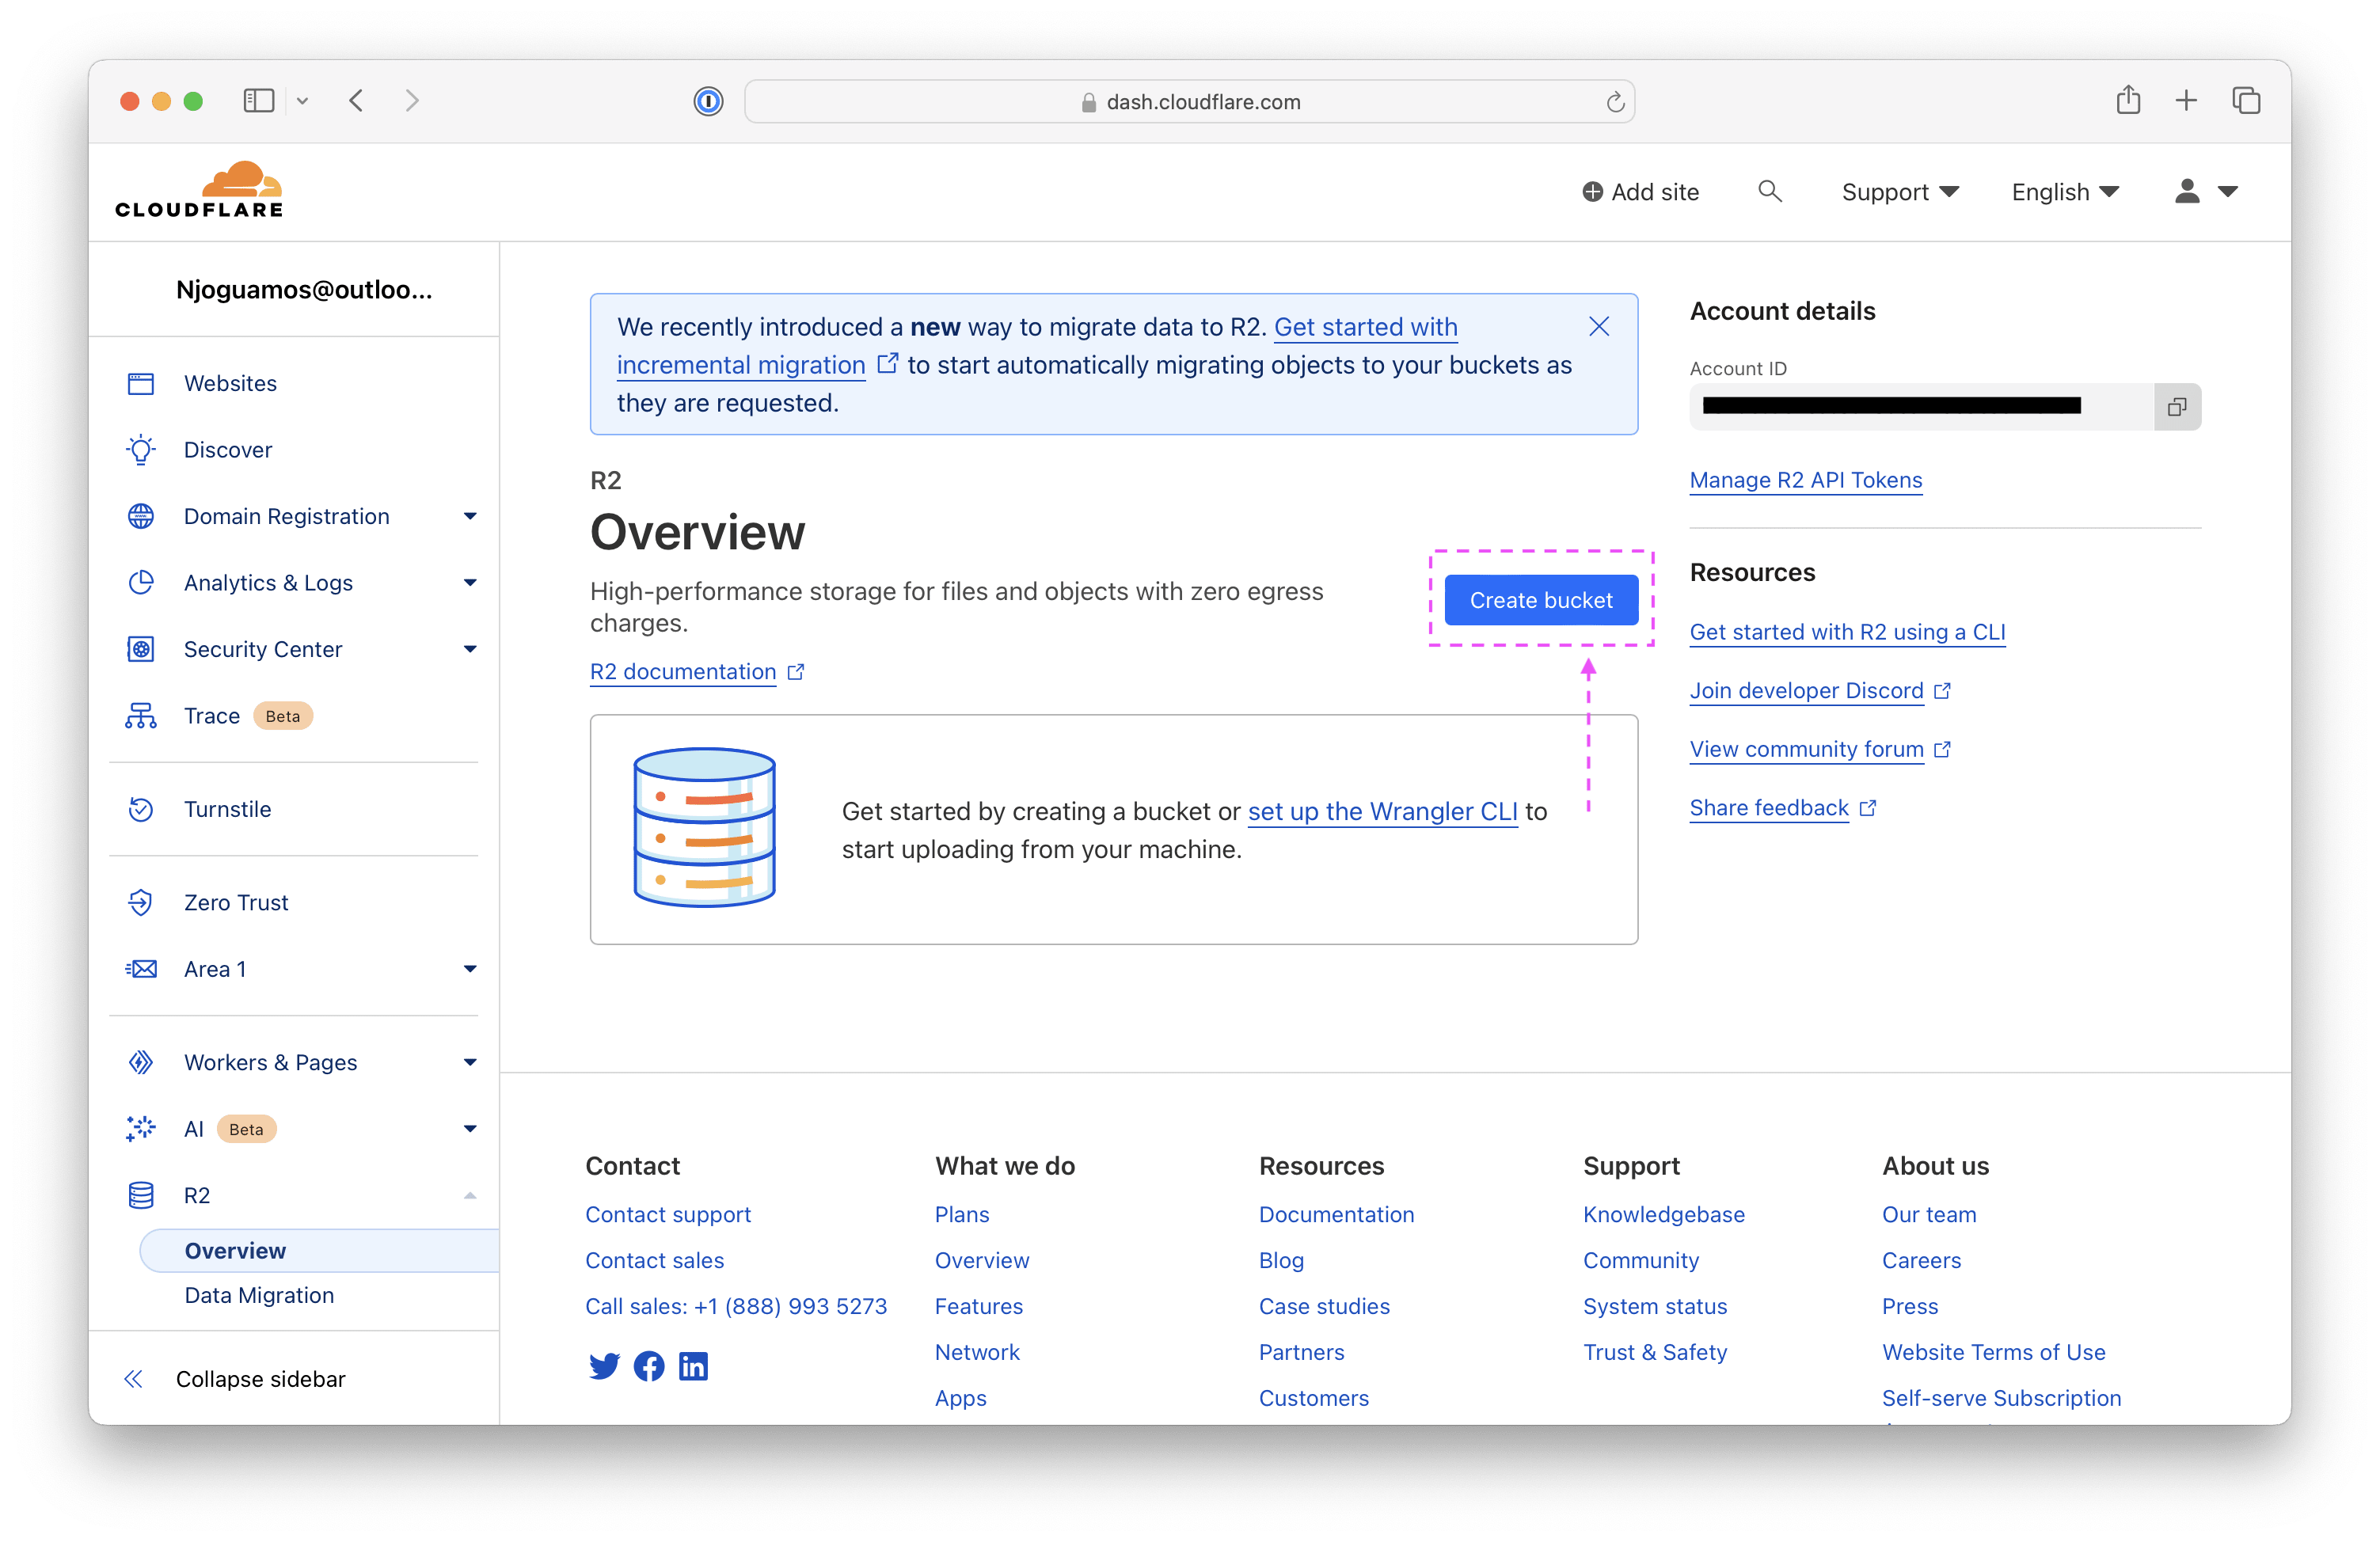
If the subscription is successful, you will be presented with an R2 dashboard. Click Create a bucket.
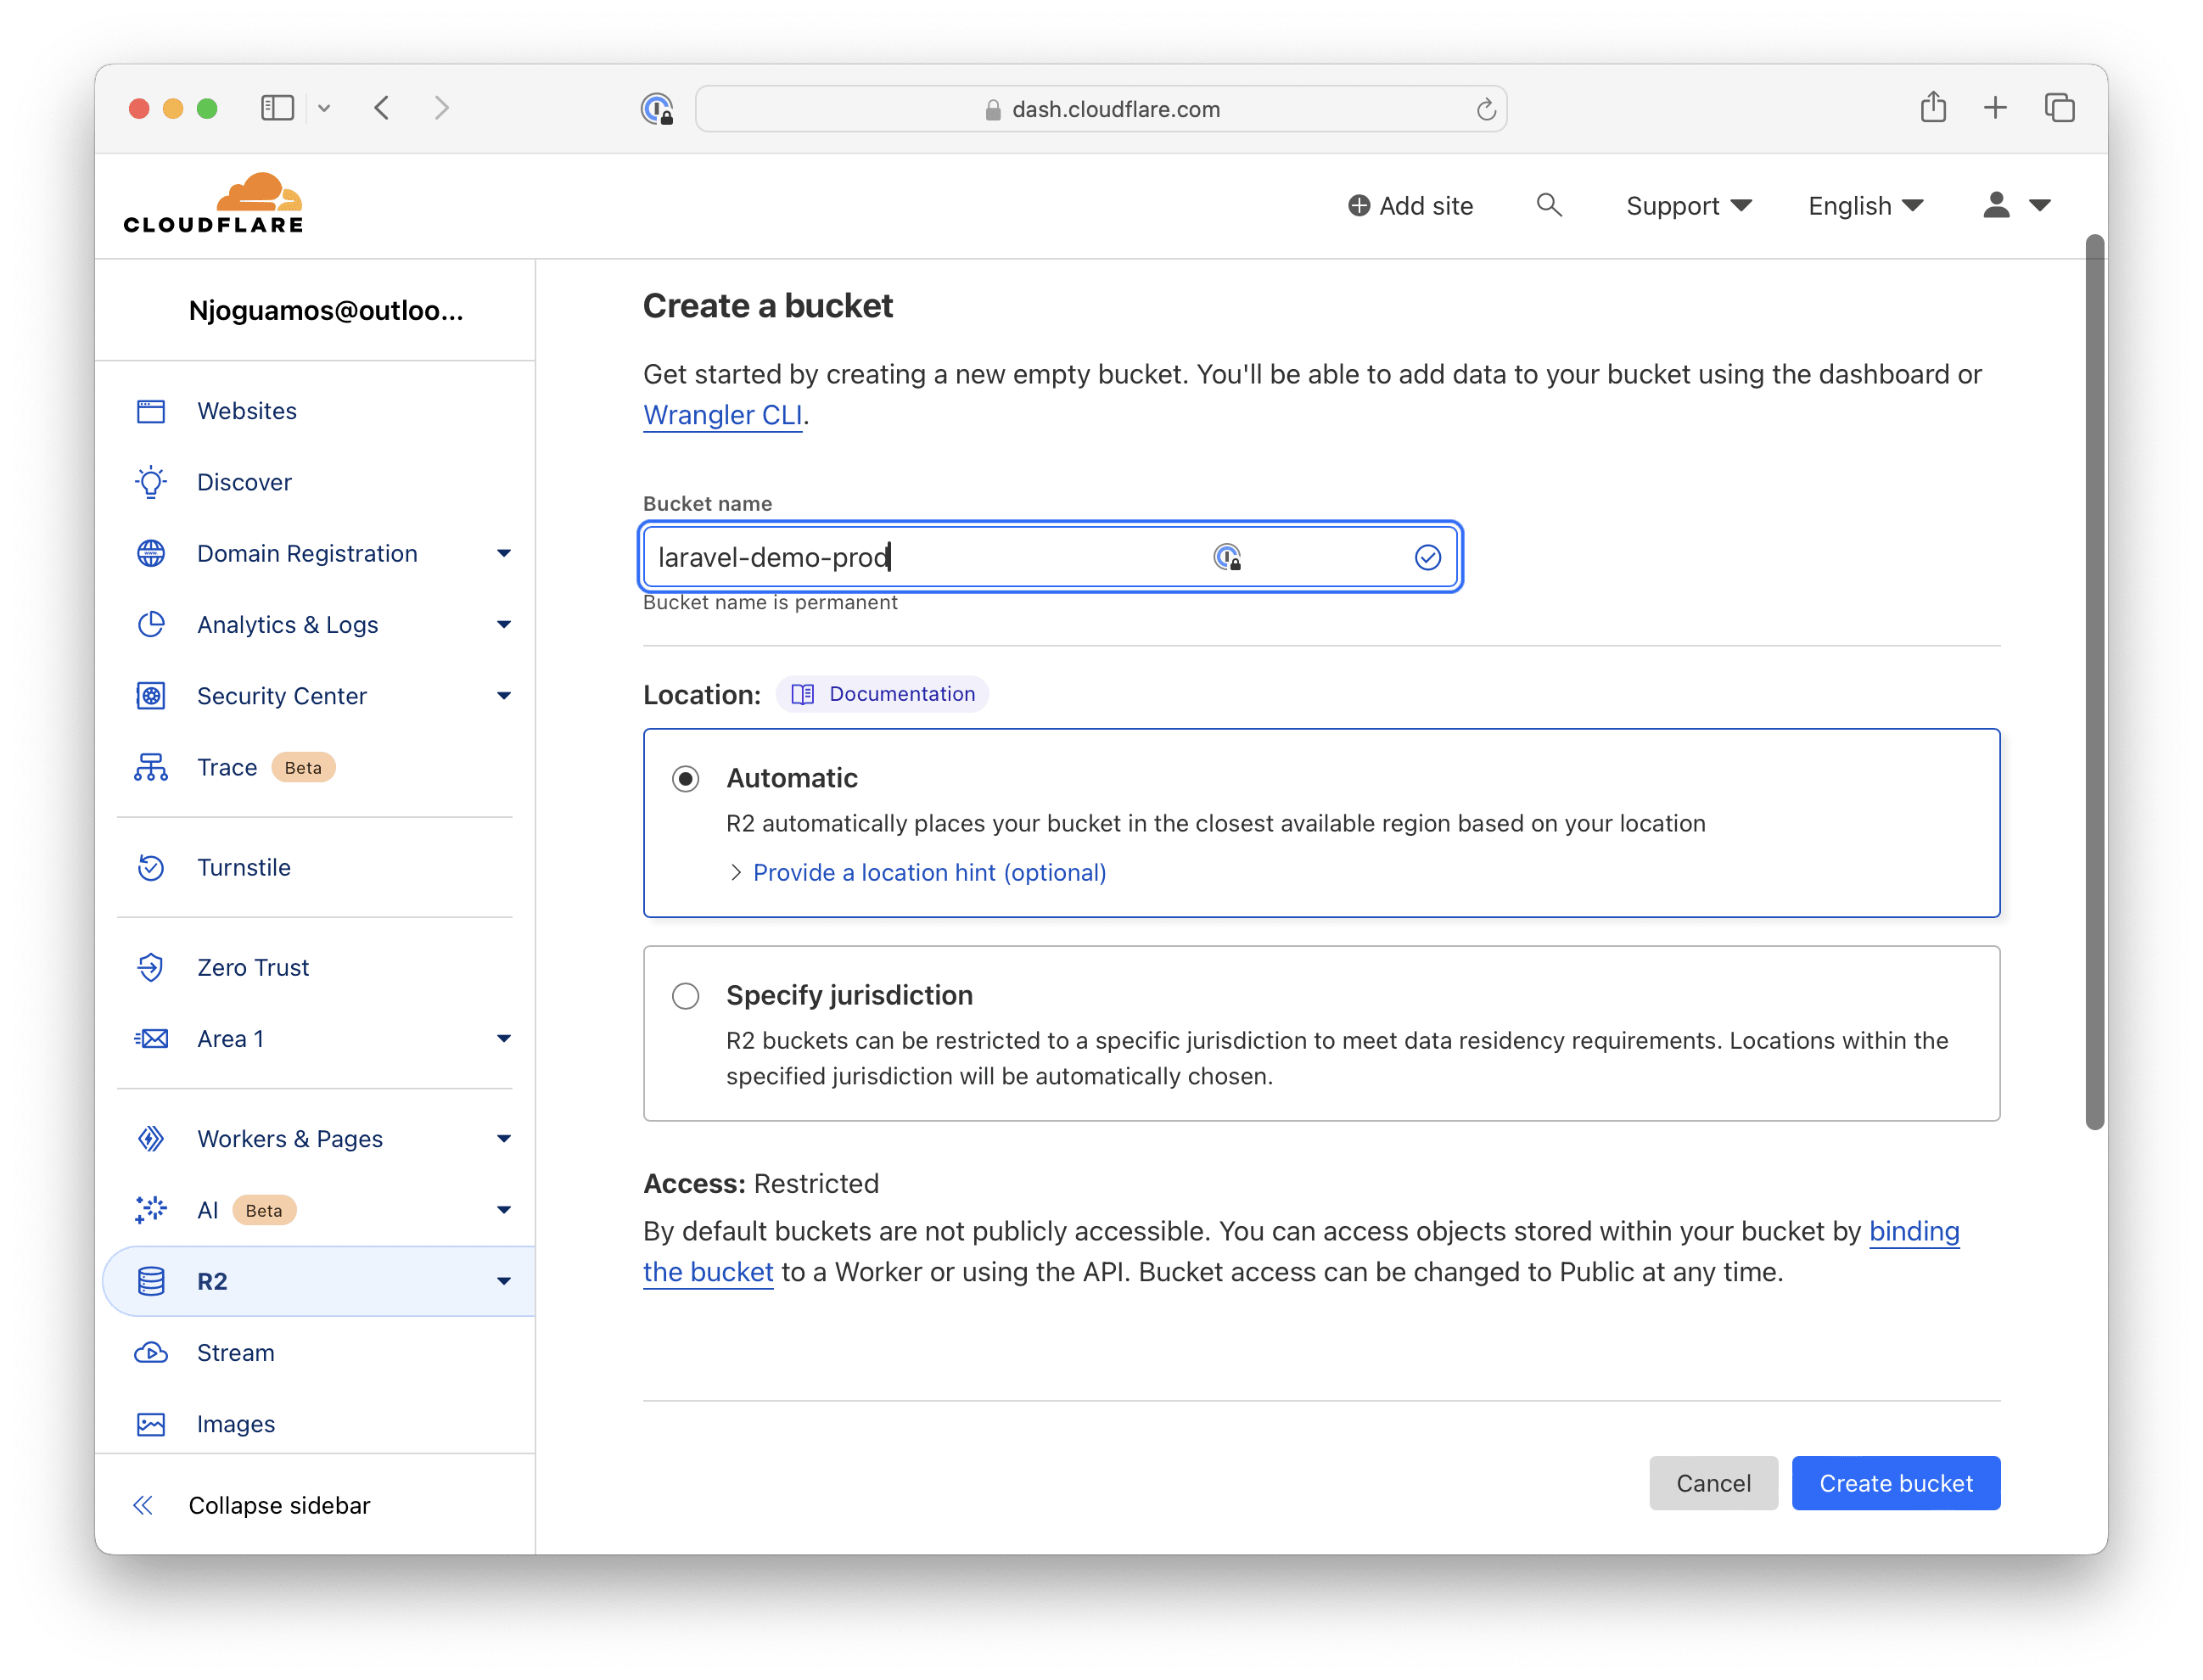
Provide a bucket name. Use your preferred naming convention. Update or retain the other default options, then click Create Bucket.
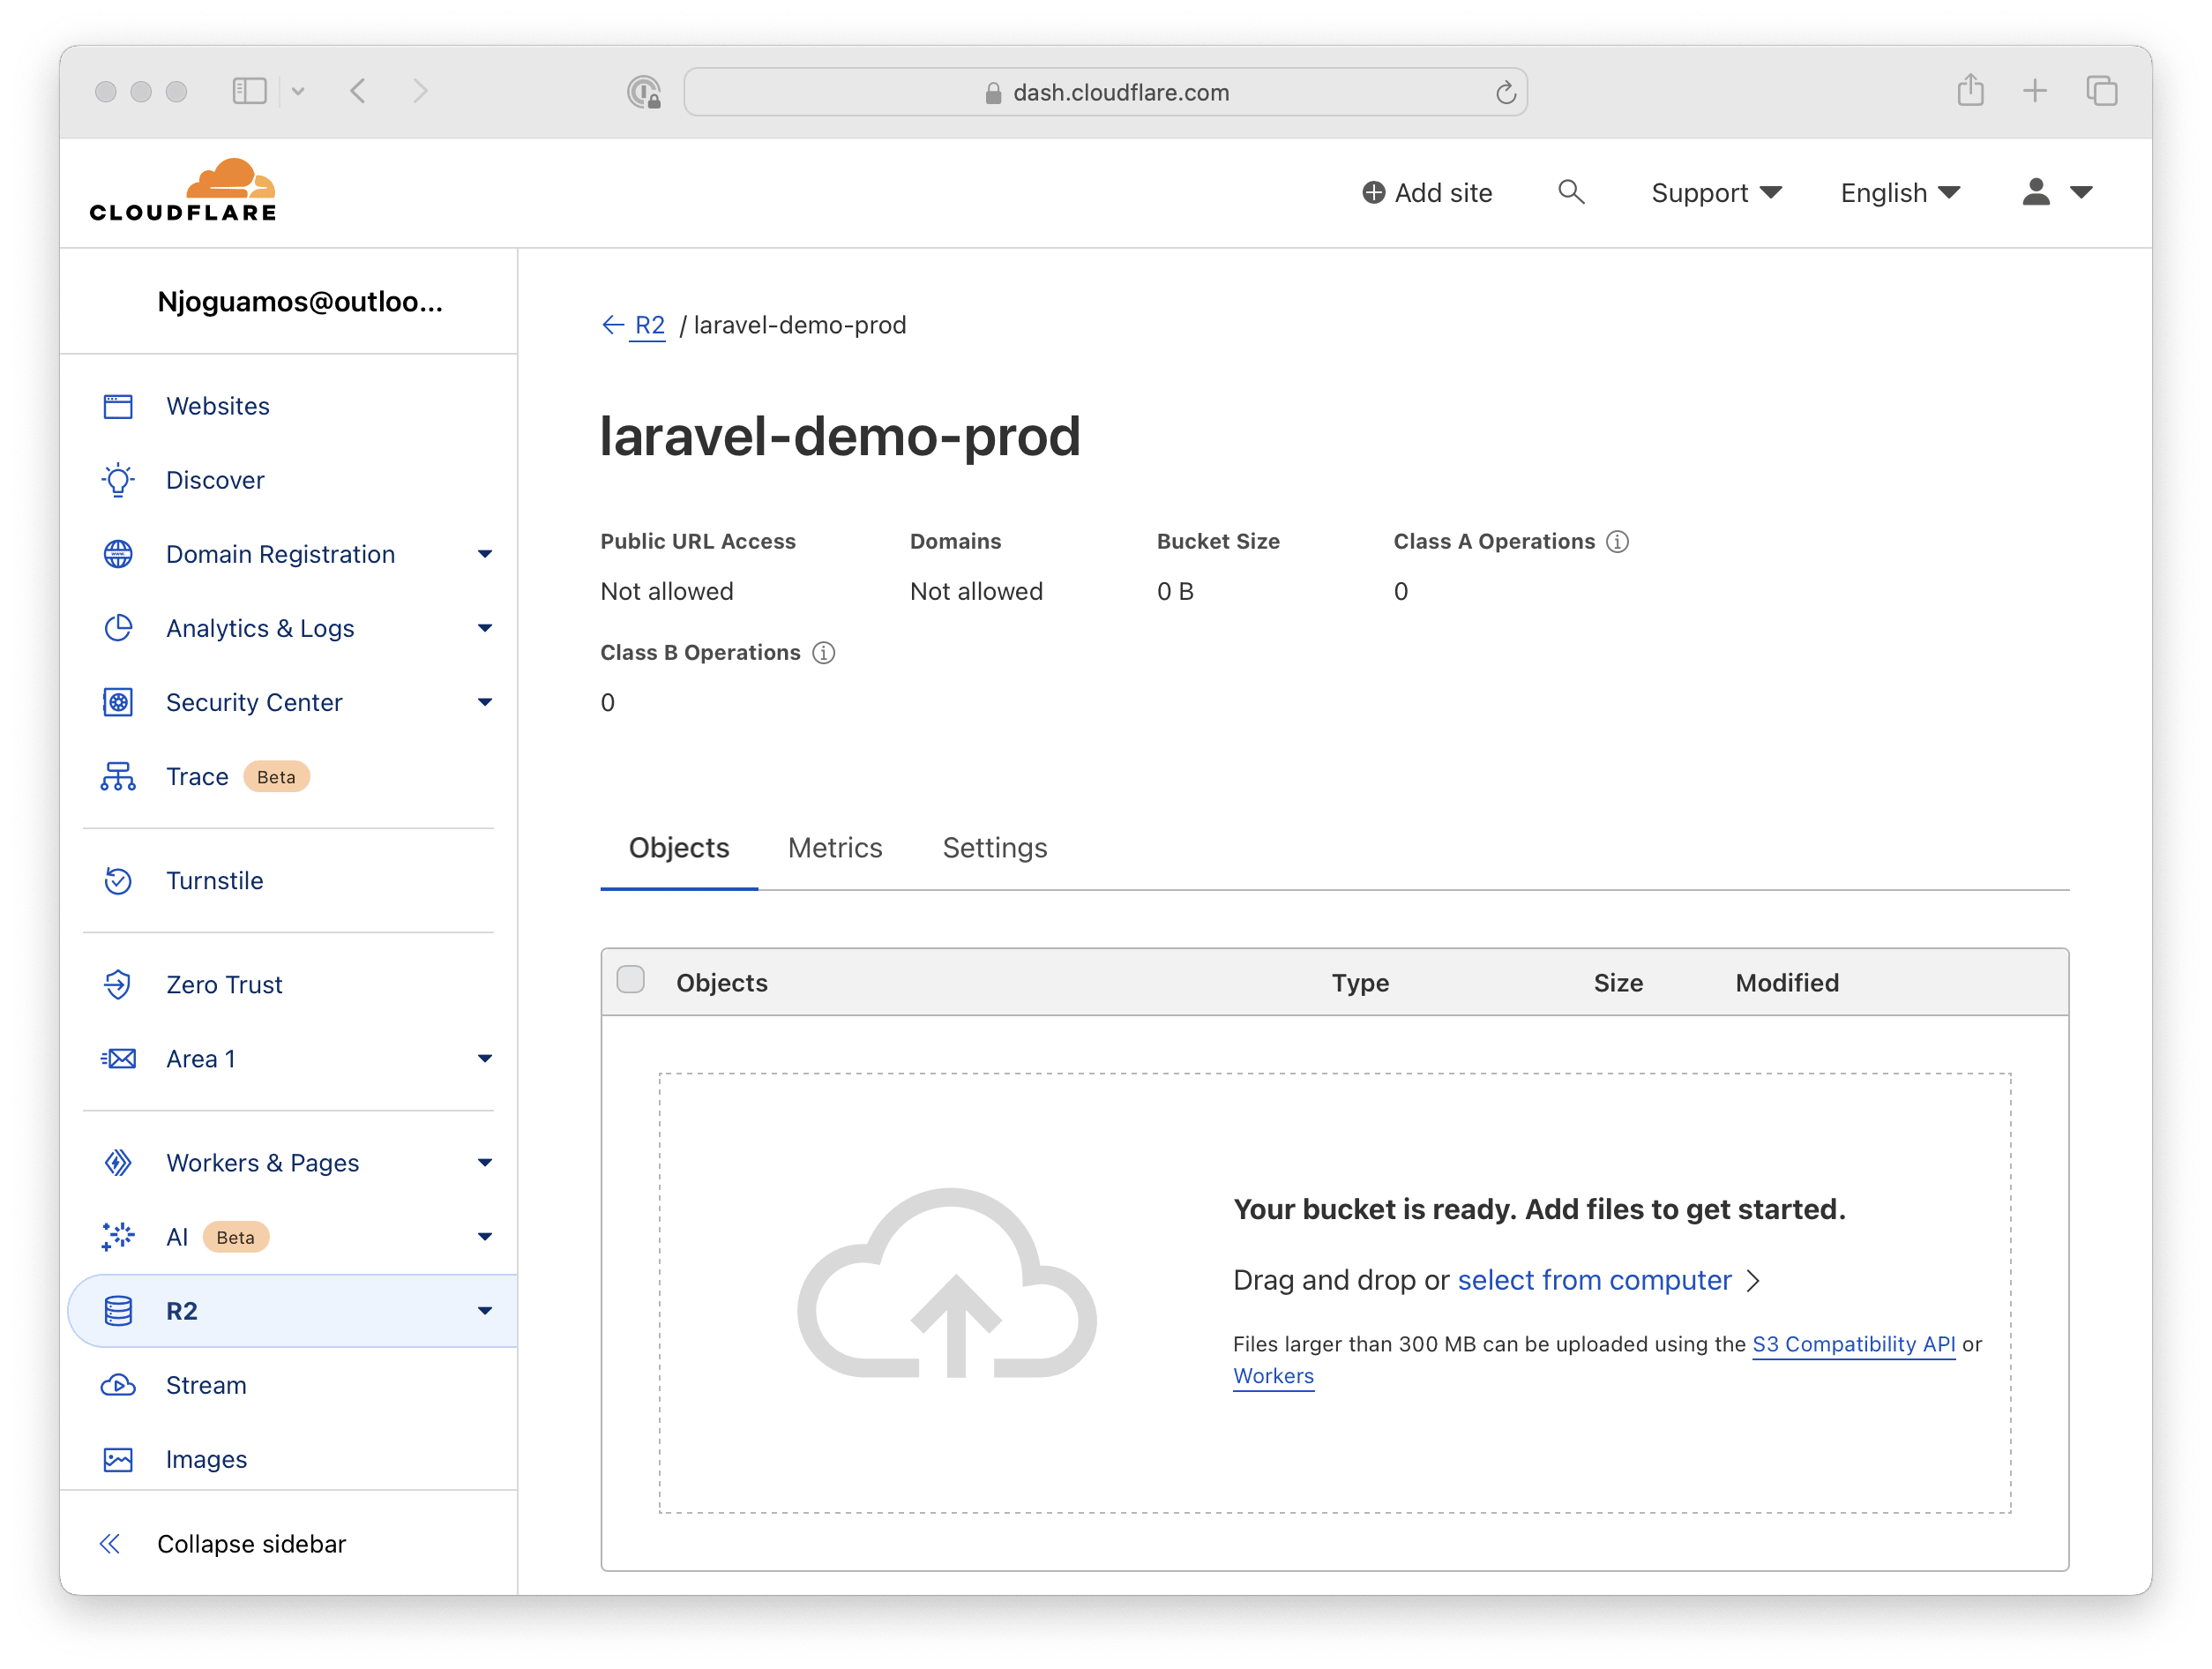
You should be presented with an empty R2 bucket ready for use upon successful creation.
Generate R2 credentials
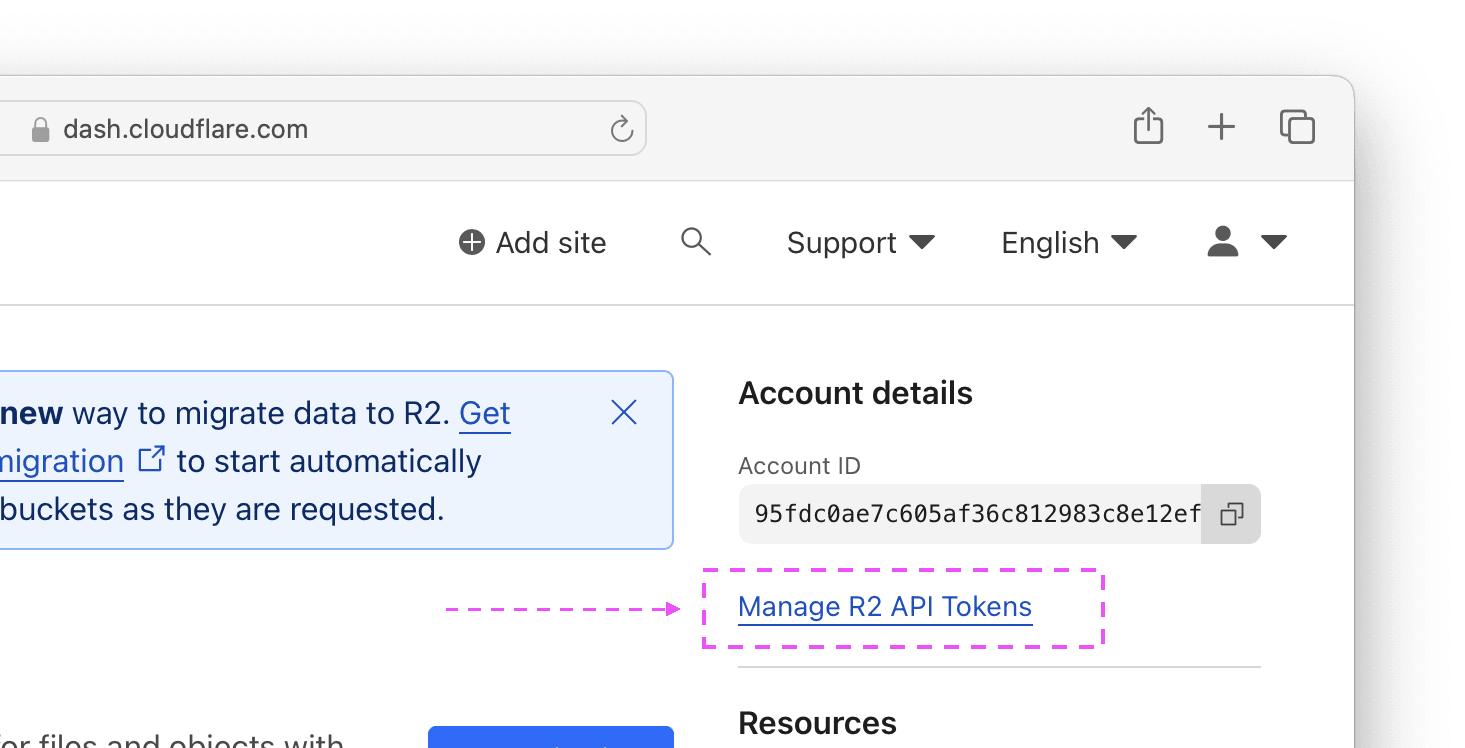
To manage the bucket contents using Laravel, you must generate credentials for the S3 client. Select R2 from the left sidebar and then choose Manage R2 API tokens.
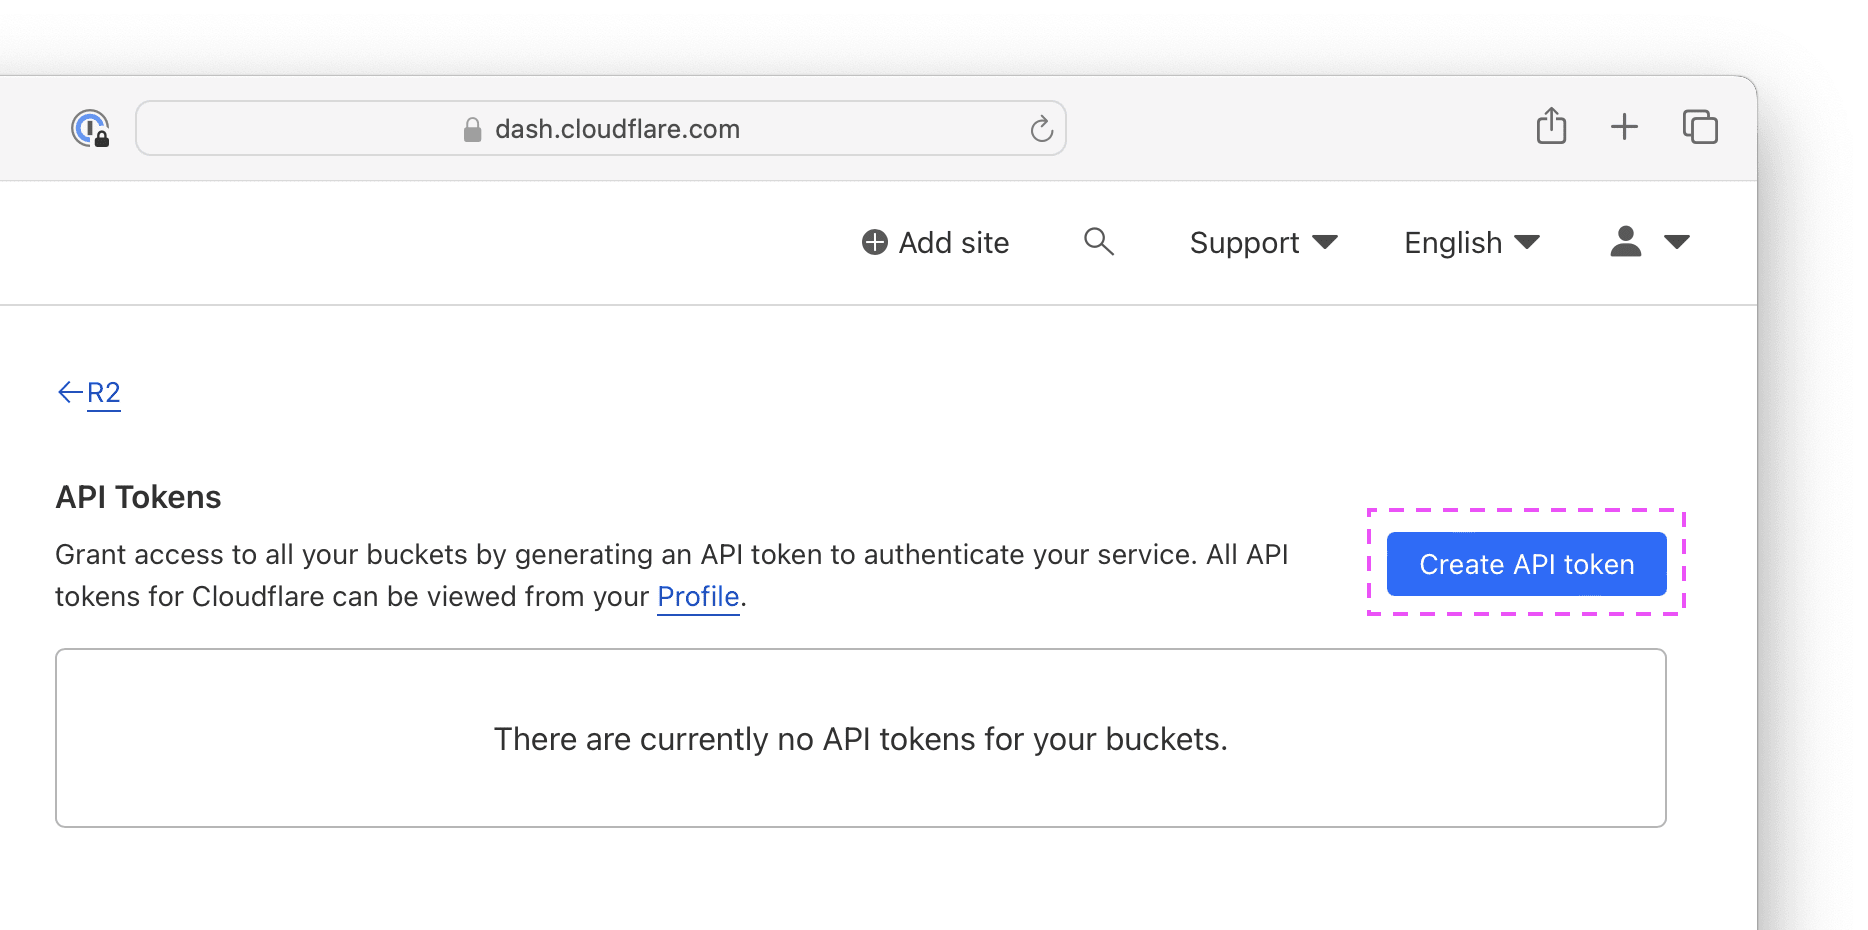
In the next page, select Create API token.
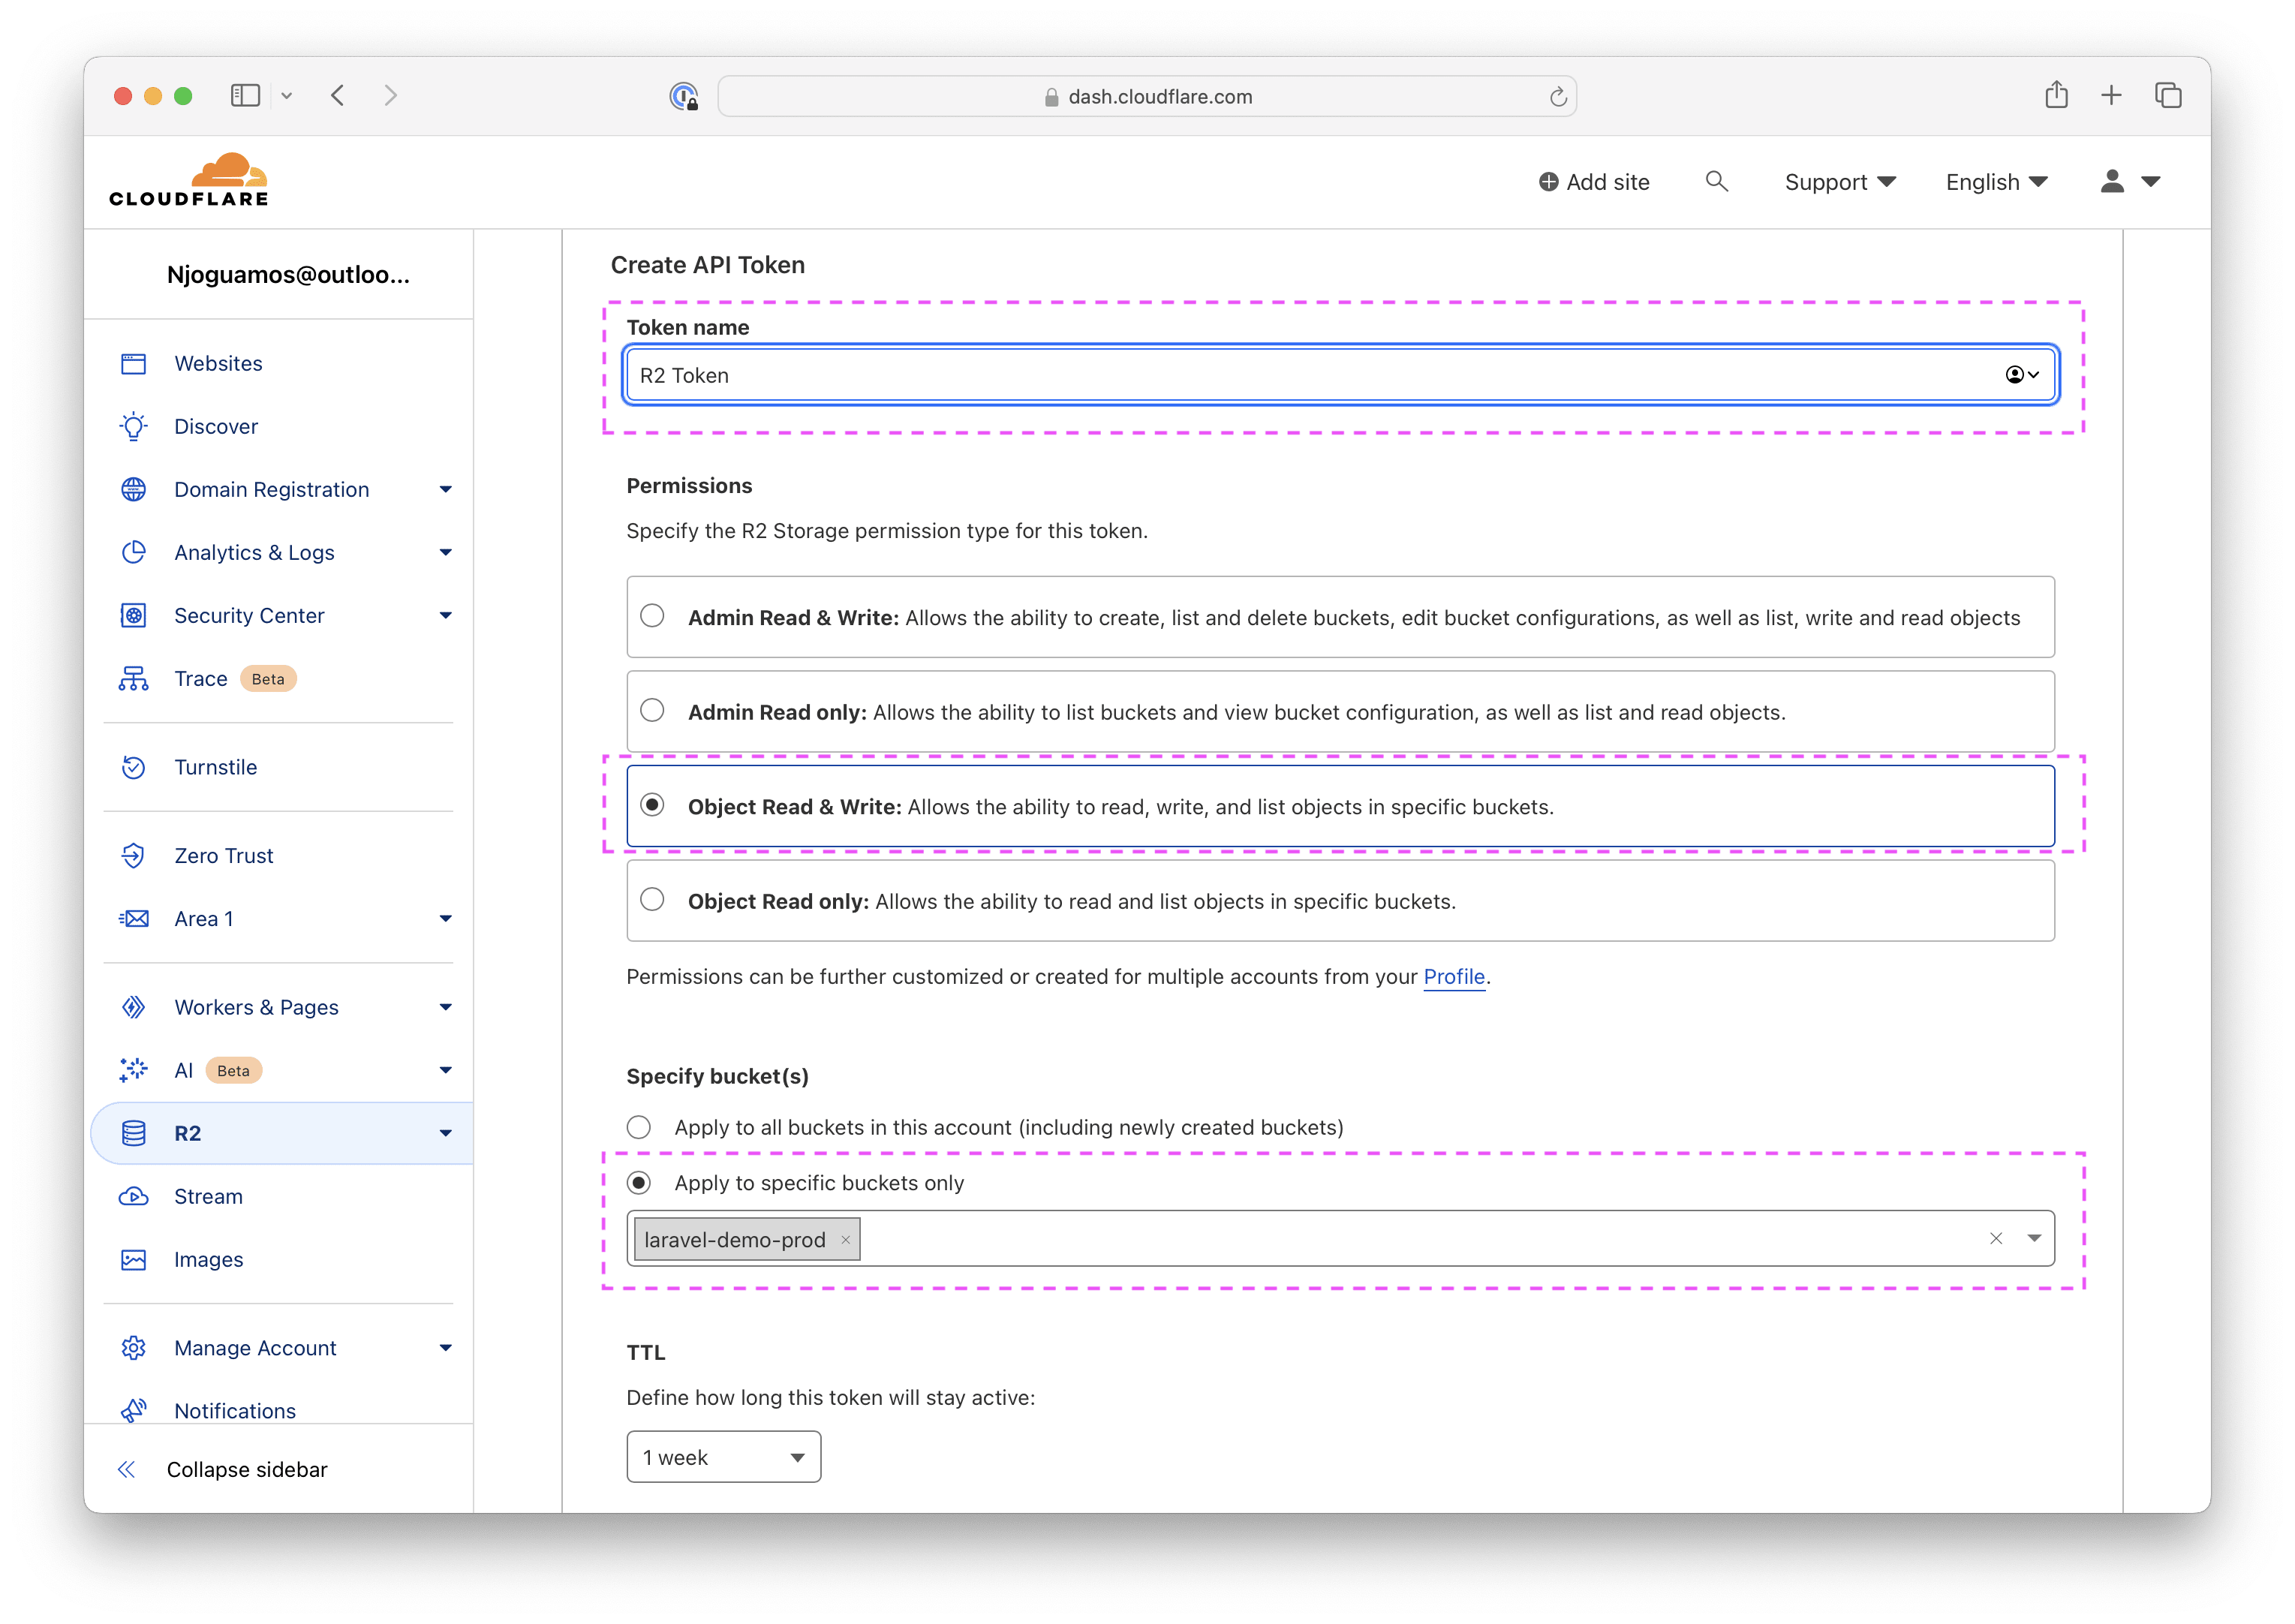
Provide your preferred token name and select Object Read & Write permission. Apply the permission to specific buckets only (the bucket we created).
After your token has been successfully created, review your Secret Access Key and Access Key ID values. Save the keys as R2_ACCESS_KEY_ID and R2_SECRET_ACCESS_KEY respectively and jurisdiction-specific endpoint for S3 clients as R2_ENDPOINT. You will need these values in the next .
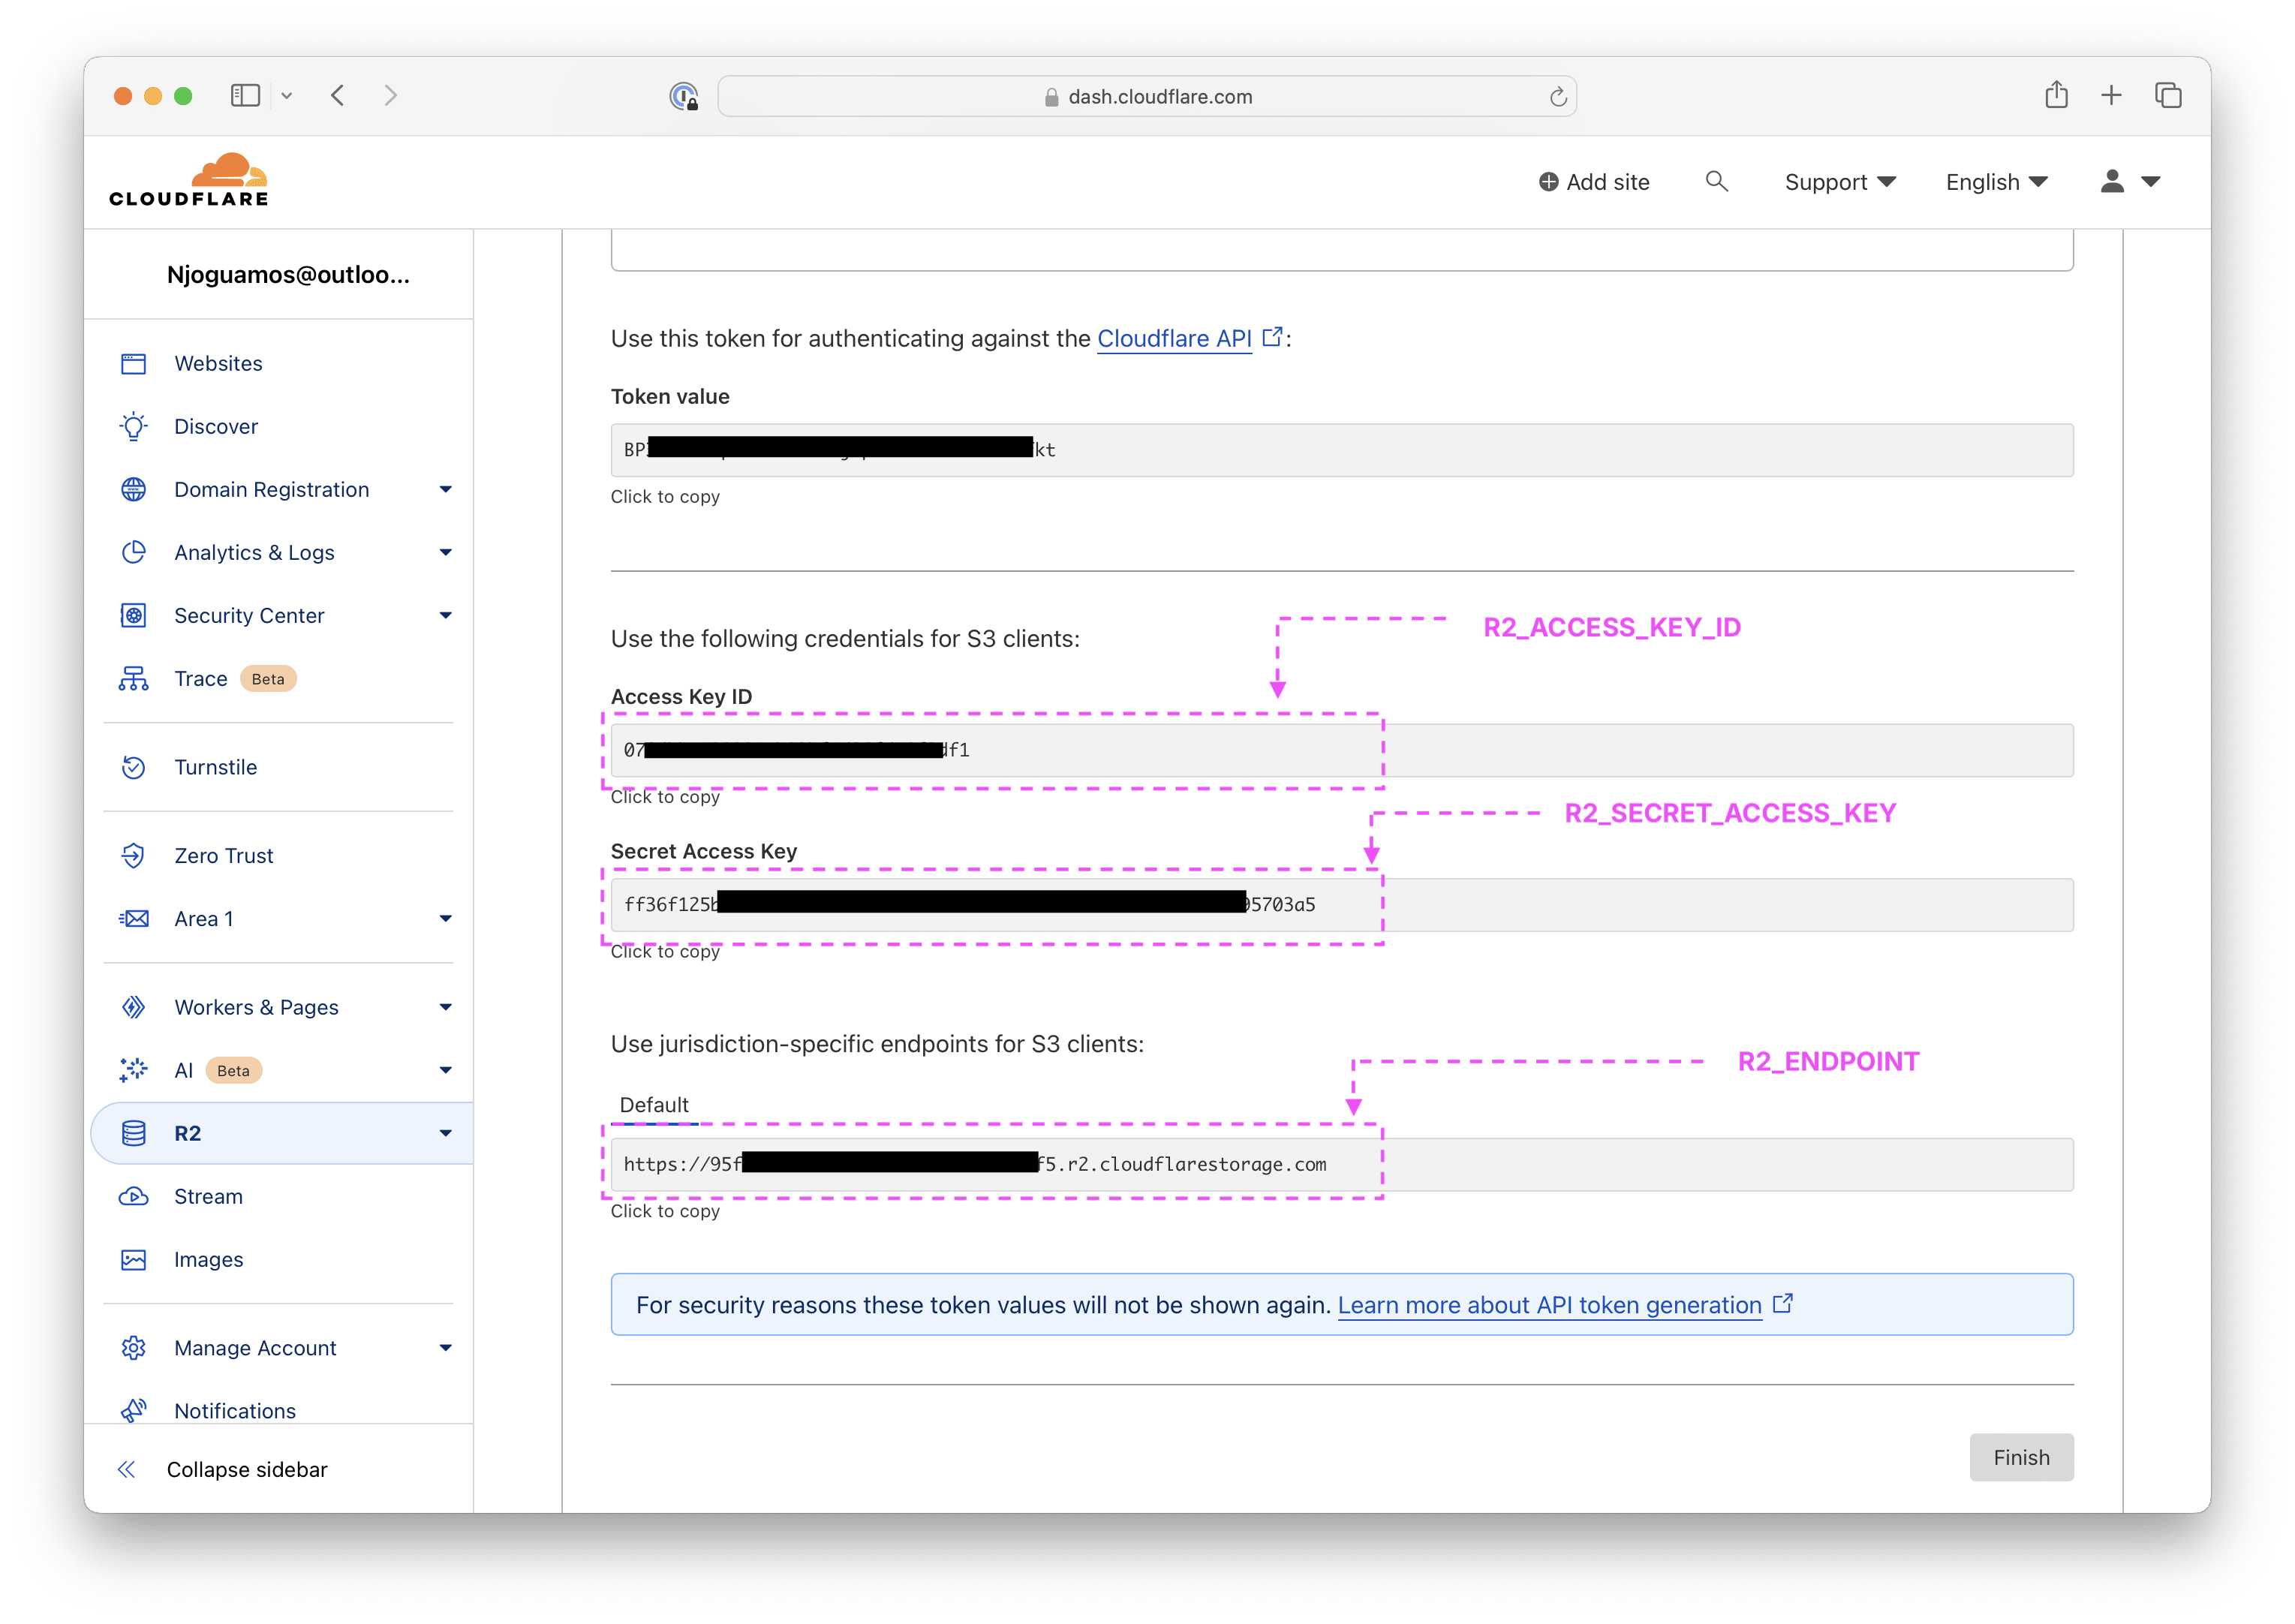
You must record both values before proceeding, as the Secret Access Keys cannot be retrieved later.
Once you save the keys, click Finish.
Setup Laravel to use R2
In your Laravel app, open the .env file and add the following credentials.
R2_ACCESS_KEY_ID=078d********cb09bf********df1
R2_SECRET_ACCESS_KEY=ff36f125b5******0072630595703a5
R2_BUCKET=laravel-demo-prod
R2_ENDPOINT=https://95f*************12ef5.r2.cloudflarestorage.com
Then open ./config/filesystems.php and add a new r2 disk as follows
<?php

return [

 'default' => env('FILESYSTEM_DISK', 'local'),

 'disks' => [

 'local' => [ /*...*/ ],

	'public' => [ /*...*/ ],

 's3' => [ /*...*/ ],

 'r2' => [
 'driver' => 's3',
 'key' => env('R2_ACCESS_KEY_ID'),
 'secret' => env('R2_SECRET_ACCESS_KEY'),
 'region' => 'auto',
 'bucket' => env('R2_BUCKET'),
 'url' => env('R2_URL'),
 'endpoint' => env('R2_ENDPOINT'),
 'use_path_style_endpoint' => env('R2_USE_PATH_STYLE_ENDPOINT', false),
 'throw' => false,
 ],

 ],

 'links' => [ /*...*/ ],

];
Finally, install the Flysystem S3 package via the Composer package manager.
composer require league/flysystem-aws-s3-v3 "^3.0" --with-all-dependenciesTesting the integration
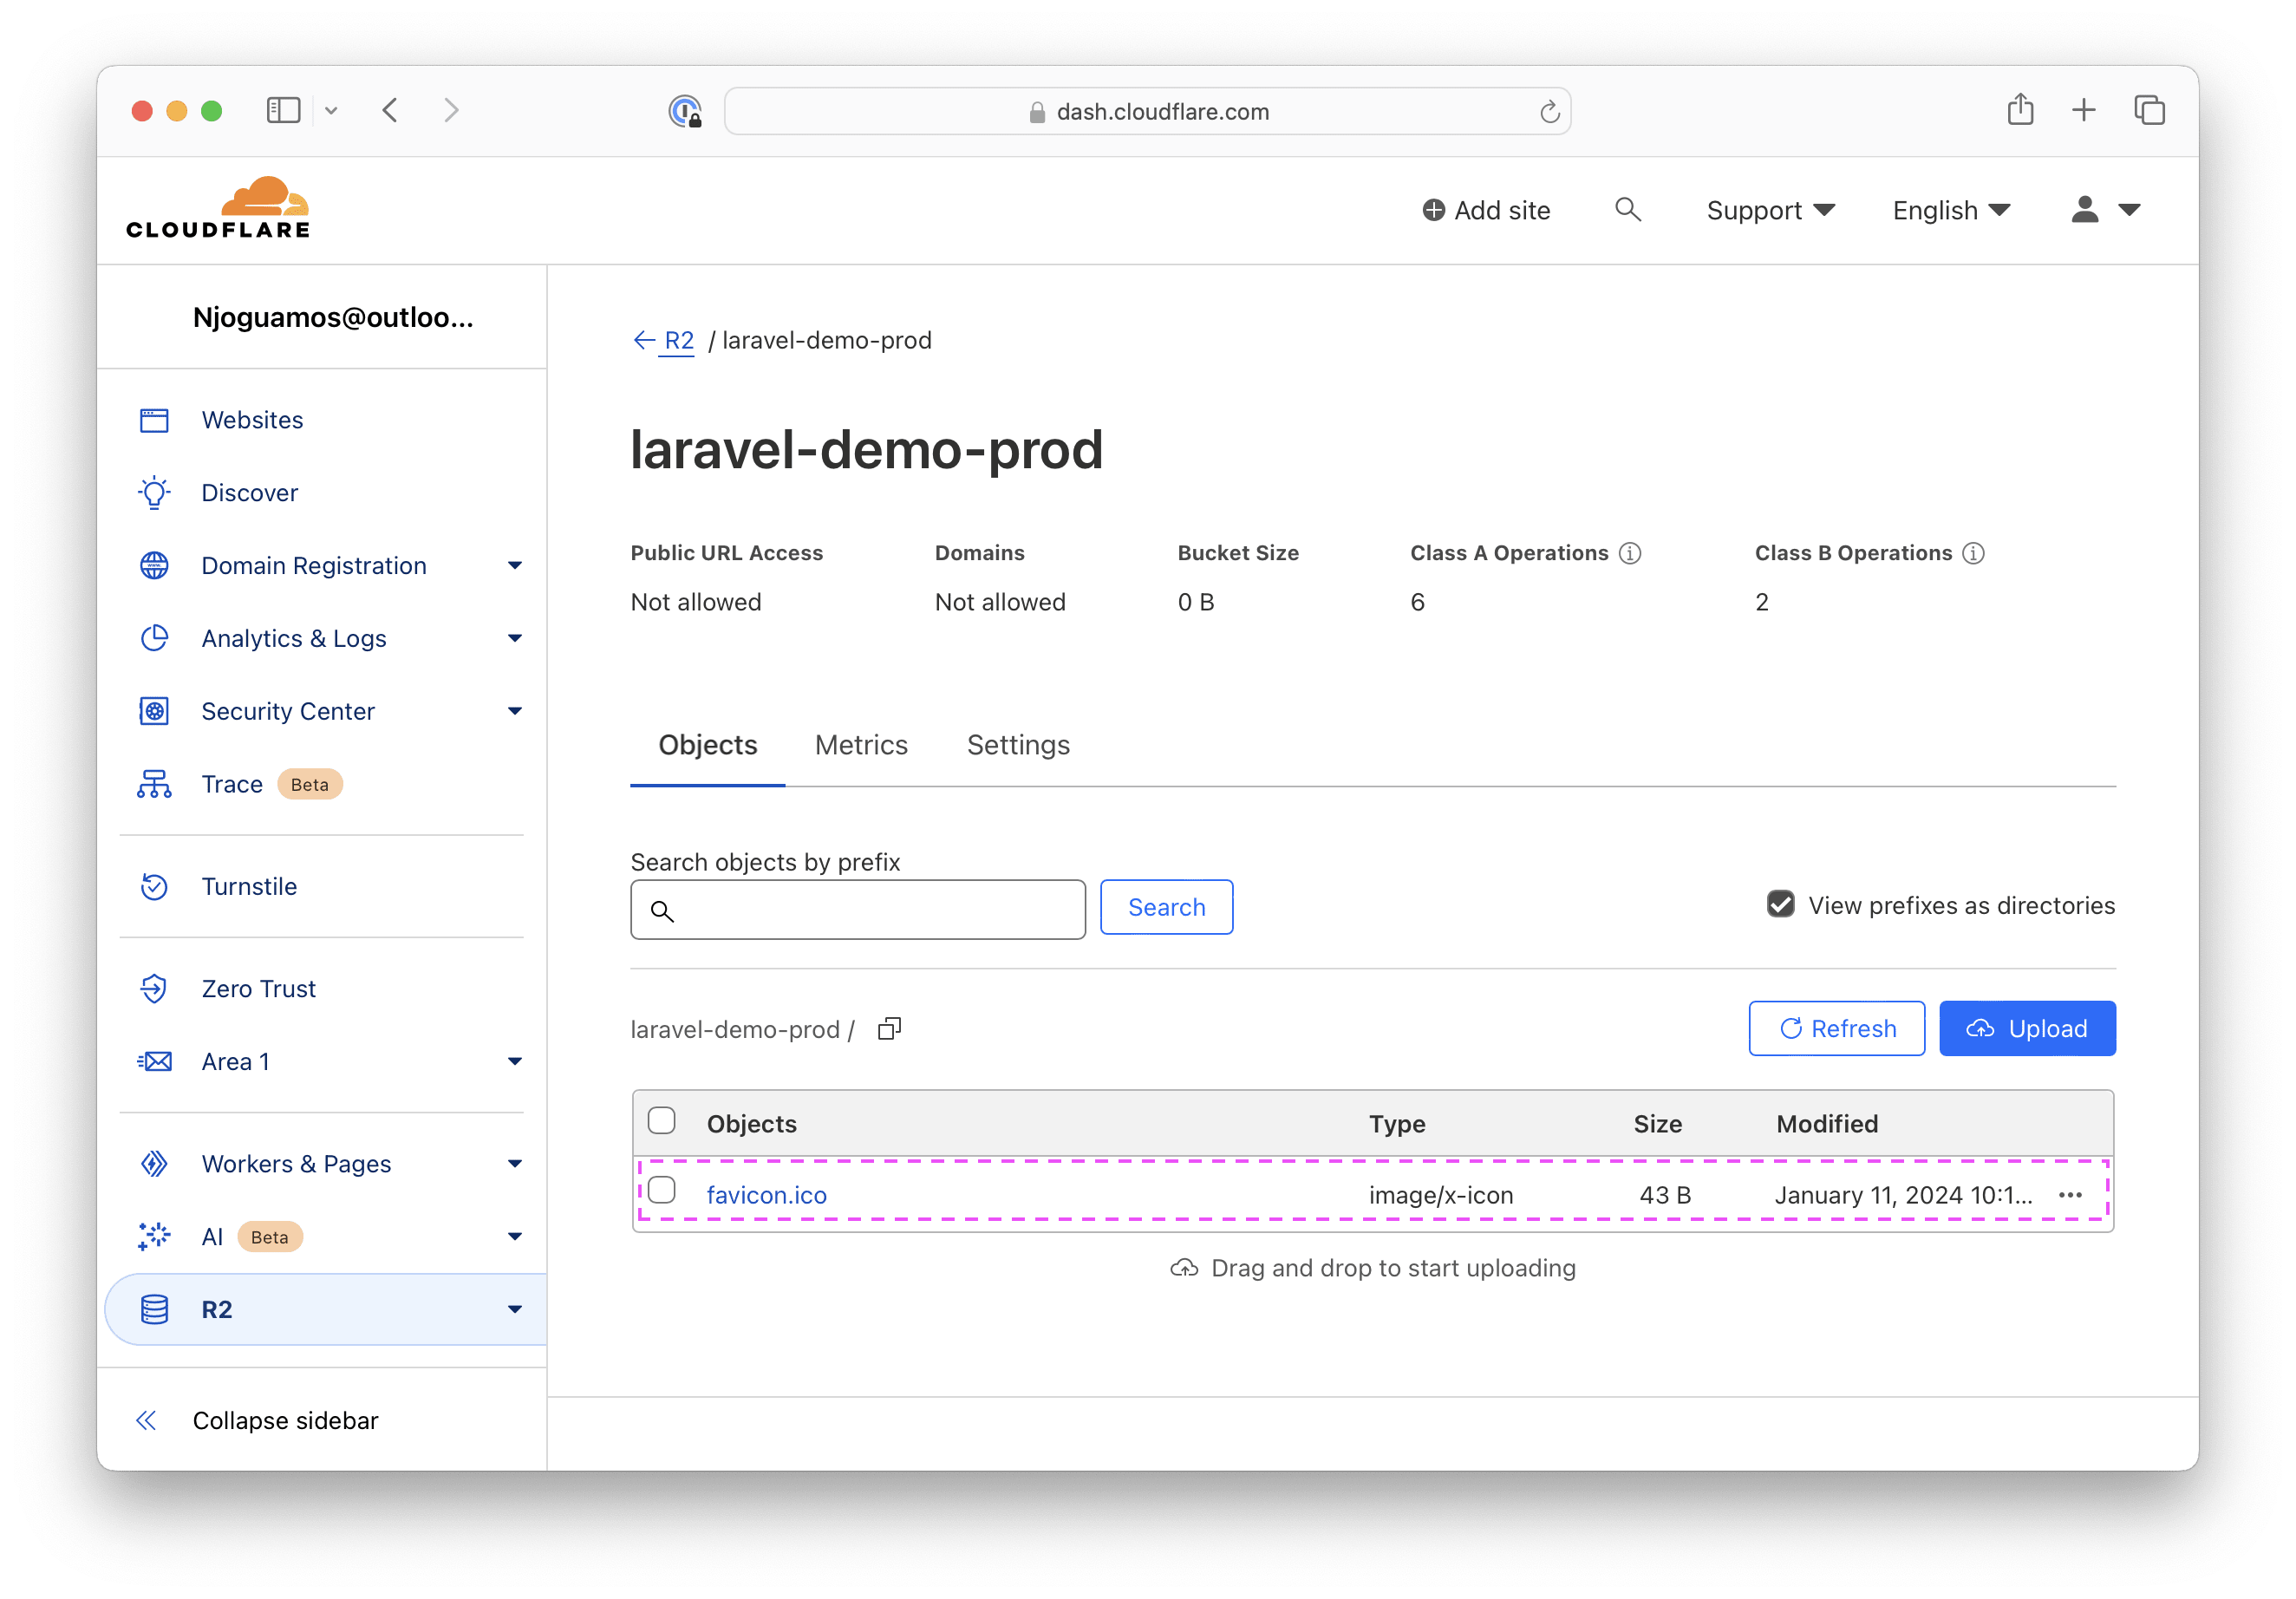
To test if R2 integration was successful, try uploading a sample file. For example, you can try to upload the public/favicon.ico, which comes with all Laravel applications.
php artisan tinkerThe command should open Psy Shell, where you can run the following code. If the command is successful, the Psy Shell should print true.
> $file = public_path('favicon.ico')
= "/Users/njoguamos/Code/r2/public/favicon.ico"

> Storage::disk('r2')->put('favicon.ico',$file)
= true
In the code above, we set the
$filevariable to the absolute path of the ‘favicon.ico’ file in the public directory. Then, use the Storage facade to store the ‘favicon.ico’ file to the ‘r2’ disk
To verify that the file was uploaded, run the following in the same Psy Shell.
> Storage::disk('r2')->allFiles()
= [
 "favicon.ico",
 ]
Open the R2 bucket dashboard on Cloudflare to verify the upload.
If you have made it this far, congratulations �. You have successfully integrated Cloudflare R2 with your Laravel application.
Conclusion
Integrating Cloudflare R2 with Laravel provides cost-effective and efficient object storage. Follow the guide to set up a Cloudflare R2 bucket and credentials and configure Laravel. R2 offers a free tier, pay-as-you-go options, and zero egress fees, making it an excellent choice for optimizing costs and performance. I hope this article was helpful. Please leave a comment in the discussion section.
Laravel News Links