https://content.artofmanliness.com/uploads/2023/06/ww9.jpg
When you take a step back from it, modern war is genuinely bizarre. Nation-states, formed by drawing arbitrary lines on a map, fight it out over abstract principles of sovereignty, democracy, fascism, etc., and do so by trying to conquer pieces of one another’s territory and having young men in the prime of their lives kill each other until one party cries uncle.
If modern war is strange to contemplate in general, nothing feels quite so surreal as wrapping your head around World War II. The weight, stakes, and drama of it. The extent it transformed everyone’s lives, from the average joe to the well-known celebrity. The millions of people and tons of material involved. The sheer sweep of it. What a truly staggering thing: a world at war.
There’s a reason that modern books and movies perennially return to WWII for their plots. Nothing else inspires awe — that distinct mixture of both fear and wonder — in the same way. Reflecting on the war — which is ever worth doing — serves as a dizzying reminder of just what human beings are capable of: enormous death, depravity, and destruction on one hand, and great humanity and heroism on the other.
To bring an event that can seem far away and yet remains in the living memory of thousands of people back into focus, we dove deep, deep, deep into the photo archives from WWII. When the war is covered and remembered today, there are a few classic pictures that repeatedly reemerge. But, of course, tens of thousands of photographs were taken during the war, and we wanted to find and resurface some lesser-known snapshots from the Big One.
The photos’ original captions have been retained.
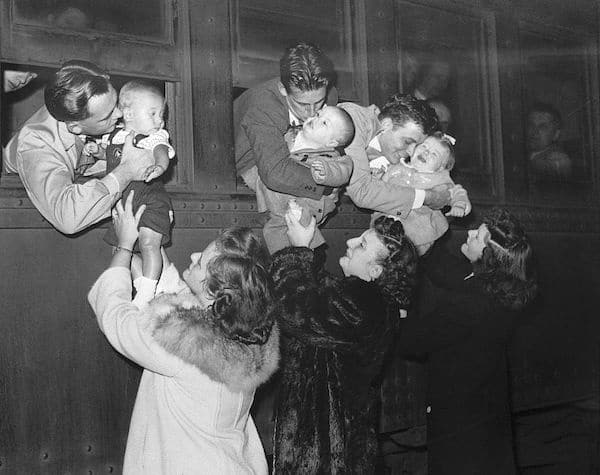
9/23/1943: Detroit, MI — Scene at Detroit’s Central Station as three post-Pearl Harbor dads say a fond farewell to their offspring as they leave for training at Fort Custer after induction.
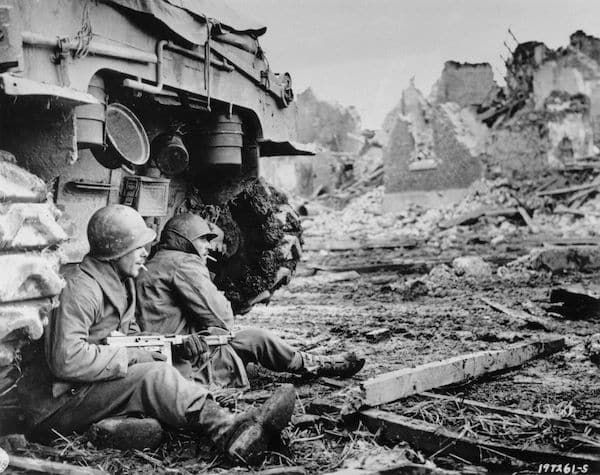
Corporal James Gregory (left) holding a M1 Thompson submachine gun and T/5 (Technician fifth grade) Omer Taylor of Headquarters Company, 36th Armored Infantry Regiment, 9th Infantry Division of the United States First Army smoke cigarettes while taking cover from incoming enemy fire behind an M4 Sherman tank on 11th December 1944 in Geich near Duren in the North Rhine-Westphalia region of Germany.
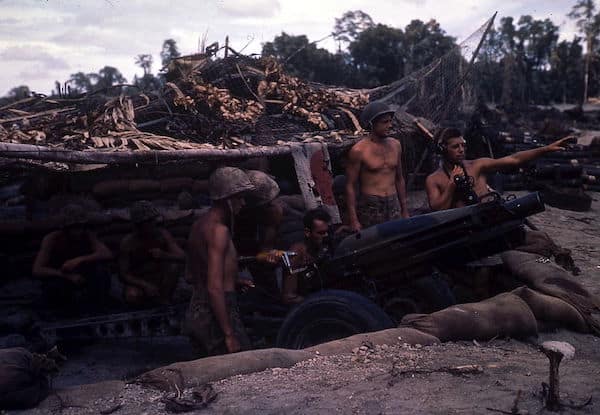
View of an American gun crew as they man a 75mm Pack Howitzer M1 (M1A1) emplacement for the defense of Torokina air field, Bougainville Island, Papua New Guinea, mid December 1943.
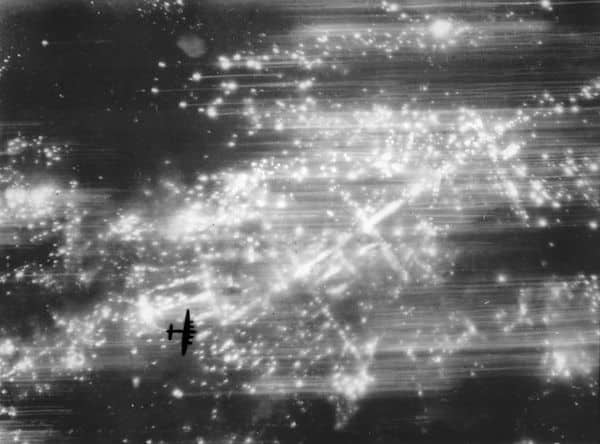
An RAF Lancaster bomber over the German city of Hamburg during a bombing raid.
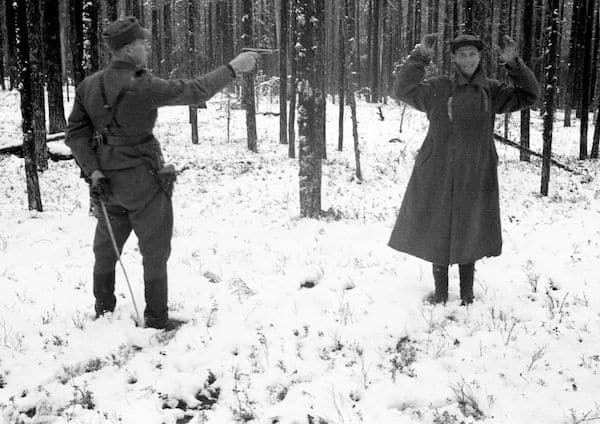
An alleged Soviet spy laughs at a Finnish soldier who is executing the spy in Rukajärvi, November 1942.
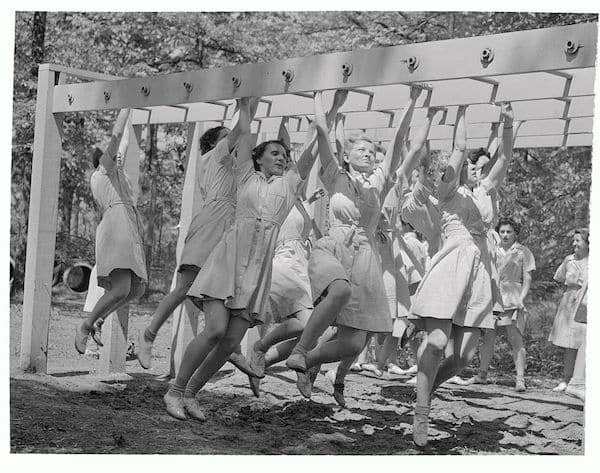
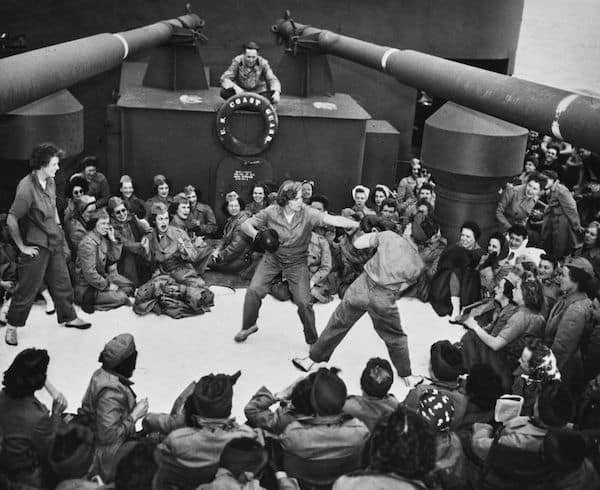
Swinging from one bar to another on an overhead ladder is a muscle toughener to be reckoned with, and when these WAACS do the course in competition as part of their training, it is quite an obstacle. It is part of the intensive physical training regime at the WAAC training camp at Fort Oglethorpe, Georgia.
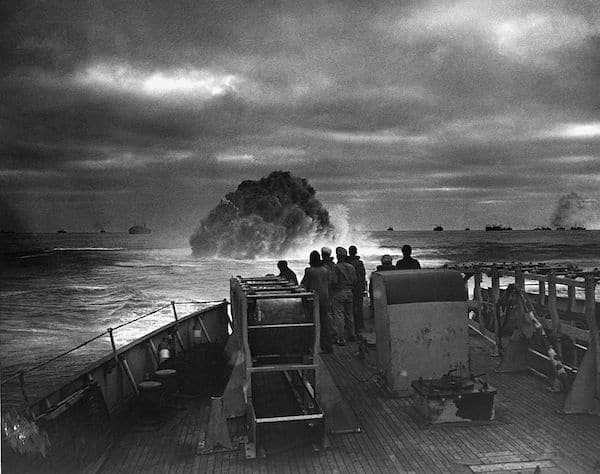
Coast Guardsmen on the deck of the U.S. Coast Guard Cutter Spencer watch the explosion of a depth charge which blasted a Nazi U-boat’s hope of breaking into the center of a large convoy. Sinking of U-175, April 17, 1943.
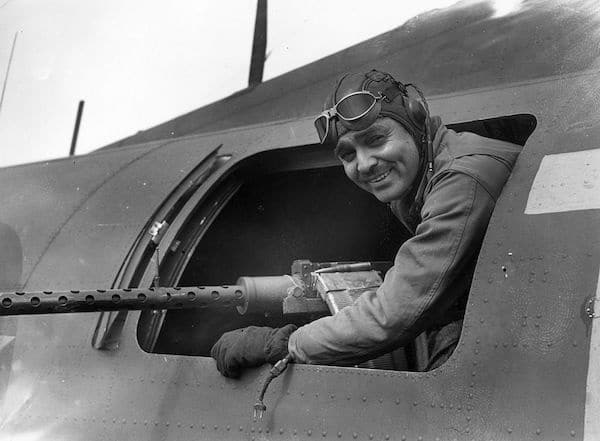
7th June 1943: US film actor Clark Gable, who is serving as a gunnery instructor with the US Army Air Force ‘somewhere in England’, manning a weapon aboard an aircraft.
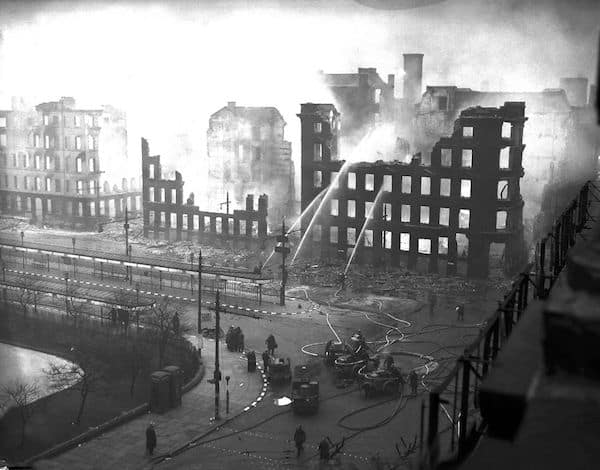
Bomb damage in Manchester.
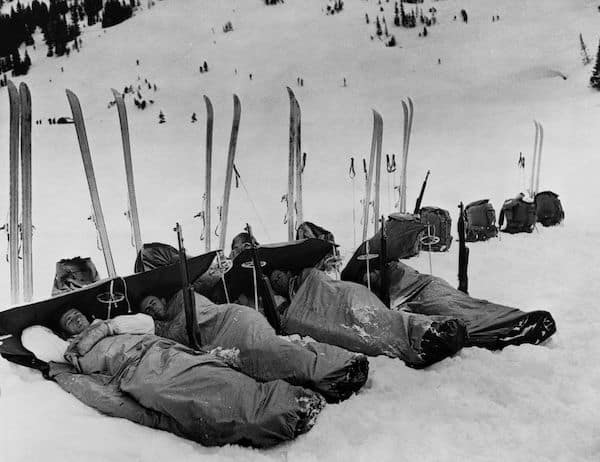
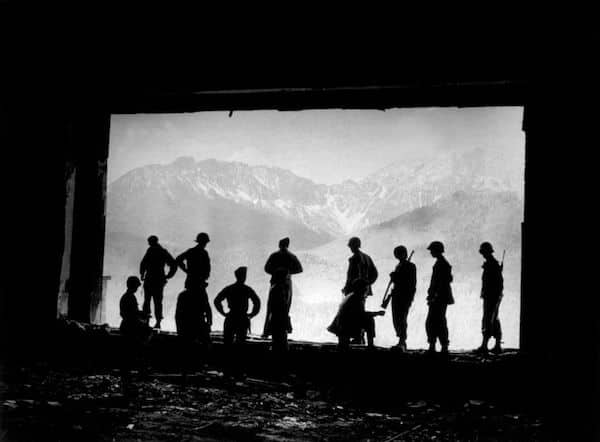
American soldiers from the 503rd parachute ski battalion rest in sleeping bags on the snow after hiking and skiing over rough mountain terrain during training exercises.
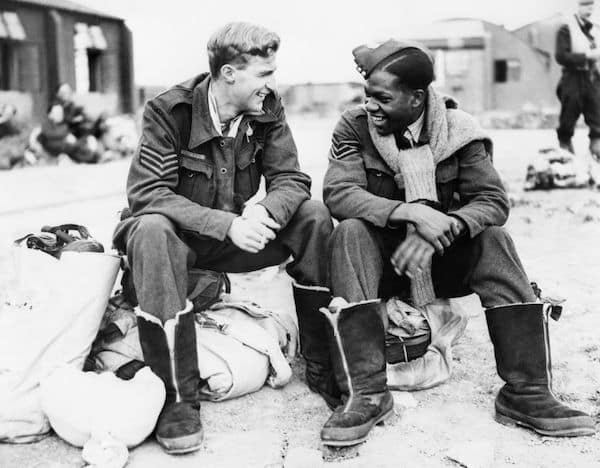
Two bomber aircrew, Sergeant J. Dickinson from Canada and Sergeant F. Gilkes from Trinidad share a joke while waiting to board their aircraft for a raid on Hamburg. Britain, 1943.
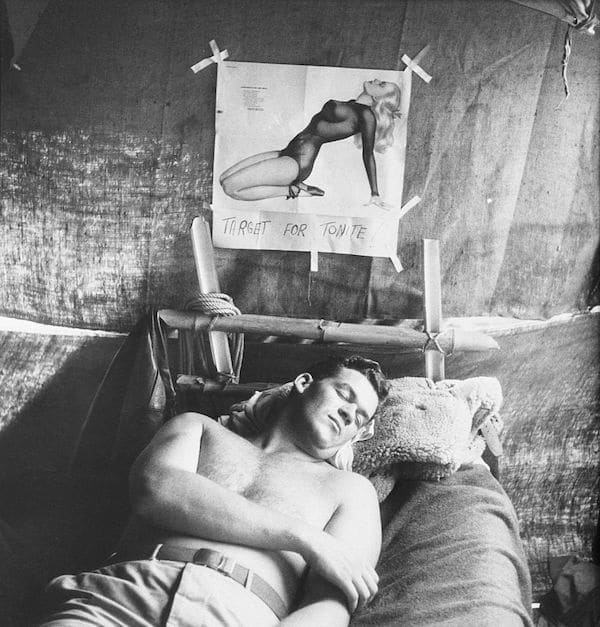
11/12/43 — Darwin, Australia: Three p.m. is siesta time in Darwin, Australia, and flying Captain R.N. Skipper dreams up a date with a dream girl. Since their flight missions usually encompass a distance of 3,000 miles, personnel of B-24 squadrons in the Darwin area are only allowed four or five raids a month. Thus, in between times, they lead a hum-drum existence, and 3 p.m. is official nap time, although the heat usually makes it impossible to sleep.
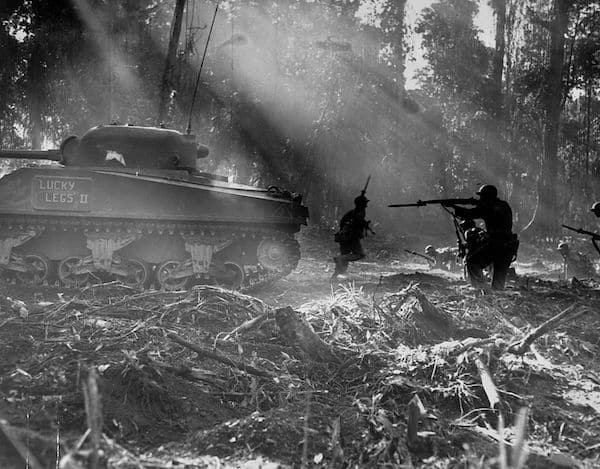
An American tank goes forward with infantrymen following in its cover, searching for Japanese that infiltrated American lines the night before. Bougainville, Solomon Islands, March 1944.
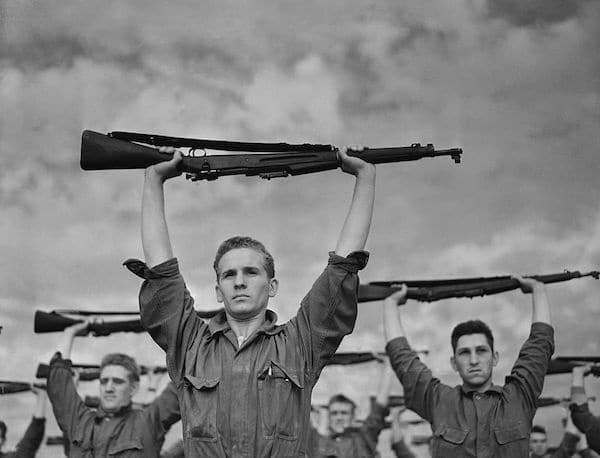
Approximately three of the seven weeks training course of the U.S. Marine recruits at Parris Island are spent on the rifle range where the future leathernecks are trained in the use of weapons with which a Marine is normally armed. This is followed by a week of advanced instruction in combat work and practice with the bayonet. Here, recruits undergo calisthenics under arms.
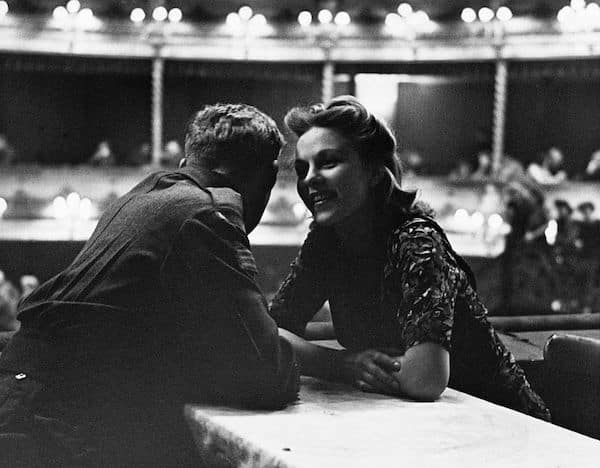
Sharing a joke at the wartime dance hall, 1944.
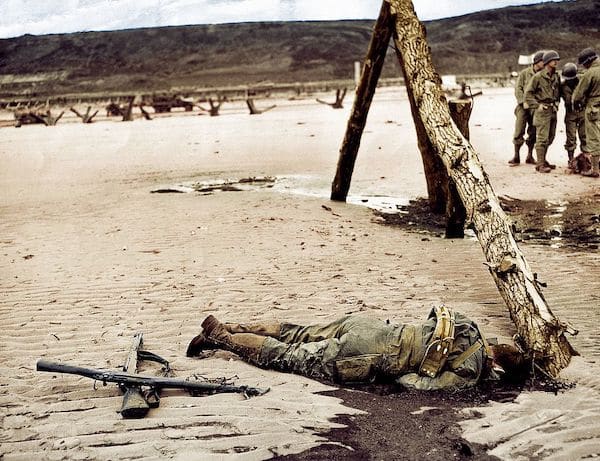
The dead body of a GI who has not been picked up is on the beach. 7th June 1944. Vierville-sur-Mer (Omaha Beach, White Dog), Normandy, France.
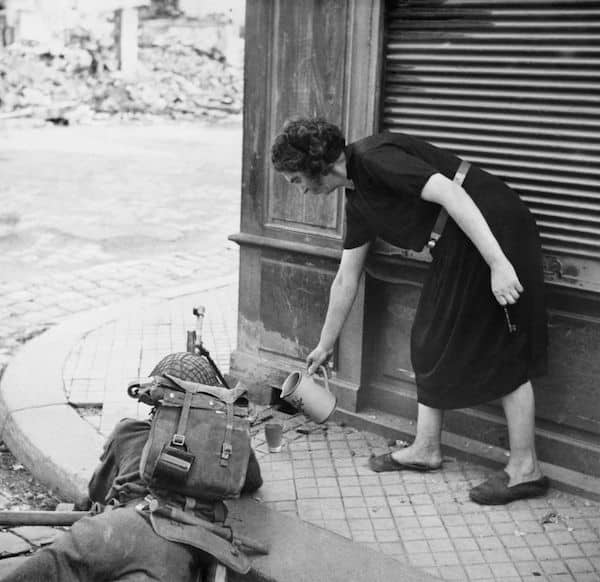
A French civilian woman pours a drink of cider for a British soldier with Bren gun in Lisieux, 1944.
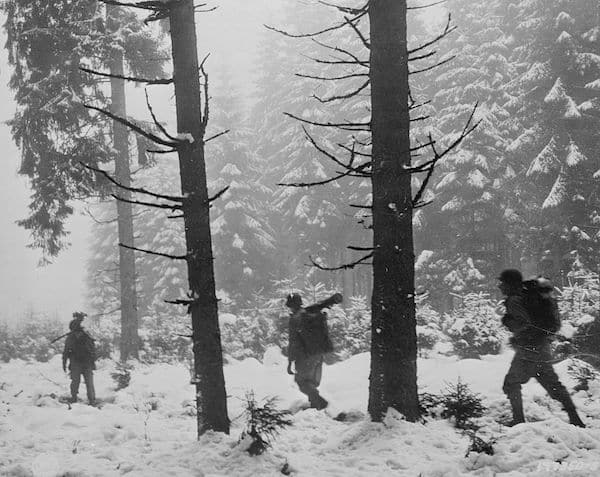
Infantrymen of the U. S. First Army silently move through the snow-blanketed Krinkelter woods in Belgium on their way to contact the enemy during the current Nazi counteroffensive on the First Army front.
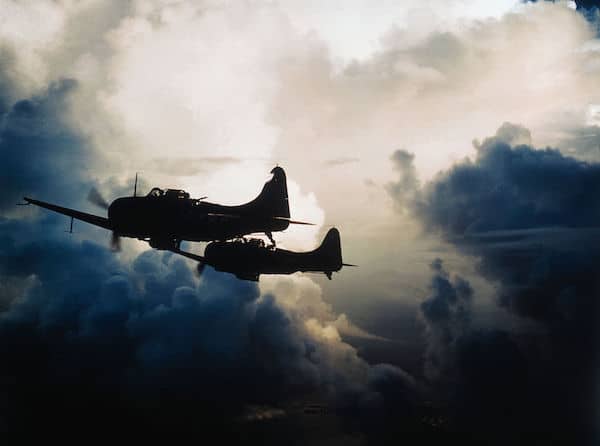
Two Navy dauntless dive bombers are poised to plunge through the thick cloud in left foreground. They carry thousand pound bombs to be dropped on Japanese installations on Wake Island.
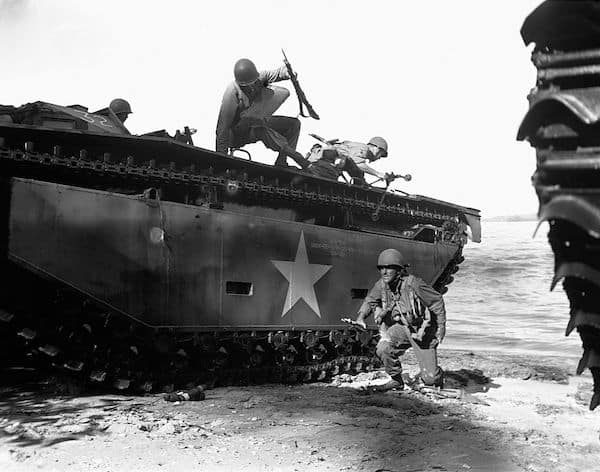
Assault troops leave “alligator” as it hits the beach of Morotai Island.

A YMCA mobile canteen serves soldiers next to an anti-aircraft battery. November 1940.
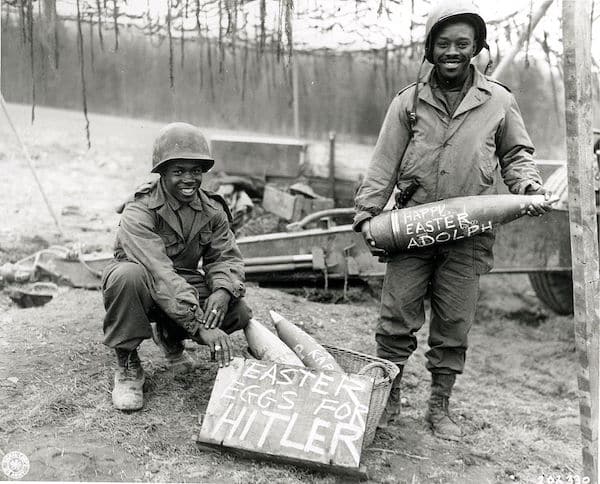
Easter morning finds Technician Fifth Grade (T/5) William E. Thomas and Private First Class (PFC) Joseph Jackson preparing a special Easter egg basket for Hitler, March 1945.
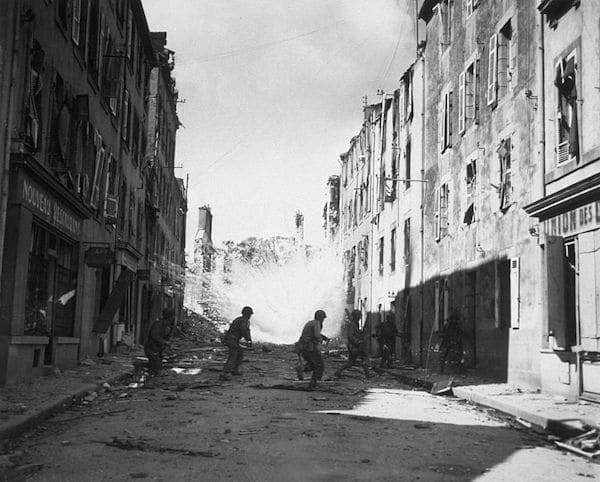
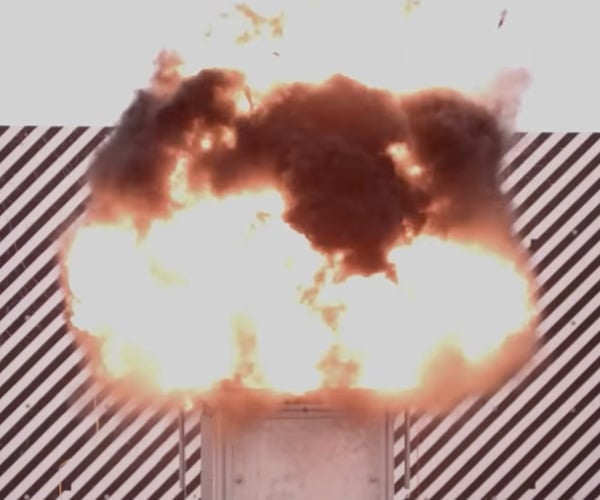
18th September 1944: A white phosphorous shell explodes as soldiers run across the street in Brest to plant explosives in enemy positions.

The British Army in Athens, Greece, October 1944. Sergeant R. Gregory and Driver A. Hardman on the Erectheum during a tour of the Acropolis.
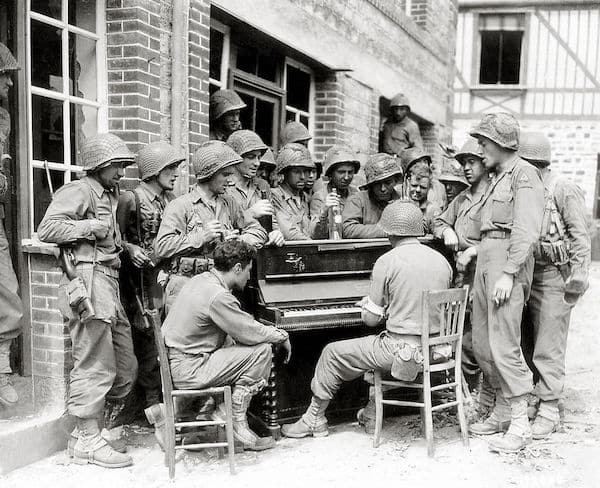
A group of American soldiers has gathered around a piano and sings a song in the street Montéglise. 10th August 1944. The two GI’s on the right wear the insignia of the U.S. Army’s 2nd Armored Division, which has just arrived in Barenton, Normandy, France.
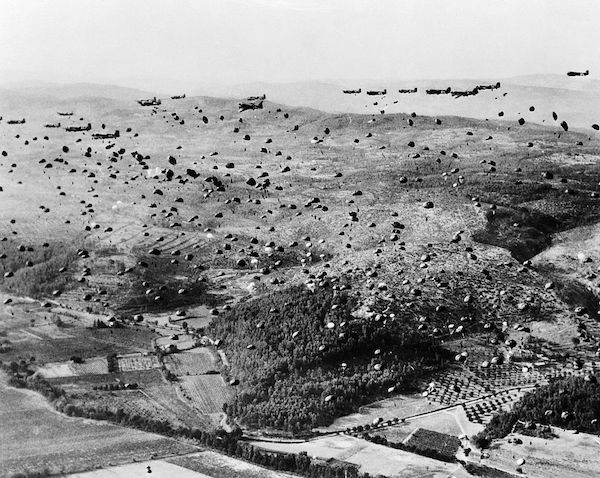
8/23/1944: Leap to free France. Thousands of vari-colored parachutes, some holding equipment, some carrying men, fill the sky over Southern France between Nice and Marseilles after dropping from their C-47 carrier planes.

617 Squadron (Dambusters) at Scampton, Lincolnshire, 22 July 1943. The crew of Lancaster ED285/AJ-T sitting on the grass, posed under stormy clouds.
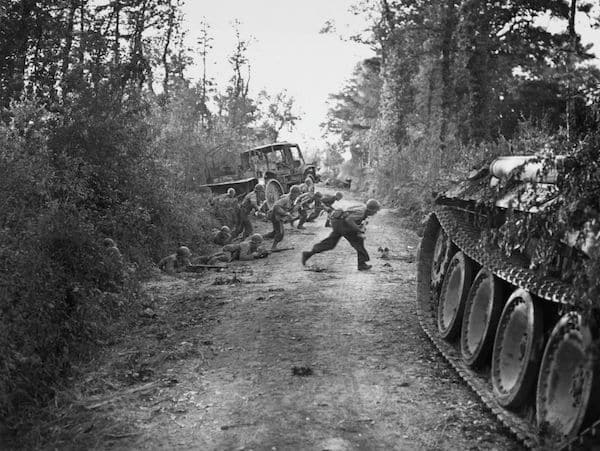
Soldiers from the 331st Infantry Regiment, 83rd Infantry Division of the United States First Army run across a road to take cover from enemy fire in the bocage hedgerows near the village of Periers during the Normandy Campaign on 21st July 1944 near Periers in Normandy, France.
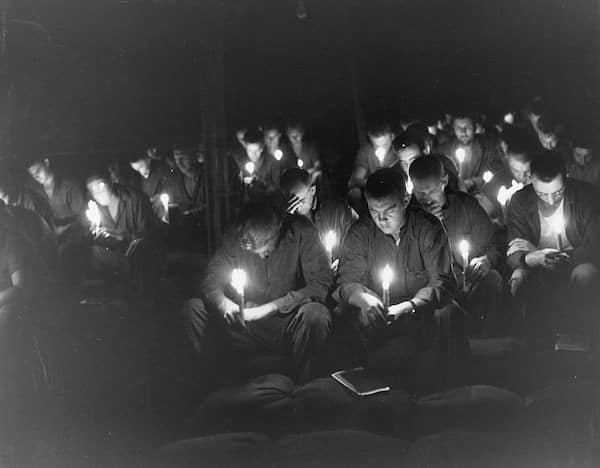
CB’s of 50th Battalion sitting on sandbags in a Canvas, NCB, Chapel, bow their heads in prayer during candlelight Holy Communion service, at Tinian, Marianas Islands. December 24, 1944.
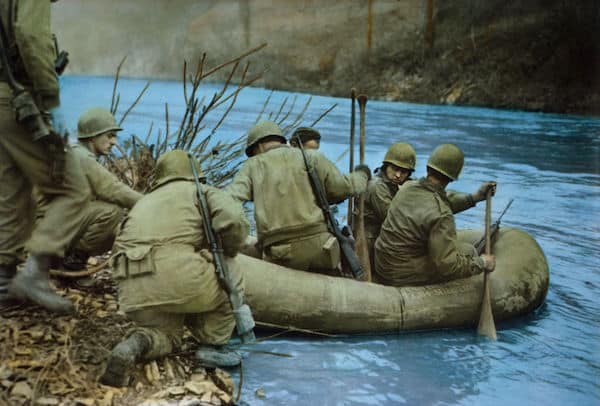
Assault troops crossing river, Rhineland Campaign, Germany, 1945.
American Marine Corps Private First Class Natalie Slack and American Marine Corps Corporal Dean L Stidham, both wearing so-called ‘peanut suits’, overalls named so for their tan color, on the deck of the troop transport taking them to Hawaii, location unspecified, in the South Pacific, circa 1943.
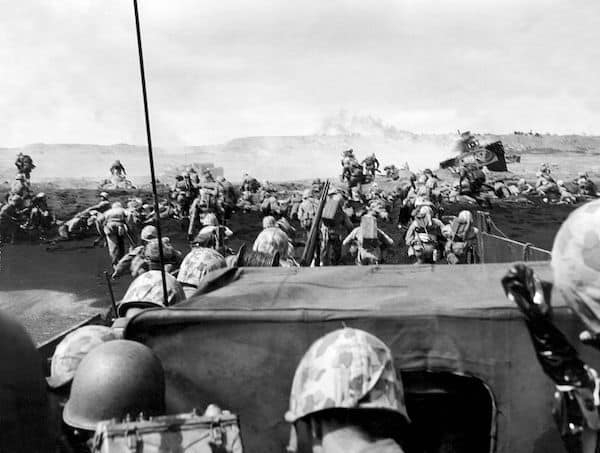
Fourth Division Marines charging from their landing craft onto the beach in the battle at Iwo Jima, Iwo Jima, Japan, March 2, 1945.
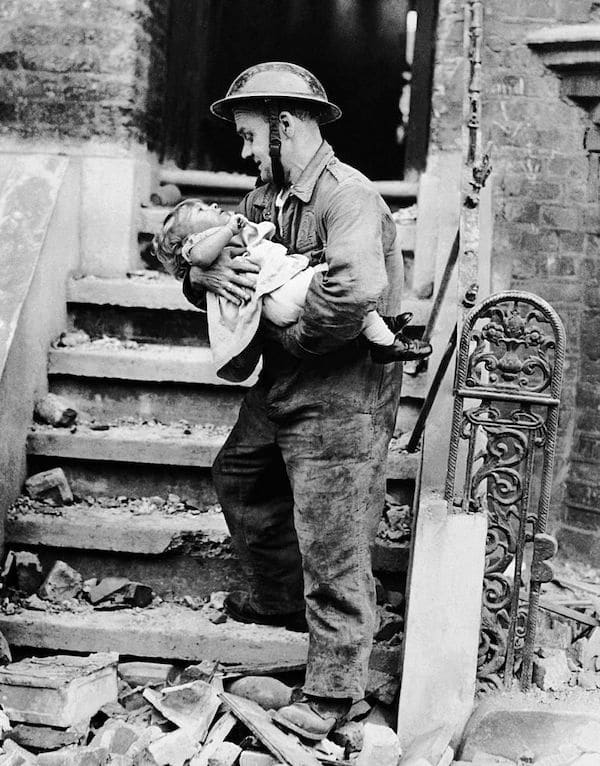
In London during World War II, on July 30, 1944, an English soldier rescues a little girl named Barbara James from the ruins of her home after a series of aerial bombings.
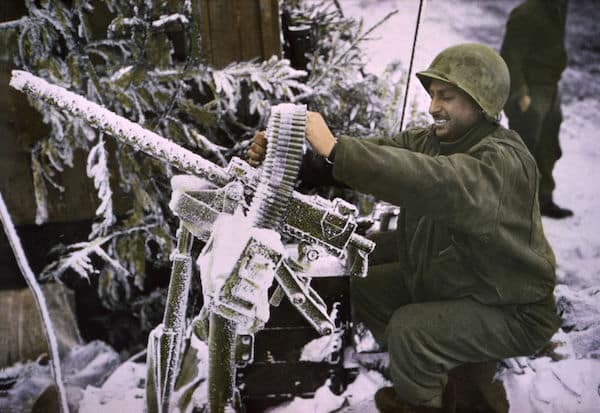
Member of Cavalry Reconnaissance Squadron checks .30-caliber machine gun, Ardennes-Alsace Campaign, Battle of the Bulge, 1945.
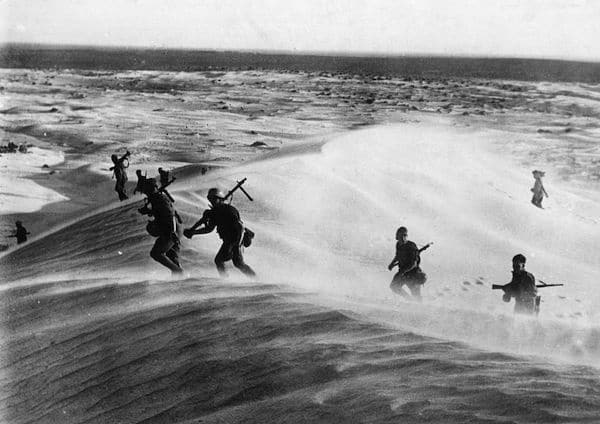
German patrol exploring the Egyptian desert while blowing the ghibli. El Alamein, September 1942.
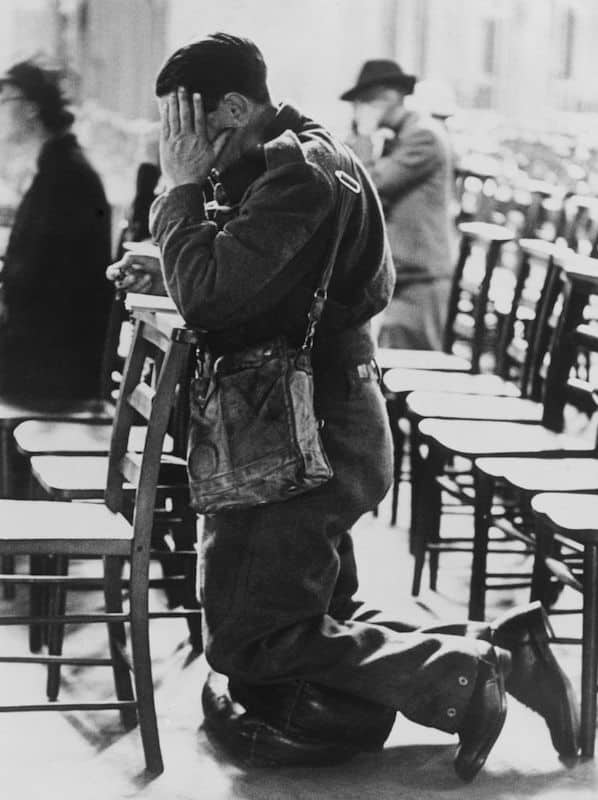
A British soldier in battledress kneeling in prayer at a Service of Intercession for France which took place at Westminster Cathedral, London, 14th June, 1940.
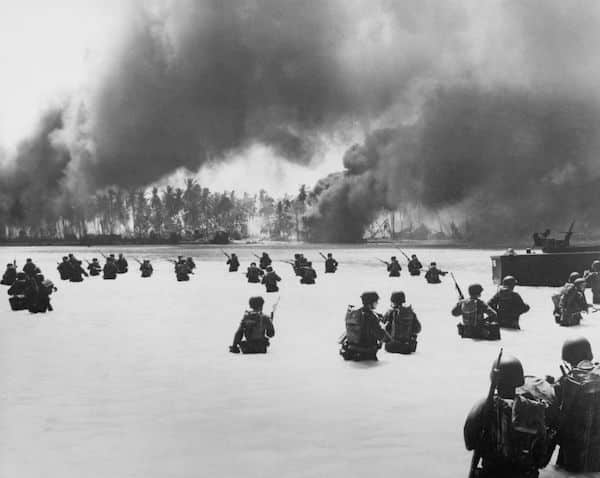
Soldiers of 2nd Battalion, 165th Infantry Regiment from the United States Army’s 27th Infantry Division landing at Yellow Beach on Butaritari Island against the incoming defensive fire from naval ground troops of the Imperial Japanese Navy’s 6th Special Naval Landing Force during the Battle of Makin Atoll on 20th November 1943 at Butaritari Island, Makin Atoll in the Gilbert Islands.
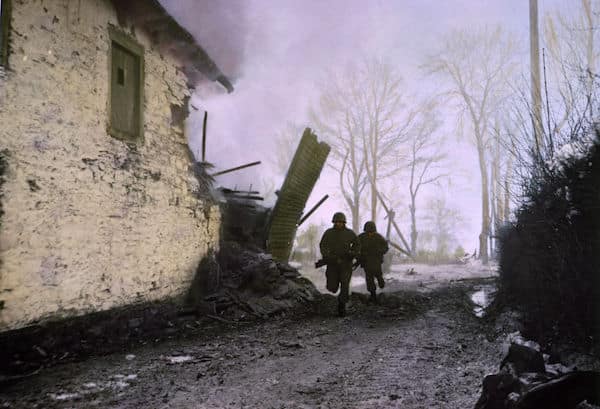
Infantrymen advancing under enemy shell fire, Ardennes-Alsace Campaign, Battle of the Bulge, 1945.
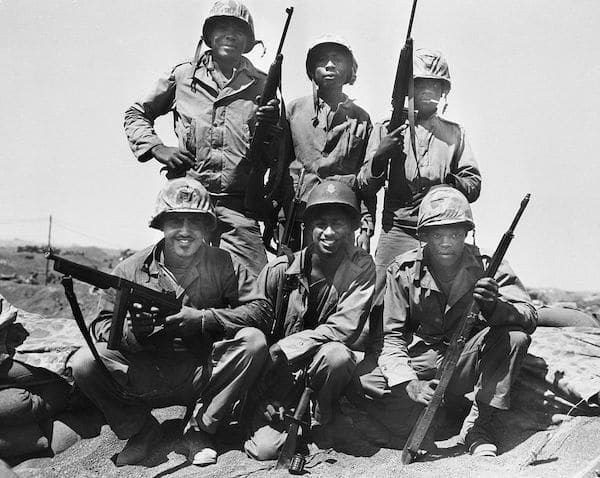
Black members of a Marine division on Iwo Jima.
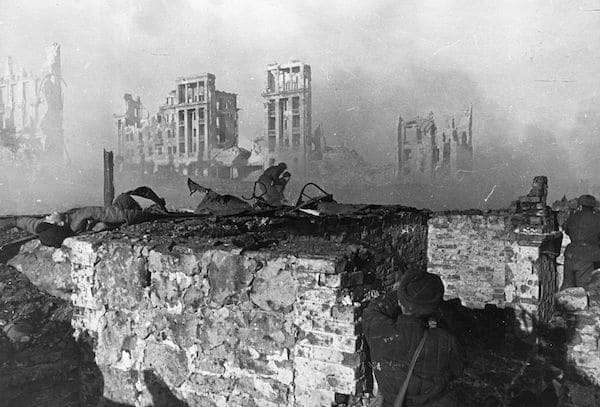
1941: Red Army troops storming an apartment block amidst the ruins of war-torn Stalingrad.
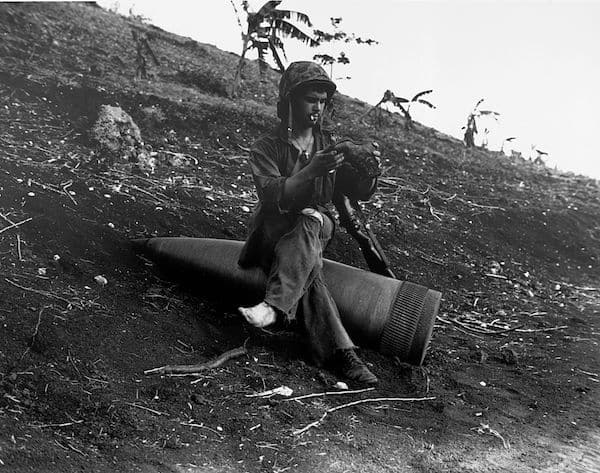
Using an unexploded 16-inch naval shell for a resting place, Marine Pfc. Raymond Hubert shakes a three-day accumulation of sand from his boondocker. July 4, 1944.
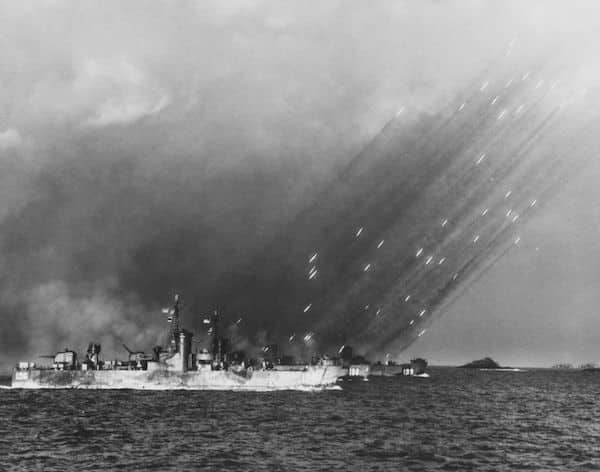
USS LSM(R)-190 (MacKay) a United States Navy LSM(R)-188-class Landing Ship Medium (Rocket) fires a barrage of rockets in salvos on to the shores of Tokishi Shima in a prelanding bombardment during the Okinawa Campaign on 27th March 1945 at Tokishi Shima near Okinawa, Japan. USS LSM(R)-190 (MacKay) was attacked and sunk by 3 Japanese Kamikaze aircraft off Okinawa on 4th May 1945.
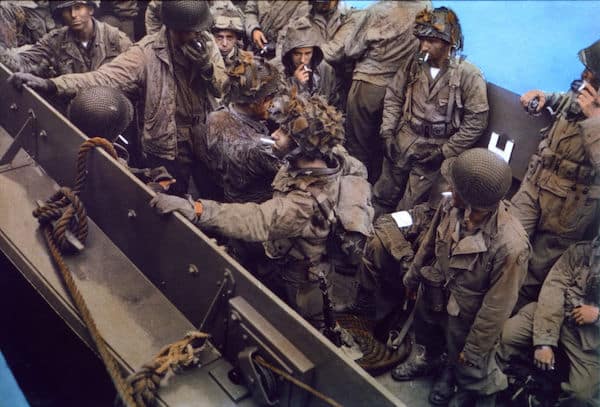
U.S. soldiers aboard Landing Craft, Vehicle, Personnel (LCVP), approaching Omaha Beach, Normandy, France.
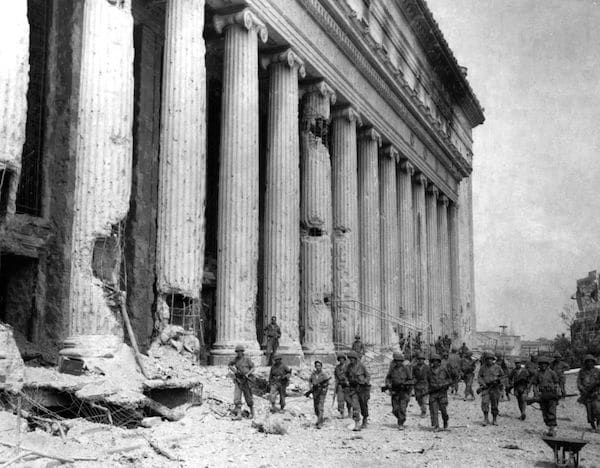
Company F, 145th Infantry, 37th Infantry Division soldiers move past the General Post Office building on their way to assault the walled city of Intramuros, Feb. 23, 1945, in Manila, Philippines.
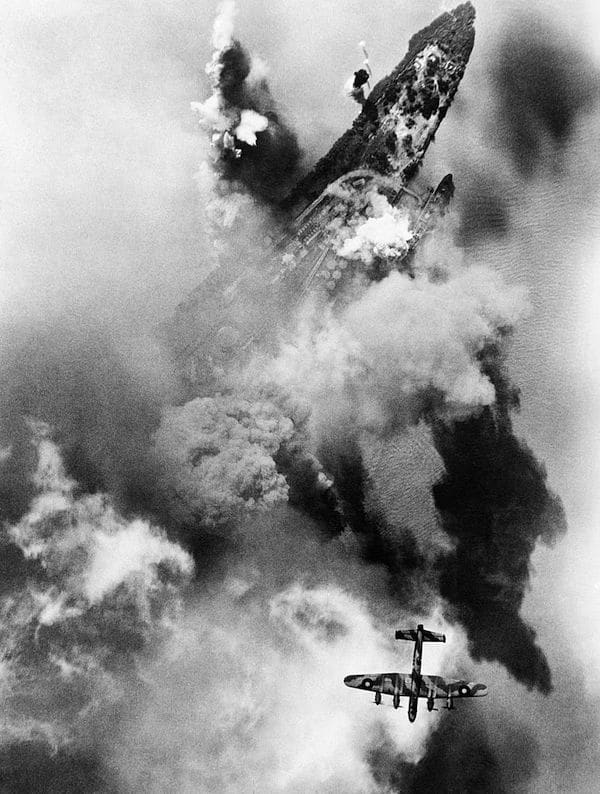
Vertical aerial photograph taken during a daylight attack on an oil storage depot at Bec d’Ambes situated in the Garonne estuary at the confluence of the Rivers Garonne and Dordogne, France. An Avro Lancaster of No. 514 Squadron RAF flies over the target area while dense clouds of smoke rise as bombs burst among the oil storage tanks, 4 August 1944.
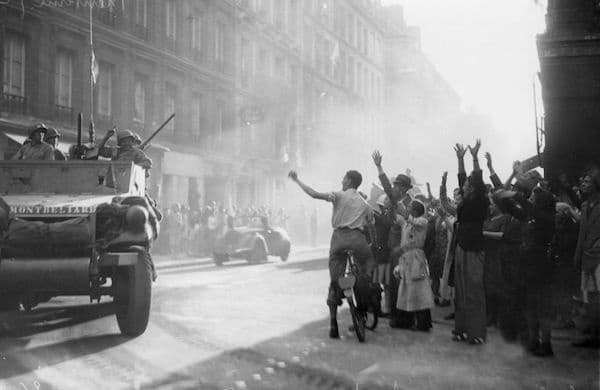
Scene of cheering crowd in the streets of Paris during the Liberation. Civilians waving at French tanks.
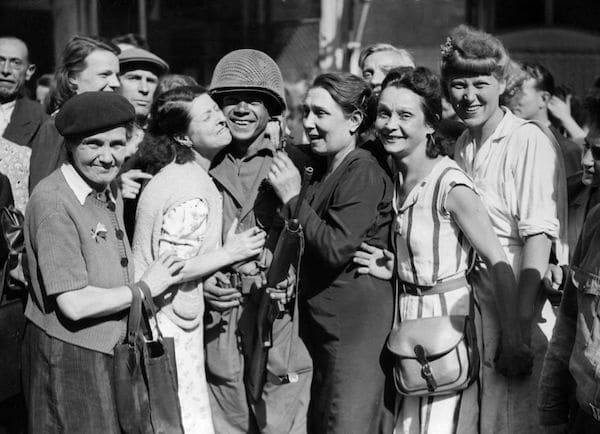
Parisian women welcome soldiers of the allied troops, on August 25, 1944 in Paris, after the battle for the Liberation of Paris.
Circa 1945: GIs stand at the ruins of the great living room window of Hitler’s mountain retreat in Berchtesgaden, the so-called Berghof.
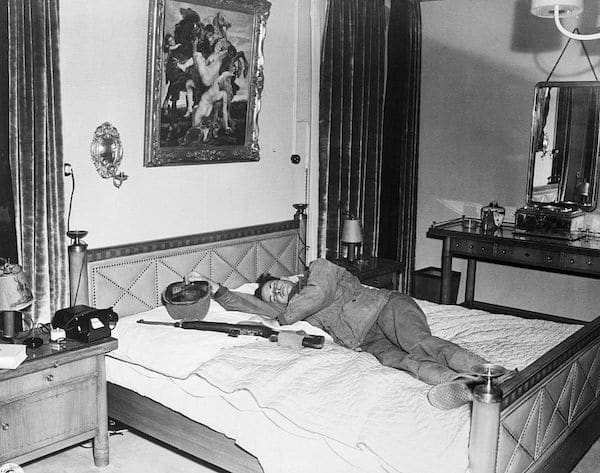
A battle-weary soldier from George S. Patton’s Third Army sleeps on the luxurious bed where Hermann Goering once slept.
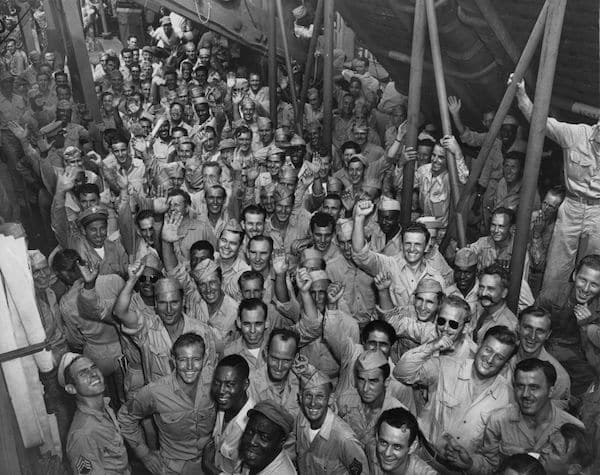
A boatload of soldiers aboard a liner arrives in New York City from the Pacific front, US, circa October 1945.
The post 50 Amazing Rarely Seen Photos From World War II appeared first on The Art of Manliness.
The Art of Manliness