https://media.notthebee.com/articles/63f607c8a156363f607c8a1564.jpg
America and guns go together like a horse and carriage. Or … probably more accurately, a horse and carriage go together like America and guns.
Not the Bee
Just another WordPress site
https://media.notthebee.com/articles/63f607c8a156363f607c8a1564.jpg
America and guns go together like a horse and carriage. Or … probably more accurately, a horse and carriage go together like America and guns.
Not the Bee
https://media.notthebee.com/articles/63f675171b9f163f675171b9f2.jpg
Please enjoy the entire Critical Race worldview fall apart in 49 seconds:
Not the Bee
https://cdn.arstechnica.net/wp-content/uploads/2023/02/PerformanceControls_Header.width-1000.format-webp-760×380.webp

Heads up, everybody: Chrome will start doing stuff to your permanently open tabs. Chrome version 110 is rolling out now, and on Windows, macOS, and Linux, the release comes with the new “Memory Saver” feature that will be automatically enabled. We first wrote about this when it hit the Chrome nightly build “Canary Channel” in December, but now the feature is rolling out to everyone.
Chrome has a reputation for gobbling up RAM, and Google seems to think the best way to combat that is to automatically shut down your tabs when they are “inactive.” Google’s explanation of the feature says, “When a tab is discarded, its title and favicon still appear in the tab strip but the page itself is gone, exactly as if the tab had been closed normally. If the user revisits that tab, the page will be reloaded automatically.” Google says this technique will reduce Chrome’s memory usage by “up to 40 percent,” which sounds great, as long as it doesn’t break anything or cause users to lose the state of their page.
As a support page outlines, Google has some use cases excluded from this feature:
Some settings and activities on your computer may prevent tab deactivation.
- Active audio or video (playback or calls)
- Screen share
- Page notifications
- Active downloads
- Partially filled forms
- Connected devices (USB or Bluetooth)
The ‘chrome://discards/’ page will let you discard a tab manually for testing purposes.
Ron Amadeo
I have no earthly idea what this graph is trying to communicate. You can click on the little balls and see various page details, though.
Ron Amadeo
Look at it go! Here’s what the graph does when I open a new tab in another window and load Feedly.
Ron Amadeo
You can take a peek at how all this works by typing “chrome://discards” into the address bar, which will bring up the developer UI to control the new tab discard feature. The “discards” tab will show you the state of all your tabs, and the right “actions” column contains an “urgent discard” link, allowing you manually discard any tab for testing purposes. After blowing up some of your favorite sites to see how they react, I highly recommend checking out the “Graph” tab here (there’s a gif in the above gallery), which is an association graph of processes and tabs that animates and moves around while you use Chrome.
You can try to divine Chrome’s tab discard behavior from this page. Visible foreground tabs cannot be discarded, even manually—you have to click over to some other tab, put a window in front of Chrome, or minimize Chrome to discard a tab. Presumably, that’s how the automatic discard feature works, too. Pages that have a serious unsaved state could be a real problem: if you dump a bunch of text into WordPress and try to close the tab with the normal close button, instead of closing, you’ll get a pop-up about unsaved changes, asking if you want to leave the site and potentially saving you from losing a bunch of work. If you use Chrome’s new tab discard feature, Chrome will trash your unsaved text like it was nothing. Some sites like Gmail deal with this well by following Google’s recommendations and auto-saving your draft text when the tab is sent to the background.
If a tab gets shut down, you’ll see this message when you go back to it.
The new “Performance” settings and how to get to them.
The good news is that you can control all this. The consumer controls for Memory Saver live at ‘chrome://settings/performance,’ or, for the UI-inclined, hit the menu, then “More tools,” then “Performance.” You can turn off the feature entirely or add sites to a list called “always keep these sites active.” Google has detailed instructions for how the exclusion parsing works on the support page, but it supports everything you would expect, like subdirectories, wildcards, and specific subdomains. Personally, I need to add the Ars Technica WordPress instance because possibly losing unsaved article text is every writer’s nightmare.
Besides the memory-saving feature, this version of Chrome is also coming with an “Energy Saver” mode for laptops, where if you’re low on battery, it will throttle tab power usage by lowering video and scrolling frame rates. Controls for that feature will be in the same “performance” tab.
Ars Technica – All content
https://media.babylonbee.com/articles/63f4fb283283363f4fb2832834.jpg
CAPERNAUM — Town officials are concerned after receiving multiple complaints from faculty at Galilee’s School for the Blind this week after Jesus of Nazareth apparently went on a healing spree and decimated the school’s enrollment.
“We were set to have an all-time high in our number of students enrolled,” said Rabbi Ananias Ben Josef, administrator of the school. “Come to find out, this carpenter — from that Nazareth ghetto of all places — strolled through Capernaum and started healing blind people left and right! We’ve got less than half of our original enrollment now! How am I supposed to pay overhead costs when I have hardly any students?”
Witnesses throughout the town said Jesus arrived with his group of disciples late in the morning at the beginning of the week and quickly drew a large crowd. “He walked in, started mingling with some of the regular people who hang out in the market, and not long after that, we all started hearing somebody start shouting, ‘I can see! I can see!'” said one man who was present in the marketplace when the healings began. “Others started bringing more sick and blind people, and things just snowballed from there.”
The school was reportedly looking into taking legal action against Jesus for causing financial harm to the institution, but there is no law against healing blind people unless it takes place on the Sabbath.
At publishing time, Jesus and His disciples had reportedly moved on to another town, with rumored plans in place to set people free from problems even more serious than blindness.
This man is under arrest – for MANSPLAINING!
Subscribe to our YouTube channel for more guffaw-inducing chucklefests!
Babylon Bee
https://laraveldaily.com/storage/330/16-18,-Argyle-Street,-London….png
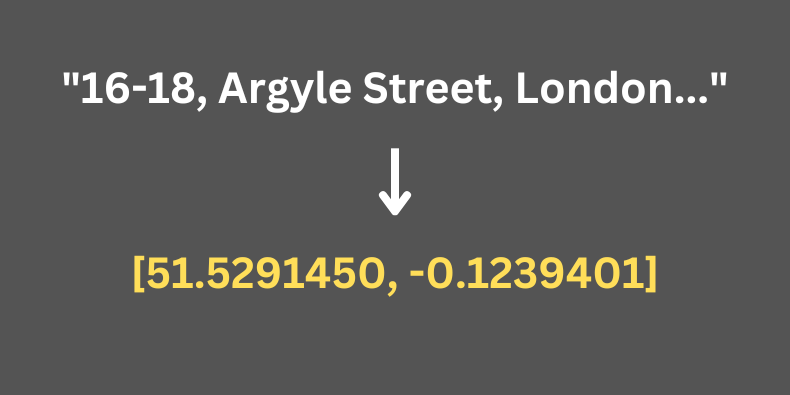
While working on a demo project, I needed to get the geographical coordinates of a real estate object, by its address: street, postcode, city, and country. In this tutorial, I will show you how to use a package called GeocoderLaravel, to achieve this.
GeocoderLaravel package is a Laravel wrapper around another package called Geocoder PHP, created for easier use within Laravel framework specifically.
Both packages have a lot of features, but we’re interested in this scenario.
To do that, we need to use one of the 3rd party Geolocation services. There are a lot of them, including the ones that have API, but probably the most simple one is Google Maps API.
Important notice: using Google Maps API (and the majority of the other similar services) is not free. They may have some limited free usage, so check their pricing docs. Keep in mind that you need to watch the usage cause they often charge per API call.
Now, step by step.
composer require toin0u/geocoder-laravel
php artisan vendor:publish --provider="Geocoder\Laravel\Providers\GeocoderService"
Simple, right?
Google Maps API Key looks something like this: AIzaSyAWRsRGOFbTXRlLHDOSudkerLjUtBfElUt. You can read here how to register and get that key.
After you do that, you can put it into the Laravel config.
GeocoderLaravel package comes with its config, supporting various providers of Geolocation.
config/geocoder.php:
return [
// ...
'providers' => [
Chain::class => [
GoogleMaps::class => [
env('GOOGLE_MAPS_LOCALE', 'us'),
env('GOOGLE_MAPS_API_KEY'), // <- THIS IS WHAT WE NEED
],
GeoPlugin::class => [],
],
],
// ...
];
As you can see, GoogleMaps is the provider enabled by default, so all you need to do is provide the API key in the .env file.
.env:
APP_NAME=Laravel
APP_ENV=local
APP_KEY=base64:wgvwuEojBNlCrmg7Pmn3x...
APP_DEBUG=true
## ...
GOOGLE_MAPS_API_KEY=AIzaSyAWRsRGOFbTXRlLHDOSudkerLjUtBfElUt
Notice: protect your .env file and this API key, cause, as I stated above, you are charged for API calls, so someone with that API key may directly damage you financially. Also, you can protect that API key from Google Maps API settings, restricting it by domain or other parameters.
Here’s a snippet that will get you the data:
$address = "16-18, Argyle Street, Camden, London, WC1H 8EG, United Kingdom";
$result = app('geocoder')->geocode($address)->get();
$coordinates = $result[0]->getCoordinates();
$lat = $coordinates->getLatitude();
$long = $coordinates->getLongitude();
Since we’re using the global helper app('geocoder'), you can call it wherever you want: in Controller, Queued Job, Service class, etc.
Obviously, you are not guaranteed to get the results, especially if your address is inputted by your users. So, you should check if there are results returned.
Also, you may want to put this logic somewhere in the Job that would be fired and put into the queue, to avoid users waiting for a few seconds to get the API results.
So, simple piece of code, but a lot of caveats and potential things to go wrong. That said, when it does go well, it feels like simple magic!
Laravel News Links
https://theawesomer.com/photos/2023/02/superman_awakens_t.jpg

Antonis and Stavros Fylladitis and a team of dedicated DC Comics fans created this CGI short inspired by Alex Ross’ incredible Kingdom Come Superman. Created with Unreal Engine 5, the film drops us into a world where chaos has won, and even the greatest superheroes have lost their way. Can Superman rise from the darkness?
The Awesomer
https://cdn.arstechnica.net/wp-content/uploads/2023/02/IMG_5794-760×380.jpg

Enlarge / One Ars staffer’s Hyundai, as it was found by police after a theft.
Ars Technica
After months of thefts that have led to at least eight deaths, car makers Hyundai and Kia are offering free software updates to roughly 8.3 million cars that can be stolen with the aid of a USB-A cable.
The National Highway Traffic Safety Administration said Tuesday that the manufacturers’ updates make it so affected cars require a key to be in the ignition switch to start. The cars’ no-key alarms will also sound for one minute instead of 30 seconds. The updates should start arriving later this month, with phased rollouts over subsequent months for 3.8 million Hyundais and 4.5 million Kias.
According to news reports and at least one class-action lawsuit, the most-affected vehicles are Kias made between 2010 and 2021 and Hyundais produced between 2015 and 2021. Thieves typically break a back window to avoid alarms, expose the steering column, and fit a USB-A cable into a matching plug. Turning the plug with an inserted cable starts the car because the cars lack an engine immobilizer that prevents the engine from starting without a paired key.
By 2015, engine immobilizers were standard on 96 percent of most manufacturers’ vehicles, according to a September 2022 report by the Insurance Institute for Highway Safety, but they were only installed on 26 percent of Hyundais and Kias. The 2022 models produced by both companies now have engine immobilizers. The theft rate for cars without immobilizers was 2.18 per year per 1,000 insured vehicles, versus 1.21 for the industry average for 2015–2019.
The relative ease of theft might have gone unnoticed if not for the “Kia Challenge,” a 2022 TikTok trend showing the methods and celebrating thefts and joyrides. The NHTSA attributes 14 reported crashes and eight deaths to the viral challenge. While there are no nationwide numbers for thefts and related crimes, they’re notable.
In Buffalo, New York, where a Kia joyride last fall killed four teenagers, Kia thefts went from 55 in 2020 to 275 in 2022, and there were 141 Hyundai thefts, according to the Buffalo News. In Washington, DC, 31 percent of all 393 vehicle thefts in a roughly three-week period in January involved Kias and Hyundais, city police told DC News Now. Insurance firms, including State Farm and Progressive, have stopped accepting new insurance policies for many of the affected Hyundai and Kia models.
One Ars staffer had his own Hyundai stolen (pictured at top) as part of the wave of thefts. It took roughly two months for the car to be returned, as replacement ignition parts were backordered at local repair shops. An insurance adjuster told the staffer that one customer had a car stolen three times in succession because the car was only restored to its pre-theft condition after each theft.
Both automakers have offered free steering wheel locks to affected customers, sometimes working with local law enforcement agencies. Hyundai also noted in NHTSA’s statement that it will issue stickers to car owners that will prominently display the car’s updated status. The software updates will require visiting a dealer for installation; Hyundai reports the installation takes about an hour. Information on the updates is available by calling Hyundai at 800-633-5151 or Kia at 800-333-4542.
Ars Technica – All content
https://i.kinja-img.com/gawker-media/image/upload/c_fill,f_auto,fl_progressive,g_center,h_675,pg_1,q_80,w_1200/ac9d9d4f3afc95b1641f396f15e63be0.jpg
Hyundai and Kia are offering a free anti-theft update after a TikTok challenge went viral last summer. The challenge directed viewers on how to break into Hyundai and Kia vehicles using tools as simple as a USB cable.
In the aftermath of the ‘Kia Challenge,’ teens were directed on how to bypass a car’s security system by a group who call themselves the Kia Boyz. The challenge has resulted in at least 14 car crashes and eight fatalities, according to a report by the National Highway Traffic Safety Administration (NHTSA).
The car companies are now providing a free upgrade to Kia and Hyundai vehicle owners to add a theft deterrent software to extend the car’s alarm from 30 seconds to one minute and will require the driver to insert the key into the ignition to power up the engine. Each update will be accompanied by a window sticker that indicates the car is equipped with an anti-theft security system.
Randy Parker, CEO of Hyundai Motor America, said in a press release, “Hyundai is committed to ensuring the quality and integrity of our products through continuous improvement and is pleased to provide affected customers with an additional theft deterrent through this software upgrade.” He added, “We have prioritized the upgrade’s availability for owners and lessees of our highest-selling vehicles and those most targeted by thieves in order for dealers to service them first.”
Vehicle owners previously had to pay a minimum of $170 for a new security system upgrade, but the cost could amount to far more than that with installation and labor driving the price to upwards of $500. According to the NHTSA, 3.8 million Hyundai and 4.5 million Kia vehicles will be eligible for the software update in the U.S.
G/O Media may get a commission
Pre-order now
Galaxy Book 3 Series
Available February 24
Each new laptop model comes with a free storage upgrade. The 1TB version of each is priced the same as the 512GB version which basically means the 1TB version is $200 off.
Kia and Hyundai owners will be entitled to the upgrade beginning this week but it will only initially apply to certain makes and models. Vehicles eligible for the update include the 2017-2020 Hyundai Elantra, the 2015-2019 Sonata, and the 2020-2021 Venue.
The companies will advance through a slow rollout of the free upgrade and owners of Kona, Palisade, and Santa Fe models will become eligible for the security system update beginning in June 2023.
Hyundai will notify eligible vehicle owners through the mail, email, and phone calls, and those who want to check when their car is able to get the upgrade can see the status by entering their VIN number on Hyundai’s website.
Gizmodo
https://i.kinja-img.com/gawker-media/image/upload/c_fill,f_auto,fl_progressive,g_center,h_675,pg_1,q_80,w_1200/69985689167fce995d454b348e06d60e.jpg
Can he actually do it? Can James Gunn complete a cohesive, emotional trilogy of superhero films within the restraints of the Marvel Cinematic Universe? He’s two-thirds of the way there and, with this latest look at Guardians of the Galaxy Vol. 3, it looks like he may just achieve that.
Written and directed by Gunn in what’ll be his last Marvel movie, Guardians of the Galaxy Vol. 3 is set for release May 5. It once again follows the adventures of Guardians Star-Lord (Chris Pratt), Drax (Dave Bautista), Rocket (Bradley Cooper), and Groot (Vin Diesel), but now they’ve also got Nebula (Karen Gillan), Mantis (Pom Klementieff), Kraglin (Sean Gunn), and Cosmo (Maria Bakalova), in a story that involves Adam Warlock (Will Poulter) and Rocket’s past. Oh, and there’s that whole alternate Gamora (Zoe Saldana) thing too since she died and came back and… just check out the latest look here.
Certainly, there’s a lot this film has to do, not to mention that for some of the cast (like Dave Bautista for instance), it could be their final film in the Marvel Cinematic Universe. Is it because their characters die? Or are Kevin Feige and the Marvel Studios team going to be done with Guardians projects in the post-Gunn era? There’s certainly plenty of other Marvel heroes to go around.
Nevertheless, we’re anxiously awaiting to see what Guardians of the Galaxy Vol. 3 has to offer and we’ll be seeing it very, very soon. The movie is out May 5.
G/O Media may get a commission
12 Giant Lego Sets for the Giant Child Within You
Lego sets for anyone of all ages to enjoy
Anyone who says Lego is for kids has never seen the price tag on these kits. And even if that were true, what are adults if not really big kids? The truth of the matter is Lego is for everyone.
Want more io9 news? Check out when to expect the latest Marvel, Star Wars, and Star Trek releases, what’s next for the DC Universe on film and TV, and everything you need to know about the future of Doctor Who.
Gizmodo
https://i.kinja-img.com/gawker-media/image/upload/c_fill,f_auto,fl_progressive,g_center,h_675,pg_1,q_80,w_1200/e9d2c013fc7e35ec8c026445a290c034.jpg
Disney’s been trying to get one final Indiana Jones movie out of Harrison Ford and Steven Spielberg for years, and come this summer, it’ll finally be out for the world to see. Indiana Jones & the Dial of Destiny aims to finally bring the adventures of the famous treasure hunter to an end and to mainly wash the taste of Kingdom of the Crystal Skull out of most folks’ mouths.
Set in 1969 during the Space Race, Ford’s Indy isn’t exactly fully behind NASA’s decision to bring Nazis on as part of its staff. And as it shockingly turns out, he’s completely right not to trust the Nazis! Instead of helping the US beat the Soviet Union to the moon, Mads Mikkelsen’s ex-Nazi scientist Jurgen Voller aims to use the Apollo moon landing for his own ends. The only thing left for Indy to do is stop Voller and his right-hand Klaber (Boyd Holbrook) the only way he knows how: by cracking his whip and punching Nazis in the face. And also by teaming up with his goddaughter, Phoebe Waller-Bridge’s Helena Shaw.
With how fun it is to watch Nazis get socked in the mouth, and how alive Ford looks to be having, Dial of Destiny looks like it’ll succeed in bringing the film series to a close, or at least Ford’s time as Indy to a close.
Directed by James Mangold and also starring Antonio Banderas, John-Rhys Davies, and Toby Jones, Indiana Jones & the Dial of Destiny releases in theaters on June 30.
Want more io9 news? Check out when to expect the latest Marvel, Star Wars, and Star Trek releases, what’s next for the DC Universe on film and TV, and everything you need to know about the future of Doctor Who.
Gizmodo