https://i.ytimg.com/vi/ubYl20CG_MM/maxresdefault.jpgHere, we will be looking at a very simple tip in Laravel which is recently added. It is Benchmark class. We can use it to get how long a code took to execute.Laravel News Links
15 Best EDC Pistols [2022]
https://i0.wp.com/www.personaldefenseworld.com/wp-content/uploads/sites/6/2021/10/N8-Tactical-Xecutive.jpg?w=1086&ssl=1
While some defense-minded handgun carriers are more than happy to pack medium- to large-sized pistols and revolvers for their everyday carry (EDC) guns, in my estimation it is the smaller compact and subcompact pistols and revolvers that predominate. Certainly, there could be seasonal considerations—it’s easier to conceal a large handgun under a winter coat. But you will carry what you will carry and, in most cases, size matters. So, we take a look at the top 15 EDC pistols for 2022.

RELATED STORY
The N8 Tactical Xecutive Delivers a True All-in-One Holster for EDC
15 Top EDC Pistols for 2022
Weight matters, too. One must also consider extra ammunition, a tactical light and/or a practical knife. As a retired law enforcement officer (LEO), I am going to carry a concealed handgun, no doubt about it. However, as I age, I’m less inclined to carry 5 pounds of gun and gear in close proximity to my waistline. I want something effective, but at the same time, I don’t want to come home following an outing and have to rub on pain-soothing ointment or pop several acetaminophen tablets. The most important rule is to have a gun. So, here are some that I’ve found for 2022 that fill the bill.
Beretta APX A1 Carry

- Overall Length: 5.63″
- Barrel Length: 3″
- Weight (unloaded): 19.8 ounces
- Magazine Capacity: 6/8
- Caliber: 9mm
- MSRP: $499
The Beretta APX A1 Carry continues to uphold the reputation of reliability and quality engineering that the APX group is known for. The striker-fired action allows for a trigger pull that is shorter and lighter, the slide readily welcomes red-dot optics, and the modularity is enhanced to allow shooters to make the APX A-1 Carry truly their own.
CZ P-01

- Overall Length: 7.2″
- Barrel Length: 3.75″
- Weight (unloaded): 28.1 ounces
- Magazine Capacity: 10
- Caliber: 9mm
- MSRP: $779
The CZ P-01 was originally designed for military and law enforcement but thanks to its compact aluminum frame, its an excellent choice for concealed carry. The P-01 offers a decocker for shooters who opt for hammer-down carry. While the first round has a hefty trigger pull, the remaining shots are released with a light but sharp single action. CZ enthusiasts will appreciate that the components of the P-01/P-06 are fully interchangeable with every other P-01/P-06, with no individual fitting required. Thanks to an integral accessory rail on its dust cover, the P-01 welcomes industry-standard lights and lasers.
FN 509 Compact

- Overall Length: 6.8″
- Barrel Length: 3.7″
- Weight (unloaded): 25.5 ounces
- Magazine Capacity: 10/12/15
- Caliber: 9mm
- MSRP: $719
This FN 509 Compact model features a design around deep concealment. A low-profile blackout rear sight mates with a high-visibility dot front sight. This striker-fired, double-action (DA) includes a flush-fit magazine and can support a 15-round extended magazine. There are also two interchangeable backstraps and advanced grip texturing, plus an integral accessory rail on the dust cover. The slide stop and magazine catch are ambidextrous.
HK VP9SK

- Overall Length: 6.61″
- Barrel Length: 3.39″
- Weight (unloaded): 23.07 ounces
- Magazine Capacity: 10/13/15
- Caliber: 9mm
- MSRP: $726.83
This version of the VP9SK has a push-button magazine catch (in place of a paddle catch) that’s also reversible, an adjustable grip frame, and an interchangeable backstrap, allowing up to 27 configurations. Sights are fixed with optional night sights. There’s also an accessory rail, and the striker-fired trigger is the best in its class. Slide finish is Black HE with a textured polymer frame.
Kimber Micro 9 Rapide (Black Ice)

- Overall Length: 6.4″
- Barrel Length: 3.15″
- Weight (unloaded): 15.6 ounces
- Magazine Capacity: 7+1
- Caliber: 9mm
- MSRP: $899.99
The Micro 9 is hammer-fired with a single-action (SA) mechanism, plus ambidextrous manual safeties. The steel slide has stepped cocking serrations and cuts to reduce weight. It’s mated to an aluminum frame, with both in a two-tone KimPro finish. Tru-Glo TFX night sights are standard, as are black textured G10 grips. The stainless match barrel allows for reliable operation round after round.
Magnum Research Baby Eagle III

- Overall Length: 7.825″
- Barrel Length: 4.43” (Full Size), 3.85” (Semi-Compact)
- Weight (unloaded): 35.52 ounces, 33.6 ounces, 32 ounces, 30.4 ounces, 28.16 ounces, 26.4 ounces, 25.92 ounces
- Magazine Capacity: 10/12/15
- Caliber: .45 ACP, .40 S&W, 9mm
- MSRP: $739/$840
The Baby III comes in both steel and polymer frames with a black oxide finish. The polymer version has a slim, textured grip frame, with a finger groove frontstrap and accessory rail, plus three-dot fixed sights. This is a double-action/single-action (DA/SA), hammer-fired pistol, with a slide-mounted manual safety/decocker.
Ruger LCP II Lite Rack .22

- Overall Length: 5.20″
- Barrel Length: 2.75″
- Weight (unloaded): 11.4 ounces
- Magazine Capacity: 10+1
- Caliber: .22LR
- MSRP: $369
Not everyone can manage difficult gun manipulation and recoil. Now, Ruger has the LCP II Lite Rack chambered in .22 Long Rifle. With a steel slide and polymer frame, this striker-fired DA has the Lite Rack System, with refined serrations and ears on the slide, a push-forward safety option, plus a Hogue HandALL grip sleeve. While set up for high-velocity .22 ammo, it has low recoil.
SAR 9C

- Overall Length: 7.5″
- Barrel Length: 4.4″
- Weight (unloaded): 27.8 ounces
- Magazine Capacity: 17+1
- Caliber: 9mm
- MSRP: $429
Made by Sarsilmaz of Turkey, the SAR 9C is a striker-fired, safety-trigger-equipped, polymer-framed pistol with a steel slide and fixed-dot sights. Good hand fit is assured with interchangeable backstraps and side panels. The grip frame has textured panels, and there’s an accessory rail on the dust cover. Recoil is tamed with a low bore axis and 20-degree grip angle.
SCCY CPX-2 GEN3

- Overall Length: 6″
- Barrel Length: 3.1″
- Weight (unloaded): 15 ounces
- Magazine Capacity: 10+1
- Caliber: 9mm
- MSRP: $309.95 (red-dot-ready version is $339.95)
The SCCY CPX-2 GEN3 is perfect for new and advanced shooters alike thanks to its ergonomic and easy-to-use design. This compact, hammer-fired, DAO pistol includes a Picatinny rail to support accessories, upgraded sights for rapid target acquisition, and an enhanced grip system for an optimal hold. The SCCY CPX-2 GEN3 is available in a variety of colors to suit just about any preference.
Sig Sauer P365 Nitron

- Overall Length: 5.8″
- Barrel Length: 3.1″
- Weight (unloaded): 17.8 ounces
- Magazine Capacity: 10
- Caliber: 9mm
- MSRP: $499.99
SIG’s P365 Nitron offers all the reliability and quality that SIG firearms are known for in a compact EDC pistol. One shot of this striker-fired handgun will show how its smooth, consistent trigger and quick, controlled firing can be counted on in any shooting situation. Even more so is the presence of the ergonomic textured grip on the durable polymer frame for a secure and dependable hold. SIG’s own X-RAY3, high-visibility, 3-dot tritium sights aid shooters in rapid target acquisition. Frame includes an integral slim-line rail that is compatible with SIG Sauer light or laser accessories. A corrosion-resistant, Nitron coated stainless steel slide features front and rear serrations to a shooter’s ability to effortlessly rack the slide back for loading and clearing the action.
Springfield Armory Hellcat Pro

- Overall Length: 6.6″
- Barrel Length: 3.7″
- Weight (unloaded): 21 ounces
- Magazine Capacity: 15+1
- Caliber: 9mm
- MSRP: $634
The Springfield Hellcat Pro packs all the punch of a large handgun into an ultra-concealable compact pistol thanks to its intimidating 15+1 capacity plus a bevy of other game-changing features. This EDC pistol is optics-ready with its OSP (Optical Sight Pistol) configuration and the slide is milled with the Springfield Micro
 footprint which accommodates the smallest micro red dots on the market. To add to this, the Hellcat Pro includes a high-visibility tritium and luminescent front sight paired with a Tactical Rack U-Dot
 rear sight to aid shooters in any lighting situation. The inclusion of a Picatinny rail allows for the addition of a light or laser. Slide and barrel are coated in an ultradurable Melonite® finish to withstand years of hard use. For ease of mind, the engineers at Springfield included a loaded chamber indicator to showcase the condition of the pistol.
Stoeger STR-9S Combat Pistol

- Overall Length: 7.9″
- Barrel Length: 4.7″
- Weight (unloaded): 28 ounces
- Magazine Capacity: 20+1
- Caliber: 9mm
- MSRP: $549
Some folks don’t mind extra bulk in their EDC. If this is the case, you might like the STR-9S Combat Pistol. It’s set up with co-witness/suppressor fiber-optic sights, threaded barrel with cap, flared mag well, three interchangeable backstraps, and optics-ready slide. This striker-fired pistol has a polymer frame, a textured, finger-groove grip, and an accessory rail. The steel slide features front and rear serrations and has a Black Nitride finish.
Smith & Wesson M&P 9 M2.0 Metal

- Overall Length: 7.4″
- Barrel Length: 4.25″
- Weight (unloaded): 30 ounces
- Magazine Capacity: 17+1
- Caliber: 9mm
- MSRP: $899
The M&P 9 M2.0 Metal manages to offer a lightweight and high-performing firearm despite its rigid metal frame. Built with all shooters in mind, the M&P 9 M2.0 Metal possesses an 18-degree grip angle for a natural point of aim, four interchangeable palmswell grip inserts to suit all hand sizes, a textured polymer front strap, an M2.0 flat face trigger for more spot-on shooting, a Picatinny-style accessory rail for lights and optics, and a low barrel bore axis to reduce muzzle rise and maintaining target engagement.
Taurus GX4XL

- Overall Length: 6.43″
- Barrel Length: 3.71″
- Weight (unloaded): 20 ounces
- Magazine Capacity: 10/11/13
- Caliber: 9mm
- MSRP: $429 ($459 for the T.O.R.O. optics-ready version)
The Taurus GX4XL makes for quite the workhorse thanks to its increased muzzle velocity and sight radius. While it has grown slightly from its predecessor, the GX4, by 20mm, it still remains an excellent choice for a compact EDC pistol. The GX4XL’s standard backstrap features a slight palm swell for improved grip. The DLC-coated stainless steel barrel resists corrosion to withstand demanding environments while the carbon steel slide is gas-nitride coated for added protection. The GX4XL’s sight system consists of a blackout steel serrated drift adjustable rear sight and fixed front sight for rapid target acquisition. The flat-face trigger has a responsive sear break with a short and tactile reset. Like the Springfield Hellcat Pro, there is a visual loaded chamber indicator for safer operation.
Walther PDP Compact 4-inch

- Overall Length: 7.5″
- Barrel Length: 4″
- Weight (unloaded): 24.4 ounces
- Magazine Capacity: 15+1
- Caliber: 9mm
- MSRP: $699
This Performance Duty Pistol has Super Terrain slide serrations and a distinctive Performance Duty trigger action with a 5.6-pound pull. The steel slide has a white-dot adjustable rear sight and post front sight and is optics-ready. The polymer grip frame has a Performance texture, and there’s an accessory rail for mounting lights or lasers.
The post 15 Best EDC Pistols [2022] appeared first on Personal Defense World.
Personal Defense World
Are You Nuts? Know your Fishing Knots! – The Trilene Knot
https://www.alloutdoor.com/wp-content/uploads/2022/10/20221020_164530.jpg
This week we are going to cover another line to hook or lure knot again this week with the Trilene Knot. Considered a very strong and reliable connection for tying monofilament or fluorocarbon to hooks, snaps, swivels, and lures, the Trilene knot, also known as the Two Turn Clinch Knot, is considered a “100% Knot”. This is because when tied properly it is often the line breaking, not the knot itself failing. The Trilene Knot has comparable knot strength to the Palomar Knot but isn’t recommended for braided lines due to not being a double line. So stick with other options if you’re planning to use straight braid. An interesting fact about this knot is while it was created by pro anglers by professional anglers Jimmy Houston and Ricky Green in the late 1970s, Trilene stepped and named the knot after itself.
Step 1
Run the line through the eye of the hook and bring the tag end of the line back along the mainline.

Step 2
Run the tag end of the line through the eye of the hook once more to create loop behind the hook eye,

Step 3
Take the tag end of the line and make five to six wraps around the main line.

Step 4
Taking the tag end of the line, while holding the line wraps so they don’t slide and clump, run the tag end through both the loops of the line that you created earlier.

Step 5
Wet the line and then pull on both the main line and tag end of the line to tighten down the Trilene Knot. Make sure everything has set evenly then cut off the tag end of the line. leave about 1/4″ of a tag just in case the knot wasn’t tightened enough and slips. To keep such things from happening make sure to give the knot a good hard pull before use.
The post Are You Nuts? Know your Fishing Knots! – The Trilene Knot appeared first on AllOutdoor.com.
AllOutdoor.com
A Lion Bonks a Tree and More in the 2022 Comedy Wildlife Photo Awards
https://i.kinja-img.com/gawker-media/image/upload/c_fill,f_auto,fl_progressive,g_center,h_675,pg_1,q_80,w_1200/5c82ef56cac875ac6429401962bf72c4.jpg
“I was following a group of meerkats on foot in the Kalahari Trails Game Reserve, in South Africa. Most individuals, including adults, were in a playful mood. It gave me a unique opportunity to capture very interesting and dynamic interactions between some members of the group. In the photo that I have selected, there is no aggression between individuals, but rather an interaction that reminds us of humans when one of your friends jokes about you and you pretend to strangle them and, in response, they open their mouth like a simpleton,” said photographer Emmanuel Do Linh San.
Gizmodo
How to Play ‘The Sims 4’ for Free Right Now (and Forever)
https://i.kinja-img.com/gawker-media/image/upload/c_fill,f_auto,fl_progressive,g_center,h_675,pg_1,q_80,w_1200/dd7a10a4d9ca17f669294209c6def75b.jpg
Like many people, I have fond memories of being addicted to The Sims. My game of choice was The Sims 2, but I also dabbled in The Sims 3 for a time. Somehow, I kicked the habit before The Sims 4 dropped back in 2014, and haven’t played much of the franchise since. It seems EA might have pulled me back in, though, as The Sims 4 is now permanently free to play.
EA announced the news last month, proclaiming they’d make the most recent entry in their Sims catalog totally free as of this past Tuesday. This isn’t a trial: You can download and play the base game without spending a dime. It’s a nice, if not shocking, development; Sims fans blasted the game before launch, as it was missing content found in previous entries, and while downloadable content added plenty of features old and new, some felt the base game was never worth the full price. In a way, The Sims 4 was made to be a free game, with the option to add on via expansion and game packs.
Of course, some of us have paid for The Sims 4 already, and EA doesn’t want to leave you hanging out to dry. If you’re an EA Play or EA Play Pro member, you’ll receive special upgrades for The Sims 4. The EA Play Edition of the game features the Get to Work Expansion Pack, while the EA Play Pro Edition features both it and the Toddler Stuff Pack as well.
To be clear, this is the base game of The Sims 4. While that’s enough Sims to get you up and running, you’ll only experience a slice of what EA has to offer. True to The Sims’ formula, EA developed expansion packs to supplement gameplay with additional furniture, clothes, pets, situations, storylines, weather, and much more. Expansion packs include:
- Cats & Dogs
- City Living
- Cottage Living
- Discover University
- Eco Lifestyle
- Get Famous
- Get Together
- Get to Work
- High School Years
- Island Living
- Seasons
- Snowy Escape
There are also twelve game packs, which are more incremental upgrades to your game when compared to expansion packs:
- Dine Out
- Dream Home Decorator
- Jungle Adventure
- My Wedding Stories
- Outdoor Retreat
- Parenthood
- Realm of Magic
- Spa Day
- Star Wars: Journey to Batuu
- StrangerVille
- Vampires
- Werewolves
By opening The Sims 4 to everyone for free, EA will earn itself a pool of potential customers for these expansion and game packs (ah, there’s that other shoe). Sure, you might never intend to spend a dime on the game, but maybe you want to see the seasons while you play, or add restaurants to your experience, or send your sim to high school. All of a sudden, you’re hundreds of dollars (and hours) deep. Classic Sims.
G/O Media may get a commission
How to download and play The Sims 4 for free
Chances are, you own something that can play The Sims 4. The game is available on PC, Mac, PS5, PS4, Xbox Series X/S, and Xbox One.
On PlayStation and Xbox, downloading the game is obvious. You’ll find the title in both the PlayStation Store and Xbox Store available to download for free. On desktop, however, it’s a little different.
On both Mac and PC, head to EA’s website for The Sims 4 here. Hover your cursor over the blue “Play for Free” button in the top right, then choose either “EA app for Windows,” “Origin for Mac,” or “Steam.” If you choose one of the first two options, you’ll need to scroll down, click on the appropriate link for your computer (The EA app for Windows and Origin for Mac), then install and open the program.
At this time, The Sims 4 on Steam is only available for Windows. You can play The Sims 4 directly from Steam without needing to download the game first.
Lifehacker
Log Viewer after 2 months
It has only been 2 months since the Log Viewer was launched to the public as an Open-Source log viewer for the Laravel framework. I did not think much of it in the beginning – maybe it would help 10-20 developers make their life easier, including myself, but the response was much more significant that I expected.
GitHub – opcodesio/log-viewer: Fast and beautiful Log Viewer for Laravel
Fast and beautiful Log Viewer for Laravel. Contribute to opcodesio/log-viewer development by creating an account on GitHub.
Quick stats so far
- 1,900+ stars on GitHub
- ~65,000 installs
- 64 Pull Requests made (24 of them made by contributors other than me)
- 28 issues closed (fixed or explained as non-issue)
Not only did the package receive a lot more love than I imagined, it also received contributions from the community to make it better! Thank you all, bravo 👏
New features
I have a limited amount of free time – usually Fridays and weekends – to contribute to this project. The attention this package got definitely kept me going and wanting to improve it even further. I also had tons of fun working on it!
I had some cool ideas for features that no other log viewer for Laravel does. So, for the last 2 months, Log Viewer has been my primary focus during my free time and together with the community we’ve built some cool features 🤓 Here’s a quick look at them.
Dark Mode
Although this hasn’t shipped with the initial version of the Log Viewer, it quickly became the number one requested feature. Who could’ve guessed, right? 😅
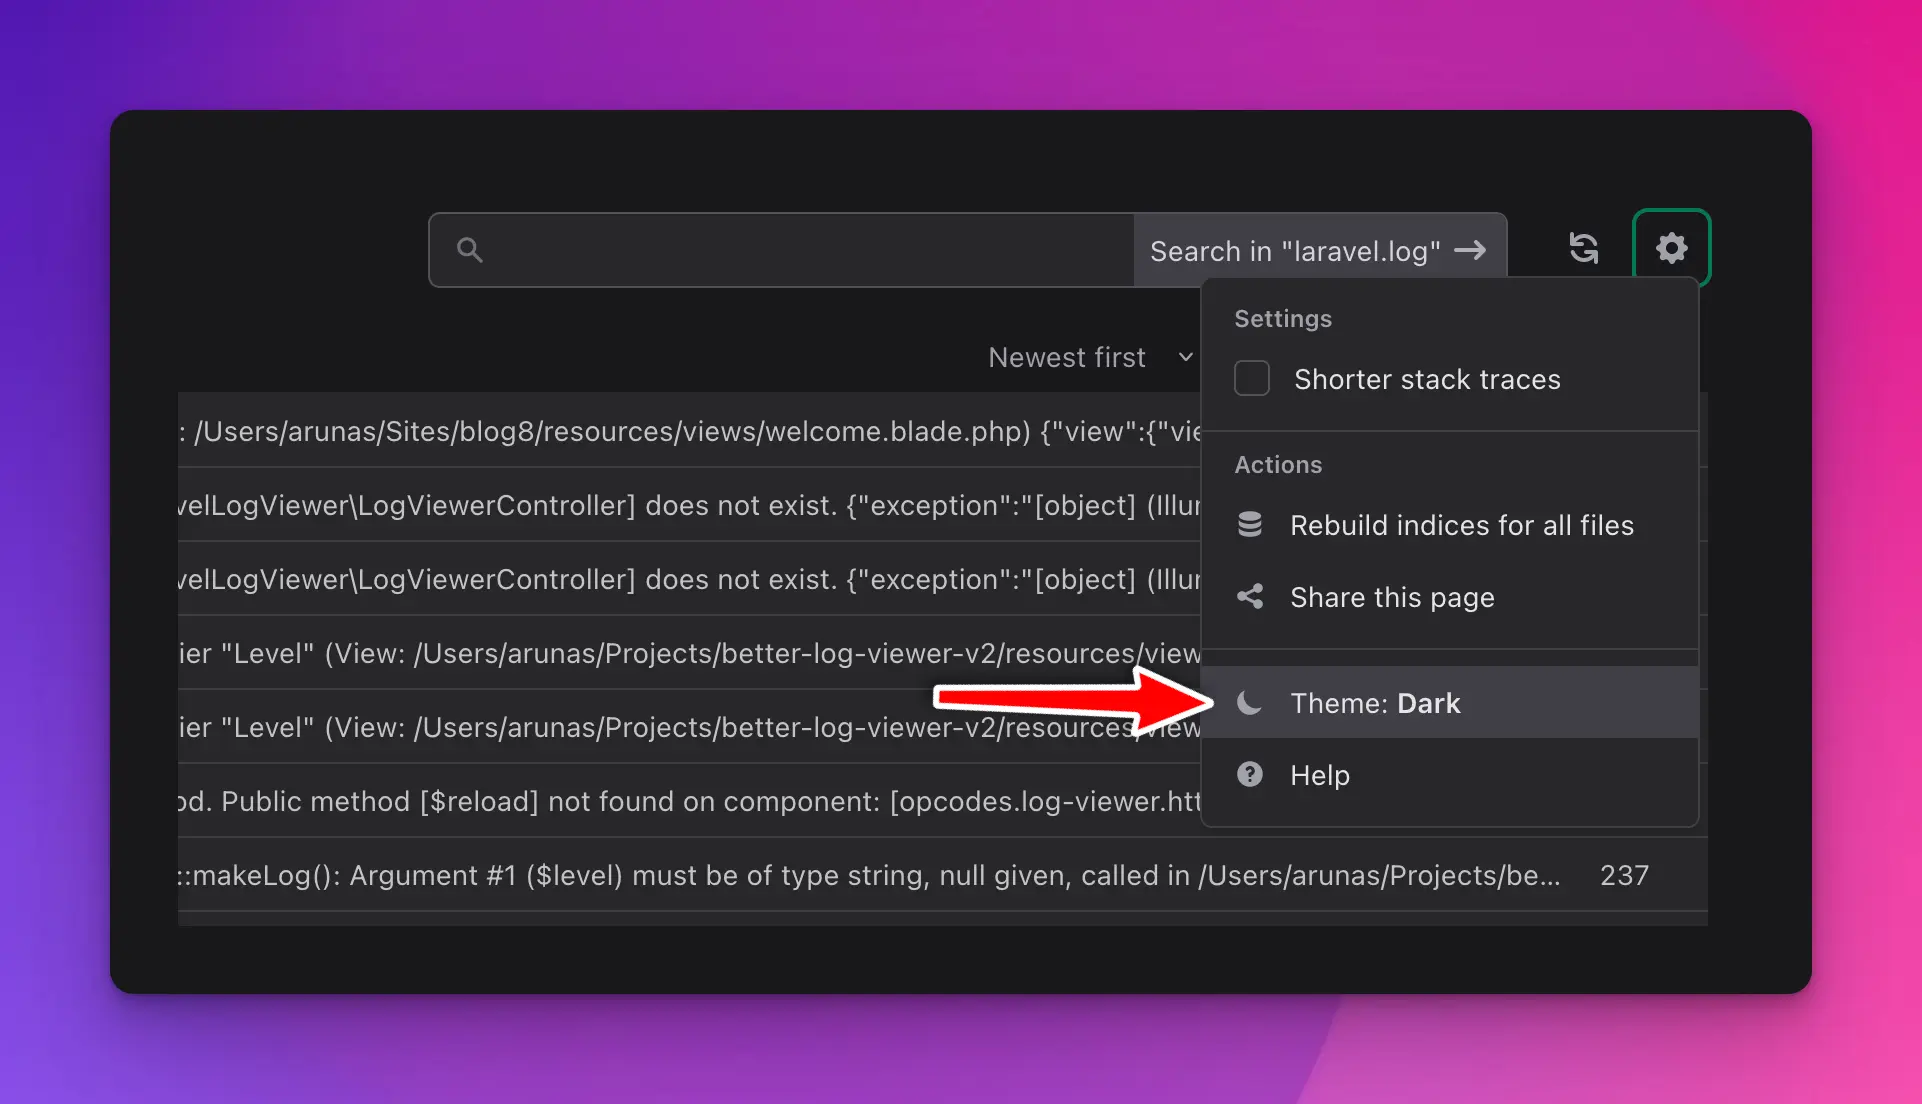
I believe one of the first community PRs was to add a Dark Mode. Log Viewer is a tool for developers – it needs a dark mode.
You can also choose a System theme, which will switch between Light/Dark mode based on your system preferences. That is set by default.
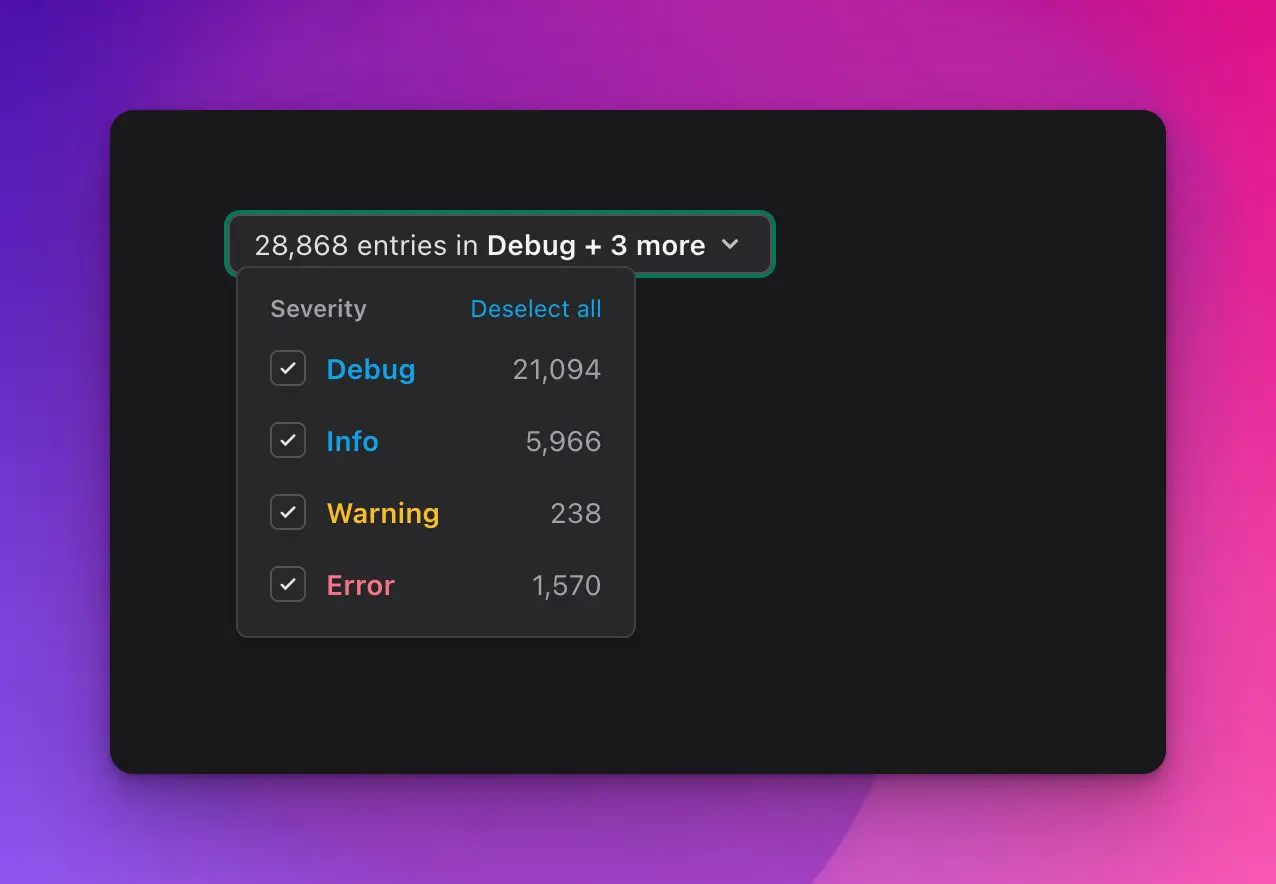
Improved severity selection
The new dropdown design of selecting log severity levels is much more space-efficient, leaving room for other features later. It now also shows the total count of logs found.
Log groups (folders)
If you include logs from multiple places, you will see them grouped in the UI. Expand/collapse, as well as perform any actions (download, delete, etc) on the groups – just like regular log files.
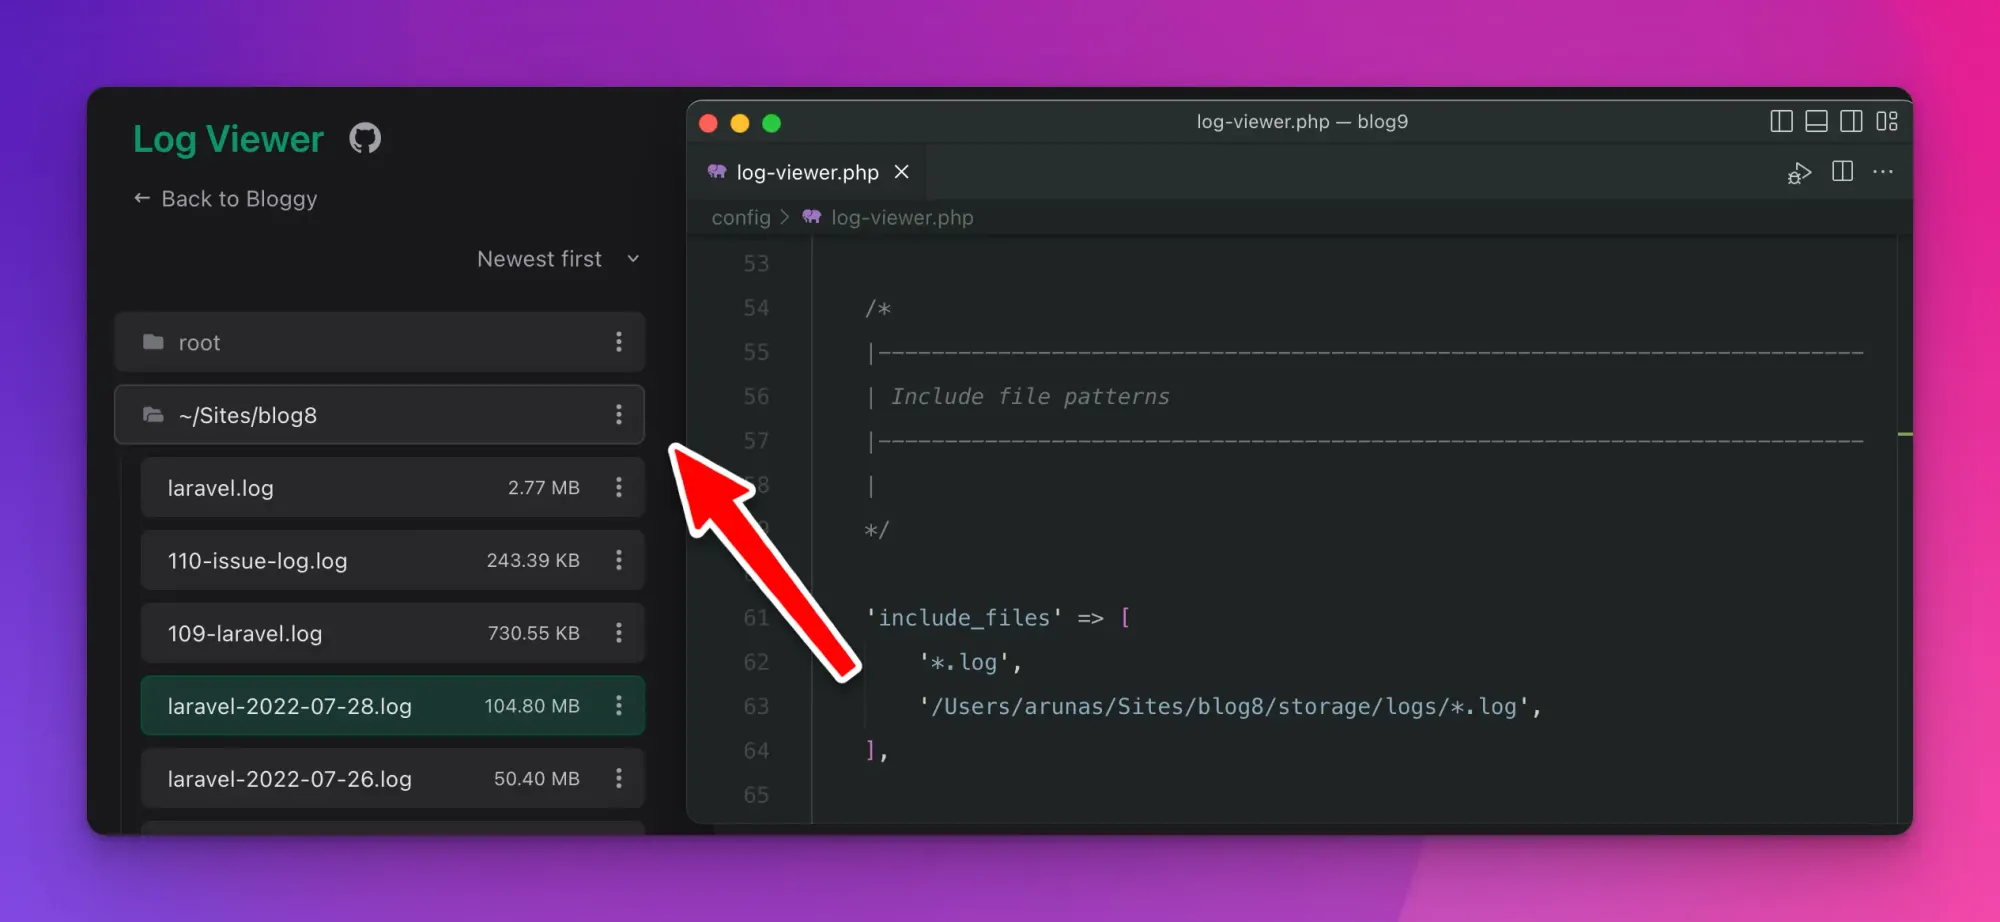
It is not based on the glob patterns defined, but rather the actual folder the logs are in. If multiple patterns resolve to the same folder – those log files will still be grouped under the same group.
On unix systems, the user’s home path will be replaced with a tilde ~ character for a cleaner design.
Searching across all files
Another heavily requested feature, as voted in the Twitter pool.
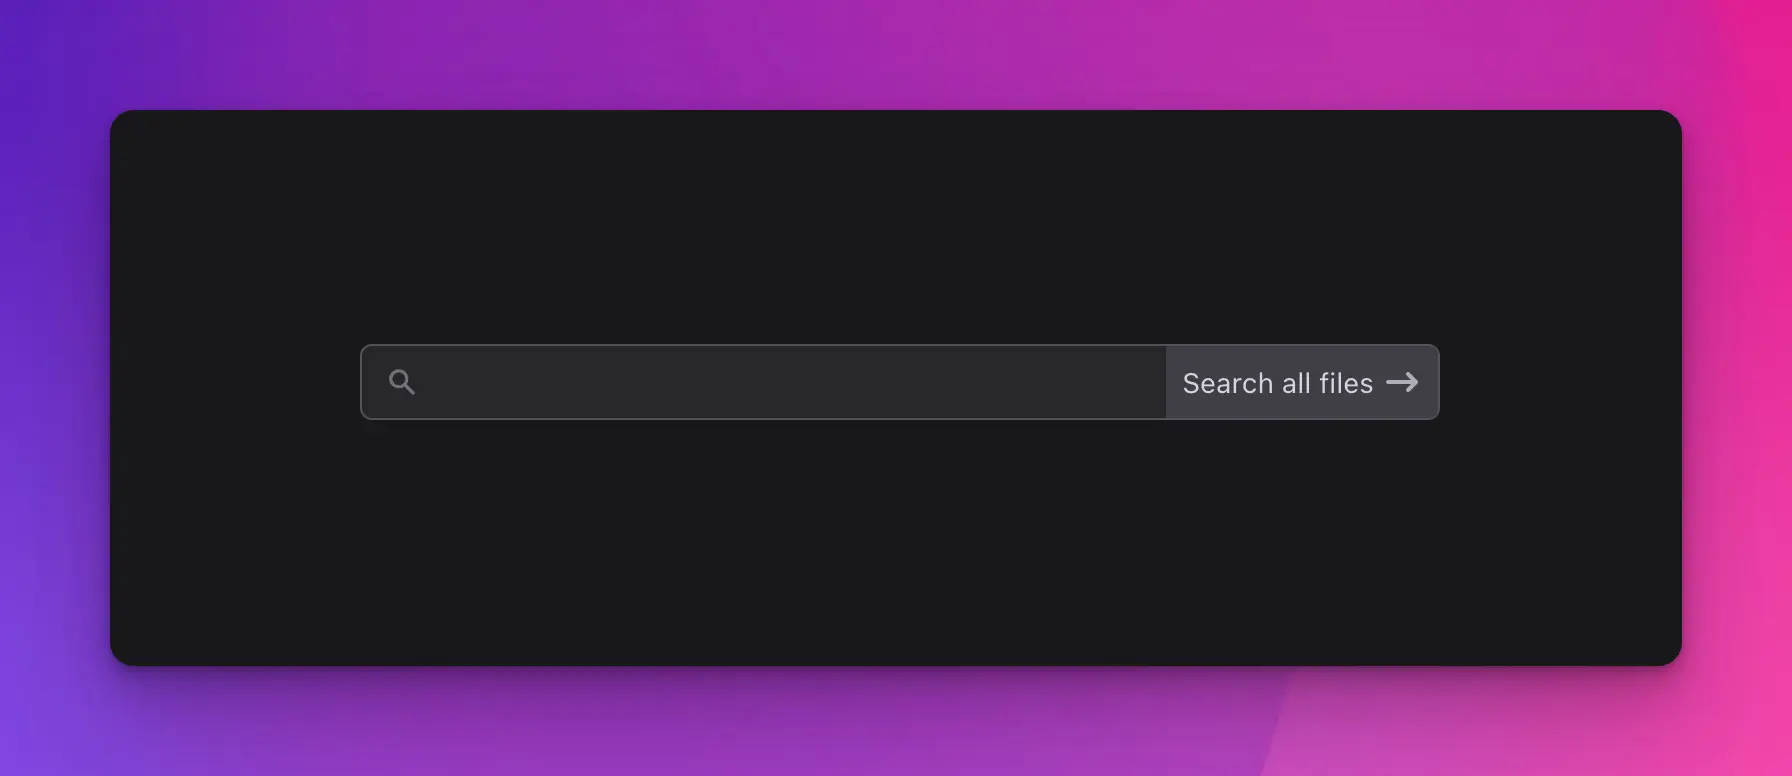
This comes useful especially if you use the daily log driver, which creates a new log file every day. If you’re looking for something, you may not know what day it happened, or what log file it is in.
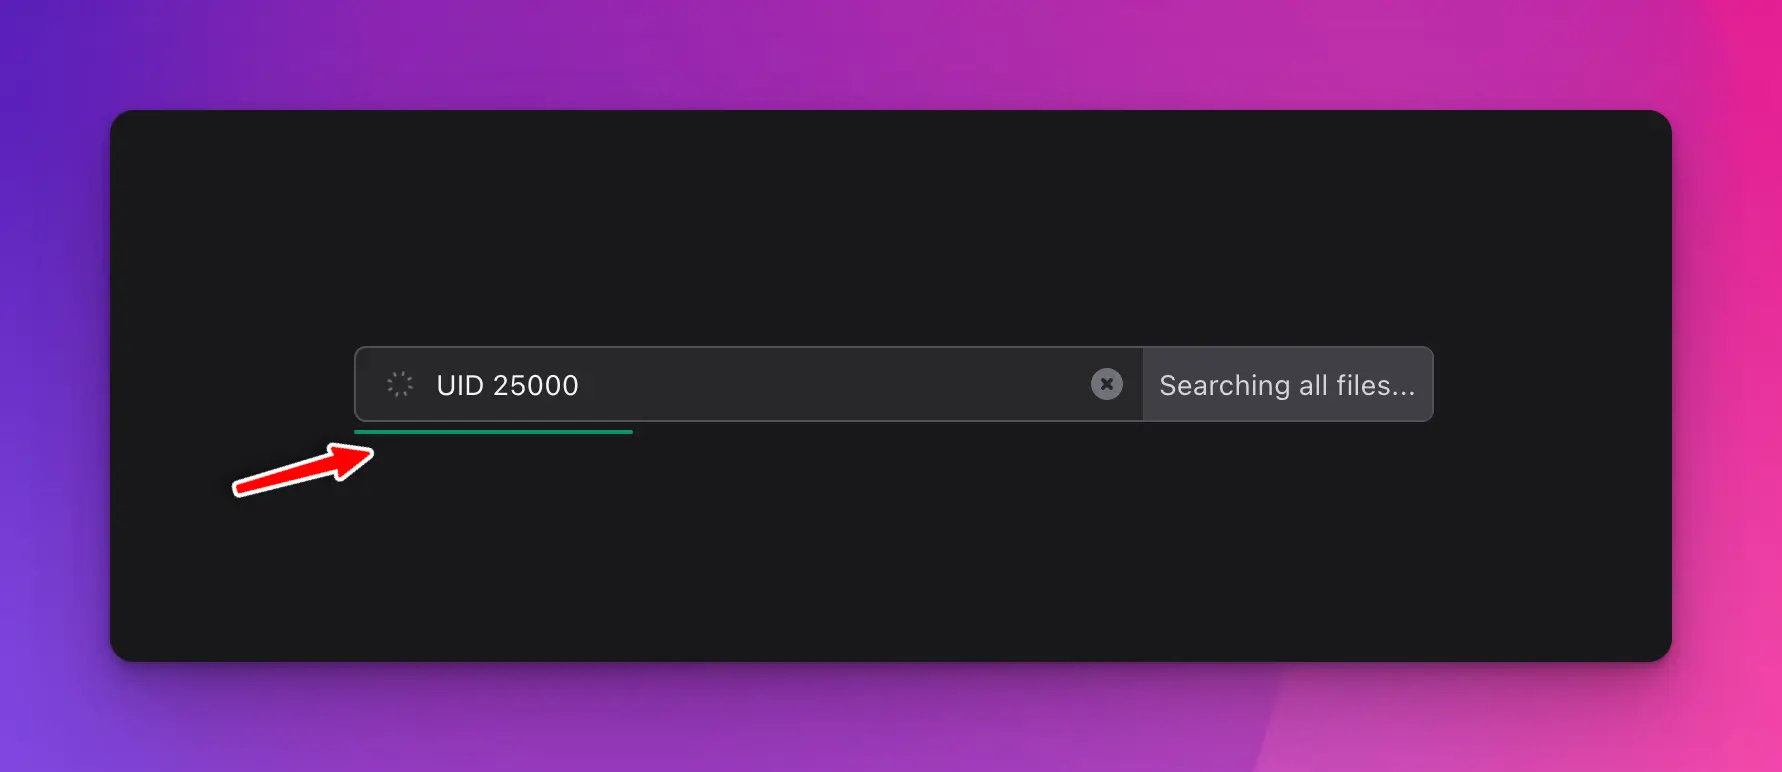
Here’s how it works:
- If you have selected a log file – it will search that log file only.
- If you have not selected any log file – it will search across every log file known to Log Viewer.
In case of a global search, sometimes it may take a while if you have gigabytes of logs across hundreds of log files. For this purpose, there’s a progress bar that will update you on the search’s progress:
Chunked log indices
The way the Log Viewer is faster than other log viewers for Laravel is by indexing the logs first before viewing them. Once we know the timestamp, severity, and the position in file for each log, we can paginate over them much more efficiently – in milliseconds in fact.
Previously, when working with large log files (more than 1 million logs inside a single file), the Log Viewer’s index could grow really big (reaching well over 100 MB in size for a multi-dimensional array in PHP) and thus increasing the memory usage for each request.
While it’s not very common to have huge log files, especially using the daily driver, it can still happen – you might get an infinite loop going on writing millions of logs, or an external service might be down during the night causing hundreds of thousands of exceptions. You don’t want to lose any of that. Your log files should be readable and accessible no matter the size.
So, in favor of an even higher scalability than previously available, I’ve rebuilt the indexing engine to split a single large index into smaller, more manageable chunks.
A single 1 GB log file might be indexed with ~200 small chunks stored in the cache. Once we know what severity levels you’re interested in, and what page you’re currently on – we can figure out the exact chunk to pull and read from. Notice the memory usage when browsing a 1 GB log file – it’s only 6 MB! That’s the beauty of not loading the full log file into memory every time you read it.

What’s next?
So, what’s next on the roadmap?
There’s still a number of features I’d like to build into the Log Viewer, namely:
- Date filters. With the global search now available, it makes perfect sense to limit your search to a particular date range. Not only would it be faster, but also give you only the results you need.
- Mobile-friendly UI. I have underestimated the amount of developers checking their logs on-the-go. I never do that myself, so I did not think much of it. It was a “nice to have” feature that I did not prioritize for the first release.
- Custom Log Parsers. You most likely have logs other than just Laravel. Apache/nginx, MySQL/PostgreSQL, Supervisor, and so on. There are many more logs that you might need to read for debugging. Wouldn’t it be nice if all of these logs could be viewed in the Log Viewer?
If there’s another feature you’d like to see as part of the Log Viewer, be sure to check our GitHub Discussions page where you can upvote existing feature requests or suggest your own!
You can also open up a Pull Request with your feature implemented – I welcome all code suggestions and improvements and would love your help to make the Log Viewer even better.
Don’t forget to visit the Log Viewer’s GitHub page and ⭐️ star it!
GitHub – opcodesio/log-viewer: Fast and beautiful Log Viewer for Laravel
Fast and beautiful Log Viewer for Laravel. Contribute to opcodesio/log-viewer development by creating an account on GitHub.
If you’d like to know more about what I do, subscribe to the mailing list here and follow me on Twitter – https://twitter.com/arukomp
Thank you to all the contributors and supporters, I appreciate you all!
Laravel News Links
Consuming APIs in Laravel with Guzzle
https://ondemand.bannerbear.com/signedurl/nZ52rq9EkQ6V3bp1Lj/image.jpg?modifications=W3sibmFtZSI6InRpdGxlIiwidGV4dCI6IkNvbnN1bWluZyBBUElzIGluIExhcmF2ZWwgd2l0aCBHdXp6bGUiLCJjb2xvciI6bnVsbCwiYmFja2dyb3VuZCI6bnVsbH0seyJuYW1lIjoiaGVhZHNob3QiLCJpbWFnZV91cmwiOiJodHRwczovL3d3dy5ob25leWJhZGdlci5pby9pbWFnZXMvaGVhZHNob3RzL2Z1bmtlZmFpdGhvbGFzdXBvLnBuZyJ9LHsibmFtZSI6InN1bW1hcnkiLCJ0ZXh0IjoiQVBJcyBhcmUgZXZlcnl3aGVyZSEgSW4gdGhpcyBhcnRpY2xlLCB5b3UnbGwgbGVhcm4gaG93IHRvIGNvbnN1bWUgZXh0ZXJuYWwgQVBJcyBpbiBMYXJhdmVsIHVzaW5nIEd1enpsZS4iLCJjb2xvciI6bnVsbCwiYmFja2dyb3VuZCI6bnVsbH0seyJuYW1lIjoiYXV0aG9yIiwidGV4dCI6IkJ5ICpGdW5rZSBGYWl0aCBPbGFzdXBvKiIsImNvbG9yIjpudWxsLCJiYWNrZ3JvdW5kIjpudWxsfSx7Im5hbWUiOiJ0YWdzIiwidGV4dCI6IiNwaHAgI2xhcmF2ZWwgI2d1enpsZSIsImNvbG9yIjpudWxsLCJiYWNrZ3JvdW5kIjpudWxsfV0&s=a5d5acb6fefeec8550d5d121a90f5dd7503d84cd986e5b79bea4b844381ab5ef
Guzzle is a PHP HTTP client that Laravel uses to send outgoing HTTP requests to communicate with external services. Guzzle’s wrapper in Laravel focuses on the most popular use cases while providing a great development experience. Using Guzzle will save you time and reduce the number of lines of code in your application, making it more readable.
A common use case is when two Laravel applications are developed, and one functions as the server while the other is the client. They will need to make requests to each other. Here are a few things we’ll cover in this article:
- What is an API?
- Difference between external and internal APIs.
- What is Guzzle?
- Laravel’s HTTP Client.
- Making requests.
- Inspecting the response format.
Prerequisites
The following will help you keep up with this tutorial:
What Is an API?
An API is a software-to-software interface that enables two applications to exchange data. APIs are propelling a new era of service-sharing innovation. They are used by nearly every major website you can think of, including Google, Facebook, and Amazon. All of these websites and tools use and provide ways for other websites and products to consume and extend each other’s data and services. You’ve been in the presence of an API if you’ve ever signed into an app or service using your Facebook or Google credentials.
They serve as a bridge between developers and the different programs that people and organizations use on a regular basis, allowing them to create new programmatic interactions. Companies can open up their applications’ data and functionality to external third-party developers, commercial partners, and internal departments through an application programming interface, or API. Through a documented interface, services and products can communicate with one another and benefit from each other’s data and capability.
Here are some common examples of APIs:
- Pay with PayPal
- Twitter Bots
- Sign In with Google
How Do APIs Work?
APIs operate as an intermediary layer between an application and a web server, facilitating data transfer across systems. To retrieve information, a client application makes an API call, often known as a request. This request, which contains a request verb, headers, and sometimes a request body, is sent from an application to the web server via the API’s uniform resource identifier (URI).
The API makes a call to the external program or web server after receiving a valid request. The server responds to the API with the requested data. The data are transferred to the requesting application via the API.
Internal vs. External APIs
Internal APIs provide a safe environment for teams to share data and break down traditional data silos. An internal API is an interface that allows developers to gain access to a company’s backend information and application functionality. The new apps built by these developers can subsequently be shared with the public, although the interface is hidden from anyone who isn’t working directly with the API publisher.
Internal APIs can help cut down on the amount of time and resources required to develop apps and the resources. Developers can leverage a standardized pool of internal software assets instead of designing apps from scratch.
External APIs provide secure communication and content sharing outside of an organization, resulting in a more engaging customer experience. An external or open API is an API designed for access by a larger population, as well as by web developers. Thus, an external API can be easily used by developers inside the organization (that published the API) and any other developer from the outside who desires to register with the interface.
Benefits of APIs
Abstraction
An API makes programming easier by abstracting the implementation and just exposing the objects or actions that the developer needs.
Security
They enable secure communication of abstracted data to be displayed or used as required.
Automation
APIs allow computers to manage tasks rather than individuals. Agencies can use APIs to update workflows to make them more efficient.
Personalization
An API can be used to establish an application layer for use in disseminating information and services to new audiences and can be customized to create unique user experiences.
What Is a REST API?
REST is an acronym for representational state transfer. The first distinction to make is that API is the superset, whereas REST API is the subset. This implies that while all REST APIs are APIs, not all APIs are REST APIs. REST is a software architectural style developed to guide the design and development of the World Wide Web’s architecture. REST API is an API that follows the design principles of the REST architectural style. REST APIs are sometimes referred to as RESTful APIs because of this. For developers, REST provides a considerable amount of flexibility and independence. REST APIs have become a popular approach for connecting components and applications in a microservices architecture because of their flexibility.
REST APIs use HTTP requests to perform common database activities, including creating, reading, updating, and deleting records (also known as CRUD). A REST API might, for example, use a GET request to retrieve a record, a POST request to create one, a PUT request to update one, and a DELETE request to delete one.
What is Guzzle?
Guzzle is a PHP HTTP client that makes sending HTTP requests with data and headers easy. It also makes integrating with web services simple. It offers a simple yet powerful interface for sending POST requests, streaming massive uploads and downloads, using HTTP cookies, and uploading JSON data, among other things. One amazing feature is that it allows you to make synchronous and asynchronous requests from the same interface.
Previously, we relied on cURL for similar tasks. However, as time passed, more advancements have been made. Guzzle is a result of one of these advancements.
Laravel’s HTTP Client
Laravel wraps the Guzzle HTTP client in an expressive, basic API, allowing one application to swiftly make outgoing HTTP requests to communicate with other web apps efficiently. Requests can be sent, and responses can be retrieved using a HTTP Client. Guzzle is a powerful HTTP client, but when performing a simple HTTP GET or retrieving data from a JSON API, the 80% use-case seems difficult. Here are some popular features the Laravel HTTP Client provides:
- JSON response data is easily accessible.
- There’s no need for a boilerplate setup to make a simple request.
- Failed requests are retried.
You may need to use Guzzle directly for more complicated HTTP client tasks. However, Laravel’s HTTP Client includes everything you’ll need for most of your applications.
Making HTTP Requests to an API Using Laravel’s HTTP Client
For us to explore various options and use cases for Laravel’s HTTP Client, we’ll build a Laravel application that shows how to make requests to an external API using Laravel’s HTTP Client.
Note: The external API being used here is hosted on my local server. You can use any API you desire; its important to ensure you get the correct URL to make request to the API.
The URL that we will be hitting on the user API for this article is the following:
Create a New Laravel Project
You can create a new Laravel project via the Composer command or the Laravel installer:
laravel new project_name
    or
composer create-project laravel/laravel project_name
Install the Package
You need make sure that the Guzzle package is installed as a dependency of your application. You can install it using Composer:
composer require guzzlehttp/guzzle
Set Up the URL in .env and in the config/app Directory
Considering that you’ll be using this URL more than once, it’s a good idea to store it as one of your environment variables. This is beneficial because, if the URL needs to be changed later on, only the .env file will be modified rather than all the points at which the URL is called in the application. Store the URL as a variable in the .env file.
GUZZLE_TEST_URL=http://127.0.0.1:8000
Add it to the return[] array in config/app.php directory.
'guzzle_test_url' => env('GUZZLE_TEST_URL'),
Next, clear your configuration and application cache by running these commands:
php artisan config:cache
php artisan cache:clear
Set up the Controller
You’ll be making GET, POST, and DELETE requests to the API in the controller.
Create the controller with this Artisan command:
php artisan make:controller TestController
Import the Http Facade
use Illuminate\Support\Facades\Http;
Note: The base URL is being fetched from config/app.php, and the specific endpoint for a request is appended to it.
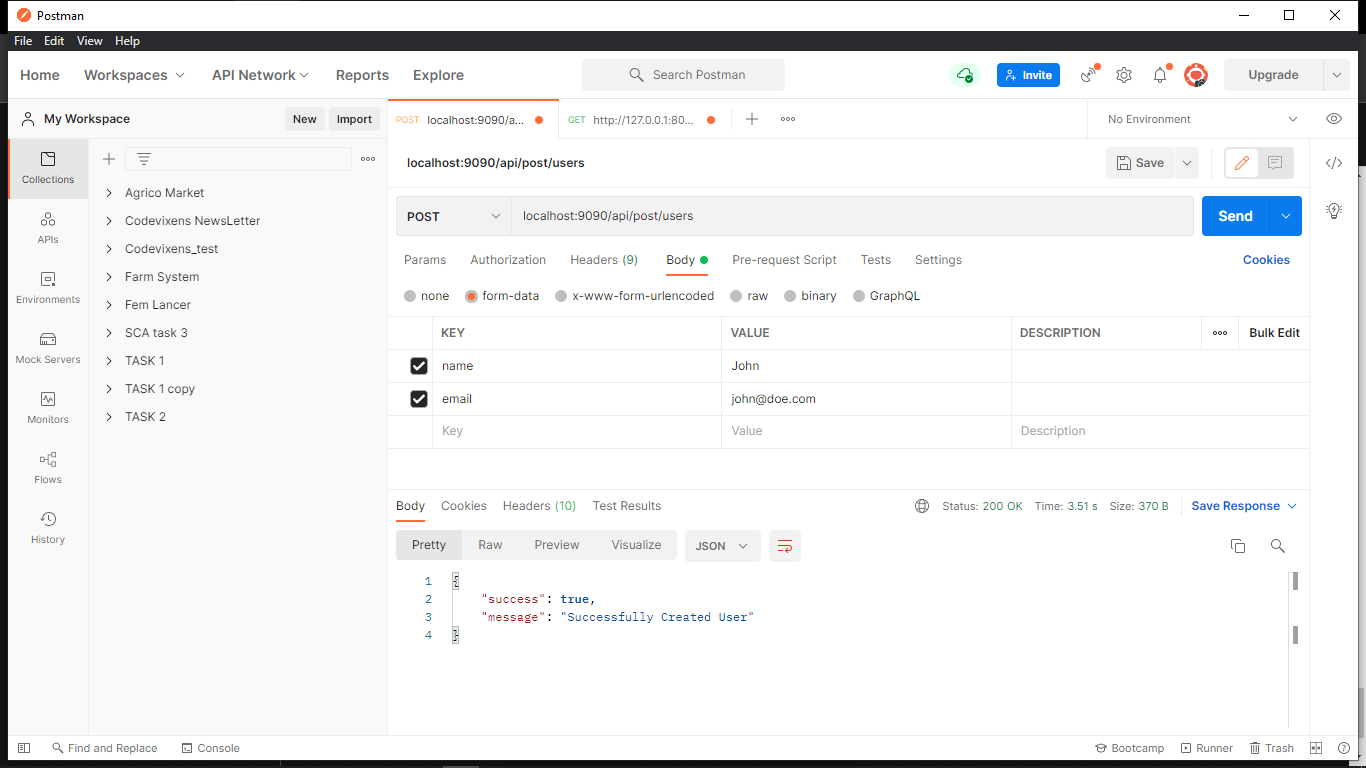
Make a POST Request
public function createUser(Request $request){
$theUrl     = config('app.guzzle_test_url').'/api/users/create';
  $response= Http::post($theUrl, [
      'name'=>$request->name,
      'email'=>$request->email
  ]);
  return $response;
}
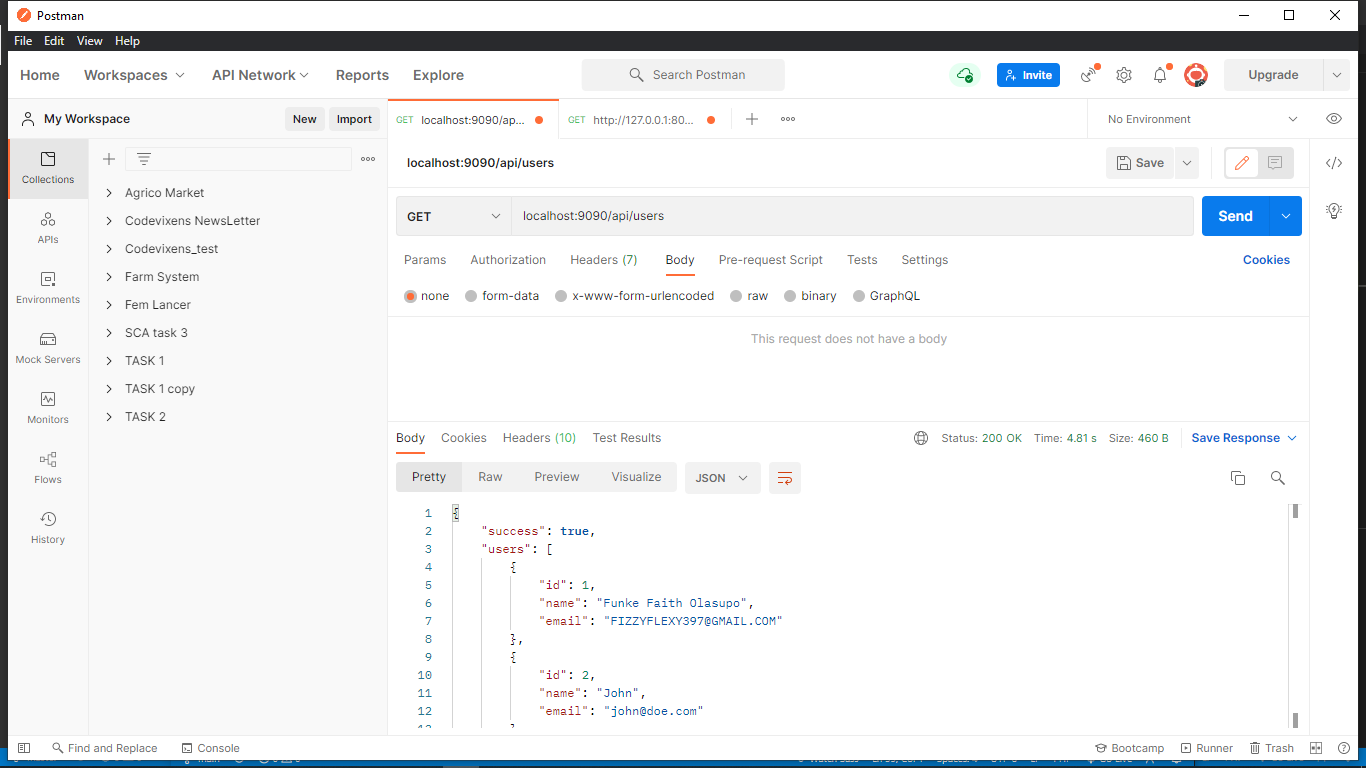
Make a GET Request
public function getUsers(){
   $theUrl     = config('app.guzzle_test_url').'/api/users/';
   $users   = Http ::get($theUrl);
   return $users;
}
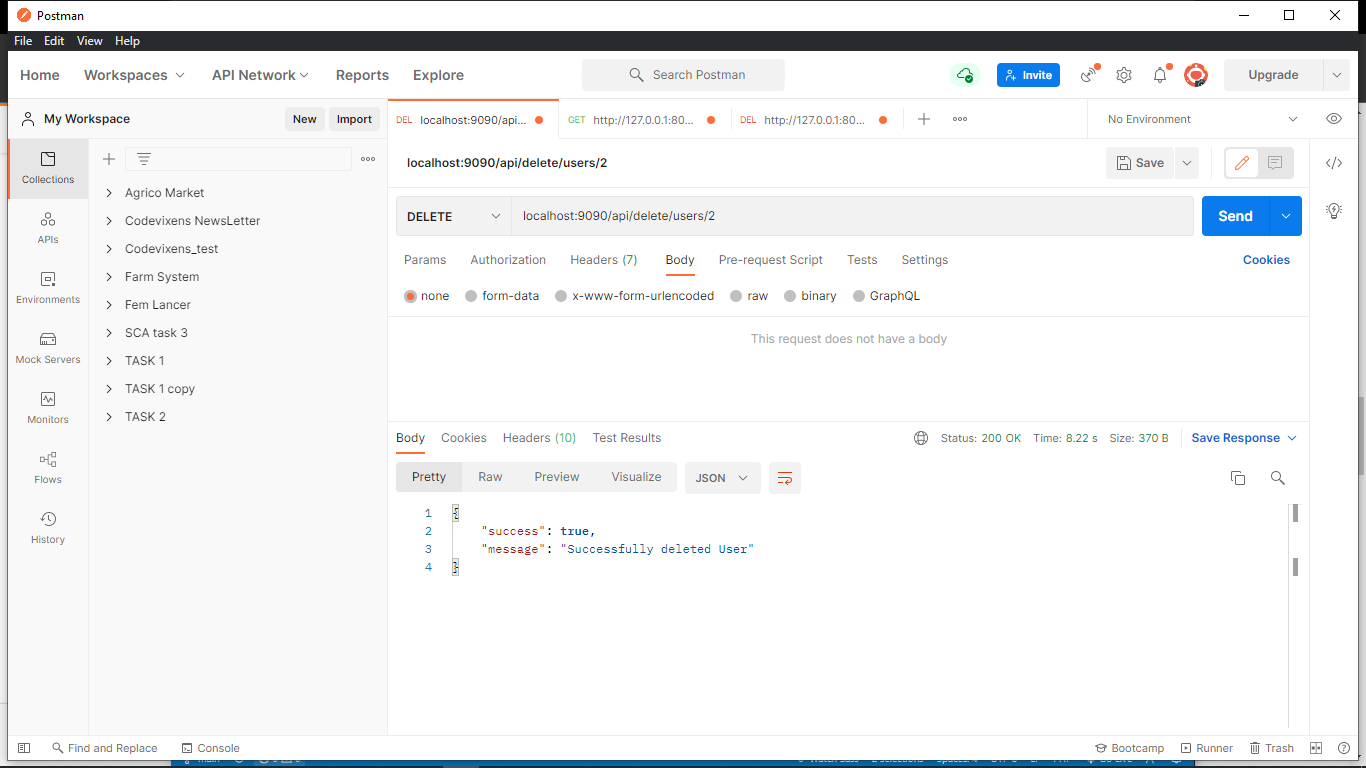
Make a DELETE Request
public function deleteUser($id){
$theUrl     = config('app.guzzle_test_url').'/api/users/delete/'.$id;
     $delete   = Http ::delete($theUrl);
    return $delete;
}
Set Up the Route
Since this is an API, the routes are defined in the routes/api.php directory.
Route::post('post/users', [TestController::class, 'createUser']);
Route::get('users/', [TestController::class, 'getUsers']);
Route::delete('delete/users/{id}', [TestController::class, 'deleteUser']);
Serve the Project
Run this Artisan command to serve the project:
Note: I am using port 9000; you can use your desired port.
php artisan serve --port 9090
Testing
We’ll be using Postman to test the API. These are the results for the requests, and they return successful for every request.
Inspect the Response Format
Laravel’s HTTP Client provides a list of options containing various formats in which response can be returned. Further queries can be performed on the response, depending on the format it is returned in. It returns a string by default.
String
Object
JSON
Check out the official Laravel documentation to learn more about Laravel’s HTTP Client. It provides various options, such as adding Authentication with Bearer Token,Headers, Timeout, and many other options, to make requests more flexible.
Conclusion
In this tutorial, you’ve learned how to consume APIs in Laravel using Laravel’s HTTP Client. Consuming APIs in Laravel is a broad concept on its own, but this tutorial can serve as a great starter guide. More information can be found in the official Laravel documentation. The code for this project is open-source and available on GitHub.
I am open to questions, contributions, and conversations on better ways to implement APIs, so please comment on the repository or DM me @twitter.
Thanks for reading 🤝.
Honeybadger has your back when it counts.
We combine error tracking, uptime monitoring, and cron & heartbeat monitoring into a simple, easy-to-use platform. Our mission: to tame production and make you a better, more productive developer.
Laravel News Links
Require Signatures and Associate Them With Eloquent Models
https://laravelnews.imgix.net/images/laravel-signature-pad.jpg?ixlib=php-3.3.1
Laravel pad signature is a package to require a signature associated with an Eloquent model and optionally generate certified PDFs.
This package works by using a RequiresSignature trait (provided by the package) on an Eloquent model you want to associate with a signature. Taken from the readme, that might look like the following:
1namespace App\Models;
2
3use Creagia\LaravelSignPad\Concerns\RequiresSignature;
4use Creagia\LaravelSignPad\Contracts\CanBeSigned;
5
6class Delivery extends Model
7{
8 use RequiresSignature;
9 // ...
10}
You can also generate PDF documents with the signature by implementing the package’s ShouldGenerateSignatureDocument interface. You can use a blade file or a PDF file as the basis for the signature document template. See the readme for details.
Once you have the package set up, a blade component provides the needed HTML to render the signature pad (shown with customizations):
1<x-creagia-signature-pad
2 border-color="#eaeaea"
3 pad-classes="rounded-xl border-2"
4 button-classes="bg-gray-100 px-4 py-2 rounded-xl mt-4"
5 clear-name="Clear"
6 submit-name="Submit"
7/>
Once you’ve collected signatures from users, you can access the signature image and document on the model like so:
1// Get the signature image path
2$myModel->signature->getSignatureImagePath();
3
4// Get the signed document path
5$myModel->signature->getSignedDocumentPath();
This package also supports certifying the PDF, and instructions are provided in the readme. You can learn more about this package, get full installation instructions, and view the source code on GitHub.
This package was submitted to our Laravel News Links section. Links is a place the community can post packages and tutorials around the Laravel ecosystem. Follow along on Twitter @LaravelLinks
Laravel News
Laravel 9 Model Events Every Developer Should Know
Laravel 9 Model Events Every Developer Should Know
Posted
Mahedi Hasan
Category
Laravel 9
Published
September 14, 2022
Hello artisan,
If you work on react js, Vue js, or WordPress, you will notice that there are some basic hooks to functionalize the corresponding language. Laravel has some model events that are automatically called when a model makes some changes.
In this tutorial, I will share with you some knowledge of Laravel model events and how we can use them in our code to make it dynamic. Assume, you would like to trigger something having changed a model data. You know, we can call model events in this situation.
There are so many model events in Laravel 9. Such as creating, created, updating, updated, saving, saved, deleting, deleted, restoring, restored. Events allow you to easily execute code each time a specific model class is saved or updated in the database.
Take a brief look:
- creating: Call Before Create Record.
- created: Call After Created Record.
- updating: Call Before Update Record
- updated: Class After Updated Record
- deleting: Call Before Delete Record.
- deleted: Call After Deleted Record
- retrieved: Call Retrieve Data from Database.
- saving: Call Before Creating or Updating Record.
- saved: Call After Created or Updated Record.
- restoring: Call Before Restore Record.
- restored: Call After Restore Record.
- replicating: Call on replicate Record

Let’s see an example of the use case of model events in Laravel:
namespace App\Models;

use Illuminate\Database\Eloquent\Factories\HasFactory;
use Illuminate\Database\Eloquent\Model;
use Log;
use Str;

class Product extends Model
{
    use HasFactory;

    public static function boot() {
        parent::boot();

        static::creating(function($item) {
            Log::info('This event will call before creating data');

            //you can write you any logic here like:
            $item->slug = Str::slug($item->name);
        });

        static::created(function($item) {
            Log::info('This event will call after creating data');
        });

        static::updating(function($item) {
            Log::info('This event will call before updating data');
        });

        static::updated(function($item) {
            Log::info('This event will call after updating data');
        });

        static::deleted(function($item) {
            Log::info('This event will call after deleting data');
        });
    }
}
You can also use $dispatchesEvents property of a model to call an event like:
protected $dispatchesEvents = [
   'saved' => \App\Events\TestEvent::class,
];
This TestEvent will call after saving the data. You write your logic inside TestEvent the class. Hope it can help you.
Read also: How to Use Laravel Model Events
Hope it can help you.
Laravel News Links
MySQL HeatWave Lakehouse Announcement Lauded by Top Industry Analysts
Leading industry analysts such as Constellation research, Wikibon, Futurum, Moor Insights & Strategy, KuppingerCole Analysts, and DBInsight, had the following to say about the recent MySQL HeatWave Lakehouse announcement.Planet MySQL