Quick Summary:
The most popular PHP framework- Laravel becomes handicapped if you eliminate its crucial part- the best Laravel packages. Yeah, sure, I’m not here to eliminate or miss out on these precious gems from the framework. Rather, in this post, I’m going to amalgamate the top Laravel packages altogether in place for your easy access.
I’m sure you will bookmark this blog for your future references! Pin it now.
Introduction
In a short span of time, Laravel has taken the PHP community by storm, and it hasn’t slowed down since its introduction. This is why Laravel does not need any introduction, as it is recognized as one of the fastest-growing backend frameworks.
I love this PHP-based framework more than any other framework as it makes the process of software development easier to implement modules, packages, plugins, and components.
I am writing this blog post to get you through the top Laravel packages to enhance your web application and performance.
What are Laravel packages?
Packages are one of the great ways to accelerate web application development and save your valuable time from the tedious task of writing the code from scratch. It can be freely reused anywhere in the code. Laravel has different-different kinds of packages; some of them standalone – Behat and Carbon are the best examples of such pages as they can be freely used with all the frameworks requesting COMPOSER.JS file.
In layman’s terms, Laravel Packages, also known as laravel plugins or bundles, are ready-to-use written scripts that you can plug and play into your application at your convenience.
Laravel’s packages deserve special attention because they minimize the code and improve the application’s maintainability.
How to install Laravel package?
The best Laravel packages can be divided into two main categories: Laravel specific packages and framework-independent packages. Laravel specific packages work exclusively with the Laravel framework, whereas framework-independent packages also work with other PHP-based frameworks.
Process of Installing Composer Package in Laravel
Composer for Laravel is what NPM is to JavaScript. When installing the package or plugin, it’s a straightforward process- write a one-line code in the composer.json file, and your job is done because the composer automatically pulls its package from packagelist.org.
To install the Laravel package, the syntax for installing the command line goes like this;

composer require packageowner/packagename
Use the below command to fetch the updated package

php artisan update
To use the installed package, instantiate a new object

$package = new Package;
If the package is namespaced then;

$package = new PackageNamespace\Package;
To ensure validation at vendor/composer/autoload_* files. You can also ensure it from the main package source file.

vendor/vendorName/packageName/[src or lib or whatever]/Package.php
Buckle up your tech stack with the latest trending updates in Laravel!
Develop a low-maintenance, flexible & secure website in minimal costs and adorn it with 3rd party plugins. Hire Laravel Developer from us and pose at the demanding nerve of the market edge.
Top Laravel Packages: Preserve the List
Let’s have a look at the best Laravel packages to optimize the performance of your Laravel application.
1. Laravel Debugbar

One of my favorites among the top Laravel packages is Debugbar that I mostly use to audit the code. It adds a dev toolbar to display exceptions, debug messages, routes, open views, and DB queries for the application. It will also show the rendered templates and parameters that you have passed.
Usage: Add using the Façade and PSR-3 levels

Debugbar::info($object);
Debugbar::error('Error!');
Debugbar::warning('Watch out…');
Debugbar::addMessage('Another message', 'mylabel');

And start/stop timing:
Debugbar::startMeasure('render','Time for rendering');
Debugbar::stopMeasure('render');
Debugbar::addMeasure('now', LARAVEL_START, microtime(true));
Debugbar::measure('My long operation', function() {
    // Do something…
});
Source: Github– 13.5k stars, 1.3k fork
2. Entrust
This package comes in handy when it comes to adding role-based permissions to your Laravel 5 application. Entrust is divided into 4 different categories: Store role records, store permission records, store relations between roles and users and store various relations between roles and permission.

Concept

$admin = new Role();
$admin->name         = 'admin';
$admin->display_name = 'User Administrator'; // optional
$admin->description  = 'User is allowed to manage and edit other users'; // optional
$admin->save();
Next, assign them to the user.

$user = User::where('username', '=', 'michele')->first();

// role attach alias
$user->attachRole($admin); // parameter can be an Role object, array, or id

// or eloquent's original technique
$user->roles()->attach($admin->id); // id only
Add role-based permissions:

$createPost = new Permission();
$createPost->name         = 'create-post';
$createPost->display_name = 'Create Posts'; // optional
// Allow a user to...
$createPost->description  = 'create new blog posts'; // optional
$createPost->save();

$editUser = new Permission();
$editUser->name         = 'edit-user';
$editUser->display_name = 'Edit Users'; // optional
// Allow a user to...
$editUser->description  = 'edit existing users'; // optional
$editUser->save();

$admin->attachPermission($createPost);
// equivalent to $admin->perms()->sync(array($createPost->id));

$owner->attachPermissions(array($createPost, $editUser));
// equivalent to $owner->perms()->sync(array($createPost->id, $editUser->id))
Source: GitHub– 6.2k stars, 1.3k fork
3. Sentry

I am pretty sure that you are familiar with the Laravel error tracking service. Sentry has its own Laravel integration. For any unexpected error, you will receive an email outlining what’s wrong with the ongoing app. To inspect the entire block of code and track group errors, it’s a convenient feature for the dashboard.
Source: GitHub– 1k stars, 149 forks
4. Bugsnag

To manage the expectations and monitor the errors, it is another cross-platform tool. Just like the Sentry, it offers fully customizable filtering and reporting. Instead of email, you will receive notification through Slack and Pagerduty
Source: GitHub– 780 stars, 111 forks
5. Socialite

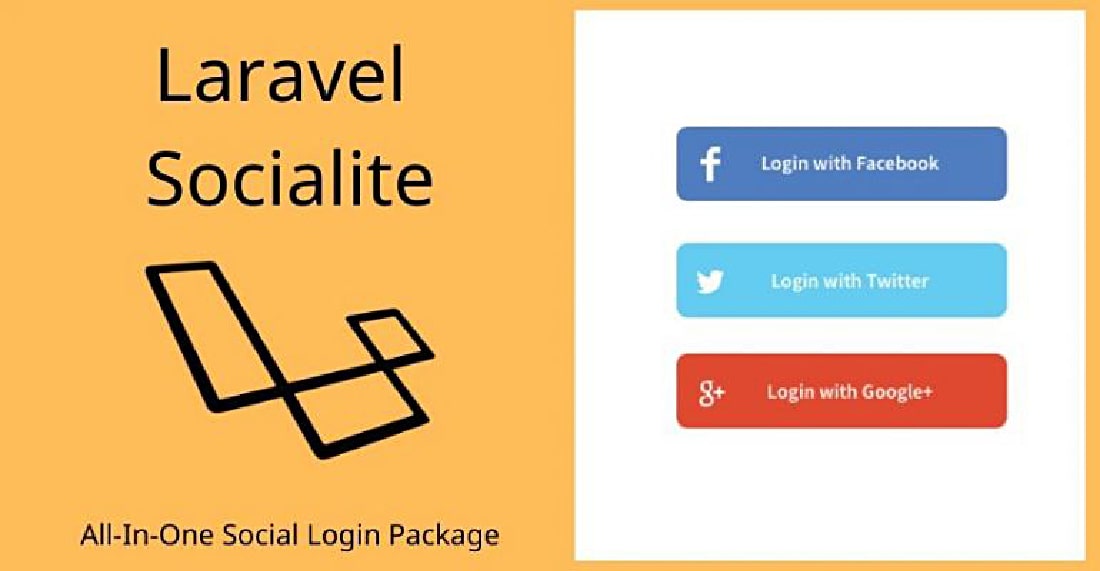
One of the simplest and easiest ways to handle OAuth authentication. Where users can sign in with the help of the most popular social networks like Facebook, Gmail, Twitter, BigBucket, and GitHub.

redirect();
    }
    /**
     * Obtain the user information from GitHub.
     *
     * @return \Illuminate\Http\Response
     */
    public function handleProviderCallback()
    {
        $user = Socialite::driver('github')->user();
        // $user->token;
    }
}
Source: Laravel
GitHub: 5k stars, 807 forks
6. Laravel Mix

Laravel Mix is known as Laravel Elixir, widely used to create an interactive API for webpack-build steps for your project. This tool is commonly used for optimizing and compiling assets in Laravel application similar to the gulp and Grant.
- Install Laravel
- Run npm install
- Visit your webpack.mix.js file, and get started!
GitHub: 4.9k stars, 796 forks
7. Eloquent-Sluggable
The purpose of this package is to provide a unique slug – a simplified version of string – that eliminates ampersands, accented letters, and spaces converting it into one case, and this package aims to make users happier with automatic and minimal configuration.

use Cviebrock\EloquentSluggable\Sluggable;

class Post extends Model
{
    use Sluggable;

    /**
     * Return the sluggable configuration array for this model.
     *
     * @return array
     */
    public function sluggable()
    {
        return [
            'slug' => [
                'source' => 'title'
            ]
        ];
    }
}
Source: GitHub– 3.3k stars, 424 forks
There’s an avalanche of Laravel Packages!
Only the expert Laravel developers will find out the best Laravel packages for your project. Get in touch with the best Laravel Development Company!
8. Laravel Heyman

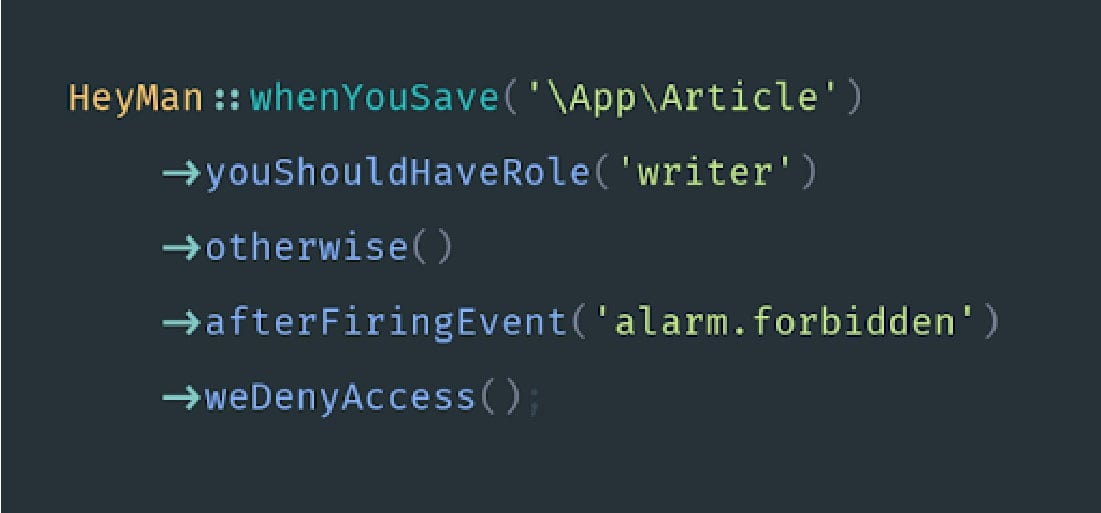
Laravel Heyman lets you validate, authenticate and authorize rest of your application’s code.

            ./tests/


            ./src
Source: GitHub– 768 stars, 37 forks
9. Laravel Charts

Charts is a PHP Laravel library to handle unlimited combinations of the charts. It is specifically designed to be loaded over AJAX and can be used without any external efforts. Laravel charts package makes use of simple API to create JS logic for your web application.
Installation:

composer require consoletvs/charts
Source: GitHub– 274 stars, 66 forks
10. Laravel Form Builder
Laravel form builder is inspired by Symfony’s form builder to create forms that can be easily modified and reused at our convenience. This package provides external support for Bootstrap3.
To install: Via Composer

composer require kris/laravel-form-builder
To use bootstrap 4

composer require ycs77/laravel-form-builder-bs4
Source: GitHub– 1.6k stars, 297 forks
11. Spatie
The sole purpose of creating a Spatie package is to allow you to embed roles and permissions within your application. Setting up different roles and admin permission on various activities within your website or the application is essential, considering the security and viability. While you can do it manually, the Spatie Laravel Packages gives you the ease to push roles right from the database.
Installing the package

composer require spatie/laravel-permission
Push Migration

php artisan vendor:publish --provider="Spatie\Permission\PermissionServiceProvider" --tag="migrations"
Migrate to Database

PHP artisan migrate
Publishing Configuration Files

php artisan vendor:publish --provider="Spatie\Permission\PermissionServiceProvider" --tag="config"
Source: GitHub– 10k stars, 1.5k forks
12. Laravel User Verification
Setting up a website and registering users, and you would need to have an email validation form embedded. The Laravel User Verification Package does the same. It is designed in a way that can store as well as handle validation tokens every time a user clicks for verification.
Installing the package

composer require jrean/laravel-user-verification
Edit the RegisterController.php file

public function register(Request $request)

{

   $this->validator($request->all())->validate();

   $user = $this->create($request->all());

   event(new Registered($user));

   $this->guard()->login($user);

   UserVerification::generate($user);

   UserVerification::send($user, 'My Custom E-mail Subject');

   return $this->registered($request, $user)

       ?: redirect($this->redirectPath());

}
Source: Github– 759 stars, 108 forks
13. Migration Generator
Having multiple database tables isn’t something new. Instead, every website has two or more tables to store different forms of data. The Migration Generator Laravel Packages is one that allows you to initiate migrations from one table to another. These include foreign keys, indexes, and further allows you to make a pick of tables involved in the migration.
Installing the package

composer require –dev “kitloong/laravel-migrations-generator”
Source: Github– 871 stars, 107 forks
14. Laravel Backup
Create a robust backup of all your data files with this exclusive package, Laravel Back-up. Keeping in mind the need to have the data stored and backed up, developers have designed the Laravel Backup package that creates a zip file of the application along with the data stored within it. The package gives the flexibility to store them at any of the systems.
Installing the package

composer require spatie/laravel-backup
To take backup, execute the following command:

php artisan backup: run
Source: GitHub– 4.8k stars, 675 forks
15. No Captcha
The No Captcha Laravel Packages is designed, keeping in mind the need to avoid spamming activities. What the package does is implement the protection and validation of Google reCaptcha. The sole purpose here is to prevent all sorts of spamming and render the website error-free.
To initiate the package, you are first required to get access to the API key. This is available free from reCaptcha, and once obtained, you can then run the following.
Add the following in app/config/app.php
- The ServiceProvider to the provider’s array:

Anhskohbo\NoCaptcha\NoCaptchaServiceProvider::class,
- The class alias to the aliases array:

'NoCaptcha' => Anhskohbo\NoCaptcha\Facades\NoCaptcha::class,

php artisan vendor:publish --provider="Anhskohbo\NoCaptcha\NoCaptchaServiceProvider"
Source: GitHub– 1.5k stars, 217 forks
16. Laravel GraphQL
If you have been accustomed to the concept of using traditional REST architecture, you will love the way Laravel’s GraphQL package behaves. Designed as the data query language, GraphQL makes it easier for developers to define their server structure and embed GraphQL within their apps.
Installing The GraphQL Package

composer require rebing/graphql-laravel
In case you are using Laravel 5.5 or above, the package would be detected automatically. However, for versions below 5.5, you need to add the following:

Rebing\GraphQL\GraphQLServiceProvider::class
and,

GraphQL' => 'Rebing\GraphQL\Support\Facades\GraphQL',
Publish and View The Configuration File:

$ php artisan vendor:publish --provider="Rebing\GraphQL\GraphQLServiceProvider"

config/graphql.php
Create Schemas For Designing The Endpoints of GraphQL

'schema' => 'default_schema',

'schemas' => [
    'default' => [
        'query' => [
            'example_query' => ExampleQuery::class,
        ],
        'mutation' => [
            'example_mutation'  => ExampleMutation::class,
        ],
    ],
    'user' => [
        'query' => [
            'profile' => App\GraphQL\Queries\ProfileQuery::class
        ],
        'mutation' => [

        ],
        'middleware' => ['auth'],
    ],
],
Source: GitHub– 1.7k stars, 221 forks
17. Tinker
Tinker is exceptionally useful and one of the top Laravel packages that helps developers test and try certain features without actually writing a script. In other words, the package allows debugging in real-time. Suppose that you want to check a few records in the database or perform specific operations.
The Tinker Laravel Packages would enable you to test and debug on your browser screen in a matter of clicks. The Tinker Laravel plugin has Laravel framework embedded within and hence, eliminates the need to manually install the same when using it with your application.

app instanceof LaravelApplication && $this->app->runningInConsole()) {
            $this->publishes([$source => config_path('tinker.php')]);
        } elseif ($this->app instanceof LumenApplication) {
            $this->app->configure('tinker');
        }

        $this->mergeConfigFrom($source, 'tinker');
    }

    /**
     * Register the service provider.
     *
     * @return void
     */
    public function register()
    {
        $this->app->singleton('command.tinker', function () {
            return new TinkerCommand;
        });

        $this->commands(['command.tinker']);
    }

    /**
     * Get the services provided by the provider.
     *
     * @return array
     */
    public function provides()
    {
        return ['command.tinker'];
    }
}
Souce: GitHub– 7k stars, 105 forks
18. Intervention/Image
Intervention/Image is one Laravel Packages that allows developers to create, edit, and appealingly modify images. The package is open-source, and developers can use it as per their requirement. In order to install the said package, run the following:

composer require intervention/image
Source: GitHub– 12.3k stars, 1.4k forks
19. Beautymail
An easy to use package enabling one-click addition of emails within the Laravel application, Beautymail has a huge repository of inbuilt templates that can be used for sending emails. Developers have the freedom to create their own HTML template and use it along with Beautymail.

publishes([
            __DIR__.'/../../config/settings.php' => config_path('beautymail.php'),
        ], 'config');

        $this->publishes([
            __DIR__.'/../../../public' => public_path('vendor/beautymail'),
        ], 'public');

        $this->loadViewsFrom(__DIR__.'/../../views', 'beautymail');

        try {
            $this->app['mailer']->getSwiftMailer()->registerPlugin(new CssInlinerPlugin());
        } catch (\Exception $e) {
            \Log::debug('Skipped registering SwiftMailer plugin: CssInlinerPlugin.');
        }
    }
Source: GitHub– 995 stars, 173 forks
20. Laravel Slack
With Laravel, you can quickly push all your notifications to the standard slack Channel. However, with the onset of the Laravel Slack package, you now have the ease to simplify things the way you want them to be. The package allows you to send messages directly from the platform to different channels.

class HelloMessage extends SlackMessage
{
    public $content = "Hey bob, I'm a sending a custom SlackMessage";
    public $channel = '@bob';
}
\Slack::send(new SlackMessage());
If needed, a dummy can be created to test the feature and functionality of the package.
Source: GitHub– 275 stars, 35 forks
Key Take Away on Best Laravel Packages
With this, we come to an end to the list of top packages for Laravel applications. It is seen that these top Laravel packages are extremely helpful in cutting down the time of development while enhancing the end to end productivity. So, if you are planning to optimize your applications or build a new one, the packages, as mentioned above, would be a great help to take into consideration.
If you are looking for the experts who can do the needful, then hire php developers from us as we are a globally renowned Laravel development company and have helped all the shapes and sizes of businesses to succeed in today’s digital world.
Go check out our helpful Laravel Tutorial page that depicts the expertise and community service of our dedicated Laravel Developers.
Frequently Asked Questions (FAQs)
More than 500 Laravel packages are available on CodeCanyon.
Here are the step that you must follow to create a package in laravel:
1. Install the latest Laravel version
2. Create Folder Structure
3. Create Composer File
4. Load Package from the Main Composer.JSON File
5. Create service Provider for Package
6. Create Migration
7. Create Model for the Table
8. Create Controller
9. Create Routes File
10. Create Views
11. Update Service Provider to Load the Package
12. Updating Composer File
Compared to the other PhP frameworks, Laravel has the best ORM (object-relational mapper). Interaction with Database objects and relationships is easy using this ORM with the help of expressive syntax. Laravel comes with the inbuilt Blade Template Engine.
A middleware helps you to inspect and filter HTTP requests that come through your application. For an instance, Laravel includes a middleware that verifies user authentication of your Laravel app. The middleware is located in the directory: app/Http/Middleware.
Laravel includes built-in authentication and session services which are typically accessed via the Auth and Session. The web browser-initiated requests are supported by cookie-based authentication. You can verify the authenticity of a user and their credentials.


