https://content.artofmanliness.com/uploads/2025/01/mus.jpg
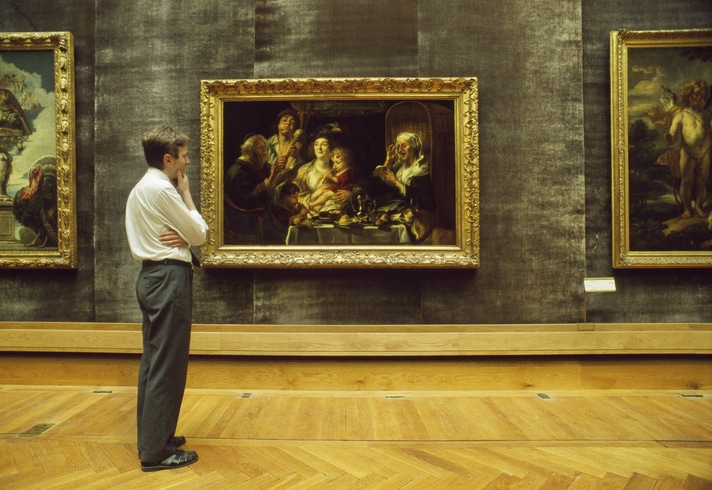
Over the Christmas break, our family took a trip to New York City. While we were there, we visited two of NYC’s most famous museums: the Metropolitan Museum of Art and the Museum of Natural History.
We had a great time but found the experience pretty overwhelming. There’s a lot of great art and exhibits in these museums, and they’re freaking huge. After spending a couple of hours at each museum, we were all pooped, though we hadn’t even scratched the surface of these cultural institutions.
It got me wondering if I could improve my approach to visiting a museum. What was the best way to do one?
I knew just who to ask to get the answer to that question: Nick Gray. Nick was on the AoM podcast a couple of years ago to discuss his book The 2-Hour Cocktail Party. Besides encouraging people to host short cocktail parties, he’s spent part of his career as a private museum tour guide in New York City and has led hundreds of tours. The man is passionate about museums. One of his life’s slogans is: “Museums are F***ing Awesome.”
I hopped on the horn with Nick to get tips on how to get the most out of your next museum visit. Here’s his field-tested battle plan.
Preparing for Your Museum Visit
Download the museum’s app. Nick told me that most big museums these days have their own app that you can use to enhance your visit, so check if they have one before you arrive. Many of these apps provide interactive maps as well as self-paced tours right on your phone. For example, the Museum of Natural History’s app has a map that can help you navigate its 1.2 million square feet. This would have come in handy on our visit; we got lost trying to find our way from the space section of the museum to its human history area.
Consider joining a tour group (but don’t be afraid to ditch it). I asked Nick if he recommended signing up for a guided tour at a museum. He told me that guided tours can make the experience more enjoyable, but he did provide this surprising caveat: “If you decide to join an in-person guided tour, you need to think about it like a magazine. Just like you can pick up a magazine and put it down without finishing it, you don’t need to stay with a tour for the entire time. Feel free to leave that tour if it’s no longer serving you.”
Nick did advise that you should leave with tact and grace. Just sort of fade away without making a big scene of it. Like an Irish goodbye.
Pack like you’re going on a day hike. A museum visit is more physically demanding than most people realize. You’re going to walk about two miles during a typical two-hour visit at a large museum. One of the biggest mistakes Nick sees people make is underpacking for their visit. He recommends you gear up for a museum visit like you would for a day hike or a trip to an amusement park. His essential packing list:
- Comfortable shoes
- Water bottle
- Light snack
- Headphones (for audio tours from your phone)
- Light layers (museums are climate-controlled and often chilly)
Nick especially emphasized the importance of bringing some snacks like nuts or a granola bar on your museum visit. “There’s an actual known phenomenon called ‘gallery fatigue’ where you just feel really wiped out mentally and physically from looking at exhibits,” Nick told me. Gallery fatigue seems to be caused by a combination of walking a lot and your brain having to choose what to pay attention to and process an endless stream of novel stimuli. Nick always kept snacks on hand for the folks in his tour groups to help stave off this condition.
Arriving at the Museum
Beat the crowds. If you’re looking to avoid the crowds, Nick recommends not visiting museums on Sunday afternoons (especially rainy and cold ones). That’s when museums are the busiest.
If you want to visit a museum when it’s less crowded, Nick suggests arriving when the museum first opens, but with this caveat: “Get there about 20-30 minutes after the museum opens. If you get there right when it opens, you’ll be standing in a long line, but usually 20 minutes after opening up, that line is gone.”
Don’t look at the exhibits (at first). Once you’re inside the museum, the first thing Nick counterintuitively recommends is to NOT look at the art. Instead, you’re going to do this:
- Get a map from the front desk.
- Walk the entire floor plan of the museum without stopping.
- Keep moving even when interesting pieces catch your eye. Don’t read any wall text or take photos.
- Complete this initial walkthrough in 10-30 minutes.
This quick initial walkthrough will give you a mental map of the museum, which will help you plan the rest of your visit.
Nick did have a caveat to his initial walkthrough advice: “For large museums like the Met or the Louvre, even a quick walkthrough would take an hour and a half, so don’t do this for those types of museums. This strategy is great for medium-sized museums.”
Take a short break and plan your visit. After your walkthrough, head to the café and have a seat to recharge for a bit. During this time, have a drink and a snack. Study your map and plan which galleries you want to revisit and spend more time in.
When planning, Nick recommends focusing on eliminating things you won’t see. If there’s a type of art or an era in history that doesn’t interest you, don’t visit that wing. It’s okay to not like or be interested in certain things.
Also, Nick recommends avoiding special exhibits: “If you’re just visiting for the day, don’t waste your time with special exhibits. These are better for locals who can come to the museum regularly. If you’re on vacation and only have two hours to visit a museum, stick to the permanent section highlights.”
Download an audio tour. Once you’ve winnowed down what you want to see on your visit, Nick recommends downloading an audio tour to your smartphone. They’re a great way to stay engaged on your visit and learn more about exhibits than you would wandering around on your own.
As mentioned above, many museum apps have these pre-loaded. Nick also told me that Bloomberg Philanthropies offers free and very well-done audio tours for your phone for many of the big museums in the United States and even a few in other countries.
If you’re visiting the Met, Nick recommends Bloomberg’s “Highlights” tour, which will take you on a guided tour of some of the Met’s most famous pieces.
Enjoying the Exhibits
Once you’ve established your game plan, start enjoying the art/exhibits. If you’re visiting an art museum, Nick offered the following tips to make your viewing more enjoyable:
- Ask yourself, “What’s your favorite piece in this gallery?”
- Play “Buy, Burn, or Steal” with companions (which piece would you want in your home, which would you rather never see again, and which would you steal if you could?)
- Give yourself permission to dislike certain pieces or galleries. You don’t have to like everything you see!
- Take note of a piece’s accession number. You’ll find this on the placard next to the piece. It’s a unique identifier for an object in a museum’s collection. If a piece really interests you, you can look it up on the museum’s website for more information.
Talk to the museum guards. In most museums, you’ll find guards patrolling the galleries. They’re there to make sure people don’t touch the art. Nick told me that the guards often have deep knowledge about the collections they protect. Don’t be afraid to strike up conversations with them — they can offer unique insights and perspectives you won’t find in any guidebook.
Take breaks! While you’re touring the museum, Nick recommends taking regular breaks every 45 minutes or so to avoid gallery fatigue. Sit down, drink some water, have a snack.
Practice good museum etiquette. To help ensure everyone has a good experience at the museum, practice good museum etiquette:
- Follow any rules the museums have about photography. Most museums these days allow you to take pictures, but it’s always good to double-check.
- Don’t be loud. Don’t touch stuff. Duh!
- Only eat and drink in designated areas. While you should bring snacks, make sure to only bust them out in designated areas. Most museums prohibit food and drink in the galleries.
- Be aware of your backpack radius. If you’ve got your backpack on your back, be aware of your radius. The last thing you want to do is swing your backpack into a priceless vase from third-century China. The risk of bumping into art with your backpack is why the Met asks patrons to wear their backpacks to the front.
If you’ve been avoiding museums because they seem overwhelming or boring, give Nick’s approach a shot. Pack some trail mix, download an audio guide, and play “buy, burn, or steal.” Focus on what interests you, take plenty of breaks, and maybe chat up a security guard or two. You might be surprised to find that museums are, indeed, pretty f***ing awesome.
Make sure to check out Nick’s website for even more tips on how to get the most out of a museum. He’s also got a great travel guide to visiting NYC in general, including additional advice on how to make the most of the Met.
This article was originally published on The Art of Manliness.
The Art of Manliness