BETHLEHEM—According to sources, the eternal Word of God has become flesh in the form of a newborn baby who was born this morning.
Some claim that this child is the human incarnation of the God of the Universe, who has come to reconcile a broken creation with its holy Creator, saving a wayward human race in a heroic rescue echoed in myths, legends, prophecies, and whispered hopes since the dawn of time.
If true, then God is with us, and things will never be the same again.
You may recall Remington filed for bankruptcy in 2018 then quickly remerged after restructuring.
But the 200-year-old firearms giant filed once again in 2020,r resulting in a bankruptcy court parting and selling the company.
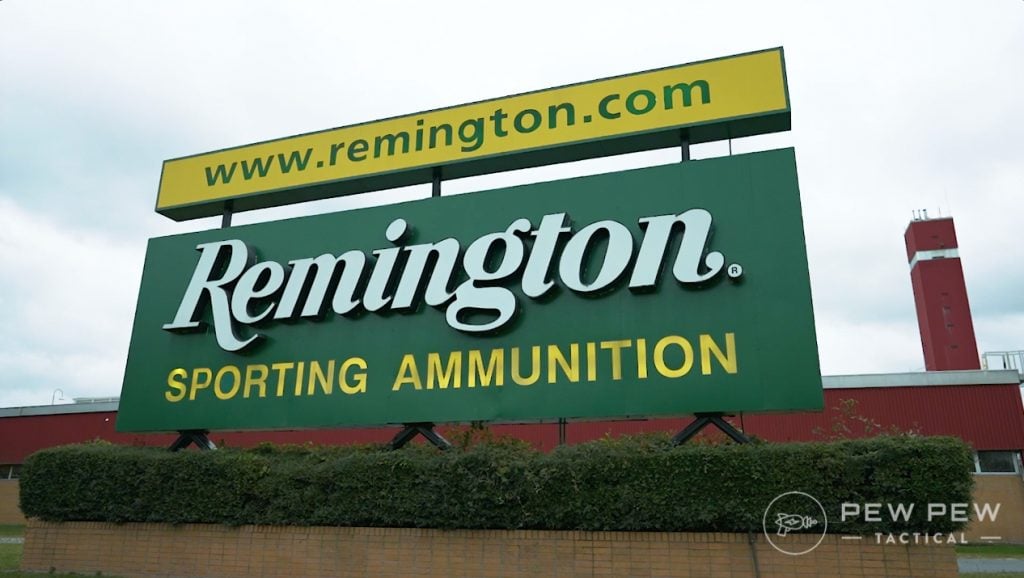
Remington Arms
The firearms component was bought by Roundhill Group LLC and rebranded as RemArms.
On the other hand, the ammunition side of things was purchased by Vista Outdoor. It’s here in the wooded plains outside Lonoke Arkansas, that our tale begins.
We met a lot of great folks as we toured the facility but were reminded that it’s still a working factory.
I tucked my hair under my hat, kept my hands to myself, and we headed into the 2A equivalent of the Wonka Chocolate Factory.
No Wonkavator, but the elevator in the shot tower was cool.
The Remington grounds sprawled across 1,200 acres and contained multiple sites for building, testing, and even enjoying their products.
The Book of Eli
We learned a lot. Led by our guide Joel, we started in a building called Eli which was named for Eliphalet Remington who founded the company in 1816.
This awesome building was currently assigned to mass-producing 9mm and the machines were whirring away as we toured.
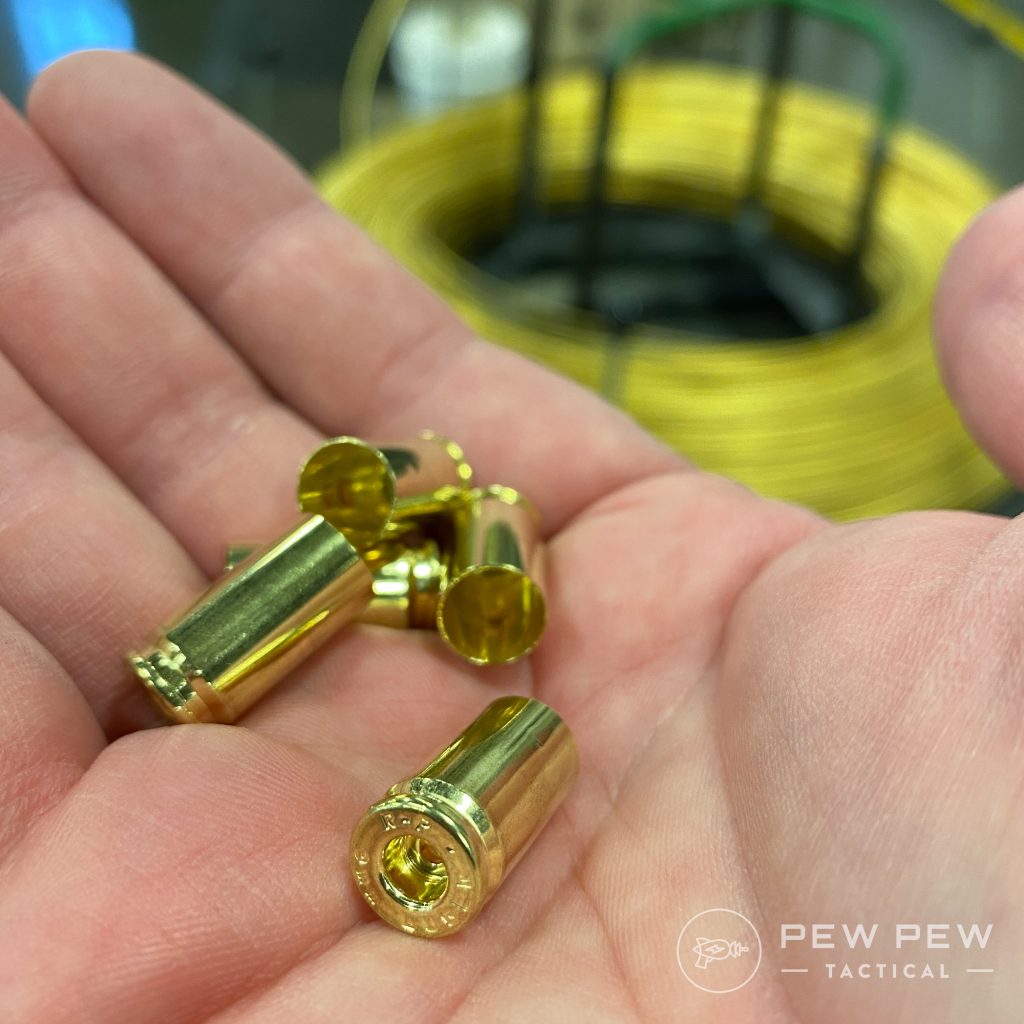
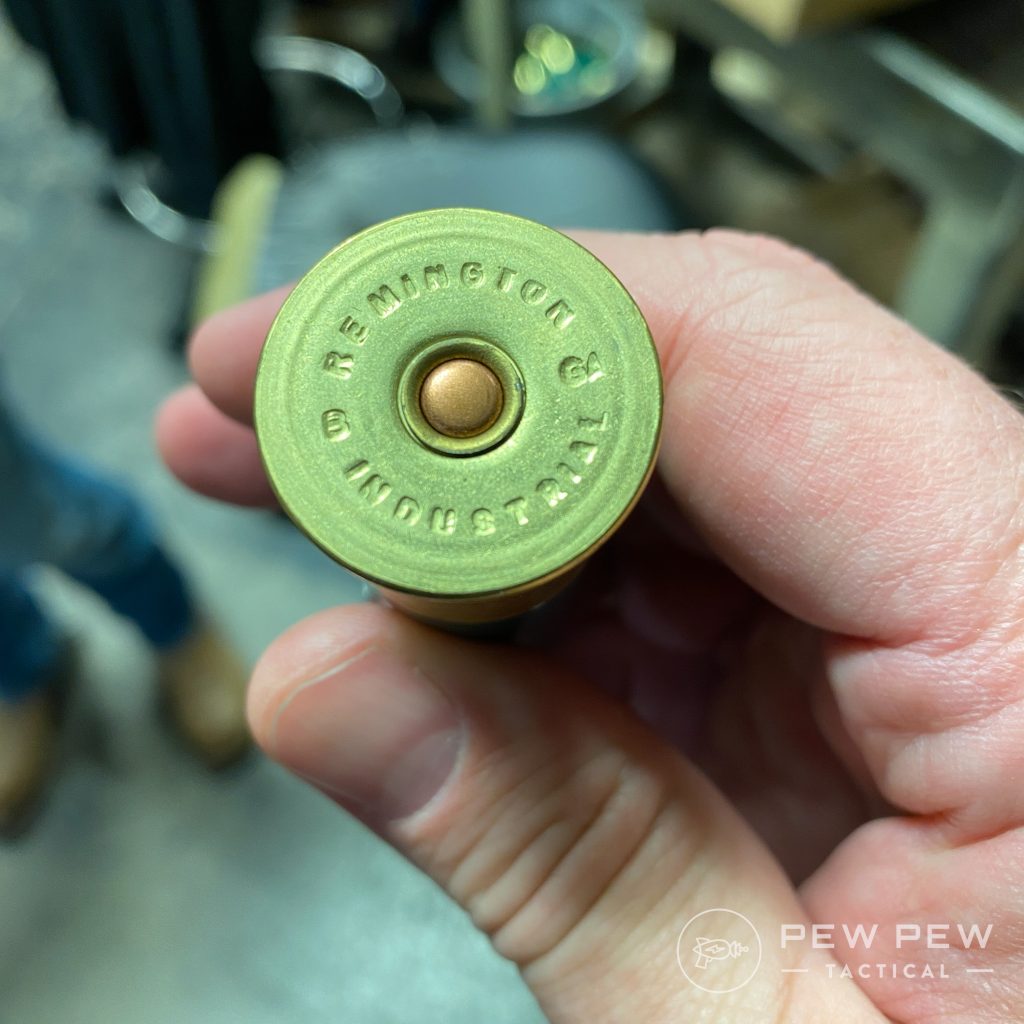
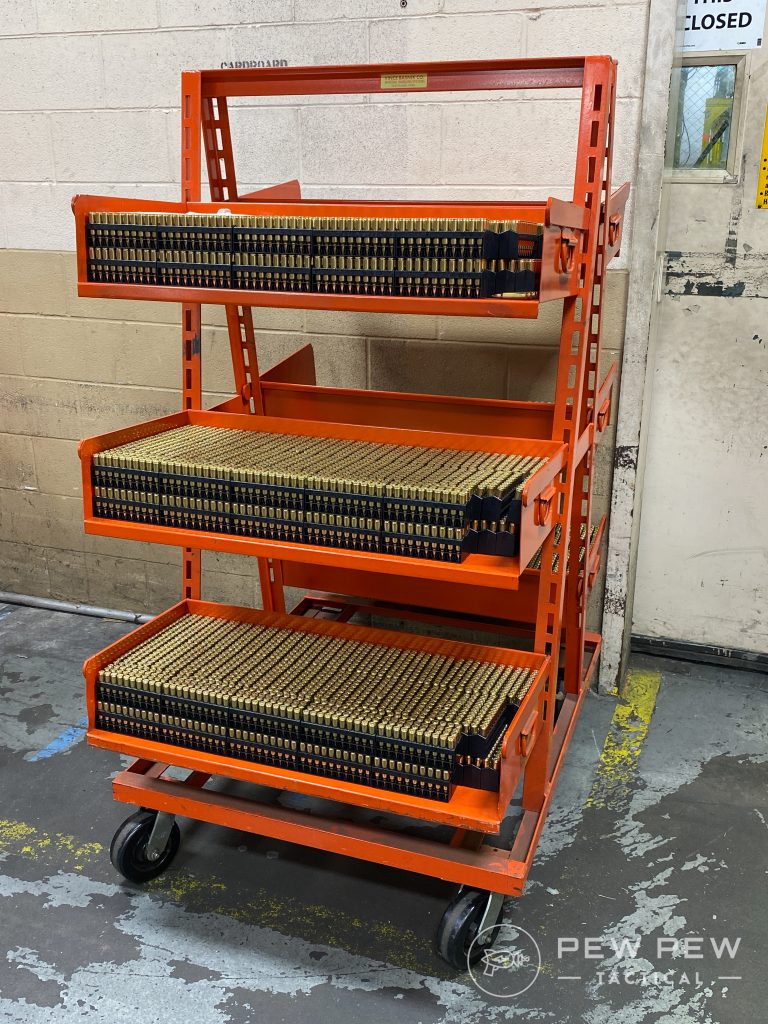
Casings, before primers and bullets.
We saw machines that handled giant coils of brass weighing 4,000 pounds.
The material was stretched, pressed, and snipped into shell casings. Then, different parts of the process added the actual bullet and primer on either end.
At a bullet maker, we spoke with Adam the plant manager who was dealing with a mechanical issue.
The giant clutch for the machine was broken down and only made in Canada.
Here, bullets are installed in the cases.
The techs they needed to work with only spoke French, a graphic example of some of the challenges faced when making ammunition.
Joel explained how coming under the Vista brand has improved things.
Working with sister agencies like Federal, the various ammo manufacturers benefit from cross-pollination — seeing how they can do things better or more efficiently.
Vista inherited some major issues when they took over but their efforts are paying dividends.
Promptly righting the ship, they worked on facility issues and brought bankruptcy furloughed employees back in time for Christmas so they’d have benefits.
The vaunted 8-gauge.
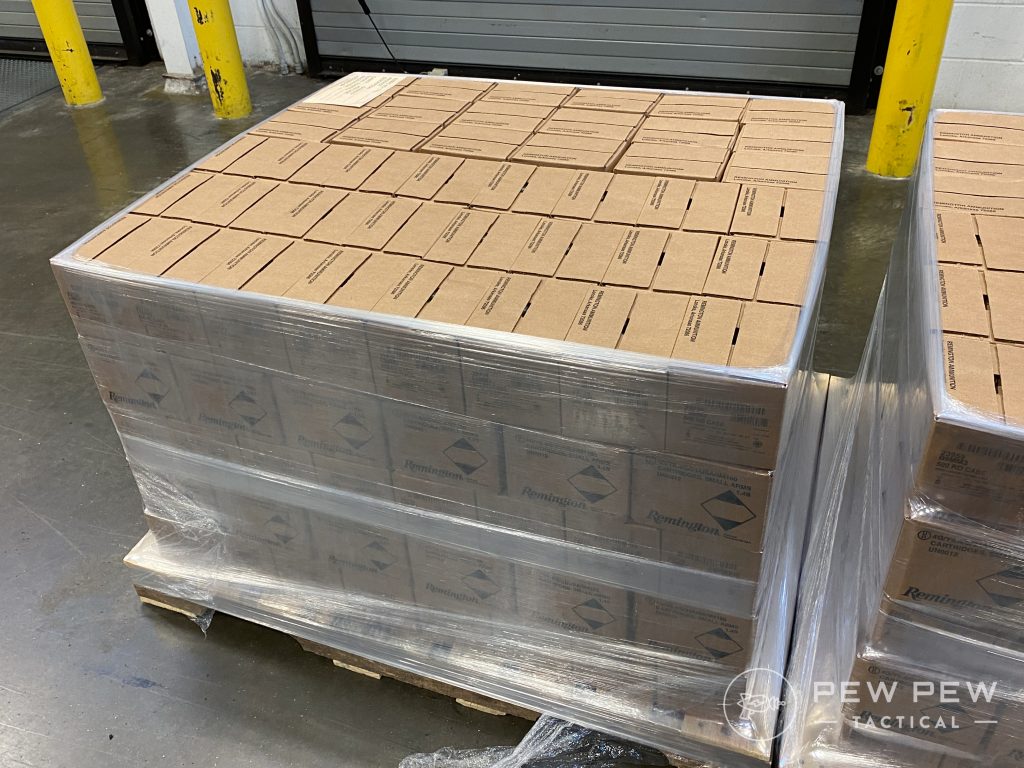
Newly helmed, Remington continued in that trend, hiring 20 people a week, and building up to three shifts in some areas to run the production 24/7 in an effort to match demand.
A month before our visit, Remington shipped out more ammunition than they had in the past five years combined!
Joel estimated their output in the billions of rounds per year.
The view from the shot tower.
And the company is still growing. The Eli building is slated for a skunkworks addition — a section dedicated strictly to R&D, hinting at some exciting developments.
Seeing long tubes of plastic heated, stretched, then cooled in tanks of water and snipped to length offered a fascinating look into the process.
Above all, the shot tower was a highlight. Some 12 stories up, a giant furnace exists strictly to melt lead into molten metal.
It gets hot in the tower with the furnace making shot.
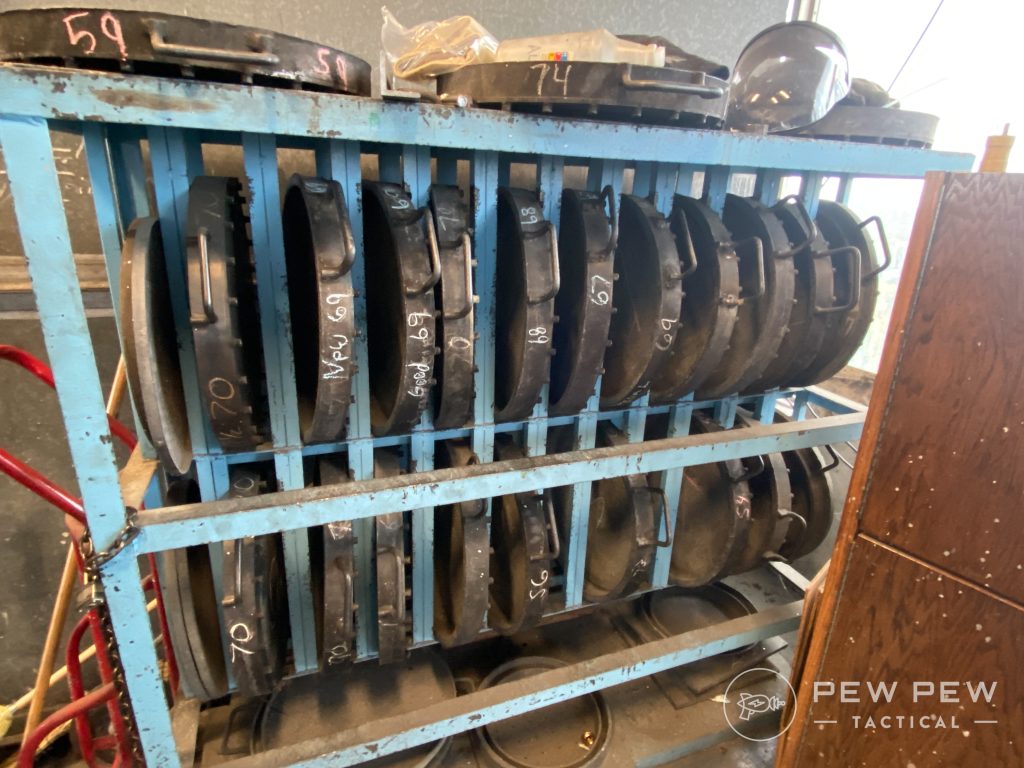
This metal then pours out through filters that form the basic size of the shot. As it drops, it cools. Then it’s collected at the bottom.
We didn’t see this running live because of the heat and risk, but there was plenty of evidence of it running everywhere we looked. Carts, hoppers, and bins of shot were everywhere.
Rimfire
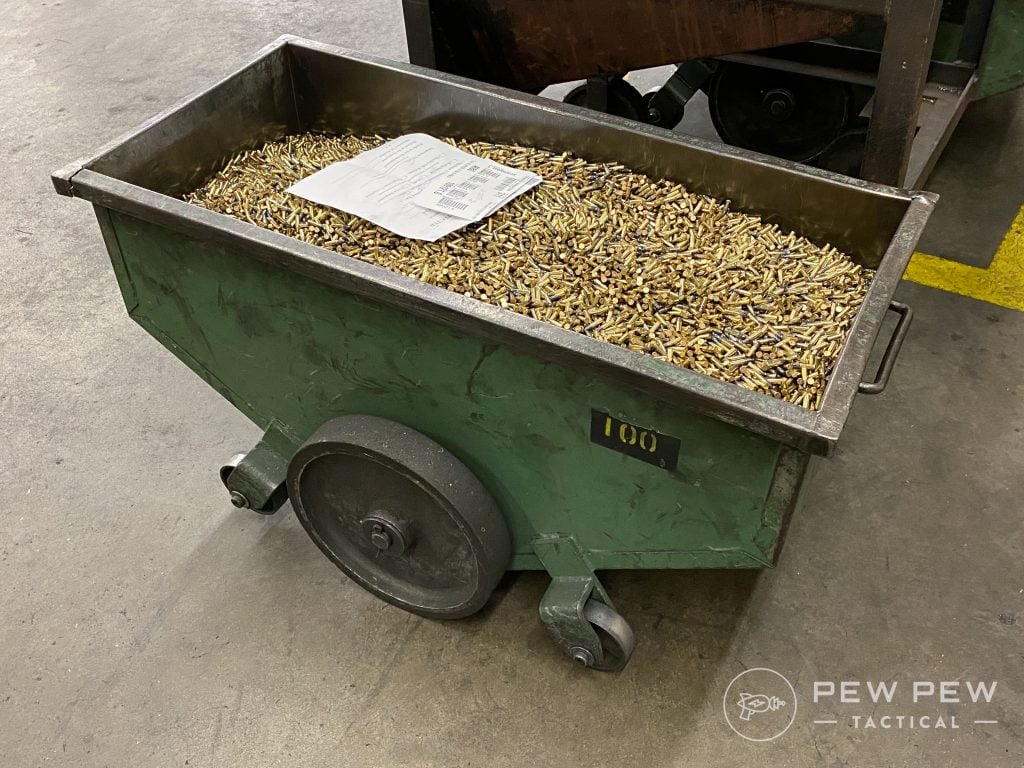
We moved onto rimfire, where Remington steadily churns out rounds.
As I think about it, even during the heightened demand, I never saw a lack of .22 LR or shotgun shells on the shelves in stores.
I would love to show up at the range with one of these hoppers of .22 LR.
This process, like the rest, was really cool. Primers are a whole different situation since they are inclusive to the case.
One of the greatest parts was just seeing enormous amounts of .22 in giant hoppers that probably weight hundreds of pounds.
At several points during this trip, I found myself wondering how long it would take me to shoot various piles of ammo I encountered.
Testing, testing…
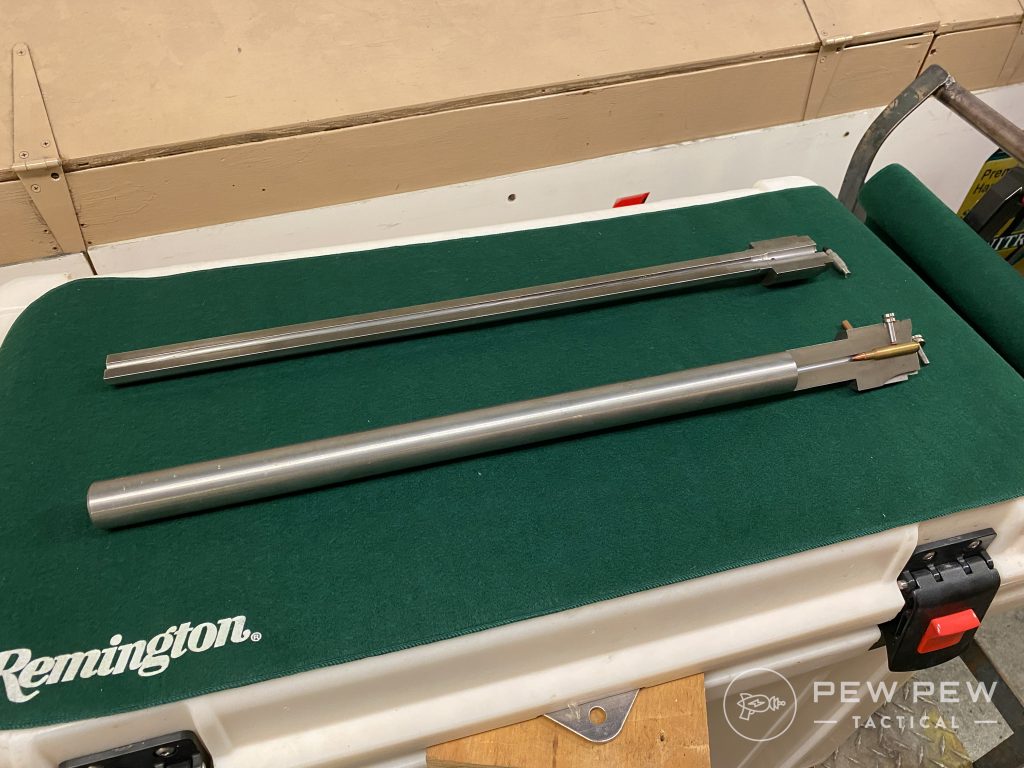
One of the cooler stops was down in the underground testing facility where workers indiscriminately test batches of ammo.
They actually pull a sample off the assembly line, load it into a test chamber, and fire it.
Testing apparatus.
Jimmy explained these tests examine the function, pressure, velocity, and accuracy of everything Remington makes.
Just as important, they test for real-world scenarios — freezing and heating ammunition to simulate actual scenarios shooters might face.
Shot “filters”
Most noteworthy was the armory at Jimmy’s fingertips, just about one of everything you could imagine!
With the tour of the facility complete, we headed out to a couple of different ranges where we shot — centerfire rifle out to 200 yards, followed by 9mm through Glocks.
No complaints here.
We also shot rimfire, rifle, and pistol, sampling a good deal of the quality products Remington offers.
Finally, we moved on to a sporting clays course. I shot skeet and trap a little, but never anything this cool.
Giant bars of metal are staged outside the furnace.
The course was as fun as it was humbling and greatly demonstrated an area where I needed a lot of practice.
Conclusion
By the end of the trip, I could appreciate how far Big Green had come. In 2020, the company faced another bankruptcy.
But now, the ammo giant has recovered and is increasing production.
From what we could tell, production was full steam ahead.
Top that off with an intense quality control program and an investment in the future with research and development.
In many ways, Remington benefitted from its separation from the firearms manufacturer of the same name. Now they have their own budget, own direction, and vision.
Coupled with the proven know-how of Vista Outdoors, this American icon is working toward a brighter future.
For a look into the factory, see the video below.
What do you think of Remington? Let us know in the comments below. Still struggling to find ammunition? Check out our guide for the Best Online Places to Buy Ammo.
Pixelmator Photo has been available for pros and enthusiasts who want to work with photos on their iPads, and now it’s an option in their pockets. Pixelmator has released a version of Photo for the iPhone that brings the advanced image editor to smaller screens. Much like the tablet app and Pixelmator Pro, you can make a wide range of non-destructive edits to photos either from the phone (including ProRAW from some iPhones) or from 600-plus RAW formats from dedicated cameras.
You’ll most likely be using some of the 30-plus color adjustments, including basics like exposure and white balance through to a wheel-based color balance system like you’d find for video grading. However, Pixelmator Photo also makes use of some helpful (if increasingly familiar) AI editing features, including object removal and upscaling for low-resolution shots. You can also expect fairly tight integration with Apple’s Photos and iCloud, such as saving edits to (or opening images from) your library.
Pixelmator Photo normally sells for $8, but it’s available for $4 to help spur iPhone buyers. The app is a free update for those already using the iPad version. This probably won’t tear you away from Adobe Lightroom and other pro photo editing apps, but Pixelmator’s classic strategy might still apply here. It’s offering an affordable, pay-once alternative to Lightroom’s Premium membership and other subscriptions you frequently need for this level of editing.
Released in 2006, Roblox grew from obscurity into a gaming juggernaut, culminating in a multi-billion-dollar public stock offering — and controversy about its monetization model that relies on children. Here’s what you need to know about the game.
Roblox is a video game and creation platform available on most mobile devices, consoles, and PCs. Players choose from experiences built by developers and can use in-app purchases for in-game content and other perks.
Due to the platform’s cutesy design and the freedoms it provides to players, Roblox has become a standout hit among children. The pandemic only spurred its growth as adults sought alternate incomes in development and children were stuck at home playing games. These forces combined to create the giant that Roblox is today.
What makes Roblox unique is its proprietary development platform. Rather than letting players build levels within the game, creators must use a discrete development tool on Mac or PC. Once content is submitted to Roblox it can be monetized in various ways.
A different game company called Media Molecule is known for pioneering “player creation” with its Little Big Planet series, but creators couldn’t monetize content. Roblox has a similar approach, but experiences can only be built in development software, not in the game itself. Roblox also lacks a central storyline for players and focuses on the experiences constructed by developers.
Roblox: the video game
Roblox isn’t a traditional video game — it’s a platform that hosts experiences built by developers using a dedicated game engine. When players open Roblox, they are greeted with a page of “experiences” or minigames that you can select to play.
Developers for the Roblox platform can design experiences and charge money for content
The game has attracted young children due to its popularity on YouTube. Influencers who target younger audiences discovered that many of the minigames’ colorful and cutesy nature in Roblox would attract viewers. This then leads to influencers hiring development teams to create minigames and content that can be monetized.
After a viewer sees the game on YouTube, they are usually invited to download the game via a pop-up ad. The excitement of playing something they saw someone else playing and the game’s cute nature will win many kids over quickly.
This simple cycle of using social media to promote specific minigames and content has been very lucrative for the platform. So lucrative that the Roblox company has begun publicly trading stock.
What are Robux?
Roblox earns its money and pays developers using an in-app purchase system for currency. The currency used in Roblox is called “Robux.” Many games and apps use this form of in-app purchase to give users currency they can spend in bulk without authenticating real payments every time.
The problem with in-app purchases in Roblox is it has multiple levels. You need the Robux currency to purchase items and accessories within the game, but you’ll also exchange Robux for other in-game currencies.
That means when playing a minigame, you could earn “dollars” by performing tasks like in any other video game. If a user wants to buy special content or more “dollars” within a minigame like “Adopt Me,” then they’ll have to spend Robux to do so.
The exchange rate for Robux is simple — divide by 100 to get the equivalent dollar amount. While this math is easy for adults, it obfuscates the value of items from children.
There is a monthly subscription that adds 450 Robux every month for $4.99. There are more economical ways to get Robux, like buying them directly from the website or getting gift cards from Amazon.
What is the Roblox Catalog
This is the default screen in the avatar builder, pushing obscenely priced content
The catalog is where any user-facing item, accessory, or customization option is sold. In the avatar menu, the catalog consists of things like hair, clothing, or faces. There can be in-game sale systems built by the developer or an isolated catalog of items built just for certain minigames.
Developers using the proprietary development software on Mac or Windows can customize and upload items that can be sold for Robux. Roblox players cannot create levels or content in the game but can buy and resell items from the catalog as long as they are listed as limited items.
There are systems in place for users to check on an item’s price history if sold by a player. This will allow users to avoid price gouging, which is rampant on the catalog.
Players and children may not recognize this distinction or understand the value of an item. Parents need to be aware of the in-app purchase system and ensure that purchases cannot be made without a passcode. Children left unattended with Roblox can quickly spend hundreds of dollars that may not be refundable.
How to exchange Robux for real money
Premium Roblox subscribers can convert Robux into real money when certain conditions are met.
Be a member of Roblox Premium
Have a minimum of 100,000 Robux earned by the account
Be 13 or older
Once a member meets the requirements, they can apply for the Developer Exchange Program. Upon approval, the account holder can request a Robux cash out once a month at the current market rate of exchange.
This means a developer or player must make at least $1,000 selling items in the catalog or via minigames before gaining the ability to cash out. Players seeking a quick cash grab will upload a simple smiley face and charge hundreds of dollars for its use. It is unknown how effective this method is, but parents should warn their children of the scams.
Possible Roblox App Store violations
Roblox frequently recommends objects worth well over what can be bought with in-app purchase
The screenshot above is from one of the most popular Roblox mini-games — Adopt Me. The highest purchase is so high that the in-app purchase system doesn’t offer enough Robux to cover it. The pop-up pushes users to visit the official website to purchase more Robux, a clear violation of Apple’s in-app purchase policy.
Developers are not allowed to mention external purchase options or direct users to websites. This has caused issues with apps like Fortnite and Hey in the past.
Robux are similar to the V-Bucks used in Fortnite. As long as you purchase in-game currency from external retailers like Amazon, the game doesn’t have to pay Apple.
Roblox isn’t immune from price gouging and scams and little seems to be done about it. The recommended tab shows multiple products with prices well over hundreds of dollars. Apple has run into similar issues on the App Store, like one developer charging $999 for an app called “I’m Rich” that did nothing.
Moderation and oversight
Since Roblox is heavily used by children, it has several systems to keep things safe. For example, the avatar creation tool prevents lewd objects from being submitted or inappropriate attire from being worn.
Systems like these are fully automated and aren’t perfect — so players will have to report anything that slips through. For example, reports of “fascist playgrounds” and “virtual strip clubs” suggest that Roblox doesn’t always catch, or understand, what should or shouldn’t be allowed.
Live chat and in-app purchases combined can make any parent worry
When examining another player’s profile, there will be a “report concern” button. This lets parents or players report any weird behavior, inappropriate messages, or other problems.
The game features live chats when in a minigame and private chats between players. There are filters to prevent sensitive content from being shared, like phone numbers, and cussing is not allowed. However, there is nothing to prevent players from sharing user names to other chat apps or meeting up on Discord.
There have been reports of child predators taking advantage of this, for example, by getting young players interested in a new world they are developing. Once the child moves the conversation to a third-party chat client, all protections disappear.
Reportedly, Roblox does little to protect users beyond banning an offending account, but the offender can make a new account and continue abuse without issue. Being banned doesn’t prevent monetization either, since the abuser can transfer their developed games to other players before an imminent ban. Therefore, there is no consequence for abusive behavior.
Parents can restrict access to certain parts of the game using the security settings. In-game chat can be disabled, and parents can hide other profile information from here.
Beyond the game there lies an entirely different world populated by the developers themselves. These developers can be anyone over the age of 13 and tend to occupy spaces beyond Roblox for communication and coordination, often in Discord.
If your child decides to develop for Roblox to try and earn money, they may be recruited by a small team. These teams are often run by other children or young adults, and Roblox takes no responsibility for what transpires between these individuals. It is up to the parents to provide oversight and ensure their child is being treated fairly and being paid properly — if money is involved.
Roblox: the content platform
While building minigames and content is limited to developers, there’s very little overhead to becoming a developer. All you need is a Mac or PC to install the free developer tool called Roblox Studio.
Roblox requires you to be over 13 years old to monetize content for the platform. Some level of competency is required to design and upload avatar items, and fundamental programming skills are needed to make minigames. The programming language used for Roblox Studio is called Lua 5.1.
Once you’ve uploaded something to the platform, even a simple shirt, you can monetize it, but you must have a premium subscription to do so. Once the object is sold from the catalog, the developer will take a cut of the revenue in Robux.
This game has its own in-game currency purchased with Robux.
Social media influencers can take advantage of the Roblox platform since there are no restrictions against self-promotion. The minigame menus and launch screen can feature links to a creator’s YouTube or other accounts. That means influencers can monetize via in-app purchases and sponsored ad viewership on YouTube.
As the platform has grown, so has the size of development studios making Roblox experiences. These large studios can have dozens of people working on one mini-game as a full-time job, and earn enough to live on. However, Roblox doesn’t take any responsibility for how these studios operate or pay their developers.
Since the game is meant to attract children to code experiences, this often leads to teams of children working together to try and compete with the large studio. Some reports suggest that some development teams are taking advantage of the child developers by not paying them well, if at all. And since none of this is regulated by Roblox, your child may find themselves being bullied into performing demanding development work for little to no compensation.
Roblox: the company
Roblox was established in 2004 and has seen many iterations since. After a few bursts in popularity, it now boasts 9.5 million developers, 24 million experiences, and $761 million paid to the community devs.
The platform is available in 180 countries in 11 different languages. Roblox claims to have 32 million average daily active users.
The vertical integration of development, monetization, and social media influence has made Roblox a multi-billion dollar company. It went public on March 10, 2021, with a net worth of $45 billion.
Investors hope that Roblox can continue to grow after the pandemic ends
Roblox will continue to grow as investors throw money at it and stock prices surge. As social media influencers saturate the experiences with YouTube links and in-app items, the game’s revenue streams will grow.
That being said, children are fickle and can move on to the next popular thing without notice. Investors also need to consider that a lot of recent growth was brought on by the pandemic, which will soon be over. Roblox will need to prove it can grow in a post-pandemic world if it wants continued investment in the game.
As long as kids are interested, however, parents need to pay attention to the game. Set up parental controls within iOS to block in-app purchases, turn off in-game chat, and ensure the games your child is interested in aren’t off-color or filled with rude players.
If your child is interested in developing Roblox experiences, discuss the issues with child labor, how income is earned, and what their goals are before they begin. Be sure to check in with them, and keep track of who they work with and if real money becomes involved.
Reports suggest that players and developers tend to keep quiet about issues due to internal politics. If a user is outed as a “snitch” or their reputation is tarnished, they may never be able to join a team or create one themselves in the future.
Payment controversy
In August 2021, Roblox came under fire for how it handled developers who made experiences for the game. A lengthy investigation posted to YouTube on August 19 by People Make games accused Roblox of being exploitative of developers in the system.
While Roblox offers developers the potential to earn revenue, in a similar way to Apple’s App Store, the situation is much tougher for those creating Roblox experiences and expecting to get paid.
Part of the problem is how Roblox focuses payouts based on Robux, the in-game currency, rather than cash. This leads to the situation of developers being able to immediately spend their earnings within Roblox itself, so the earned funds never leave the platform.
Users earn very little when they cash out Robux
The concept is likened to the company scrip used by mining firms in the 19th century, which would see mine operators provide a scrip to employees that could be paid at the company store, instead of currency. Workers would be warned off from any potential scrip-to-currency exchanges due to exchange fees taking some of the value away, leaving them with buying items from the company itself.
Along with in-game items, the currency is also usable to pay for advertising within the game. This service, again, is operated by Roblox itself.
In terms of how much Roblox pays out, developers earn just 35% of the value of Robux from a transaction, with it keeping 65%. By contrast, Apple takes its 30% fee at most, as does Steam, Microsoft’s Xbox platform, and Sony, while Epic and Microsoft Windows game sales involve a 12% fee.
Roblox’s own developer pages cites the high number of individual fees that are taken out as a cost of the transaction and operating the platform. This includes a 24% cut to app stores like Apple’s own.
Unusually, one chart from June 2021 had Roblox saying it took a 26% share for itself, separate from the 9% it takes for “platform investment” and 14% for “platform hosting and support.” In total, Roblox takes up to 49% of the value of a Robux transaction for itself.
The black market exists to avoid paying Roblox its fees
Of course, the small amount of money earned from performing transactions and Robux exchanges on Roblox itself led to black markets being formed. Players, again often children, are guided to illegal websites that exist outside of the Roblox company’s sight. Here they can put expensive items up for sale for much cheaper, thanks to lack of fees.
Users can also use the black markets to exchange Robux for cash or other items, again avoiding the requirements set by the company. It has been reported that these black markets have operated without interference for years. Allegedly, this is due to the fact that the Roblox economy relies heavily on these back-alley dealings.
Even though Roblox has been made aware of such illegal transactions, the only action the company allegedly takes is banning offending users. People Make Games reached out for comment from the company and didn’t receive a direct answer to their inquiries.
Roblox is a publicly-traded company worth roughly $55 billion on the stock market, which is the same valuation given to Nintendo.
Updated on December 15, 2021 with information from People Make Gamesfollow-up video.
The Enigma Machine was a cipher device used by Germany during WWII to encrypt and decrypt top-secret communications. Animator and educator Jared Owen provides a detailed look at its ingenious design and how it scrambled and unscrambled letters. Given its complexity, we’re amazed that it was cracked.
 Dilbert Daily Strip