AR-15 Maintenance Schedule: Complete Guide

https://cdn-fastly.thefirearmblog.com/media/2026/03/08/20461/post.jpg?size=720×845&nocrop=1

The internet can’t agree on AR cleaning schedules. You’ve got the "after every range trip no matter what" crowd and the "never cleaned mine, runs great" guys. Both are kinda wrong. Real answer depends on how you shoot and what you’re willing to tolerate. Your rifle won’t grenade if you skip a cleaning session. But neglect adds up.

AR-15 @TFB:

The Quick Version

  • After every range session: Wipe it down, check the lubrication levels
  • Every 500-1000 rounds: Actually clean the BCG and inspect parts
  • Every 2000-5000 rounds: Closer parts inspection, replace what’s worn
  • Once a year: Deep clean and inspection, even if you barely shot it

That handles most situations. Details below matter when things go wrong.

After Every Range Session

People overthink this part or completely ignore it. You don’t need a full teardown after 50 rounds. You also shouldn’t toss a wet rifle in the safe for six months. Middle ground exists.

Quick checks that actually matter:

  • Wipe the exterior down. Dust, rain, humidity – get that crap off.
  • Look in the bore for obstructions. Takes five seconds.
  • Run your finger across the bolt. Still got oil? Good.
  • Function check if something felt weird while shooting.

Full disassembly after casual range time is overkill. The carbon buildup isn’t going to lock your gun up overnight; you’re not running a duty weapon in Fallujah.

Lube question: ARs run better wet. Period. A dirty but lubed gun will cycle all day. A spotless dry gun has an above-average chance of choking. If you do literally nothing else, make sure the bolt carrier group has oil where metal meets metal. Cam pin area, bolt lugs, carrier rails. That’s where it counts.

Want to know more about the difference between lubricants, protectives, and solvents? Wrote a whole article just for you!

Every 500-1000 Rounds

This is your real maintenance window. Recreational shooters hit this every few trips. Competition guys might burn through it in a weekend.
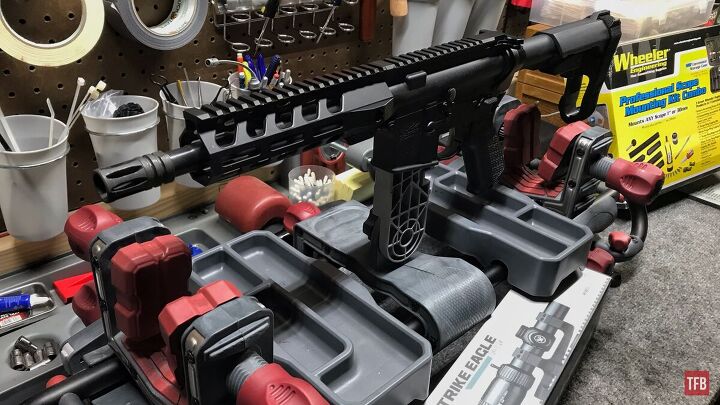
Bolt Carrier Group

Pull the BCG and clean it properly. Carbon cakes up on the bolt, inside the carrier, around the gas rings. Nylon brush and solvent handles most of it, scrapers for stubborn buildup.

While you’re in there:

  • Gas rings: Stack them so gaps don’t line up. Stand the carrier on the bolt face with bolt extended. If it collapses under its own weight, your rings are toast.

  • Bolt face: Check for cracks around the lug recesses. Pitting within reason is normal wear. Cracks mean replace it now.
  • Cam pin: Look for wear or mushrooming. These are cheap, swap it if questionable.
  • Firing pin: Tip should be smooth and rounded, not chipped or flattened.

Bore Cleaning

Copper fouling builds gradually and will eventually affect your groups. Every 500 rounds or so, run a proper bore cleaning. This means bore snake for quick work, rod and patches with copper solvent for thorough jobs. Clean until patches stop showing that blue-green copper staining. Some carbon in the bore doesn’t hurt anything. "Clean enough" is when patches come out mostly clear.

Chamber and Lug Recesses

The chamber and barrel extension get ignored, but carbon here causes extraction problems. Chamber brush on a short rod, takes maybe 30 seconds, clean the lug recesses in the barrel extension too. Prevents headaches later.

Every 2000-5000 Rounds

Parts inspection and potential replacement territory. Round count actually matters here. If you don’t track your rounds, consider starting to keep a rough count now.

Extractor and Ejector Springs

The most common wear items are on the bolt. The extractor spring loses tension over time, and you get failures to extract. Ejector spring weakens, ejection pattern gets erratic, or you get failures to eject entirely.

Wear signs:

  • Brass is not ejecting to a consistent clock position anymore
  • Extracted cases showing extractor slip marks
  • Failures to extract, especially with steel case ammo (steel cased ammo in very high round counts cause accellerate chamber wear as well)

Replacement springs cost a few bucks. Swap them proactively around 5,000 rounds instead of waiting for malfunctions. Some guys keep spares on hand or in the storage of a pistol grip.

Extractor and Ejector

Inspect the extractor hook for chips or rounding, check ejector for mushrooming. These outlast springs but do wear eventually.

Gas Rings

If you didn’t swap them already, 3000-5000 rounds is typical service life. That bolt standing test from earlier is your check. Replace as a set.

Buffer Spring

Springs weaken from being compressed and expanded over and over again. You might notice the cycling sound changes, like less "sproing," more dull thud. Function usually continues fine until it’s pretty worn, but degraded springs mess with timing.

Standard carbine springs last around 5,000 rounds for most shooters; heavier buffers or adjustable gas blocks change that math.

Barrel Throat

Check for erosion if you shoot hot loads or do rapid-fire strings. Bore scope helps here. I’d look for sharp rifling edges at the throat becoming rounded or eroded. This kills accuracy before it affects function. Most recreational shooters won’t wear out a barrel throat in any reasonable timeframe. High-volume competitors and mag dump enthusiasts see it sooner.

Annual or Seasonal Maintenance

Even with a low round count, thorough inspection once a year minimum. Rifles that sit unused develop different problems.

Storage issues:

Oil migrates and evaporates. A rifle stored for months might be bone dry even if you oiled it before putting it away. Check for rust in the bore, chamber, BCG, which are most vulnerable, especially in humid areas. 

Hardware check:

  • Castle nut: Should be staked or thread-locked at a minimum, check for loosening
  • Optic mounts: Verify zero and torque on mounting screws
  • Handguard hardware: Check for loosening, especially free-float rails
  • Muzzle device: Verify timing and torque

Function test: Run a few rounds through it early in the season or after long storage. Don’t trust a gun that’s been sitting without verification.

Signs Something’s Wrong

Malfunctions are diagnostic. Random one-off jams happen to everyone. Patterns indicate actual problems. 

NOTE: First and foremost, confirm the AR is having issues with multiple magazines. Sometimes it is that simple and at the very least it rules out a bad mag. 

  • Short-stroking (failure to lock back, weak ejection): Undergassed. Gas block alignment, gas port size, suppressor issues, etc. Or a weak buffer spring, dry bolt carrier, or worn gas rings.
  • Failure to extract: If it isn’t ammo-related, a worn extractor spring is most common. Could be a damaged extractor, a dirty chamber, or out-of-spec ammunition.
  • Failure to eject: Worn ejector spring, damaged ejector, bent ejector. OR related to a short stroking issue. 
  • Double feeds: Magazine issues usually, sometimes extractor problems, or short-stroking causing incomplete ejection.
  • Light primer strikes: Worn firing pin, firing pin carbon buildup, weak hammer spring, or hard primers in your ammo.

When cleaning doesn’t fix a malfunction pattern, narrow it down and start swapping parts. Springs first since they’re cheap. Move to harder stuff after. The AR platform is the Lego of guns. Parts can be cheap, spare parts can be on hand, don’t think too hard about it.

What You Can Skip

The AR platform is way more tolerant than a quick internet search suggests.

Over-cleaning myths: You don’t need to scrub the bore after every session, carbon on the bolt carrier won’t hurt if it’s lubed, the trigger doesn’t need cleaning unless it’s actually malfunctioning, buffer tube doesn’t need regular attention.

Parts that last longer than people think: Bolts regularly go 10,000+ rounds (often way more), barrels last 10,000-20,000+ depending on use, lower receivers basically last forever with normal use, triggers rarely wear out from shooting.

Don’t replace parts on arbitrary schedules. Inspect, test, and replace when you see actual wear or experience actual problems. The rifle tells you when something needs attention.

Final Thoughts

Your AR needs attention, but doesn’t need to be babied. Keep it lubed, clean the BCG periodically, inspect wear items at reasonable intervals, and address problems when they show up. That’s it.

The guys obsessing over every carbon speck are wasting time. The guys who never clean and wonder why their rifle chokes are learning expensive lessons the hard way. As I said, middle ground exists. Keep a rough track of your round count, and your rifle will run for tens of thousands of rounds.

What’s your maintenance routine look like? Any hard lessons learned from neglect or parts failures? Let us know what you guys and gals think in the comments below.

The Firearm Blog

Real Python: Spyder: Your IDE for Data Science Development in Python

https://files.realpython.com/media/Pythons-Spyder-IDE_Watermarked.a5f4691ecaa3.jpg

There are many different integrated development environments (IDEs) to choose from for Python development. One popular option for data-focused work is Spyder, an open-source Python IDE geared toward scientists, engineers, and data analysts. Its name comes from Scientific PYthon Development EnviRonment.

Out of the box, it has powerful plotting, what-if, and profiling capabilities. It also integrates well with the data science ecosystem, is extensible with first- or third-party plugins, and has a relatively quick learning curve.

How does Spyder stack up against other Python IDEs? It depends on your use case. It’s not as powerful or customizable as VS Code, nor does it pretend to be. It does, however, excel for data science workflows:

Use Case Pick Spyder Pick an Alternative
Optimized for data science workflows
Dedicated to Python
Full-featured VS Code
Supports interactive notebooks ✅ With a plugin Jupyter, VS Code

If you’re focused on data science in Python, Spyder is a strong fit. For a more full-featured IDE or heavy notebook use, consider Jupyter or VS Code instead.

You can get a handy Spyder IDE cheat sheet at the link below:

Get Your Free Spyder Cheat Sheet: Click here to download the PDF with installation steps, shortcuts, and interface tips.

Take the Quiz: Test your knowledge with our interactive “Spyder: Your IDE for Data Science Development in Python” quiz. You’ll receive a score upon completion to help you track your learning progress:


Interactive Quiz

Spyder: Your IDE for Data Science Development in Python

Test your knowledge of the Spyder IDE for Python data science, including its Variable Explorer, Plots pane, and Profiler.

Start Using the Spyder IDE

You can install Spyder in a few ways: as a standalone program, through a prepackaged distribution, or from the command line. You can also try out Spyder online.

To install Spyder as a standalone application, go to the Spyder download page. When you visit the site, it detects your operating system and offers the appropriate download. Once you download your install file, open it and follow the directions.

You can also install a Python distribution tailored to data science, such as Anaconda or WinPython. Both of these choices include Spyder in their base installations.

You’ll likely want to install dependencies and useful data libraries in addition to Spyder. In this case, first create a Python virtual environment, then use this command:

Shell

$ conda create -c conda-forge -n spyder-env spyder numpy scipy pandas matplotlib sympy cython

The install process for pip is similar. To install spyder together with common packages, run:

Shell

$ python -m pip install spyder numpy scipy pandas matplotlib sympy cython

For more information on installing Spyder, refer to their install guide.

Out of the box, the Spyder interface consists of three panes:

Spyder IDE InterfaceThe Spyder IDE Interface

On the left, you see code in the Editor pane. In the bottom right, you’ll find the IPython Console. Here, you can run code and check past commands using the History tab. The top-right area includes tabs such as Help, Debugger, Files, Find, and Code Analysis. You’ll learn about the Variable Explorer, Plots, and Profiler in the upcoming sections.

Explore Data With the Variable Explorer

Read the full article at https://realpython.com/spyder-ide/ »


[ Improve Your Python With 🐍 Python Tricks 💌 – Get a short & sweet Python Trick delivered to your inbox every couple of days. >> Click here to learn more and see examples ]

Planet Python

Security Blueprint for Enterprise Laravel Applications (2026)

https://acquaintsoft.com/img/asset/aW1hZ2VzL3NlY3VyaXR5LWJsdWVwcmludC1mb3ItZW50ZXJwcmlzZS1sYXJhdmVsLWFwcGxpY2F0aW9ucy53ZWJw/security-blueprint-for-enterprise-laravel-applications.webp?w=1200&h=630&fit=crop&s=52676c01b5524e5c722014416d3f3849

A complete Laravel application security blueprint covering authentication hardening, input validation, dependency auditing, CSP headers, secrets management, and CI/CD security scanning.

Laravel ships with strong security defaults. CSRF protection is built in. Password hashing uses bcrypt by default. Mass-assignment protection requires explicit fillable declarations. Most common web vulnerabilities are addressed out of the box if you use the framework as intended.

Enterprise applications need more than defaults. They need a layered security architecture that covers authentication hardening, input validation at every layer, dependency vulnerability management, secrets management separate from code, security headers, and automated security scanning in CI/CD. This article gives you that blueprint.

Key Takeaways

  • Laravel’s security defaults are strong – the most common vulnerabilities come from bypassing them, not from the framework itself.
  • Authentication hardening requires more than strong passwords: MFA, session management, token rotation, and account lockout policies.
  • Input validation belongs at every layer: Form Requests for HTTP, type declarations for service layer, parameterised queries for database.
  • Dependency vulnerabilities are a real and growing attack vector – automated auditing via composer audit should run on every deployment.
  • Secrets must never live in code or version control – use environment-based secret management with rotation policies.
  • A Content Security Policy (CSP) header eliminates XSS attack vectors that bypass Laravel’s CSRF protection.

The Security Layers

A Quick Answer

A complete security blueprint for enterprise Laravel covers six layers:

  1. Authentication hardening (MFA, session management, Sanctum token rotation)

  2. Input validation at every layer (Form Requests, type declarations, parameterised queries)

  3. Dependency vulnerability management (composer audit, automated scanning)

  4. Secrets management (environment-based, rotated, never in code)

  5. Security response headers (CSP, HSTS, X-Frame-Options)

  6. Automated static analysis (Enlightn, Psalm, PHPStan) in CI/CD.

Layer 1: Authentication Hardening

Layer 1: Authentication Hardening

Multi-Factor Authentication

Password-only authentication is insufficient for enterprise applications. Implement TOTP-based MFA using the pragmarx/google2fa-laravel package or the Spatie/laravel-google-authenticator equivalent. For higher assurance, WebAuthn hardware key support is available via the asbiin/laravel-webauthn package. Enforce MFA for administrative roles at minimum; consider enforcement for all users in high-risk applications.

Session Security

Configure session settings in config/session.php for production: encrypt=true (encrypts session payload at rest in Redis), secure=true (HTTPS-only cookies), same_site=strict (prevents CSRF via cross-site requests), http_only=true (prevents JavaScript access to session cookies). Set an appropriate session lifetime — not indefinite. Implement session invalidation on password change.

Account Lockout Policy

Laravel’s built-in RateLimiter can implement account lockout. After five failed login attempts within ten minutes from a specific IP plus email combination, lock the account temporarily. Log the lockout event. Alert the account owner via email. This prevents credential stuffing attacks without creating excessive friction for legitimate users.

Sanctum Token Security

For API authentication with Sanctum: implement token rotation (new token issued on each authentication, old token revoked), set token expiry via the expiration configuration, use token abilities to scope permissions per token, and log all token creation and revocation events.

Layer 2: Input Validation at Every Layer

HTTP Layer: Form Requests

Create a Form Request class for every controller method that accepts input. Never use $request->all() or $request->input() without explicit validation rules. Form Requests enforce validation before the controller method is called and provide a clean, testable location for validation logic. Validate strictly — use ‘required’, ‘string’, ‘max:255′, ’email:dns’ rather than permissive rules.

Application Layer: Typed Parameters

Service class methods should use typed parameters (string, int, float, bool, or Value Objects) rather than accepting raw arrays or mixed types. PHP 8.1’s readonly properties and enums provide additional type safety at the service layer. Typed parameters prevent class of injection attacks that bypass HTTP-layer validation.

Database Layer: Parameterised Queries Only

Eloquent’s query builder uses parameterised queries by default — SQL injection is prevented if you use the ORM correctly. The danger points are: raw query methods (DB::statement(), DB::select() with string interpolation), whereRaw() and orderByRaw() with user-controlled values, and direct use of $request->input() in query strings. Never interpolate user input into raw SQL expressions.

Layer 3: Dependency Vulnerability Management

Layer 3: Dependency Vulnerability Management

Third-party packages are a significant attack surface. The 2021 Log4Shell vulnerability and numerous npm/Composer package vulnerabilities demonstrate that supply chain attacks are real and impactful.

composer audit

Run composer audit as part of every CI/CD pipeline. It queries the Packagist security advisories database and reports known vulnerabilities in installed packages. A build with known high-severity vulnerabilities should fail. Add composer audit –no-dev to your deployment pipeline — it checks production dependencies only.

Automated Dependency Updates

Use Dependabot or Renovate to automate minor and patch version updates for Composer packages. Configure review requirements for major version updates. Keeping dependencies current reduces the vulnerability window between package vulnerability disclosure and application update.

Layer 4: Secrets Management

Secrets — API keys, database credentials, encryption keys, third-party service tokens — must never live in code or version control. The .env file is a local development convention; it is not a secrets management system.

Production Secrets Management

For AWS deployments: AWS Secrets Manager with IAM role-based access. Secrets are fetched at application bootstrap and injected as environment variables. Rotation policies rotate credentials automatically without code changes. For non-AWS deployments: HashiCorp Vault provides equivalent functionality. For Kubernetes deployments: Kubernetes Secrets with sealed-secrets for encrypted storage in version control.

Secret Rotation Policy

Set rotation periods for all secrets: database passwords quarterly, API keys on any team member departure, encryption keys annually with key derivation function to transition encrypted data. Document the rotation procedure and test it — a rotation policy that has never been executed in testing will fail when executed under incident pressure.

Layer 5: Security Response Headers

Layer 5: Security Response Headers

Content Security Policy (CSP)

CSP is the most effective defence against Cross-Site Scripting (XSS) attacks that bypass CSRF protection. A CSP header tells the browser which sources of scripts, styles, images, and other content are permitted to load on your pages. Inline scripts from attacker-injected content are blocked even if the injection bypasses server-side sanitisation.

Spatie’s laravel-csp package provides a clean interface for building and testing CSP headers in Laravel. Start with a report-only CSP (violations are reported but not blocked) to identify legitimate inline scripts before enforcing. Enforce with strict-dynamic and nonce-based script loading.

HSTS, X-Frame-Options, and Referrer-Policy

Add a security headers middleware to your HTTP kernel: Strict-Transport-Security: max-age=31536000; includeSubDomains; preload (HTTPS enforcement). X-Frame-Options: DENY (clickjacking prevention). X-Content-Type-Options: nosniff (MIME-type sniffing prevention). Referrer-Policy: strict-origin-when-cross-origin (referrer privacy). These four headers together close the most common browser-level attack vectors.

Laravel Security Audit

We run a scored security audit on your existing or planned Laravel application.

Request Security Audit

Layer 6: Automated Static Analysis

Enlightn

Enlightn is a Laravel-specific security and code quality analyser. Run php artisan enlightn to get a scored report covering: exposed debug information, CSRF configuration, CORS misconfiguration, SQL injection risk patterns, mass assignment vulnerabilities, and insecure session configuration. Integrate into CI/CD with a minimum score threshold.

PHPStan and Psalm

PHPStan and Psalm perform static type analysis, catching type errors, undefined method calls, and logic errors before they reach production. At level 6 or above, PHPStan catches the majority of type-related bugs that would otherwise manifest as runtime errors. Add to CI/CD as a blocking check.

Conclusion

Security is a layered discipline. No single control is sufficient, and the most sophisticated attack surface protections are irrelevant if MFA is not enforced or if secrets live in the codebase. Work through the six layers in order – authentication hardening and input validation deliver the most impact per hour of effort. Our Laravel development services include security architecture review and Enlightn-scored security audits on all enterprise engagements.

FAQ’s

  • How do I secure a Laravel application for enterprise use?

    Six layers: authentication hardening (MFA, session encryption, token rotation), input validation at HTTP/service/database layers, automated dependency vulnerability scanning with composer audit, secrets management separate from code (AWS Secrets Manager, HashiCorp Vault), security response headers (CSP, HSTS, X-Frame-Options), and static analysis with Enlightn and PHPStan in CI/CD.

  • Is Laravel secure out of the box?

    Laravel ships with strong security defaults: CSRF protection on all state-changing routes, bcrypt password hashing, mass-assignment protection, parameterised queries via Eloquent, and XSS protection in Blade templates. Most vulnerabilities in Laravel applications come from bypassing these defaults – using raw SQL queries, skipping form request validation, or disabling CSRF middleware.

  • How do I prevent SQL injection in Laravel?

    Use Eloquent and the query builder for all database interactions – they use parameterised queries by default. When raw queries are necessary, use parameterised bindings: DB::select(‘SELECT * FROM users WHERE id = ?’, [$userId]). Never interpolate $request->input() values directly into SQL strings. Use PHPStan with security-focused rules to detect unsafe raw query patterns in code review.

  • What is a Content Security Policy and why does Laravel need one?

    A Content Security Policy is a response header that tells the browser which sources of content are permitted to load on your page. It prevents XSS attacks by blocking injected scripts even if they bypass server-side sanitisation. Use Spatie’s laravel-csp package to implement CSP in Laravel. Start with report-only mode to identify legitimate inline scripts before switching to enforce mode.

Chirag D

With over 11 years of experience in web application development and project management, I excel in leading cross-functional teams to deliver innovative digital solutions. My expertise spans eCommerce platforms, ERP systems, and JS & PHP-based frameworks, including WordPress, React JS, and Laravel. As a Technical Project Manager, I specialize in strategic planning, system design, and end-to-end project execution, transforming complex ideas into scalable, high-impact applications.

Laravel News Links

This once-ridiculed Microsoft gadget finally makes sense now

https://static0.howtogeekimages.com/wordpress/wp-content/uploads/2026/02/windows-continuum-fi.jpg

Back in 2015, Microsoft announced Windows Continuum, a feature that could transform Windows 10 Mobile phones into full-blown desktops, complete with a desktop-like interface, full-screen apps, and support for keyboards and mice. The catch was that Continuum was impressive on paper, but not in practice.

How-To Geek

DBStan – Database Analysis for Laravel

README

The DBStan package provides detailed analysis and insights into your database schema for Laravel applications. It helps identify structural issues, missing indexes, normalization problems, nullable column risks, foreign key inconsistencies, and performance concerns.

It is an essential tool for debugging, optimizing, reviewing, and maintaining a healthy database architecture in Laravel projects.

Important Notice: Configure Database Before Using This Package

Before using this package, ensure your database connection is properly configured in your Laravel application.

If the database is not configured correctly, DBStan will not be able to analyze your schema.

Make sure your .env file contains valid database credentials.

Security Warning

This package exposes detailed database schema analysis.
It is intended for admin and development use only.

Do NOT expose this tool publicly in production without proper access restrictions, as schema details may reveal sensitive structural information.

#Laravel  #Database  #Schema  #PHP  #Performance  #Optimization  #Analysis

Documentation

Features

  • Analyze full database schema structure
  • Detect missing indexes on foreign keys and log tables
  • Identify nullable column overuse and high NULL value ratios
  • Detect normalization and integrity issues (duplicate rows, orphan risks, improper foreign key naming)
  • Audit trail checks (created_by, updated_by, deleted_by columns)
  • Detect repeated common fields across tables
  • Identify tables with too many columns or wide VARCHARs
  • Highlight performance risks (large TEXT columns, JSON overuse, unbounded growth, table size)
  • Detect improper pivot table structures
  • Identify enum and boolean overuse
  • Detect mixed domain columns (e.g., info/data/details in varchar)
  • Check for missing soft deletes and timestamps
  • Detect status columns missing indexes
  • Detect polymorphic relation overuse and missing indexes
  • Lightweight and optimized for fast schema scanning
  • Supports Laravel 9, 10, and 11 with PHP 8+ compatibility
  • CLI-based analysis with structured categorized output

Supported Versions

  • PHP: ^8.0
  • Illuminate Support: ^9.0 | ^10.0 | ^11.0

Installation

To install the package, run:

composer require itpathsolutions/dbstan

Commands

Vendor Publish (Optional)

After installing the package, you may publish the configuration file using:

php artisan vendor:publish --tag=dbstan-config

This will create the configuration file at:

config/dbstan.php

You can customize thresholds like:

  • Maximum columns per table
  • Maximum VARCHAR length
  • JSON column limits
  • Large table size threshold
  • Nullable ratio threshold

Run Analysis for Production

To analyze your database schema:

php artisan dbstan:analyze

or

http://127.0.0.1:8000/dbstan

These both scans your entire database and displays categorized results in the browser or terminal.

Export Report

Currently, DBStan displays analysis results in the terminal or browser.

Future versions may support exporting reports to JSON, HTML, or PDF formats.

Output Categories

DBStan organizes its findings into four main categories:

1. Structure Issues

  • Tables with too many columns
  • Wide VARCHAR fields
  • Missing timestamps or soft deletes
  • Boolean and enum overuse
  • Nullable column overuse
  • Large TEXT columns
  • Data type appropriateness
  • Mixed domain columns
  • Repeated common fields across tables
  • Pivot table structure issues

2. Integrity Issues

  • Duplicate rows detection
  • Foreign key naming inconsistencies
  • Cascading action problems
  • Possible orphan risks
  • Unique constraint violations

3. Performance Issues

  • Missing indexes on foreign keys
  • Missing indexes on log tables
  • Missing indexes on status columns
  • High NULL value ratios
  • Table size analysis
  • Unbounded growth risks

4. Architecture Issues

  • Audit trail implementation (created_by, updated_by, deleted_by)
  • JSON column overuse
  • Polymorphic relation overuse

Environment Configuration

Ensure your .env file contains:

DB_CONNECTION=mysql
DB_HOST=127.0.0.1
DB_PORT=3306
DB_DATABASE=your_database
DB_USERNAME=your_username
DB_PASSWORD=your_password

After updating configuration:

php artisan config:clear

FAQs

1. What does this package do?

DBStan analyzes your Laravel database schema and detects structural, normalization, and performance issues.

2. Does it modify my database?

No. DBStan is completely read-only.
It does NOT make any changes to your database.

3. Is it safe for production?

Yes, but it is recommended to use it in development or staging environments.
Avoid exposing schema analysis publicly.

Contributing

Contributions are welcome!

If you’d like to contribute:

  1. Fork the repository
  2. Create a feature branch (git checkout -b feature/your-feature)
  3. Commit your changes (git commit -am 'Add new feature')
  4. Push to the branch (git push origin feature/your-feature)
  5. Open a Pull Request

Please ensure:

  • Your code follows PSR-12 coding standards
  • All tests pass before submitting
  • You include tests for new features

For major changes, please open an issue first to discuss what you would like to change.

Security Vulnerabilities

If you discover a security vulnerability within DBStan, please send an email to enquiry@itpathsolutions.com.

All security vulnerabilities will be promptly addressed.

For more details, see our Security Policy.

License

DBStan is open-sourced software licensed under the MIT license.

Laravel News Links

MacBook Neo proves that it would be great if Apple let an iPhone or iPad be your Mac

https://photos5.appleinsider.com/gallery/66992-140732-ipadmacos2-xl.jpgThe MacBook Neo proves that macOS can run on an iPhone processor. More than that, it shows how Apple now has all of the elements to make a device that’s transformative in every sense.

Tablet computer attached to a white keyboard, displaying a colorful blue and yellow wave wallpaper with desktop icons, calendar, weather widget, and small grayscale photo thumbnails on the screen
macOS doesn’t work on iPad, but imagine if it did.

Imagine only ever needing to carry around your iPhone, regardless of whether you were working with macOS or not. Imagine connecting your iPad to a Magic Keyboard, and firing up macOS.

Either would be one single device that works like an iPhone in your hand, or an iPad on your lap, but a Mac when you connect it to the right input and output devices.

Continue Reading on AppleInsider | Discuss on our ForumsAppleInsider News

This Custom Lego-Inspired Mac Mini Case Is Retrofuturism Done Right

https://gizmodo.com/app/uploads/2026/03/M2x2-Lego-computer-1280×853.jpg

A couple of months ago, Eindhoven-based designer Paul Staal was thinking about a new project: a smart dashboard for his home office. His idea was to integrate the dashboard into a 3D-printed shell that paid homage to Lego’s classic 2×2 sloped computer brick, a piece that’ll be instantly recognizable to anyone who has spent any time with vintage Space Lego sets.

Eventually, Staal tells Gizmodo, he decided to combine the dashboard into a case for his Mac Mini: “[I thought], ‘Why would I add another device to my desk? Why not just make it large enough for my [computer] instead?’”

The original design stuck closely to that of the Lego brick, but Staal found the result “bland and boring”: without the detailing on the front of the brick, the case was essentially just a large right-angled triangle. But then inspiration struck: why not combine the Lego silhouette with the aesthetics of another 1980s design icon?

M2x2 all parts
© Paul Staal / Watt IV

The result was the M2x2, a case that takes its inspiration from both Lego’s classic console brick and the original Apple Macintosh. It’s 3D printed with a filament that’s an absolute dead ringer for the latter’s beige plastic shell, and equipped with a 7” touch screen, multiple USB-C ports, an SD card reader, and a handle for portability.

M2x2 with minifigures
© Paul Staal / Watt IV

The design is full of clever touches: for example, the two large studs atop the case are both functional, with one serving as a volume knob for Staal’s Bluetooth speaker and the other as a wireless charger for his AirPods and Apple Watch. (They’re also adorned with actual Lego studs that can accommodate a mini-figure—or, indeed, one of the bricks that served as the design’s inspiration.) Anyone else using the design can customize the functionality to their liking: “I made the design for this case modular,” Staal explains, “so if anyone wants to make one, they can choose what they want to use the studs for.”

M2x2 with Lego minifigure and AirPods
© Paul Staal / Watt IV

The touchscreen, meanwhile, is essentially self-contained: “It offer[s] quick access to some controls on my Home Assistant dashboard.” Staal says that if he makes another version of the device, he’d perhaps replace it with an iPad Mini to take advantage of that device’s integration with macOS. “Maybe I’ll work on that in the future,” he says, “perhaps even pairing it with a Mac Studio instead of a Mac mini.”

For now, though, he has a couple of other projects on the go: “I have a couple of other projects that I still want to document/finalise and share on my website… One of them is a new dock for my Nintendo Switch 2, [which] I hope to finish somewhere in the upcoming weeks, so stay tuned.”

Gizmodo

Here’s the final trailer for The Super Mario Galaxy Movie

http://img.youtube.com/vi/LX9kXRRJlPw/0.jpg

The Super Mario Galaxy Movie is nearly upon us, as the hotly-anticipated sequel arrives in theaters on April 1. Nintendo recently dropped the final trailer for the film, which is filled with quick visual gags and nods to the source material.

There aren’t too many actual reveals in this footage, as it covers a lot of the same ground as previous trailers. However, it does show that fan favorite Lumalee is returning as a prison guard of some sort, reversing the storyline from the original film in which the cheerfully nihilistic creature was trapped in a cage.

Nintendo also released a larger presentation that featured the aforementioned trailer, but also included interviews with actors and franchise creator Shigeru Miyamoto. We did get some news in this video.

It was revealed that the long-tongued dinosaur Yoshi will be voiced by Donald Glover. So it’s likely the dino will be saying a lot more than "Yoshi" over and over. Actor Luis Guzman will also be playing Wart, the primary antagonist from Super Mario Bros. 2. Issa Rae will be on hand to voice Honey Queen, the gigantic bee character from the Super Mario Galaxy games.

It was even confirmed by lead actors Chris Pratt and Charlie Day that Luigi would be on hand for the entire adventure this time, and not confined to a cage-based subplot. I didn’t realize Luigi’s role in the first film was enough of a controversy to warrant this kind of mention, but here we are.

Illumination CEO Chris Meledandri also appeared in the video, assuring viewers that there are still "some big surprises" waiting in the actual film. To that end, there’s been a rumor floating around that Fox McCloud from the Starfox franchise would be showing up. Is this the start of a Nintendo cinematic universe that will culminate in 10 years with a Super Smash Bros. movie? Stranger things have happened.

This article originally appeared on Engadget at https://www.engadget.com/entertainment/tv-movies/heres-the-final-trailer-for-the-super-mario-galaxy-movie-181819593.html?src=rssEngadget

★ MySQL defaults were not designed for your Laravel app

https://masteringlaravel.io/images/main-social.jpg

Most of us set up MySQL, run our migrations, and never think about the database configuration again.
And honestly, that works fine for many apps.

But MySQL ships with defaults tuned for minimal hardware, not for a production Laravel app handling real traffic.
Settings like innodb_buffer_pool_size, flush behavior, and I/O thread counts are all set conservatively out of the box.

I came across a great article on Laravel News that walks through the InnoDB settings most likely to affect your app’s performance.
It’s not a deep dive into the MySQL manual.
It’s a practical overview of what to look at, why it matters, and what tools can help you figure out the right values for your setup.

For example, the buffer pool size alone can make a huge difference.
The default is far too small for most production apps, and bumping it up based on available RAM lets MySQL keep more data in memory instead of hitting disk repeatedly.

The article also highlights some handy tools like MySQLTuner and Percona Toolkit that analyze your running database and suggest specific changes.
Much better than guessing.

Not everyone reads the MySQL manual cover to cover, so articles like this are a great way to pick up practical knowledge without a huge time investment.

Here to help,

Joel

P.S. If your app is sluggish, and you’re not sure where to start, we can help you find the bottleneck. Schedule a call and let’s figure it out together.

Laravel News Links

9 open-source apps I install on every new Windows PC

https://static0.howtogeekimages.com/wordpress/wp-content/uploads/2025/06/windows-11-wallpaper-with-some-laptops-around-and-a-padlock-icon-in-the-center.png

Windows comes loaded with software to meet most of your needs out of the box, but if you like free and open-source projects, or if you just want alternatives, there are plenty of great options out there.

How-To Geek