This is a pretty cool little tutorial on tying/weaving/braiding paracord to create a short length of cord with a handle on one end (complete with clip or key ring) and a paracord-encased steel ball on the other end. This “impact tool” can be called by many names, including monkey’s fist, mini-monkey fist, and stinger — and it looks as if, in the right hands, it could be an effective tool for self defense.
This is a good teaching video from “The Weavers of Eternity Paracord” and I have no doubt I could do this if I wished to… and I just might. I really like how some simple wraps can securely encase a steel sphere… pretty cool.
Ever make one of these, or some other paracord creation(s)? Let us know in the comments section.
OpenAPI-backed API testing in PHP projects – a Laravel example
https://ift.tt/38OHjdL
OpenAPI-backed API testing in PHP projects – a Laravel example
Last updated: 2020-11-14 ::
Published: 11/11/2020
:: [ history ]
Am I proud of this montage? You bet I am.
OpenAPI is a specification intended to describe RESTful APIs in JSON and YAML, with the aim of being understandable by humans and machines alike.
OpenAPI definitions are language-agnostic and can be used in a lot of different ways:
An OpenAPI definition can be used by documentation generation tools to display the API, code generation tools to generate servers and clients in various programming languages, testing tools, and many other use cases.
In this article, we will see how to combine OpenAPI 3.0.x definitions with integration tests to validate whether an API behaves the way it’s supposed to, using the OpenAPI HttpFoundation Testing package.
We will do so in a fresh Laravel installation, for which we’ll also generate a Swagger UI documentation using the L5 Swagger package.
I will first elaborate a bit further on why this is useful, but if you’re just here for the code, you’re welcome to skip ahead and go to the Laravel example section straight away.
The issue
APIs are pretty common nowadays, and when we’re lucky they come with some form of documentation that helps us find our way around the endpoints. These documentations come in many shapes and flavours (some tastier than others), but one thing they’ve got in common in that they need to be updated every time the API they describe changes.
To many developers, maintaining an API’s documentation feels like extra homework when they’ve already passed the exam; it’s boring, sometimes tedious, and often unrewarding. Some strategies can help, like using annotations to keep the code and the documentation in one place; but those are often annoying to write still, and even the most willing developer is not immune to an oversight that won’t necessarily be caught by coworkers.
The usual outcome is that, one way or another, the documentation and the API become out of sync, leading to confused consumers.
Another aspect of API maintenance is ensuring that no endpoint stops functioning the way it’s supposed to; regressions will be introduced eventually, and without a proper testing strategy they might go unnoticed for a while.
A way to avoid this is to implement integration tests that will automatically check that the API’s behaviour is correct, and that recently introduced changes have not had unintended consequences. This is fine, but still doesn’t provide any guarantee that the expectations set in the integration tests are exactly the same as the ones displayed by the documentation.
If only there was a way to ensure that they perfectly reflect each other…
A solution
We are now assuming that we’ve got an API documentation and some integration tests, and we’d like to align their expectations somehow.
The OpenAPI specification has become a popular choice to describe APIs over time, but whether we use it or not doesn’t change the fact that the corresponding definitions need to be maintained; in other words, using OpenAPI does not automagically make the aforementioned issues go away.
What sets OpenAPI apart, however, is that it’s used as the base layer for a growing number of tools that make the specification useful far beyond the mere documenting side of things.
One of these tools built for the PHP ecosystem and maintained by The PHP League is OpenAPI PSR-7 Message Validator, a package for validating HTTP requests and responses implementing the PSR-7 standard against OpenAPI definitions.
The idea is essentially to take HTTP requests and responses, and make sure they match one of the operations described in an OpenAPI definition.
Can you see where this is going?
We could basically use this package to add an extra layer on top of our integration tests, that will take the API responses obtained in the tests and make sure they match the OpenAPI definitions describing our API.
If they don’t, the tests fail.
This is what it looks like as a fancy diagram:
The OpenAPI definition describes the API, and the tests use the OpenAPI definition to make sure the API actually behaves the way the definition says it does.
All of a sudden, our OpenAPI definition becomes a reference for both our code and our tests, thus acting as the API’s single source of truth.
PSR-7
You might have noticed a small detail in the previous section: the OpenAPI PSR-7 Message Validator package only works for – it’s in the name – PSR-7 messages. The issue here is that not all frameworks support this standard out of the box; as a matter of fact, a lot of them use Symfony’s HttpFoundation component under the hood, whose requests and responses do not implement that standard by default.
The Symfony folks have got us covered though, as they’ve developed a bridge that converts HttpFoundation objects to PSR-7 ones, as long as it’s given a PSR-7 and PSR-17 factory to do so, for which they suggest to use Tobias Nyholm‘s PSR-7 implementation.
All of these pieces form a jigsaw puzzle that the OpenAPI HttpFoundation Testing package offers to assemble for us, allowing developers to back their integration tests with OpenAPI definitions in projects leveraging the HttpFoundation component.
Let’s see how to use it in a Laravel project, which falls into this category.
A Laravel example
The code contained in this section is also available as a GitHub repository.
First, let’s create a new Laravel 8 project, using Composer:
The first one is the OpenAPI HttpFoundation Testing package mentioned earlier, that we install as a development dependency as it’s intended to be used as part of our test suite.
The second one is L5 Swagger, a popular package bringing Swagger PHP and Swagger UI to Laravel. We actually don’t need Swagger PHP here, as it uses Doctrine annotations to generate OpenAPI definitions and we’re going to write our own manually instead. We do need Swagger UI, however, and the package conveniently adapts it to work with Laravel.
To make sure Swagger PHP doesn’t overwrite the OpenAPI definition, let’s set the following environment variable in the .env file at the root of the project:
L5_SWAGGER_GENERATE_ALWAYS=false
Create a file named api-docs.yaml in the storage/api-docs folder (which you need to create), and add the following content to it:
This is a simple OpenAPI definition describing a single operation – a GET request on the /api/test endpoint, that should return a JSON object containing a required foo key.
Let’s check whether Swagger UI displays our OpenAPI definition correctly. Start PHP’s development server with this artisan command, to be run from the project’s root:
Open localhost:8000/api/documentation in your browser and replace api-docs.json with api-docs.yaml in the navigation bar at the top (this is so Swagger UI loads up the YAML definition instead of the JSON one, as we haven’t provided the latter).
Hit the enter key or click Explore – our OpenAPI definition should now be rendered as a Swagger UI documentation:
Expand the /test endpoint and try it out – it should fail with a 404 Not Found error, because we haven’t implemented it yet.
Let’s fix that now. Open the routes/api.php file and replace the example route with this one:
Route::get('/test', function (Request $request) { return response()->json(['foo' => 'bar']);});
Go back to the Swagger UI tab and try the endpoint again – it should now return a successful response.
Time to write a test! Open tests/Feature/ExampleTest.php and replace its content with this one:
<?phpnamespaceTests\Feature;useOsteel\OpenApi\Testing\ResponseValidatorBuilder;useTests\TestCase;classExampleTestextendsTestCase{/** * A basic test example. * * @return void */publicfunctiontestBasicTest(){$response=$this->get('/api/test');$validator=ResponseValidatorBuilder::fromYaml(storage_path('api-docs/api-docs.yaml'))->getValidator();$result=$validator->validate('/test','get',$response->baseResponse);$this->assertTrue($result);}}
Let’s unpack this a bit. For those unfamiliar with Laravel, $this->get() is a test method provided by the MakesHttpRequests trait that essentially performs a GET request on the provided endpoint, executing the request’s lifecycle without leaving the application. It returns a response that is identical to the one we would obtain if we’d perform the same request from the outside.
We then create a validator using the Osteel\OpenApi\Testing\ResponseValidatorBuilder class, to which we feed the YAML definition we wrote earlier via the fromYaml static method (the storage_path function is a helper returning the path to the storage folder, where we stored the definition).
Had we had a JSON definition instead, we could have used the fromJson method; also, both methods accept YAML and JSON strings respectively, as well as files.
The builder returns an instance of Osteel\OpenApi\Testing\ResponseValidator, on which we call the get method, passing the path and the response as parameters ($response is a Illuminate\Testing\TestResponse object here, which is a wrapper for the underlying HttpFoundation object, which can be retrieved through the baseResponse public property).
The above is basically the equivalent of saying I want to validate that this response conforms to the OpenAPI definition of a GET request on the /test path.
That’s because the validator has a shortcut method for each of the HTTP methods supported by OpenAPI (GET, POST, PUT, PATCH, DELETE, HEAD, OPTIONS and TRACE), to make it simpler to test responses for the corresponding operations.
Note that the specified path must exactly match one of the OpenAPI definition’s paths.
You can now run the test, which should be successful:
$ ./vendor/bin/phpunit tests/Feature
Open routes/api.php again, and change the route for this one:
Route::get('/test', function (Request $request) { return response()->json(['baz' => 'bar']);});
Run the test again; it should now fail, because the response contains baz instead of foo, and the OpenAPI definition says the latter is expected.
Our test is officially backed by OpenAPI!
The above is obviously an oversimplified example for the sake of the demonstration, but in a real situation a good practice would be to overwrite the MakesHttpRequests trait’s call method, so it performs both the test request and the OpenAPI validation.
As a result, our test would now be a single line:
This could be implemented as a new MakesOpenApiRequests trait that would “extend” the MakesHttpRequests one, and that would first call the parent call method to get the response. It would then work out the path from the URI, and validate the response against the OpenAPI definition before returning it, for the calling test to perform any further assertions as needed.
Conclusion
While the above setup is a great step up in improving an API’s robustness, it is no silver bullet; it requires that every single endpoint is covered with integration tests, which is not easily enforceable in an automated way, and ultimately still requires some discipline and vigilance from the developers. It may even feel a bit coercive at first, since as a result they are basically forced to maintain the documentation in order to write successful tests.
The added value, however, is that said documentation is now guaranteed to be accurate, leading to happy consumers who will now feel the joy of using an API that just works; this, in turn, should lead to less frustrated developers, who shall spend less time hunting down pesky discrepancies.
All in all, making OpenAPI definitions the single source of truth for both the API documentation and the integration tests is in itself a strong incentive to keep them up to date; they naturally become a priority, where they used to be an afterthought.
As for maintaining the OpenAPI definition itself, doing so manually can admittedly feel a bit daunting. Annotations are a solution, but I personally don’t like them and prefer to maintain a YAML file directly. IDE extensions like this VSCode one make it much easier, but if you can’t bear the sight of a YAML or JSON file, you can also use tools like Stoplight Studio to do it through a more user-friendly interface (note: I am not affiliated).
Tame Black Friday Gremlins — Optimize Your Database for High Traffic Events
https://ift.tt/3f68hyu
It’s that time of year! The Halloween decorations have come down and the leaves have started to change and the Black Friday/Cyber Monday buying season is upon us!
For consumers, it can be a magical time of year, but for those of us that have worked in e-commerce or retail, it usually brings up…different emotions. It’s much like the Gremlins — cute and cuddly unless you break the RULES:
Don’t expose them to sunlight,
Don’t let them come in contact with water,
NEVER feed them after midnight!
I love this analogy and how it parallels the difficulties that we experience in the database industry — especially this time of year. When things go well, it’s a great feeling. When things go wrong, they can spiral out of control in destructive and lasting ways.
Let’s put these fun examples to work and optimize your database!
Don’t Expose Your Database to “Sunlight”
One sure-fire way to make sure that your persistent data storage cannot do its job, and effectively kill it is to let it run out of storage. Before entering the high-traffic holiday selling season, make sure that you have ample storage space to make it all the way to the other side. This may sound basic, but so is not putting a cute, fuzzy pet in the sunlight — it’s much harder than you think!
Here are some great ways to ensure the storage needs for your database are met (most obvious to least obvious):
make sure network-attached storage is extensible on the fly, or
properly tune the database mount point to be leveraging logical volume management or software raid to add additional volumes (capacity) on the fly.
In an on-premise or pre-purchased infrastructure, make sure you are overprovisioned — even by end of season estimates — by ~25%.
Put your logs somewhere else than the main drive. The database may not be happy about running out of log space, but logs can be deleted easily — data files cannot!
Don’t Let Your Database Come in “Contact With Water”
We don’t want to feed or allow simple issues to multiply. Actions we take to get out of a bind in the near term can cause problems that require more attention in the future — just like when you put water on a Gremlin, it will multiply!
What are some of these scenarios?
Not having a documented plan of action can cause confusion and chaos if something doesn’t go quite right. Having a plan documented and distributed will keep things from getting overly complicated when issues occur.
Throwing hardware at a problem. Unless you know how it will actually fix an issue, it could be like throwing gasoline on a fire and throw your stack into disarray with blocked and unblocked queries. It also mandates database tuning to be effective.
Understanding (or misunderstanding) how users behave when or if the database slows down:
Do users click to retry five times in five seconds causing even more load?
Is there a way to divert attention to retry later?
Can your application(s) ignore retries within a certain time frame?
Not having just a few sources of truth, with as much availability as possible:
Have at least one failover candidate
Have off-server transaction storage (can you rebuild in a disaster?)
If you have the two above, then delayed replicas are your friend!
Never “Feed” Your Database After “Midnight”
What’s the one thing that can ensure that all heck breaks loose on Black Friday? CHANGE is the food here, and typically, BLACK FRIDAY is the midnight.
Have you ever felt like there is just one thing that you missed and want to get off your backlog? It could be a schema change, a data type change, or an application change from an adjacent team. The ‘no feeding’ rule is parallel to CODE FREEZE in production.
Most companies see this freeze start at the beginning of November when the most stable prod is the one that is already out there, not the one that you have to make stable after a new release:
Change Management is your friend; change that needs to happen should still have a way to happen.
Observability is also your friend; know in absolute terms what is happening to your database and stack so you don’t throw a wrench in it (Percona Monitoring and Management can help).
Educate business stakeholders on the release or change process BEFORE the event, not DURING the event.
Don’t be afraid to “turn it off” when absolute chaos is happening. Small downtime is better than an unusable site over a longer period of time.
Conclusion
Black Friday, Cyber Monday, and the Holidays can be the most wonderful time of the year — and now that we’ve covered the rules, some of the “Gremlins” can stay small and fuzzy and your business won’t get wrecked by pesky database issues or outages.
How Percona Can Help
Percona experts optimize your database performance with open source database support, highly-rated training, managed services, and professional services.
Things to Consider When Building A Reliable AR 15 Rifle
https://ift.tt/32QQNBq
Things to Consider When Building A Reliable AR 15 Rifle By RAR Guns
RAR Independence XRT Rifle
Castle Rock, CO –-(Ammoland.com)- I often see articles and post explaining how to assemble an AR15 rifle. While I find many of these articles to be very informative, most don’t touch on the details that are required to build a reliable, accurate rifle.
First, let’s examine what a reliable AR15 must be able to do. A reliable Ar15 must first and foremost fire every time you pull the trigger. Whether in a life or death situation, competition shooting, or just plinking, your weapon needs to work properly. It must also hit what you are aiming at.
One of the main reasons an Ar15 will miss fire is that poor quality parts were used. Saving a few dollars on a bolt assembly can mean the difference between a reliable rifle and one that consistently has problems.
When building a rifle from scratch, you should have a sort of blueprint. You should know what parts you are going to use from the outset as opposed to just buying parts as you find them on sale. This is not to say you have to buy all your parts at once. But instead, know what you going to buy and why you’re using that particular part.
I have seen several instances where someone bought AR rifle parts because it was cheap. This later caused problems in the rifle. One guy bought a lightweight buffer and buffer spring because it was very cheap. Upon completing the rifle, he went to the range only to find that he couldn’t get two rounds in a row through it because it was short cycling. The buffer and spring did not match the rest of the parts he was using.
You should know how and what you will be using your rifle for. This will affect what parts you use to build the rifle. For instance, if you plan to shoot steel cased ammo in your rifle, you will have much more success with a 5.56 NATO chambered rifle than a .223 chambered rifle.
You will also need a heavy-duty SOPMOD style ejection spring kit. This will ensure that you get a successful shell extraction each and every time you fire the weapon.
Consider AR Rifle Accuracy when Building A Reliable AR 15 Rifle
Enhanced Ar15 Parts
Another thing to consider is how important accuracy is. AR15s vary in accuracy by quite a bit. They can range anywhere from ¼ MOA to 3 MOA. A lot of the accuracy obviously has a lot to do with the barrel you choose. A barrel does not have to cost $500.00 to be a good, accurate barrel. You can achieve a sub 1 MOA with a mid range cost barrel. And contrary to popular belief, a longer barrel is not a whole lot more accurate than a shorter barrel in most cases.
What you may gain in accuracy will be lost in mobility and weight.
When thinking about how accurate your weapon needs to be, consider the mission of the weapon. If it is a combat or tactical competition rifle, you probably what something you can group a lot of rounds quickly in a small area as opposed to one shot at a time in a ¼ inch hole. There are several things that can help in this area. A gas piston system will help with faster target reacquisition as will a good muzzle break/compensator. There are several products available to modify the receiver extension/buffer tube as well that will reduce felt recoil.
A high-quality AR15 trigger and enhanced lower parts kit can also aid in acquiring your target quickly. I don’t recommend a two-stage trigger for a combat or tactical competition rifle. Instead, I like a short pull single-stage trigger with about 4 lbs. or less of resistance.
A reliable feed is another area that needs to be addressed. There are a lot of low cost lower receivers on the market that are very good. There are a few that are only good for paperweights. A good AR15 lower should either be forged or billet. Never use a cast lower receiver. They are unreliable and weak.
A quality BCG or Bolt Carrier Group is very important to reliable feeding. This is what is going to push the round into the chamber and lock it into place. A poorly manufactured BCG will be unreliable and possibly dangerous to the operator and other friendlies in the area.
The upper receiver may or may not have M4 style feed ramps. In today’s market, I see no reason not to have M4 feed ramps at least in the chamber. One problem we see a lot is the fit between the M4 cuts on the upper receiver and the M4 cuts on the chamber matching up. An improper fit will cause miss feeds and jams. This can be corrected a couple different ways. If you’re mechanically inclined, you may be able to fix the problem yourself. If not, take your rifle to a qualified gunsmith or armorer to fix the problem.
These are just a few things that should be considered when starting to build your own AR15 rifle.
RAR Guns will at no charge or obligation, give free AR building advice and help to anybody who wants it. No strings attached.
RAR Independence XRT Rifle
About:
RAR Guns. Home of the best AR 15s in the world. We don’t just assemble parts. We measure and test each part before it is installed. Then each part is function tested to ensure proper operation. We have several AR15 models to choose from and we also build to your custom specifications. We warranty our AR15 rifles for workmanship for a full year no questions asked. Our AR15 rifles will even perform with most Russian, steel cased, and polymer-coated ammo. If it breaks or has a malfunction within one year of purchase, we will correct the problem for free.
Menus and toolbars can make your applications look polished and professional, presenting users with an accessible set of options, while status bars allow you to display relevant information about the applicationâs status.
In this tutorial, youâll learn:
What menus, toolbars, and status bars are
How to create menus, toolbars, and status bars programmatically
How to populate Python menu and toolbar using PyQt actions
How to use status bars to display status information
In addition, youâll learn some programming best practices that you can apply when creating menus, toolbars, and status bars with Python and PyQt. If youâre new to GUI programming with PyQt, then you can check out Python and PyQt: Building a GUI Desktop Calculator.
You can download the code and resources for the sample application that youâll build in this tutorial by clicking on the box below:
Download the sample code:Click here to get the code youâll use to learn how to add menus, toolbars, and status bars to your GUI applications using Python and PyQt.
Building Python Menu Bars, Menus, and Toolbars in PyQt
A menu bar is a region of a GUI applicationâs main window that holds menus. Menus are pull-down lists of options that provide convenient access to your applicationâs options. For example, if you were creating a text editor, then you might have some of the following menus in your menu bar:
A File menu that provides some of the following menu options:
New for creating a new document
Open for opening an existing document
Open Recent for opening recent documents
Save for saving a document
Exit for exiting the application
An Edit menu that provides some of the following menu options:
Copy for copying some text
Paste for pasting some text
Cut for cutting some text
A Help menu that provides some of the following menu options:
Help Content for launching to userâs manual and help content
About for launching an About dialog
You can also add some of these options to a toolbar. A toolbar is a panel of buttons with meaningful icons that provide fast access to the most commonly used options in an application. In your text editor example, you could add options like New, Open, Save, Copy, and Paste to a toolbar.
Note: In this tutorial, youâll develop a sample application that implements all the above menus and options. You can use this sample application as a starting point to create a text editor project.
In this section, youâll learn the basics of how to add menu bars, menus, and toolbars to your GUI applications with Python and PyQt.
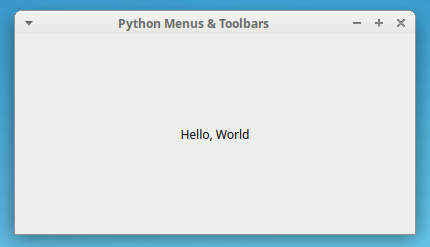
Before going any further, youâll create a sample PyQt application that youâll use throughout this tutorial. In each section, youâll add new features and functionalities to this sample application. The application will be a main windowâstyle application. This means that itâll have a menu bar, a toolbar, a status bar, and a central widget.
Open your favorite code editor or IDE and create a Python file called sample_app.py. Then add the following code to it:
Now sample_app.py contains all the code that you need for creating your sample PyQt application. In this case, Window inherits from QMainWindow. So, youâre building a main windowâstyle application.
In the class initializer .__init__(), you first call the parent classâs initializer using super(). Then you set the title of the window using .setWindowTitle() and resize the window using .resize().
The windowâs central widget is a QLabel object that youâll use to show messages in response to certain user actions. These messages will display at the center of the window. To do this, you call .setAlignment() on the QLabel object with a couple of alignment flags.
Thatâs it! Youâve created a main windowâstyle application with Python and PyQt. Youâll use this sample application for all the upcoming examples in this tutorial.
[ Improve Your Python With ð Python Tricks ð â Get a short & sweet Python Trick delivered to your inbox every couple of days. >> Click here to learn more and see examples ]
Let’s make a function called greet that prints out "Hello world".
>>> def greet():
...     print("Hello world")
...
You can put as many statements as you like in a function, but we’ve chosen to just put one statement in this greet function.
When we callgreet (by specifying the name of the function and open and close parentheses) Python will execute the statements inside that function:
>>> greet()
Hello world
If we pass an argument to the greet function, we’ll get an error:
>>> greet("Trey")
Traceback (most recent call last):
  File "<stdin>", line 1, in <module>
TypeError: greet() takes 0 positional arguments but 1 was given
We got an error because we passed an argument to greet but the greet function takes zero positional arguments.
Accepting arguments
To make a function that accepts arguments, you put the arguments in the parentheses when defining it.
Here we’ll modify our greet function to print out "Hello" and a name variable (instead of "world"):
>>> def greet(name):
...     print("Hello", name)
...
If we call this new greet function, we can pass a value to the name argument to print out that name:
>>> greet("Trey")
Hello Trey
So we use def to define a function, we type the name of the function we’re defining, and then we put parentheses.
Inside the parenthesis we put any arguments that our function accepts (if there’s more than one argument, they’re separated by commas).
That first line is always followed by a colon, which indicates the start of a block of code (meaning all the statements in the function are indented).
Positional vs keyword arguments
If we take the greet function and call it with Trey, this is a positional argument.
We can also pass in a keyword argument or a named argument.
We could pass the name in using a keyword argument like this:
>>> greet(name="Trey")
Hello Trey
Default argument values
If we don’t give any arguments to this function we’ll see an error because the greet function accepts a name argument, and it’s required:
Function arguments are required by default in Python.
If you want to make optional arguments, you need to provide a default value.
We can specify a default value with an equals sign:
Note: that equals sign doesn’t have anything to do with keyword arguments.
When you call a function an equal sign specifies a keyword argument.
When you define a function, an equal sign defines a default value for an argument.
If we call this function with an argument it does the same thing as before:
>>> greet("Trey")
Hello Trey
But if we don’t supply an value for that argument, name will default to world.
>>> greet()
Hello world
Return values
Let’s take a function, product that accepts two arguments, numbers and start (which defaults to 1):
>>> def product(numbers, start=1):
...     total = start
...     for n in numbers:
...         total *= n
...     print(total)
...
This product function doesn’t really work the way it probably should.
When we call product with some numbers, 6 is printed out:
>>> total = product([2, 1, 3])
6
We would expect the variable total to be 6.
But it’s not 6: it is None!
>>> total
>>> print(total)
None
None is the default return value for all functions.
Arguments are the inputs to a function.
The return value is the output of a function.
Normally you’ll want your functions to have a return statement.
Let’s change the product function to return instead of calling print:
>>> def product(numbers, start=1):
...     total = start
...     for n in numbers:
...         total *= n
...     return total
...
Now that we’ve changed print to return, if we execute the same sort of code as before we’ll see nothing is printed out.
>>> total = product([2, 1, 3, 4])
But total is 24 now:
>>> total
24
When you call a function, it’s return value will be passed back to you, the caller of that function, and we can capture that into a variable or pass it off somewhere else.
Summary
To define a function in Python, you use the def keyword.
You put the name of the function, open and close parentheses, with any arguments inside those parentheses.
If any of the arguments are optional, you’ll need to give them default values.
Then you put a colon, to start defining the body of the function (a colon means you’ve got a block of code that’s going to be indented).
The statements you write will be executed when that function is called.
Importantly functions have inputs, which are their arguments and also an output, which is the return value of that function, which isn’t required, but most functions have a return value.
Encrypting and signing data using private/public keys in PHP
https://ift.tt/35rI4Hr
For a project, I needed to make sure that a particular piece of data actually came from a specific source. There are already many packages that allow you to do this, but most are not fun or easy to use. That’s why we created a new package called spatie/crypto to do this.
Smart camera founder gets Wyze to car prowler and uses his own tech to catch criminal in action
https://ift.tt/38H9CL1
When Dave Crosby, one of the co-founders of Seattle-based Wyze Labs, was the victim of a robbery this summer, he turned to his own company’s technology for help in solving the crime. A new, outdoor security camera — unreleased to the public at the time — was mounted over his driveway and captured footage of a car prowler grabbing another of the cameras from Crosby’s vehicle.
Crosby, head of marketing for the 3-year-old smart home products maker, was testing the Wyze Cam Outdoor. He ended up as a main player in a YouTube video (above) that could serve as a testimonial for the new security device.
“I actually had grabbed those Outdoor Cams from the office and put them in my car because later that week I was shooting the actual promo video for the product,” Crosby told GeekWire, admitting that he mistakenly left his car unlocked. “Little did I know that a nice promo video would be created all on its own.”
When Crosby and co-workers discovered that the thief had posted the stolen camera for sale on Craigslist the next day, he set about chronicling it all for his popular YouTube channel, to document his efforts to catch a criminal. Crosby is no slouch on YouTube — he’s got 3.25 million subscribers who usually tune in to catch the father of three singing with his daughter.
He hit the ground running that day in August — and started filming himself — when he realized his car had been broken into and the footage was on his Wyze camera. Holding up a box for the Wyze Cam Outdoor, Crosby breathlessly said, “This is brand new. No one in the world has it. People are super excited to get this … it’s gonna be huge.”
Footage from Dave Crosby’s Wyze Cam Outdoor of a man entering Crosby’s vehicle at his home. (YouTube screen grab via The Crosbys)
Crosby moved about his home that morning, informing his wife Ashley of what happened and looping in his kids, Claire, 8, Carson, 6, and June, 2. A Wyze co-worker communicated with the thief on Craigslist, trying to arrange a spot to purchase the stolen camera for $50.
Crosby talked on the phone with police, trying to figure out the best way to have them involved as he made plans to be the one who would confront the thief. He said he definitely had some safety fears as he eventually set off the next day, with his family following in another vehicle, for a Fred Meyer parking lot in Renton, Wash. He was told to just dial 911 when he was in the area and police would arrive.
“I was surprised the police wanted me to just go make a deal with him,” Crosby told GeekWire, adding that once he was on the scene about to meet the seller, police arrived instantly before he could even talk to the guy.
“It was a fun adrenaline rush and I’m glad I got to be involved in catching him,” Crosby said.
The Wyze Cam Outdoor from Seattle-based Wyze Labs. (Wyze Photo)
The video captured Crosby filling out a police report in the back of his car, seated near his kids. Footage of the suspect is blurred as he talked to police. An officer returned the stolen camera to Crosby and remarked on Wyze’s technology in relation to it’s big Amazon-owned competitor.
“Good luck with the Wyze camera,” the officer said. “Gonna compete against Ring.”
“We are. We’re gonna take ’em down,” Crosby replied. The Wyze Cam Outdoor ended up selling out instantly when it was officially released and Crosby told GeekWire that it’s been a struggle to make them as fast as the startup can.
The value of the camera ended up not being enough to book the man into jail, and Crosby said he never followed up on the results of a supposed court date for the thief.
But his kids got a lesson in crime fighting and dad came away looking pretty cool.
“You could totally be a police,” his son said in the video.
And then the promo for Wyze cameras comes full circle as his daughter concluded, “And this is why we have WyzeCams, people.”


 It’s that time of year! The Halloween decorations have come down and the leaves have started to change and the Black Friday/Cyber Monday buying season is upon us!