https://www.percona.com/blog/wp-content/uploads/2024/04/MariaDB-better-than-MySQL-200×112.jpg Apples or oranges?Tea or coffee?Books or eBooks?Each of these comparisons has very similar features and serves many of the same purposes, but in the end, they are different choices people make. Do you know what else belongs on this list?MariaDB or MySQL?It’s time we discuss the age-old debate of MariaDB versus MySQL and see if […]Percona Database Performance Blog
Learnings from our multi-tenant Laravel application
https://i.ytimg.com/vi/Lmope5CdM10/maxresdefault.jpg
Laravel News Links
How Mirror Balls Are Made
https://theawesomer.com/photos/2024/04/metal_mirror_ball_t.jpg
We’ve seen how they make disco balls in the last American mirror ball factory; now see how they do it in Japan. Nissho Co., Ltd. makes shiny spheres by bending sheet metal into domes, screwing them together, hand-cutting and gluing hundred of round mirror tiles then filling the gaps with grout. Note that the tiles are different sizes depending on their placement.
The Awesomer
Fedora Linux 40 Officially Released
prisoninmate writes: Fedora Linux 40 distribution has been officially released — powered by the latest Linux 6.8 kernel series, and featuring the GNOME 46 and KDE Plasma 6 desktop environments, reports 9to5Linux: "Powered by the latest and greatest Linux 6.8 kernel series, the Fedora Linux 40 release ships with the GNOME 46 desktop environment for the flagship Fedora Workstation edition and the KDE Plasma 6 desktop environment for the Fedora KDE Spin, which defaults to the Wayland session as the X11 session was completely removed." "Fedora Linux 40 also includes some interesting package management changes, such as dropping Delta RPMs and disabling support in the default configuration of DNF / DNF5. It also changes the DNF behavior to no longer download filelists by default. However, this release doesn’t ship with the long-awaited DNF5 package manager. For AMD GPUs, Fedora Linux 40 ships with AMD ROCm 6.0 as the latest release of AMD’s software optimized for AI and HPC workload performance, which enables support for the newest flagship AMD Instinct MI300A and MI300X datacenter GPUs."
Read more of this story at Slashdot.
Slashdot
This Is My New Favorite MacBook Accessory and It’s Not Even Close
https://www.gearpatrol.com/wp-content/uploads/sites/2/2023/11/dsc08180-jpg-654161e693a46-jpg.webp
The Dockcase Smart USB-C Hub has a premium build, transparent design and a little display showing key info. It’s wonderful.
 Photo by Tucker Bowe for Gear Patrol
Every product is carefully selected by our editors. If you buy from a link, we may earn a commission. Learn more
I’ll be honest: USB-C hubs aren’t the most exciting gadgets to write about. They do a pretty simple job — add extra ports to your laptop while allowing you to create a desktop-style workstation with external monitors — and not much else. But given how many people work remotely without a traditional desktop setup, a USB-C hub is also pretty vital.
There are a lot of USB-C hubs to choose from in 2024. Most look the same — little black or grey dongles that connect to your laptop via a USB-C cable. That’s the not case with the Dockcase USB-C Smart Hub “Explorer Edition,” my new favorite MacBook accessory. And it’s not even close.
Dockcase Smart USB-C Hub 10-in-1 Explorer Edition
 Dockcase
Dockcase Smart USB-C Hub 10-in-1 Explorer Edition
At face value, the Dockcase USB-C Smart Hub is straightforward enough. It’s a 10-in-1 hub with enough ports to connect most of your peripherals. It supports 100-watts of pass-through power for your laptop. It has microSD and UHS-II SD card slots. And it connect up to two 4K external monitors (at 60fps) or one 8K display (at 30fps) via its HDMI and DisplayPort ports. These are all pretty standard features.

But the thing that truly sets the Dockcase USB-C Smart Hub apart … I mean, just look at it. It has a premium build that’s made mostly of aluminum and glass, and it’s transparent so you can see into it. You can see the motherboard, transistors and other inner workings of the device. It’s cool! Especially for a USB-C hub.
Cooler still, the Smart USB-C Hub has a little one-inch color display that shows you real-time info about power, data transfer, monitor resolution and internet speeds (if you have an hardware ethernet connection). Basically, it does the little things to tell you more your setup and satisfy the inner nerd in you.

When you plug the Smart USB-C Hub, the display lights up and shows you a graphic of the different ports you’re using — if you’re using a port, it’ll light up. If you’re using its 100-watt USB-C PD port to power your laptop, it shows you how much power is being passed-through being consumed by your laptop and the Smart USB-C Hub. And when connected to an external monitor, it’ll show you resolution and frame rate data, too.
The Smart USB-C Hub has a little navigation button that allows you to jump through different displays and see even more detailed information.
There’s room for more nerdery, too. The Smart USB-C Hub has a little navigation button that allows you to jump through different displays and see even more detailed information on port usage and display information. It’s a little tedious, admittedly, as you have to learn a serious of controls — which is mostly a sequence of quick and long-presses — so it’s not exactly intuitive. One neat thing with this button is that you can rotate the orientation of the little 1×1-inch screen; a quick double-tap will rotate so that you can orientate in whatever direction you like.

For me, the Dockside Smart USB-C Hub is a little overkill. I have a few peripherals connected to it — including a small soundbar, an external webcam, an external hard drive and a single monitor that feels inferior given the higher-resolution displays (with high frame rates) that it can support. But it’s so different and fun, and it adds a bit of flair to my home workstation.
And at $130, it’s not actually too far out of the realm of other USB-C hubs with similar capabilities. But in terms of aesthetics and overall cool factor, it’s in a class of its own.
 Dockcase
Dockcase Smart USB-C Hub 10-in-1 Explorer Edition
Gear Patrol
IceburgCRM – AI – CRM Creator
https://avatars.githubusercontent.com/u/118024971?v=4?s=400
Screenshots:
Project Home Page – iceburg.ca
Iceburg CRM is a metadata driven CRM with AI abilities that allows you to quickly prototype any CRM. The default CRM is based on a typical business CRM but the flexibility of dynamic modules, fields, subpanels allows prototyping of any number of different tyes of CRMs.
- [Unlimited Relationships between any number modules without common fields]
- [Metadata creations of modules, fields, relationships, subpanels, datalets, seeding]
- [Ability to Import/Export in 6 different formats (XLSX, CSV, TSV, ODS, XLS, HTML]
- [25 different input types, Laravel field validation, Maska field masking]
- [26 themes with light and dark themes available]
- [Module based Role permissions (read, write, import, export)]
- [Calendar, Audit logs, Vue3 Charts, Convertable modules, Related Fields (related to another module)]
Iceburg CRM is created with:
composer create-project iceburgcrm/iceburgcrm iceburgcrm

// Default
php artisan iceburg:seed

// Convert Existing DB to CRM
php artisan iceburg:seed --type=adminpanel

// Use AI
php artisan iceburg:seed --type=ai --prompt="Create a stamp collecting crm"
- Default – Install the default Classic IceburgCRM: 55 Modules, 282 Fields, 43 Relationships, 24 Subpanels, 5 Datalets
- AdminPanel – Point to an existing Database and turn it into a CRM. Type is requires but additional parameters are optional. If not supplied will use existing connection details.
php artisan iceburg:seed --type=adminpanel --connection_host=123.123.123.123 --connection_port=3306 --connection_database=databasename --connection_username=dbuser --connection_password=dbpassword --connection_charset=utf8mb4 --connection_collation=utf8mb4_unicode_ci
Example of a live wordpress database converted to a CRM.
WordPress CRM
WordPress Website
- Core – Install only the core files. This will create a blank CRM template.
php artisan iceburg:seed --type=core
- Custom – Add your own modules, field, relationships, subpanels and generate it.
php artisan iceburg:seed --type=custom
- AI – Describe the CRM you want and let AI create it. Including the logo parameter will create an unique image for your login page. ChatGPT 3.5 is used as the default.
Dalle-3 is used for image generation. Cost: 4 cents per crm with logo or a 1 penny without the logo.
php artisan iceburg:seed --type=ai --prompt="Create a stamp collecting crm" logo="yes"
Each AI generation is different. Based on the prompt above here are three CRM’s created:
Stamp Collectors CRM 1
Stamp Collectors CRM 2
Stamp Collectors CRM 3
Note: Connection parameters, can be used with different types of installation.
If you do not have a server available visit digitalocean and get $200 dollars in free credit
If not installed, please install composer
If not installed, please install npm
composer create-project iceburgcrm/iceburgcrm iceburgcrm

or

git clone git@github.com:iceburgcrm/iceburgcrm.git

cd iceburgcrm
Edit your database environment variables
vim .env

DB_HOST=
DB_PORT=
DB_USERNAME=
DB_PASSWORD=
DB_DATABASE=
Open permissions on the storage and
sudo chown -R www-data:www-data /path/to/your/project/public
sudo chown -R www-data:www-data /path/to/your/project/storage


Deploy
```php
sudo chmod 775 storage -R
AI Assist (Optional)
// Add your OPENAI KEY AND ORG ID TO your environment file to enable AI Assist
// This will enable an AI ASSIST button in add or edit modules
// that will allow you to fill in any field with AI Assisted data


OPENAI_API_KEY=
OPENAI_ORGANIZATION=
- Accounts
- Contacts
- Contracts
- Leads
- Opportunities
- Lineitems
- Products
- Campaigns
- Cases
- Documents
- Notes
- Projects
- Groups
- Quotes
- [pie chart] Total Sales
- [line graph] New Leads / Contacts / Accounts over 7 days
- [pie chart] New Opportunities / Contracts / Quotes
- [bar graph] Meeting (Today, 7 Days, 30 Days)
- [pie chart] Orders this month
- Settings
- Permissions
- Modules, Fields, Subpanels, Users, Datalet editing
- Accounting
- Admin
- HR
- Marketing
- Sales
- Support
- User
- Describe your CRM and build it with AI
- Select from our premade CRM templates
- Make any Database into a CRM
**Classic CRM. Accounts, Contacts, Contracts, LineItems, etc.** [Preview](https://classic.iceburg.ca)
**A platform for sneaker enthusiasts to catalog their collections, track market values, manage trades or sales, and connect with other collectors.** [Preview](https://rarebooks.iceburg.ca)
**For wine enthusiasts and sellers, offering cellar management, tasting notes, vintage tracking, and a community feature for sharing recommendations and organizing tastings.** [Preview](https://wine.iceburg.ca)
**Tailored for small to medium fitness studios, featuring membership management, class scheduling, fitness progress tracking for members, and integration with wearable tech for health data.** [Preview](https://fitness.iceburg.ca)
**A niche CRM for professional networking organizations, offering event planning, member engagement tracking, mentorship program management, and job boards.** [Preview](https://networking.iceburg.ca)
**For retailers and enthusiasts of crafting, offering inventory management, project tracking, supplier databases, and community features for sharing project ideas and tutorials.** [Preview](https://crafting.iceburg.ca)
**A platform for coffee lovers to track their favorite beans, roasts, brewing methods, and café experiences, including a marketplace for specialty beans and equipment.** [Preview](https://coffee.iceburg.ca)
**For beekeepers to track hive health, manage honey production records, schedule maintenance, and engage with local and online beekeeping communities.** [Preview](https://beekeeping.iceburg.ca)
**This is a premade instance of a wordpress database with iceburgcrm. Once created, download and point your wordpress files.** Changing the data in the CRM will change the wordpress website.
[CRM Preview](https://wordpress.iceburg.ca) [Wordpress Website](https://wordpresssite.iceburg.ca)
If you discover a security vulnerability within Iceburg CRM, please send an e-mail to security@iceburg.ca.
The Iceburg CRM is open-sourced software licensed under the AGPL
Laravel News Links
Recommended Visual studio code extensions for Laravel developers
https://hashnode.com/utility/r?url=https%3A%2F%2Fcdn.hashnode.com%2Fres%2Fhashnode%2Fimage%2Fupload%2Fv1642543661094%2Flo_jgxvt5.png%3Fw%3D1200%26auto%3Dcompress%2Cformat%26format%3Dwebp%26fm%3Dpng
In this article, we’ll be looking at awesome vscode extensions for PHP/Laravel developers.
Vscode is a free open-source text editing tool by Microsoft with support for developing applications using different programming languages. It has built-in Git functionality.
Install extensions to add new languages, themes, debuggers, and to connect to additional services. Extensions run in separate processes, ensuring they won’t slow down your editor.
It has a desktop app for Windows, Linux and macOS. Find out more about [Vscode] (code.visualstudio.com)
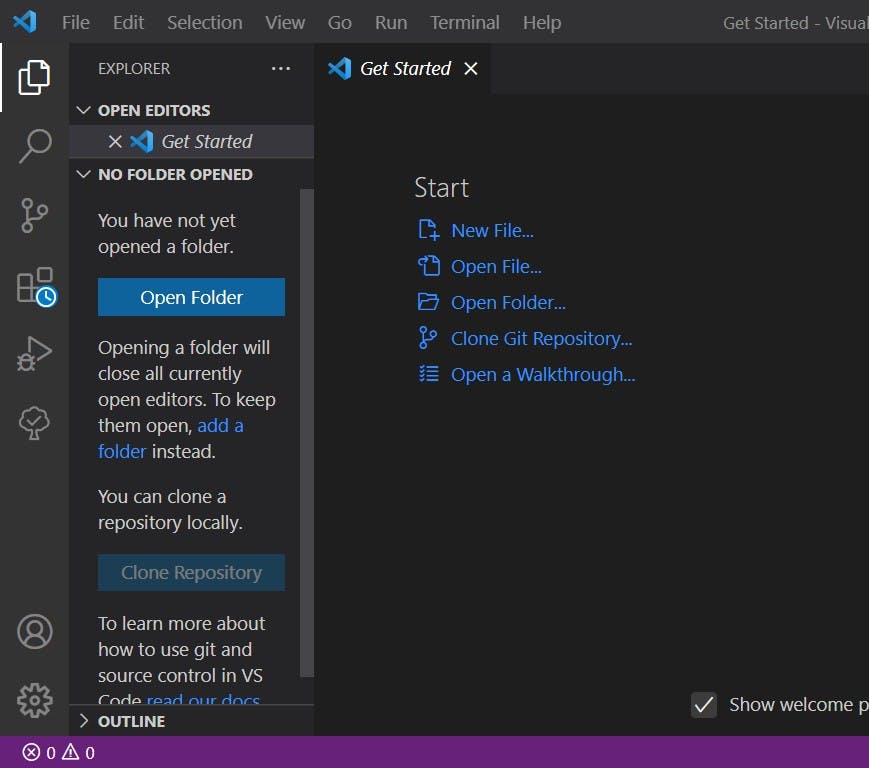
Vscode is one of the best editors a developer should’ve.
The following are a few amongst many extensions out there to smoothen your development experience in building Laravel apps.
[Laravel Extension Package] (marketplace.visualstudio.com/items?itemName..)
This is one of the finest laravel vscode extensions with 10 extensions in one (collection of vscode extensions)
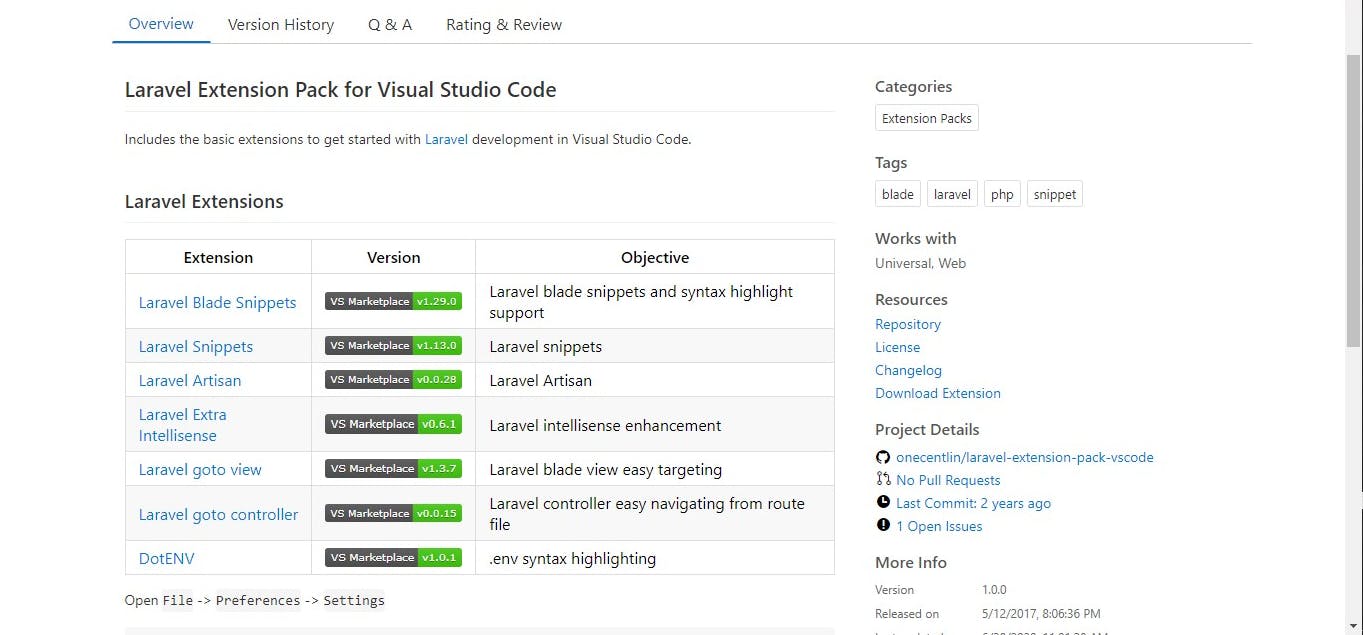
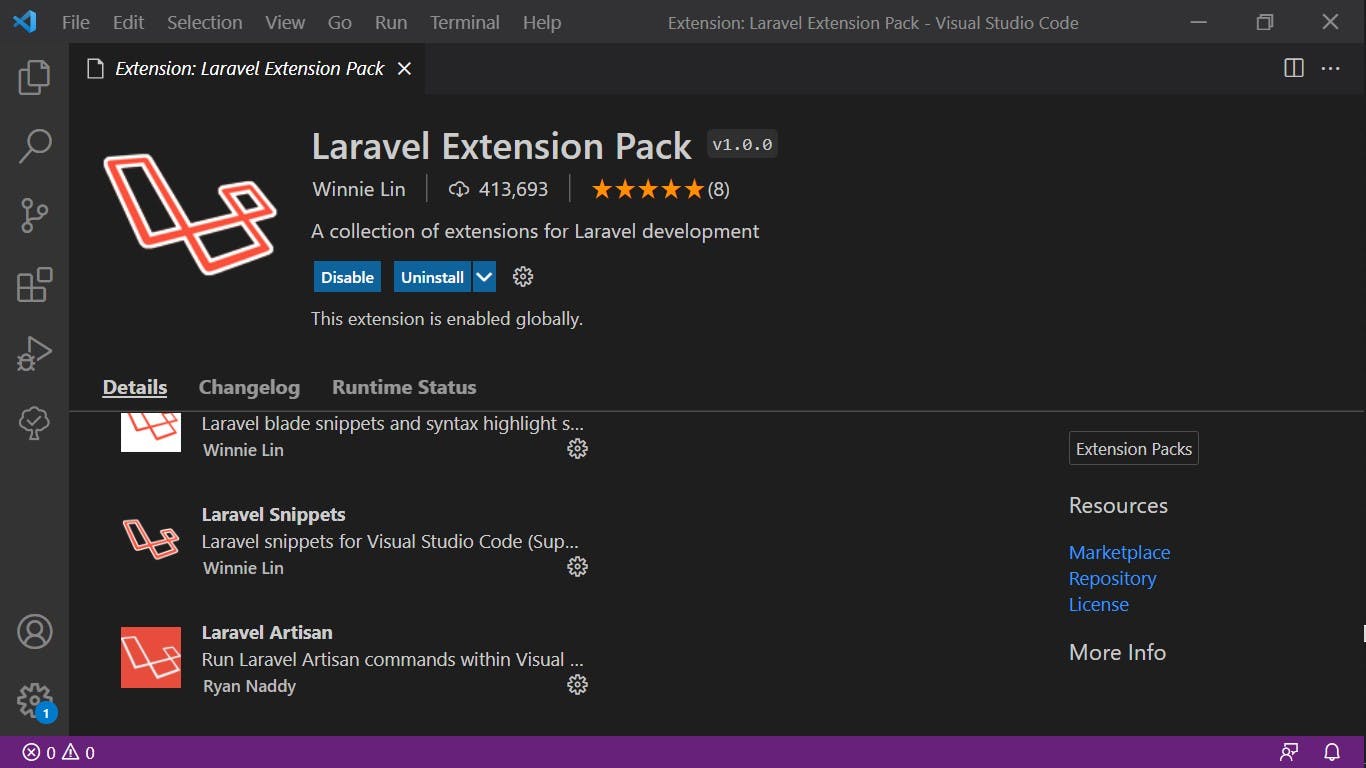
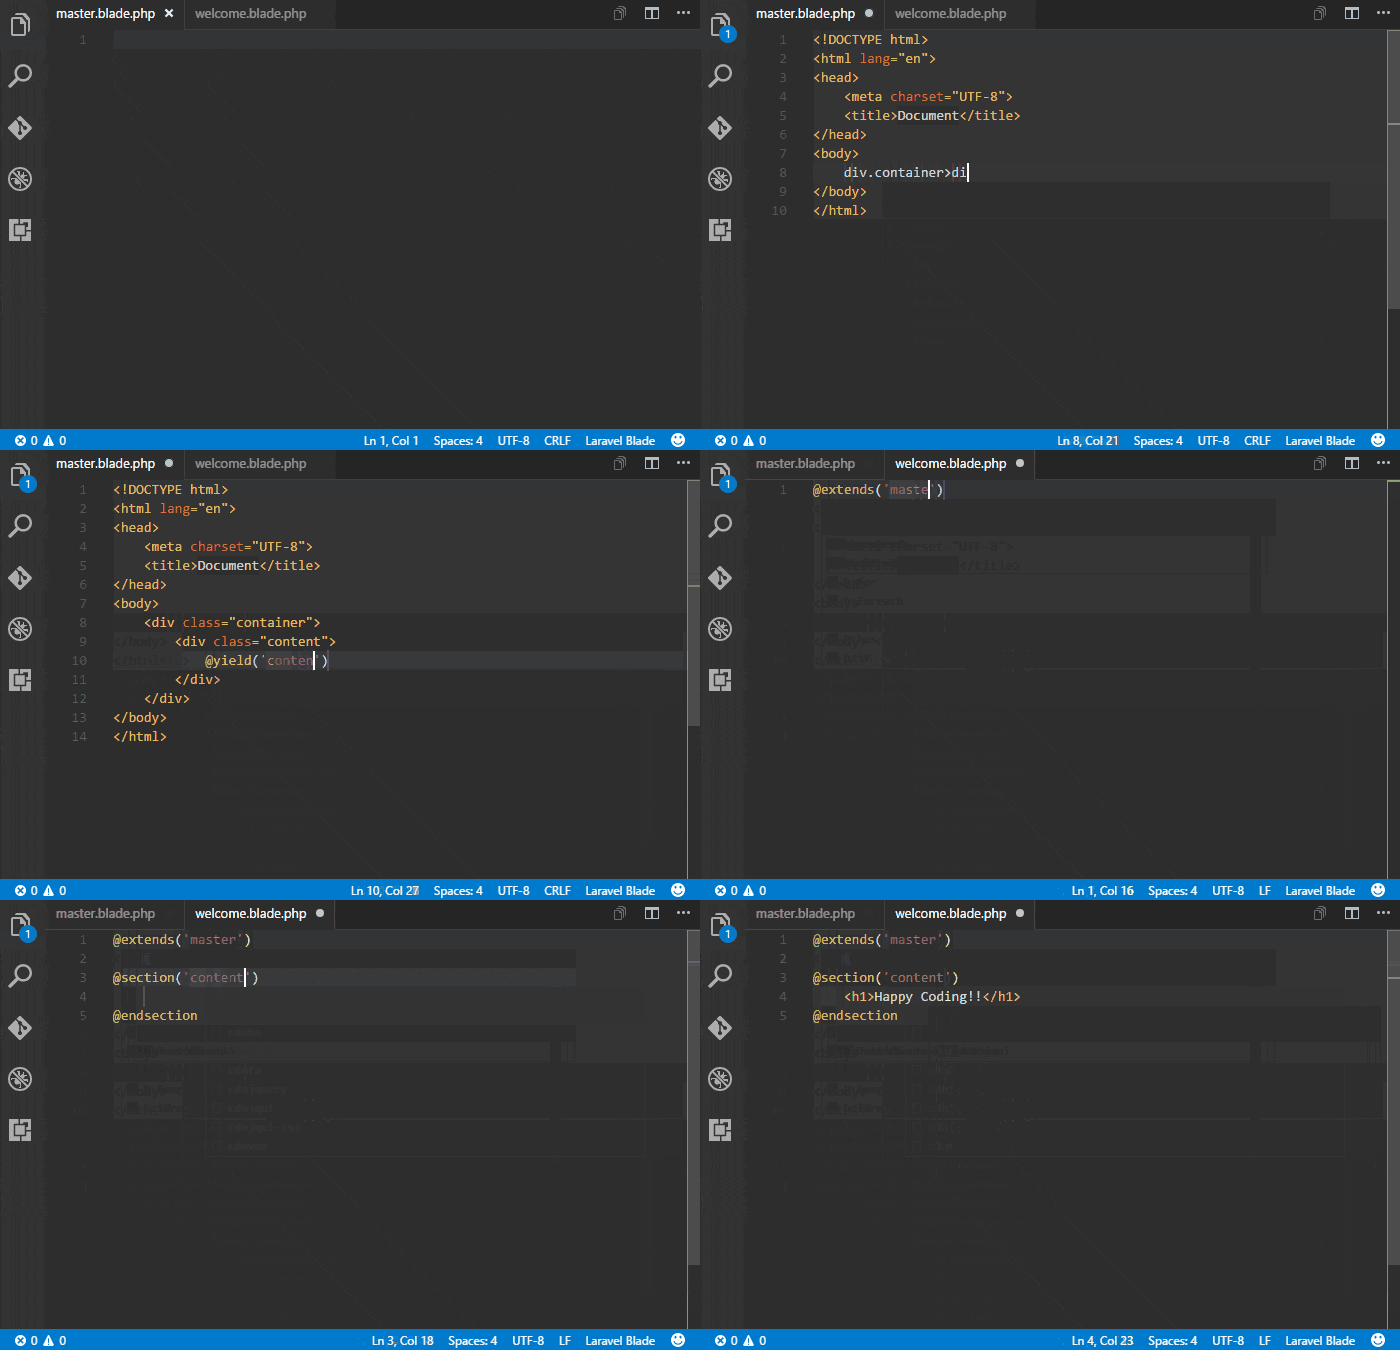
The laravel blade snippet, dotEnv, laravel artisan, go to view, go to controller, laravel extra IntelliSense, PHP debug, PHP IntelliSense, editor config for VScode, are added automatically when the laravel extensions package is installed.
Features
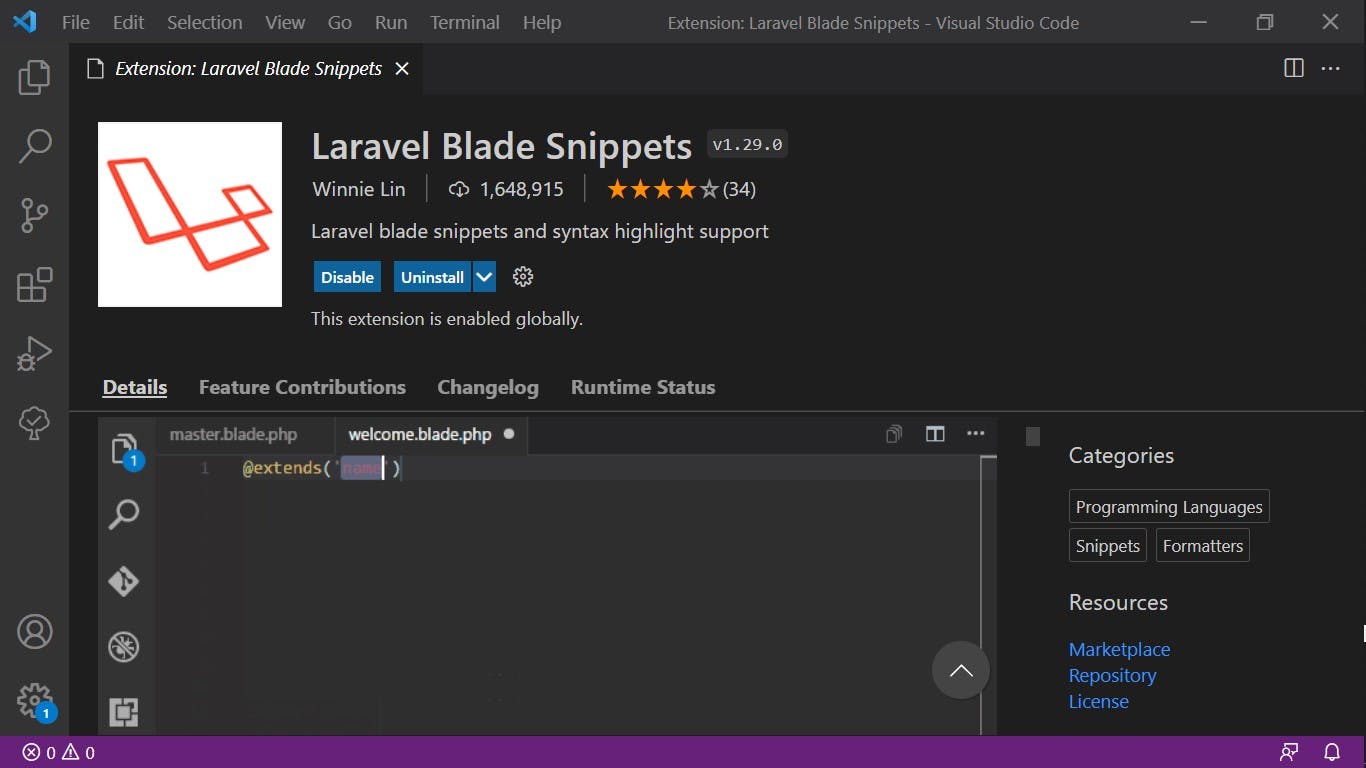
Demo
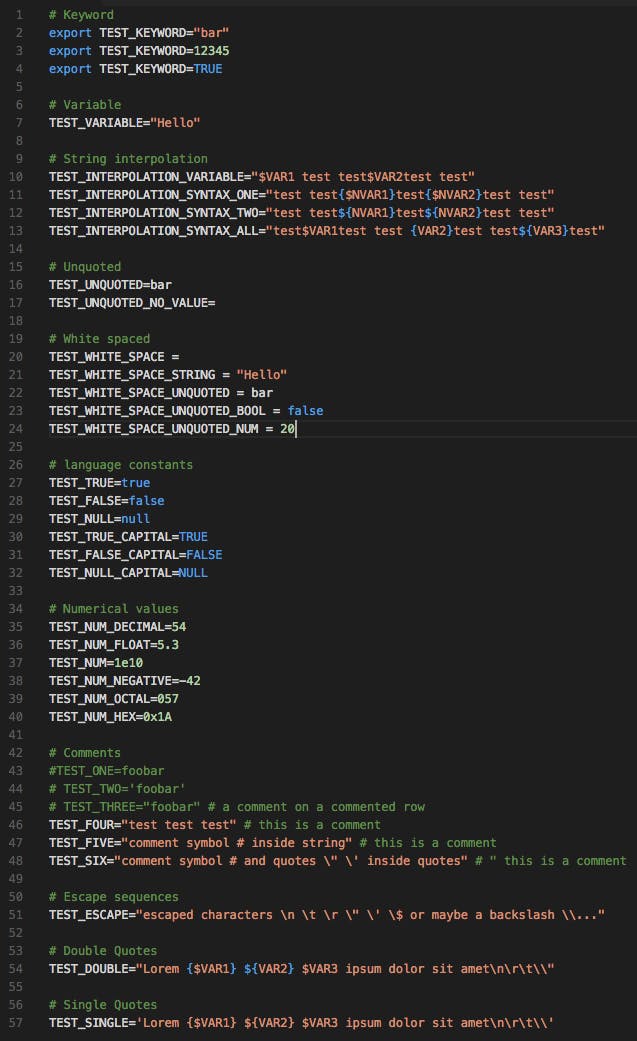
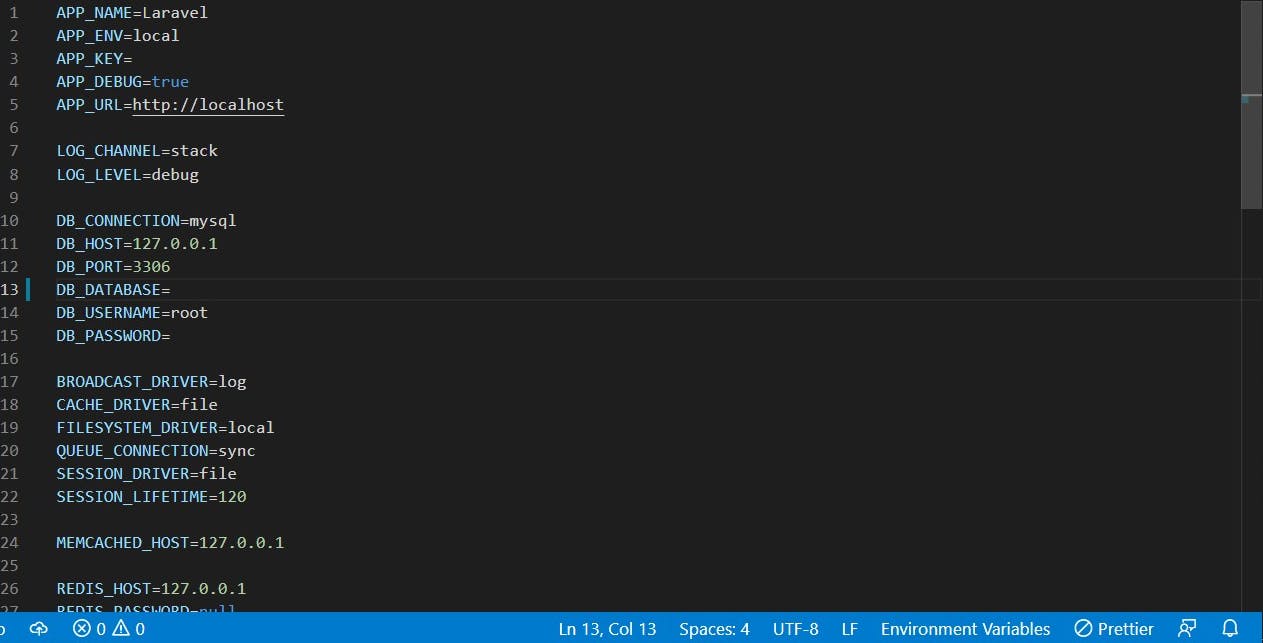
DotEnv Extension has support for highligting .env variables and values
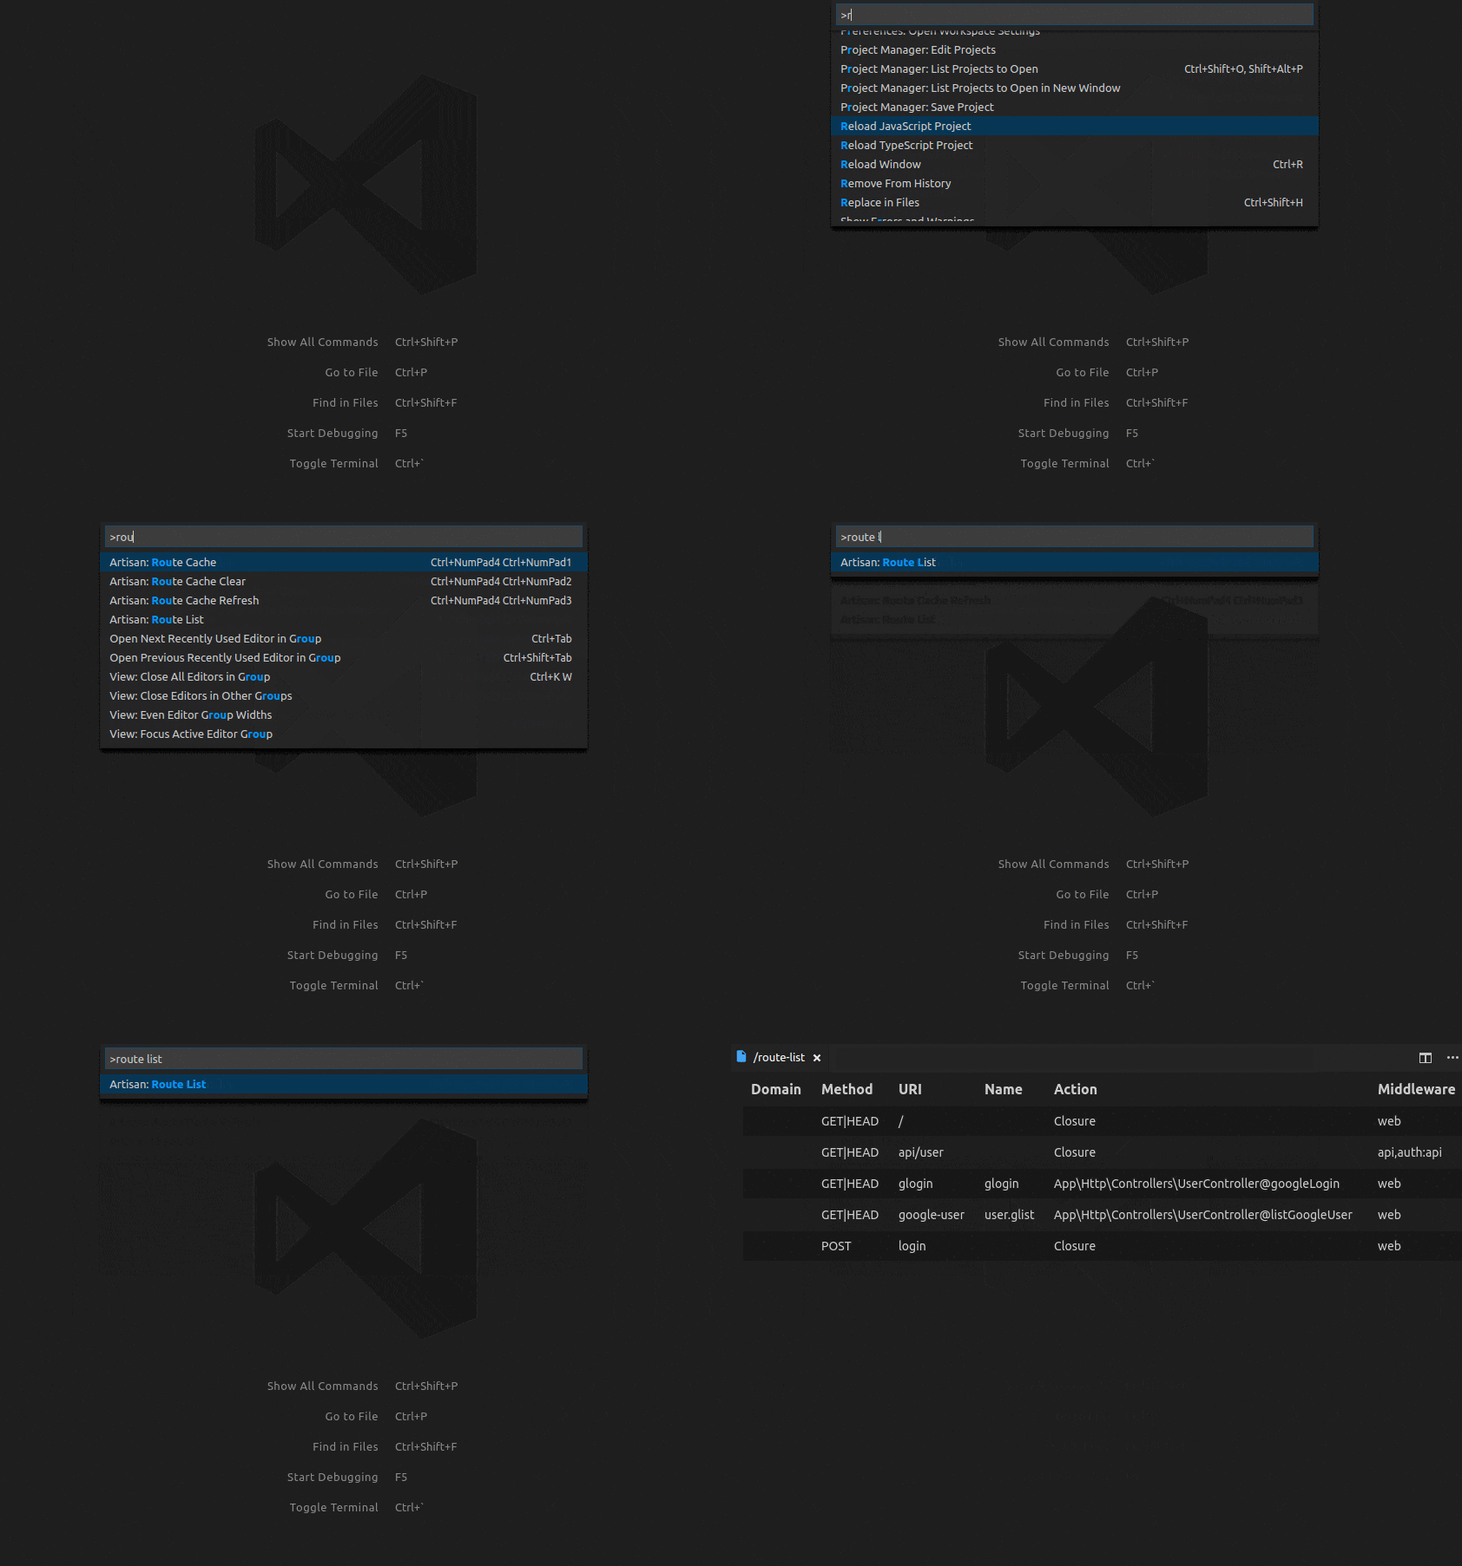
With this extension, we can run laravel commands within vscode and also suggest the list of laravel commands in a situation where a developer cannot recall the command name.
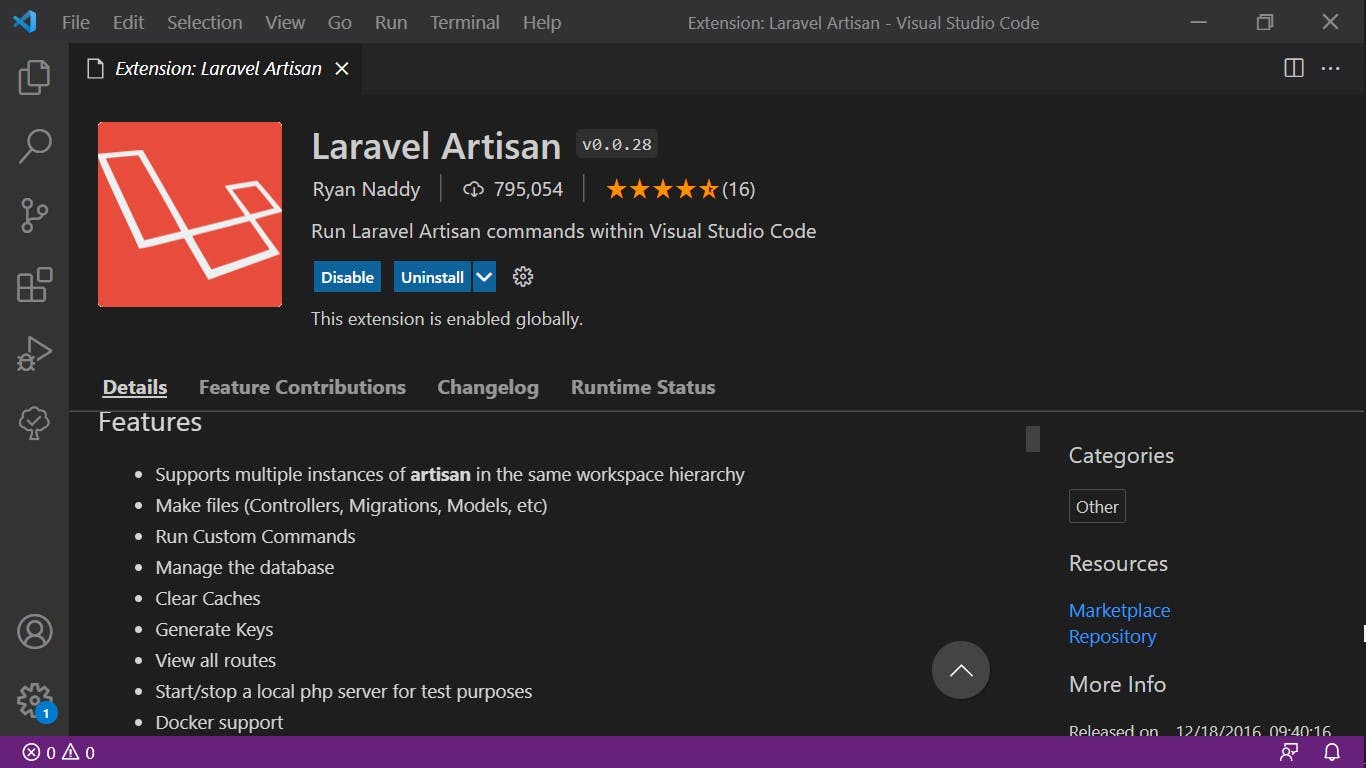
Demo
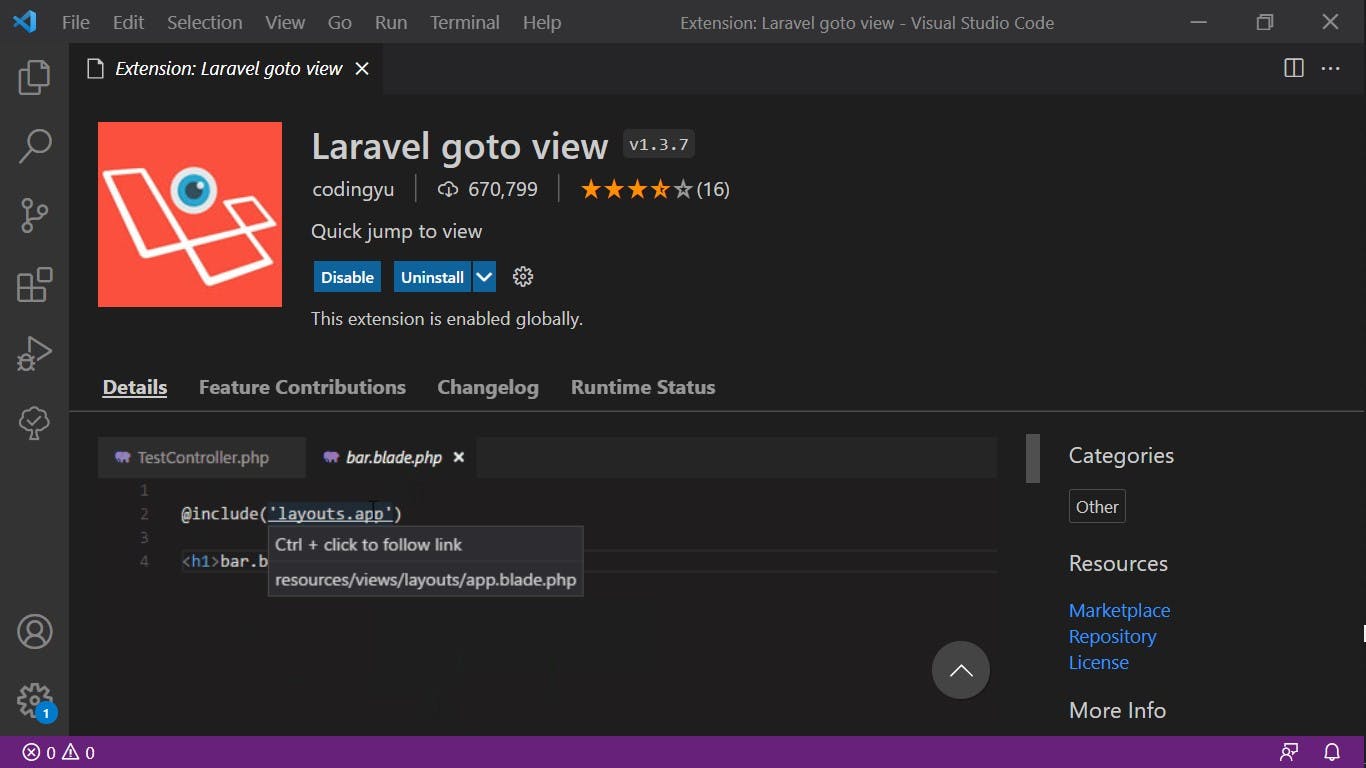
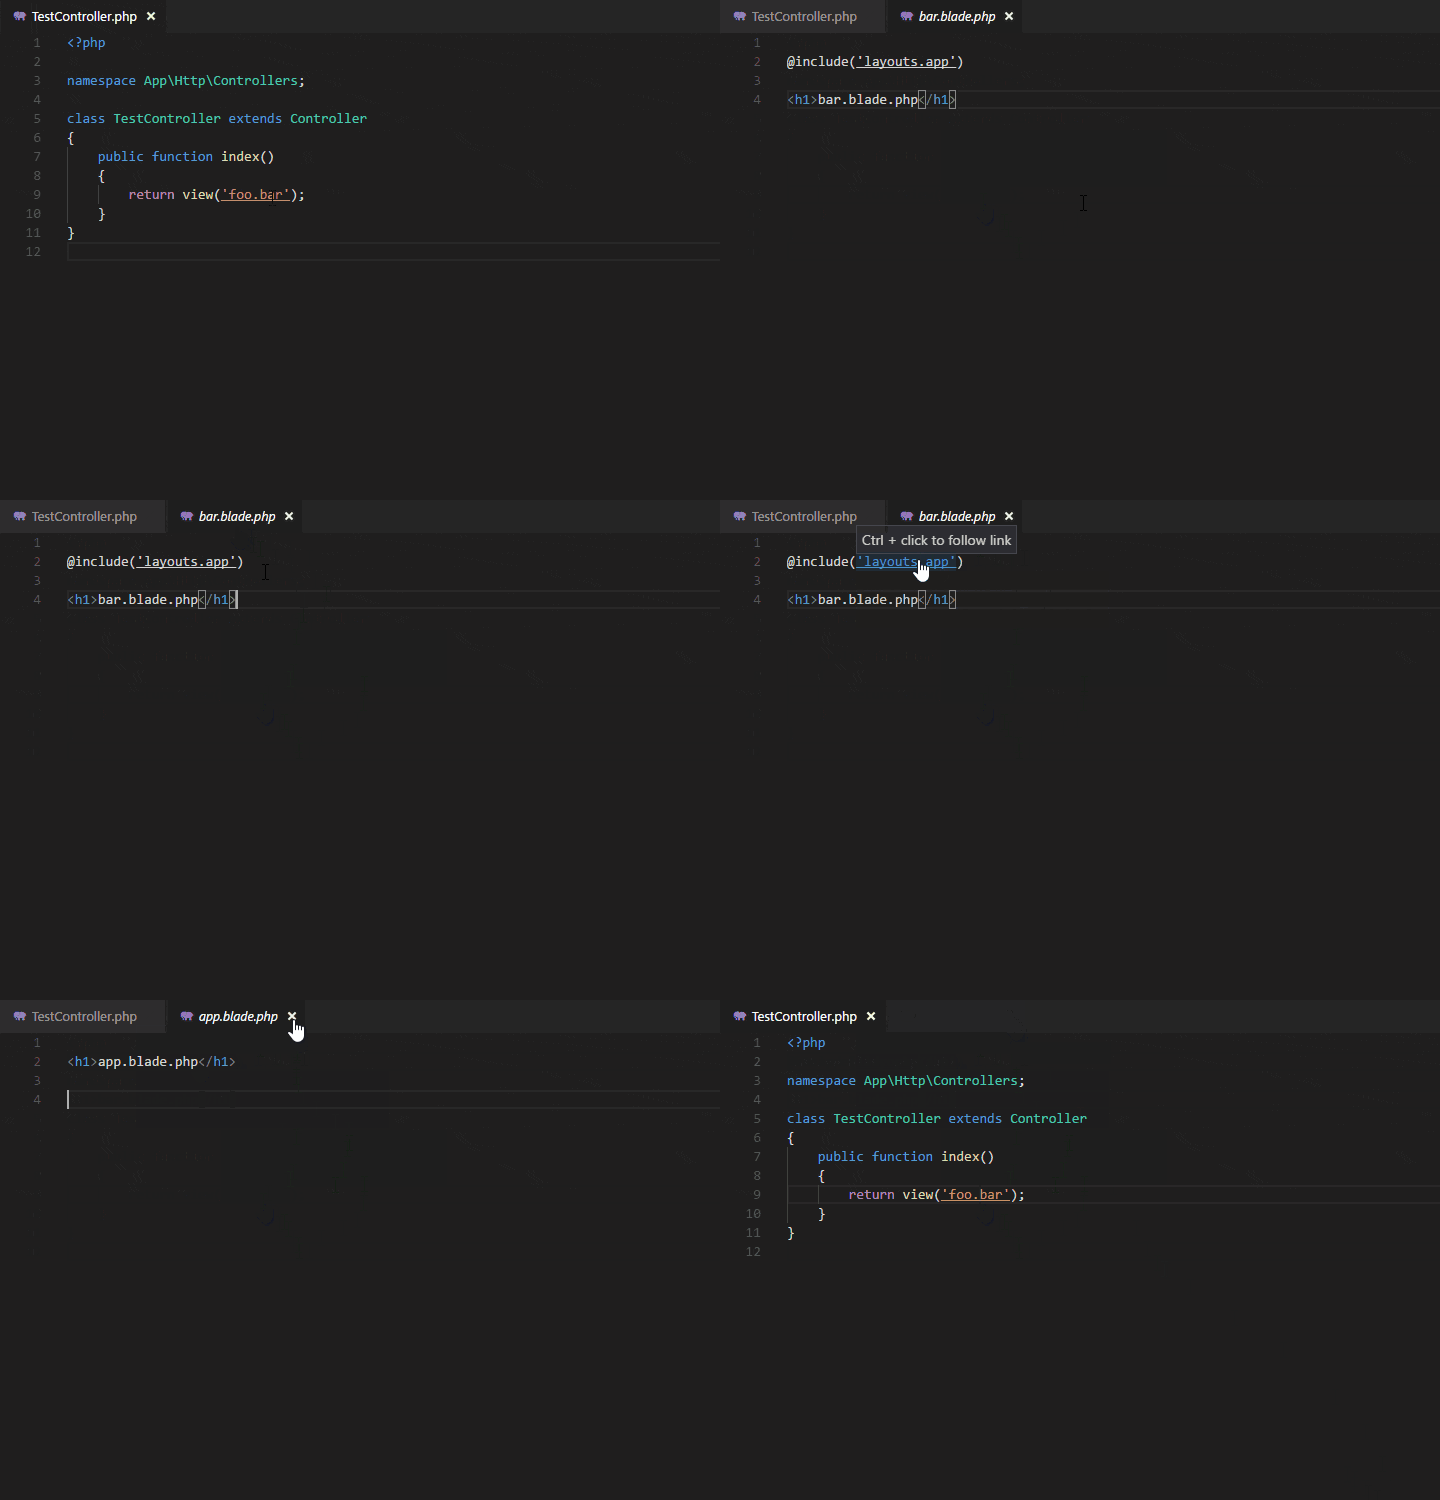
Go to view With this extension, a developer can easily navigate to a file from within the code snippets by holding the ctrl key plus click on Windows.
Demo
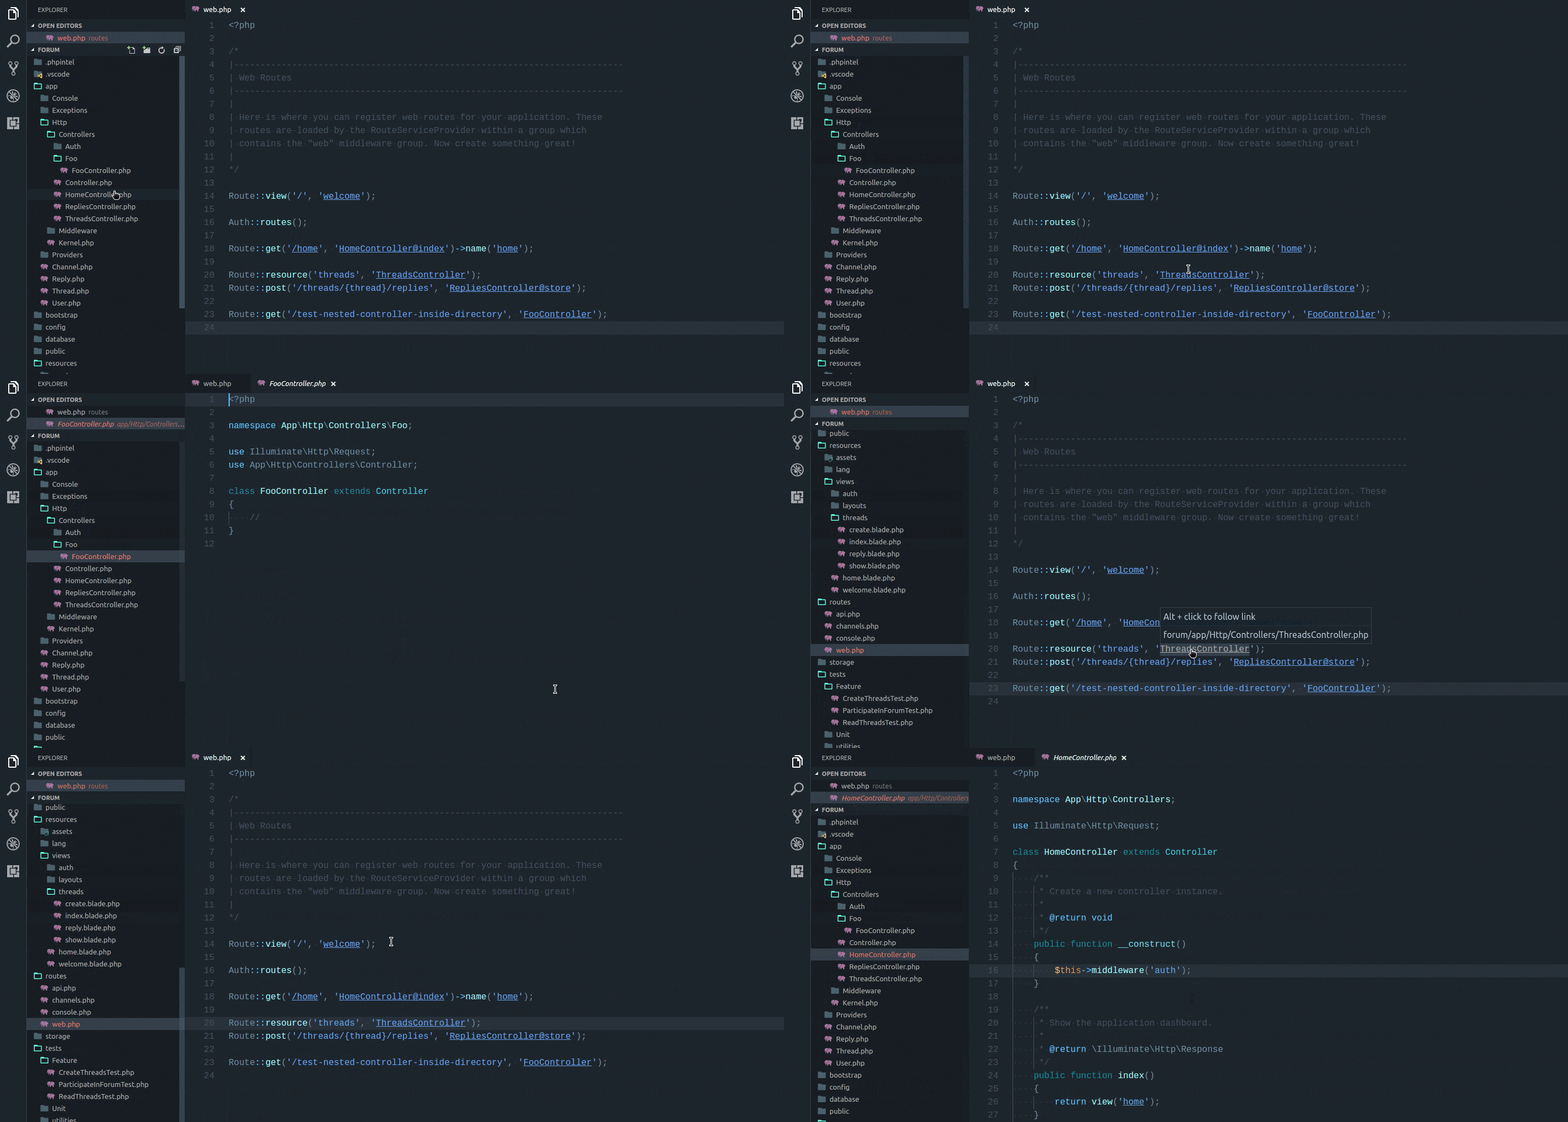
Alt + click to navigate from a route to a respective controller file.
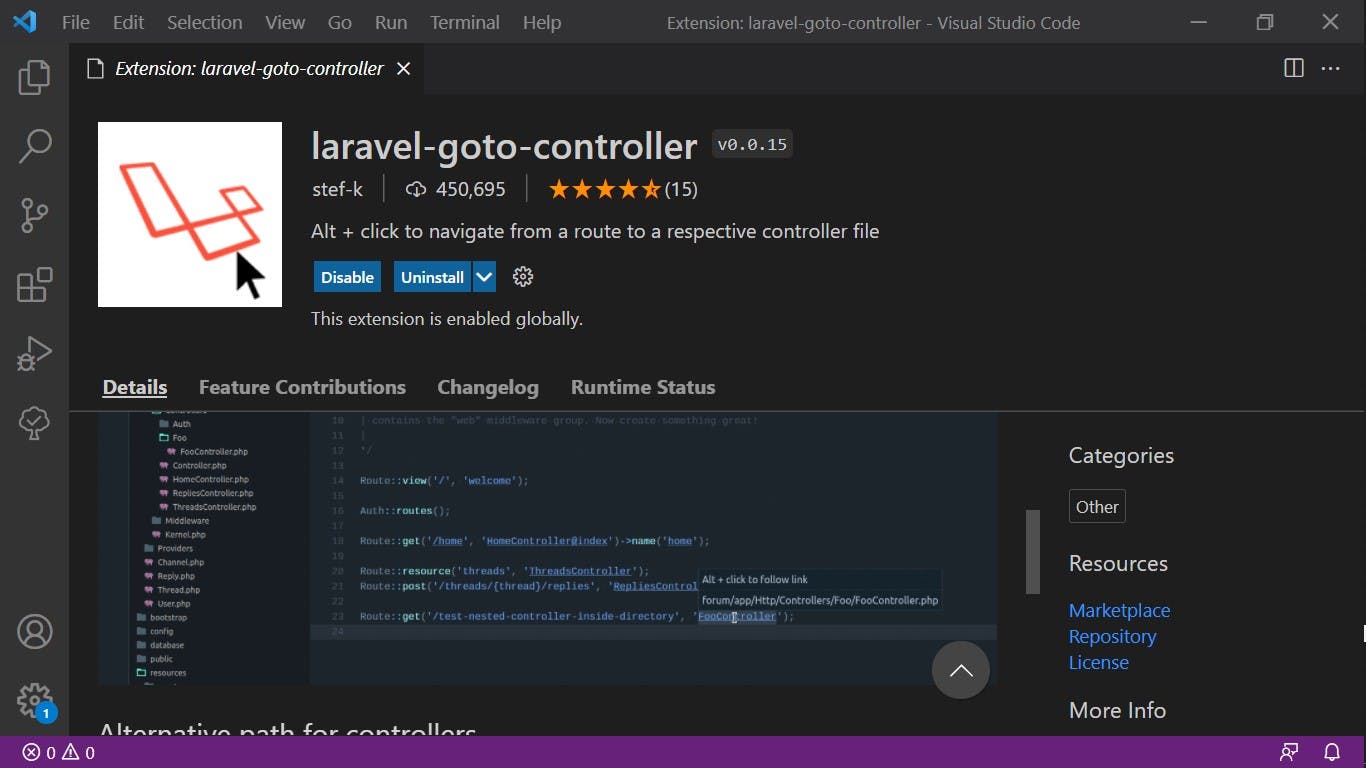
Demo
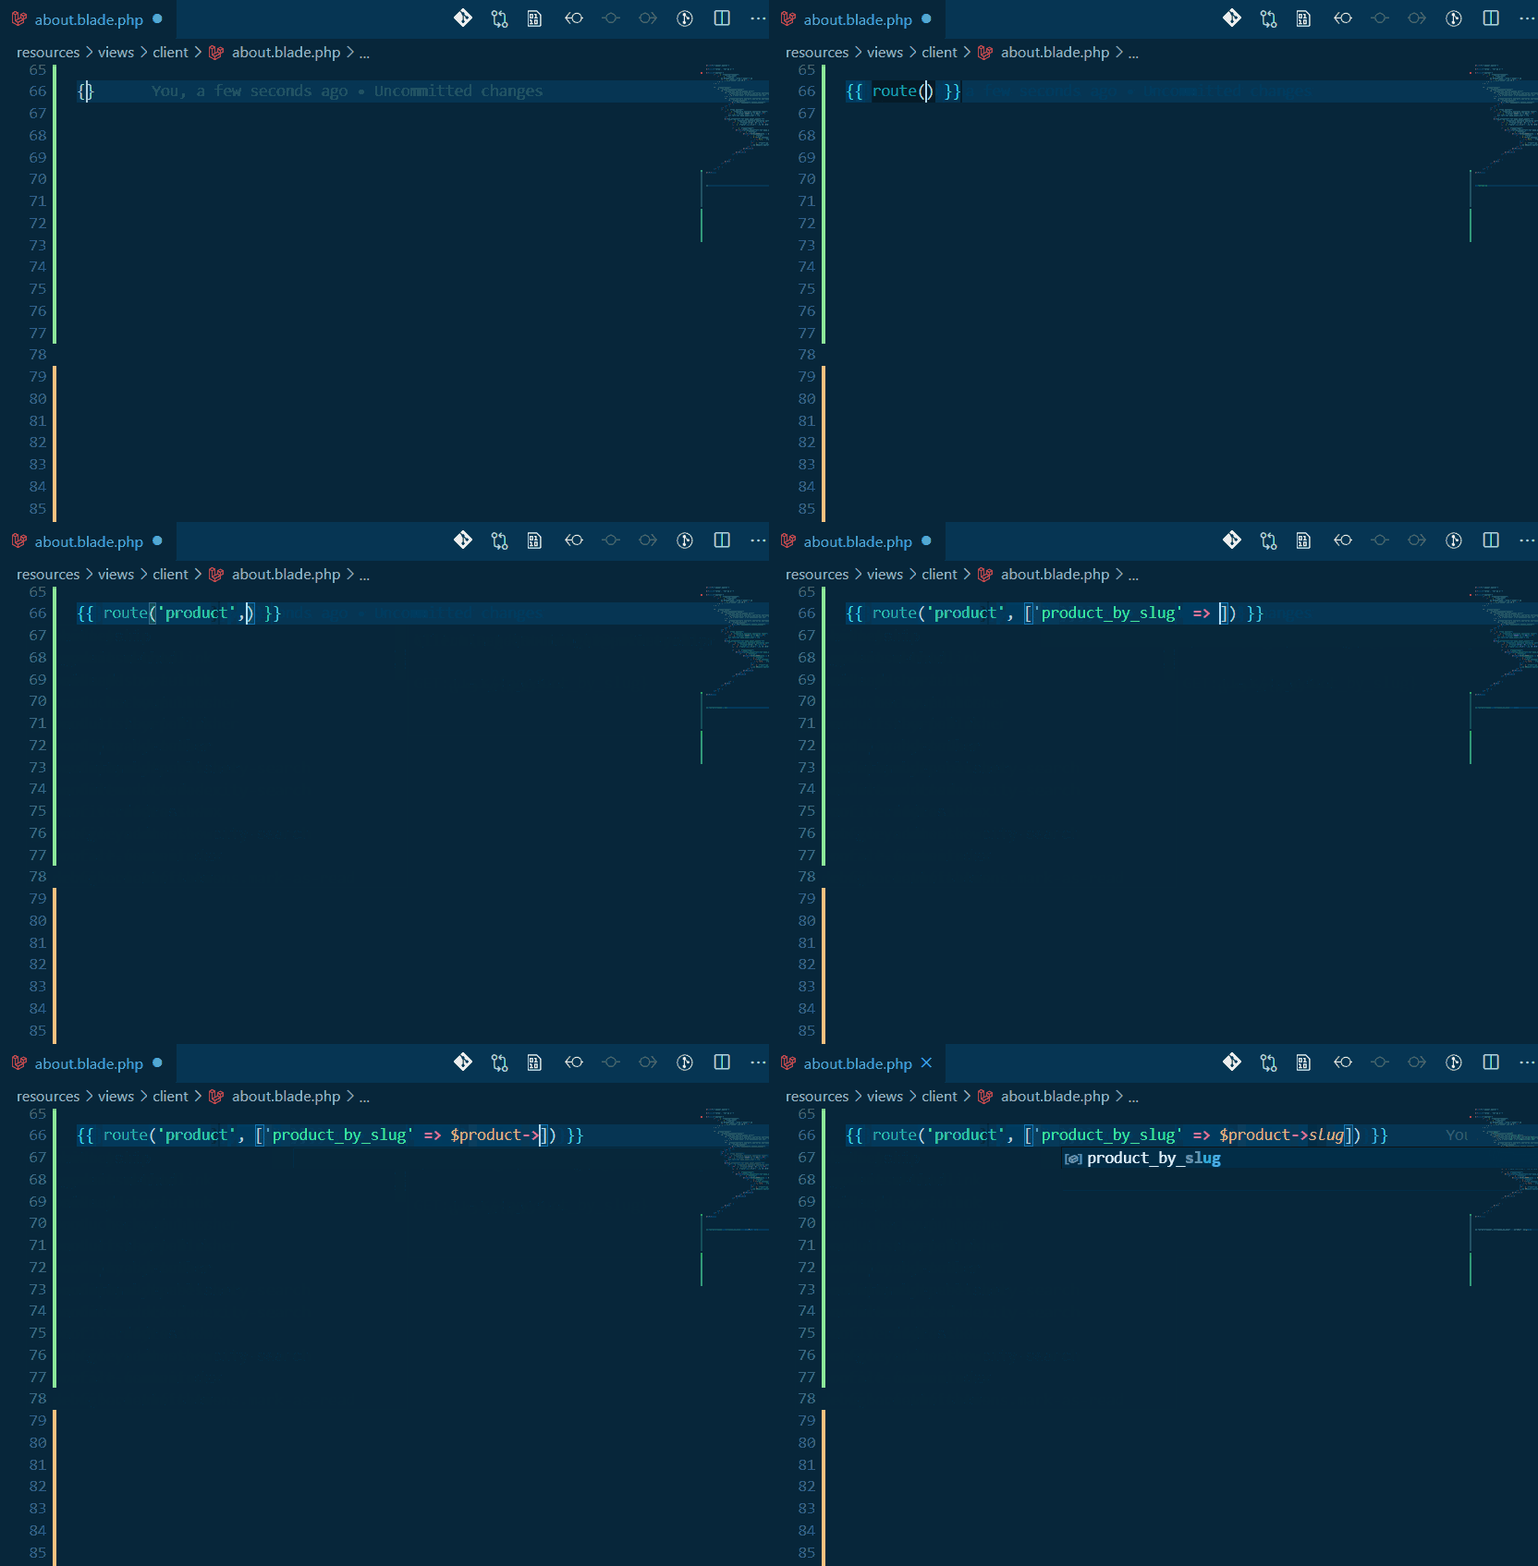
Features
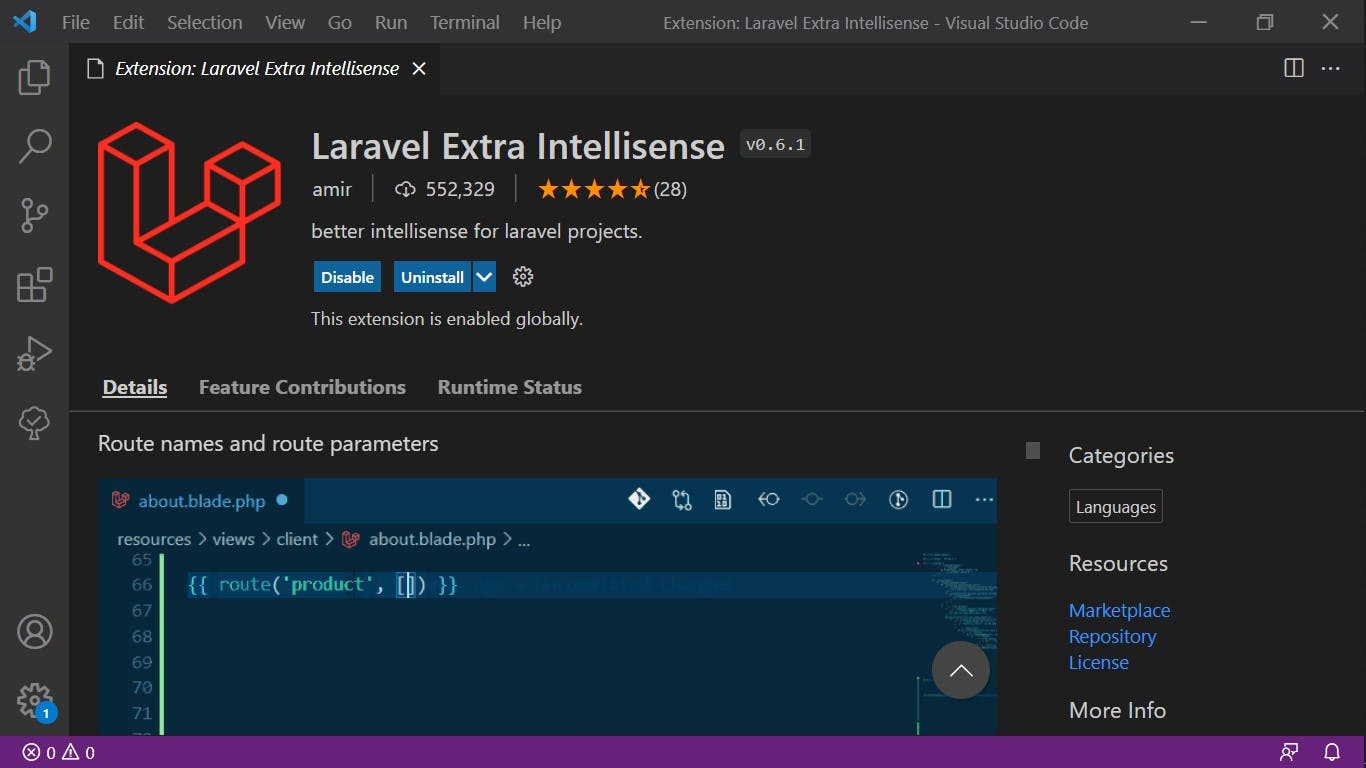
Demo
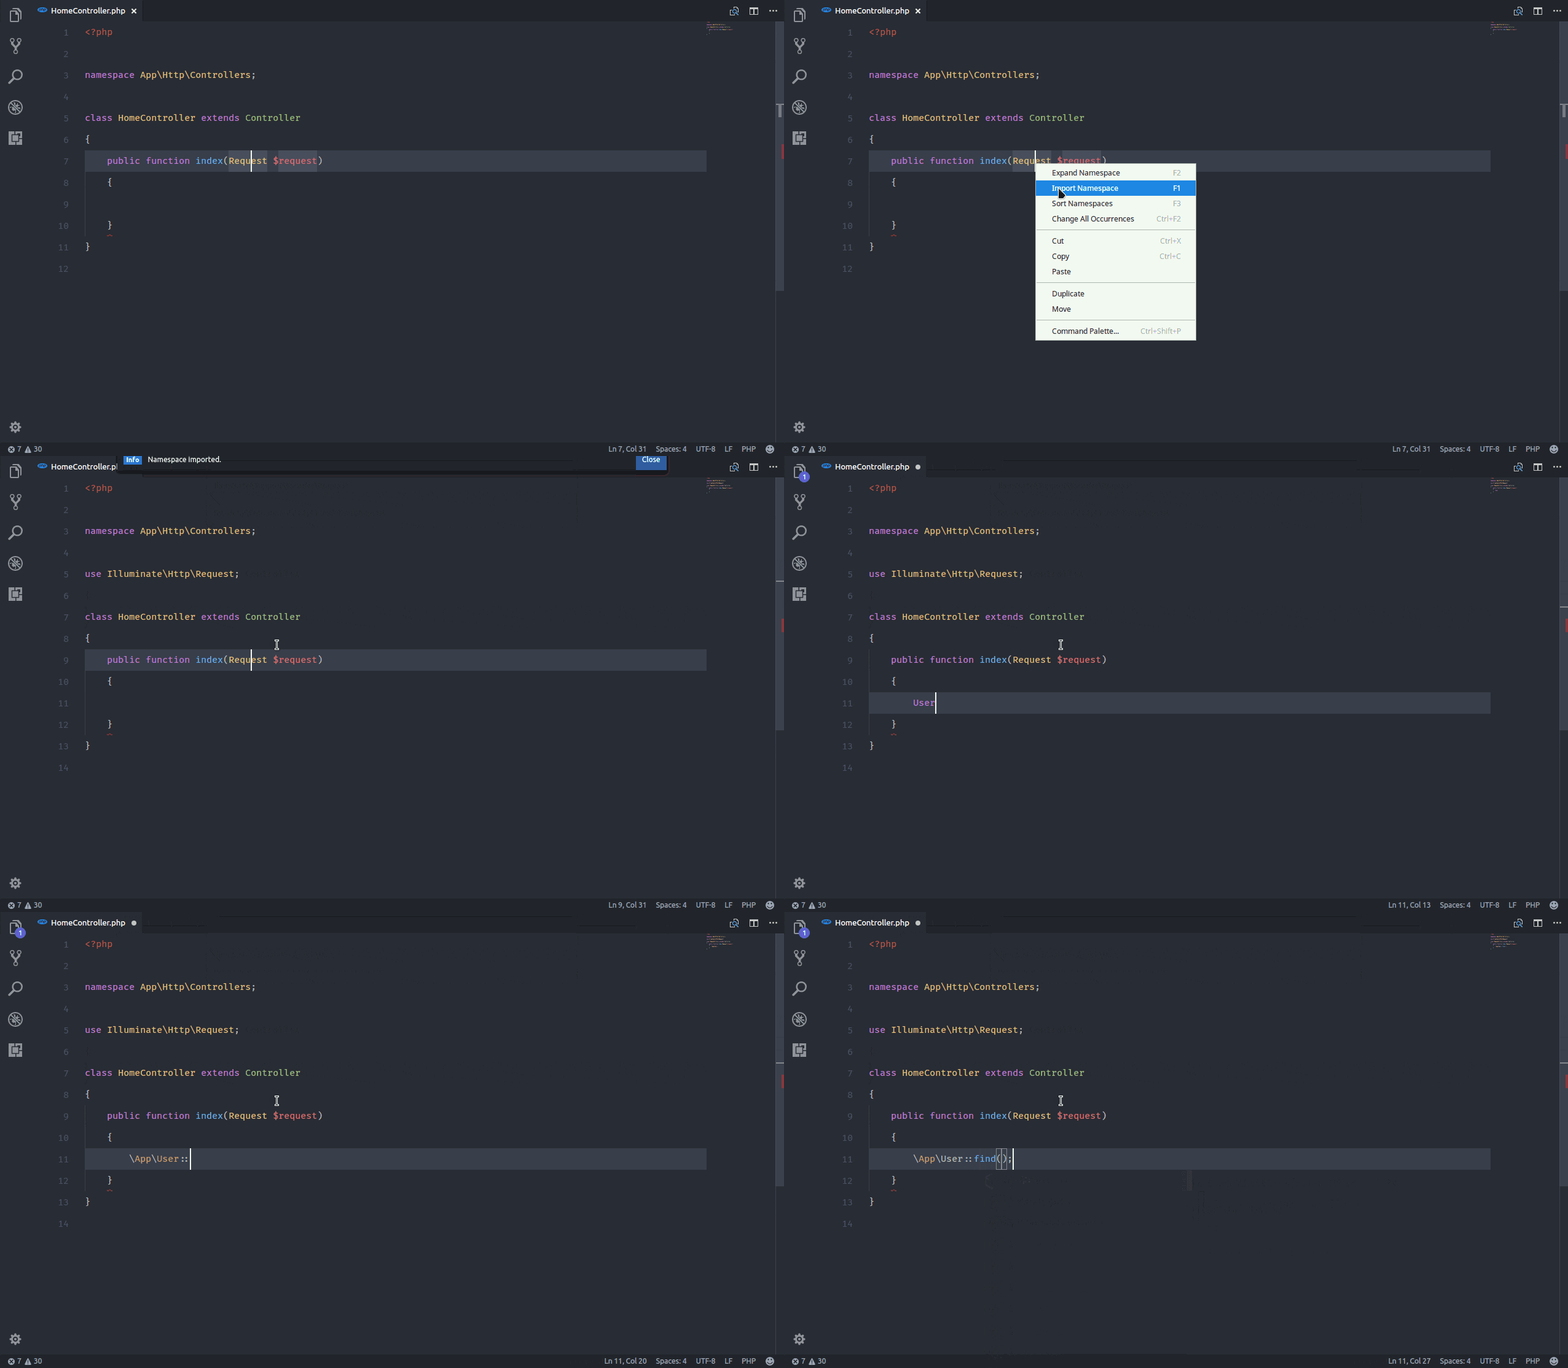
PHP Namespace Resolver can import and expand your class. You can also sort your imported classes by line length or in alphabetical order.
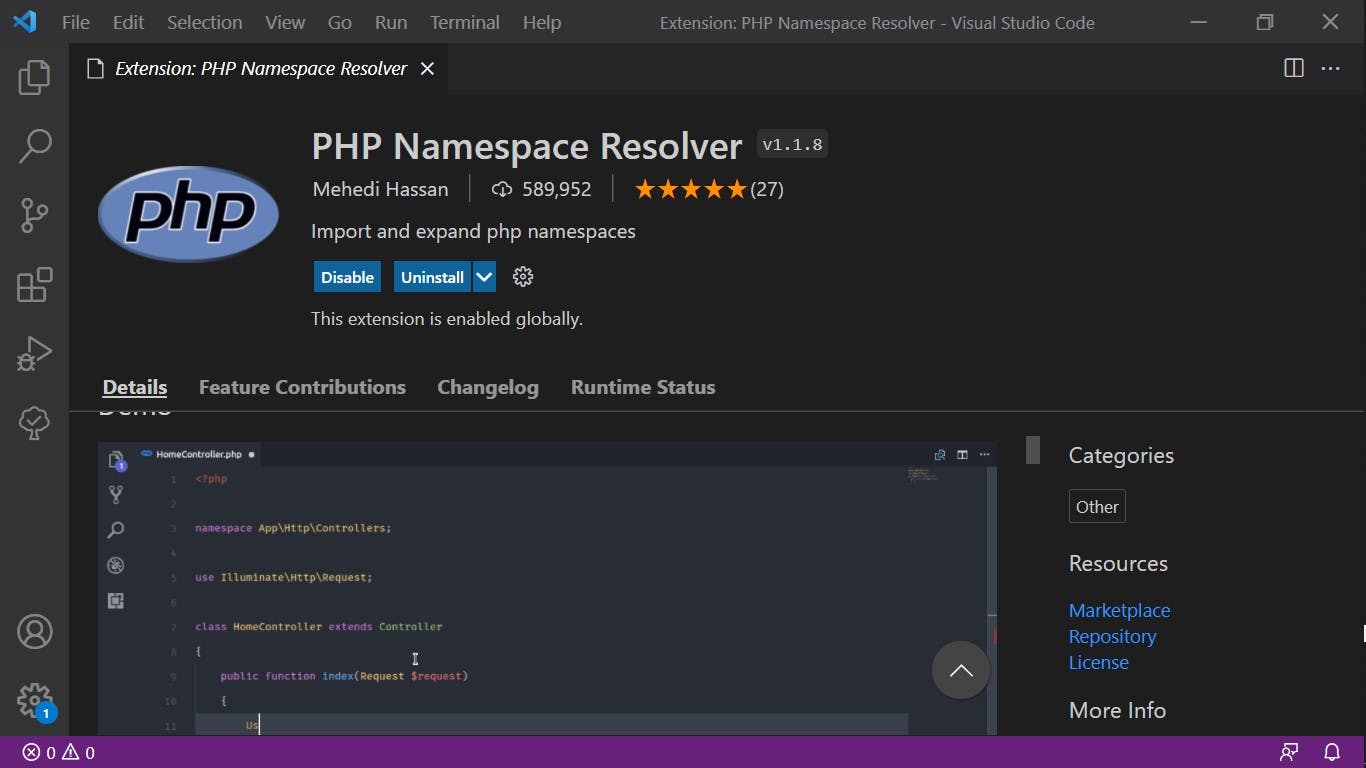
Demo
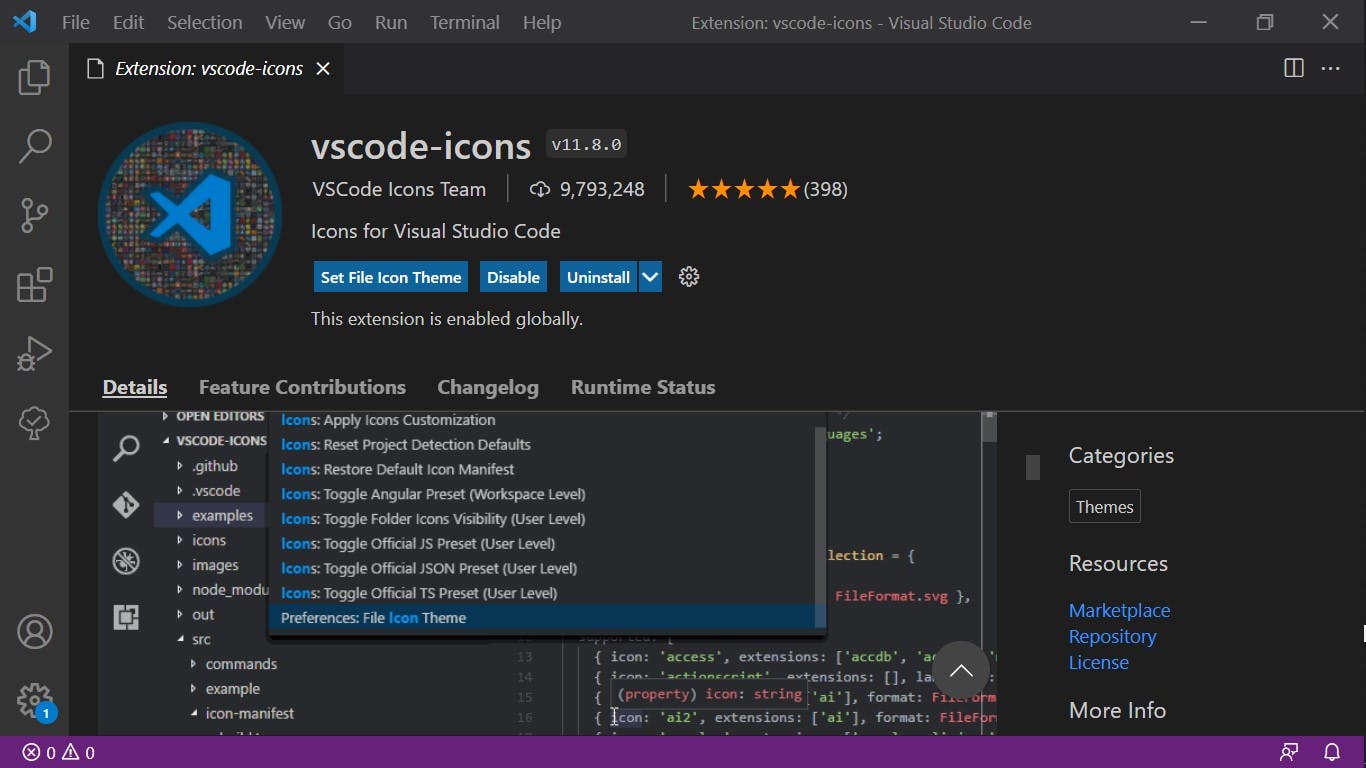
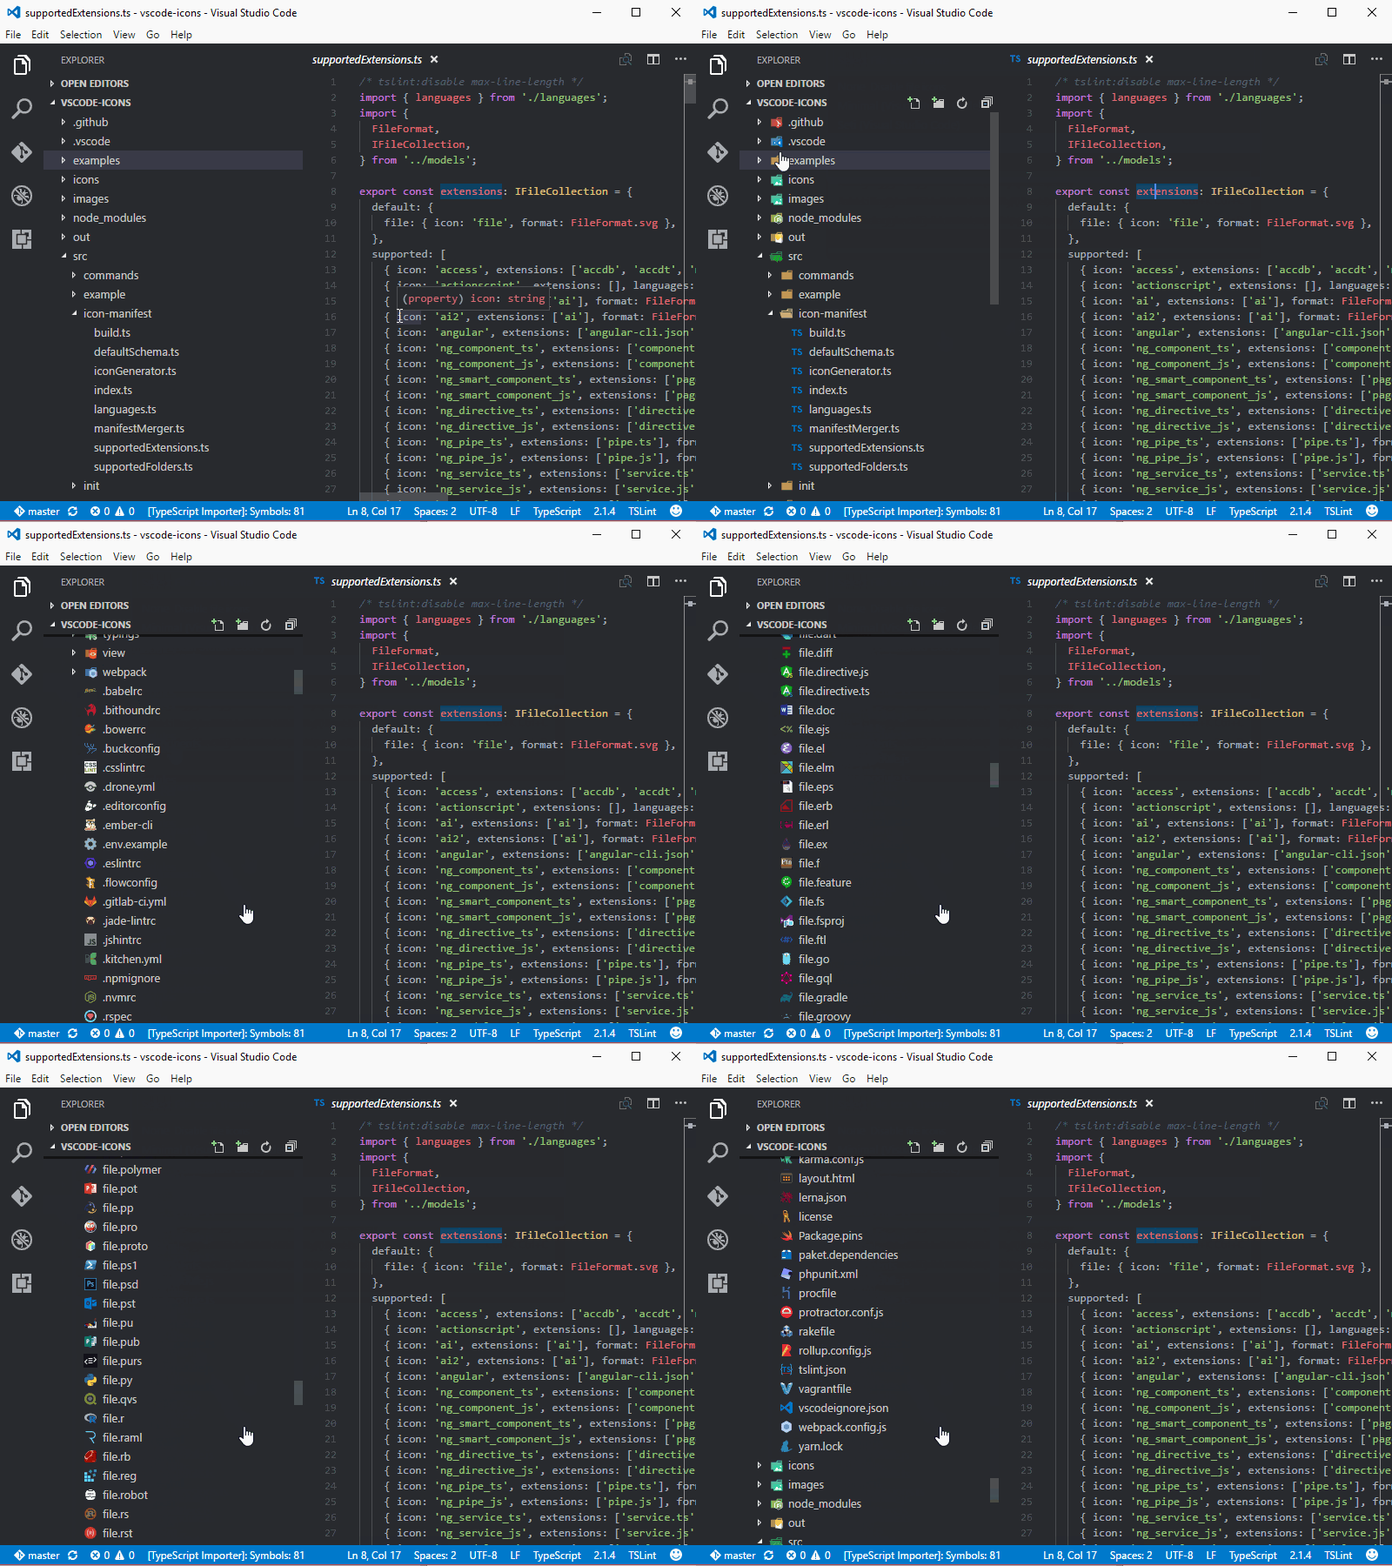
Add beautiful custom icons to folders on the directory
Demo
Features
-
Highlight lines containing diagnostics
-
Append diagnostic as text to the end of the line
-
Show icons in gutter
-
Show message in status bar
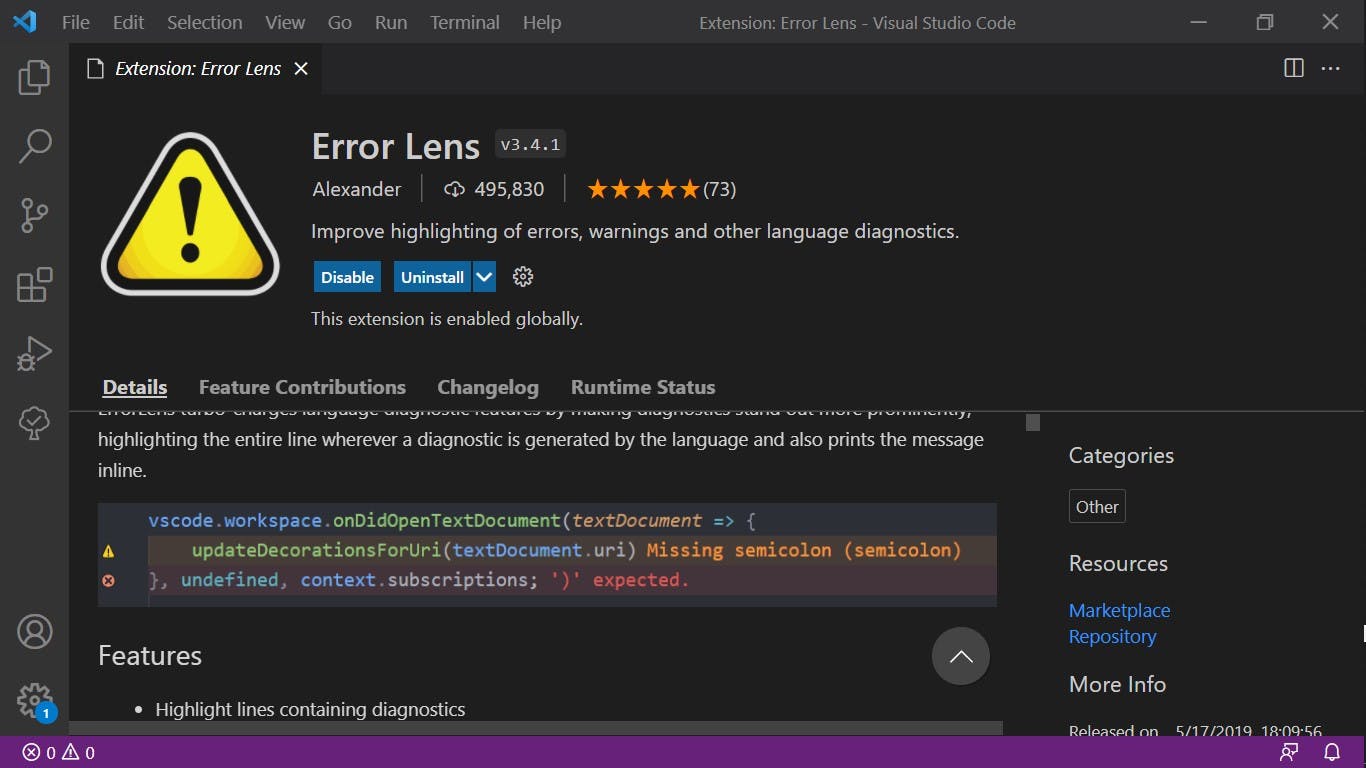
Features
-
Fuzzy-matching autocomplete to create new file relative to existing path (thanks to JoeNg93 for making it faster)
-
Create new directories while creating a new file
-
Create a directory instead of a file by suffixing the file path with / as in somedirectory/ to create the directory (thanks to maximilianschmitt)
-
Ignores gitignored and workspace files.exclude settings.
-
Additional option of adding advancedNewFile.exclude settings to workspace settings just like native files.exlude except it explicitly effects AdvancedNewFile plugin only. (thanks to Kaffiend)
-
Control the order of top convenient options ("last selection", "current file", etc) via config setting advancedNewFile.convenienceOptions
Demo
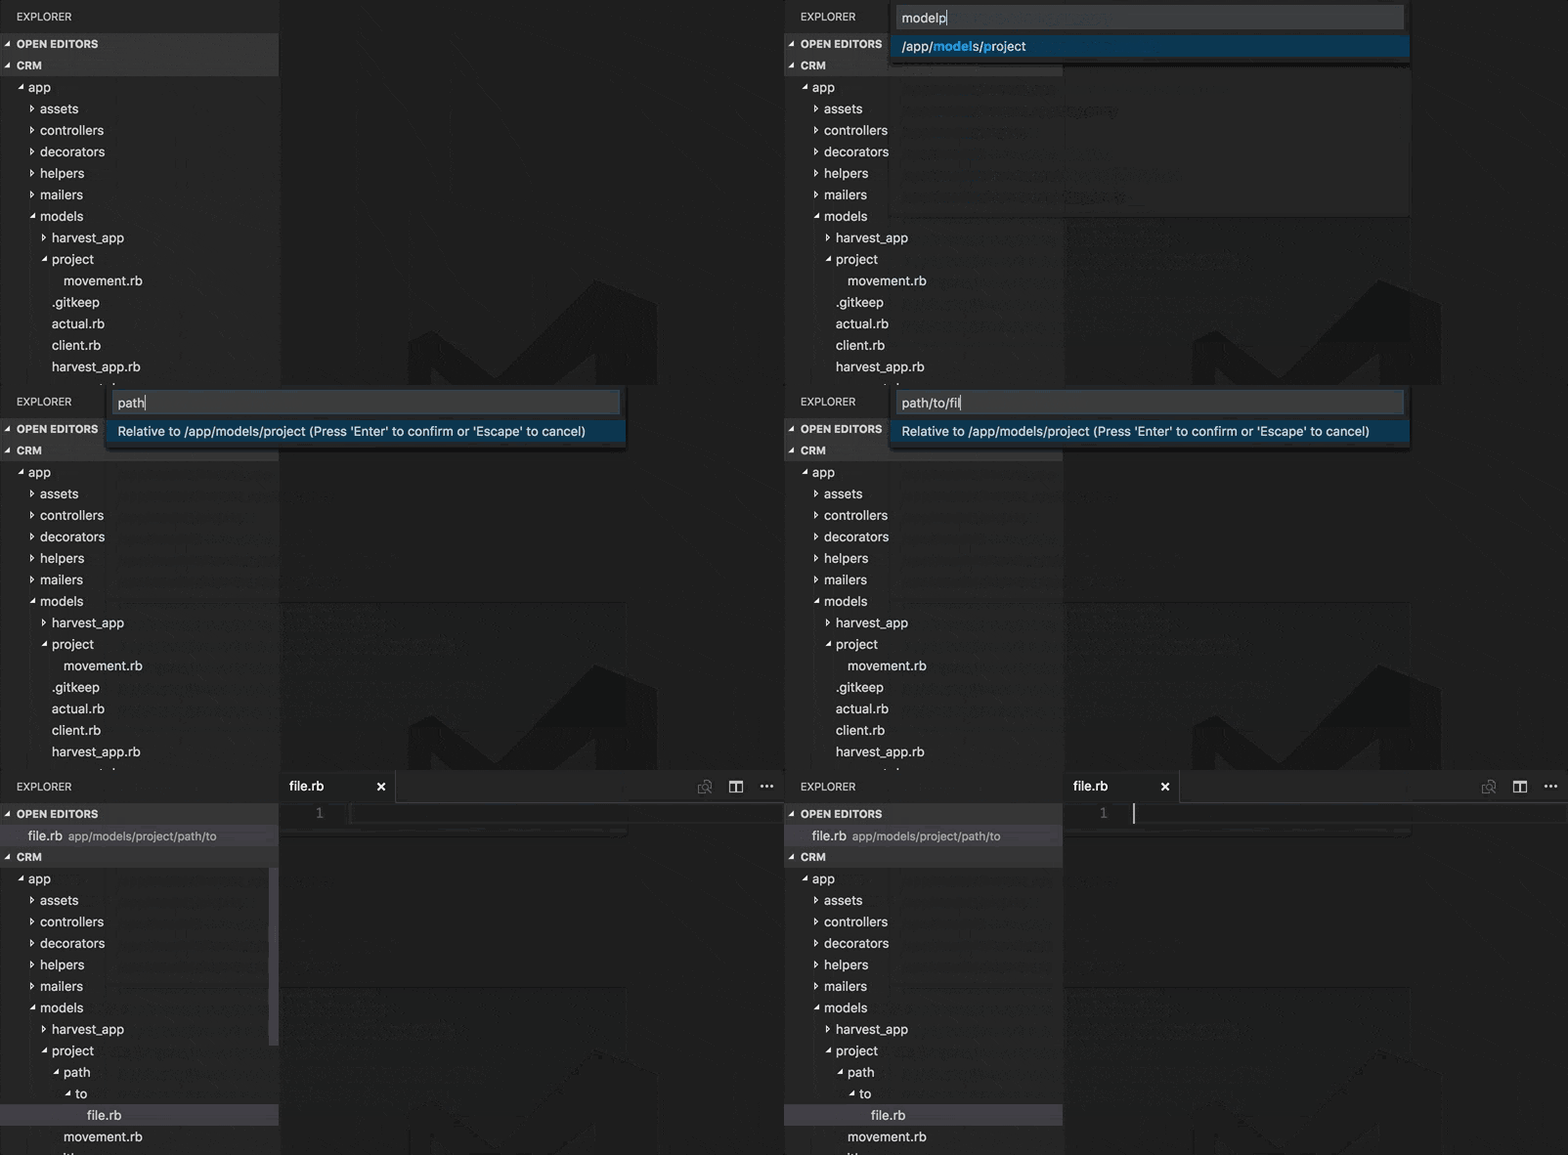
A convenient way of creating, duplicating, moving, renaming, deleting files and directories.
Inspired by Sidebar Enhancements for Sublime.
Demo
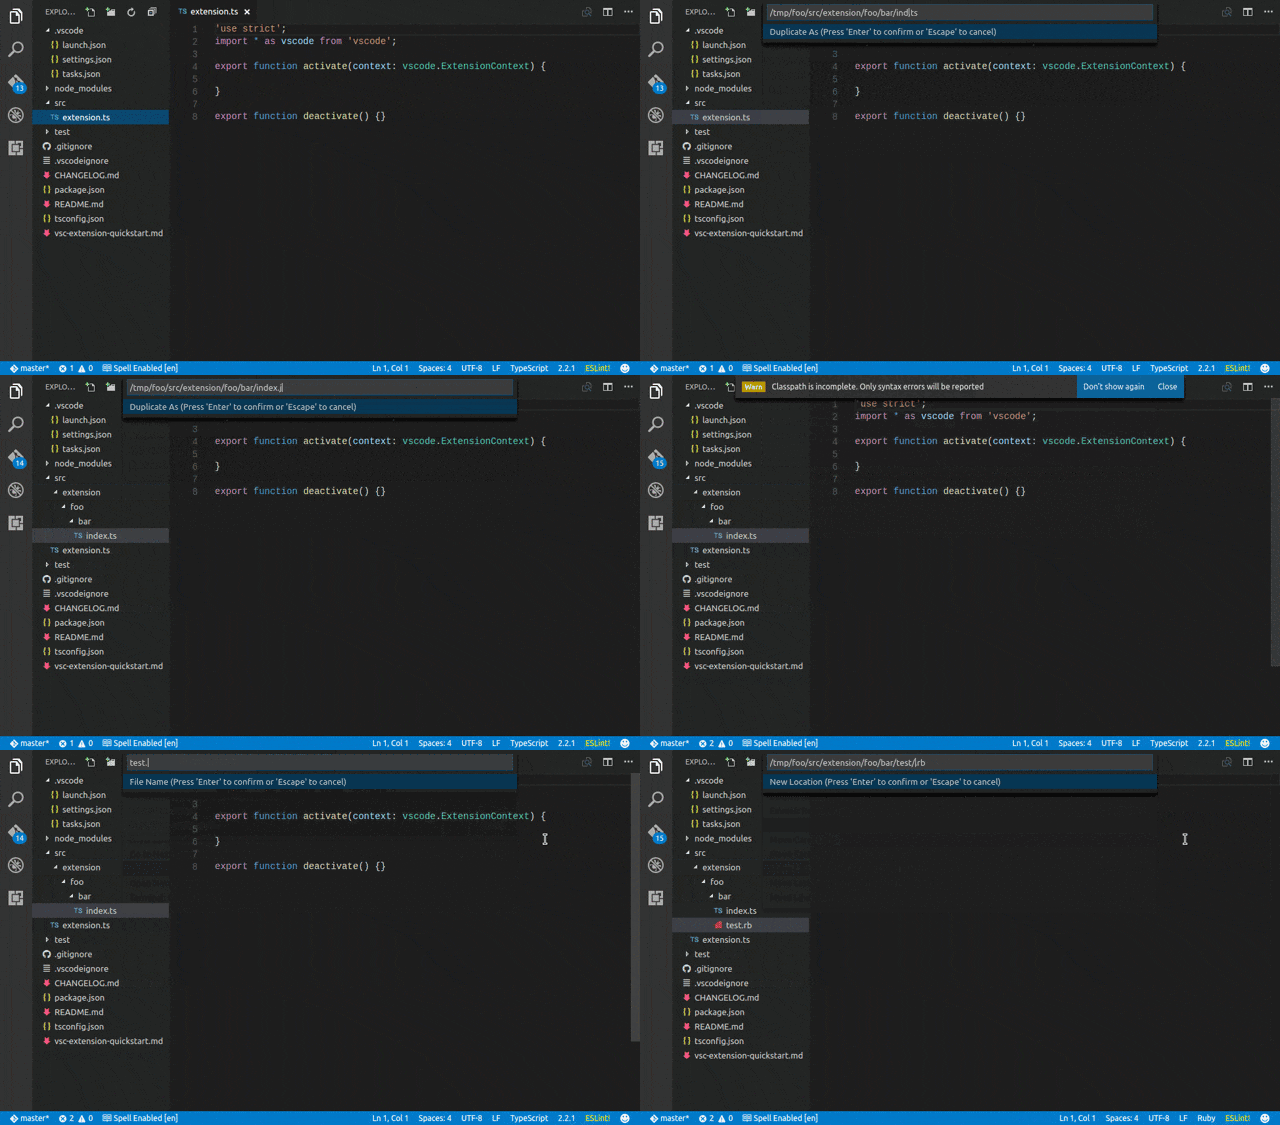
Thank you for reading this article.
Find this helpful or resourceful? kindly like, comment and share.
Check out my Tech Youtube channel for technical contents.
Laravel News Links
A Guide to Better Understanding MySQL Charset Levels
https://www.percona.com/blog/wp-content/uploads/2024/04/A-Guide-to-Better-Understanding-MySQL-Charset-Levels.jpeg We usually receive and see some questions regarding the charset levels in MySQL, especially after the deprecation of utf8mb3 and the new default uf8mb4. If you understand how the charset works on MySQL but have some questions regarding this change, please check out Migrating to utf8mb4: Things to Consider by Sveta Smirnova.Some of the questions […]Planet MySQL
Our favorite pictures from the North American eclipse: DPReview Editors’ Challenge results
https://1.img-dpreview.com/files/p/E~C50x0S2000x1500T1200x900~articles/1396158790/DPReview_eclipse_best_02.jpeg
DPReview Editors’ Challenge results
 |
Last week, we issued a challenge to the DPReview community to show us what you got. We wanted to see your best images from the North American total solar eclipse, and over 150 of you submitted!
We saw heaps of creativity and technical know-how on display. It was also interesting to see all the solar flares that matched among photos taken hundreds of miles apart. Before we dive in, a heartfelt thanks to everyone who submitted. We couldn’t call out every image we liked and tried to restrain ourselves as best as possible (otherwise this article would be four times as long). We should also note that images are presented in no particular order other than to provide an engaging visual flow (so we don’t end up with similar back-to-back photos). If you don’t see your work here today, we encourage you to submit for our next challenge. We love seeing your work!
Also, a quick reminder to keep comments constructive and civil. To be blunt, it’s one thing for editors to receive harsh comments, but it’s another threshold to be rude to people not on our staff who want to make some images and share their work. Rule #1: Be nice. That’s it, there is no rule #2.
Plane over eclipse with sunspots seen in Toronto at 02:35 PM EST, by philmar
 |
It’s not only one of the more descriptive titles we saw, but it’s also a great image.
"Shot with a 10 Stop ND filter," philmar writes, "A plane fortuitously passed through the frame. I did notice plane until I reviewed my shots in Lightroom. Toronto experienced 99.95% of the eclipse but was under thick cloud except for about 20 minutes."
Created on Canon EOS R7 at 400mm with adjustments to color temperature, exposure, texture, clarity, vibrance and sharpening.
Untitled, by Morris0
 |
Totality photographed through light clouds in Del Rio, Texas. Morris0 used a Fujifilm X-H2s with a Fujifilm XF 150-600mm lens. They said they previously used this lens to photograph the 2017 eclipse and "knew that the corona fits nicely at 600mm." The photo was also handheld, as Morris0 had left their tripod at home while racing to catch a flight to see the eclipse from a hotel in Del Rio, Texas.
"Experiencing totality is very special as it’s a stunning sight and you feel it get cold, the birds fly to their nests and everyone around expresses emotional outbursts. I was thrilled that we got to see the eclipse and felt that the clouds added to the look and experience."
"Photography is a passion as are nature and wildlife and blending them drives me. I’ve been a member of the DPReview community since about 2000 and have made many friends here. It has been a pleasure sharing my photos and knowledge with the community."
And then the frogs began to sing, by protapic
 |
Captured at the Holden Arboretum in Kirtland, Ohio, given the title, one imagines the false night tricked some amphibians that day. Captured on a Panasonic Lumix DMC-GM1 with Olympus M.Zuiko Digital ED 8-25mm F4 Pro.
Cloudy Eclipse, by Sam Eileen
 |
Taken in Oneonta, NY, using a Canon EOS Rebel T6 (EOS 1300D) with a Canon EF 75-300mm F4.0-5.6 III lens.
"Edited solely in Photoshop 2023. Brightness & Contrast + 15 Slight curves Vibrance & Sat. +35 Smart sharpened w/ 30% noise reduction."
A truly once in a lifetime photo, by cwatson1982
 |
To hear cwatson1982 tell it, this photo was cobbled together through grit and luck.
"We didn’t seriously prepare … I was shooting through an old adapted Nikon 70-210 F4 and a 1.4x teleconverter at 210mm (on a Panasonic Lumix GH6) and using an ND1000 filter," they wrote.
"To be completely honest, I was just shooting bracketed sets on a tripod at regular intervals hoping like most people to get some decent shots of the eclipse. I did not see the birds until after the capture; it was just a very happy accident. I exclaimed ‘what are the odds of that?’ … I kind of feel like I used up all my luck for the year!"
We hope that’s not true cwatson1982. We’re only four months into the year! Wishing you more luck for the year ahead.
Darkness Above, Sunrise all Around, by JMLobert
 |
It’s a thing of beauty when you see a fisheye lens used well.
JMLobert paired a Nikon Z6 with a Sigma 8mm F3.5 EX DG Circular Fisheye and pulled this eclipse image among the trees.
"Venus visible to the right of the sun and Jupiter to the left. While dark above, there is sunrise and sunset all around the viewer, 60 miles out. It’s an eerie and wonderful experience when it suddenly gets dark, temperature drops and the wind stops."
The final image is a composite image made from multiple exposures.
"To accommodate the changing brightness, I bracketed 9 stops every 30 seconds and changed that bracket by 5 stops up, shortly before totality (then back shortly after). Totality is about 12 stops darker than the sunlit day, just a bit short of the 16 stop light loss going from day to night."
solarEclipse-3, by Wakawaka Studios
 |
This scene with backlight clouds was taken just after totality, as the moon moves past the sun. It was taken in Frisco, Texas, with a Canon 5D Mark III and Canon EF 70-200mm F2.8 IS II USM lens.
Several adjustments were made in Lightroom: contrast -3, highlights -41, shadows +100, clarity +80 and sharpened.
eclipse 2024 Ohio, by deoreo
 |
Taking a more environmental approach to the eclipse, deoreo opted for a wide angle Sigma 14-24mm F2.8 DG DN zoom to pair with a Sony a7R IIIa, outside their home in Akron, Ohio.
The best-laid plans, however, presented some challenges. "I completely underestimated how dark totality would be! I managed to get five photos but had to change ISO, f-stop, and shutter on the fly to get this image. The final image was processed with Photoshop
to lighten up the shadows."
Challenges aside, we asked them how they felt about the result. "I’m glad I was able to include my family in the photo. It will be fun to look back on it in the future to remember the moment, and where we were!"
Sanger Eclipse, by Facyn6
 |
It seems this DPReview shutterbug figured who needs lens filters when you can just slap your eclipse-viewing glasses in front of the lens. It feels risky, but the result is rather nice and stands out amid fellow entries.
"I took this photo in the backyard of my home with eclipse glasses in front of the lens," Facyn6 wrote. "Only cropped for better composition. No any other edit."
Eclispe 2024, by Jason333
 |
This was one of the few smartphone entries that caught our eye. It was created at Niagra Falls in Ontario, Canada, and was taken with a Samsung Note 20 Ultra 5G camera.
DLittle, by Phodougrapher
 |
A partial solar eclipse, as seen from cloudy Winnipeg, Manitoba, Canada. The image was made with a Nikon 1 V1 with an FT-1 adaptor, Nikon 70-200 and Nikon TC -14E II, for an effective focal length of 756mm. The image has been cropped and resized for sharpness in Adobe RAW.
NJ Eclipse 2024, by Holger Drallmeyer
 |
We’ve seen a strong contingent of submissions from New Jersey in this photo challenge (does DPReview need to make a road trip out?). This submission comes to us from The Garden State, a 1-second exposure of clouds whipsing past the solar show.
Captured with a Canon EOS 6D and Sigma 150 – 500mm F5-6.3 DG OS HSM lens with a 16.5 stop ND Filter. Lightroom adjustments to exposure, highlights and shadows.
Untitled, by scottyinfrisco
 |
Taken with a Panasonic Lumix DMC-FZ2500 using an eclipse filter. "I knew [I] needed the most reach, and this, with digital zoom, was the longest lens I had available."
"The image is SOOC JPEG on Standard Highest quality," wrote scottyinfrisco. "Image is completely unedited."
"I know gear drives this hobby, but never underestimate your own skill in making images."
Great advice and execution, scottyinfrisco; we couldn’t agree more.
Untitled, by Kfsumo
 |
Without a doubt, the most creative submission to the challenge. Kfsumo captured this image with a Ricoh GR III in macro mode pointed at a sheet of colored paper. The shadows on the paper were created holes in a metal umbrella above the paper.
The concept is the centuries-old camera obscure, and the execution is great. Well done!
Untitled, by BaronGreenback
 |
Niagara Falls was under overcast conditions, but BaronGreenback still got a shot of the sun just before or after totality.
Taken on a Nikon D850 with Nikon AF-S Nikkor 200-500mm F5.6E ED VR lens.
Eclipse Stages, by NickMammone
 |
A composite image created from 13 images captures the multiple stages of the eclipse.
NickMammone writes: "While the moment of totality is a spectacular moment, there is a lot more to this event than just those 2 minutes. I wanted to capture that in one picture. This is a combination of multiple photos from different stages of the Eclipse. All shot on the same camera, same lens, same location."
Lightroom edits were made to exposure, contrast, whites, blacks, highlights and color temperature. Level adjustments were also made to each picture to blend the edges into the black background.
Breaking Out from Totality, by dan7901
 |
Solar flares are seen as the moon moves past the sun. Captured in Norwalk, Ohio, along the center of the path for totality, with almost four minutes of darkness.
dan7901 used a Nikon D500 with a Sigma 150-600mmlRig Fluid head AD-01 tripod, all equipment they use as self-described amateur wildlife photographers lens and a Smal. The timing was the biggest challenge they faced.
"In order to catch the solar prominences, I needed to remove the filter before the totality and keep the lens unfiltered for a very short time period after totality."
To help with this, they turned to an app that had countdowns for when the sun would enter and leave totality.
"Since I used the timing app, I really rested myself from taking photos during most of the totality period to enjoin the experience, and after the shots right after leaving the totality, I checked some of the shots, and felt satisfied and released!"
2024 solar eclipse from NJ, by kssharma
 |
Cloud cover is always a concern for eclipse viewing, but kssharma took on the challenge by getting creative. A four-second exposure on their OM System OM-1 yielded this dramatic sky scene over Edison, New Jersey.
"The challenge was how to get an interesting eclipse pics as almost everyone would be taking similar pics," they wrote. "Since I love taking long exposure and my OM-1 allows it handheld I thought to give it a try to make the clouds dramatic instead of using high shutter speed to freeze it." From there, they edited the file to give some definition to the clouds, raise shadows and adjust the tonal curve in Photolab 7.
"Photography is my way to meditate. I love exploring small world around us which we can’t see with our naked eyes. To the DPR I just want to say a huge THANK YOU! DPR itself and the members of the community have been a source of inspiration for me."
Thank you
 |
Thank you to everyone who participated. Seriously, how amazing is it to see our fellow DPReview reader’s work? To see all the entries for yourself and vote for your favorites, head over to the challenge now. The complete shooting specs and gear used for each photo in the challenge platform can also be found in the challenges gallery.
If you couldn’t participate in this editors’ challenge, keep an eye out for our next one. We’ll be doing more during the year as we celebrate 25 years of DPReview. Speaking of which, do you have a suggestion for an Editors’ challenge? In the comments, let us know what to do for our next one.
Articles: Digital Photography Review (dpreview.com)
Decathlon X Outercraft HydroBike
https://theawesomer.com/photos/2024/04/decathlon_outercraft_hydrobike_t.jpg
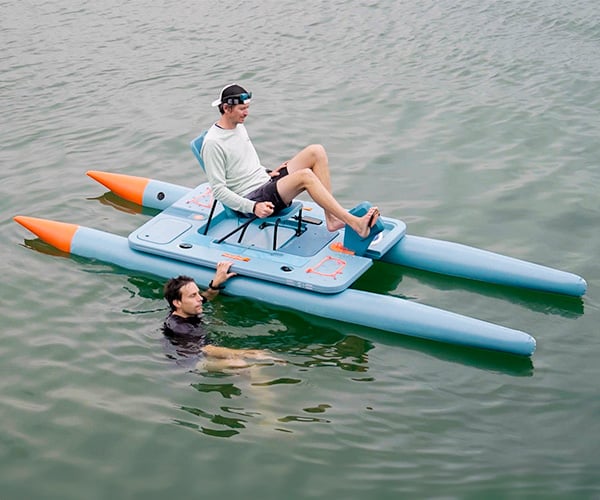
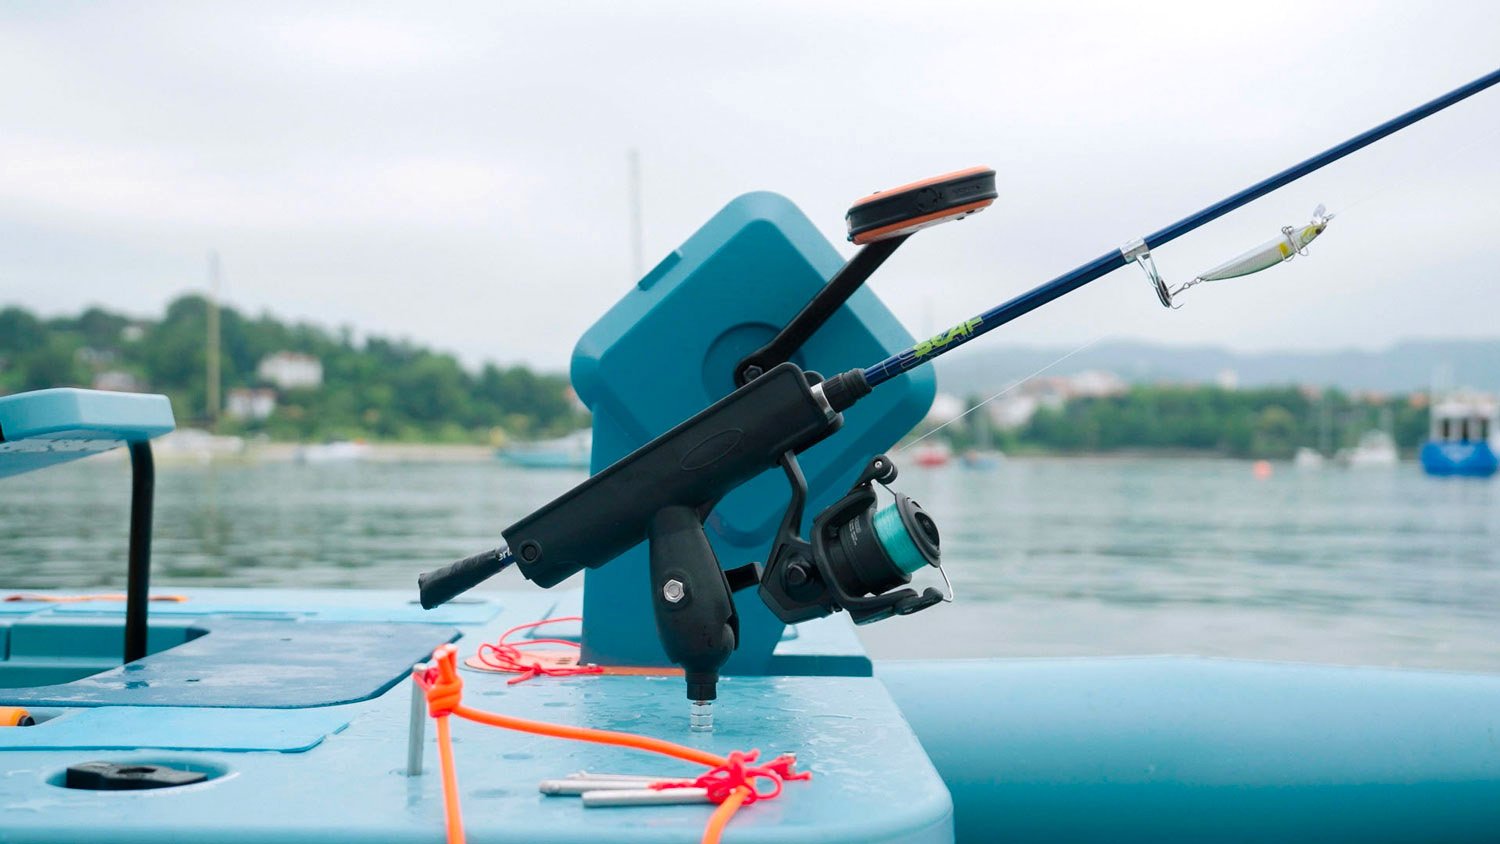
Don’t have the balance to use a stand-up paddleboard? Decathlon teamed up with Outercraft to design the Hydrobike – a unique watercraft that combines a paddleboard, pedal boat, and catamaran. It has inflatable floats, a single-seat, and modular storage for outdoor gear. It’s a proof-of-concept at this point, but we hope to see it go into production.
The Awesomer

