https://www.louderwithcrowder.com/media-library/eyJhbGciOiJIUzI1NiIsInR5cCI6IkpXVCJ9.eyJpbWFnZSI6Imh0dHBzOi8vYXNzZXRzLnJibC5tcy8yNzI1NjExMi9vcmlnaW4uanBnIiwiZXhwaXJlc19hdCI6MTYzMjAzMTM3Mn0.hoK4La1Gic-Tc0bfPSPTJ__NAG6BichSlJtOGRyBts4/image.jpg?width=980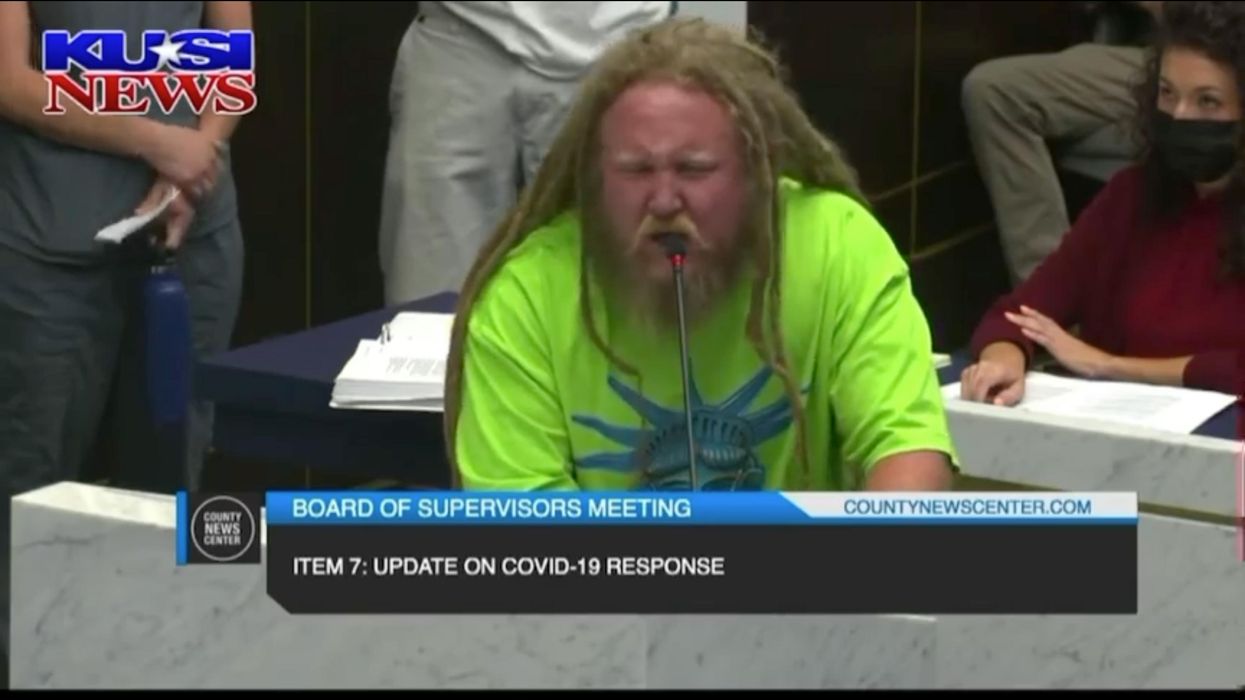
Yesterday I saw a meme that read something like "I now know which of my neighbors would’ve turned in Anne Frank to the Nazis." COVID-19 has revealed who can be trusted, and who is a snitch to the authorities. One could argue our C-Nazis readily identify themselves in public. The unidentified man in the video I’m about to drop on you took the Nazi comparison two steps further. He is the level of angry everyone should be.
For the record, I tried to find the raw file for this, but JP’s video will have to suffice.
"Have you been a good little Nazi and gotten the vaccine? Hail Fauci! Hail Fauci! Hail Fauci!"
He then accused the Board of Supervisors in what I believe is San Diego, of violating the Nuremberg Code. That’s a new one. So I looked it up. Here’s article one:
The voluntary consent of the human subject is absolutely essential. This means that the person involved should have legal capacity to give consent; should be so situated as to be able to exercise free power of choice, without the intervention of any element of force, fraud, deceit, duress, overreaching, or other ulterior form of constraint or coercion; and should have sufficient knowledge and comprehension of the elements of the subject matter involved as to enable him to make an understanding and enlightened decision. This latter element requires that before the acceptance of an affirmative decision by the experimental subject there should be made known to him the nature, duration, and purpose of the experiment; the method and means by which it is to be conducted; all inconveniences and hazards reasonably to be expected; and the effects upon his health or person which may possibly come from his participation in the experiment. The duty and responsibility for ascertaining the quality of the consent rests upon each individual who initiates, directs, or engages in the experiment. It is a personal duty and responsibility which may not be delegated to another with impunity.
Huh. Fascinating. No coercion, people who are a part of a medical experiment must give consent, and we must have sufficient knowledge of the subject matter. Because fact-checks are what they are, I need you to decide if we’re in an experiment or not.
Speaking of fact checks, Reuters ran a fact check on the Nuremberg Code being applied to mask mandates and found it false. I wonder what they’d say about vaccine passports.
Regardless, we’re living in dangerous times. Not because of a virus. But of how certain people are using a virus to control all of us. What we need are more people like Mr. Dreadlocks here, willing to scream it so we can all hear the message.
Looking for a fashionable way to support Louder with Crowder? Get your swag at Crowdershop today!
Louder With Crowder