Duncan Vizla was known as the Black Kaiser, a top assassin. He’s retired, but his former firm comes after him with a bounty on his head, prompting a group of young assassins to try and finish the job. Mads Mikkelsen stars in Netflix’s action flick. Premieres 1/25/19.
Lt. Gov.-elect Jon Husted will lead a new omnibus InnovateOhio office to coordinate streamlining of government technology operations and promote broadband internet access, tech education and entrepreneurship statewide.
Gov.-elect Mike DeWine proposed the office when campaigning in September and announced Husted’s leadership role in a Tuesday tweet. Costs or funding sources for the office were not immediately available. The Republican is to be sworn in Monday, and Ohio’s last two incoming governors…
Remington 870 Shotguns are one of the definitive shotguns on the market in terms of reliability and ease of use, from civilian use to military and police – the 870 is simply one of theshotguns that almost everyone should own.
But if you’re new to the platform, you might be wondering how to field strip and clean your new scatter gat.
Don’t worry, we’ll cover that and more below…
We also have an awesome video that you can watch if you’d like to see how we clean our 870 directly!
If text and pictures are more your thing, read on!
Cleaning Supplies and Prep
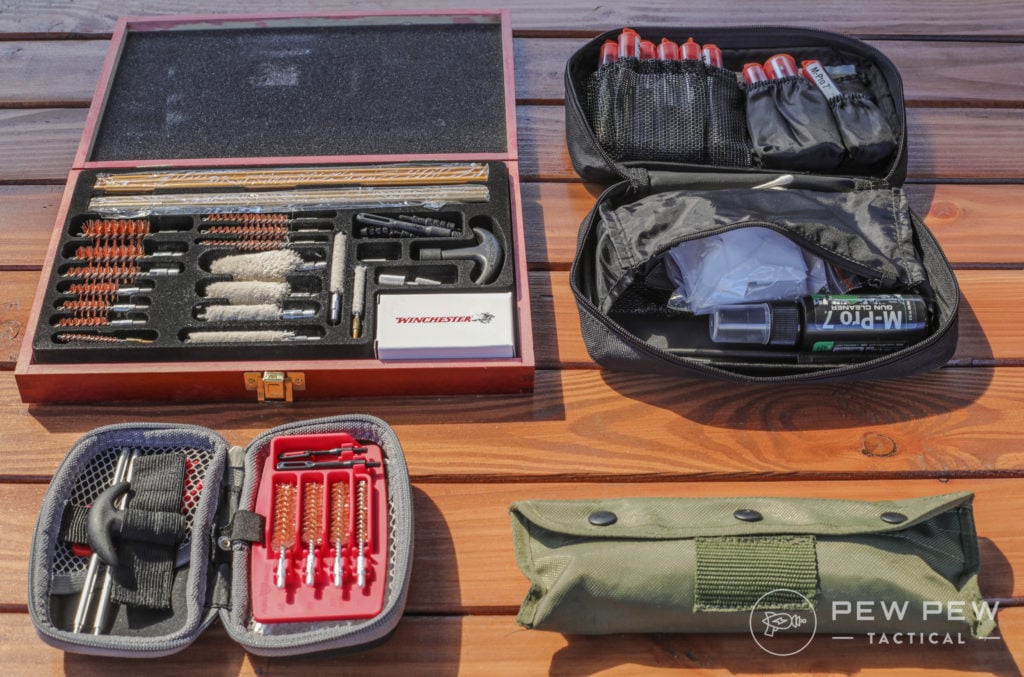
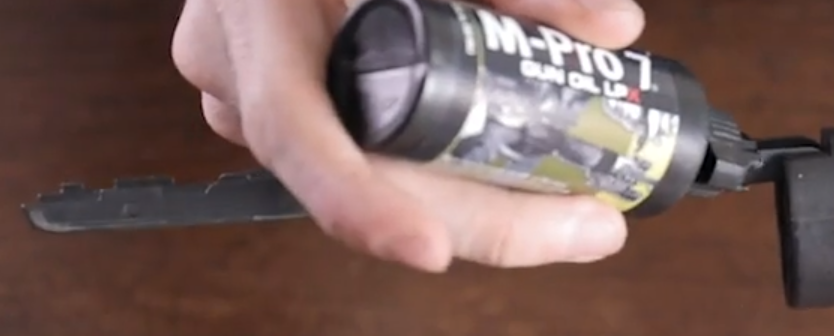
Cleaning an 870 is much like cleaning any other firearm, you’ll need some brushes, patches, a microfiber cloth, solvents, and lubricants. Conveniently all of these tools (except the microfiber cloth), cleaners, and lube are found in the M-Pro 7 Cleaning Kit.
Now that you have your tools, find a decent place to work – a counter, table, or workbench all work great.
Ensure any and allammunition is removed from the area before you start cleaning your firearm!
I like to lay down a towel or neoprene mat to soak up any spilled solvents and to catch the carbon, copper, and gunk that is cleaned from the weapon.
Field Stripping
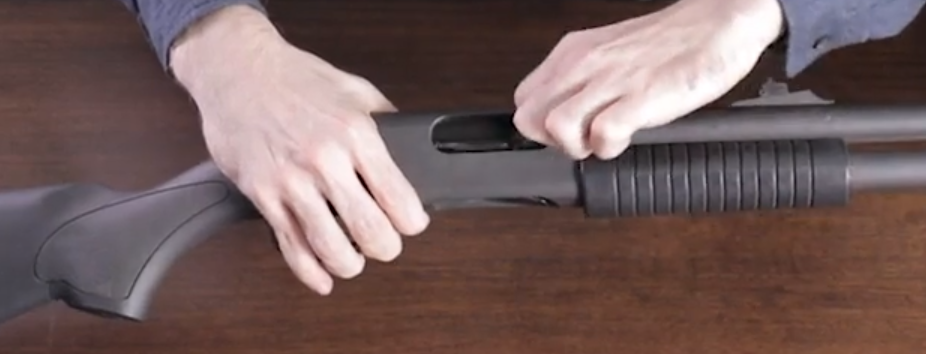
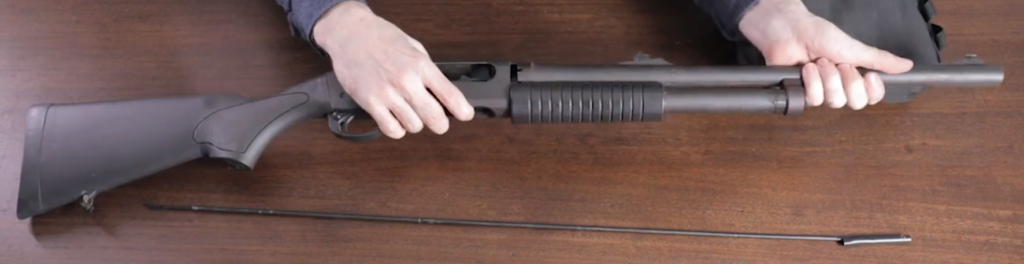
The first step to cleaning any weapon is to double or triple check that the weapon is unloaded. For the 870, start with racking your slide to the rear and visually inspecting the chamber to make sure it is clear.
Always make sure your firearm is clean before working on it!
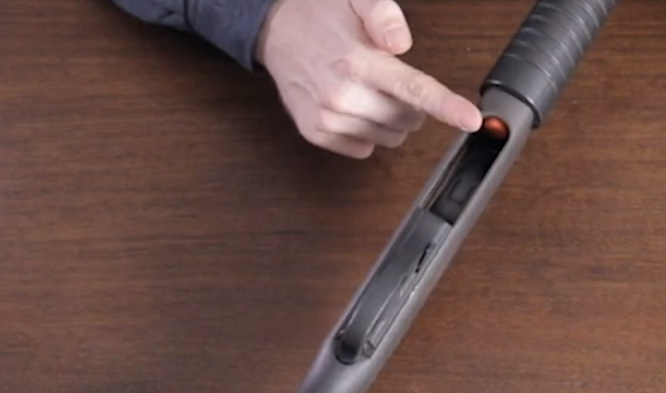
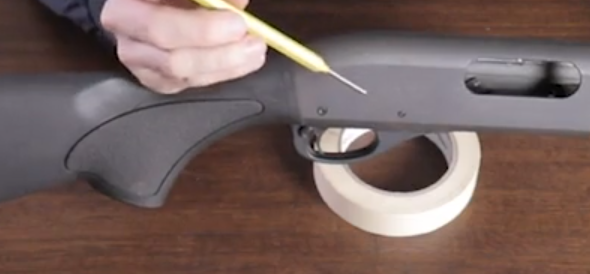
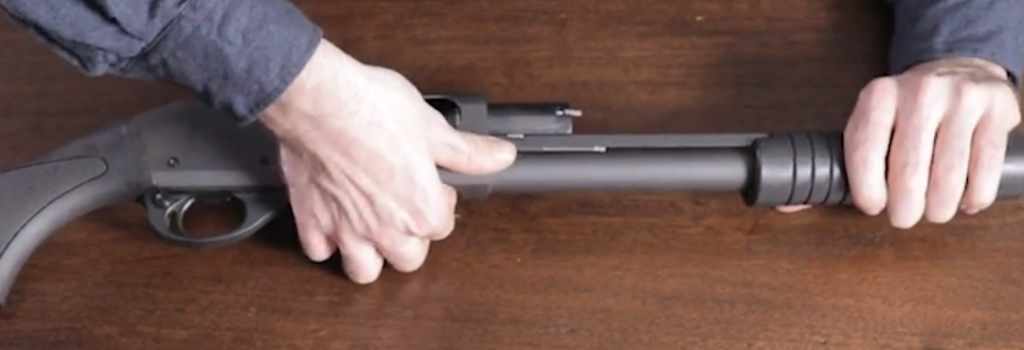
Flip the shotgun over and ensure that the magazine follower is visible and the shotgun tube is empty of shells.
See where John is pointing? That’s the magazine follower.
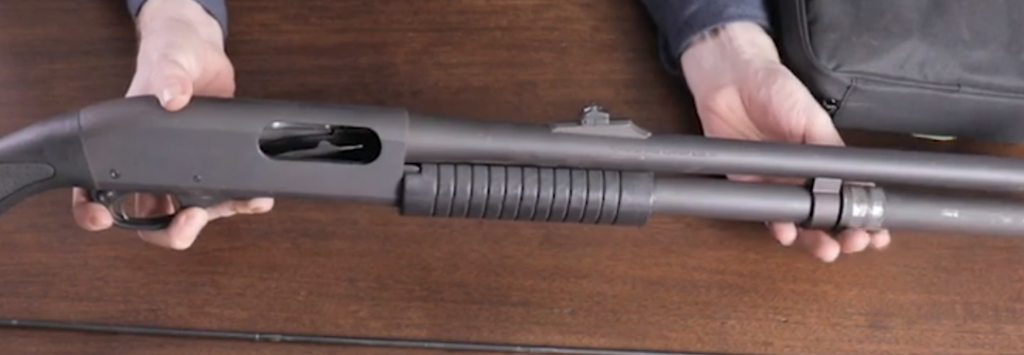
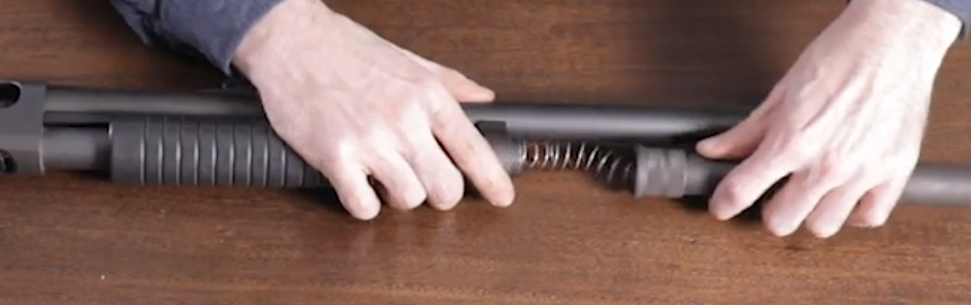
Next, locate your magazine tube cap at the end of your magazine tube and rotate it counter-clockwise. You’ll see that our shotgun has an extended magazine tube, so your cap/tube might look a little different.
Unthread your magazine cap
Make sure that you keep some pressure on the tube while removing the cap, once the cap is removed the tube will still be under some spring tension and can go flying across the room if you’re not careful.
Careful, that spring might go sailing!
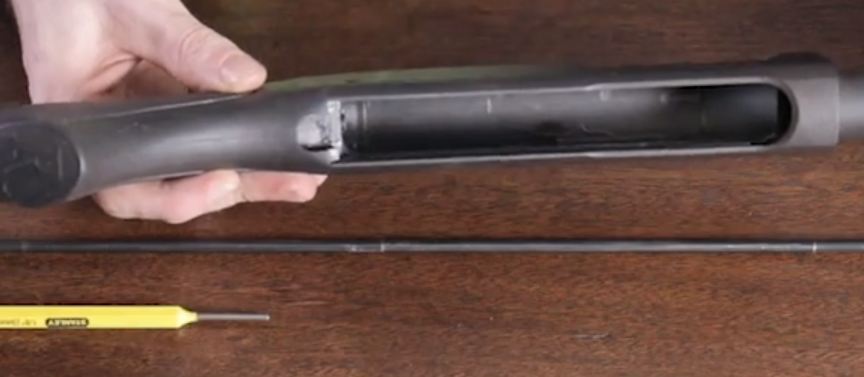
Once complete, the barrel of the shotgun should pull off with a simple tug.
Quick tug and the barrel comes off
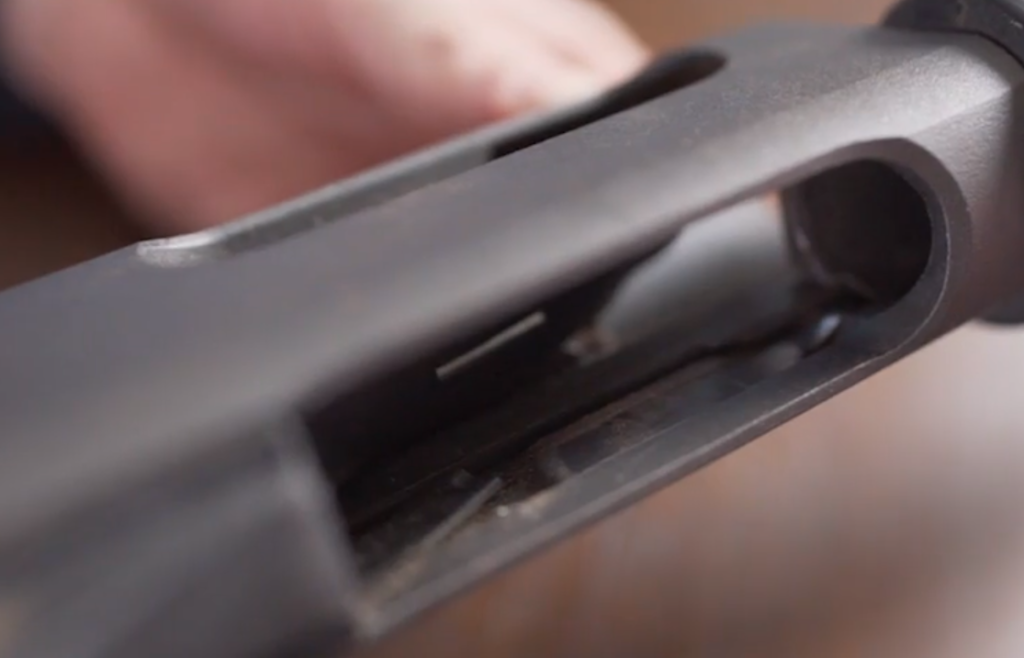
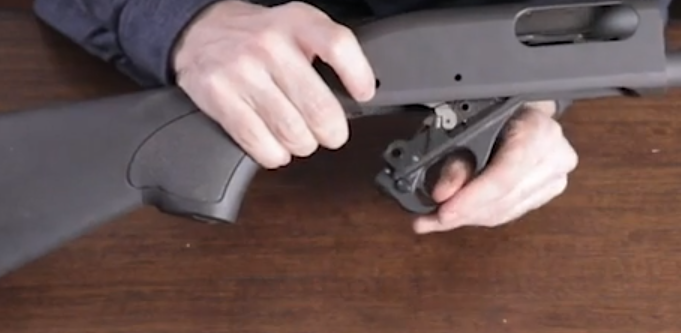
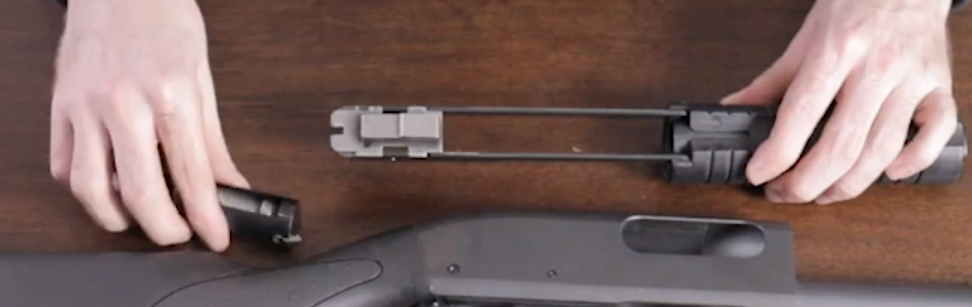
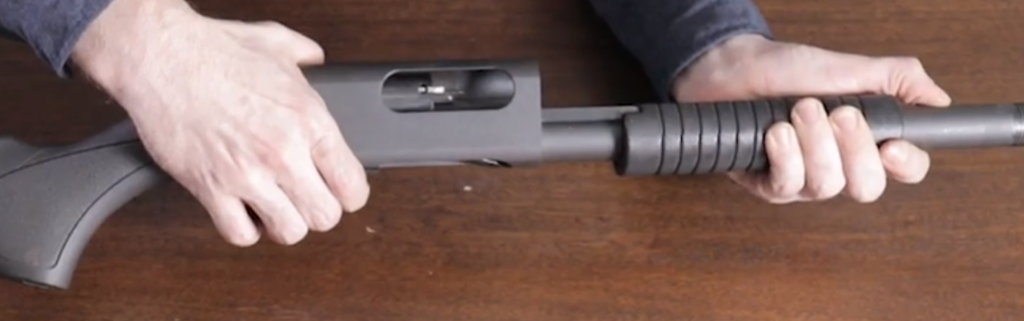
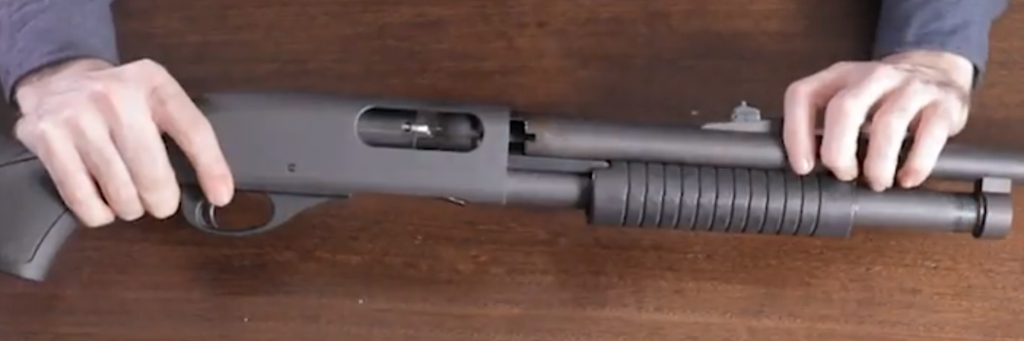
The forend assembly will take a little fiddling – start with turning the shotgun over and depressing the two tabs you find on the inside of the receiver where the magazine tube meets.
Push the two tabs in…you can see one here, the second one is on the other side.
You might need to press one tab in and then the other, sometimes these can be a bit stiff and hard to move.
Once released just pull the forend assembly off the rest of the shotgun, the bolt and bolt carrier will come out with this step as well.
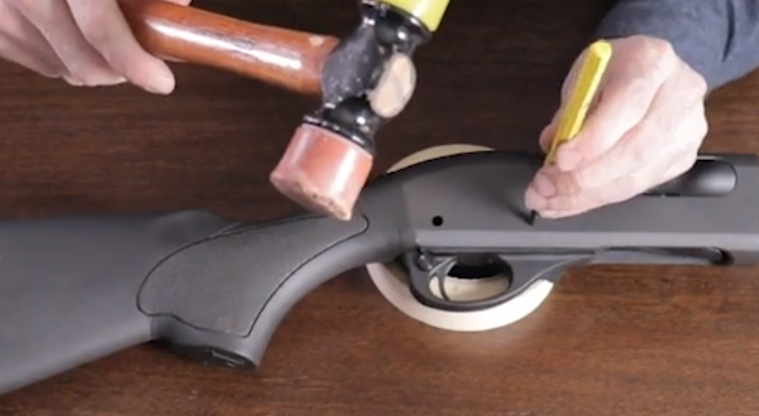
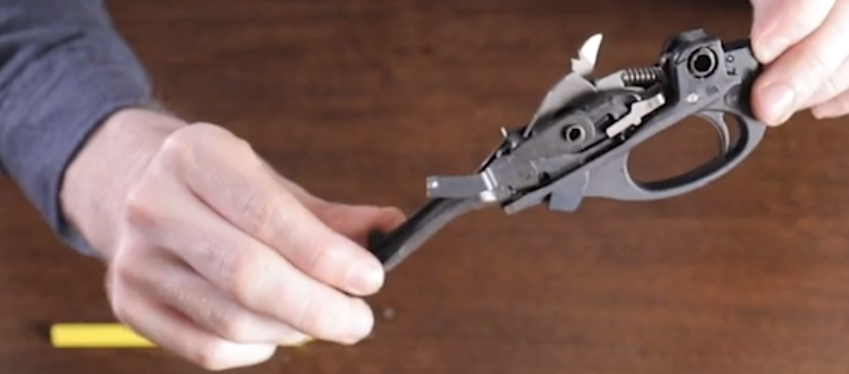
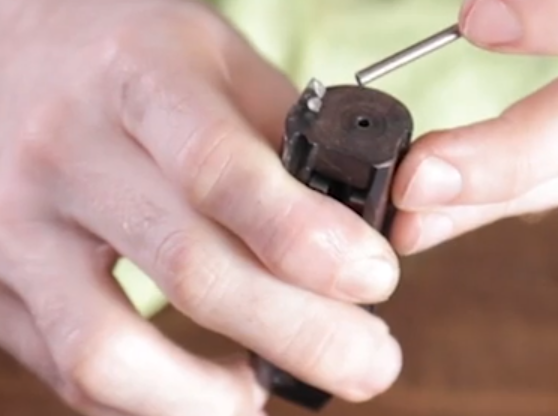
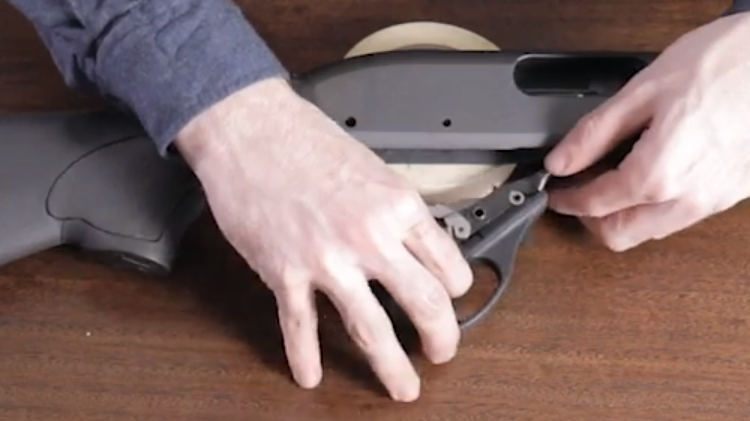
This is the part that you’ll need your pin punch. Set the shotgun on it’s left side and using your punch and hammer, drive the two pins out the other side.
You’ll want a punch to remove the two pins
These should come out fairly easy, but don’t feel shy about giving them a good wack to get them out. You’ll start with the forward most pin.
Out with the pins! Forward pin first
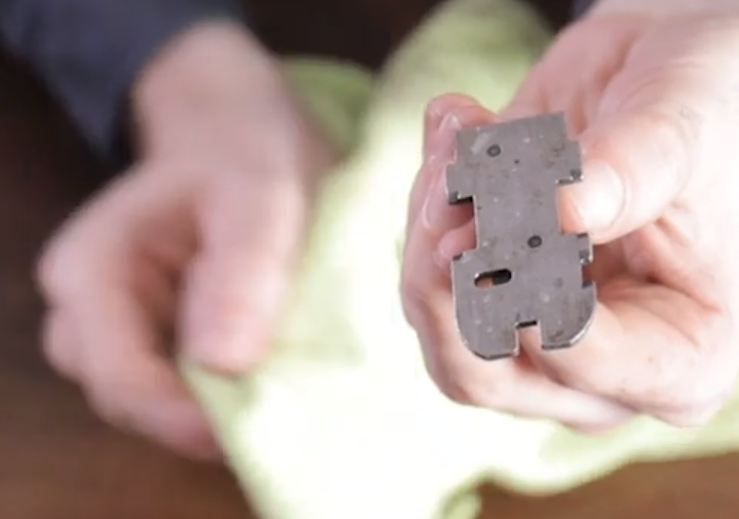
After the pins are removed, you can remove the trigger group from the receiver!
Remove Trigger Group
Cleaning
Give the inside of your now empty receiver a spray of cleaner and then set it aside while we work on the other parts.
Spray the inside of the receiver with cleaner
Starting with the bolt and bolt carrier. Give the bolt a thorough spray down with cleaner…
This is your bolt and bolt carrier. Spray them down!
Followed by spraying the carrier itself – you’ll want to separate the two so you can get to all sides of each.
Take your barrel and spray some cleaner down both ends before setting it once again to the side.
Spray cleaner down both ends of the barrel
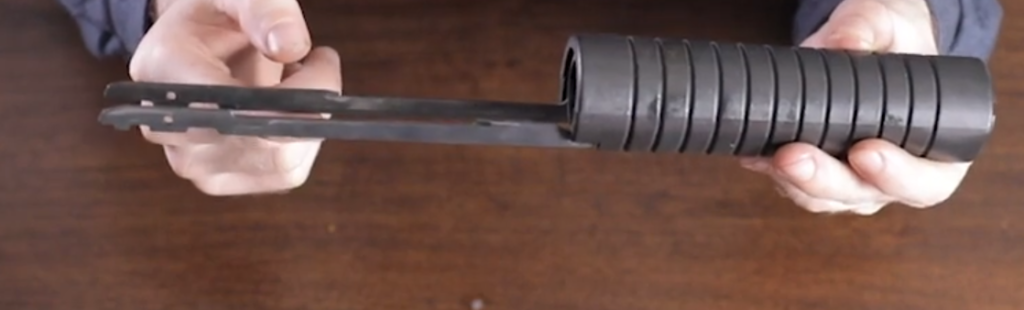
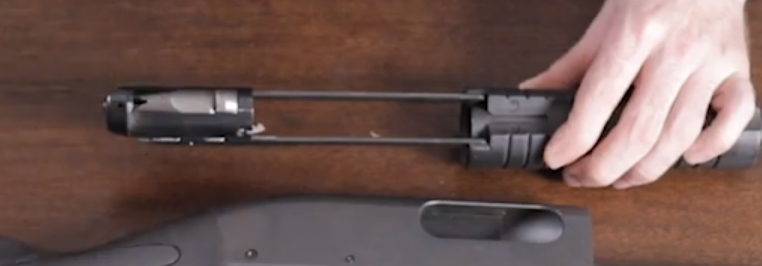
Inspect your forend assembly rails for any carbon build up. There likely won’t be much, so you can normally just wipe it down with a microfiber cloth – but if there is heavy build up, hit it with some cleaner!
Inspect and clean the rails
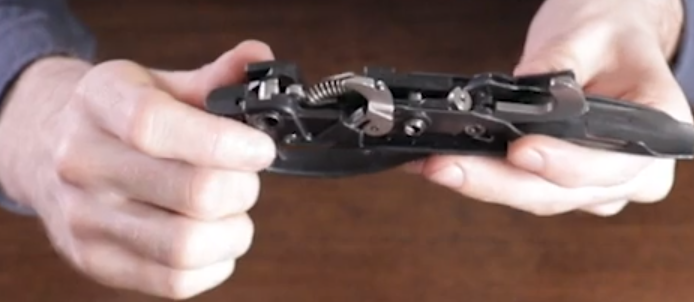
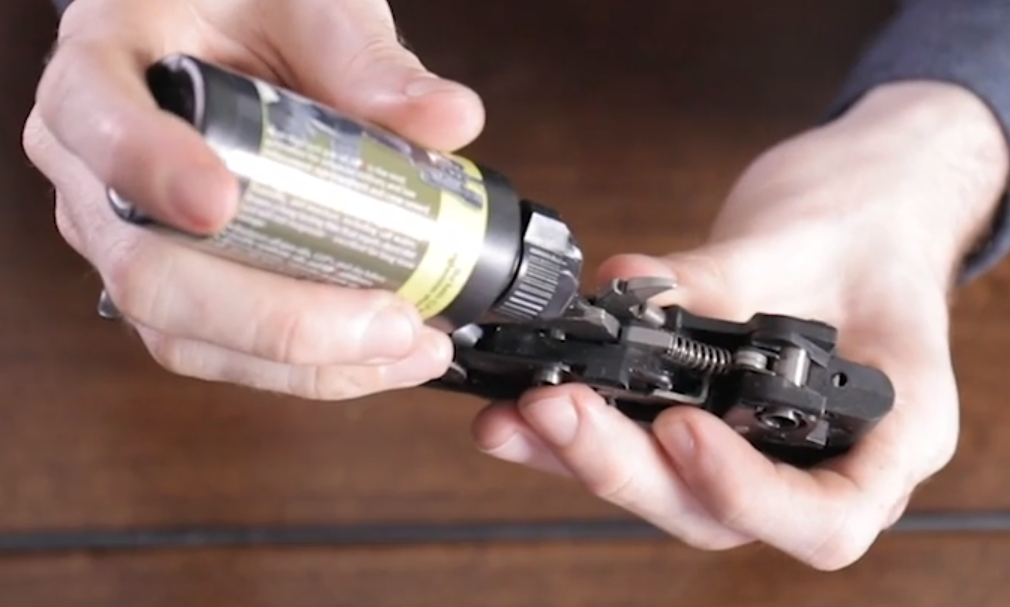
Our trigger group is next! Spray with cleaner and wipe down.
Spray the trigger group
If it is extra dirty you may want to clean it a bit deeper by lowering the hammer to get into the internals of the trigger group. While holding the hammer, gently depress the trigger and slowly lower the hammer down. Be careful as the hammer spring is stiff.
Trigger group with the hammer forward
Once clean, recock the hammer and set the trigger group aside.
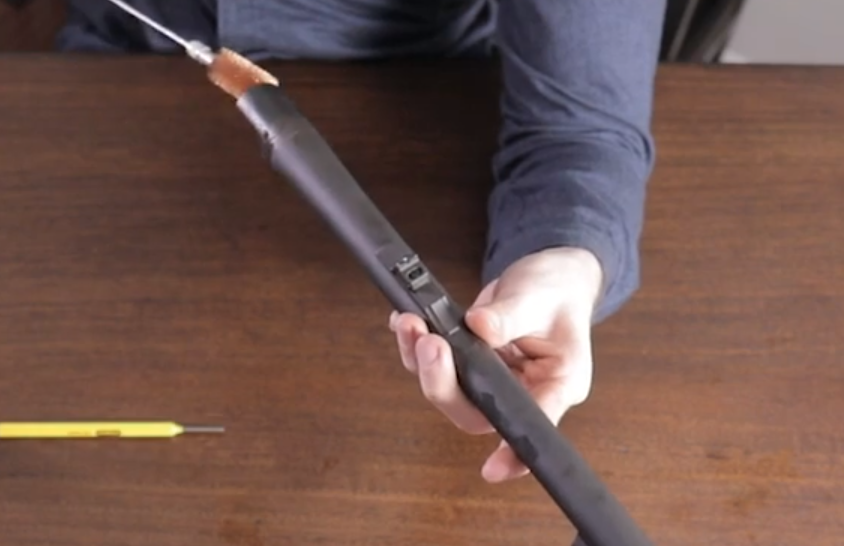
Grab your bore brush, attach it to your cleaning rod, and run it down the barrel several times starting at the rear of the barrel (the chamber end is the rear).
Use your cleaning brush pushing from the rear of the shotgun forward
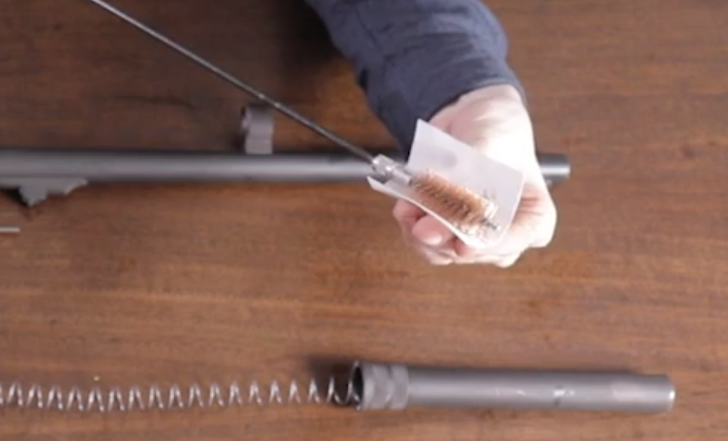
Attach a cleaning patch by wrapping it around your bore brush, then using the same push-forward method run the patch through your barrel.
Wrap your brush with a clean patch
This will likely take a few patches before they start to come out mostly clean.
Ewwwwww
After the patches are coming out mostly clean, set the barrel aside and grab your receiver!
Using a microfiber cloth wipe down the inside of the receiver paying extra attention to the where the forend assembly rails interface with the receiver. The receiver is unlikely to be extra dirty so this should be easy. If there is buildup though, use a brush to scrub it away.
Clean the inside of the receiver
Inspect your magazine tube and make sure there isn’t any fowling, debris, or other stuff. If there is then use a dry cleaning patch to clean the inside of the tube. Do not use any lube or cleaning down it!
A look down our magazine tube
Take your bolt and wipe it down with the microfiber cloth. If there is a heavy build-up, use a brush to scrub it!
Wipe down your bolt using a microfiber cloth
Make sure to inspect the bolt face and extractor claw of the bolt, cleaning those are critical.
Extractor Claw and Bolt Face
Repeat with your bolt carrier.
Wipe down the bolt carrier
Lubrication
There are only two parts you need to lubricate, so this is quick and easy.
We’ll start with the trigger group. Place a small amount of lube on the hammer face and the hammer spring.
Lube the hammer face and trigger spring
The rails of your forend assembly will also need some lube, but only a small amount and across the entire surface of the rails. Use your microfiber cloth to wipe up excess lube.
Lube the whole rail very lightly
Reassembly
Now that everything is clean and slick it’s time to put your shotgun back together.
Start with the trigger group, insert it into the body of the receiver and aline the pin holes.
Trigger pack going back in
Replace the pins hammering them from the right to the left and starting with the forward pin.
Hammer time. Pins go in from the right to the left side of the receiver and forward pin first
Set your bolt carrier into the matching notches on your forend rails. Place the bolt on top of the bolt carrier with the bolt face facing forward toward the muzzle end of the shotgun.
Bolt carrier into notches on rails
Place the bolt on top of the bolt carrier with the bolt face facing forward toward the muzzle end of the shotgun.
Bolt on the carrier on the rails
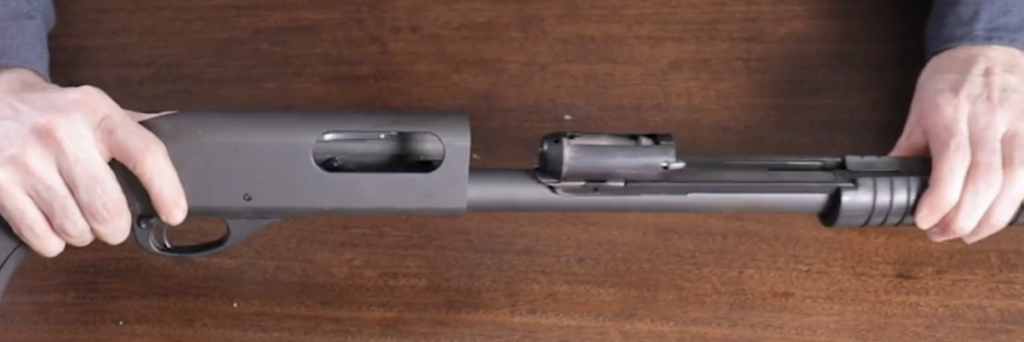
Slide the entire forend assembly over the magazine tube and into the receiver.
Forend assembly goes back in
Once you feel resistance, push the internal tabs in the receiver and keep sliding the forend assembly into the receiver.
Feeling some resistance? Push on the tabs used for disassembly and slide the rails over the tabs
Cycle the pump and the bolt to the rear and then forward about halfway.
Rack to the rear and then forward by about half as shown
Grab your barrel again and give it one last inspection before reattaching it to the shotgun, the barrel should slide easily into place.
Replace the barrel
Reinsert your magazine follower and spring assembly into the magazine tube. Note: the follower goes in first!
Spring goes into the magazine tube and then tighten down your magazine cap.
Keep in mind that we have a magazine tube extension on our 870, but however your tube looks just tighten down your magazine cap to secure the tube in place.
Finally – rack the action of your shotgun to check that everything functions correctly!
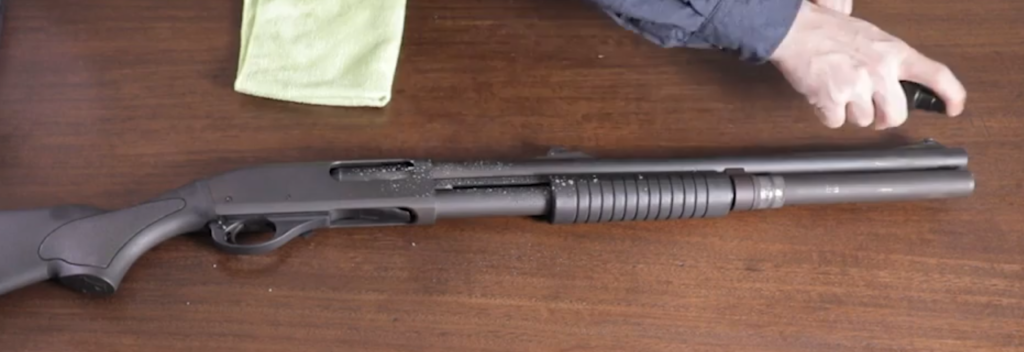
One last step you might want to take is to clean the outside of the gun once it is reassembled. Just take some cleaner and a microfiber cloth and give it a good spray and rub down.
Cleaning the outside of our dirty shotgun
And that’s it! You’re done!
Parting Shots
Now that you’re comfy with taking your shotgun apart and putting it back together again, maybe its time to make some upgrades to your trusty 870.
A binary Captain Marvel shines in a new IMAX poster.Image: IMAX
For some, Monday night marked the end of the college football season. For others, like us, it marked the arrival of brand new footage from Captain Marvel and the news that tickets are now on sale.
The film opens March 8, giving you two months to figure out when you want to see the film but, based on this new extended TV spot, that’s probably going to be as soon as possible. Check it out.
That’s a great spot all around but, for me, the highlight is Coulson asking Nick Fury if he can find more heroes like Carol. The answer, as we know, is yes, he will. He’ll find Captain America, Iron Man, Thor, and the Marvel Cinematic Universe will be born. Plus there’s a lot of humor in the footage, more than we’ve seen so far. All of this is very encouraging.
Plus, with tickets now on sale, there are a few cool new posters specific to different formats. Here are three of them.
The Captain Marvel IMAX posterImage: IMAX
The Captain Marvel Real D poster.Image: Real D
The Captain Marvel Dolby Cinema poster.Image: Dolby
Captain Marvel opens March 8. We’ll have much more Tuesday morning.
For more, make sure you’re following us on our new Instagram @io9dotcom.
Whether you’re running 440C or S90V, even the most super of steels will need to be sharpened eventually. This can be an intimidating task to some, but we’re going to take a look at three systems that make the job easy and achieve fantastic results.
The theory of sharpening is simple. Using something abrasive, usually a stone, material is removed from one side of the edge until you can feel a burr on the opposite side along the entire length of the edge. The process is duplicated on the opposite side.
It’s usually best to alternate the side you are working on every few strokes so that each has a similar amount of material removed, keeping the edge itself even and centered.
Once you are able to raise a consistent burr on each side, you’ll move to finer grit abrasives until you achieve the desired amount of refinement on the edge. The grit you start with will depend on how degraded the edge is.
You can go as high as you want with your grit, all the way up to a mirror polish if desired, but you’ll want to go up to something in the “fine” range…at least 1,000 grit (but often much higher).
This is by no means an exhaustive overview, but it’s plenty to get you started. There are myriad ways to achieve the results you need, and today we’re going to take a look at three of our favorite sharpening systems that are suitable for all levels of experience.
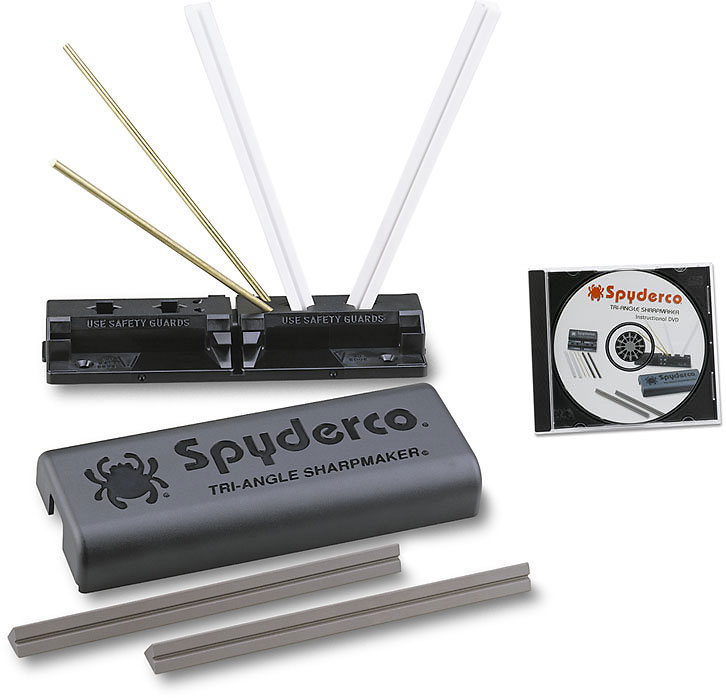
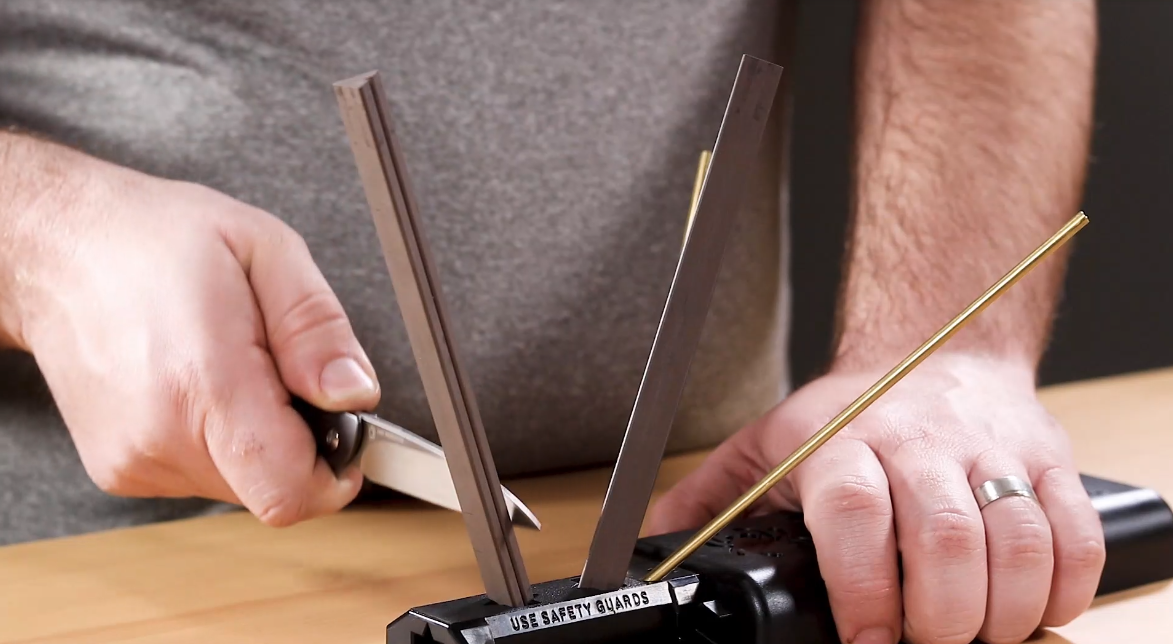
The first is the Spyderco Sharpmaker, an intuitive and easy-to-use device that can achieve hair-shaving results on almost any steel out there, as long as the edge isn’t so far gone that you need to reprofile it.
All of the elements come in a black plastic case that doubles as a stand, making this a very tidy package to store when not in use. There are two preset angles for the stones, meaning you don’t have to worry about maintaining the proper angle as you would when freehand sharpening on a flat stone.
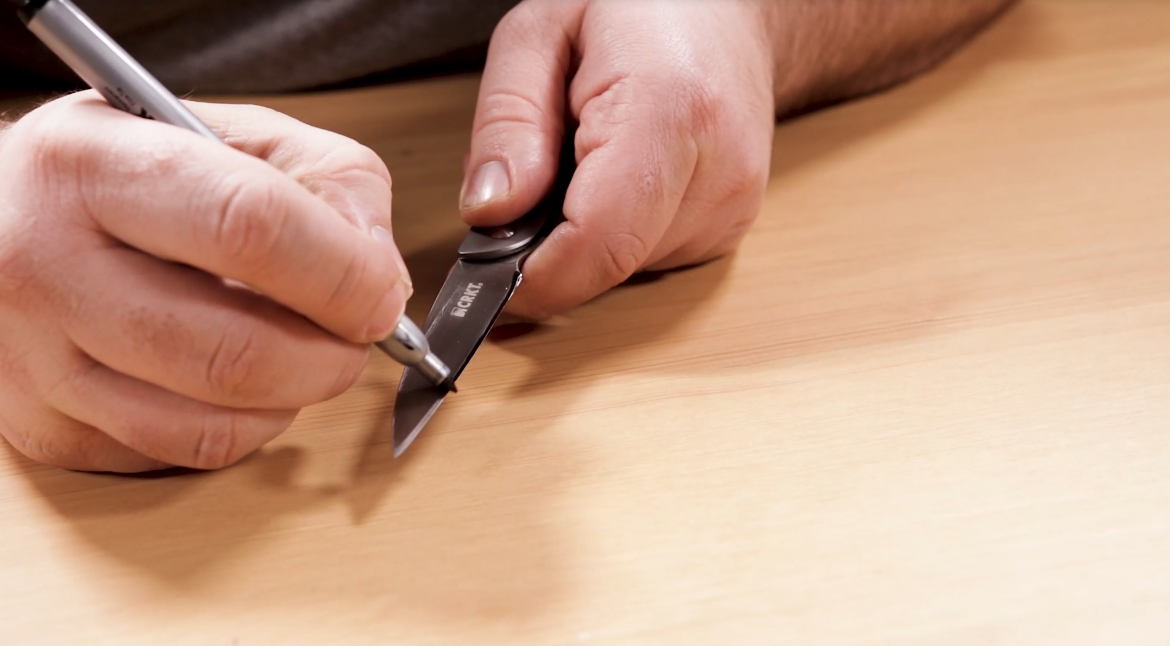
One way to check and see if the preset angle is matching up to your knife is to color the sharpened edge in with a black marker. After a few strokes, if the marks have disappeared, you know you are lined up properly.
Once the brass guards are in place, you start with the corner of the triangular brown medium stones. All you have to do is hold the blade straight up and down and place the heel of your blade at the top of the stone. Bring the blade straight down, and draw it towards you as you do, so that you hit the whole edge by the time you reach the bottom of the stone.
Do this twenty times on each side of the blade, then rotate the stones and perform twenty strokes per side again, this time on the flat side.
Repeat the same steps as before, this time using fine white stones, starting with the corner, and then the flat side of the triangle. Once you are finished, your edge should be hair popping sharp. At this point, your blade should be able to cut paper, but we aren’t done yet. The stand also has a couple of other ways of holding the stones, allowing you to easily sharpen other tools such as chisels, scissors, and even straight razors.
The Sharpmaker is a truly versatile device that is a classic for a reason – it just plain works.
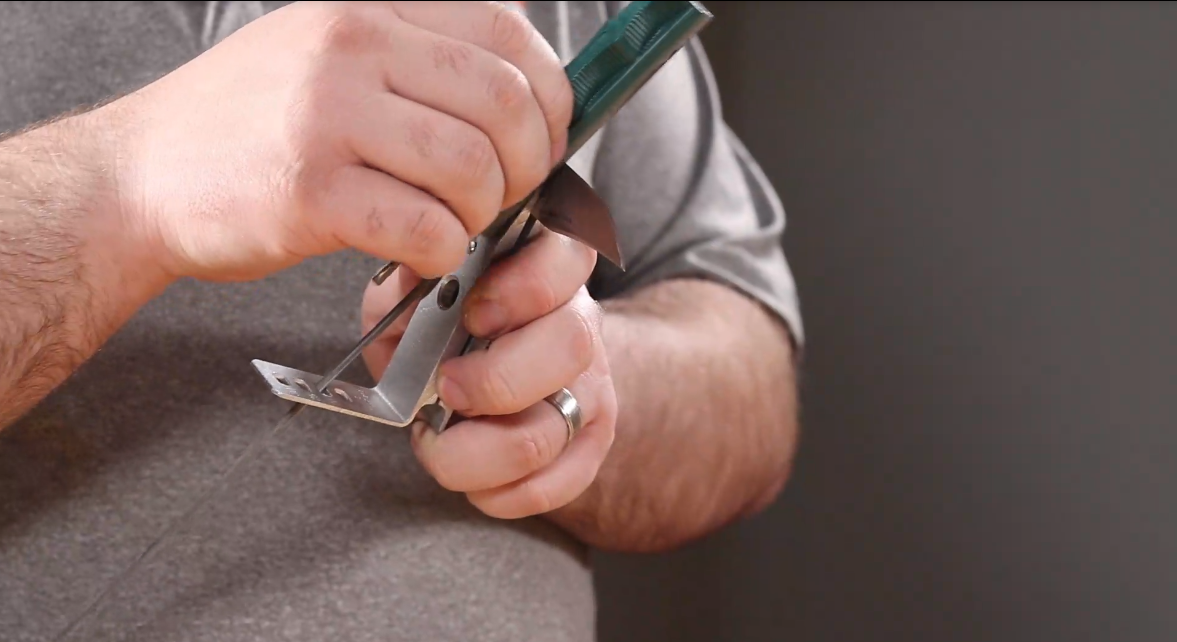
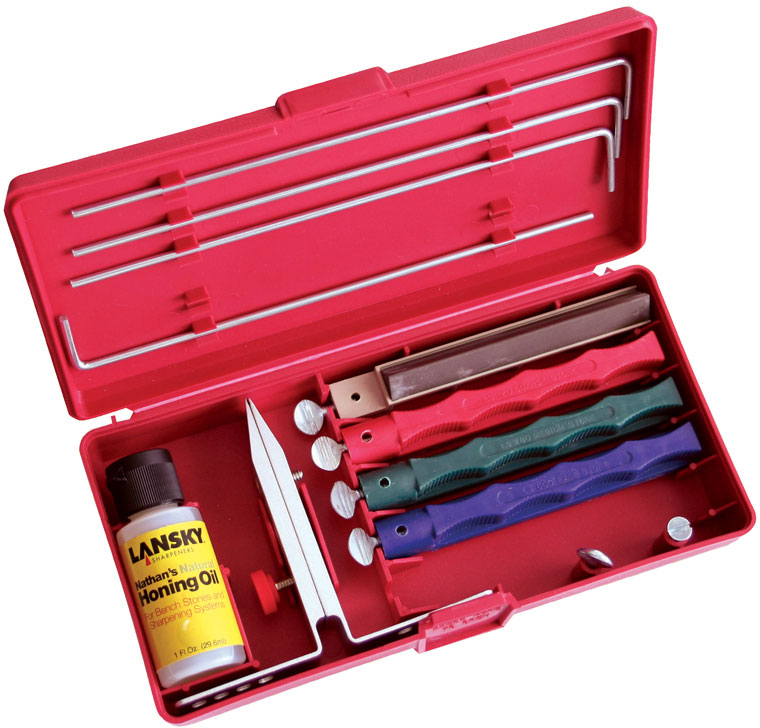
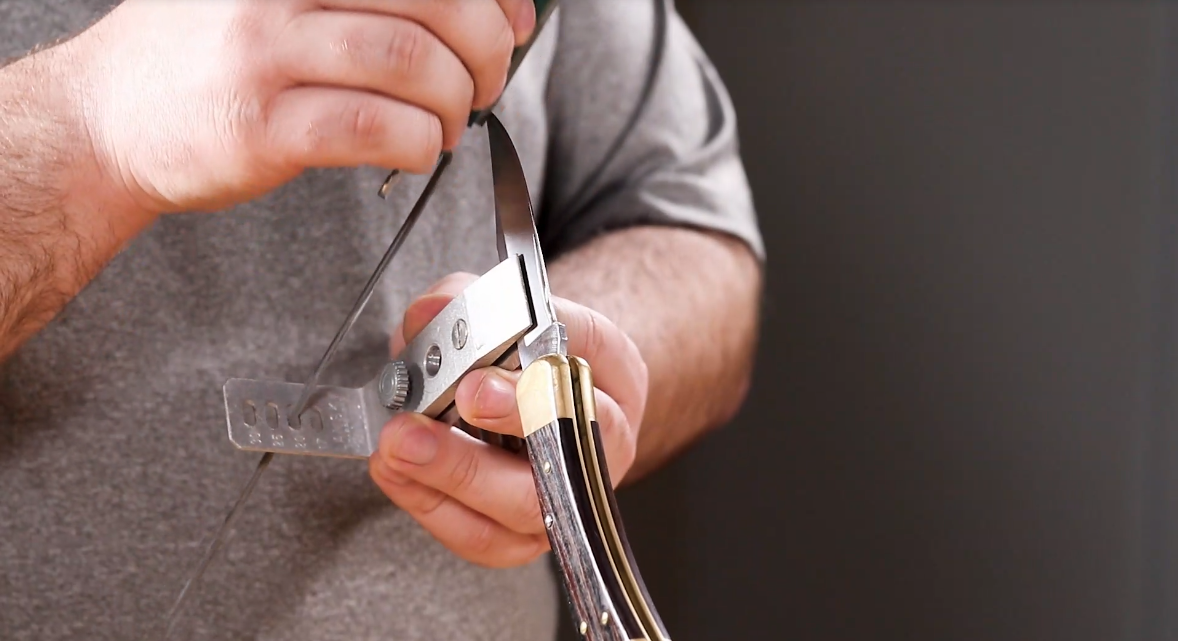
This set comes with a clamp that holds your blade steady and provides guide holes for the included stones so you can maintain the proper angle for your blade. Along with honing oil, the standard set comes with coarse, medium, and fine stones and is a great starting point. For a little extra money, higher-end sets come with more grits but they can also be purchased separately, as the standard set’s case comes with extra slots for storage if you choose to upgrade. The process here is simple. Clamp the spine of your blade into place and attach the guide rods to the stones you wish to use. Starting with the coarsest stone you need, choose your angle and insert the guide rod into the proper hole.
Sharpen as described earlier until you can raise a burr consistently on both sides, then move up to the next grit until your desired sharpness is achieved.
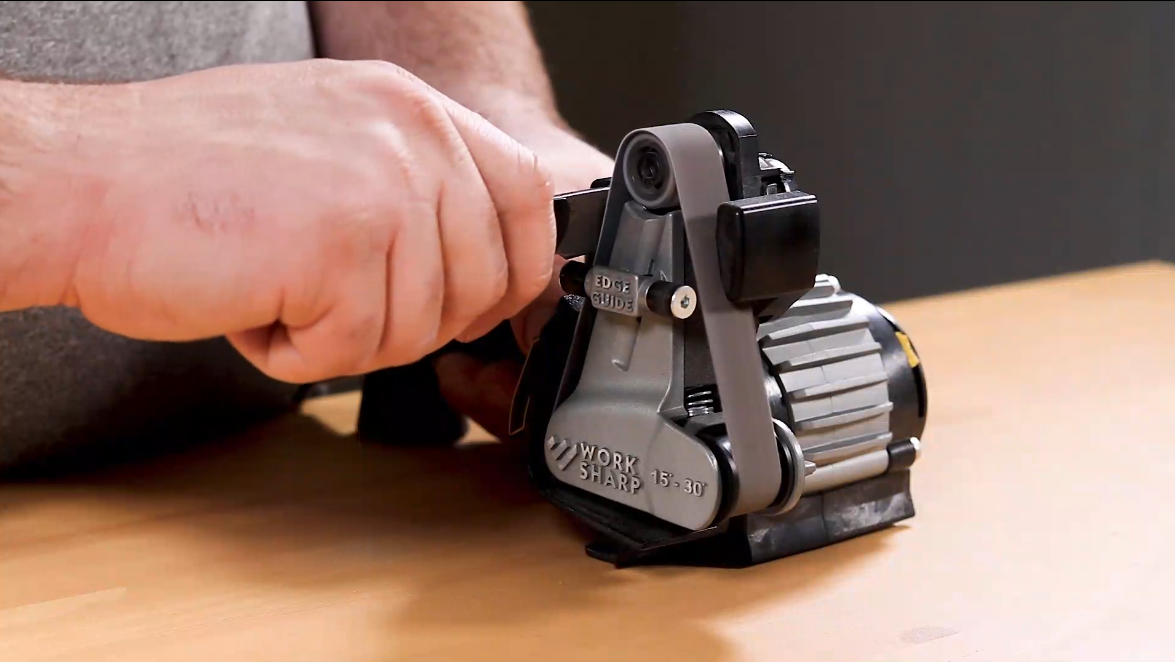
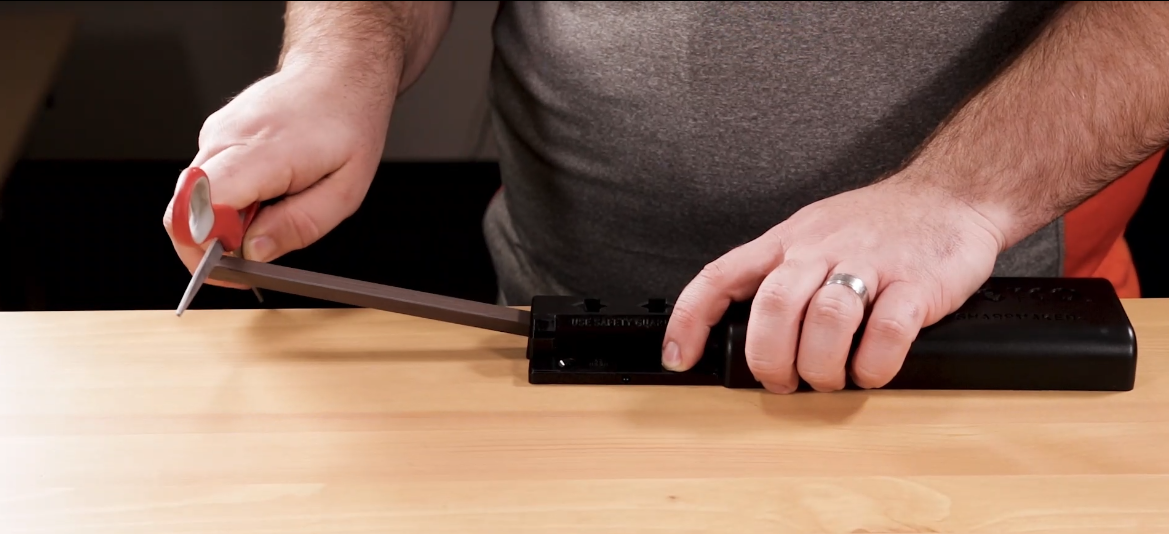
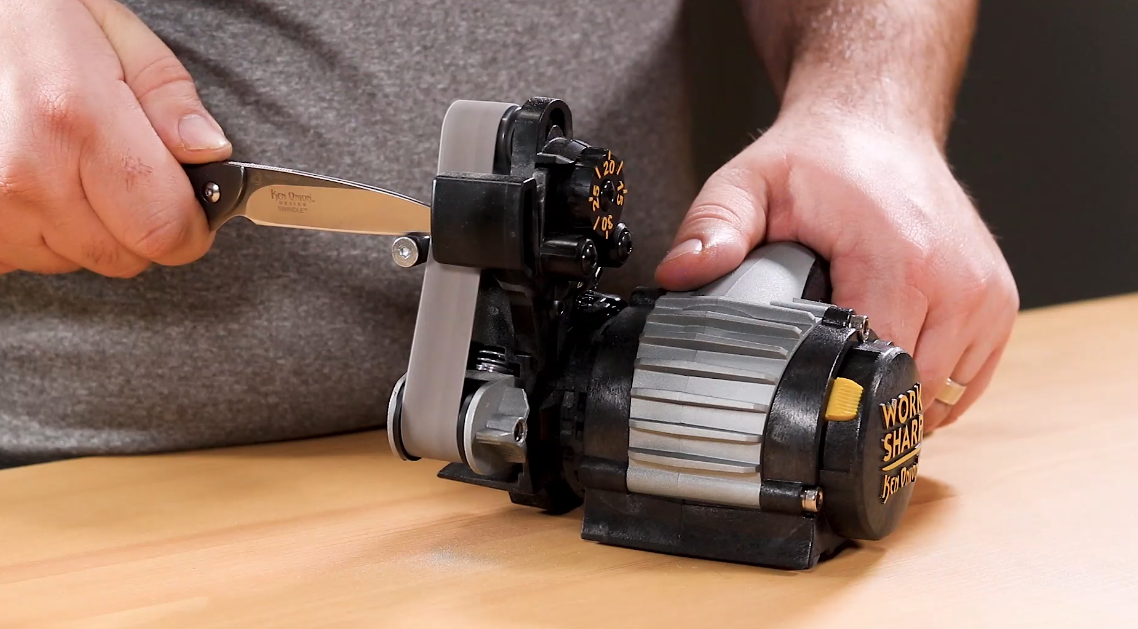
If you want to take your sharpening game to the next level, a powered unit from Work Sharp may be in order. Work Sharp has been raising the bar in the sharpening arena by thinking outside the box, and their Ken Onion Edition Knife & Tool Sharpener is one of our favorite units that they make, offering fast and accurate performance.
Unlike the previous units we showed you, the Ken Onion Work Sharp is driven by an electric motor, using abrasive belts and an adjustable angle guide to sharpen your edge.
After selecting your angle, set the heel of the blade on the belt, pull the trigger to start the motor, and pull the blade backward at a rate of one inch per second according to the manufacturer, stopping the motor before the tip of your knife passes the centerline of the belt. Then do the same for the opposite side. As with all the sharpening methods we’ve shown you, repeat these steps as necessary until the burr is consistent, then proceed to the next grit until desired sharpness is achieved.
One thing to keep in mind when using this unit: the motor speed is adjustable, but make sure you don’t overheat your edge and ruin the temper. Keep things nice and slow until you are comfortable with the system.
Further enhancing the versatility of the Ken Onion Work Sharp is its ability to accept add-ons sold separately, including a tool grinding attachment and a blade grinding attachment, offering a form factor similar to professional knife grinders in a much smaller footprint.
As you can see, there are certainly differences between these three systems, but you won’t go wrong with any of them. Friends don’t let friends carry a dull knife, and these are units that we believe in, and not just because we sell them. We actually own them. The units you saw in this blog are ones that came from the KnifeCenter staff’s personal collections, where they have all given years of reliable service.
What questions do you have about using these sharpening systems? Let us know your tried and true tips in the comments below!
The only kids programming language worth using, Scratch, just celebrated the launch of Scratch 3.0, an update that adds some interesting new functionality to the powerful open source tool.
Scratch, for those without school aged children, is a block-based programming language that lets you make little games and “cartoons” with sprites and animated figures. The system is surprisingly complex and kids have created things like Minecraft platformers, fun arcade games, and whatever this is.
The new version of scratch includes extensions that allow you to control hardware as well as new control blocks.
Scratch 3.0 is the next generation of Scratch – designed to expand how, what, and where you can create with Scratch. It includes dozens of new sprites, a totally new sound editor, and many new programming blocks. And with Scratch 3.0, you are able to create and play projects on your tablet, in addition to your laptop or desk computer.
Scratch is quite literally the only programming “game” my kids will use again and again and it’s an amazing introduction for kids as young as pre-school age. Check out the update and don’t forget to share your animations with the class!

 Lt. Gov.-elect Jon Husted will lead a new omnibus InnovateOhio office to coordinate streamlining of government technology operations and promote broadband internet access, tech education and entrepreneurship statewide.