Arkham Asylum Releases All Inmates Amid Coronavirus Fears

Arkham Asylum Releases All Inmates Amid Coronavirus Fears

https://ift.tt/2XG2gSy

GOTHAM—Arkham Asylum has freed all its inmates to prevent the spread of coronavirus, sources with the Gotham Police Department confirmed earlier this week.

The prisoners were at risk for contracting COVID-19 and so were let go to take some of the strain off the Gotham prison system. After freeing them, interestingly, there was a rise in crime, a side effect the Gotham P.D. claim they didn’t see coming.

“Yeah, in hindsight, maybe this wasn’t the greatest idea,” said Commissioner Jim Gordon as a giant vine burst out of the ground and began wreaking havoc downtown and Bane punched walls just for fun. “Letting criminals out can sometimes cause a rise in crime, and we didn’t exactly see that coming.”

“HahahahahahahaHAHAHA!!!” cackled the Joker as he was let out. “Now it’s time to kill the Batman!” Medical officials believe killing the Batman could actually help further coronavirus outbreaks from occurring and so will turn a blind eye to the Joker’s evil plan this time.

Within two days of being let out, they were all caught again by Batman but then broke out again, before being caught again and then breaking out again.

“Yeah, we’re not great at this whole ‘running a prison’ thing,” said the warden.

Breaking: Paypal Now Available

Many of you told us you wouldn’t subscribe until we offered Paypal as a payment option. You apparently weren’t bluffing, so we finally caved and added Paypal. Now — like the unbeliever faced with God’s invisible qualities displayed in nature — you are without excuse.

fun

via The Babylon Bee https://babylonbee.com

April 15, 2020 at 06:03PM

What’s the Best Way to Enable (And Test) Encryption at Rest in RDS?

What’s the Best Way to Enable (And Test) Encryption at Rest in RDS?

https://ift.tt/2wFHcQX

Encryption at Rest in Amazon RDSThe other day on a call, a client asked me an interesting question.  We were discussing some testing they were doing in Amazon Relational Database Service (RDS).  The question came up “since RDS is managed, how can I prove to my security team that the data is actually encrypted?”  We’ve all read whitepapers and blogs that talk about encryption in the cloud, but it is something I’ve not needed to validate before.  Instead, I just enable encryption when I create an RDS instance and move along to the next steps of the setup. This discussion really got me thinking – what is the best way to enable and test encryption at rest in my RDS instance?

Encryption at Rest – MySQL Fundamentals

Before getting too far into the RDS specifics, I wanted to cover the basics of encryption at rest in MySQL.  There are essentially two ways to encrypt data at rest:

  • Full disk encryption (filesystem/block level)
  • Transparent Data Encryption (TDE) with InnoDB

Full disk encryption is just like it sounds – the entire disk (or data directory mount point) is encrypted and a key is needed to read the data.  Without this key, MySQL cannot read the data files and is rendered useless. This is a very straightforward way to maintain a flexible encryption setup as you can switch out storage engines or database servers altogether.

Transparent Data Encryption (TDE) was introduced in MySQL 5.7 and handles encryption at the instance level as opposed to the OS level.  By enabling a master key (using the keyring_file plugin or a remote service such as Vault), the InnoDB engine will encrypt its own data to disk.  Without access to the key, InnoDB will fail to load within MySQL. Likewise, any file-level backups (i.e. using Percona XtraBackup) will be rendered useless without the key.

Both methods are completely acceptable forms of encryption at rest, but different organizations may choose one or the other based on their specific requirements.  When looking at RDS, however, things are different.

Encryption at Rest – RDS

As RDS is a managed service, you do not interact with the base operating system or filesystem.  Rather, you leverage the API provided by AWS to launch and configure your instance. This poses a problem if you are currently using a keyring_* plugin in MySQL – how do you store your master key on the filesystem or configure other plugins for remote key management?  Unfortunately, you can’t. However, there is still a viable solution for encrypting your data at rest with RDS.

With RDS being built on the underlying IaaS components of AWS, you are able to leverage the existing functionality of those components through the API.  The feature we are looking at here is EBS (Elastic Block Store) encryption. Much like the full disk encryption method described above, EBS allows you to encrypt volumes using AWS default keys or customer master keys (CMKs) defined within the Key Management Service (KMS).  These keys are required for the volume to be usable and for snapshots to be restorable. This enables you to ensure data-at-rest encryption for your RDS instances.

Putting it All Together

In the past, I’ve used both the RDS default encryption key and user-defined keys.  For this exercise, however, I wanted to ensure I could prevent my database from being restored or restarted on demand.   To start, I created a new CMK in the KMS service to use with my database and gave the RDS service permission to access it:

Then, when I create my RDS instance, I can choose this new key when I enable encryption.  For my test, I encrypted my instance using a cleverly named CMK key called database-key:

Note that along with my CMK, the (default) aws/rds key is an option.  I want control over my key and when it is used so I choose my key and not the default.  Note that certain instance types don’t offer encryption so if you don’t see this option when creating your instance, check your instance type against the list here.

After that, it is just business as usual.  I connected to my RDS instance, populated some dummy data, and took my first snapshot.  This is when it was time to confirm that I could indeed disable the key and prevent access to my data.  Here is the important thing to note – as my instance was encrypted with a specific key at startup, the snapshots also require the same key.  You can see that in my Snapshot Restore window, it specifies the key needed and I don’t have the option to disable it or choose another key:

This is how RDS ensures that the key is tied to the instance and you can’t just take the data and restore it elsewhere.  After disabling my CMK (with my instance still running), I tried to restore my snapshot. Success! My snapshot was not able to be restored and I was pleasantly greeted with the following error message:

This confirms that by using my own key, I can effectively lock out any unauthorized restoration or access to the data at the disk level.  But now, I wanted to verify one additional item. Looking at how encryption at rest works on a standard instance, I also wanted to confirm that the key was needed to start the instance.

With the key disabled, I stopped the running instance.  After that process completed, I tried to restart my instance.  Again, it was successful in that I was not able to restart my instance with the key disabled:

So just like a standard instance that is missing the master key, the RDS instance isn’t able to start with the key disabled.  Similar to an on-prem deployment, ensuring that your CMK is secure is outside of the scope of this blog post. But with that being said, this exercise demonstrates the power and flexibility of using CMKs to ensure your data is encrypted at rest.

Wrapping Up

Hopefully, this post and example were useful to you.  It is always a good practice to ensure that documentation matches behavior.  In this case, I feel confident that leveraging CMKs to control my RDS encryption should meet a majority of security requirements.  For any help ensuring that your RDS deployment is following best practices, please don’t hesitate to reach out to Percona. We’d be happy to help ensure your RDS (or other cloud) deployment is done in the best possible way!

technology

via MySQL Performance Blog https://ift.tt/1znEN8i

April 15, 2020 at 02:01PM

WATCH: Rifle Training, Skills and Safety for First-Time Buyers

WATCH: Rifle Training, Skills and Safety for First-Time Buyers

https://ift.tt/2xuRpA4

As the COVID-19 global pandemic continues to spread, more and more Americans are purchasing guns for their protection. After runs on food and goods sparked into panic buying, guns and ammo sales reached record highs. Americans have spoken, and they clearly want the right to buy guns to protect their family. In fact, many are buying guns for the very first time. With that in mind, we’ve put together a three-part introductory video series on handgun, rifle, and shotgun training, skills, and safety. Here’s the second video in our series, focusing on rifles. Be sure to check out “Part I: Handgun Training” and “Part III: Shotgun Training” as well.

The shotgun remains a formidable home defense weapon.

RELATED STORY

WATCH: Shotgun Training, Skills and Safety for First-Time Buyers

Rifle Training, Skills and Safety

Most importantly, all gun owners must follow the four basic gun safety rules: Treat every gun as if it were loaded. Never point a gun at anything you don’t want to destroy. Always keep your finger off the trigger until you’re ready to shoot. Know your target and what’s beyond it. Those four rules should define every choice you ever make in gun handling. Follow them, and you’ll never have a problem, a negligent discharge or worse.

The rifle, especially America’s most popular rifle, the AR-15, excels in the role of home and self-defense. With a 30-round magazine, extremely intuitive controls and high accuracy potential, most contemporary semi-automatic rifles are easily learned. You can often shoot them well, with an extremely fast learning curve.

However, there’s still much that must be learned, especially for the new shooter. Rifle manipulations, magazine changes, and shooting all require training and practice. While the AR design remains especially popular, it still brings its own set of challenges and requirements to run safely and effectively.

Finally, welcome to the 2A club. While it took a global pandemic for some to get here, we’ve all got one thing in common. We all decided to take full responsibility for our family’s ultimate safety and protection. Owning a firearm, especially a rifle, brings tremendous responsibility. So watch our video, learn, and then seek out certified training. Then get to the range and practice. Knowledge is power, so share it with any and all potential gun owners out there.

The post WATCH: Rifle Training, Skills and Safety for First-Time Buyers appeared first on Personal Defense World.

guns

via Personal Defense World https://ift.tt/2Arq2GB

April 15, 2020 at 12:18PM

WATCH: Handgun Training, Skills, and Safety for First-Time Buyers

WATCH: Handgun Training, Skills, and Safety for First-Time Buyers

https://ift.tt/2XEHiUe

The coronavirus pandemic changed the world. As shelter-in-place orders and shutdowns mirrored climbing cases and death counts, runs on goods such as food and supplies sparked even more fear about the coming days. We were entering extremely uncharted waters. In short order, many people turned to exercising their Second Amendment rights, some for the very first time. Since so many folks purchased their very first firearms for home defense, we’ve put together a three-part introductory video series on handgun, rifle, and shotgun training, skills, and safety. Here’s the first video in our series, focusing on handguns. Be sure to check out “Part II: Rifle Training and “Part III: Shotgun Training” as well.

Pistol Drawing, Josh Froelich teaches his preferred conceal carry drill on target transitions.

RELATED STORY

WATCH: Quick Pistol Drawing With Pro Shooter Josh Froelich

Handgun Training and Safety

First, right out of the gate, new gun owners, and old ones for that matter, must follow the four basic gun safety rules: Treat every gun as if it were loaded. Never point a gun at anything you don’t want to destroy. Always keep your finger off the trigger until you’re ready to shoot. Know your target and what’s beyond it. Those four rules should define every choice you ever make in gun handling. Follow them religiously, and you’ll never have a problem, a negligent discharge or worse.

Semi-automatic handguns remain an extremely popular choice for home and self-defense. Compact and concealable, handguns deliver tremendous versatility. But one must master the fundamentals of handling, loading and shooting a pistol. In fact, pistols are the toughest of the firearm platforms to shoot accurately, requiring the most training and practice.

So watch the video and learn. Then, as you can, find a qualified, certified instructor and get some training. Finally, invest in some ammo and hit the range to practice.

Welcome to the 2A gun club. We’re happy you’re with us. Now get trained up, and then pay it forward by taking someone you know out to the range for a day of shooting. Lastly, have fun and be safe.

The post WATCH: Handgun Training, Skills, and Safety for First-Time Buyers appeared first on Personal Defense World.

guns

via Personal Defense World https://ift.tt/2Arq2GB

April 15, 2020 at 12:18PM

WATCH: Shotgun Training, Skills and Safety for First-Time Buyers

WATCH: Shotgun Training, Skills and Safety for First-Time Buyers

https://ift.tt/3coyZjx

The coronavirus pandemic, and the ensuing panic, has changed the gun narrative in America. Now more than ever in recent memory, Americans are turning to the Second Amendment to ensure the safety of their families. Gun and ammo sales continue to soar; that means many first-time buyers are heading to gun stores. We want to make sure new gun owners have the proper training. So we’ve put together a three-part introductory video series on handgun, rifle, and shotgun training, skills, and safety. Here’s the third video in our series, focusing on shotguns. Be sure to check out “Part I: Handgun Training” and “Part II: Rifle Training”  as well.

Handgun Training, Pistol Training, Handguns 101, Pistols 101, First-time buyers

RELATED STORY

WATCH: Handgun Training, Skills, and Safety for First-Time Buyers

Shotgun Training, Skills and Safety

First and foremost, all gun owners must follow the four basic gun safety rules: Treat every gun as if it were loaded. Never point a gun at anything you don’t want to destroy. Always keep your finger off the trigger until you’re ready to shoot. Know your target and what’s beyond it. Those four rules should define every choice you ever make in gun handling. Follow them religiously, and you’ll never have a problem, a negligent discharge or worse.

The shotgun remains one of the most effective tools for home defense. Users can load low-brass birdshot to ensure rounds don’t over-penetrate interior walls. For more firepower, buckshot also becomes a formidable stopper. And when you really have to take down something big or engage targets at range, slugs prove devastating.

But there is much to learn to effectively manipulate, run and fire a shotgun in a defensive setting. Watch our video, learn, and then invest in some quality, certified instruction. Then get on the range and practice, practice, practice. Shotgun loading takes time to master, and you can never be proficient enough running a defensive shotgun.

Welcome to the firearms community. Get trained, practiced hard, and have fun out there on the rang. And remember, share what you’ve learned with others.

The post WATCH: Shotgun Training, Skills and Safety for First-Time Buyers appeared first on Personal Defense World.

guns

via Personal Defense World https://ift.tt/2Arq2GB

April 15, 2020 at 12:18PM

Everything You Need to Know About the GLOCK 19

Everything You Need to Know About the GLOCK 19

https://ift.tt/3ccyRn4

Ah, the unfailing GLOCK 19. Have you ever wondered about the story behind one of the world’s most popular pistols? What it would be like to fire an excellently crafted handgun built to withstand any conditions for home defenders, servicemen and women alike?

How about some points on maintaining an efficiently built weapon like the GLOCK 19? We’ll take a shot at all of these topics and more below. Let’s dive right in.

GLOCK 19 History

There are five generations of this famous pistol, but we will begin with the story of the GLOCK company to really understand where our latest G19 comes from.

Gaston Glock, an Austrian engineer, began his humble career in the glamorous realm of curtain rod manufacturing in the 1960s. Weird, right? Not what I think of when I picture the deadly accurate pistols that bear his name!

Anyway, in the 70s, the Austrian military commissioned him to design knives, grenade casings and machine-gun belt links. Thus began his entry into the firearms business.

Gaston Glock designed his first handgun in 1981 at the request of the military, which needed an accurate gun that could be fired quickly in the field of battle.

Already an expert in polymer manufacturing, Glock took to his garage workshop and designed the first-generation G17.

It took about 18 months for him to fine-tune his renowned SAFE ACTION system that eliminates the need for an external safety by incorporating a tri-tiered safety system using the trigger, firing pin and drop safety.

The first G19 was designed in 1988, and was built with fewer parts to minimize the chance of malfunctions. He built his name and company on the word reliability.

As the GLOCK handguns became more popular, especially for police and military forces, more problems with his design became apparent.

Most famously, the “AD Heard Round the World” incident occurred in 1992 when a New York officer’s weapon discharged multiple times with his hand nowhere near the trigger.

After this incident, GLOCK changed their tooling methods and over the subsequent years honed the G19, with upgrades to every new generation, into one of the most reliable handguns on the market today.

GLOCK 19 and GLOCK 17 on Stack of Bullets
From @thattexasguy762 on Instagram

GLOCK 19 Specs and Performance

I’ve used the word “reliable” several times already, but I want to break down exactly why I’m using that term so freely with the G19. With more than 60,000 9mm rounds through the action, this handgun has had ZERO malfunctions for me. Zero.

It is so efficiently designed that the G19 is capable of withstanding the most brutal conditions. It is not a classically pretty gun, but, boy, will it do its job.

As far as accuracy goes, the G19 will hit its mark whether you are using it for competition, as a duty gun or for concealed carry defense. At 25 yards, it was averaging 3-inch 5-shot patterns.

The Marksman barrel has hardline rifling that stabilizes shots, while the balance and dual recoil spring assembly create minimal kick so you are able to lock back on target quickly with precision.

Ergonomically, the G19 feels good to shoot. The Gen5 has removed the annoying finger grooves found in Gen3 and Gen4, and the customizable backstraps give you the grip size you want.

One thing that I personally would modify, however, is the awkward, angular trigger guard and uncomfortable cutout in the front of the magazine well.

These are minor annoyances, however, and are totally based off of personal preference.

Overall, the G19 is comfortable, soft-shooting and well-balanced. Here are some specs:

  • Caliber: 9x19mm
  • Capacity: 15 + 1
  • Trigger: 5.5 lb. pull
  • Dimensions:
    • OAL: 7.28”
    • Height: 4.99”
    • Width: 1.18”
    • Weight: 23.65 oz

The GLOCK 19 is reasonably priced, retailing around $600 (or $699.99 if you upgrade the standard polymer U-dot sights to AmeriGlo Night Sights).

The popularity of this pistol makes it easy to find in most outdoor stores, but can also be found online and at specialty shops.

GLOCK Maintenance

Before you get started cleaning your new G19, you’ll want to disassemble it properly according to the owner’s manual.

Here’s a brief summary of what that looks like…

Disassembly

As with any weapon, before you do anything, be sure to remove the magazine and check that the chamber is empty, both by looking and feeling inside the chamber. Remember to always have the weapon pointed in a safe direction.

Once you’ve done that, here are some steps for disassembly:

  • Remove slide. With the slide pulled back about a quarter of an inch, remove the slide by pulling the disassembly tabs down and moving the slide forward.
  • Take out the recoil spring assembly and then the barrel.
  • Disassemble the slide assembly. With the GLOCK armorer’s tool, push the firing pin spacer sleeve down and take the slide cover plate off with your thumb.
  • Remove the firing pin assembly and extractor depressor plunger. Push down on firing pin safety to remove the extractor last.
  • Disassemble the receiver. First take out the locking block pin from either direction. Move the slide stop lever back and forth while using the armorer’s tool to push on the trigger pin until the trigger pin is released.
  • Remove the trigger pin. Then, lift out the slide stop lever and pry the locking block out. Push on the trigger housing pin on the backstrap and pull out the trigger mechanism.

After disassembling and cleaning your weapon, reassembly is just these steps in the reverse order (with the exception that the locking block pin should always be the first pin to go back into the receiver).

Cleaning

When cleaning your GLOCK, make sure you use good-quality gun lubricant and the tools supplied with your weapon.

You’ll need cloth patches, a brass bore brush, the GLOCK cleaning rod that came with your weapon, gun lubricant of your choice, a dual-end cleaning toothbrush, Q-tips, clean rags, cleaning solvent and a clean, flat area to work in.

Got it? Good. Here are some steps for cleaning:

  • Clean your barrel. With a solvent-dampened patch attached to your cleaning rod, sweep out the chamber several times in a clockwise rotation starting with the breech end.
    • Then, do the same thing with a brass bore brush until the chamber looks shiny and clean. Scrub carbon deposits off of the exterior portions of the barrel using a cleaning toothbrush and solvent.
    • Wipe off with a rag and make sure the bore is dry by using a dry patch.
  • Clean your slide assembly. Use the cleaning brush to clean the breech face and in and around the extractor. DO NOT get solvent in the firing pin channel.
    • Take a clean Q-tip and sweep out the slide rail cuts as well as the inside of the slide. A wet patch can be used to clean the underside and inside of the slide. Use a dry patch to wipe everything clean.
  • Clean your receiver. Remove carbon deposits from the contact points and locking block using the toothbrush. Brush debris from inside of the receiver.
    • With a clean rag, wipe clean the ejector, cruciform, trigger bar, connector and locking block.
  • Lubricate your weapon. Apply one drop to the outside front barrel and one to the rear barrel lug. Holding the frame left side down, apply one drop to the connector.
    • For the slide, face the rail cuts upward and drag one drop-down each cut. Then, add one drop to the top of the slide where it rubs the upper barrel and you’ve got a clean weapon.
GLOCK 19 with Knife
From @balistix_4o6 on Instagram

Conclusion

For many law enforcement agencies and home defenders alike, the GLOCK 19 is the favored choice because of its reliability, ease of care, competitive price and well-balanced shootability.

To recap, the GLOCK 19 is:

  • Durable
  • Easy to maintain
  • Practical for many situations
  • Highly accurate (3-inch patterns)

Overall, GLOCK has really delivered with their latest generation of G19s. There’s a reason the GLOCK 19 is one of the most popular weapons on the market, and now you have everything you need to know to check it out for yourself.

What are your thoughts on the GLOCK 19? Let us know by leaving a comment below.

Get the Best Deals on Guns, Ammo & Gear sent 3 days a week.

guns

via The Shooter’s Log https://ift.tt/2VbyLGM

April 15, 2020 at 08:38AM

Ooni’s Koda 16 pizza oven is the rare kitchen gadget that delivers on its promise

Ooni’s Koda 16 pizza oven is the rare kitchen gadget that delivers on its promise

https://ift.tt/2VHP3pV

Ooni (nee Uuni), has been around for a few years now, but its latest oven, the Koda 16, launched in March. Just like everyone else, I’ve been cooped up at home for weeks with nothing but all of the projects I would get around to one day.

At the top of my list was learning how to make decent pizza at home (we don’t have many decent pizzaiolo’s in my town). I’d been hearing about the Ooni oven for a while — mostly via Neven Mrgan’s great Instagram feed — so I spring for the Koda 13” and started firing some pies.

I was immediately enamored with the eye popping results. Chewy, crispy, well cooked Neopolitain-style pizza within 30 minutes of taking it out of the box. And I’m not exaggerating. After a couple of pizza launching disasters (this is not as easy as it looks, people), I was eating the product of my own hands and the Ooni’s 800+ degree baking surface. While not even an advanced amateur chef, I have always had somewhat of an aversion to single-use gadgets. Technique always wins, right?

The problem with that thinking is that it is really impossible to cook true Neopolitain pizza at home in the US because our ovens just don’t get hot enough. A ton of experimental dough situations have resulted in a few workable New York style pizza recipes for 500 degree ovens. But for thinner crusts there is zero substitute for that true 800-1000 degree cooking environment.

The Ooni delivers that in under 20 minutes attached to a bog standard propane tank. It’s brilliant.

Ooni co-founder Kristian Tapaninaho started messing around with building a decent pizza oven in 2010. He got into making home pies and realized that there was pretty much no way to do it other than building a large, expensive oven in his back yard. He began prototyping what became the company’s original oven in 2012, and he says that the original oven’s design stemmed from a super simple yet super obvious (in hindsight) design constraint: what could they ship affordably?

Due to shipping restrictions, it had to be under 10kg and had to fit in a certain footprint. Everything piece of design work on the first oven stemmed from those constraints. Why, for instance, does the Ooni oven have 3 legs? Because the 4th one would have put them over weight.

Within those constraints, the original oven took shape — delivering that super high-heat surface with a simple wood-fired unit that more than doubled its original funding goal on Kickstarter. Kristian and co-founder Darina Garland defined this high-heat, high results at-home outdoor pizza oven market at scale, along with other later entrants like Roccbox.

I had a bit of a chat with Kristian about how Ooni was doing lately, with the specter of coronavirus and the new business realities that have resulted.

“This COVID-19 situation began for us in mid January as our suppliers started informing us that they were delaying return to work from Chinese New Year,” Kristian said. “At the time the worry was if we’d have enough supply for the summer which is of course peak season for us. As our supply chain was restarting, it was clear that we’d have similar lockdowns in our main markets as well. Overall, however, we started the year at a strong inventory position which helped buffer any interruptions.”

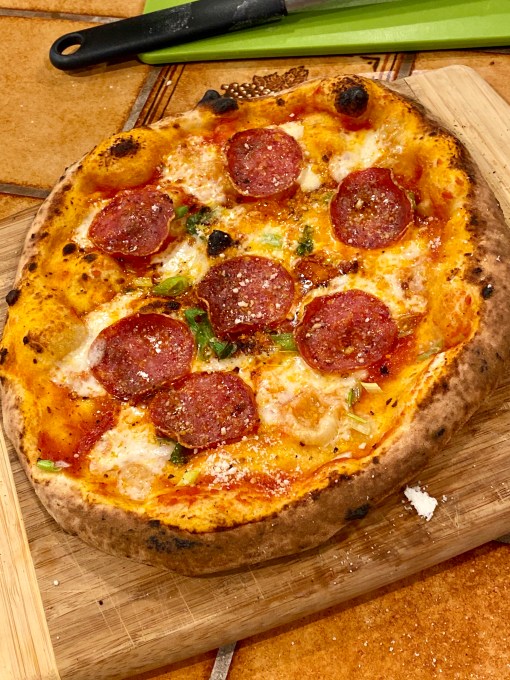
He says that Ooni was lucky given that the initial production run of the Ooni 16 was already in warehouses by the time things got really hairy in Edinburgh and the surrounding areas. And the team was fairly ready for the new challenge of stay-at-home work.

“Much of our team comms already happened over Slack so the team’s been really quite well setup for working from home,” he told me. “We have great relationships with our 3rd party logistics providers and while they’ve been incredibly busy, they’ve been able to maintain a good level of service, at least in the grand scheme of things.”

Yeah, but how does it work?

Once Kristian saw that I was playing with my Ooni 13 he offered to send the newly launched 16″ model over to play with. I jumped at the chance to make a bigger pie.

My experiences with the Ooni ovens so far have been nothing short of revelatory. Though I’ve pondered indoor options like the Breville Smart Oven, I knew in my heart that I wanted that brilliant taste that comes from live fire and the high heat that would let me enjoy super thin crust pizzas. I’ve now fired over three dozen pizzas in the Ooni and am coming to know it a bit better. Its recovery time, rotation needs and cooking characteristics. I have never used a more enjoyable cooking utensil.

I’ve tried a few dough recipes, because I know I’ll get questions about it, but I’ve used two to good effect. Ooni’s own recommended dough (though I hydrate a bit more) and this Peter Reinhart recipe, recommended to me by Richie Nakano.

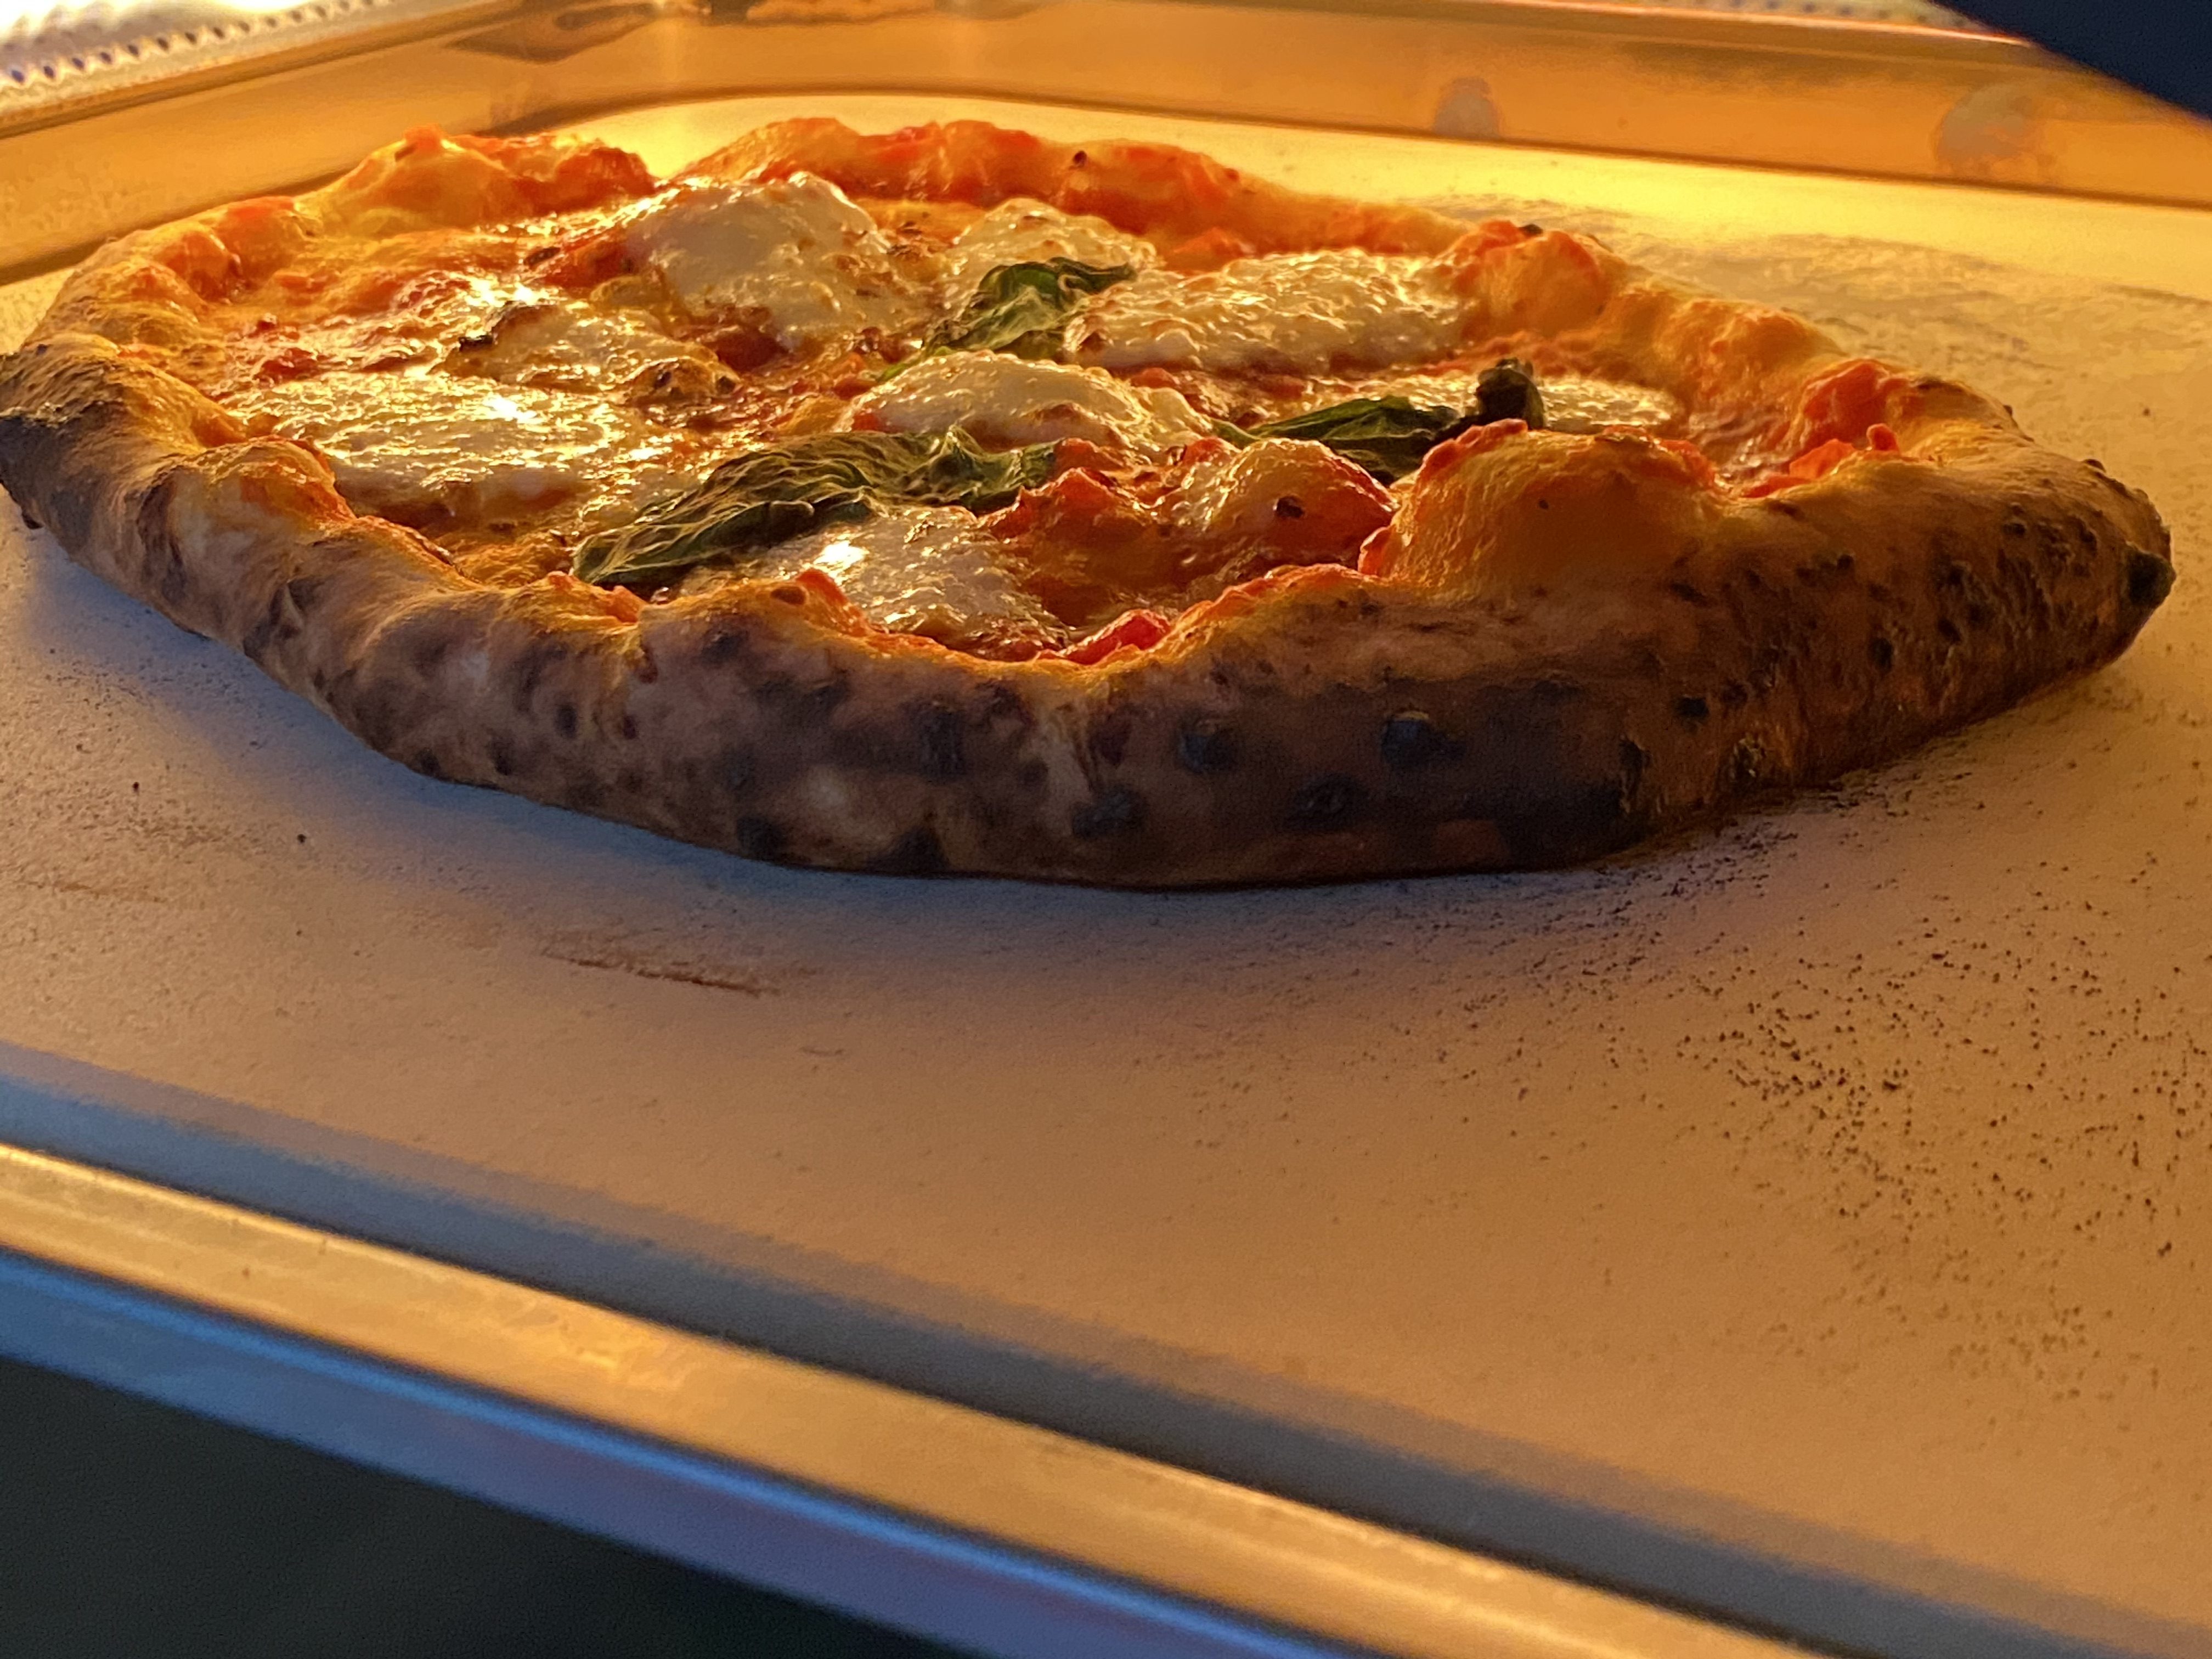
The pizzas that result are bursting with umami. The oven enables that potent combination of cheese, sauce and randomly distributed carbonization that combines into the perfect bite. Your pie goes in somewhat pedestrian — whitish dough, red sauce, hunks of fresh mozzarella — and you see it come to life right in front of your eyes.  Within 60-90 seconds, you’ve transmogrified the simple ingredients into a hot endocrine rush of savory, chewy flavor.

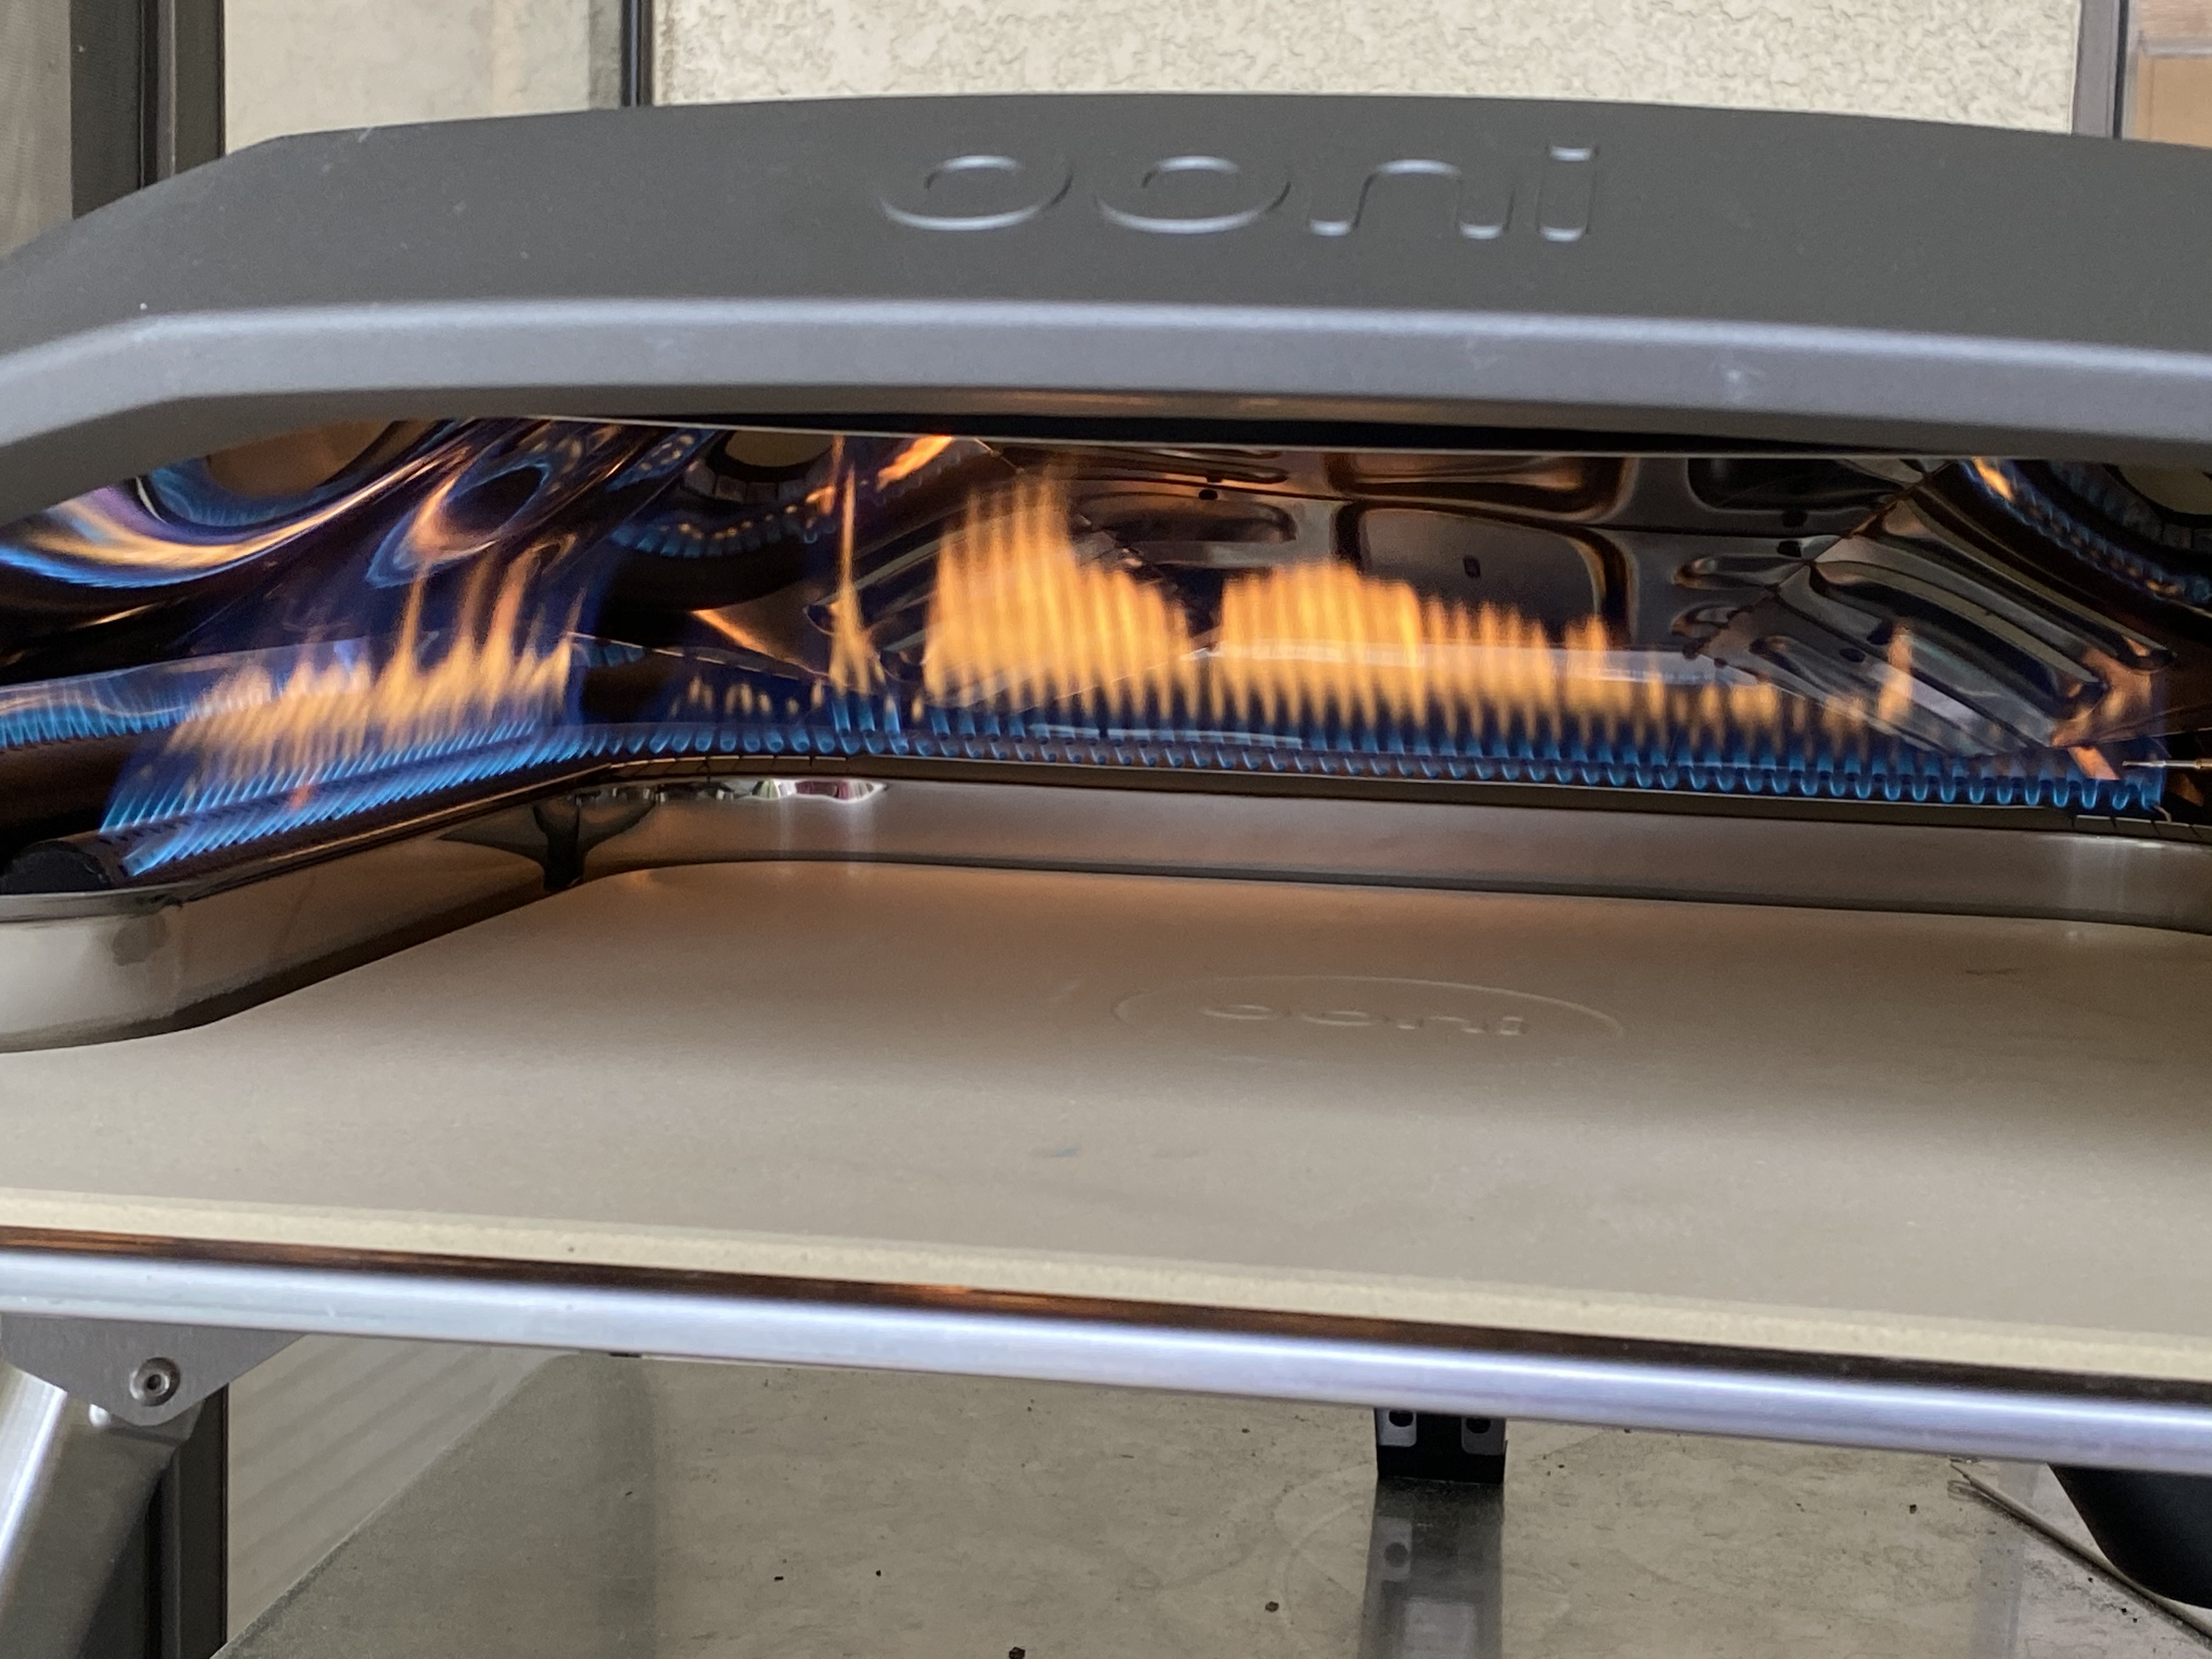
As I mentioned before, the setup is insanely simple. Flip out the legs, put it on an outdoor surface with some support and attach a propane tank. An instant of lighting knob work and you’re free to step away. Fifteen minutes later and you’ve got a cooking environment to die for. The flip down legs make the 13” model super great for taking camping or anywhere you want to go to create your own pizza party. Ooni even sells a carrying case.

The design of the oven’s upper shell means that all of the heat is redirected inwards, letting the baking surface reach 850 degrees easily in the center, up to 1000 degrees near the back. The Koda 16 has such an incredibly roomy cooking surface that it is easy to see to the sides and around your pizza a bit to tell how the crust is rising and how the leoparding is coming along. Spinning your pie mid-cook is such an important part of this kind of oven and the bigger mouth is smashing for this.

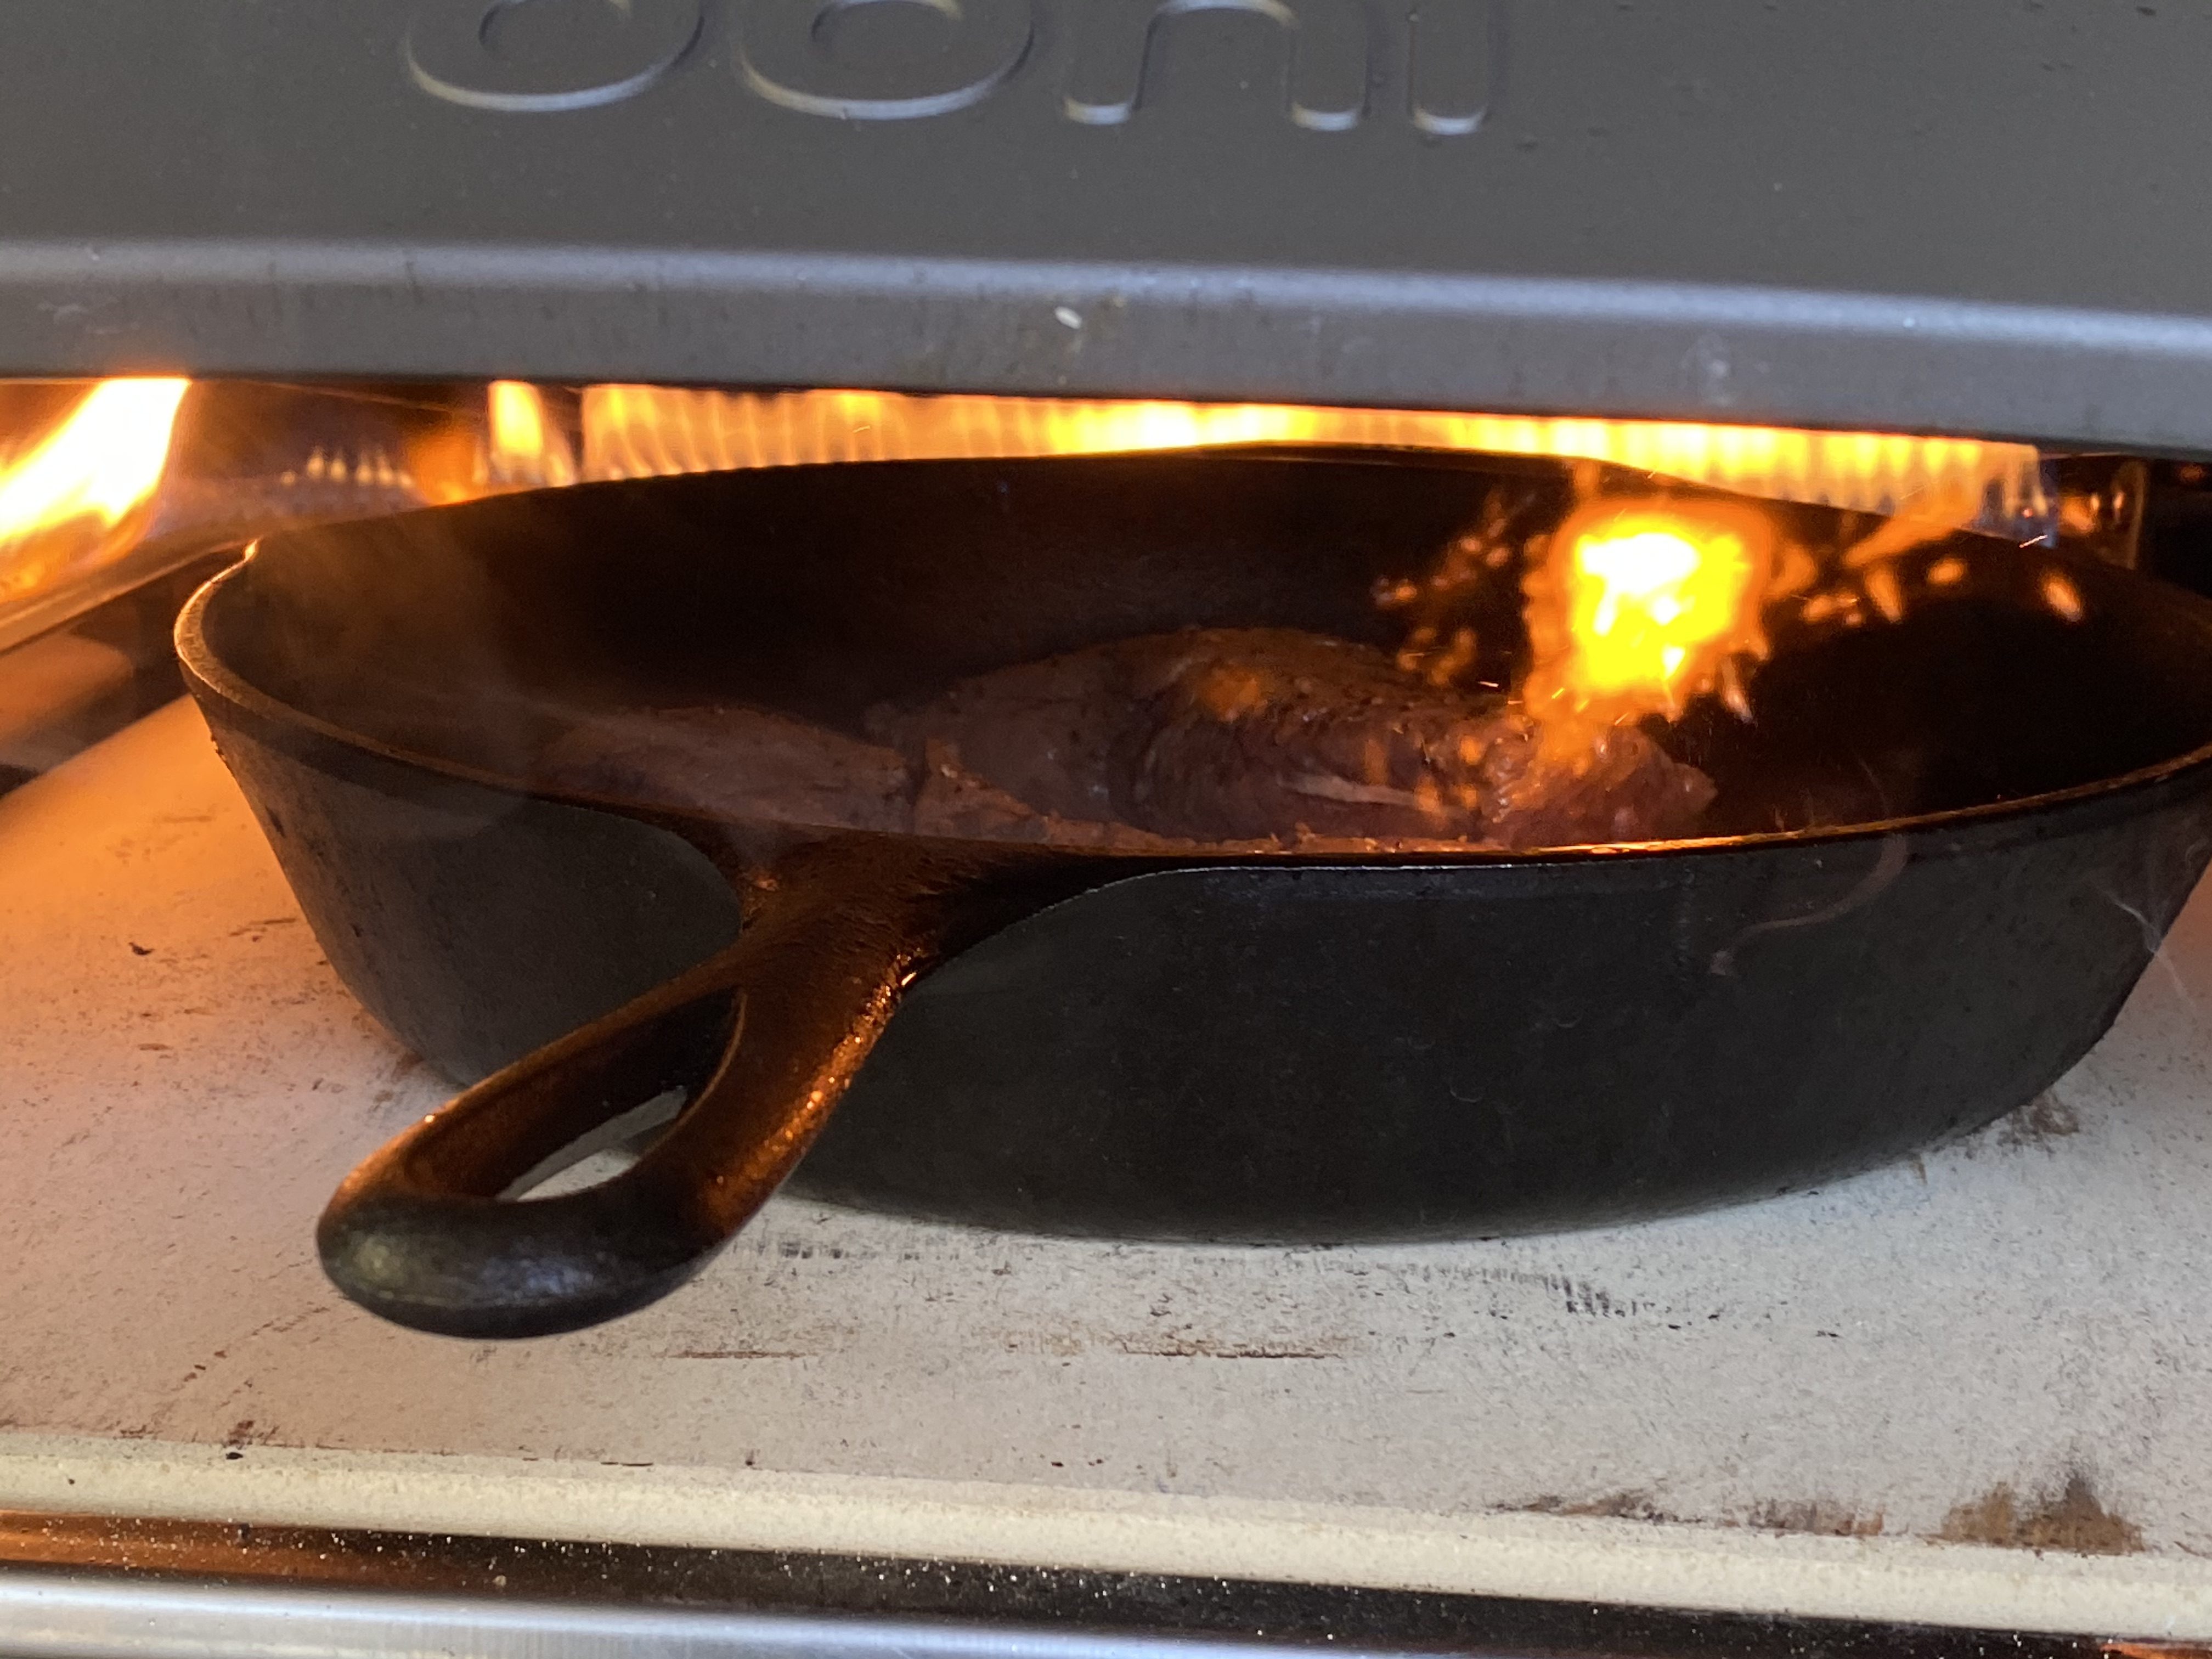
Heck I even cooked steak in it, to mouth watering results.

“Our core message has always been ‘great restaurant quality pizza at home’ and while the situation is what it is, more people spending more time at home looking for great home cooking options has been strong for our online sales,” Kristian said when I asked him about whether more people were discovering Ooni now. “Pizza making is a great way to have fun family time together. It’s about those shared experiences that bring people together.”

This mirrors my experiences so far. I’m not precisely ‘good’ at this yet, but I’m plugging away and the Ooni makes even my misses delicious. This weekend I was even confident enough to hold a socially distanced pizza pick-up party. Friends and family put in their orders and I fired a dozen pies of all kinds. Though I couldn’t hug them, I could safely hand them a freshly fired pizza and to most Italians like me, that’s probably better.

In my mind, the Ooni Koda pulls off a rare trifecta of kitchen gadgets: It retains the joy and energy of live flame, delivers completely on its core premise and still remains incredibly easy to use. Highly recommend.


technology

via TechCrunch https://techcrunch.com

April 14, 2020 at 09:30PM

Select Nintendo Labo kits are $20 today at Best Buy

Select Nintendo Labo kits are $20 today at Best Buy

https://ift.tt/3chwDmf

If you’re a parent and want to give your kids something creative to do the next time they play with their Switch, Best Buy is holding a well-timed sale on Nintendo Labo kits. The retailer has discounted all four Labo kits it stocks to $20. At the moment, the Variety and Vehicle kits are the best value since they’re usually $70 and they allow you to build a good selection of projects. With the Variety kit, for instance, you can make a house, piano, motorbike, fishing rod and two RC cars.

Nintendo Labo Variety Kit $20 Nintendo Labo Vehicle Kit $20

Just note that the kits are on sale for today only. Best Buy has also marked each of the products for clearance, so supplies may be limited.

Engadget Senior Editor Devindra Hardawar loved the concept of Labo when he reviewed the Variety and Robot kits in 2018. While he found some of the games you could play with your cardboard creations simplistic, he enjoyed the variety of the experiences each one offered. Building each of the projects was also a lot of fun. We were less fond of the VR kit that Nintendo released last year. While the headset itself was comfortable and studier than Nintendo’s past Labo releases, the lack of a head strap was annoying. We also didn’t find the VR updates to games like Super Mario Odyssey and The Legend of Zelda: Breath of the Wild compelling. At $20, however, all the kits are easier to recommend, especially at a time like this.

geeky,Tech,Database

via Engadget http://www.engadget.com

April 14, 2020 at 10:54AM

Episode 910 Scott Adams: Have You Been Brainwashed by the Government? Find Out Today!

Episode 910 Scott Adams: Have You Been Brainwashed by the Government? Find Out Today!

https://ift.tt/3eeMrbv


My new book LOSERTHINK, available now on Amazon https://tinyurl.com/rqmjc2a

Content:

  • Did Boris Johnson get treated with hydroxychloroquine?
  • Brainwashed children and reflex thinking as adults
  • Shifting risk to people willing to voluntarily accept that risk
  • Sweden’s non-mitigating policy

If you would like my channel to have a wider audience and higher production quality, please donate via my startup (Whenhub.com) at this link: 

I use donations to pay for the daily conversions of the original Periscope videos into Youtube and podcast form, and to improve my production quality and search results over time. 

The post Episode 910 Scott Adams: Have You Been Brainwashed by the Government? Find Out Today! appeared first on Scott Adams’ Blog.

thinkers

via Scott Adams’ Blog https://ift.tt/2ke54Vz

April 13, 2020 at 12:09PM

Polymer80 GLOCK Build Project: Make Your Own 9mm Ghost Gun

Polymer80 GLOCK Build Project: Make Your Own 9mm Ghost Gun

https://ift.tt/3b9PeAQ

Welcome to part one of a three-part series, a joint collaboration between The Truth About Guns, Ammoland, and USA Carry. We’ve started a new project that will include three articles going over the process of building your own Polymer80 GLOCK compatible 9mm pistol and getting it running.

The Polymer80 kit for this project was provided by 80-Lower.com. They sent me one of their complete GLOCK compatible pistol kits. This kit includes the Polymer80 80% frame as well as the lower parts kit, the slide and slide kit, and a small travel safe.

What is an 80% Frame?

Polymer 80 GLOCK compatible build project

The beginnings of a spooky “ghost gun” (Travis Pike for TTAG).

If a gun’s frame or receiver is built, but remains unfinished, it’s not considered a gun…legally speaking. These unfinished frames and receivers are known as “80%” frames or lower receivers (in the case of an AR-15). The idea is that the buyer will do the last 20% of the finish work to make it operate, in effect building his own gun.

That’s something that’s been legal in the U.S. since forever, though now a few states prohibit home builds or require a home-built firearm to be registered and serialized. Be sure you know your state’s laws.

There’s a wide variety of 80% frame and receivers available today, including kits available for AR-15s, AKs, Ruger 10/22s, Sten guns, GLOCKs, and many, many more.

Again, since these are unfinished frames in the eyes of the ATF, the are not considered firearms. That means they can be shipped directly to your home. You don’t have to pay a transfer fee or fill out a 4473 background check form.

Federally it’s perfectly legal to build a gun for your own personal use. As mentioned above, however, that freedom varies among the states, with the demonization of home-builds as “ghost guns.”

A few states have regulated 80% builds, so be sure to check your state’s laws. The only other caveat is that our glorious Federal government says I can’t make these and sell them to anyone else. That requires a manufacturer’s license, but that’s another argument for another day.

The Polymer80 GLOCK frames are known by their official nomenclature as the PF940 series. They come in full-sized, compact, and subcompact models, as well as a G43 variant.

I went with the PF940C, the GLOCK 19/23-sized variant of these frames for this project. They also come in a rather wide variety of colors including black, FDE, OD Green, Cobalt, Titanium, and Gray.

Why Build Your Own?

Because to hell with gun control. Honestly, if you order a lower or a kit over the internet with a credit card, shipped to your home address, keeping it off the books isn’t guaranteed if someone starts looking hard enough. But building your own firearm this way makes it a bit more difficult to track you than a 4473 form would.

My reason for building one, though, is that I like guns, and I like having projects to work on. I’ve built one of these before and I find it to be fun and interesting. It gives you a very excellent view of how GLOCK pistols work and just how simple they are.

Best of all, at the end of the project, you have yourself a very good 9mm handgun.

The PF940 frames also feature better ergonomics than factory GLOCKs as far as I’m concerned. Especially the models prior to the Gen5 guns. They lack finger grooves, have a more 1911-ish grip angle, and feature a more aggressive undercut in the trigger guard.

There is also a more pronounced beavertail to the rear of the grip. I’ve a frequent victim of GLOCK slide bite, but not with this particular pistol.

The Polumer80 frams also feature a normal Picatinny accessory rail as opposed to GLOCK’s weird proprietary rail. The subcompact models have rails, including the G43 variant (GLOCK doesn’t offer that).

If you don’t go the kit route, there’s also the attraction of buying your parts one piece at a time and getting the exact components you want. I can certainly see why it’s easier to do get the parts you want up front and have it done rather than swapping out parts.

What You’ll Need to Finish the Kit

polymer80 pistol build tools you'll need

You don’t need any fancy tools to complete the build (Travis Pike for TTAG)

The Polymer80 kits come with a simple clamp-on jig, as well as the two bits and the endmill you’ll need to finish the pistol. In terms of tools, you can finish the frames a variety of ways.

A guy on Reddit did one with no power tools at all. I used a Dremel, a hand drill, a mallet, and a few punches, tools most people will have or can pick up very affordably. I also used a vise, but in my last build, I didn’t need one. A vise does make things much simpler, though, so if you have one, I recommend you use it.

Polumer80 80% pistol build project

Polymer80 jig with pistol frame inside (Travis Pike for TTAG)

The vise makes the process nearly idiot-proof, although, as we’ll see in this series, I’m a bit of an idiot. Once the jig is snapped over the frame, everything you need to do is aligned and ready to mill. There are no adjustments needed, and it’s all Dremel and drill work after that.

What’s in My Kit?

My complete pistol kit is pretty simple. I used a PF940C frame with a 9mm slide kit produced by 80-Lower. It’s a simple slide with forward and rear serrations and is all black.

I like that, for the most part, the kit is all GLOCK OEM parts. Nothing against the aftermarket, but the Polymer80 PF940C kit was built for GLOCK parts, so that’s the route I wanted to take. It may not be fancy or “custom,” but it will be reliable.

The barrel and trigger assembly that’s included with the 80-lower.com kit (Travis Pike for TTAG)

So that’s the lowdown on 80% frames, why you’d want one and what a kit gun like mine includes in the next sections, we’ll go through building the gun and then making it reliable.


guns

via The Truth About Guns https://ift.tt/1TozHfp

April 12, 2020 at 04:00PM