How to Delete Multiple Rows using Checkbox in Laravel?
https://ift.tt/3taVKAs
It’s almost need to give feature for remove multiple records using checkbox, if you are developing e-commerce application or any big web application then you must give feature to delete multiple records.
So in this post, i will let you know how to delete multiple records with checkbox in laravel 5, laravel 6, laravel 7 and laravel 8 application. here i also give multiple delete and you can also delete single records. Few days ago i posted for confirmation before delete record, so you can read from here : Laravel 5 – Confirmation before delete record from database example.
In this example, i simply created “products” table with id, name, details, created_at and updated_at columns. I also added mysql query for add dummy records. Here i use jquery for select all checkboxs and delete all records. So finally you have to follow some step and get the layout like as bellow.
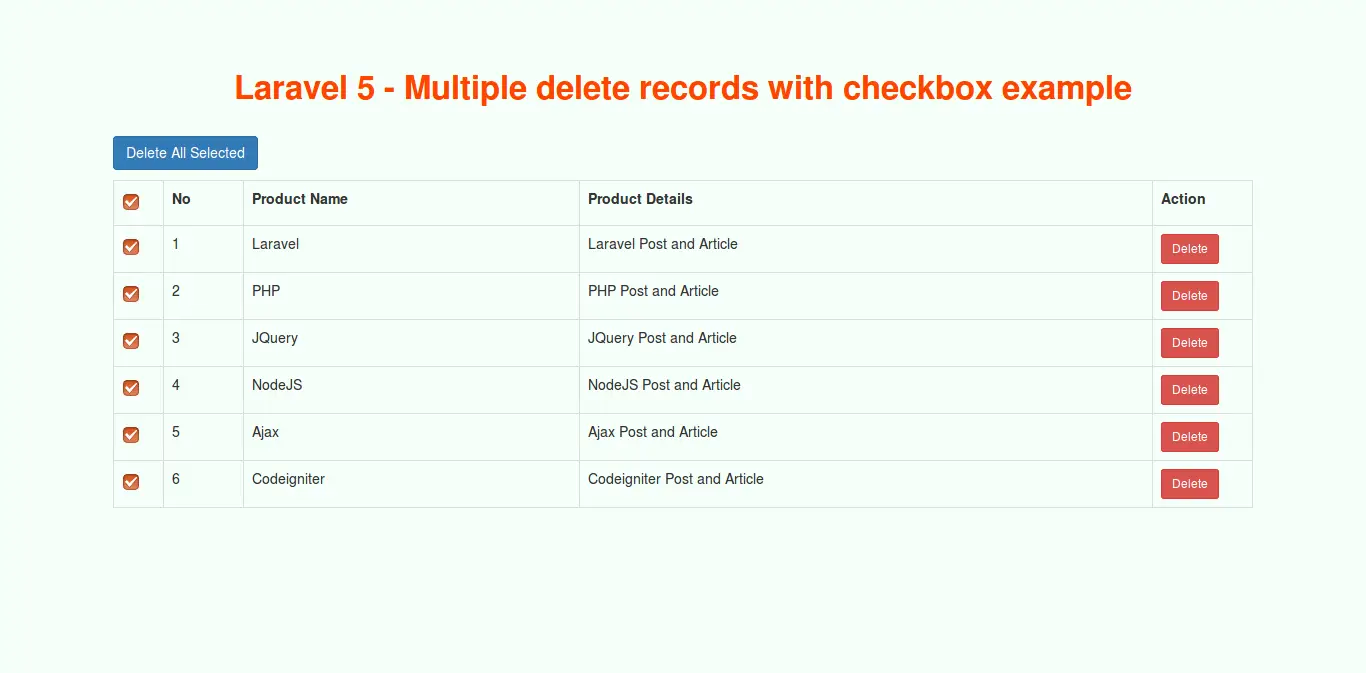
Preview:
Step 1: Create products Table with Dummy Records
Here, you have to create “products” table then you can run mysql query for dummy records. You can create products table using migration and then also create some dummy records using seeder. So now i just simple sql query.
Dummy Records Query:
INSERT INTO `products` (`id`, `name`, `details`, `created_at`, `updated_at`) VALUES
(1, 'Laravel', 'Laravel posts', NULL, NULL),
(3, 'PHP', 'PHP posts', NULL, NULL),
(4, 'JQuery', 'JQuery posts', NULL, NULL),
(5, 'Bootstrap', 'Bootstrap posts', NULL, NULL),
(6, 'Ajax', 'Ajax posts', NULL, NULL);
Step 2: Create new Routes
In this step, we are doing from scratch so we will add three routes, one for display data and another for delete request, then third for remove all selected data. So you have to simply add three new routes in your laravel application.
routes/web.php
Route::get('myproducts', '[email protected]');
Route::delete('myproducts/{id}', '[email protected]');
Route::delete('myproductsDeleteAll', '[email protected]');
Step 3: Add ProductController
Here, we will create new ProductController file to handle request of created three new route. In this Controller we define three method, index(), destroy() and deleteAll(). method will handle route request. So let’s create new controller and put code:
app/Http/Controllers/ProductController.php
<?php
namespace App\Http\Controllers;
use Illuminate\Http\Request;
use DB;
class ProductController extends Controller
{
/**
* Show the application dashboard.
*
* @return \Illuminate\Http\Response
*/
public function index()
{
$products = DB::table("products")->get();
return view('products',compact('products'));
}
/**
* Show the application dashboard.
*
* @return \Illuminate\Http\Response
*/
public function destroy($id)
{
DB::table("products")->delete($id);
return response()->json(['success'=>"Product Deleted successfully.", 'tr'=>'tr_'.$id]);
}
/**
* Show the application dashboard.
*
* @return \Illuminate\Http\Response
*/
public function deleteAll(Request $request)
{
$ids = $request->ids;
DB::table("products")->whereIn('id',explode(",",$ids))->delete();
return response()->json(['success'=>"Products Deleted successfully."]);
}
}
Step 4: Add Blade File
In last step, we will create products.blade.php file and write code of jquery for delete and delete all function. So let’s create products.blade.php file and put bellow code:
resources/views/products.blade.php
<!DOCTYPE html>
<html>
<head>
<title>Laravel 5 - Multiple delete records with checkbox example</title>
<link rel="stylesheet" href="https://maxcdn.bootstrapcdn.com/bootstrap/3.3.7/css/bootstrap.min.css">
<script src="https://cdnjs.cloudflare.com/ajax/libs/jquery/3.2.1/jquery.min.js"></script>
<script src="https://cdnjs.cloudflare.com/ajax/libs/twitter-bootstrap/3.3.7/js/bootstrap.min.js"></script>
<script src="https://cdnjs.cloudflare.com/ajax/libs/bootstrap-confirmation/1.0.5/bootstrap-confirmation.min.js"></script>
<meta name="csrf-token" content="">
</head>
<body>
<div class="container">
<h3>Laravel 5 - Multiple delete records with checkbox example</h3>
<button style="margin-bottom: 10px" class="btn btn-primary delete_all" data-url="">Delete All Selected</button>
<table class="table table-bordered">
<tr>
<th width="50px"><input type="checkbox" id="master"></th>
<th width="80px">No</th>
<th>Product Name</th>
<th>Product Details</th>
<th width="100px">Action</th>
</tr>
@if($products->count())
@foreach($products as $key => $product)
<tr id="tr_">
<td><input type="checkbox" class="sub_chk" data-id=""></td>
<td></td>
<td></td>
<td></td>
<td>
<a href="" class="btn btn-danger btn-sm"
data-tr="tr_"
data-toggle="confirmation"
data-btn-ok-label="Delete" data-btn-ok-icon="fa fa-remove"
data-btn-ok-class="btn btn-sm btn-danger"
data-btn-cancel-label="Cancel"
data-btn-cancel-icon="fa fa-chevron-circle-left"
data-btn-cancel-class="btn btn-sm btn-default"
data-title="Are you sure you want to delete ?"
data-placement="left" data-singleton="true">
Delete
</a>
</td>
</tr>
@endforeach
@endif
</table>
</div> <!-- container / end -->
</body>
<script type="text/javascript">
$(document).ready(function () {
$('#master').on('click', function(e) {
if($(this).is(':checked',true))
{
$(".sub_chk").prop('checked', true);
} else {
$(".sub_chk").prop('checked',false);
}
});
$('.delete_all').on('click', function(e) {
var allVals = [];
$(".sub_chk:checked").each(function() {
allVals.push($(this).attr('data-id'));
});
if(allVals.length <=0)
{
alert("Please select row.");
} else {
var check = confirm("Are you sure you want to delete this row?");
if(check == true){
var join_selected_values = allVals.join(",");
$.ajax({
url: $(this).data('url'),
type: 'DELETE',
headers: {'X-CSRF-TOKEN': $('meta[name="csrf-token"]').attr('content')},
data: 'ids='+join_selected_values,
success: function (data) {
if (data['success']) {
$(".sub_chk:checked").each(function() {
$(this).parents("tr").remove();
});
alert(data['success']);
} else if (data['error']) {
alert(data['error']);
} else {
alert('Whoops Something went wrong!!');
}
},
error: function (data) {
alert(data.responseText);
}
});
$.each(allVals, function( index, value ) {
$('table tr').filter("[data-row-id='" + value + "']").remove();
});
}
}
});
$('[data-toggle=confirmation]').confirmation({
rootSelector: '[data-toggle=confirmation]',
onConfirm: function (event, element) {
element.trigger('confirm');
}
});
$(document).on('confirm', function (e) {
var ele = e.target;
e.preventDefault();
$.ajax({
url: ele.href,
type: 'DELETE',
headers: {'X-CSRF-TOKEN': $('meta[name="csrf-token"]').attr('content')},
success: function (data) {
if (data['success']) {
$("#" + data['tr']).slideUp("slow");
alert(data['success']);
} else if (data['error']) {
alert(data['error']);
} else {
alert('Whoops Something went wrong!!');
}
},
error: function (data) {
alert(data.responseText);
}
});
return false;
});
});
</script>
</html>
Now we are ready to run our example so run bellow command for quick run:
php artisan serve
Now you can open bellow url on your browser:
http://localhost:8000/myproducts
I hope it can help you….
programming
via Laravel News Links https://ift.tt/2dvygAJ
January 29, 2021 at 03:06PM