https://media.notthebee.com/articles/628184f2d0a72628184f2d0a73.jpg
Check it out and then let’s chop it up:
Not the Bee
Just another WordPress site
https://media.notthebee.com/articles/628184f2d0a72628184f2d0a73.jpg
Check it out and then let’s chop it up:
Not the Bee
https://theawesomer.com/photos/2022/05/tesla_model_s_tank_t.jpg
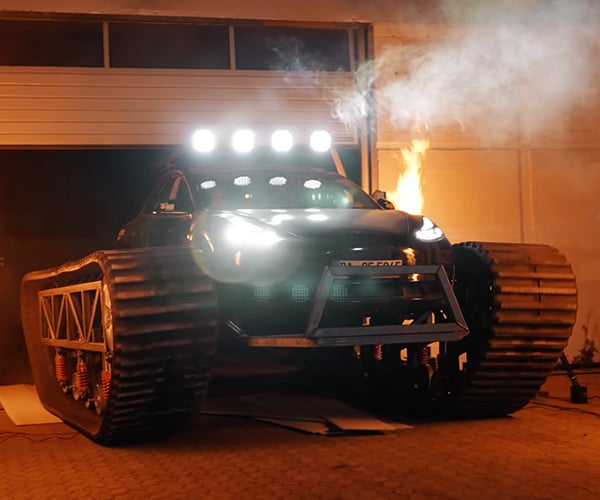
Despite its acceleration abilities, the Tesla Model S is a relativelt tame-looking car from the outside. But that all changed after The Real Life Guys got their hands on one. The German YouTubers took a Model S and converted it into a Model T by lifting it more than two feet and equipping it with tank tracks. Turn on subtitles.
The Awesomer
https://i.kinja-img.com/gawker-media/image/upload/c_fill,f_auto,fl_progressive,g_center,h_675,pg_1,q_80,w_1200/8a1753083a1326db73c5b967d34b1c24.jpg
Fire pits are often considered an inviting part of outdoor spaces—but sometimes the smoke they create is less than inviting. Whether the lingering smell on your coat or in your hair is a nuisance, or you happen to be the person who always seems to be sitting where the wind blows the smoke, reducing the amount of it can improve the quality of your evening around the fire. Although there’s no such thing as a completely smokeless fire, so-called “smokeless” fire pits use a double-chamber system for fuel burning that outputs significantly less smoke.
A smokeless fire pit works is by circulating air through a double-walled container that a fire can be built in. First conceived of by the Dakota people, this simple and ingenious engineering trick can be mimicked in our contemporary fire pit designs by either modifying an existing backyard pit or building a new one.
The air gets heated as it travels through the outer wall, and more of the fuel is burned at this higher temperature, causing less residue, ash, and smoke to be emitted. The downside is that a hotter fire will tend to send heat upwards faster than it goes outwards, so it doesn’t have as much radiant heat as a traditional fire pit; but it still has the dancing flames and warm light, and you will still feel some heat from the fire.
For this project, you’ll need:
For your existing pit, remove the metal ring from the pit and widen the base so it lays about an inch from the outside of the metal fire pit ring—leaving about enough space for your finger to fit between the outer wall of your pit and the ring is enough to allow air to travel around the outside of it.
Once you have your first layer of stone or brick laid, you’ll need to create some spaces to allow air to flow into the gap. Some people gap their stones at the base to make an intake hole about every foot or so around the circumference of your pit. If you’re using bricks, you can use a half brick with a space to each side of it every second or third brick. Then you can rebuild the outer wall of your fire pit with no gaps.
Next, you’ll need to drill holes in the fire pit ring. Use your drill and metal drill bit to drill a hole about every foot, about an inch from the top edge of your metal ring. You should use your safety gear for this part to prevent metal splinters. Use your file to smooth out the edges of the holes you drilled and remove any barbs left over. Place your ring back into your fire pit, and you’re all set.
To build a new metal smokeless fire pit, take the lid of your 20-quart pot and use the bottom of your smaller pot to trace a circle in the center of the underside of the lid with a permanent marker. Don your safety gear and use your grinder with a cut-off blade, drill, and jigsaw with a metal blade (or drill and metal shears) to cut out the middle of the larger pot’s lid. Use the file to smooth out the edges of your hole, and your smaller pot should nest in the lid of the larger pot, leaving about a one inch gap between the two.
Next, drill holes every three inches or so, an inch from the top of the smaller pot and an inch from the bottom of your larger pot. Use your metal file to remove any barbs and smooth the edges of the holes. Then, when you put the two pots together, you’ll have a small smokeless stove. Make sure that when you use your stove, you’re not placing it on a surface that’s vulnerable to heat so you don’t start a fire outside your pit.
This method will work with any pair of containers with a similar ratio in size to a 20- to 16-quart ratio. For a larger model, metal trash cans will work, as well.
Lifehacker
https://i.ytimg.com/vi/yJAEMgya4K8/maxresdefault.jpgin this video you’ll learn how to build a Public API.
We’re using, Caching, rate limiting, API resources and we’ll have a look at Laravel Telescope.
We’ll also use PostMan to test our API.Laravel News Links
https://cdn.athlonoutdoors.com/wp-content/uploads/sites/8/2008/12/mass.gif
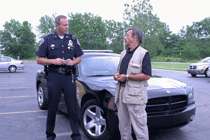
Here’s a list, current as of 2022, of concealed carry laws by state. After the list, read on for explanations of CCW laws across the country.
RELATED STORY
Top 10 Lifesaving Concealed Carry Tips for 2022
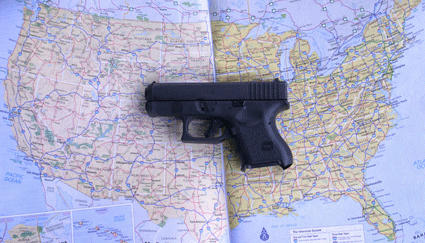
The interstate traveler has 50 different sets of rules to deal with, plus over-riding federal law. It isn’t easy, but for safety and peace of mind when traveling, the laws of the jurisdictions where you’re going are worth knowing.
 I write more than a few magazine articles each year, and this one is always the hardest. The reason is because nothing else I’m assigned to write about has 50 or more facets on its surface, every one of them capable of changing at a moment’s notice.
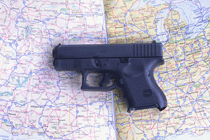
In other countries where I’ve carried guns, the license usually covers the holder anywhere in the nation. Here, in this regard at least, it seems that the operative word in “United States” is “states.” There are 50 of them, each with their own set of gun laws: a patchwork quilt made up of half a hundred pieces.
That worked out reasonably well a hundred years ago, when this country still had an agrarian-based economy and most ordinary folks still grew up, lived, and died within 50 or 100 miles of where they were born. Today, we Americans constitute the most mobile society on earth. A road trip might take you through several states in a single day.
The states have universal reciprocity with your driver’s license. That’s not so with your concealed carry license. The differences are many. For instance, carrying a gun without a piece of paper that authorizes you to do so is perfectly legal in Alaska, but will get you popped for a misdemeanor on the first offense and a felony on the second offense in New Hampshire, and will see you convicted of a felony for the first offense in New York. There are states where any honest, law-abiding citizen can get the permit to carry, states where only the rich and powerful are likely to do so, and states where no one can.
I’ve long since given up on trying to publish lists of state gun laws in an annual magazine since they change so frequently. Just about every week, you hear that State A has added State B to the list of issuing authorities whose gun carry permits they’ll recognize, while State C has announced that it will no longer be reciprocal with State D.
That’s why, instead, I’m going to recommend that you go online and check an Internet site that can be far more up to date than any print medium. The best site (www.handgunlaw.us) for concealed carry at this time, in my opinion. Founded by Steve Aikens and Gary Slider, this site “has its feelers out” and stays on top of changes in handgun laws, with emphasis on concealed carry rules. There are links to each state’s official “dot-gov” websites, where you can pick up the fine points of their regulations.
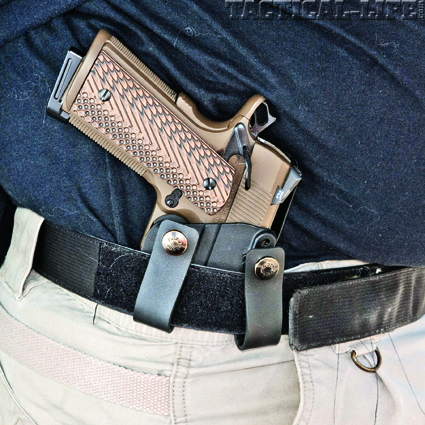
 First, let’s get a little terminology thing out of the way. Some absolutists and semanticists like to debate whether that little paper that authorizes CCW (Concealed Carry Weapon) is a “license” or “permit.” Not having time for semantics here, I’ll use them interchangeably. Whether or not we believe that carrying a gun should be a right, we have to understand the reality, our legal system has evolved in such a way that carrying a gun has come to be treated as a privilege, one that requires that specific piece of paper in 48 of the 50 states.
If you want to carry a concealed handgun in this country, there are four different approaches you’ll have to deal with depending on where you are.
Under this system, no permit or license is required to carry a loaded, concealed handgun in public, though certain places (courthouses, for example) may be off-limits. For many years, Vermont was our only such state. A few years ago, Alaska took the same route. One is merely forbidden to “carry” if one is a convicted felon, has been adjudicated mentally incompetent, or has criminal intent. And yes, in both Vermont and Alaska, these laws extend to visitors from out of state. Since that time, many other states have joined the list of Constitutional Carry states.
 This seems to have worked well for the relatively short time it has been in place in Alaska, and it has worked famously well for the long time that it has been in place in Vermont. For many years Vermont has proven to have the lowest crime rate in the nation. You’d think this would tell the other states something about Free Carry.
About the only real problem Vermont had with this system was that with no permit of their own, when other states offered reciprocity, pistol packers in the Green Mountain state had nothing to reciprocate with. The savvy lawmakers who brought the Vermont Model to Alaska picked up on that, and Alaskans today have the option of a shall-issue permit which is recognized by many other states.
 Shall-Issue
It is on this front that activists for gun owners’ civil rights have won the most important series of victories in the last 20 years. Circa 1987, the state of Florida went from a system where it was optional for the authorities to give out such permits (and they were only good in the county where they were issued) to a license that authorized the holder to carry statewide. Moreover, the law was written so that the permit could not be denied to any law-abiding citizen with a clean criminal record who could show a minimal acceptable level of firearms safety training. This is known as shall-issue licensing.
The “Florida Model” was soon copied across the land. It has been wonderfully successful. Nowhere has it triggered the increase in spontaneous violent crimes that its opponents predicted, and indeed, the norm seems to be that violent crime against the person goes down after these improved legislative reforms are passed.
Shall-issue means that the appointed issuing authority can’t turn you down because they don’t like the color of your skin or the way you vote, or the idea of ordinary people carrying guns. Currently, shall issue is the most popular form of concealed carry.
As the term implies, issuing authorities in these states may issue permits if they choose, but are not required to do so. This is also known as the “Discretionary” system, because the permits are issued at the discretion of the authorities. This old system is rife with corruption. In one big city, the story on the police force was that the cops in charge of issuing permits were transferred more frequently than vice cops, because police bosses saw the position as being ripe to draw tantalizing bribes for the “victimless crime” of allowing people to protect themselves from criminals.
This is not to say that the authorities take bribes, mind you. However, in may-issue jurisdictions, when a list of carry permit holders is published, it tends to comprise the wealthiest members of the community. New York State Penal Code 265, which encompasses this sort of regulation, requires that the issuing authority set its own standards as to who will get permits, and then stick to it. In New York City, one standard set was that the individual was likely to carry large sums of money. When Old West gunfighter Bat Masterson became a sportswriter in New York City, he wrote that the law in its wisdom allowed both the rich and poor to have ice, it was just that the rich had it in the summer and the poor had it in winter. New York City’s interpretation of the concealed carry privilege seemed to be similar, the rich and poor alike can get carry permits, so long as they carry large amounts of cash or other valuables.
States that currently hold to the may-issue rule include Alabama, California, Connecticut, Delaware, Hawaii, Iowa, Maryland, Massachusetts, New Jersey, New York, and Rhode Island. The District of Columbia technically falls in this group as well, though one wonders how someone who lives there can utilize the permit, since possession of handguns by all but police has long been banned in that jurisdiction. Fortunately, as I write this, that ban has just been struck down by the SCOTUS decision in the Heller case.
May-issue systems lend themselves to the sort of decisions for which the legal system coined the term “arbitrary and capricious.” In Hawaii, for instance, while technically it’s possible to get a carry permit, it just isn’t possible in real world practice. I am aware of three having been issued there to private citizens during my adult lifetime. One went to the civilian armorer who serviced the Honolulu Police Department’s duty weapons. Another was held by the Governor, who got it when he was Lieutenant Governor. The third didn’t last long, a Honolulu Police Chief issued it to his sister-in-law, but had to take it back when the newspapers got wind of the story. On the other hand, I hear that a few hundred carry permits have been issued in the last few years to security guards in Hawaii. That’s sort of analogous to a chip out of the Great Wall of China, but maybe it’s a start.
As of 2022, there are no longer any US states that completely deny the right to carry a concealed or open firearm. However, as noted above, some may-issue states such as Miami have such arbitrary and capricious permitting systems as to be functionally no-issue. Other states, such as New Jersey and New York only issue permits to the rich, famous, and connected.
 Reciprocity
Gun owners’ civil rights groups have made great strides in gaining reciprocity, that is, recognition of permits issued in other states. Reciprocity keys on agreements between the Attorney General of the given states. The carry permits that seem to have the most reciprocity, as many as 30 or so states, come from Florida, New Hampshire, and Utah. Some states have “total reciprocity,” in that they recognize permits issued in all other states. Indiana and Michigan have had this policy for as long as I can remember, and it has always worked well. More common, however, is “limited reciprocity,” which means that only certain states’ carry licenses will be recognized by the given jurisdiction. Sometimes this is because the given state insists that the other state have requirements at least as strict as their own, and sometimes it’s simply a case of “we’ll recognize yours if you’ll recognize ours.” There are also some states that will only recognize your out-of-state permit if you live in the state where it was issued.
Some other states will not recognize outside permits, but will issue their own non-resident permits. Check out www.handgunlaw.us for the lists of who recognizes whom, and which states issue non-resident permits, and where to apply for the latter.
The careful armed citizen who knows the law and fills out the paperwork can broaden their concealed carry world dramatically. For instance, it has long been believed that New England was a bastion of anti-gun sentiment, but the fact is that the responsible gun owner who dots every “i” and crosses every “t” can become legal to carry throughout that six-state region. Vermont does not require a permit to carry (though some towns there have reportedly enacted concealed carry bans: check which ones before you go there). New Hampshire has a long list of states whose permits they’ll recognize reciprocally, and also issues non-resident permits through the State Police in Concord, the capital city. Maine, Connecticut, Massachusetts and Rhode Island also have non-resident permit procedures in place, though you may encounter progressively difficult procedures as you attempt to obtain them. Nonetheless, it can be done.
The bottom line is that the concealed carry picture is brighter right now than it has been in the memory of any living American. We who worked for it can congratulate ourselves, but we can’t rest on our laurels. There is still much work to do. There are still many more lives to protect.
The post Concealed Carry Laws by State appeared first on Tactical Life Gun Magazine: Gun News and Gun Reviews.
Tactical Life Gun Magazine: Gun News and Gun Reviews
https://assets.amuniversal.com/ddafdbe0a47b013aa5e3005056a9545d
marketing,
project,
cloud,
catbert,
leadership,
budget,
birthday,
engineer,
time sheet,
sales,
wally,
strategy,
dogbert,
powerpoint,
project management,
topper,
leader,
boss,
change,
meeting,
data,
management,
mordac
Dilbert Daily Strip
https://media.notthebee.com/articles/62756fd2c1cce62756fd2c1ccf.jpg
I’m no video game nerd, but I’ve seen and played enough games to know that these guys pretending to be in a video game are very accurate and very impressive.
Not the Bee
https://theawesomer.com/photos/2022/05/smashing_eggs_1_million_fps_t.jpg

You’ve gotta break some eggs to make a YouTube video. The Slow Mo Guys broke out the big guns with the Phantom TMX 7510 high-speed camera to capture footage of eggs being pierced with a bullet at as much as 1 million frames per second. While the slowest shots are amazing, the resolution drops off dramatically around 100,000 fps.
The Awesomer
https://bearingarms.com/wp-content/uploads/media/2022/04/gun-pistol-handgun-weapon-firearm-5947350-1200×630.jpg
https://media.babylonbee.com/articles/article-11202-1.jpg
WINSTON-SALEM, NC—Gary Chapman, the author of the best-selling Christian romance novel The 5 Love Languages, has just announced that a 6th love language has emerged: Tacos.
“I always knew a love language was missing. Acts of Service, Quality Time, Physical Touch, Recurring Gifts, and Words Of Affirmation just felt incomplete and left me with an insatiable hunger that could never be filled,” said Gary Chapman. “That’s when it hit me: what people need to feel loved is Tacos!”
Chapman continued, ”It needed some additional meat to it (preferably seasoned ground beef or pork) with something special sprinkled on top and all wrapped up together in something tangible people could actually hold, and sink their teeth into. And that’s when it hit me…TACOS!”
According to sources, Gary Chapman’s new book The 6th Love Language details how couples can keep their love tank full by providing their loved one with delicious tacos. Many positive reviews have already flooded in with hundreds stating that their marriage has been saved thanks to tacos.
“Our marriage was on the rocks. We just couldn’t seem to express our love for one another in the way that fills each other’s ‘love tank,'” said Ben Heinemeier and his wife Jennifer. “Sometimes your words, time, gifts, touch, and actions just aren’t what people need. Instead, what they need is a tasty Mexican dish full of meat, cheese, and lettuce in a fried tortilla shell!”
At publishing time, Gary Chapman was rumored to be developing a brand new secret 7th love language: Pizza.
Mandy is absolutely triggered by Twitter’s possible takeover by Elon Musk. She attends a Twitter-sponsored therapy session to help her cope.
The Babylon Bee